Just over two weeks to go until our brand new show!
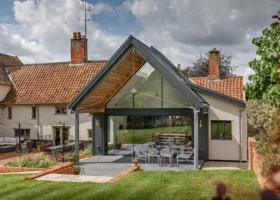
Build your dream home with confidence
BOOK YOUR TWO FREE TICKETS HEREBuild your dream home with confidence
BOOK YOUR TWO FREE TICKETS HEREEstimate your project costs instantly with Build It's interactive self-build cost calculator
Calculate NowGet an accurate, detailed cost breakdown of your project
Submit plans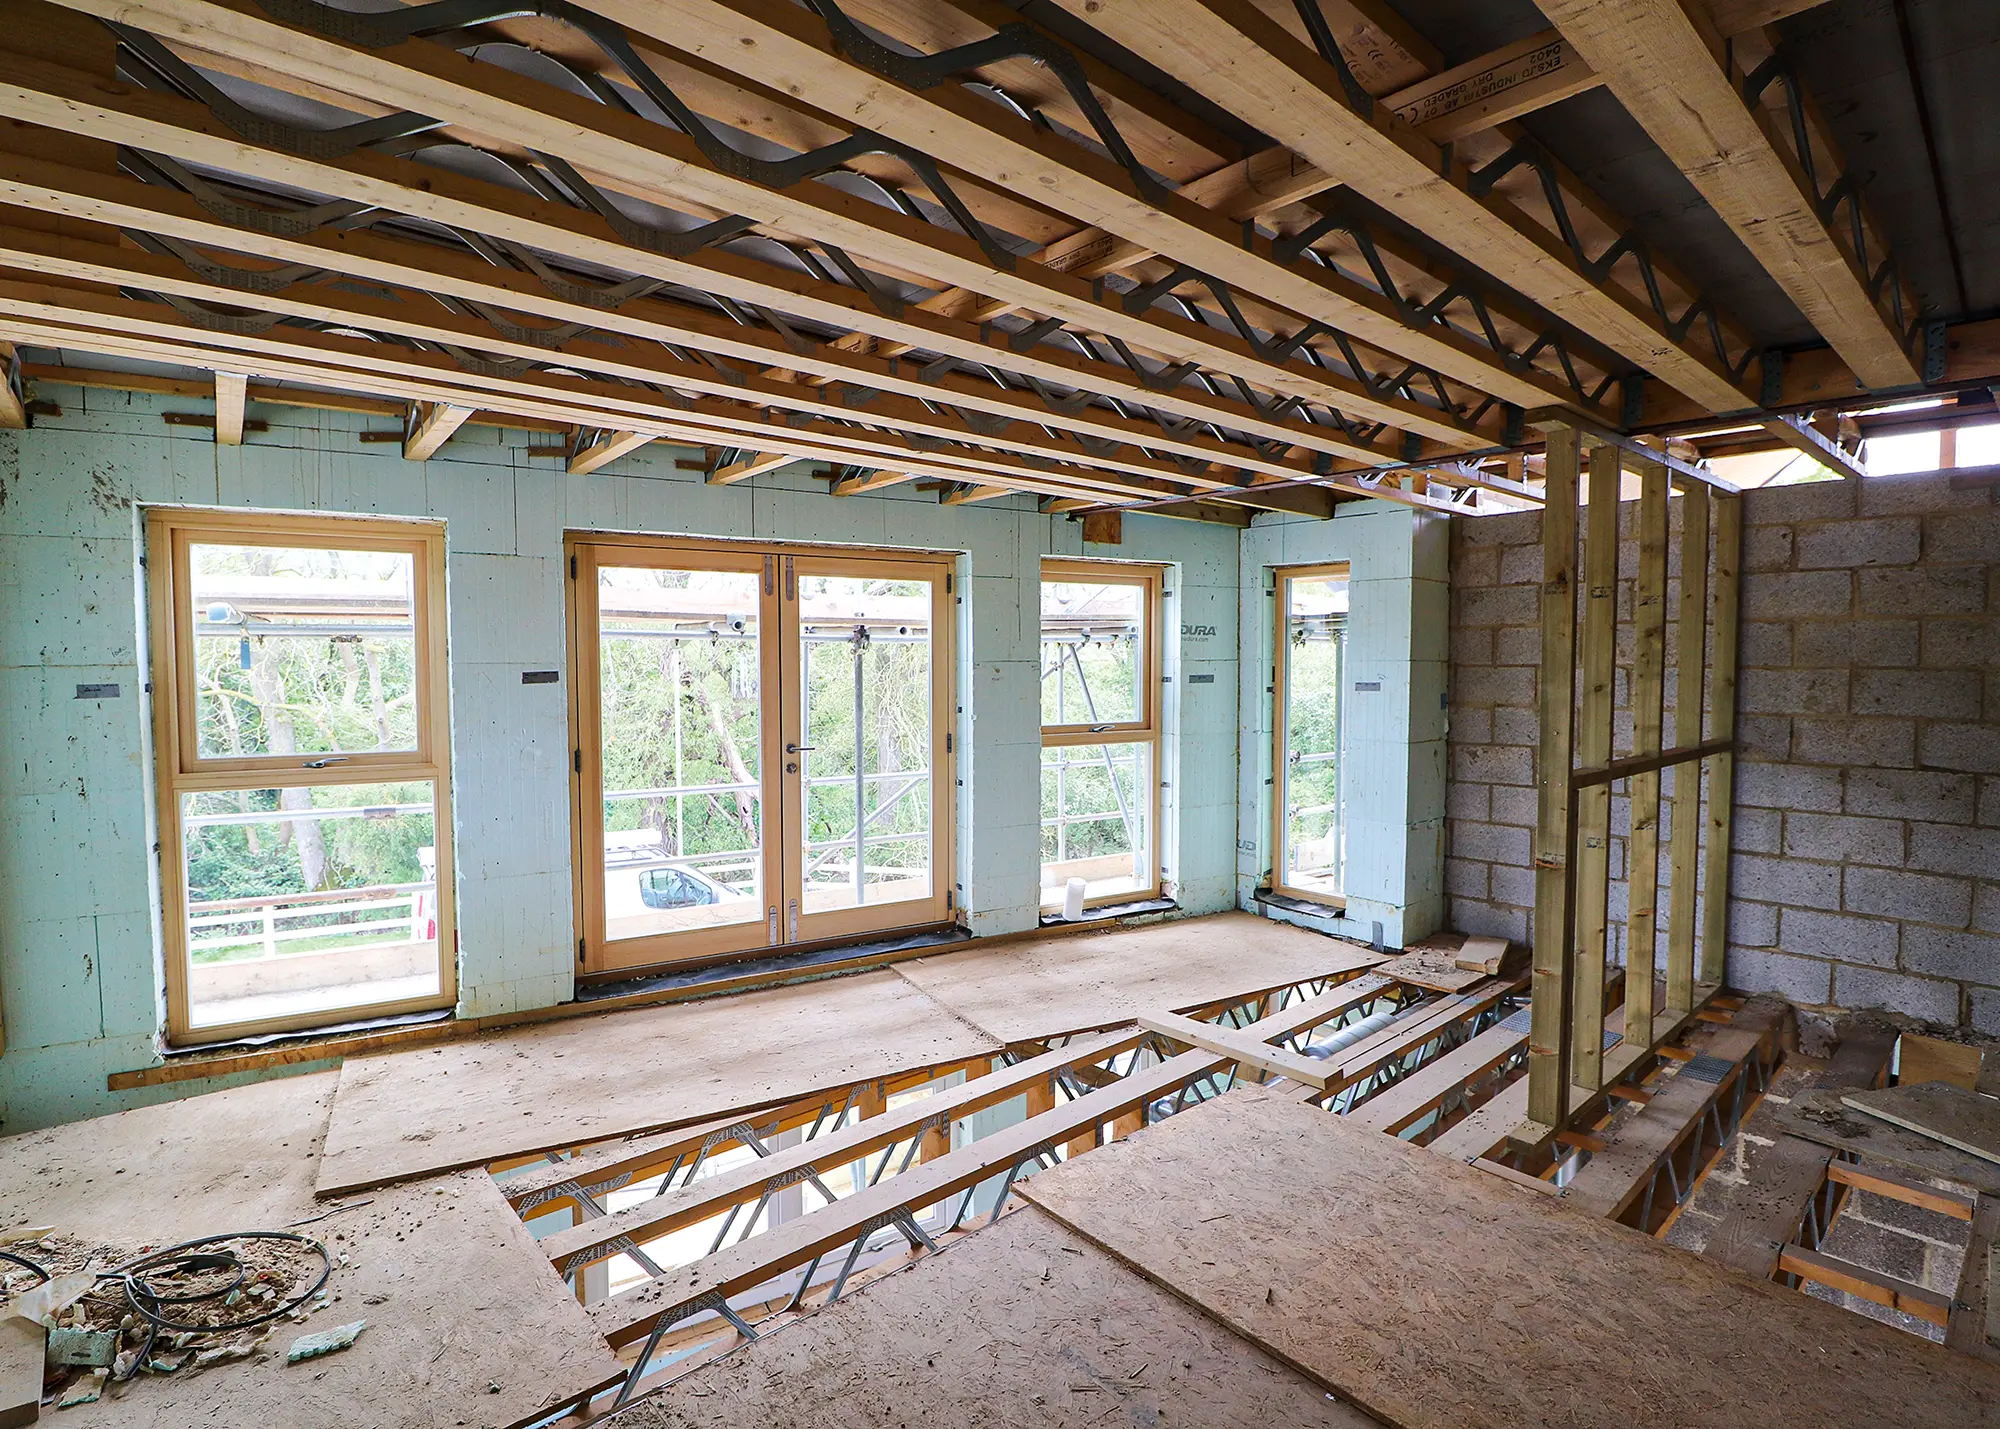

When air leaks out of a building, heat will escape along with it. So, it’s no surprise that good airtightness is a key strategy for reducing energy demand from space heating in new homes.
Hence why airtightness has had so much attention from exponents of Passivhaus and other low energy construction approaches, as well as in the UK Building Regulations. To many self builders, however, controlling air leakage can feel like a bit of a dark art.
Here I’m taking a look at the essentials to ensure you can achieve optimum levels of airtightness in your self build home.
As we’ve become better at insulating our homes, the amount of heat lost through the building fabric has fallen sharply. That’s true even for properties constructed just to the minimum standards of Building Regulations. What this means, in turn, is that the proportion of heat lost through uncontrolled air leakage has become relatively higher.
Unfortunately, many modern houses do not perform as well as they are designed to do. This issue is known as the performance gap, and poor airtightness is one of the major causes of this issue. So, achieving a really airtight building requires great attention to detail during both the design and construction stages, including careful specification and sequencing to make sure that airtightness membranes are installed correctly.
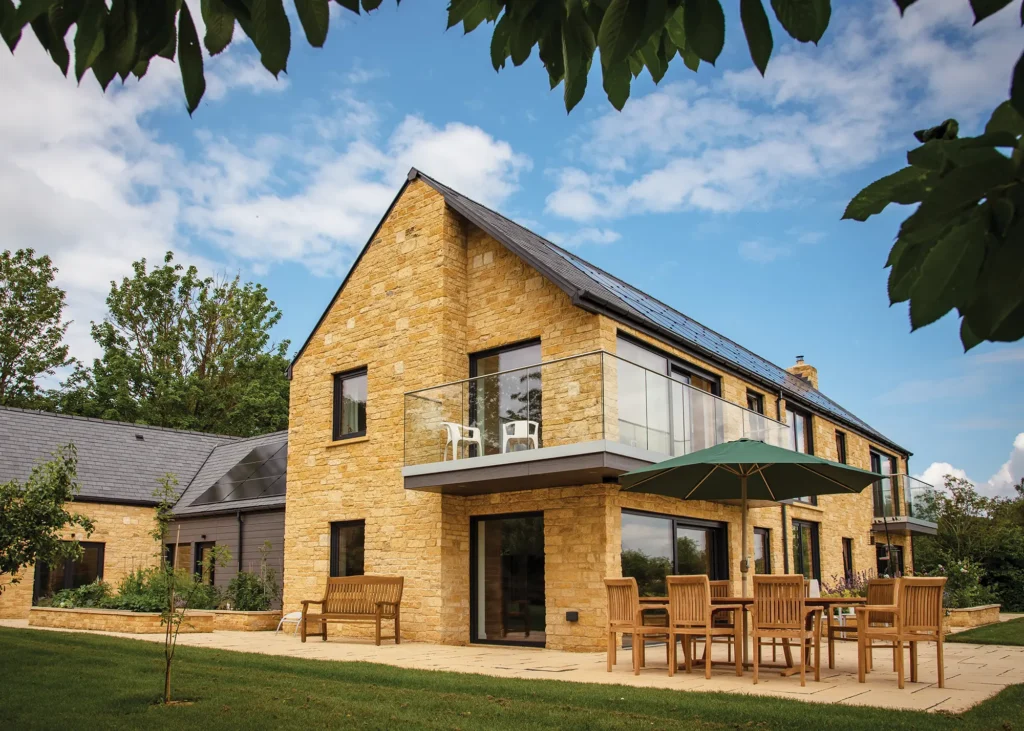
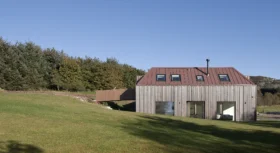
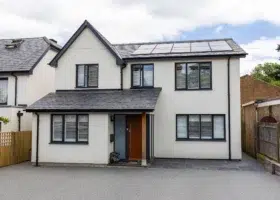
Winner of the 2021 Build It Award for Best Timber Frame Home, Gryphon House achieves Passivhaus standards for airtightness. The project combines Frame Technologies’ efficient TechVantage S timber frame system with a ProClima Intello airtight vapour control membrane and Siga Sicrall sealing tape
Crucially, this can’t be done in isolation. Nobody wants to live in a stifling, sealed up box – so the provision of fresh air (ie ventilation) must go hand-in-hand with your project’s airtightness strategy. The importance of this has been underpinned via recent changes to Part F of the Building Regs.
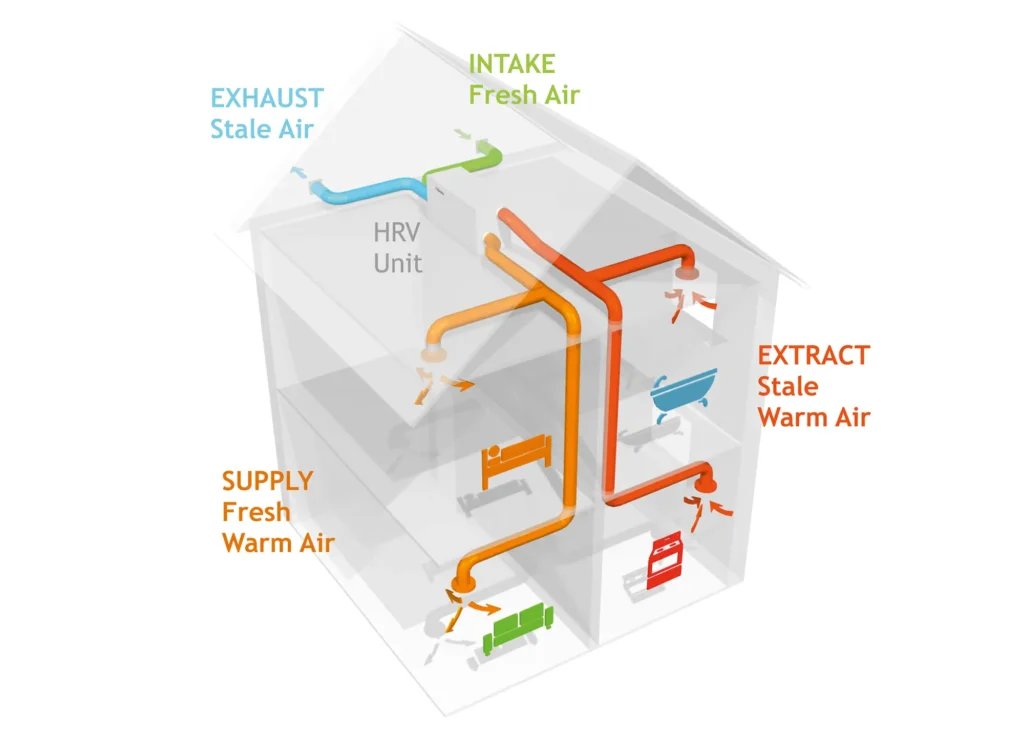
These days, many self builders aim to include mechanical ventilation and heat recovery (MVHR) to provide high-quality fresh air. This tech can extract warmth from stale outgoing air and transfer it into the incoming supply, helping to optimise thermal performance and – hopefully – reduce your long-term energy bills.
It takes power to run these systems, however, and as a result, a heat recovery system won’t begin to save energy until airtightness is better than three air changes per hour at 50 Pascals(3ACH@50Pa). The average value for airtightness in existing UK properties is estimated to be around 12ACH@50Pa, while Building Regulations currently only call for a notional value of 5ACH@50Pa. So, you’ll need to go further than the minimum standards when creating your own home to use MVHR effectively.
Read More: 12 Ways to Save on Home Energy Bills
Need more advice about different aspects of your project?Build It’s Self Build Virtual Training will give you the detailed know-how to successfully realise your dream home. Our interactive courses are presented by Build It’s expert contributors and designed to give you the key nuggets of knowledge you need – all from the comfort of your own home. Covering everything from finding land to planning permission and design, our courses take place online and allow for audience participation and experience sharing. Use the code TWENTY for 20% off. |
Many people think of air leakage purely in terms of external wind blowing air into our houses. While this is partly true, the situation is in fact rather more complex. Wind creates zones of positive and negative pressure around buildings, which in turn both pushes air in and sucks it out of our homes. In addition, as we all know, heat rises, and this of itself can generate positive and negative pressure zones within houses.
Air leakage occurs mainly at the junctions between the core elements of a building, particularly where different structural components and materials interface. Some building materials are naturally airtight, while others need special membranes or tapes to improve airtightness.

Available from Ecological Building Systems, Pro Clima Aerosana Visconn is a flexible and quick-drying liquid-applied air barrier that can be brushed, rolled or sprayed on – making it ideal for preventing air leakage on brick, block and other porous surfaces
Any open chimneys or airbricks (common in existing houses) are of course free passages for heat to escape to the exterior. Leakage also occurs through penetrations, usually from services such as drainage pipes, cables etc – and even via light fittings, if the house’s airtight layer is located on the inside of the structure.
QUICK GUIDE Simplifying airtightnessGiven the importance of airtightness in reducing energy usage in new build homes, it’s no surprise that companies are innovating to make the process easier. Build It is aware that novel whole-house options are now coming to the market that aim to take much of the legwork out of cutting down air leakage. For example, AeroBarrierUK’s approach involves pressurising a building, usually at dry shell stage once the windows and doors are fitted, before releasing a waterborne vapour permeable solution. Once your desired airtightness level has been achieved, the modular sealing stations are then shut off, and the building is allowed to vent and depressurise.
In a recent self build project, a three-bedroom family house in Herefordshire, AeroBarrier was used to reduce leakage from 6.25ACH@50Pa to just 0.95ACH@50Pa post-seal – accurately achieving the homeowner’s aims for a low-carbon, low-energy result. |
The basic principle of airtightness is to establish an air barrier line all the way around the building, which includes the walls, floors and roof. This is similar to the thermal envelope used to establish the boundary for insulation. In other words, a holistic approach is required whereby every aspect of the building is considered. The recommendation in Passivhaus is to draw a red line on the detailed drawings to show exactly where the air barrier will lie.
This barrier line can be drawn either inside the structural members of the building or outside of it. It should not be a mixture of both, however, as this introduces great complexity and is a recipe for failure. In the UK we commonly use internal air barriers.
While these are effective, they require specialist components and tend to feature multiple penetrations for services. In North America, external air barriers are more prevalent because they’re considered to be simpler to install, with fewer components and penetrations.
Sometimes, the building component itself will be sufficiently airtight for your project goals; in others an additional layer may be required. For example, OSB (oriented strand board, a timber sheet material) is relatively airtight, and there are even specialist options designed for use as air barriers – so extra measures may only be needed to create an effective seal at joints between the boards. That said, some types of OSB perform differently to others, so you and your designer should take care with the specification.
Learn More: Self Building a Passivhaus: 10 Steps to Follow For Passivhaus Approval
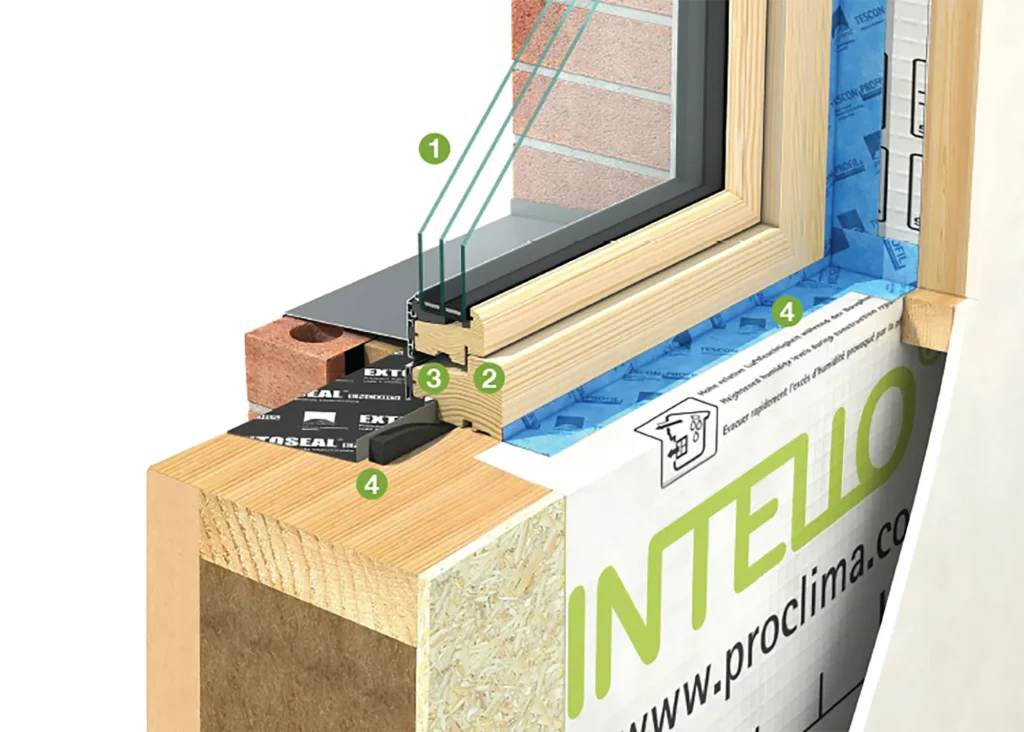
This illustration by Green Building Store shows the key components of a well-installed, high-performance window: (1) low U-values, such as argon-filled triple glazing; (2) dual compression seals for airtightness; (3) multipoint locking; (4) airtightness tapes to achieve the desired air and weathertightness
Concrete is also effectively airtight, which means that solid floors should not need an additional layer (except where they meet walls etc). On masonry projects, a wet plaster finish or parge coat can provide the airtightness. Materials such as glass are also inherently airtight, but gaps occur where it meets the frame – so look for designs that address this, and consider using airtightness tape between the frame and the house superstructure.
Buildings are complex and there can be all kinds of structural connections between elements, such as wall/floor junctions and wall/roof junctions. In most cases it’s the junctions between dissimilar materials that we need to focus on. Careful detailing is required to achieve airtightness at these locations.

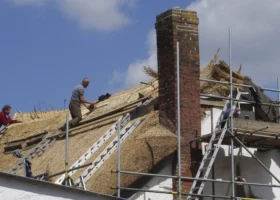
Dry house shell stage is your final chance to address issues in airtightness at junctions between materials, without having to rip out and undo work; so it’s the best time for a detailed air blower test
Increasingly, products are becoming available that help designers and installers to deal with these challenges. For example, where a soil pipe exits the airtightness layer, a purpose-made flange is fitted to the soil pipe and the horizontal section is then sealed to the barrier through which it penetrates. Airtightness tapes are widely-used and fantastic for sealing around windows and doors.
In addition, you can now buy paint– or spray-on liquid membranes, which are great for areas where it’s tricky to apply tapes (such as floor-to-wall junctions).
CLOSER LOOK The need for good home ventilationYou might ask why we should go to such a lot of effort to seal up our buildings, only to have to introduce passive or mechanical ventilation. The answer is that what we are seeking to eliminate or minimise, specifically, is uncontrolled air leakage. A completely airtight building would be dangerously unhealthy, not to mention contravene the Building Regulations! The recently updated Approved Document F1 (2021) sets out minimum standards for ventilation of new dwellings. Getting this right isn’t straightforward, and the regulations acknowledge this. The strategy in the Approved Document therefore combines standards for targeted extract ventilation from wet rooms, whole dwelling ventilation and purge ventilation (ie opening the windows). Most self builders will probably be using a whole dwelling system. That might be because they are building super airtight homes, or because they are also looking to use heat recovery – which really requires a centralised system to be most effective.
Approved Document F of Building Regulations states that the minimum whole dwelling ventilation rate for the supply of air to the habitable rooms in a dwelling should meet both of the following conditions:
To save you looking this up, for a four-bedroom dwelling of 150m2 internal area, these requirements would equate to either 45 litres per second (l/s) or 37 l/s. As you need to satisfy both conditions, in this example the whole dwelling rate would need to be at least 45 l/s. If you’re instead using a decentralised room-by-room approach, based on having trickle vents in windows and extraction from all wet rooms, then requirements standards apply under the regs. However, note this approach probably wouldn’t be compatible with a super airtight building. More Advice: Home Ventilation: Creating a Well Ventilated and Healthy House |
Planning the airtightness layer fully at the design stage is vital, but there then needs to be a process in place to ensure every detail of the design is carried through during the construction phase. Getting this right requires close cooperation between architect and contractor. It is much cheaper and less stressful to approach things methodically, rather than having to take sections of a building apart and retrofit a barrier where air leakage has been identified by post-construction testing.
A particular challenge is to plan the correct sequence of works. For example, where rafters sit on a ridge beam, placing a strip of the membrane over the beam before the rafters are put in place will make things quicker and easier later in the works. But this needs to be done as the roof is assembled – earlier than we would normally think about airtightness and well before finishing trades are on site.
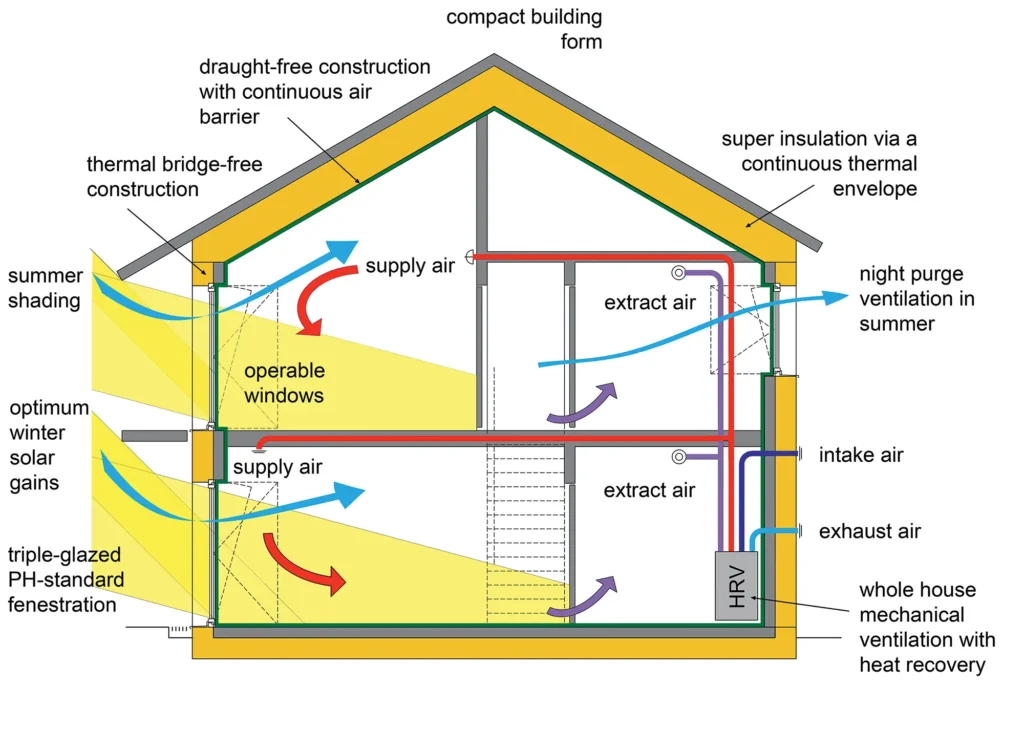
This illustration from the Passivhaus Trust identifies the key principles of the low-energy building standard, including the requirement for a continuous air barrier
Some tradespeople may not have built to the standards you want to achieve before. They may therefore need to go through some training to understand their own role in the process and learn the sequencing of applying what, to many, will be new products.
This is best addressed by appointing an airtightness champion – someone who will understand exactly where the barrier lies, communicate this to all contractors on site, supervise all relevant work and make sure that later trades do not damage the layer as they complete their parts of the project. Some sites also put in place a no-blame reporting mechanism, encouraging operatives to disclose any breaches in the airtightness layer, so they can be made good before they get covered up.
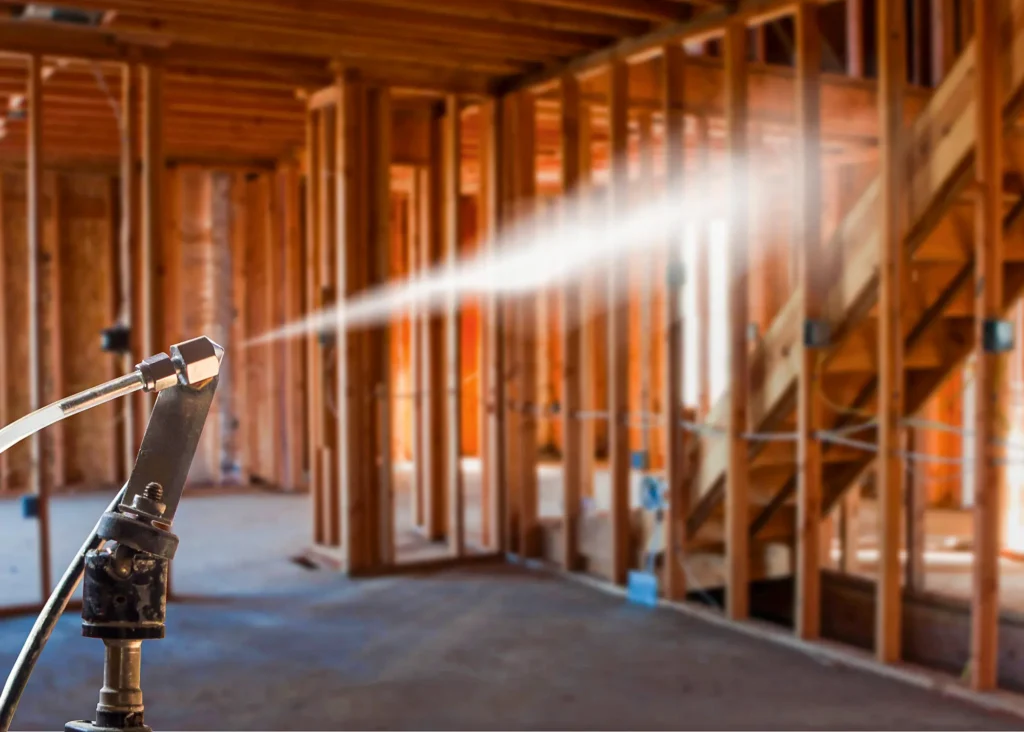
One of the key steps to achieving a good airtightness result is forensic testing. This isn’t the final pass/fail airtightness test that’s done for Building Regulations purposes when the house is complete. Instead, it is carried out when the airtightness layer is in place, but the finishing layers (plasterboard etc) have not yet been installed. The benefit of this is that the airtightness layer is accessible, so changes can be made if required.
A forensic airtightness test uses the same basic process as a final test (ie pressurising the building), but also involves the identification of leakage routes using smoke pens and thermal imaging cameras. From this will come a detailed report which shows the builder if and, importantly, where remedial action needs to be taken.
Inspiring & Efficient Projects: Eco Homes: 30 Sustainable Self Builds to Inspire Your Eco House


 Login/register to save Article for later