

- Plan ItBack
- Design ItBack
- Build ItBack
- Homes
- ProductsBack
- CostsBack
- Self Build Cost Calculator
Estimate your project costs instantly with Build It's interactive self-build cost calculator
Calculate Now - Costs & Finance
- Contracts & Warranties
- Build It Estimating Service
Get an accurate, detailed cost breakdown of your project
Submit plans
- EventsBack


 Login/register to save Article for later
How to Bleed a Radiator – Your Simple Step by Step Guide

Wondering how to bleed a radiator? If the tops of your radiators feel cold, while the lower sections get nice and toasty, then air is almost certainly trapped in the system. This means it’s time to bleed your radiators.
Bleeding the radiators in your house releases the trapped air, allowing hot water to circulate throughout the whole emitter, rather than getting stuck at the bottom. You should bleed your radiators at least once a year – ideally before the heating season begins!
The good news is that bleeding radiators is a simple DIY job that can improve the health and efficiency of your heating system, giving you a warmer home and saving you money by reducing your energy bills. Our simple DIY step-by-step guide will show you how to successfully bleed a radiator.
How to Bleed a Radiator – a Simple Step by Step Guide
How to bleed a radiator – what equipment do you need?
|
1. Switch on the central heating
The first thing you need to do when bleeding your radiators is turn on the heating. This will build up the pressure in your central heating system, so that any air rises to the top of the radiators. Make sure the radiators are fully on (open the intake valve or TRV to its highest setting) and wait until all of them have heated up. You may need to temporarily set your main thermostat to a higher temperature so that all the radiators come on.
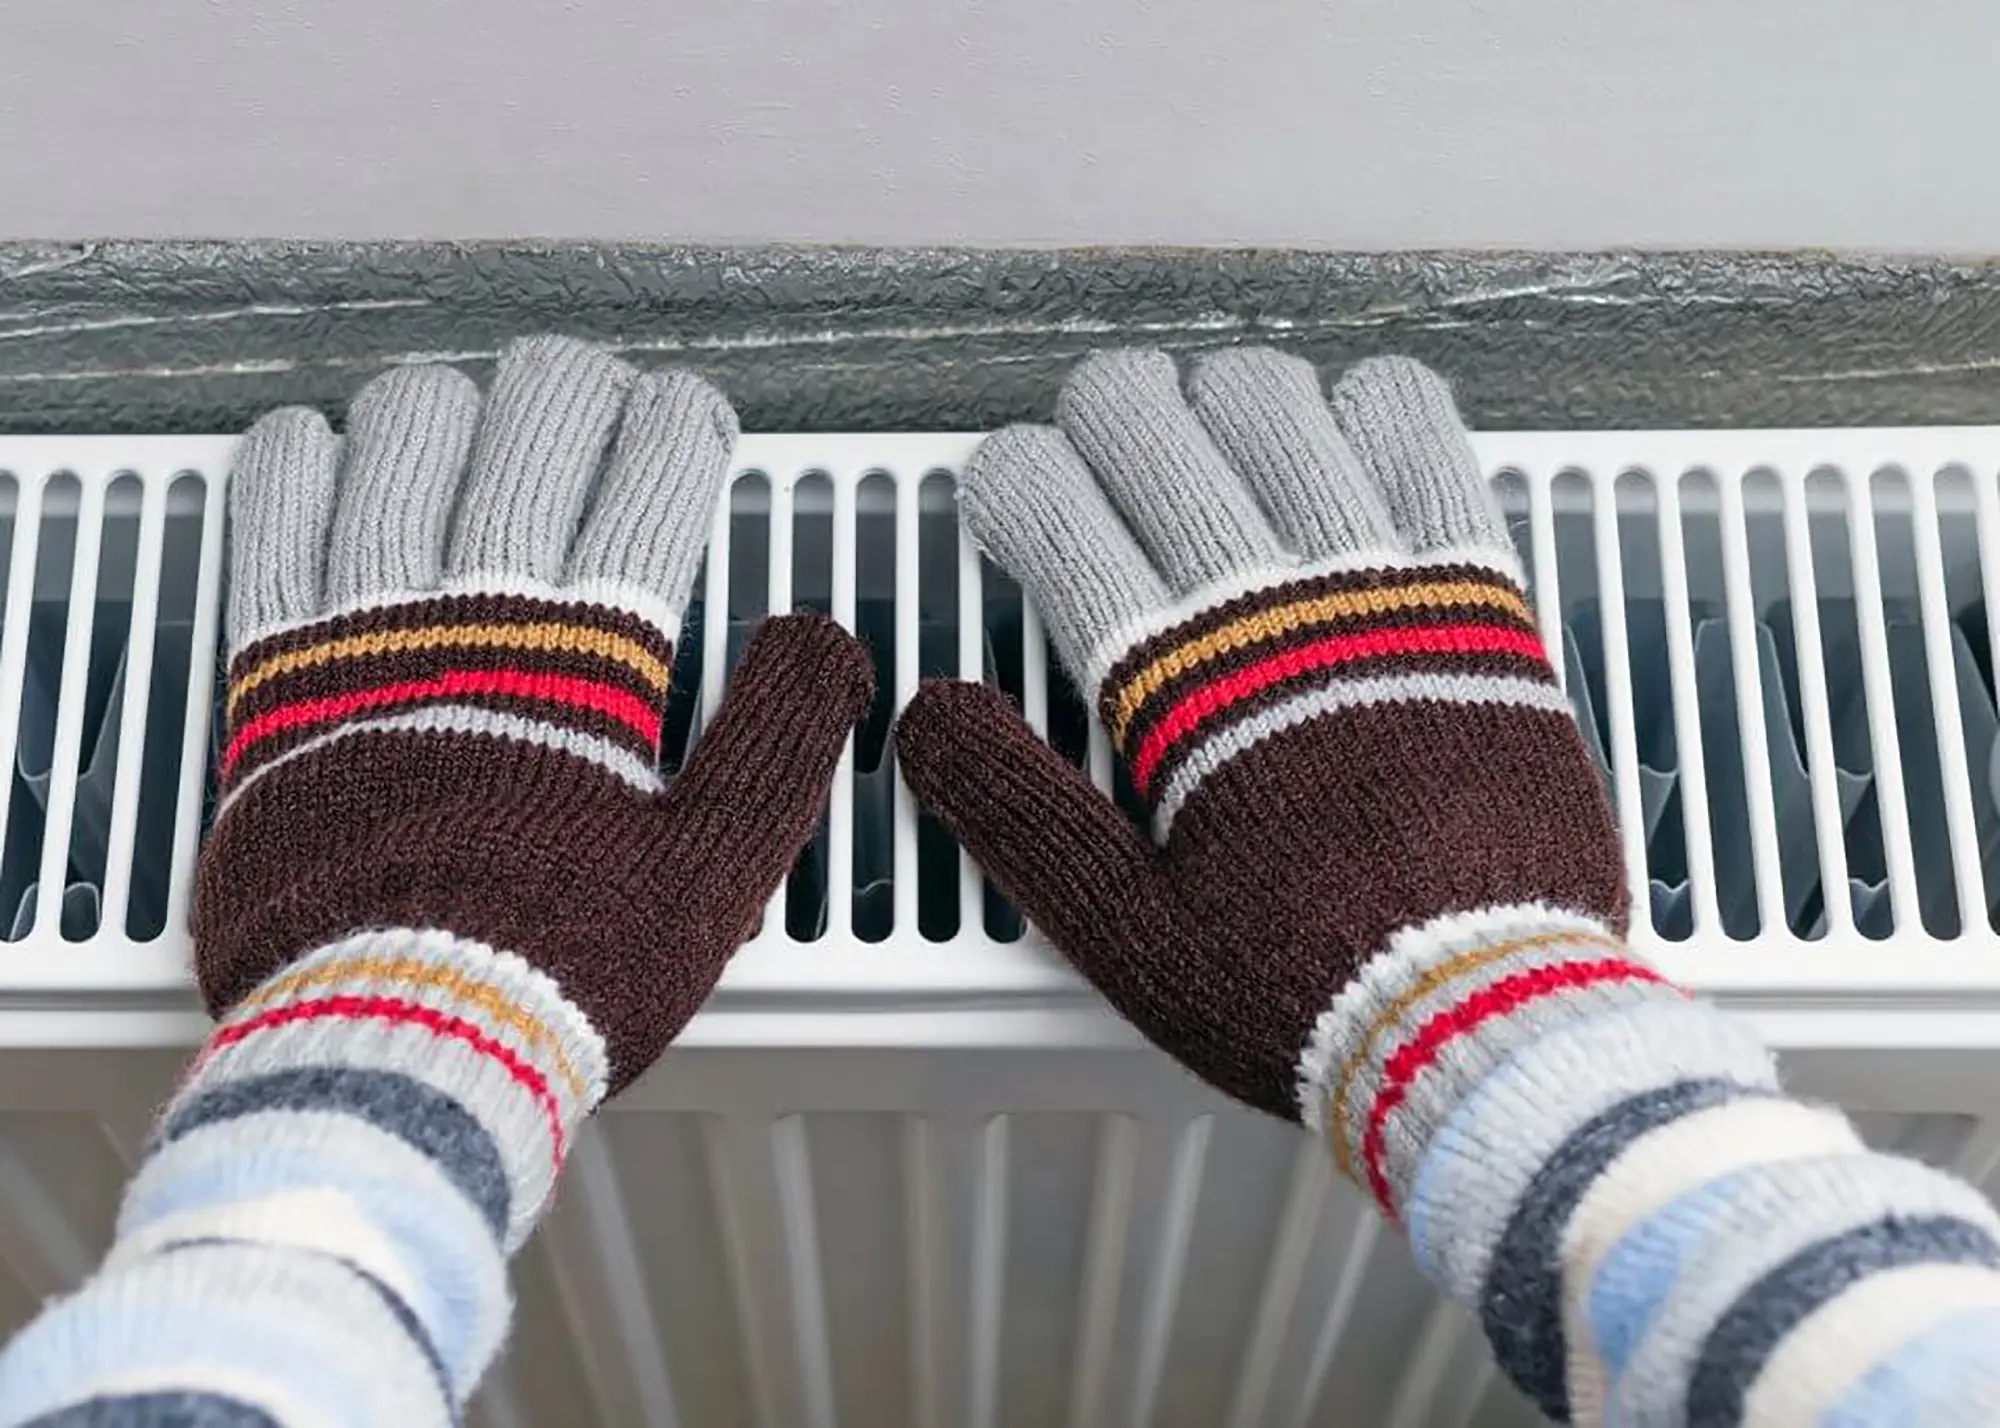
Protect your hands against scalding by wearing gloves to check for cold spots on your radiators
2. Check each radiator before bleeding
You may want to wear gloves for this step, to minimise the risk of burning your hands. So, how can you tell if your radiators need bleeding? There are a number of tell-tale signs, including:
- Cold spots (usually the top section is colder than the bottom)
- Gurgling noises coming from the radiator
- The radiator takes a long time to heat up
- The whole radiator feels cold
Did you know?If your radiators feel cold at the top and hot at the bottom, this may indicate a build-up of sludge has settled (usually caused by corrosion). The individual radiator or the whole system may need flushing to remedy the issue. The latter job is best undertaken by a heating engineer. |
3. Switch the heating off again
Before you bleed the radiators, you’ll need to turn the heating off again and allow the radiators to completely cool. If they’re still warm, hot water is likely to spurt out when you open the valve.
4. Identify the radiator bleed valve
This should be located at the top of the radiator, usually at one of the ends. There are various configurations, but most look like a shallow hole with a square inside. The square is the part you’ll need to turn to release the air.

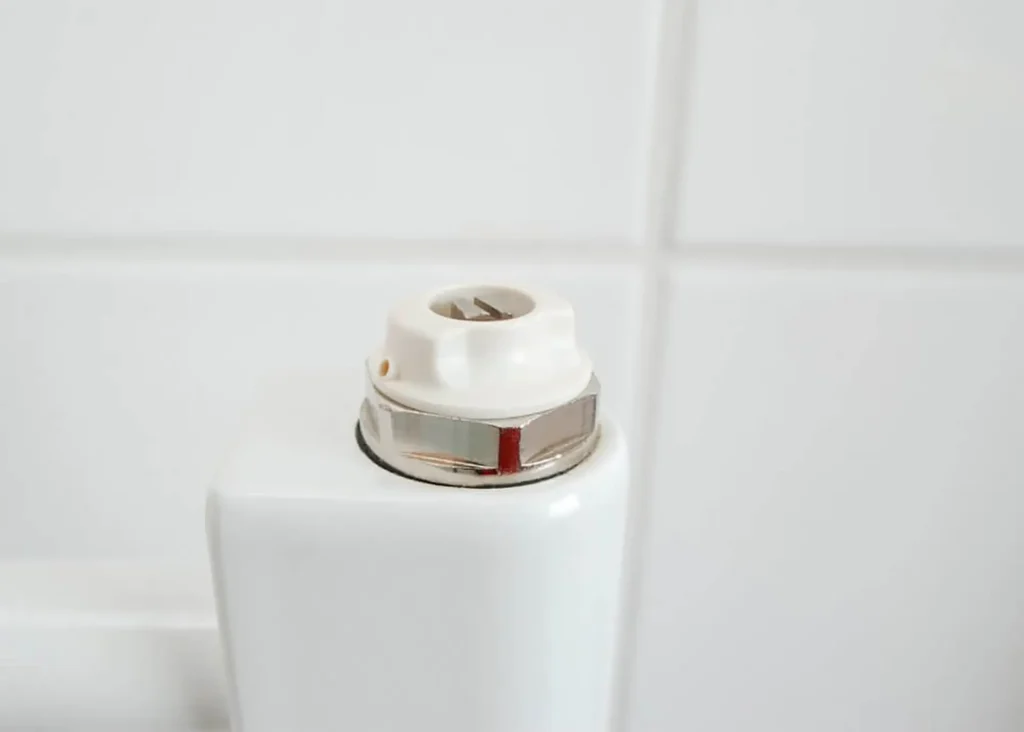
On some models the location may be different (you may find it on the rear of the radiator, along the top section, for instance). Note that modern screwdriver-operated versions look slightly different – they tend to have an extra piece with a nozzle.
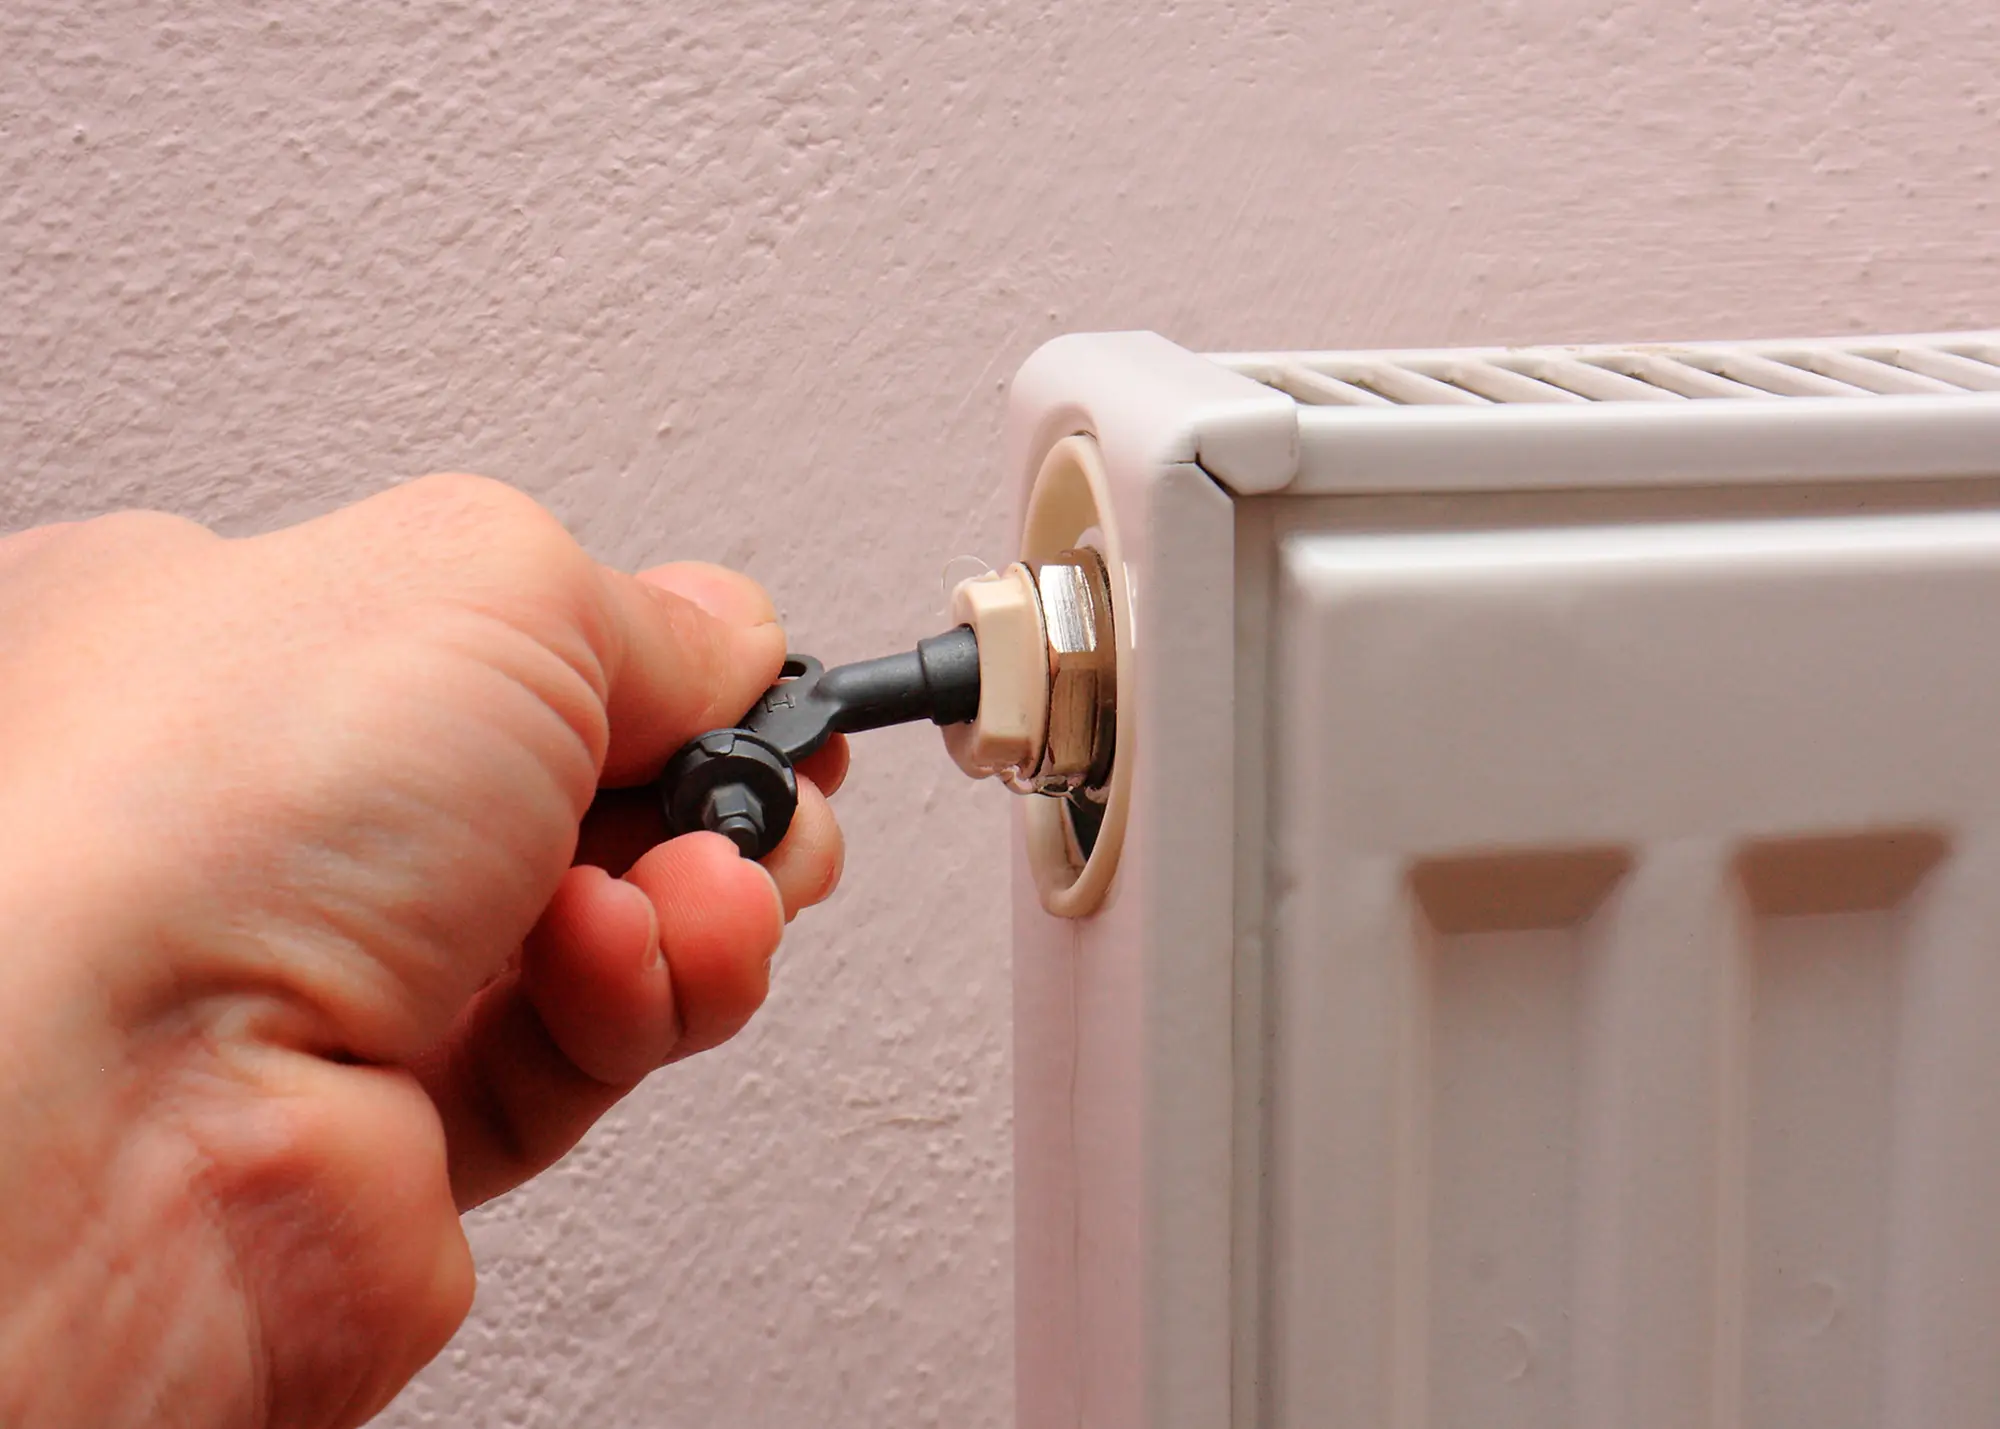
5. Bleed the radiator
So, how do you bleed a radiator? Grab your radiator key and attach it to the square nut in the centre of the bleed valve (in some cases you can use a flathead screwdriver). You’ll need to slowly turn the screw anti-clockwise to loosen it. Half a turn should be enough to allow any air to hiss out.
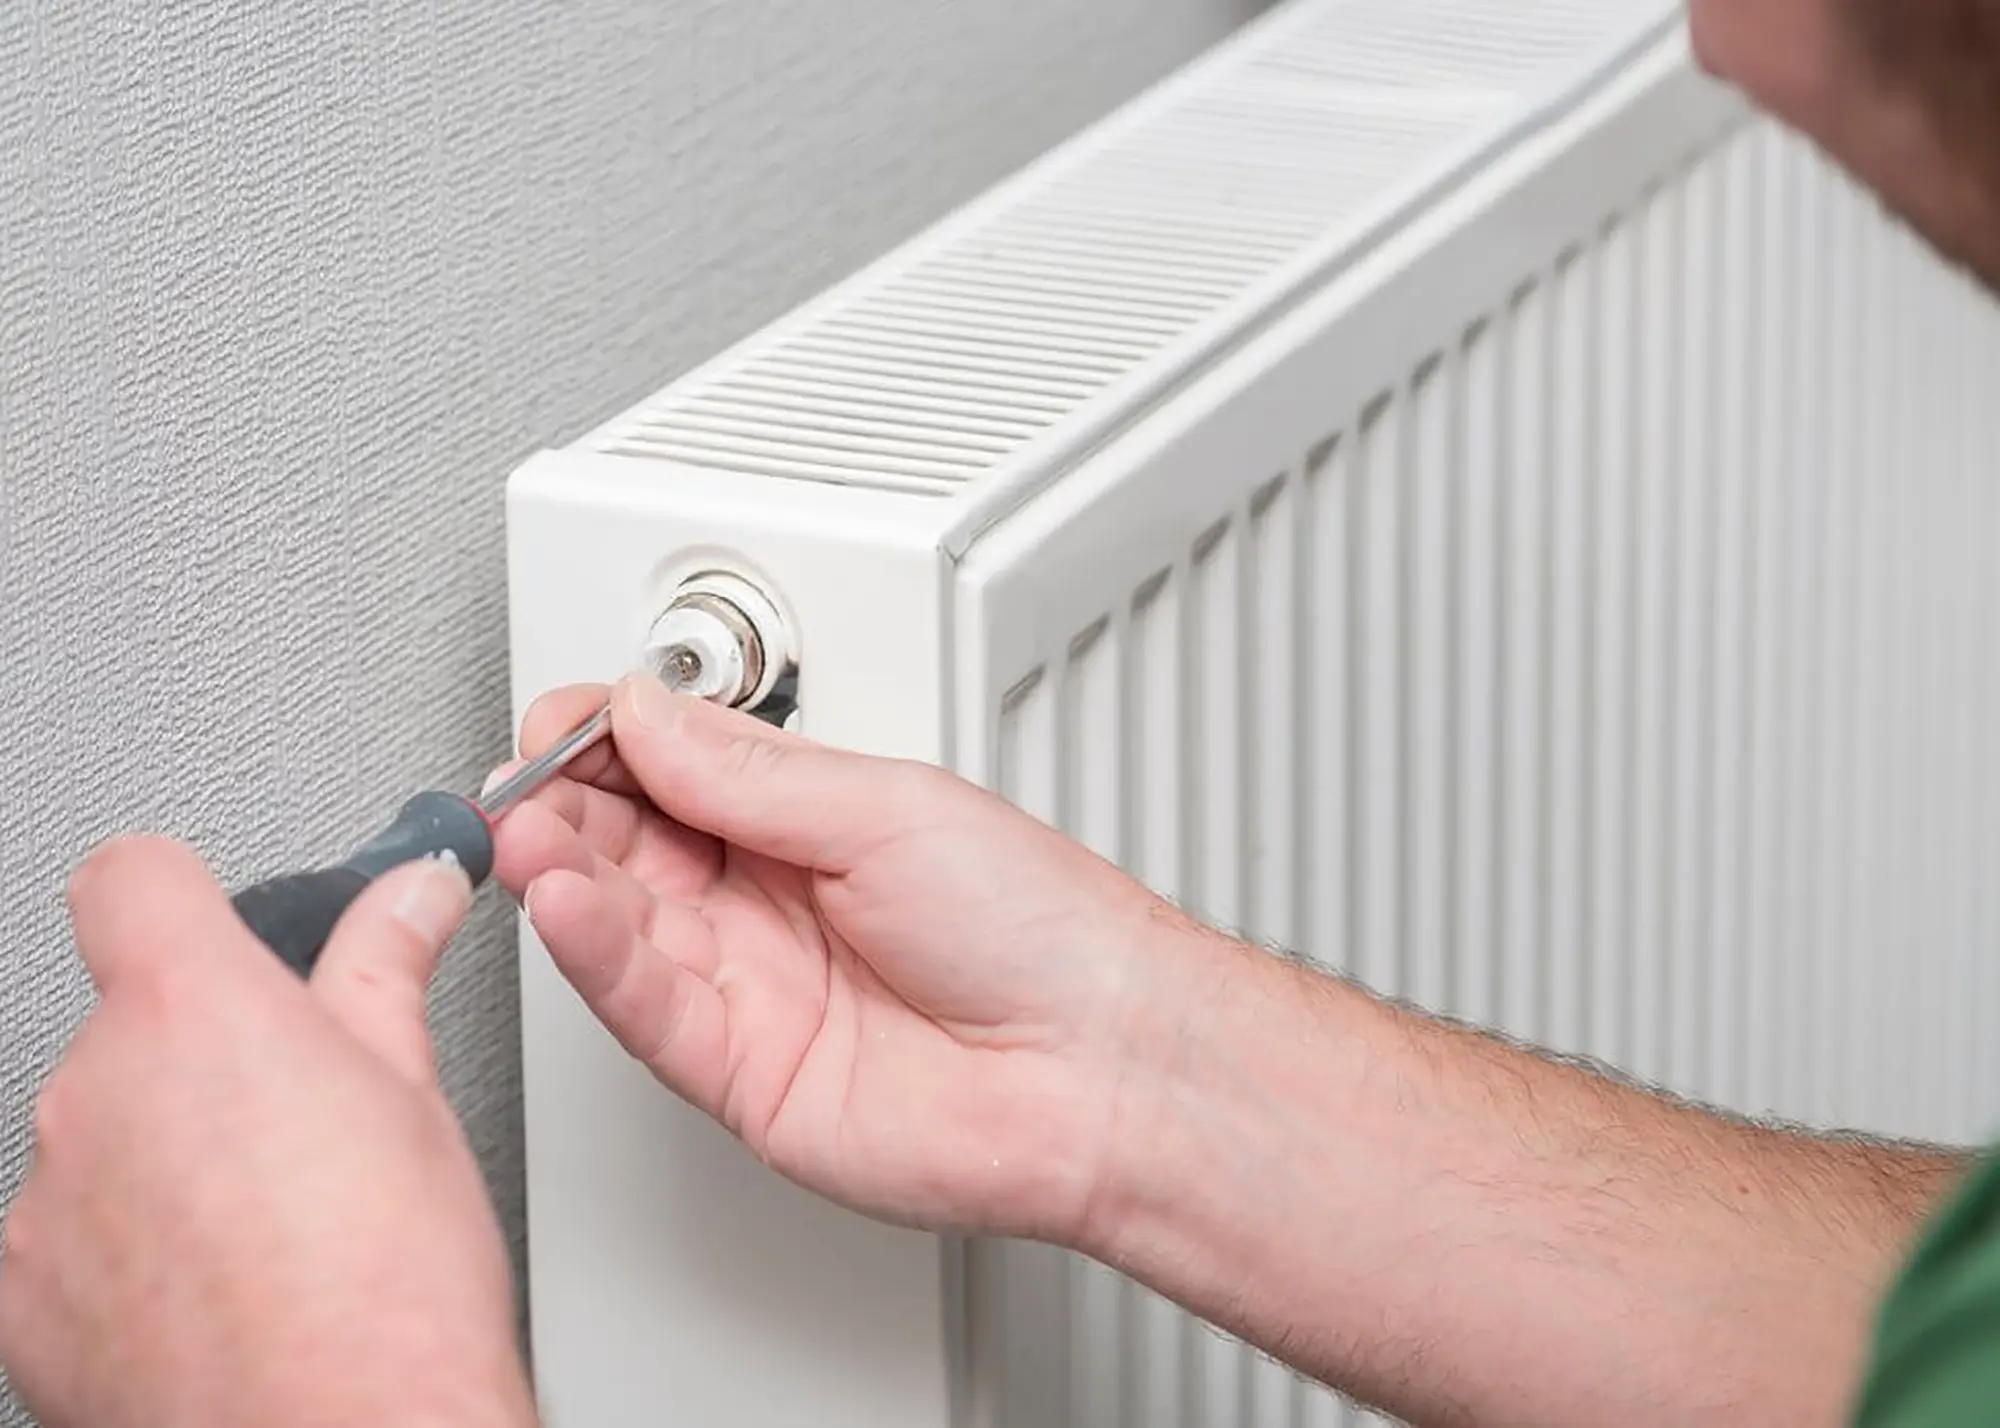
This modern bleed valve can be opened with a flathead screwdriver
Be sure to keep your cloth beneath the valve to catch the water. Keep bleeding the radiator valve until you see a steady stream of water. Modern versions usually have a small nozzle that allows a small amount of water to jet out.
6. Close the valve
Once the hissing sound as stopped and water starts to trickle out with no spluttering, that’s your cue to shut the bleed valve (by turning the key clockwise). Make sure it’s tight, but don’t overdo it as this could damage the valve. Wipe away any excess water to prevent any risk of rusting, then move on to the next radiator.
7. Check the pressure
Before you switch the heating back on, it’s best to check the boiler is still operating within its recommended pressure level. This is usually between 1 and 1.5 bar (around 15-21 psi). Your boiler should have a pressure gauge on the instrument panel, with an indicator needle that should be resting in the green section.
It’s possible that bleeding radiators could drop the pressure too low – in which case you may need to top up the boiler pressure up using the filling loop.
8. Turn the heating back on
Once everything looks normal, switch the heating on again and allow the radiators to warm up. Check they feel hot all over (if not, some may need bleeding again) and inspect them to ensure there are no leaks from the bleed valve. If all the radiators are working as expected, congratulations – you’re done!
Build It

You may be interested in


Great guide! Bleeding a radiator is such a simple but crucial task for keeping a heating system efficient. I’ve noticed that doing this before winter really helps keep my home warm without overworking the boiler. One tip I’d add—have an old towel or small container ready to catch any water drips when opening the valve. Saves a bit of cleanup! Thanks for the step-by-step breakdown