- Plan ItBack
- Design ItBack
- Build ItBack
- Homes
- ProductsBack
- CostsBack
- Self Build Cost Calculator
Estimate your project costs instantly with Build It's interactive self-build cost calculator
Calculate Now - Costs & Finance
- Contracts & Warranties
- Build It Estimating Service
Get an accurate, detailed cost breakdown of your project
Submit plans
- EventsBack


 Login/register to save Article for later
Period Renovation Blog 21: Working on the Sitting Room

To demonstrate the depth of intervention involved in a period renovation project, here I’m concentrating purely on the progress of one room – our sitting room.
Over the last two and a half years this space has been worked on intermittently, as each element dovetails with progress elsewhere in the house.
Superficially, the finished room does not appear dramatically different from the starting point. Seeing it during work gives a much better impression of how extensive the renovation has been than the before and after images.
Looking back at the Estate Agent’s photos, the room looks more or less habitable as it was. But every surface was either unsightly, deteriorated beyond use, structurally unstable or damaging to the underlying historic fabric.
Period Renovation Blog 20: Render and Windows
In addition, there were extensive damp areas, terrible thermal performance and no services at all.
All of this meant we had to strip all the heavy cement plaster from the walls, remove plasterboard panels from the ceiling, demolish a concrete block dividing wall and break out the concrete floor.
Fortunately, most of the underlying structure uncovered by stripping the plaster was in remarkably good condition.
The stonework of external walls was completely sound; our long-term programme meant that we could leave the damp walls for more than a year to dry out before replastering.
The main structural issue we uncovered was in an internal cob wall that had been lined with concrete blocks at the expense of a significant portion of the cob structure.
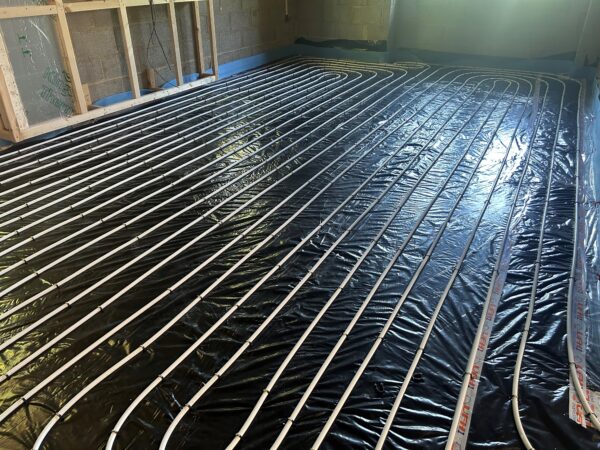
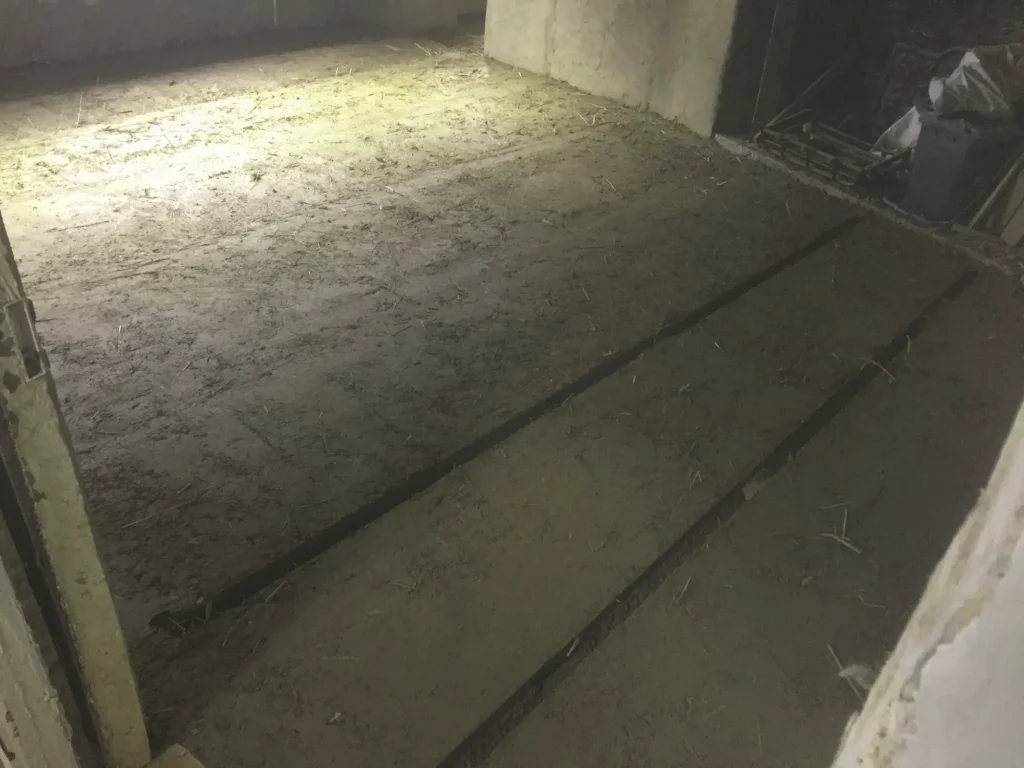
The concrete floor turned out to be sitting directly on the bedrock on which the house is built. We needed to excavate the rock to a depth of 200mm to accommodate our new insulated floor build up and underfloor heating.
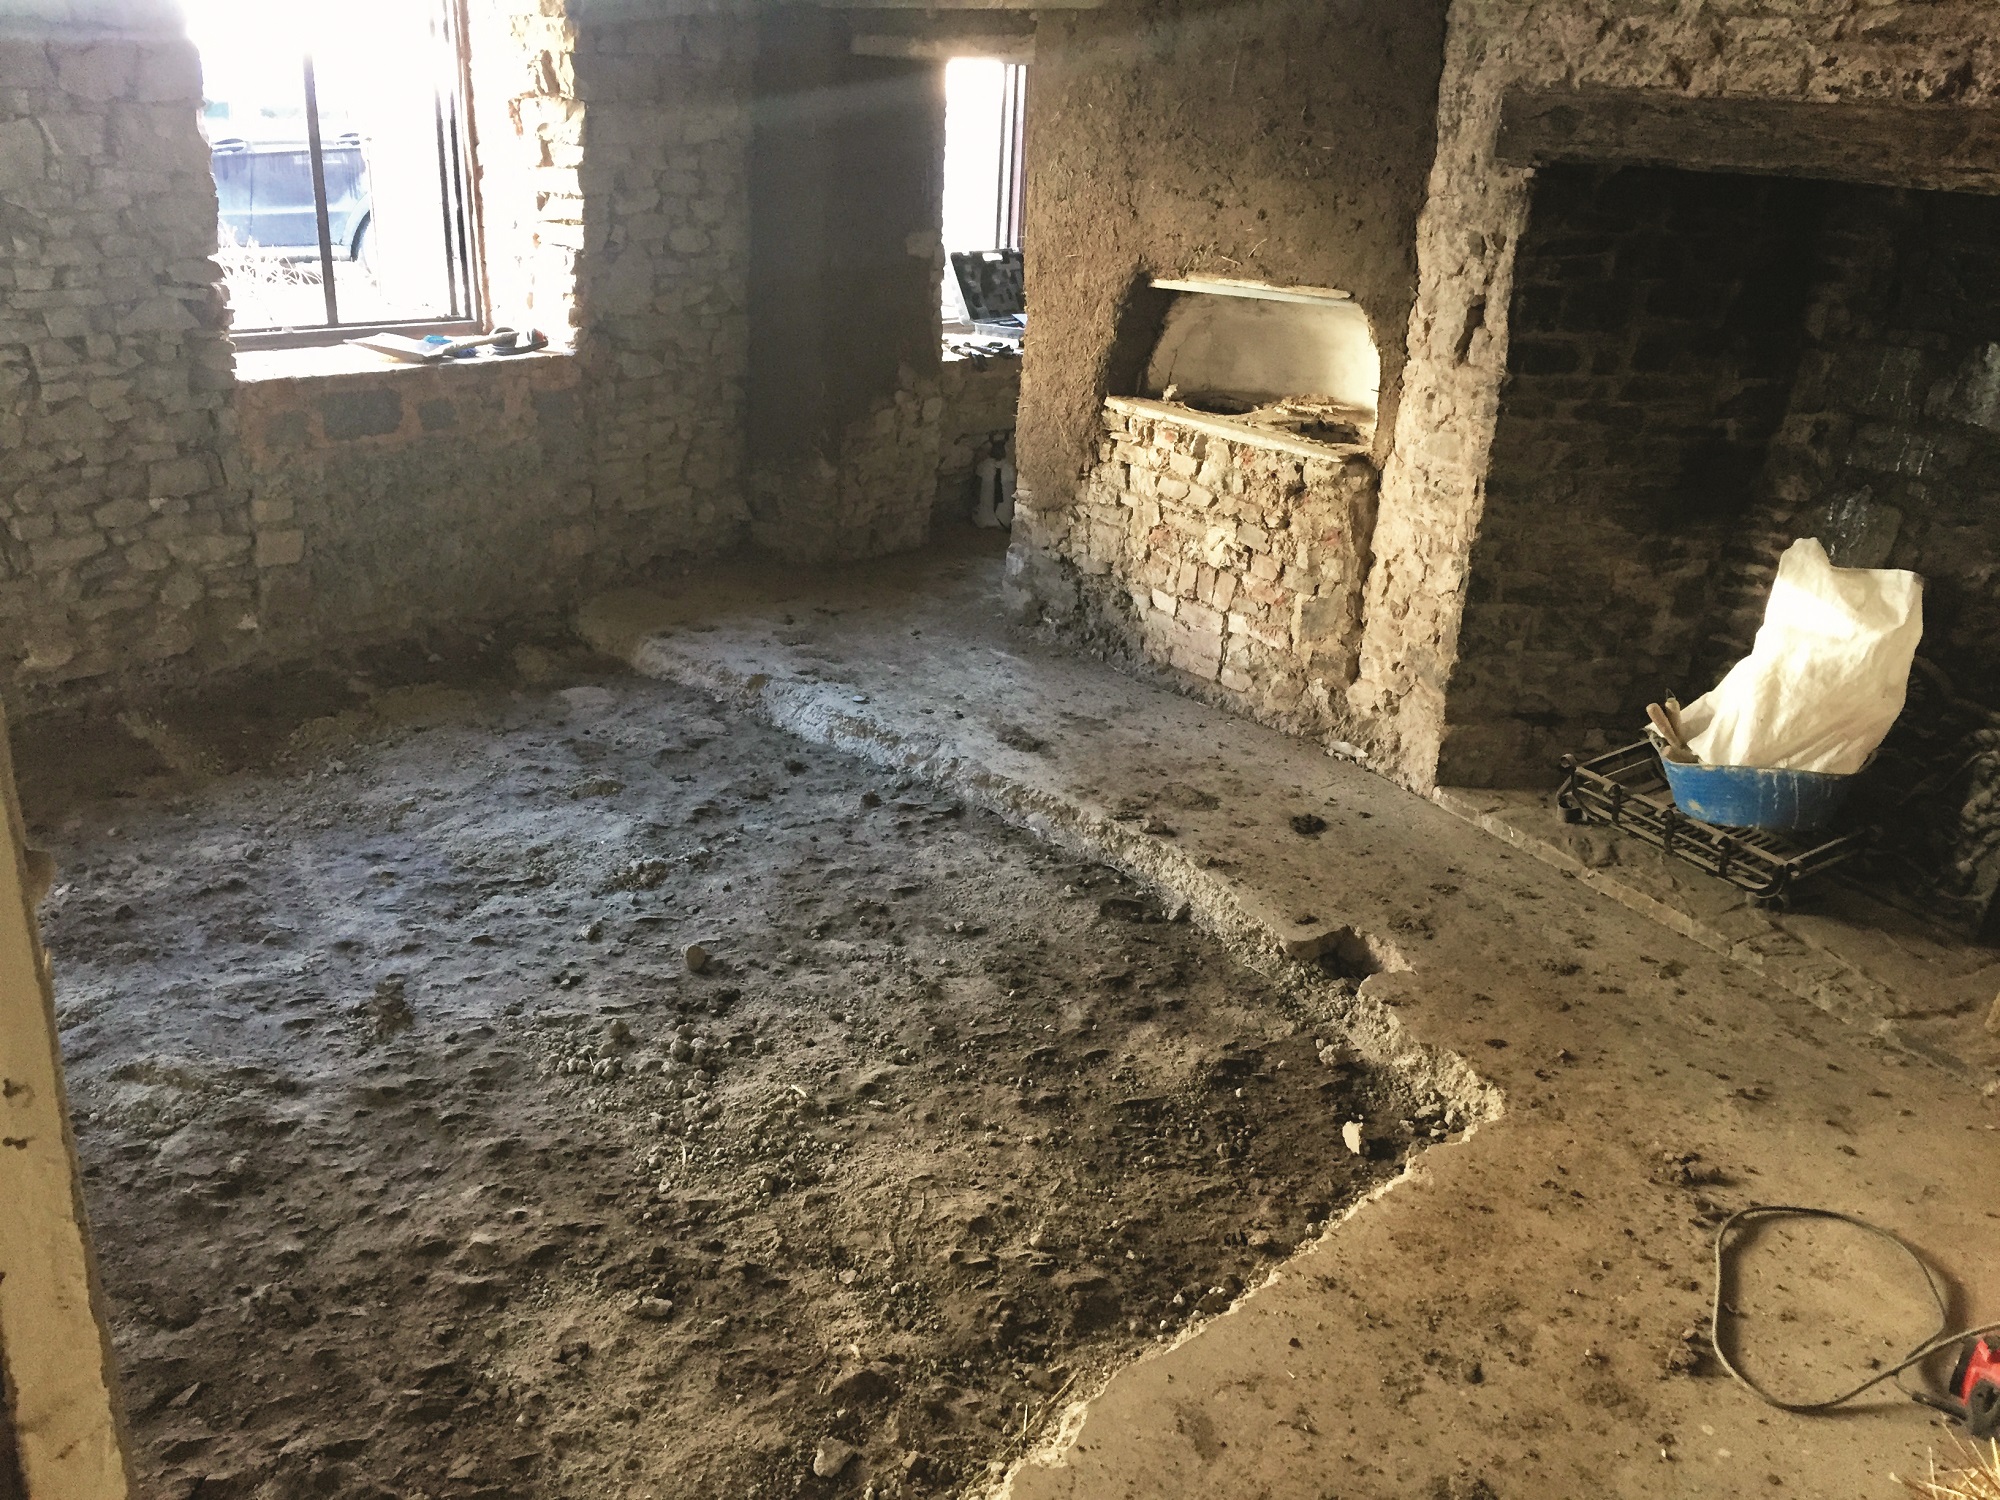
The old concrete floor turned out to be sitting directly on the bedrock on which the house is built. It needed to be excavated to a depth of 200mm to accommodate the new insulated floor build up and underfloor heating
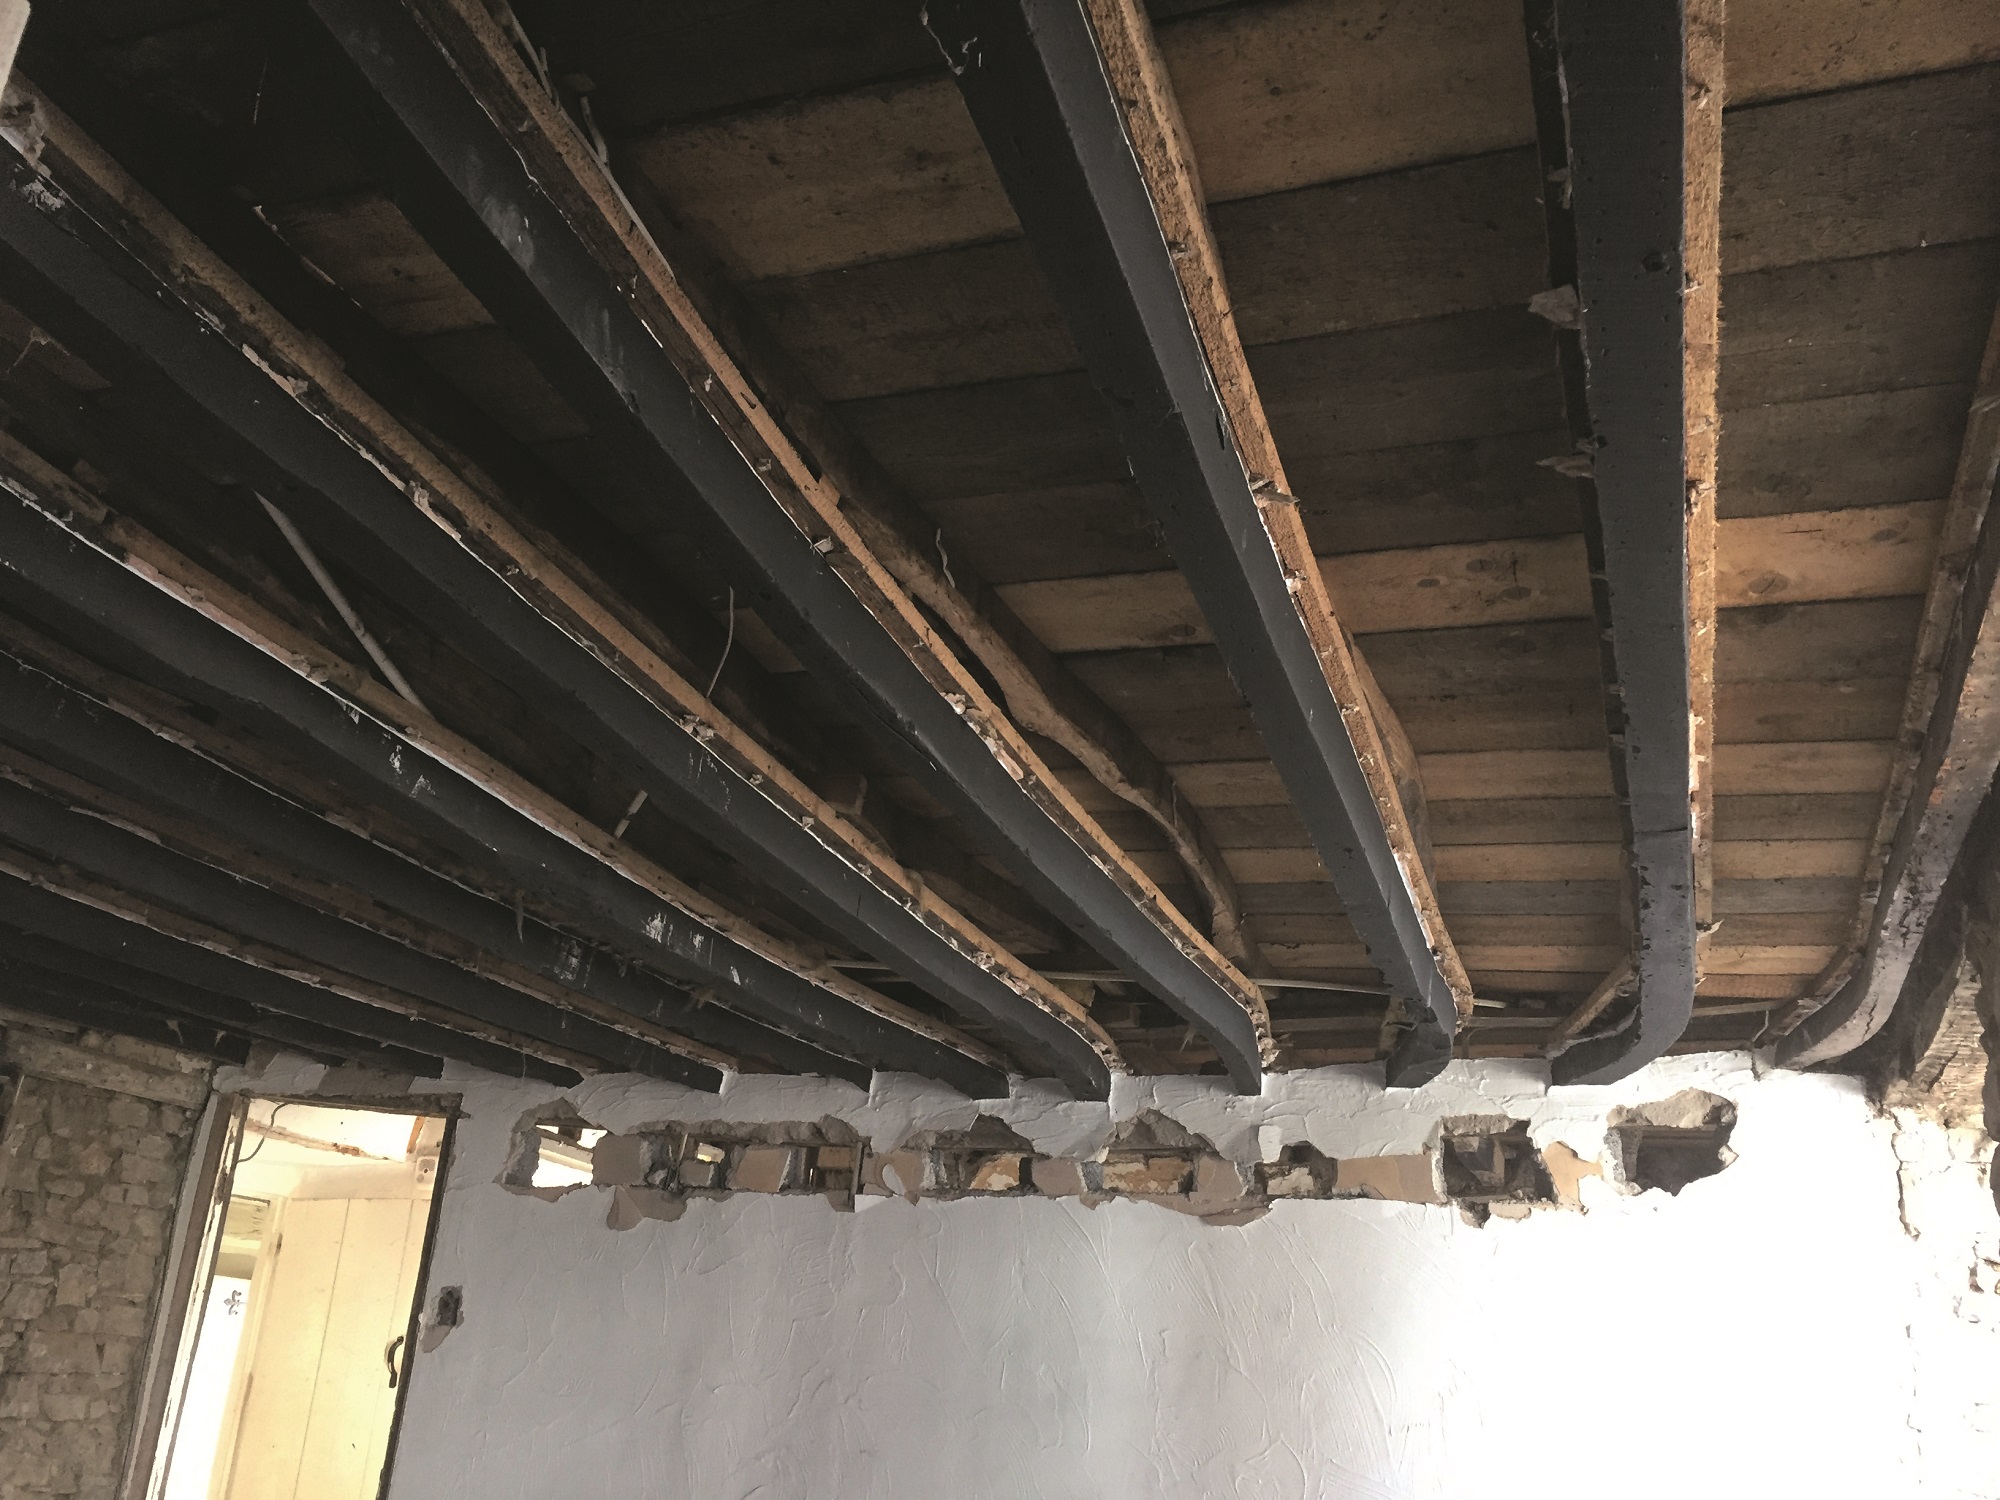
The ceiling structure had experienced major deflection a very long time ago. This is now effectively baked into the structure of the building and there was no question of attempting to correct it.
An additional set of joists had been inserted to support and level the floor above, but these weren’t well connected to the original joists making the floor quite unstable. With the ceiling removed we were able to tie the two layers of joists together and fix some anchors in the walls the stiffen the whole arrangement.
Floor
Once we had installed insulation and underfloor heating (covered in blog post 10) we could build up the new finished floor.
In the sitting room we decided to form the floor base from cob. This is a highly sustainable local material – most of the ingredients are dug from our own site. It is also very healthy and breathable and provides excellent thermal mass for the underfloor heating.
After the floor was dug to the correct depth, a base of cob was laid. This highly sustainable material was mostly sourced from the surrounding site. Healthy and breathable, it also provides excellent thermal mass for underfloor heating
There is an unusual complicating factor in our house because it was built in stages on a hill, resulting in varying levels throughout the building. The floor levels in the rooms adjoining the sitting room differ by 200mm.
We needed to achieve level entry from the hall but don’t want to have a big drop down into the dining room. By laying the sitting room floor on a fall we were able to accommodate half of the difference – there will still be a slope down into the dining room, but it is manageable.
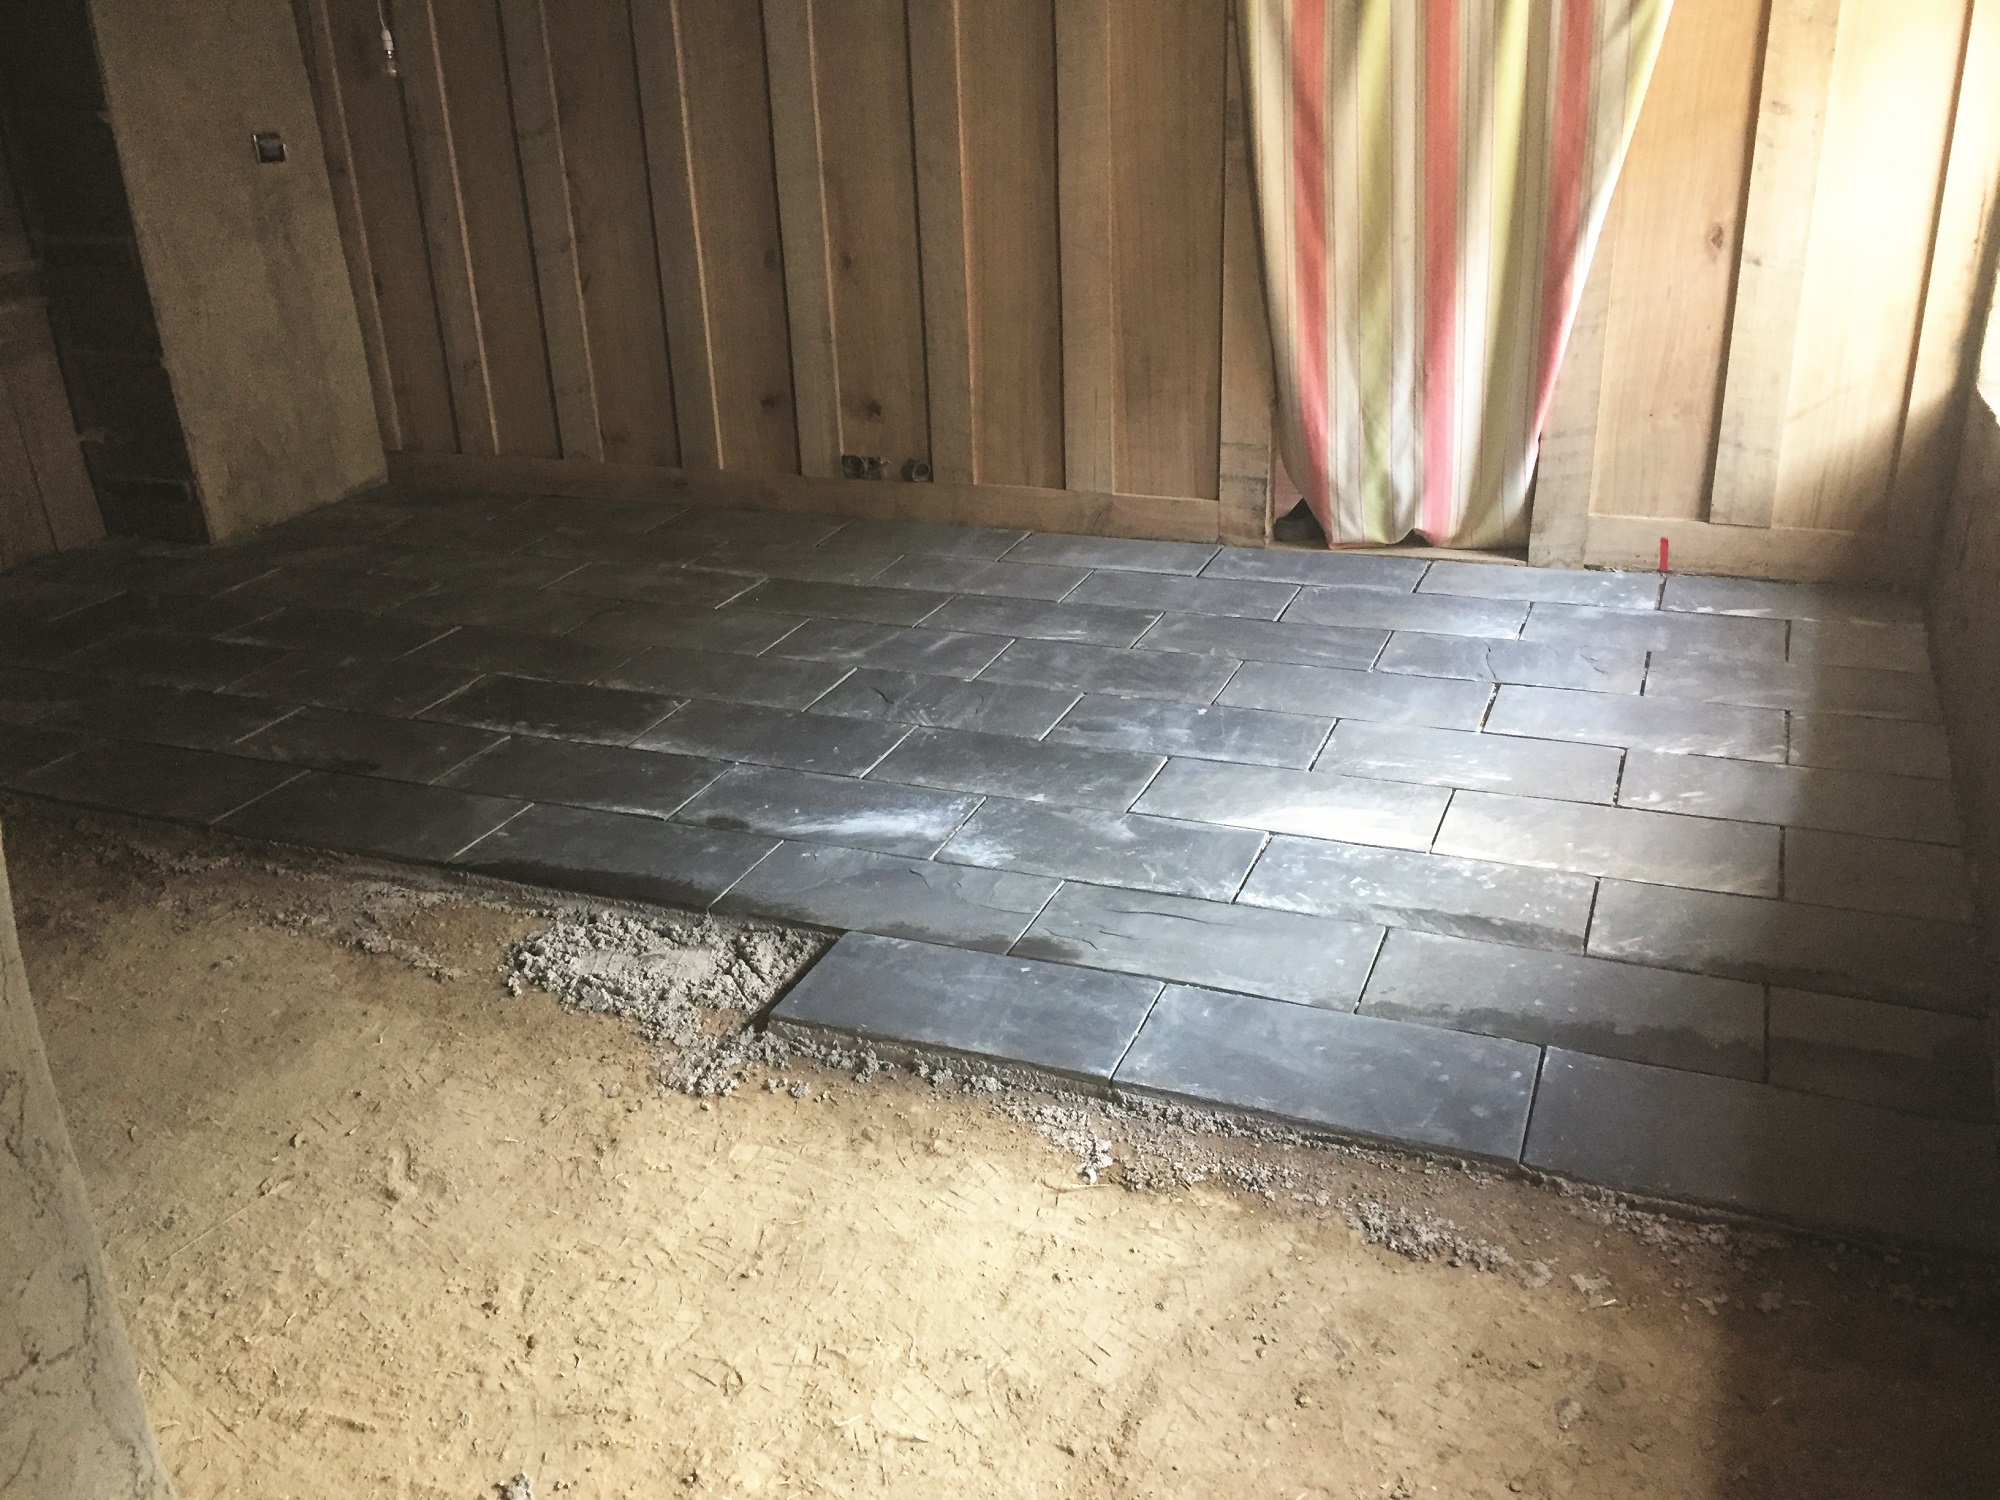
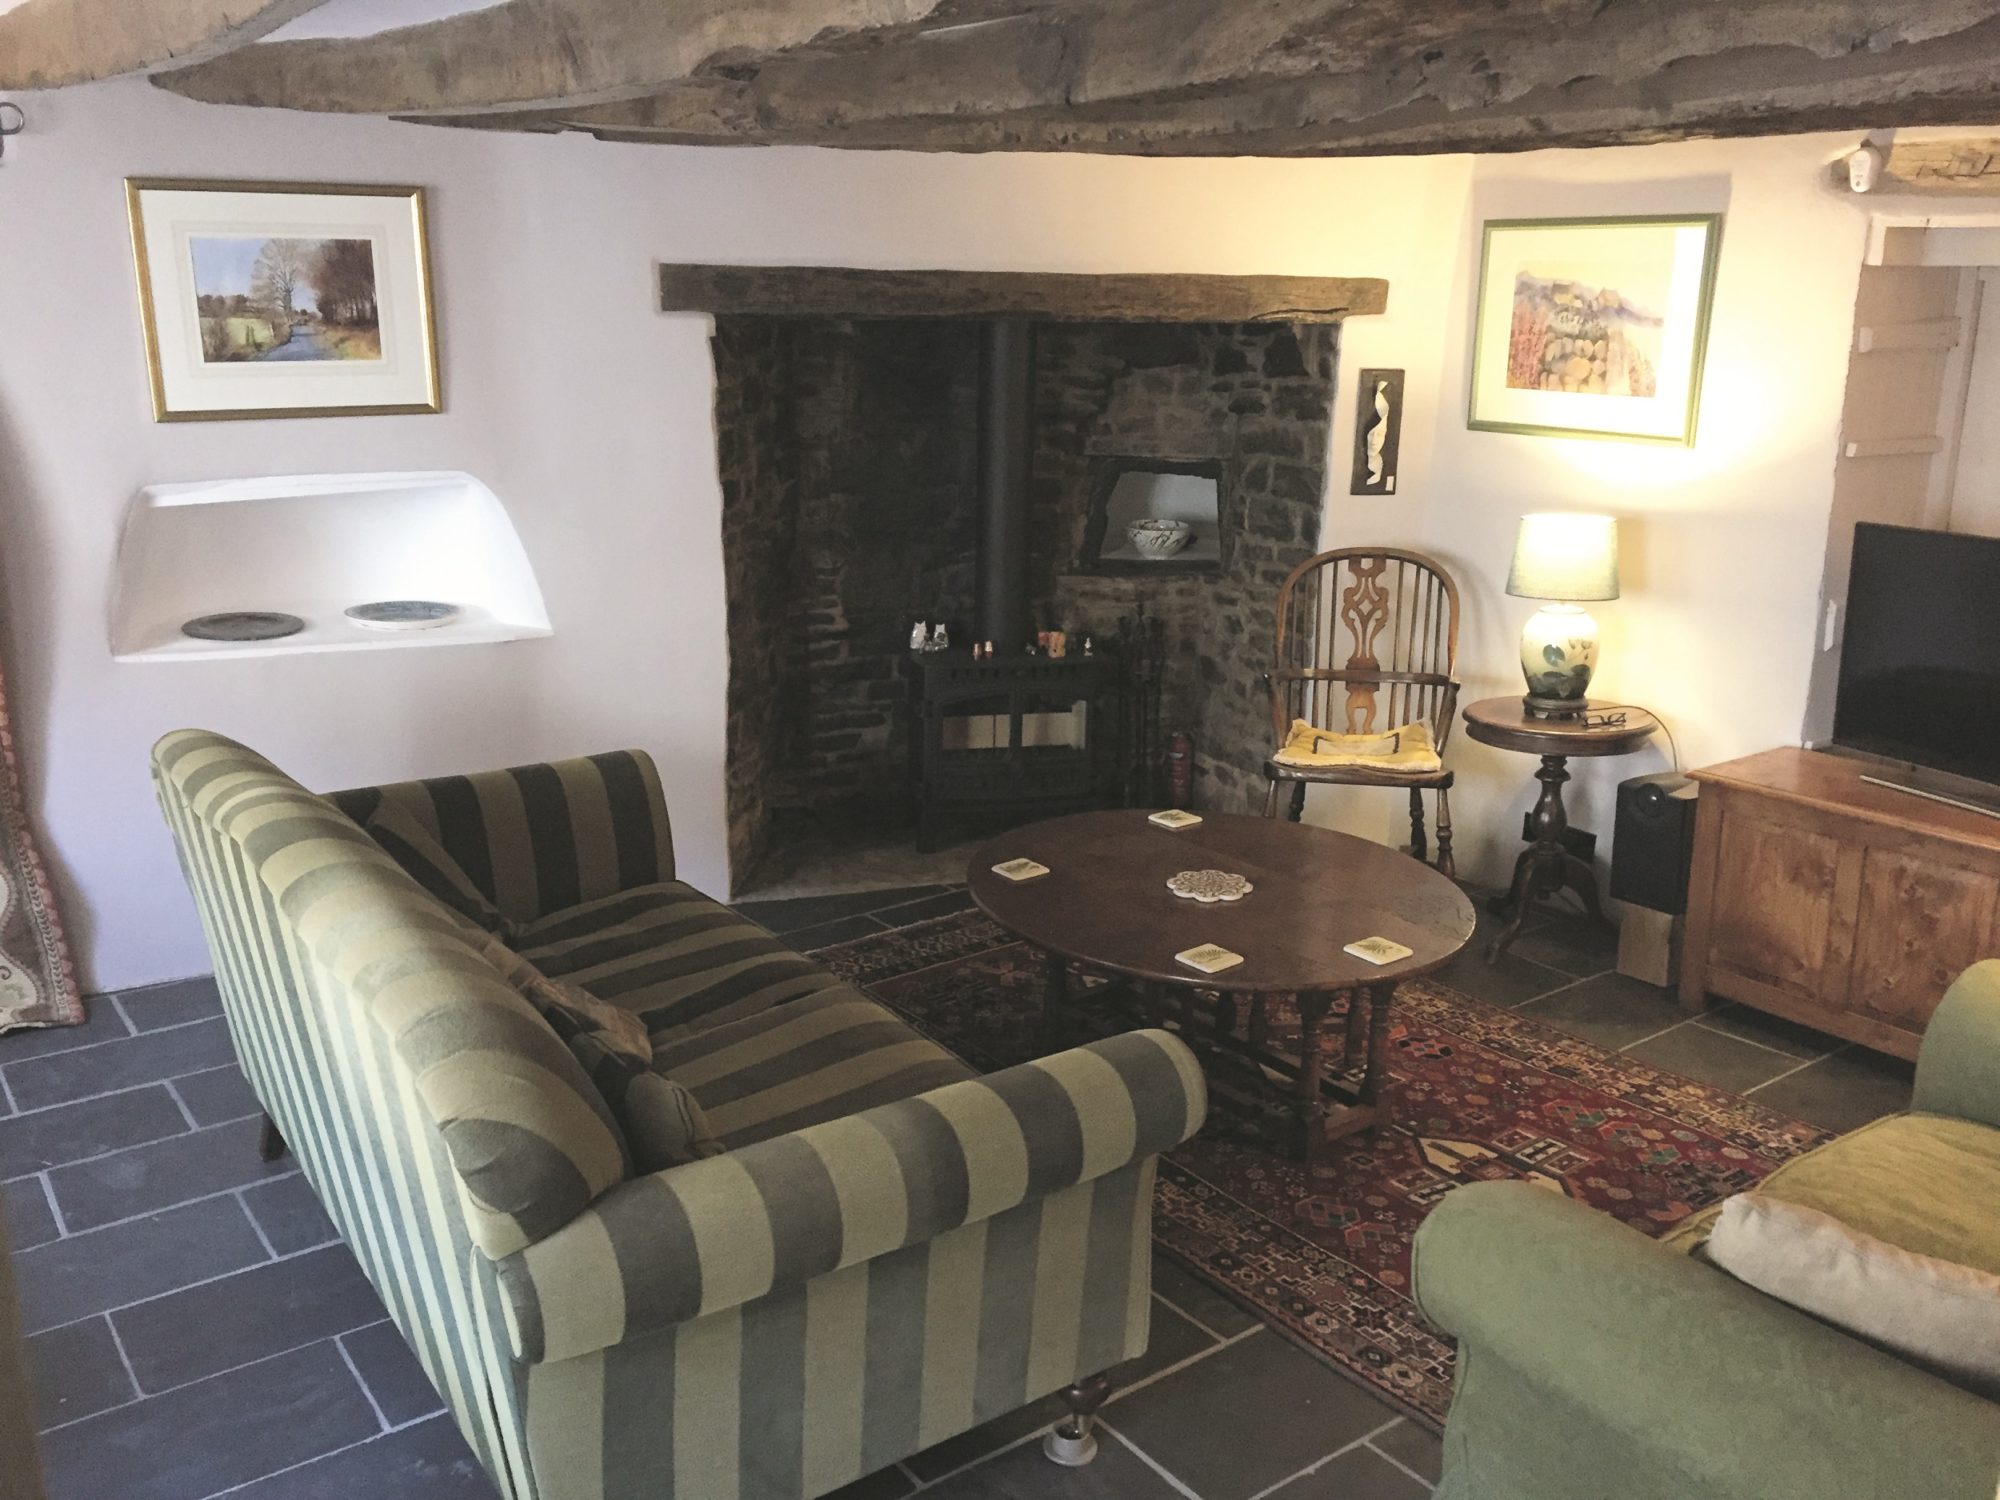
Once the cob was laid, the floor was finished with thick slate tiles, embedded in lime mortar
This required careful setting out but was not too difficult. The decision to use cob paid off because it holds its form much better than many more conventional materials. Compacting it between timber formers gave us the base we needed.
On top of the cob we have laid a thick slate floor, bedded in lime mortar. This provides more thermal mass and good conduction of heat from the underfloor heating.
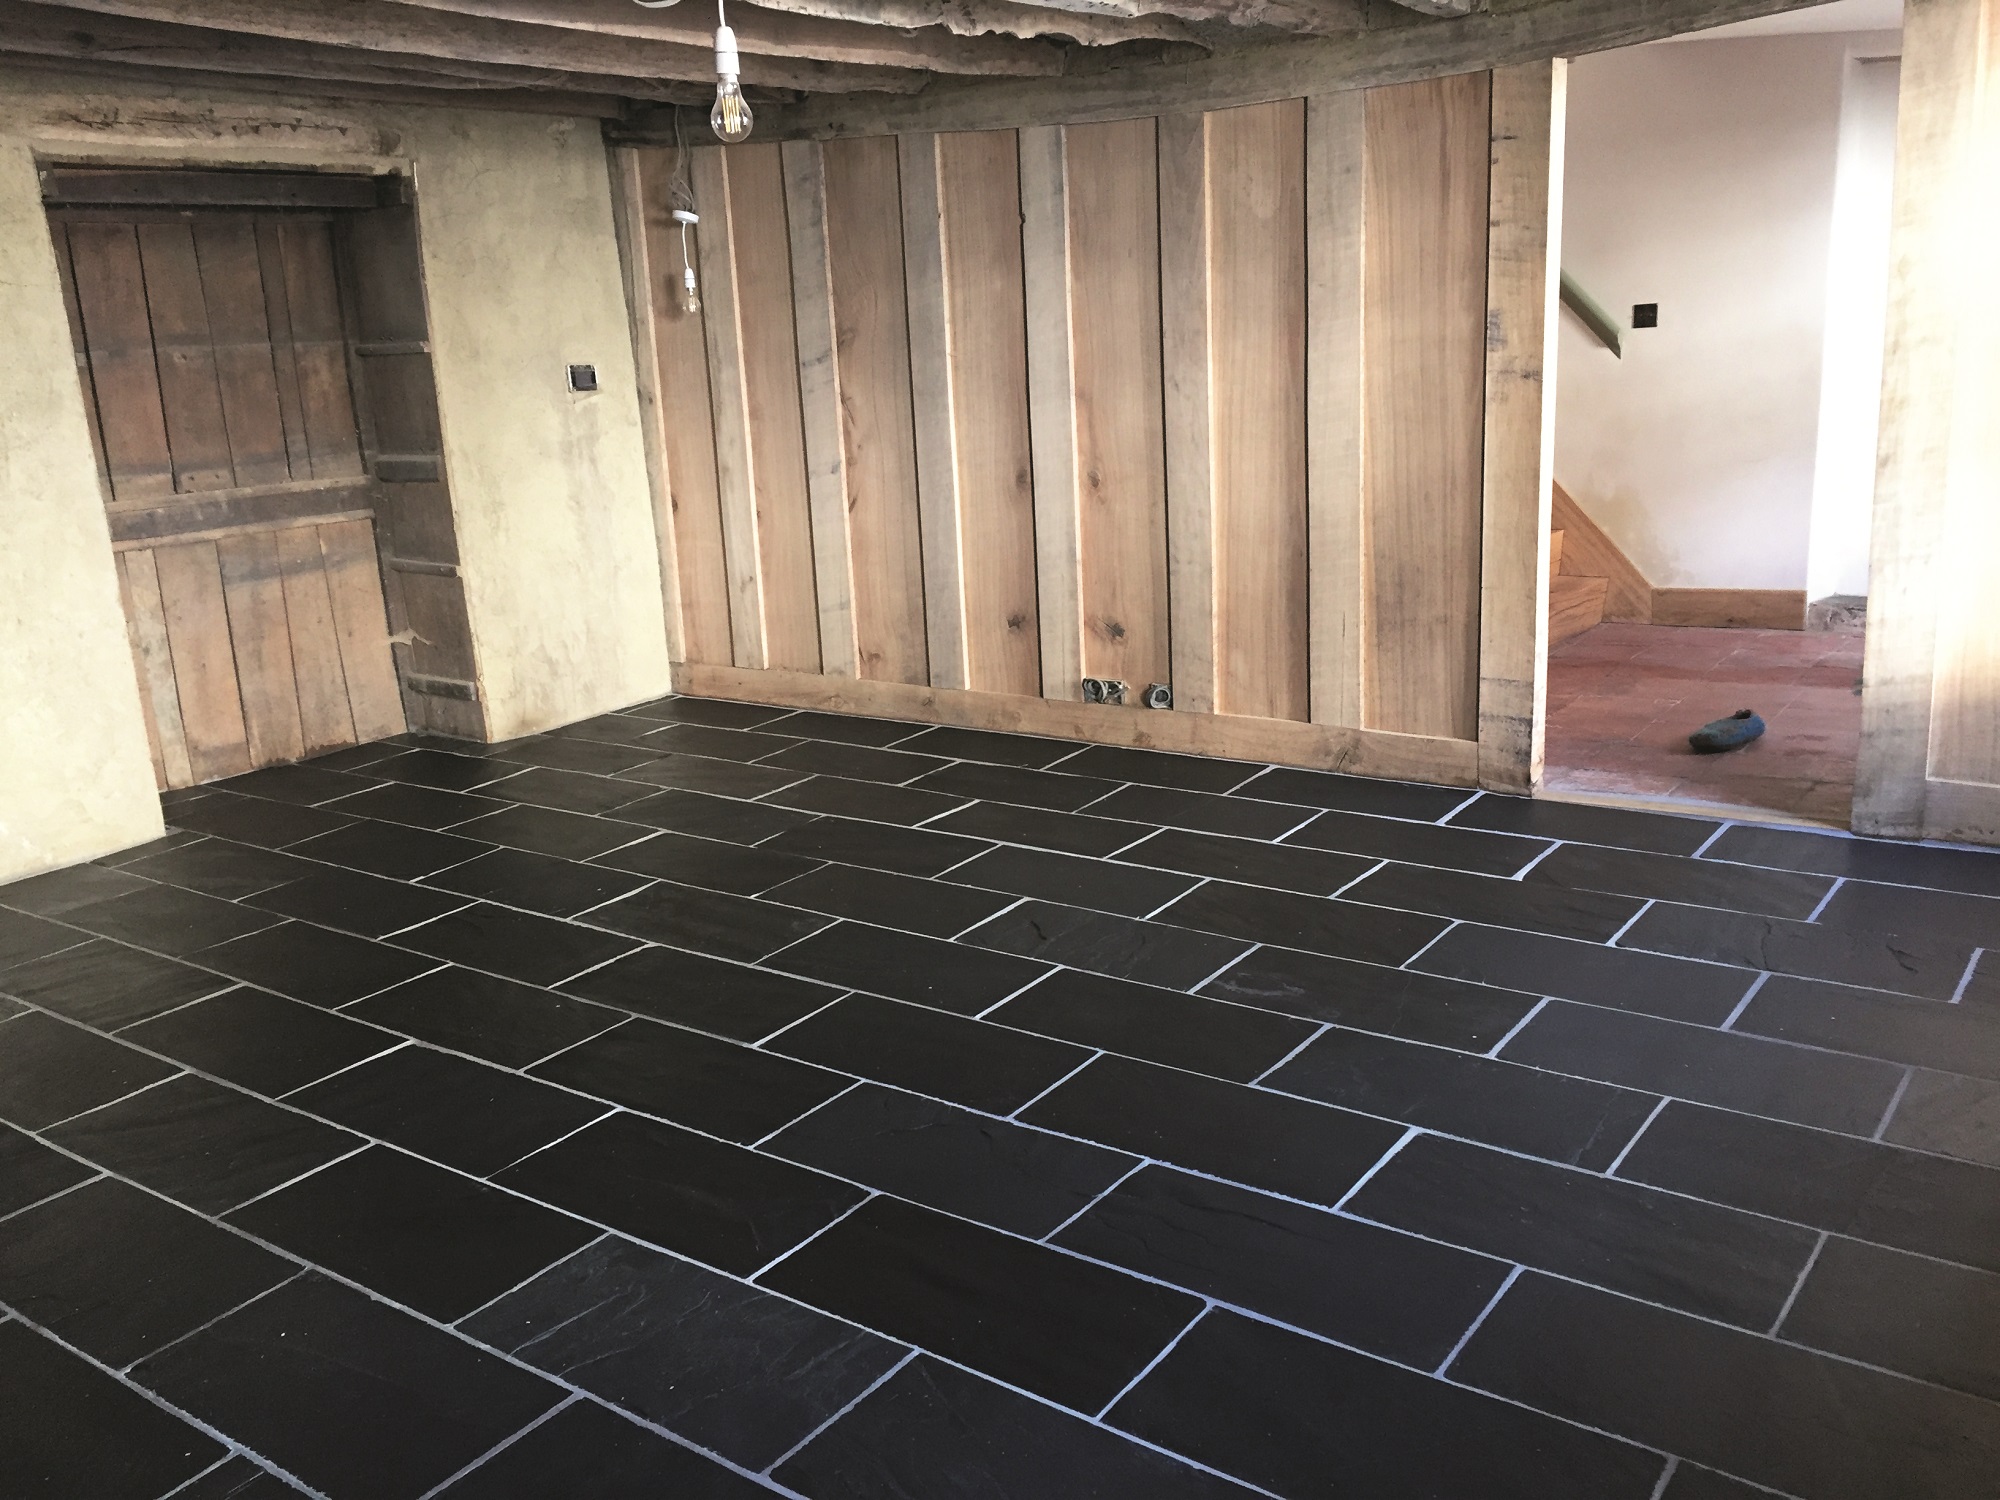
The finished floor is timeless and traditional, while the hidden underfloor heating provides the sitting room with ample warmth
It was a bit of a technical challenge because we had to be millimetre perfect at each end of the sloping floor to meet existing finishes but has worked out really well. Surprisingly almost nobody notices that the floor is not level until it is pointed out to them.
Walls
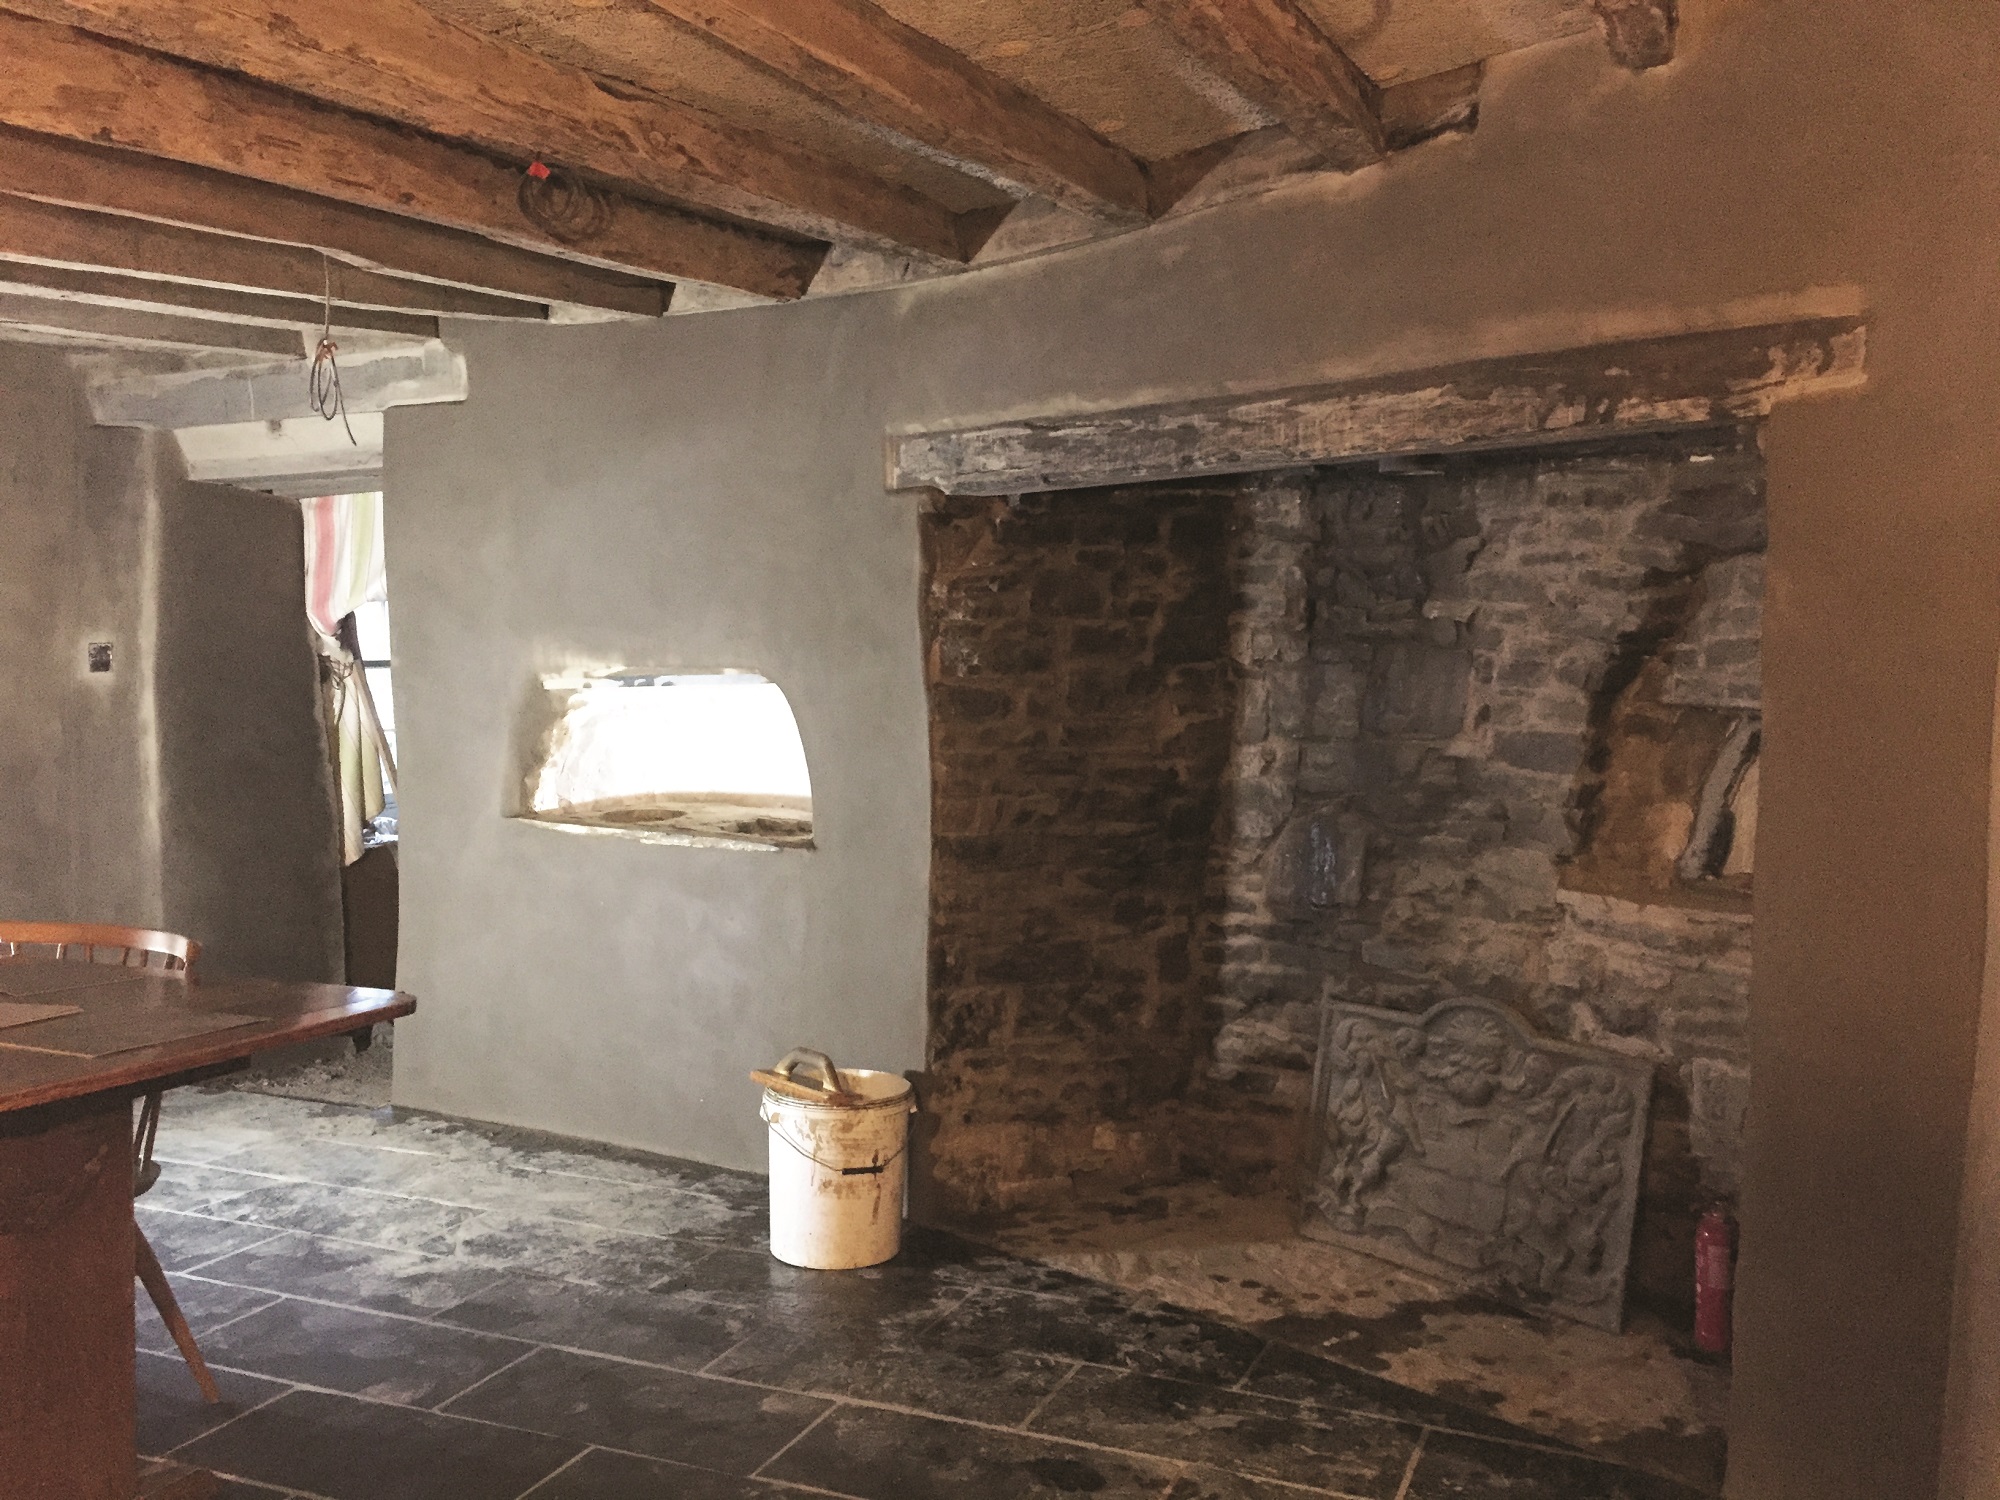
When we stripped the walls we found a remarkable old stove within the cob wall. This was in poor condition and, as a rare historical feature, required careful consolidation and conservation.
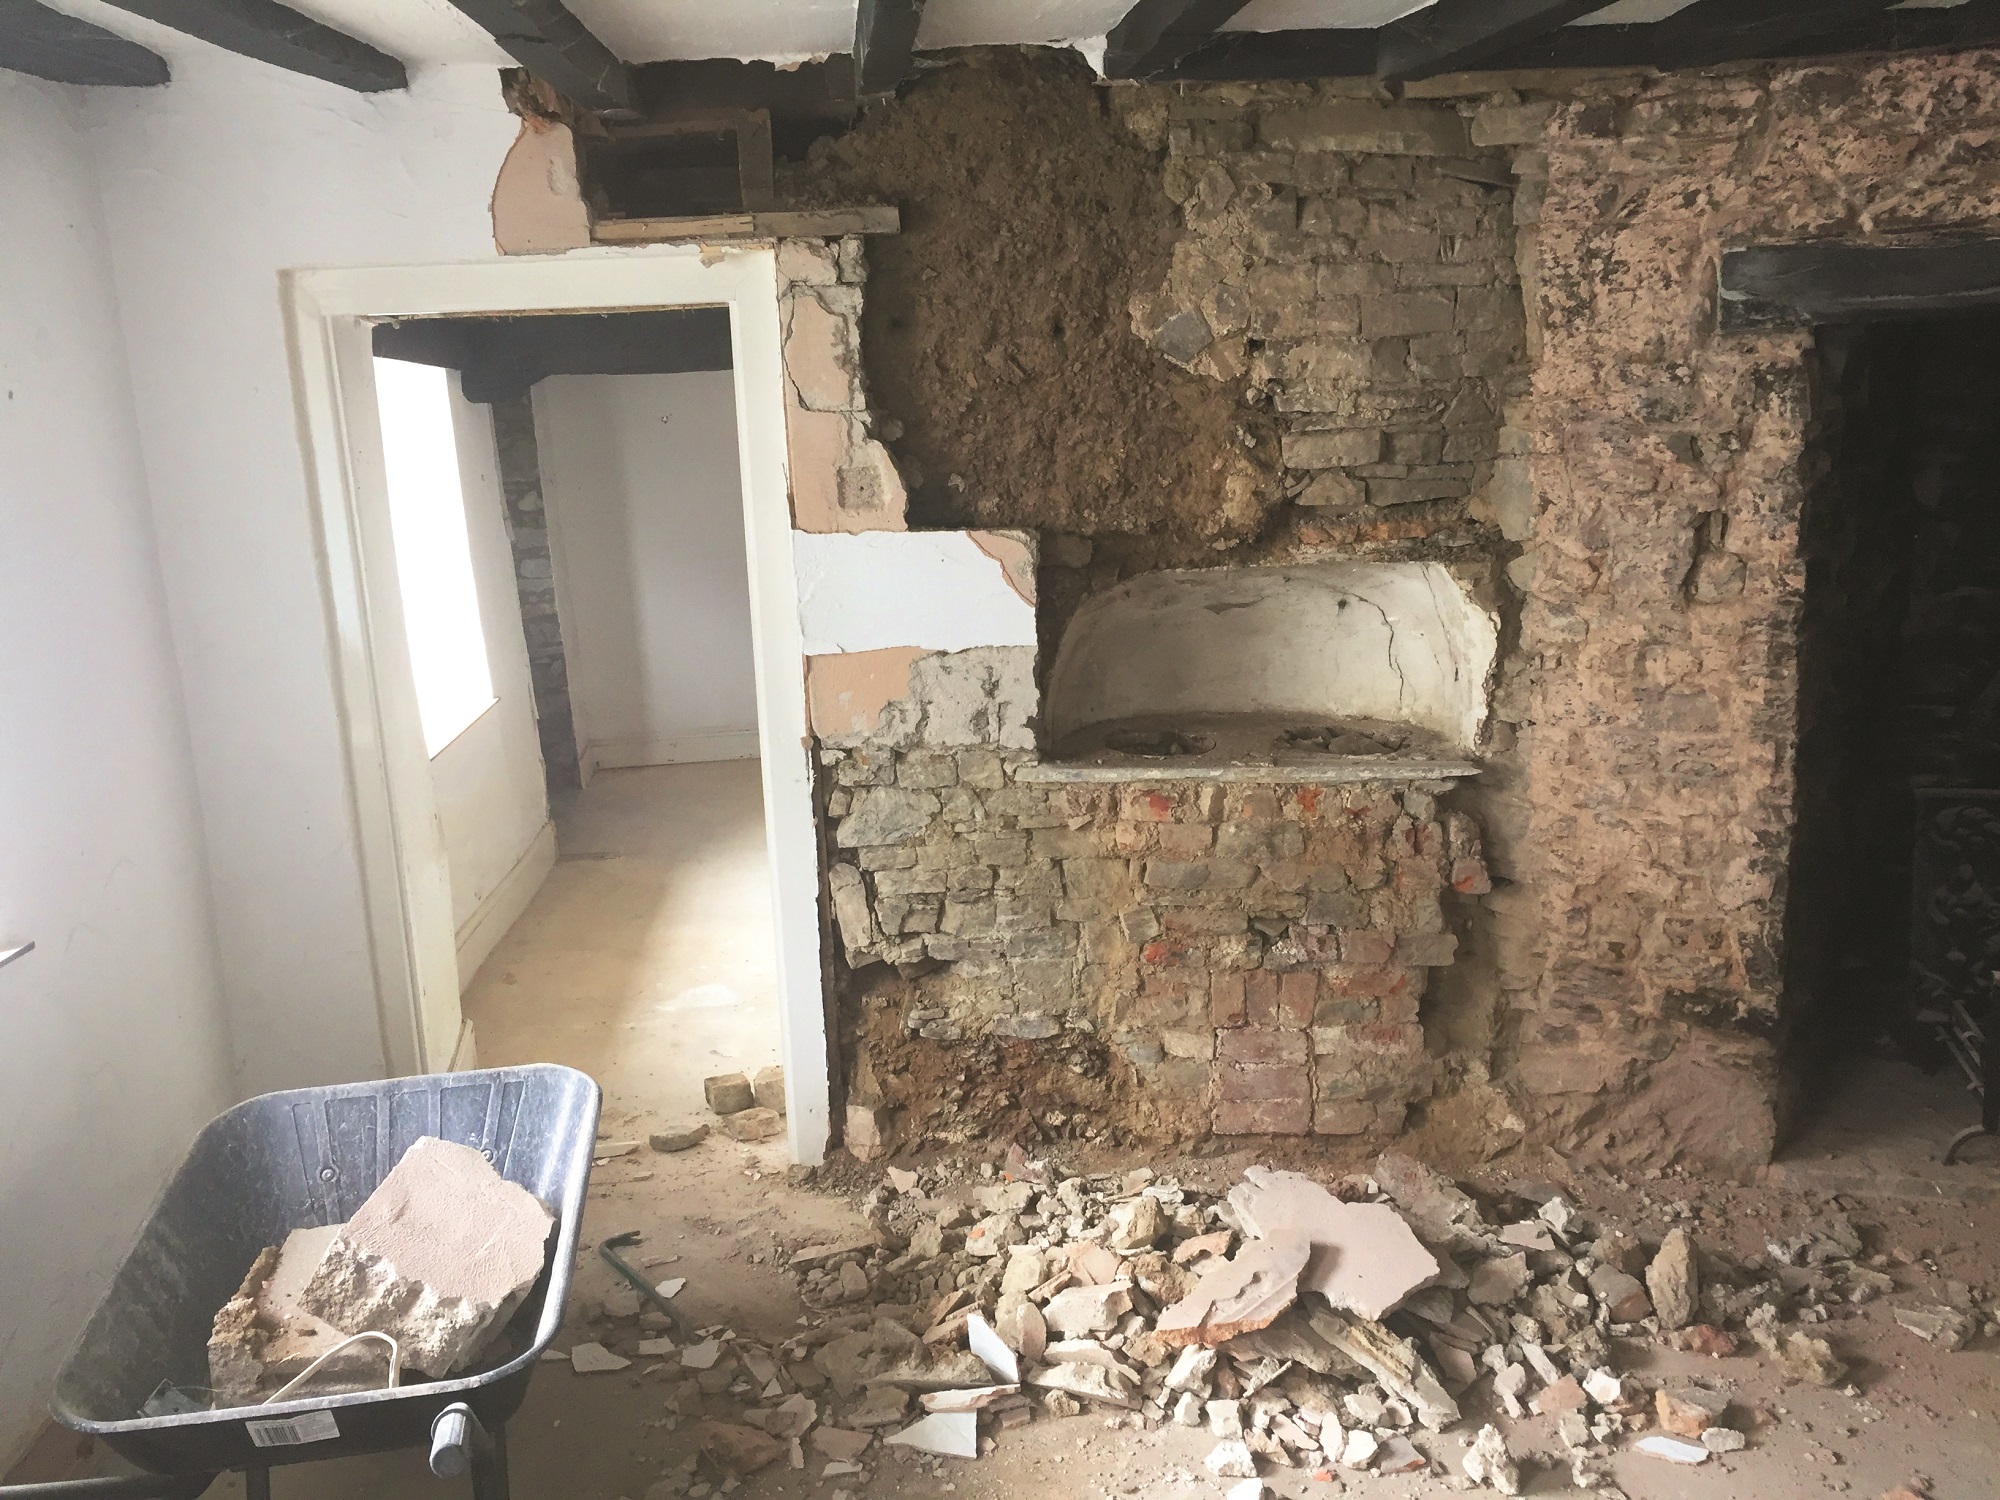
When the walls of the sitting room were stripped, we found an old stove hidden behind the plaster. It was in poor condition but as a rare historical feature, we knew it needed to be preserved
We puzzled for a long time about how to do this and also wondered how to incorporate such a strange feature in the wall of our sitting room. Much painstaking work ensued involving lime grout, slate, clay, fine lime plaster and hot-mixed limewash.
As it started to recover its shape it actually blended well into the surrounding wall finish and is a very positive point of interest.
The remaining bare stone walls were dubbed out with clay to give a more or less even surface – in some places this needed a build up of 4-5 inches. We then plastered with a thick clay plaster base coat incorporating a lot of hair.
In order to restore the historic feature, we used lime grout, slate, clay, fine lime plaster and hot-mixed limewash. The process was time-consuming and painstaking, but we got there in the end
Once this was fully dry it was covered with a much thinner finishing coat which was floated up to a fairly smooth finish. We found that our clay is very shrinkable, which causes a lot of cracking in the plaster as it dries.
It took a lot of experimentation with different mixes over the course of a year or so to manage to control the cracking. Fortunately, we now have a mix that works well. We have found that a beneficial property of our clay is that it is very hard when dry; this has resulted in a really durable finished plaster.
Finally, we painted the plastered walls using Earthborn clay paint, which gives an attractive and highly breathable finish.
Once the new plaster had set, we painted the walls using Earthborn clay paint, which gives the room an attractive and highly breathable finish. We now have a lovely focal feature and have preserved an historic design detail
The removed concrete block wall has been replaced with a new oak screen – you can read all about that in the January issue.
Ceiling
The exposed joists of the ceiling were covered in thick black paint that really reduced their character. They were also lined with battens that had supported the plasterboard panels and smeared with textured plaster that had been liberally spread about. Once we’d removed the battens and dozens of nails we set about stripping the paint.
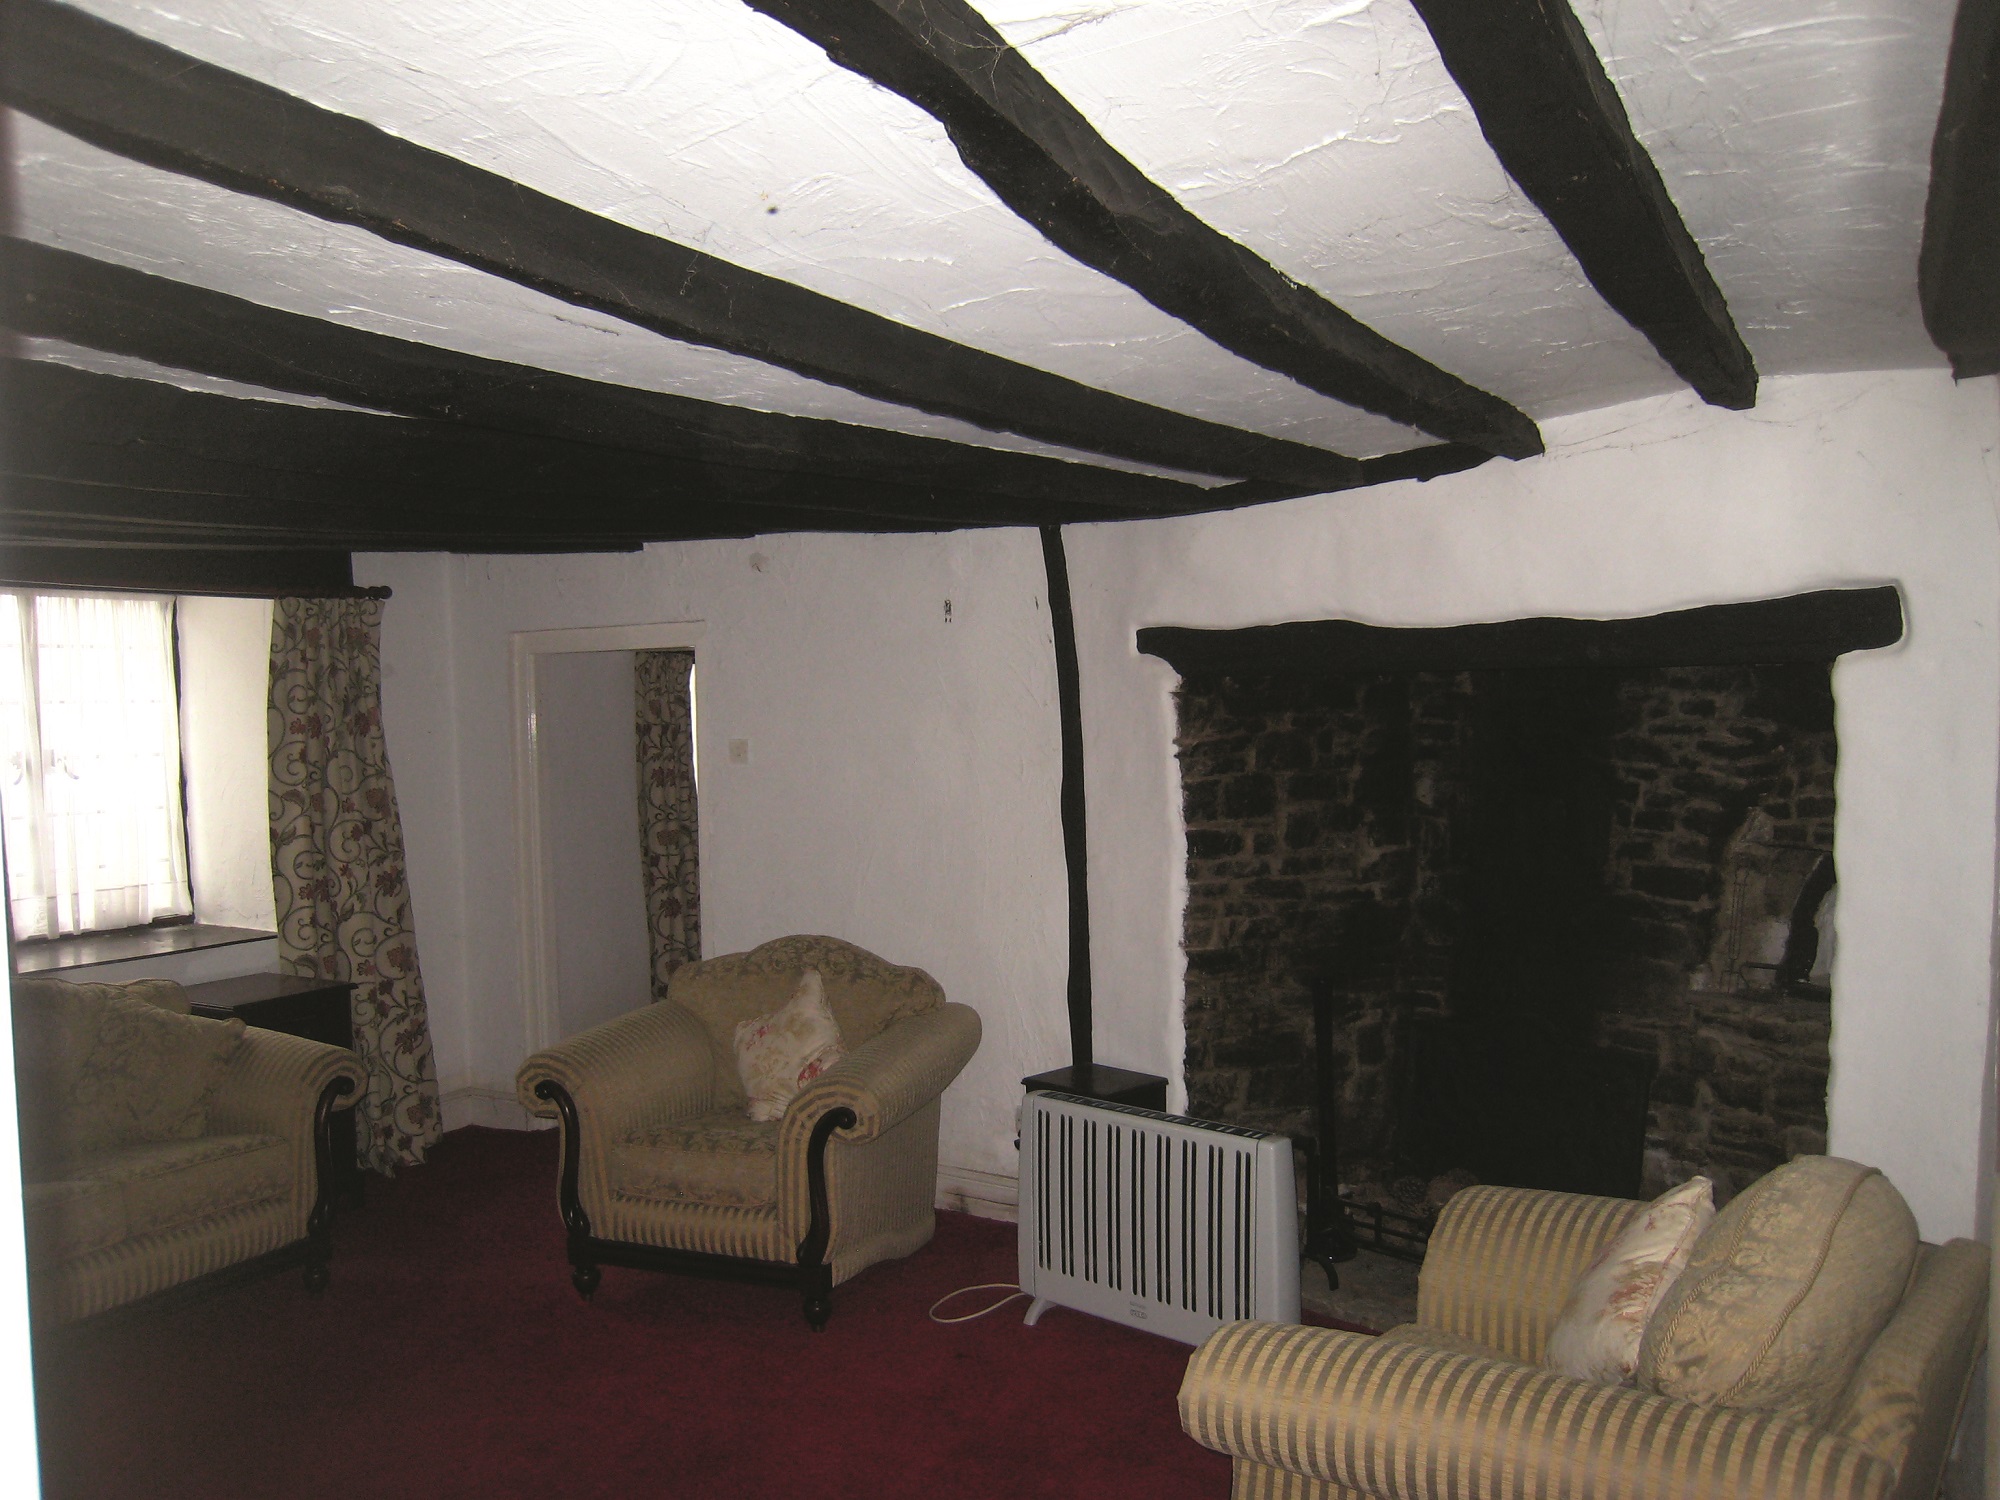
Before: the historic ceiling beams has been poorly painted, so we wanted to return them to their original splendour
The first stage was to go over carefully with a belt sander to remove the worst. This gave us the first indication that the joists were oak; some of it of very high quality.
This was followed by two applications of a water based paint stripper, each brushed on, left for 48 hours, then scraped and finally washed off with water and a stiff brush.
We weren’t happy to find under the layers of paint a dark brown stain that didn’t succumb readily to the stripper. This required a further attack with the belt sander with fine grade belts followed by wire brushing. After a good clean the joists were finished with wax polish. They now look fantastic and well worth all the effort.
After gently sanding the beams, we removed any nails and then removed the paint using a water-based paint stripper. Underneath, there was another layer of dark paint that proved hard to shift
I always say that there are some jobs in a renovation project that you can only do yourself and this is certainly one of them. It involved countless hours of hard labour spread over a couple of years.
At the same time painstaking attention to detail is essential to achieve a good finish and retain the character of the grain of the timber, original saw marks and even, in our case, some patches of bark. To pay someone of sufficient skill and application for that much work would be completely unaffordable.
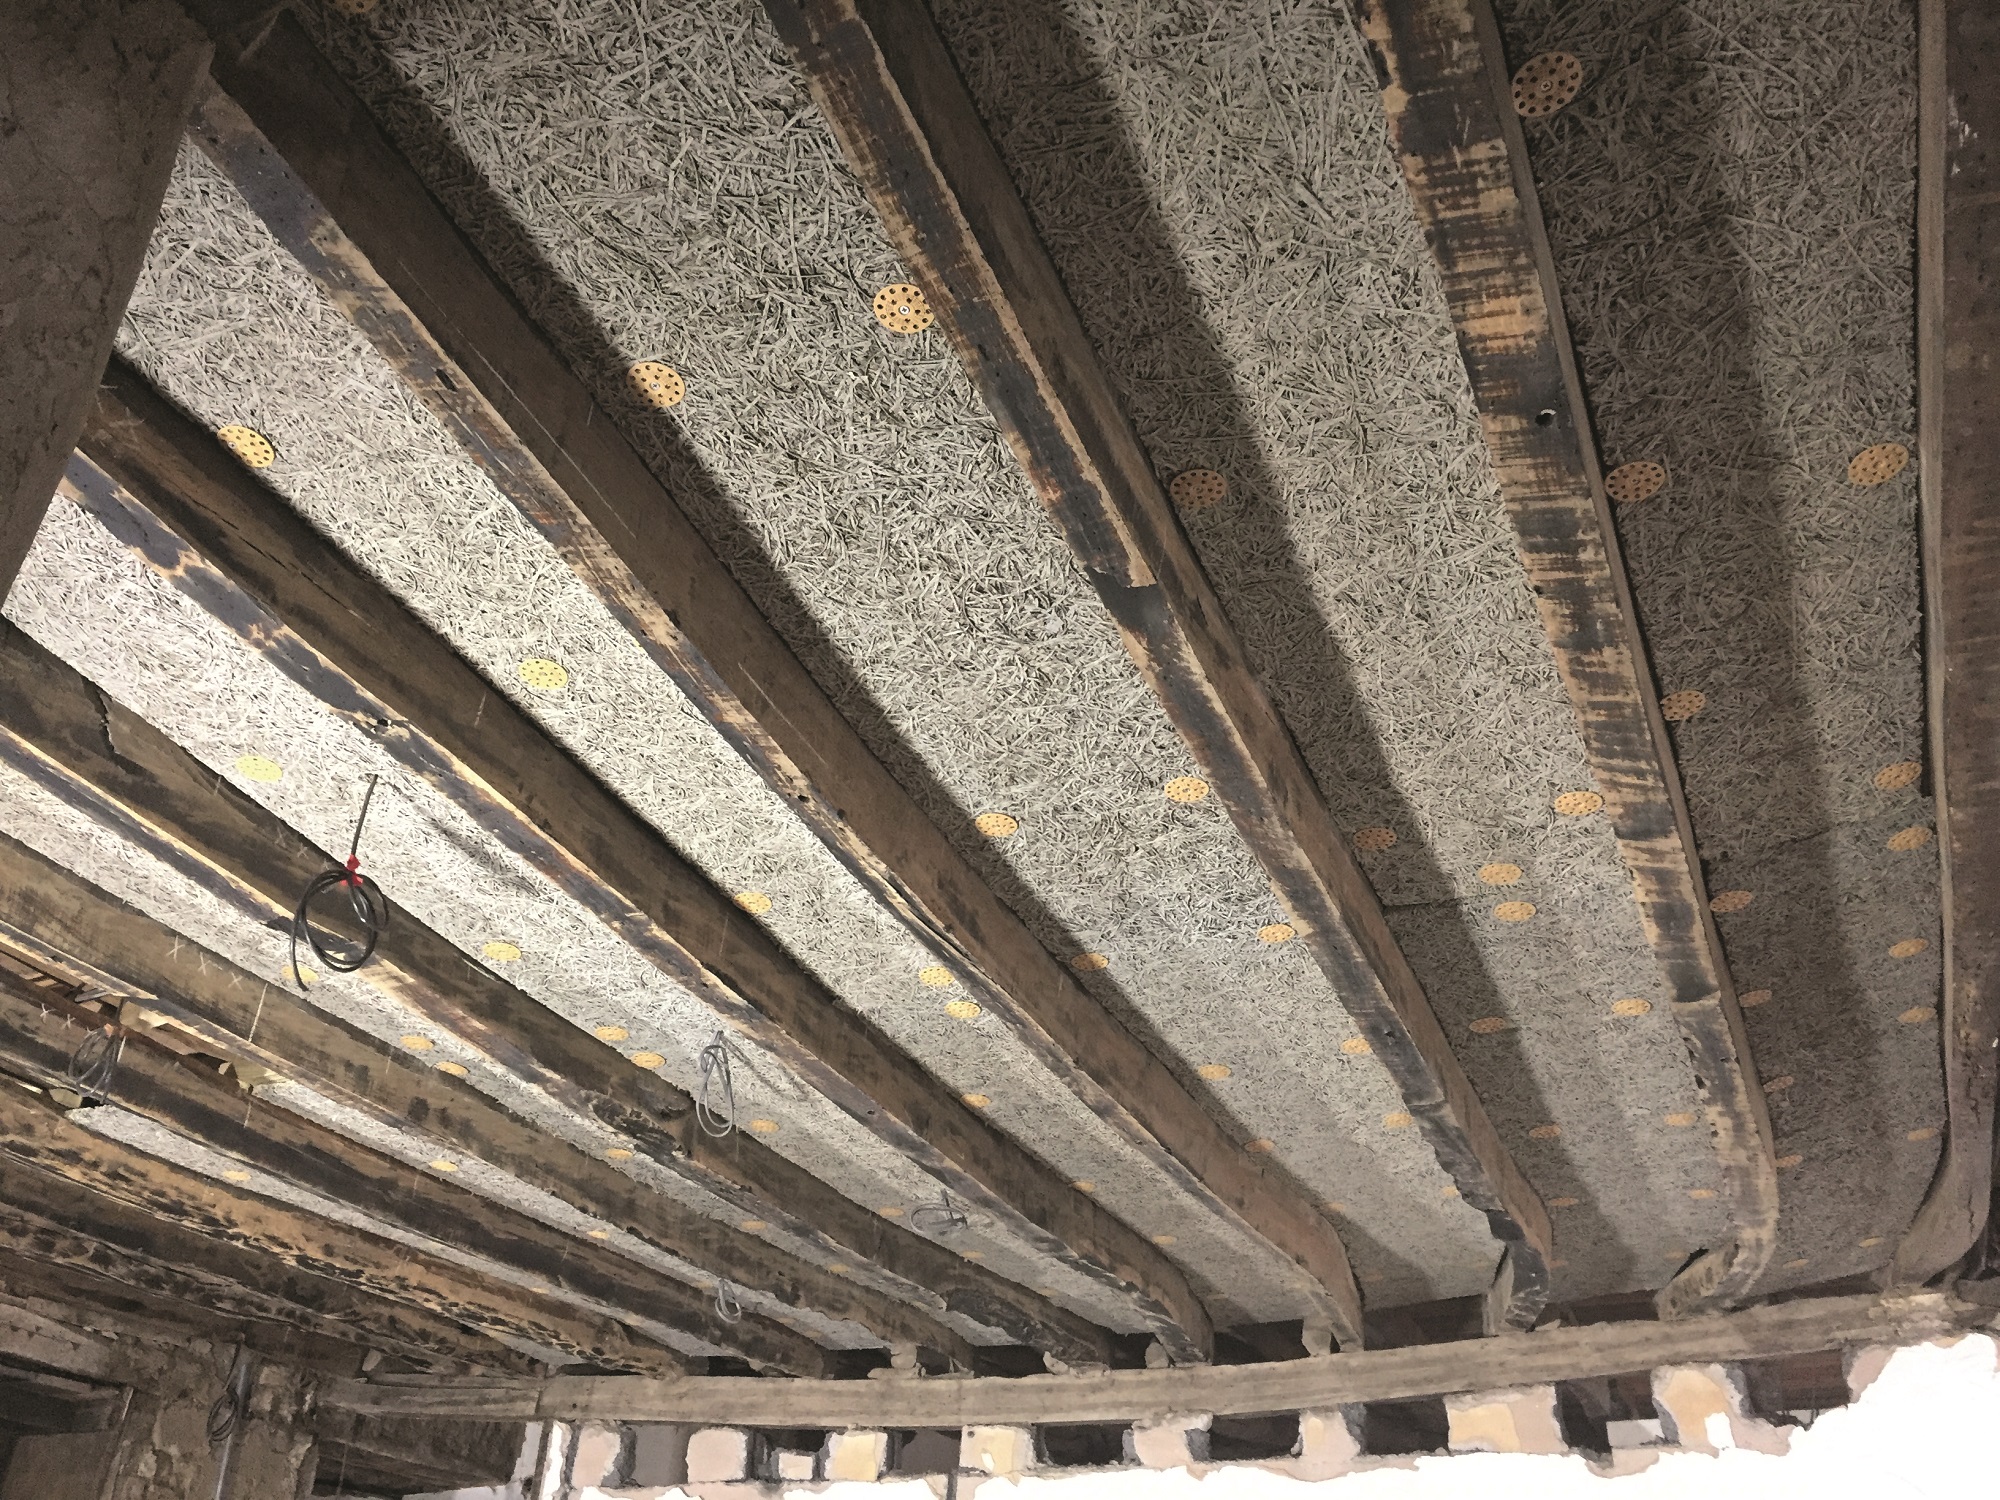
This image shows the partially completed ceiling. We replaced the panels between the joists with woodwool board, which was fixed to the new bracing above the level of the joists, so the full joist depth could be exposed
The panels between the joists were replaced with woodwool board cut to some very interesting shapes because our joists have extraordinary bends and twists. The board was fixed to the new bracing above the level of the joists, so the full joist depth is exposed.
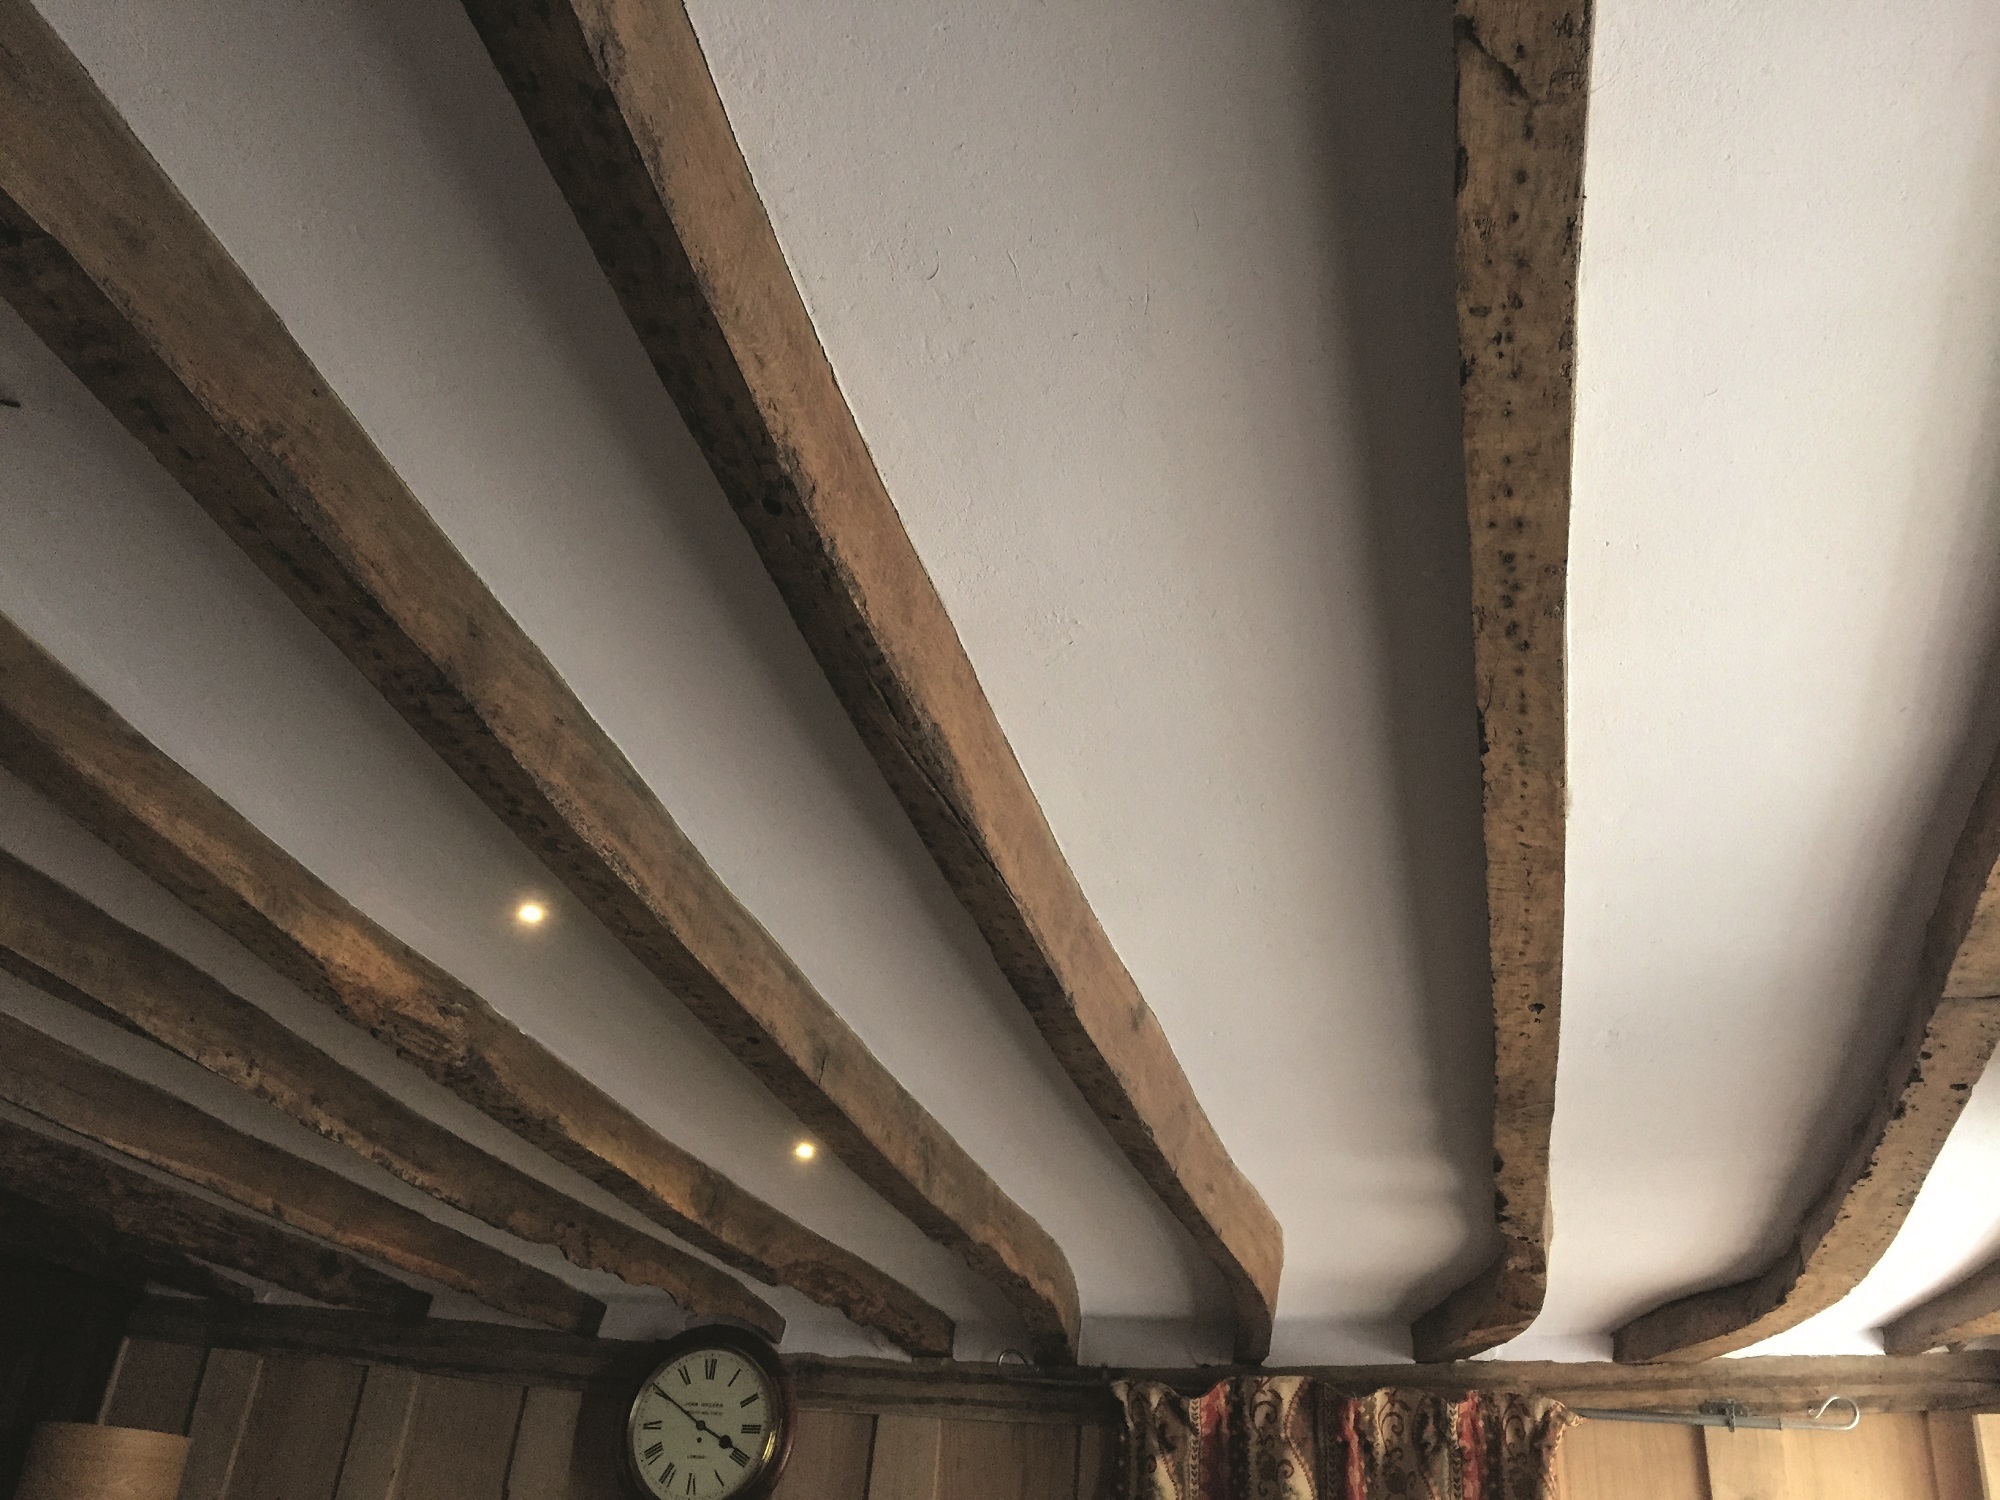
After: The ceiling was finished with a coat of clay plaster and then painted with clay paint. The beams truly stand out and are the now the room’s defining feature
I then plastered the panels with a single coat of clay plaster in a similar mix to the finishing coat for the walls but with plenty of hair to give it tensile strength. This was painted with clay paint.
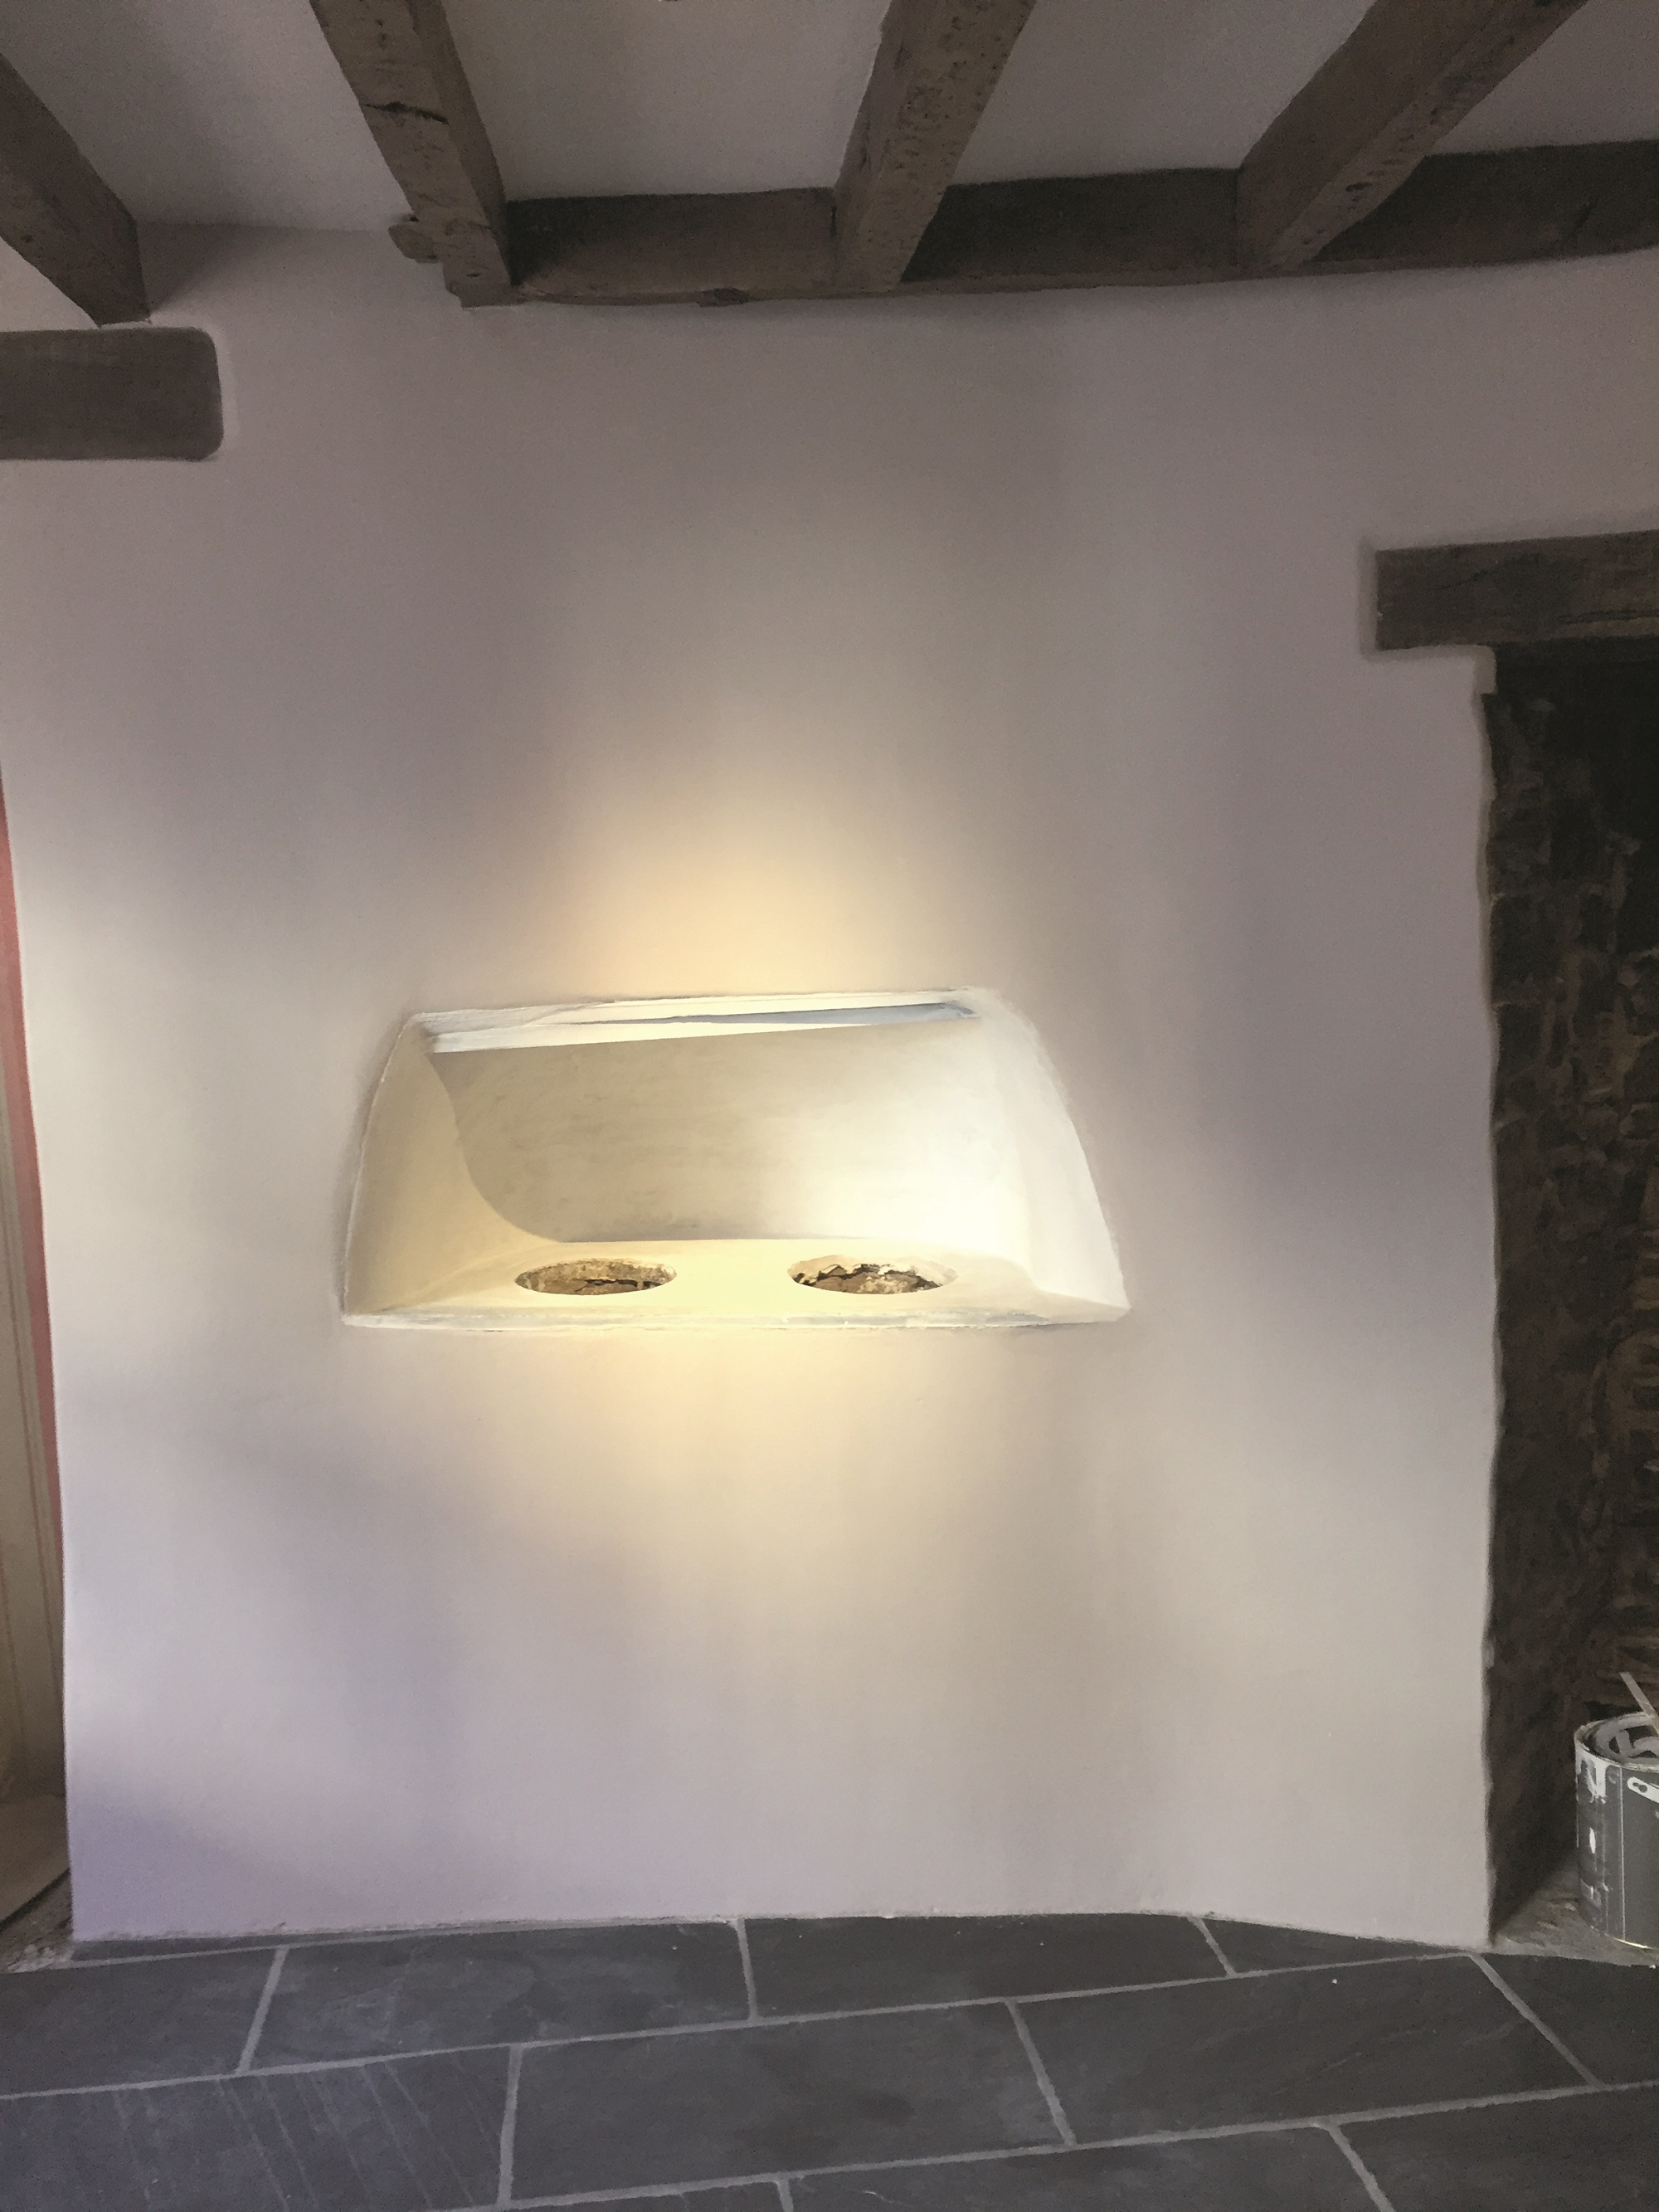
We’ve fitted a combination of micro LED spotlights and downlights in the ceiling to give us discrete targeted lighting that doesn’t interfere with the minimal headroom and complements the main room lighting provided by lamps on a switched 5amp circuit.
Alan Tierney

You may be interested in