Estimate your project costs instantly with Build It's interactive self-build cost calculator
Calculate NowGet an accurate, detailed cost breakdown of your project
Submit plans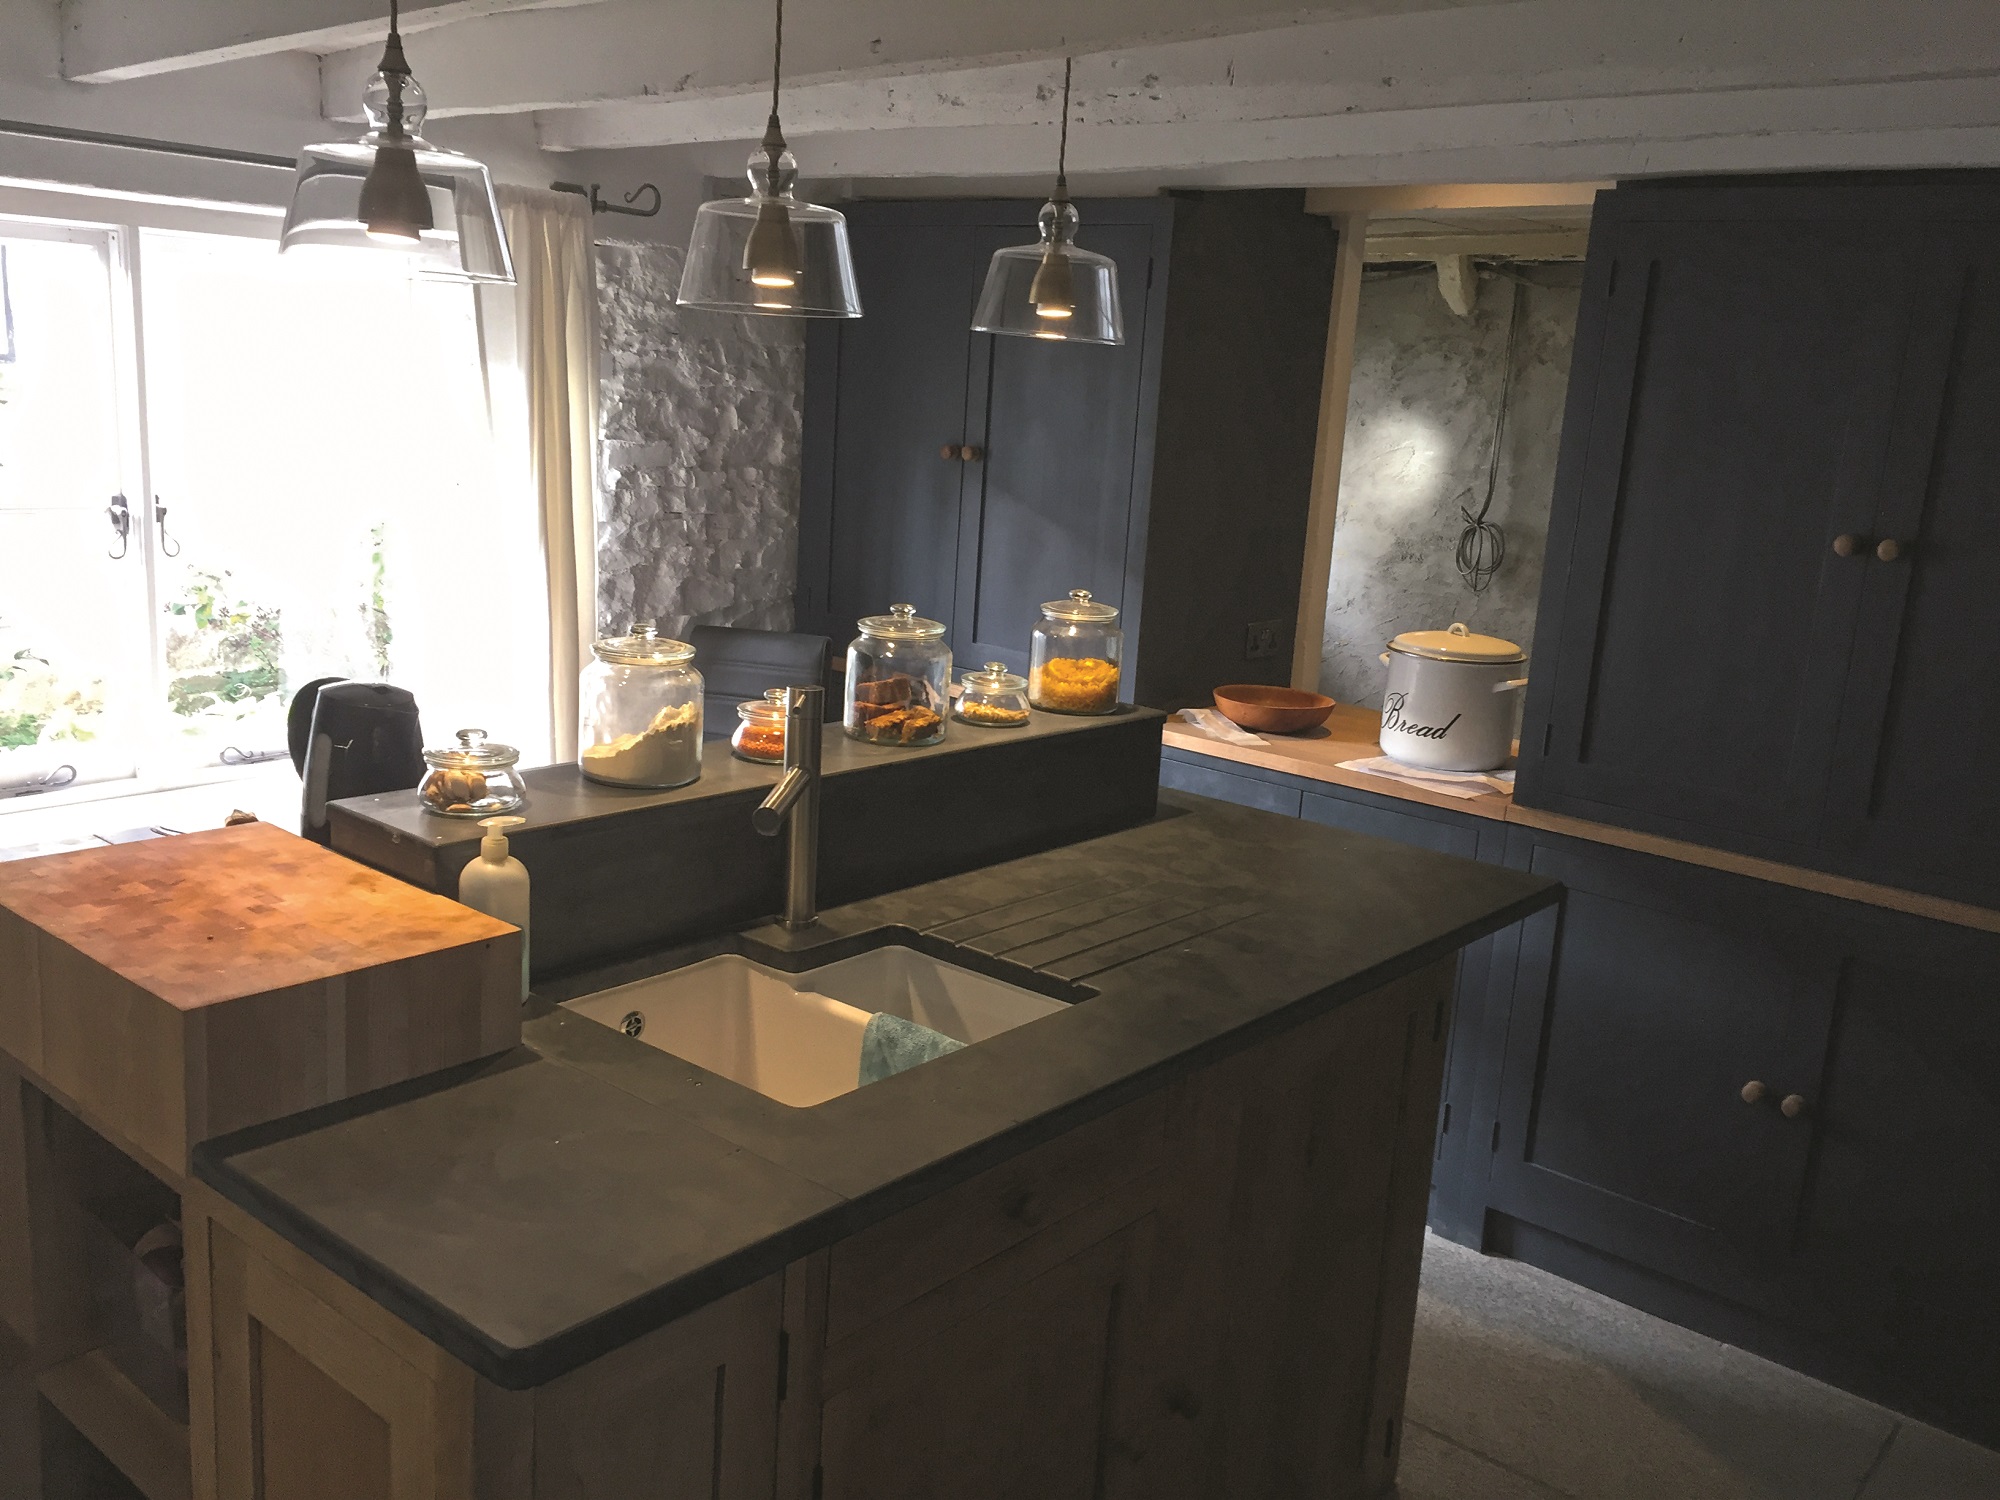

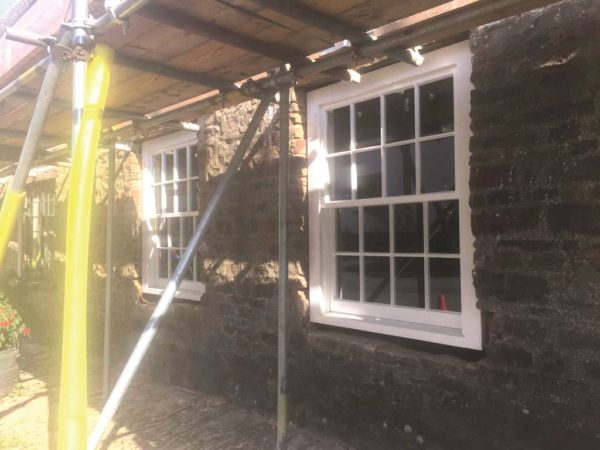
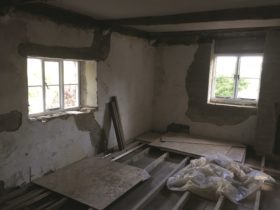
In the previous segment of this renovation diary, we were taking on structural changes, such as repairing and replacing windows, reconfiguring the master bedroom and beginning plastering inside.
Well, after many months of background work, we are finally getting to the satisfying stage of actually completing sections of the house.
With the plastering complete, we have been able to decorate the main bedroom and bathroom. We chose Earthborn Claypaint, to maintain maximum breathability of the building fabric.
It has the added advantage of being very easy and pleasant to use, with no VOCs (volatile organic compounds) resulting in a healthy internal environment. The natural pigments give a lovely subtle finish.
Period Renovation Blog 16: Plastering Begins
The new doors are ledged units made locally from reclaimed oak with handmade latches and hinges. We also have an oak floor that flows throughout the rear wing, with a more water-resistant hard wax oil finish in the bathroom.
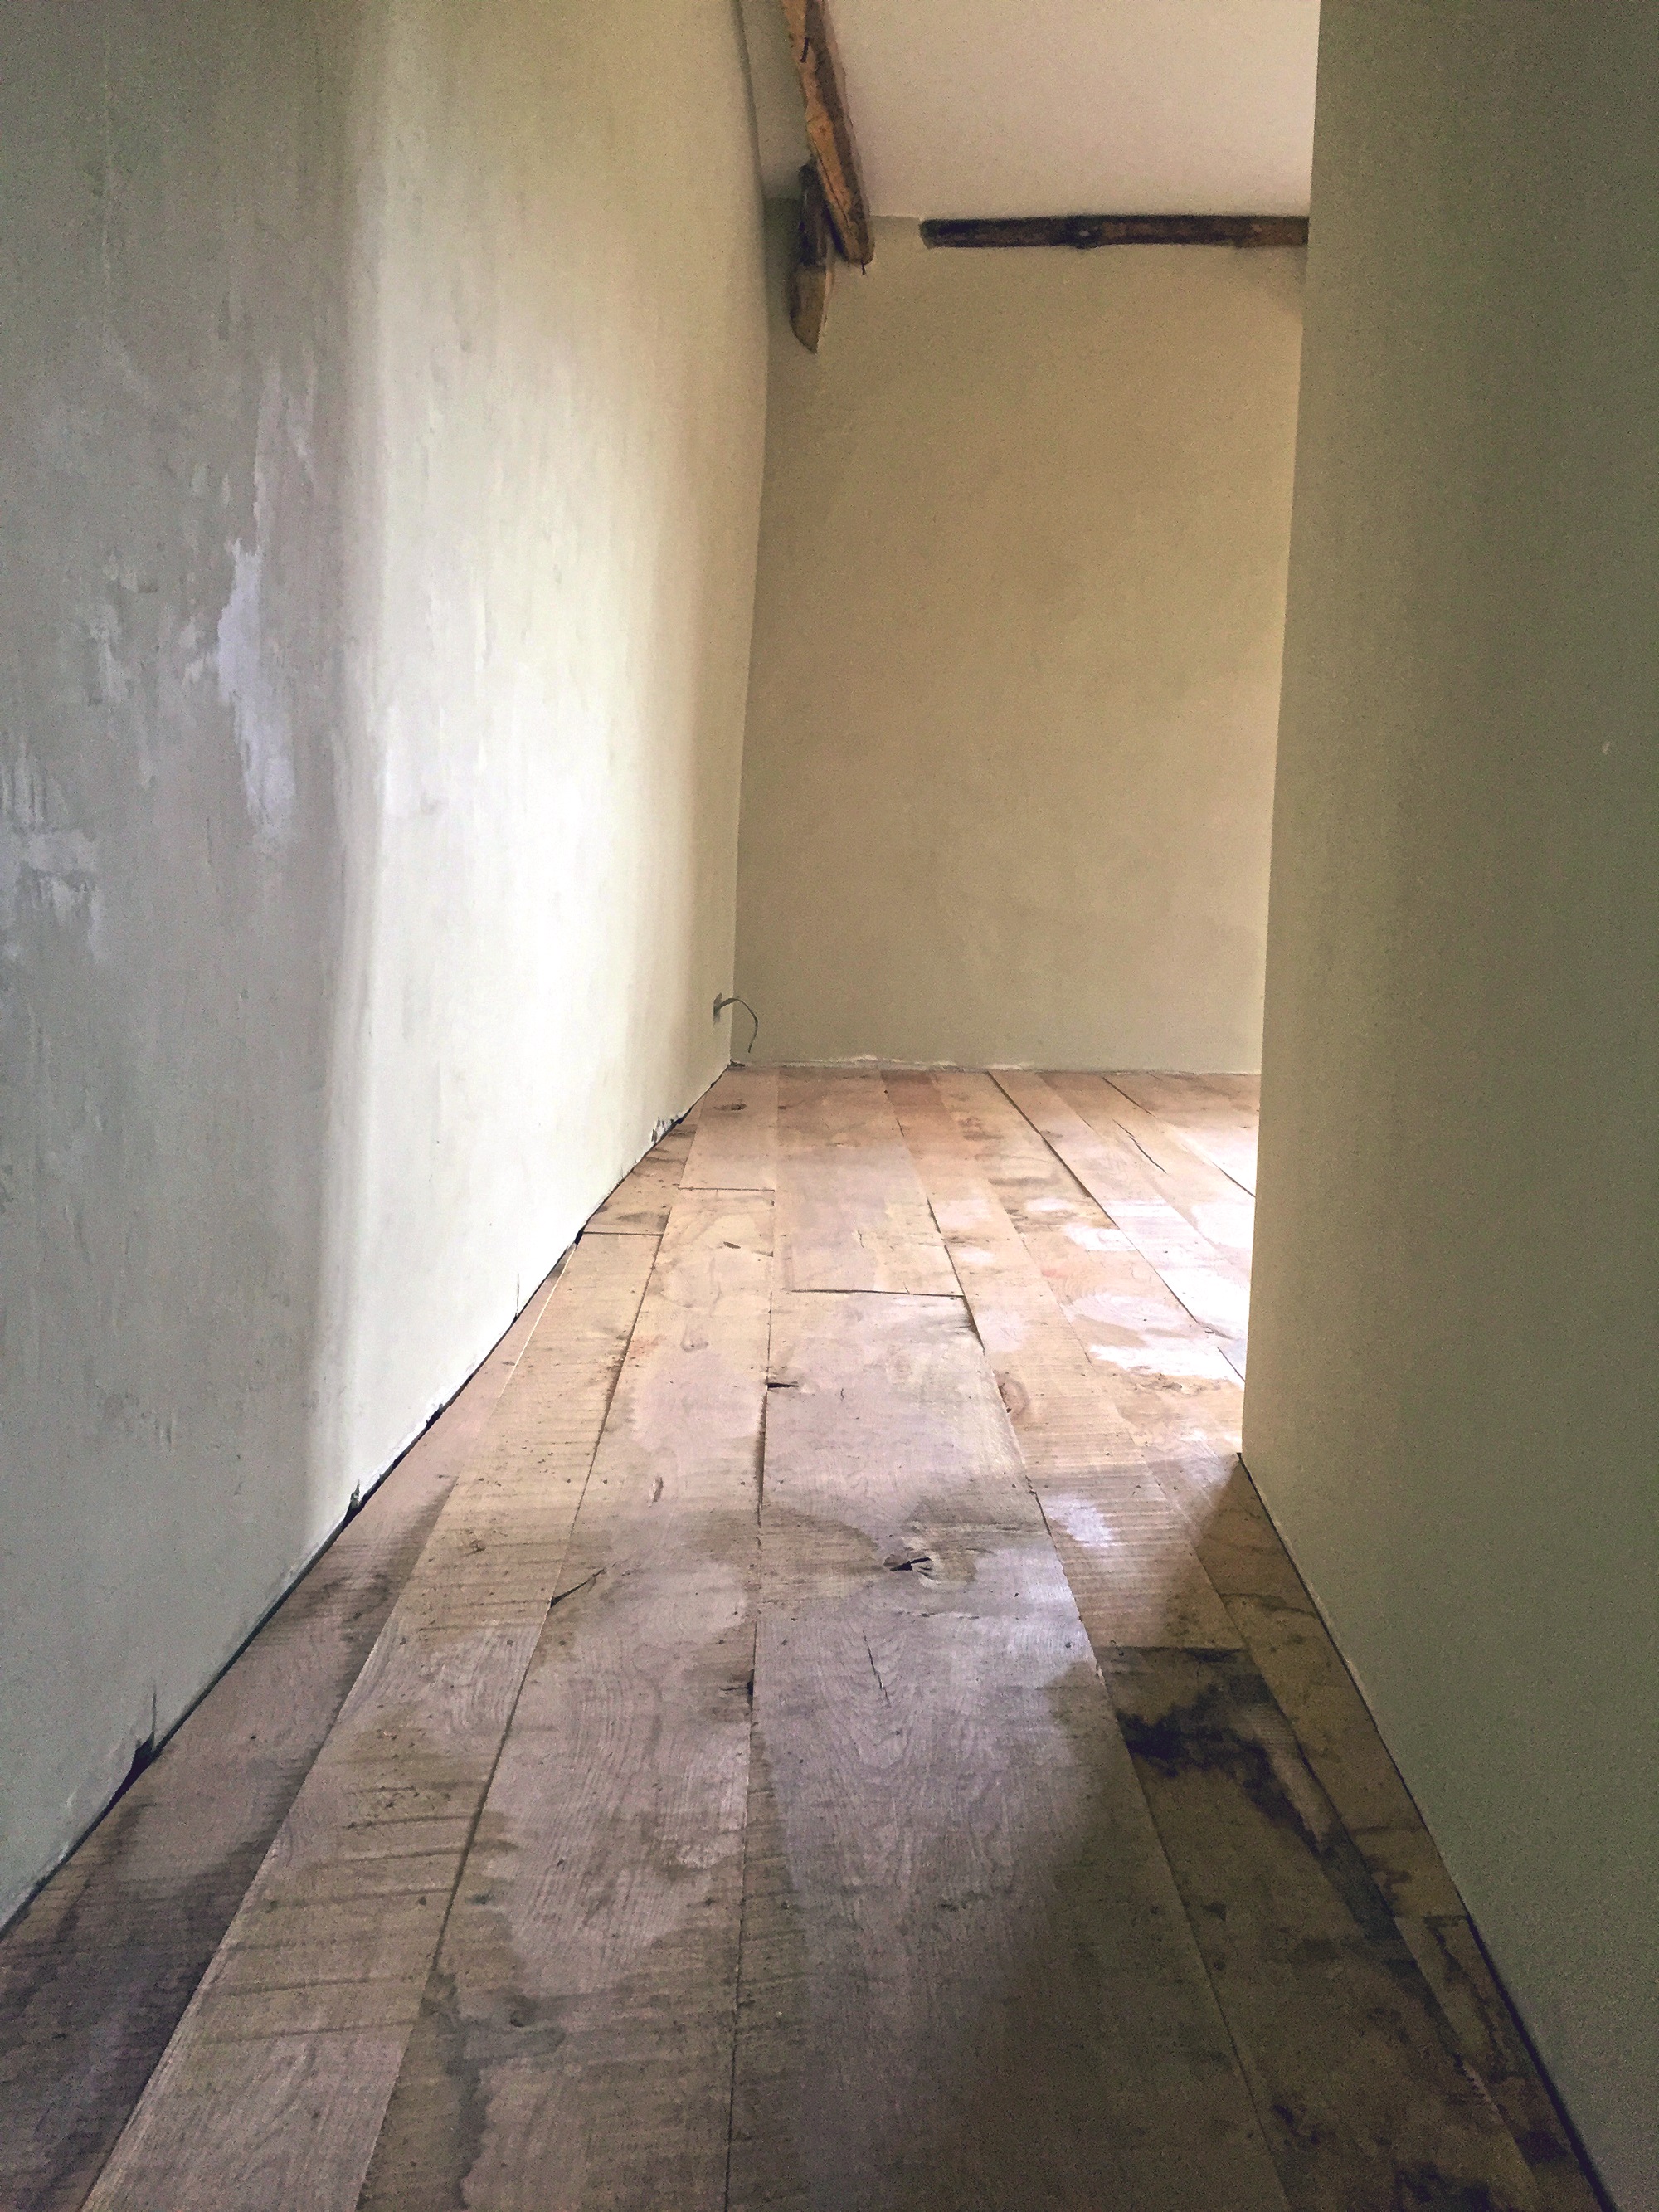
We choose an oak floor for the rear wing. In the bathroom, it benefits from a more water-resistant hard wax oil finish.
We chose heritage boards from the local sawmill, which are variable widths and have a minimally finished upper face, including knots and minor defects. This has given us a beautiful floor that is not too perfect.
It has been expertly laid by Simon, our site carpenter, using cut clasp nails; it really contributes to the character of these rooms.
Second fix electrics finish the job, with plenty of sockets in the bedroom, wall lights and 5-amp sockets for lamps.
We’ve opted for no ceiling lights to avoid wiring in the thatched roof space. finding the right bathroom light fittings can be problematic, according to personal taste.
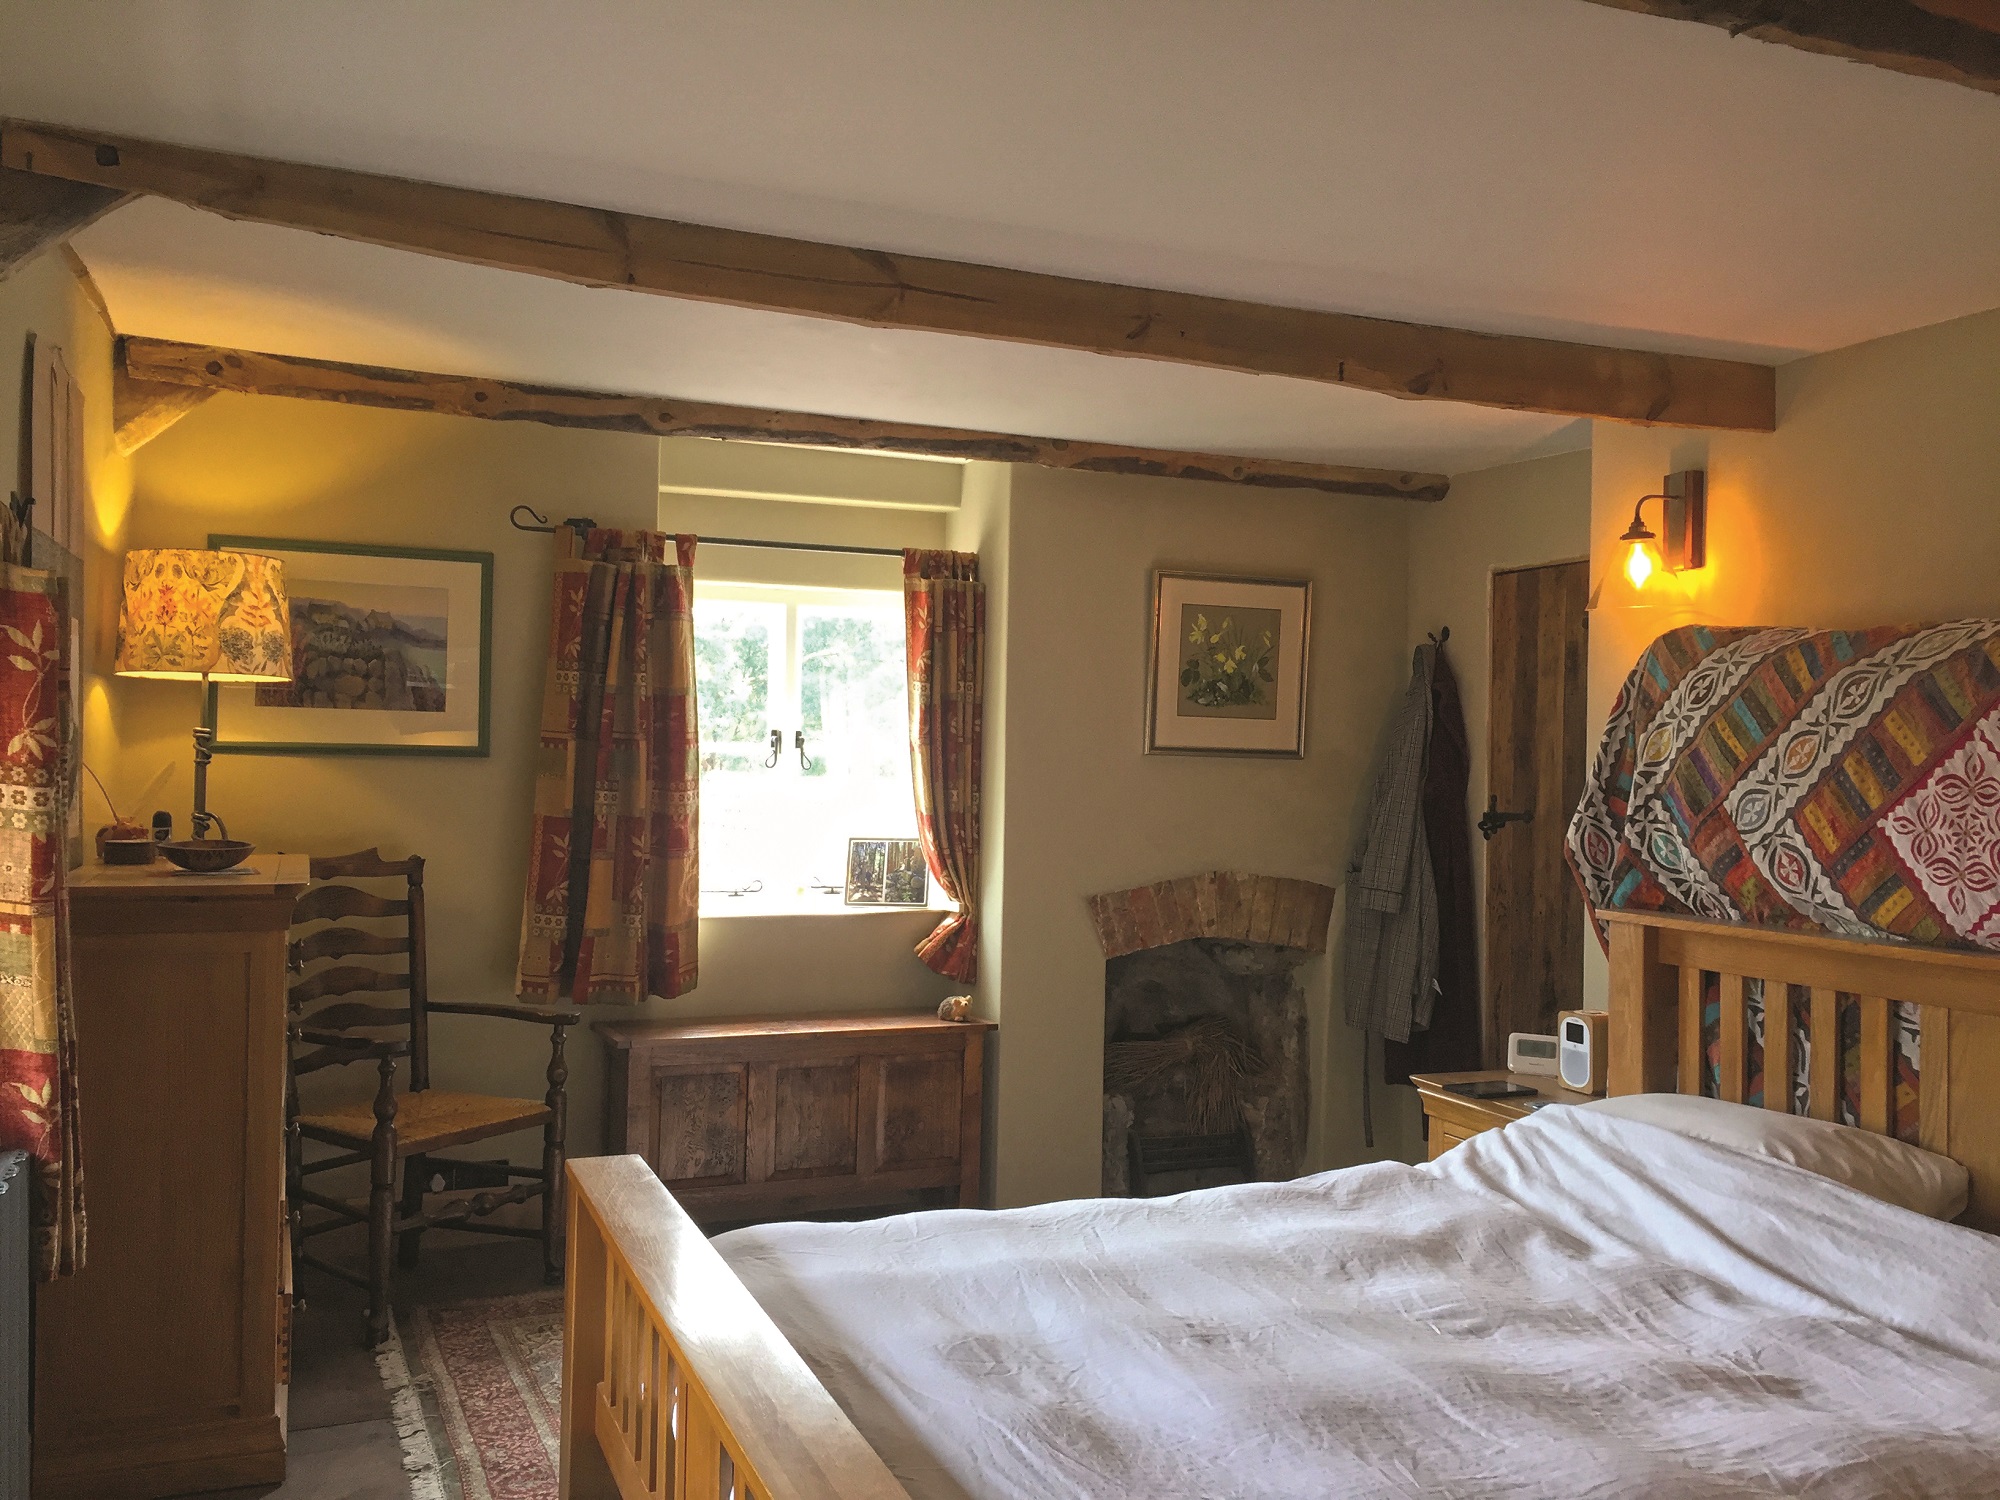
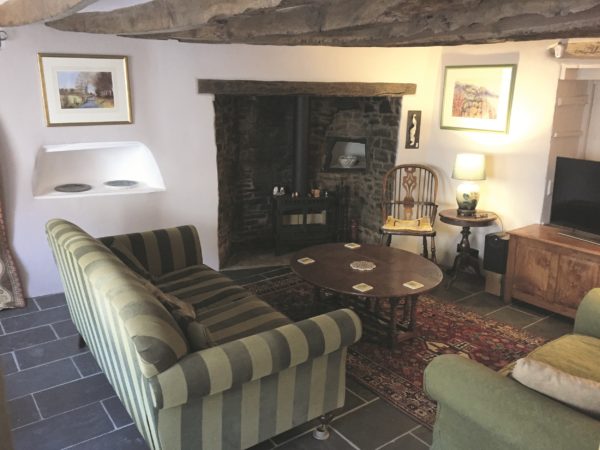
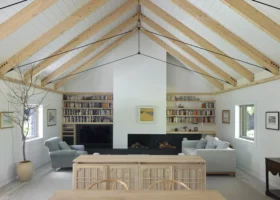
The finished bedroom features lovely rustic beams and a preserved fireplace for added character
We have avoided them by means of a recessed light in the shower niche, a hidden LED strip around a large mirror, floor washers from under the bath and light from the ceiling window into the illuminated roofspace.
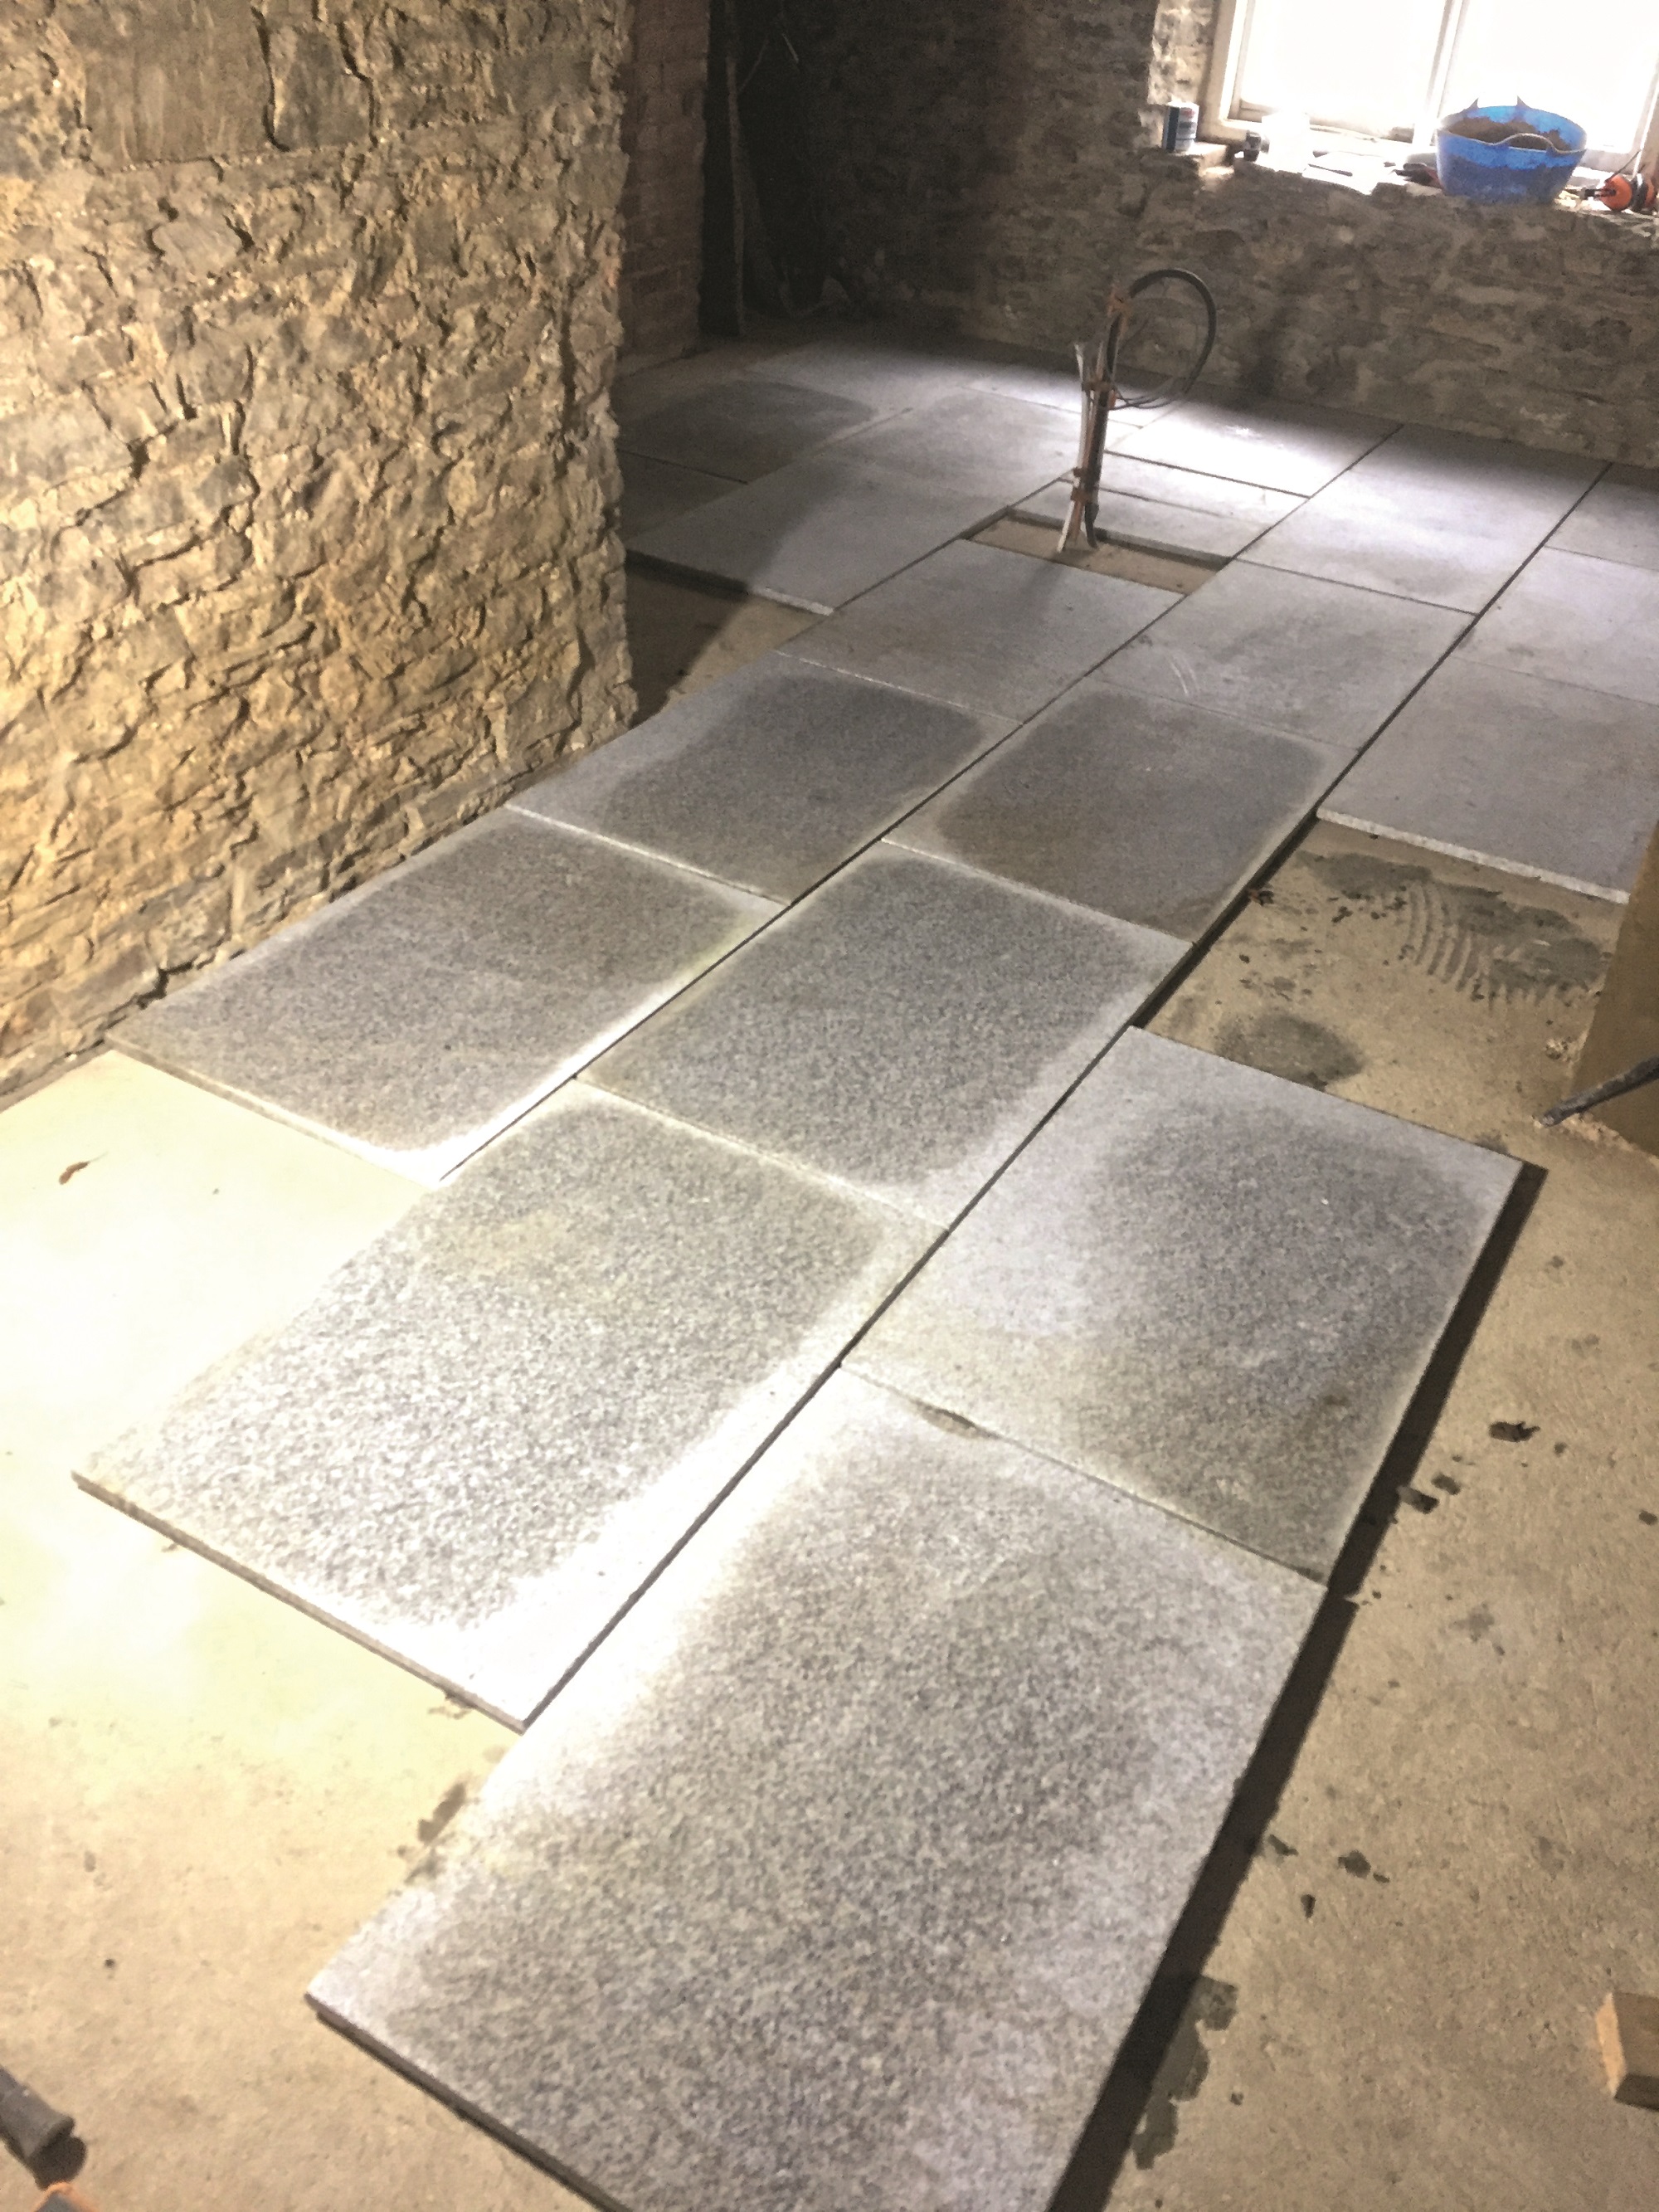
The kitchen floor is a considerable area, which will extend significantly further when the adjoining breakfast room is added. For a floor covering that suits that expanse we selected large – 900mm x 600mm – granite tiles.
Laying them was quite a job which required the assistance of some hired muscle (my student nephew). Now they are down and grouted, the floor looks fabulous.
We opted for slate worktops that complement the kitchen’s new granite floor
The zone is an awkward shape, with limited wall space, no square corners or parallel walls. We worked through several design iterations to develop a general layout that worked for us.
It was clear that the kitchen needed to be completely bespoke – no standard units were going to fit our space. Fortunately, we have found a local supplier whose extensive range includes handmade kitchens at remarkably good value.
Working out the details was a very collaborative process involving us, their designer, the carpenter who was making the units and, later, the stonemason who cut and fitted the worktops.
The stylish bespoke kitchen has been designed with a large island to suit the space. Dark cabinetry gives the room a dramatic yet cosy feel
They found ways to work around our awkward shapes, fit in sink, dishwasher, fridge, hob etc and incorporate some unusual features such as a raised butchers block for me (I am rather tall) and sliding sections of worktop over compost and recycling bins.
We solved the lack of wall space by having a large island that takes up much of one half of the kitchen, shallow larder cupboards, and an induction hob recessed into the old fireplace. The island and hob surround have slate worktops that complement the granite floor and are a joy to use.
Our excellent lighting designer, Jerry, has provided the icing on the cake with a combination of LED fittings and strips operated using wall-mounted radio frequency controllers.
This gives us four independent zones that can be dimmed and changed from warm white through to cold. We have pushed the boat out with pendant lights from Jim Lawrence over the island, with GU10 lamps controlled on the same RF system.


 Login/register to save Article for later