


 Login/register to save Article for later
As this can shrink and swell with changes in moisture, foundations must be designed to prevent the risk of subsidence or heave.
- Plan ItBack
- Design ItBack
- Build ItBack
- Homes
- ProductsBack
- CostsBack
- Self Build Cost Calculator
Estimate your project costs instantly with Build It's interactive self-build cost calculator
Calculate Now - Costs & Finance
- Contracts & Warranties
- Build It Estimating Service
Get an accurate, detailed cost breakdown of your project
Submit plans
- EventsBack
House Foundations & Groundworks for a Self Build – Your Guide to Building Foundations
Your building foundations will play a vital role in supporting the weight and structure of your property. Get in the know with the different house foundation types and what the initial stages of your project will look like with our comprehensive guide


House foundations are a crucial part of a self build project, establishing a solid, long-lasting base that will support your property for generations. The architectural design of your house will influence your choice of building foundations, as will soil conditions, the weight and load distribution of the building, its size and any specific design features. It’s important to fully understand your site and its ground conditions to ensure you’re specifying the right foundation type.
Not only will the house foundations be one of the first building operations to take place on site, it’s also an integral part of the structural design phase. So, what does the groundworks phase involve, which foundation type is right for your plot, and what do you need to know before starting a project? Here, we’re taking a closer look at the different house foundations on offer and what to consider when setting out on a self build project, to ensure success right from the start.
Jump to
- Understanding your plot’s ground conditions
- The different house foundation types
- The importance of foundations in planning
- Building control inspections
- Foundation depth
- How to budget for foundations
- The key stages explained
- FAQs
Why is it important to understand your site’s ground conditions early on?
Understanding your plot’s ground conditions is paramount when deciding on the right house foundations. In the UK, soil types can vary significantly from one region to another, and even within a small geographic area. So, it is crucial to assess your soil’s properties, including its bearing capacity, susceptibility to movement and drainage.
“Before anything else, you must get a geotechnical soil survey done,” says Simon Orrells of Frame Technologies. “This will give you the soil structure, and bearing pressure and make up, and will advise on the building foundation type (not design) so that your engineer can design from it. If you need a self build mortgage, your lender and structural warranty provider will require a soil survey.”
An insulated foundation system from Glatthaar Keller
There is no one-size-fits-all approach to house foundations, the different soil types and designs demand specific engineering solutions. “Soil conditions are a big unknown when undertaking any building work. An interpretative ground survey will provide information on the condition of the ground, its stability, its bearing capacity and, not least, the water table,” says Anthony Spinney of Glatthaar Keller. “All of these elements need to be taken into account when calculating for ground bearing slabs. It would also be wise to include some contingency in the cost of the groundworks, as there will still be unknowns.”
So, what do you need to know about possible ground conditions and how will this influence your building foundations choice? The most common soil types include:
Clay soils
Sand & gravel
These typically offer good load-bearing and drainage, suitable for a range of foundations.
Peat
High in organic matter, this type may not provide the required support for your home without reinforcement.
Rocky ground
Solid rock can be a stable foundation, but may be challenging and costly to excavate.
If the makeup of your plot requires deep building foundations, then consider adding a basement level. “We find many of our clients create a habitable basement if the amount of excavation allows space for an additional level,” says Anthony. “Where there is a risk of flooding and/or high groundwater levels, we’ll anchor the slab using engineered piles. We use waterproofing to protect against soil moisture, moderate water pressure from backwater and high groundwater levels.” Under British Standard 8102, such measures must be designed by a qualified specialist for professional installation.
What are the main 4 house foundation types?
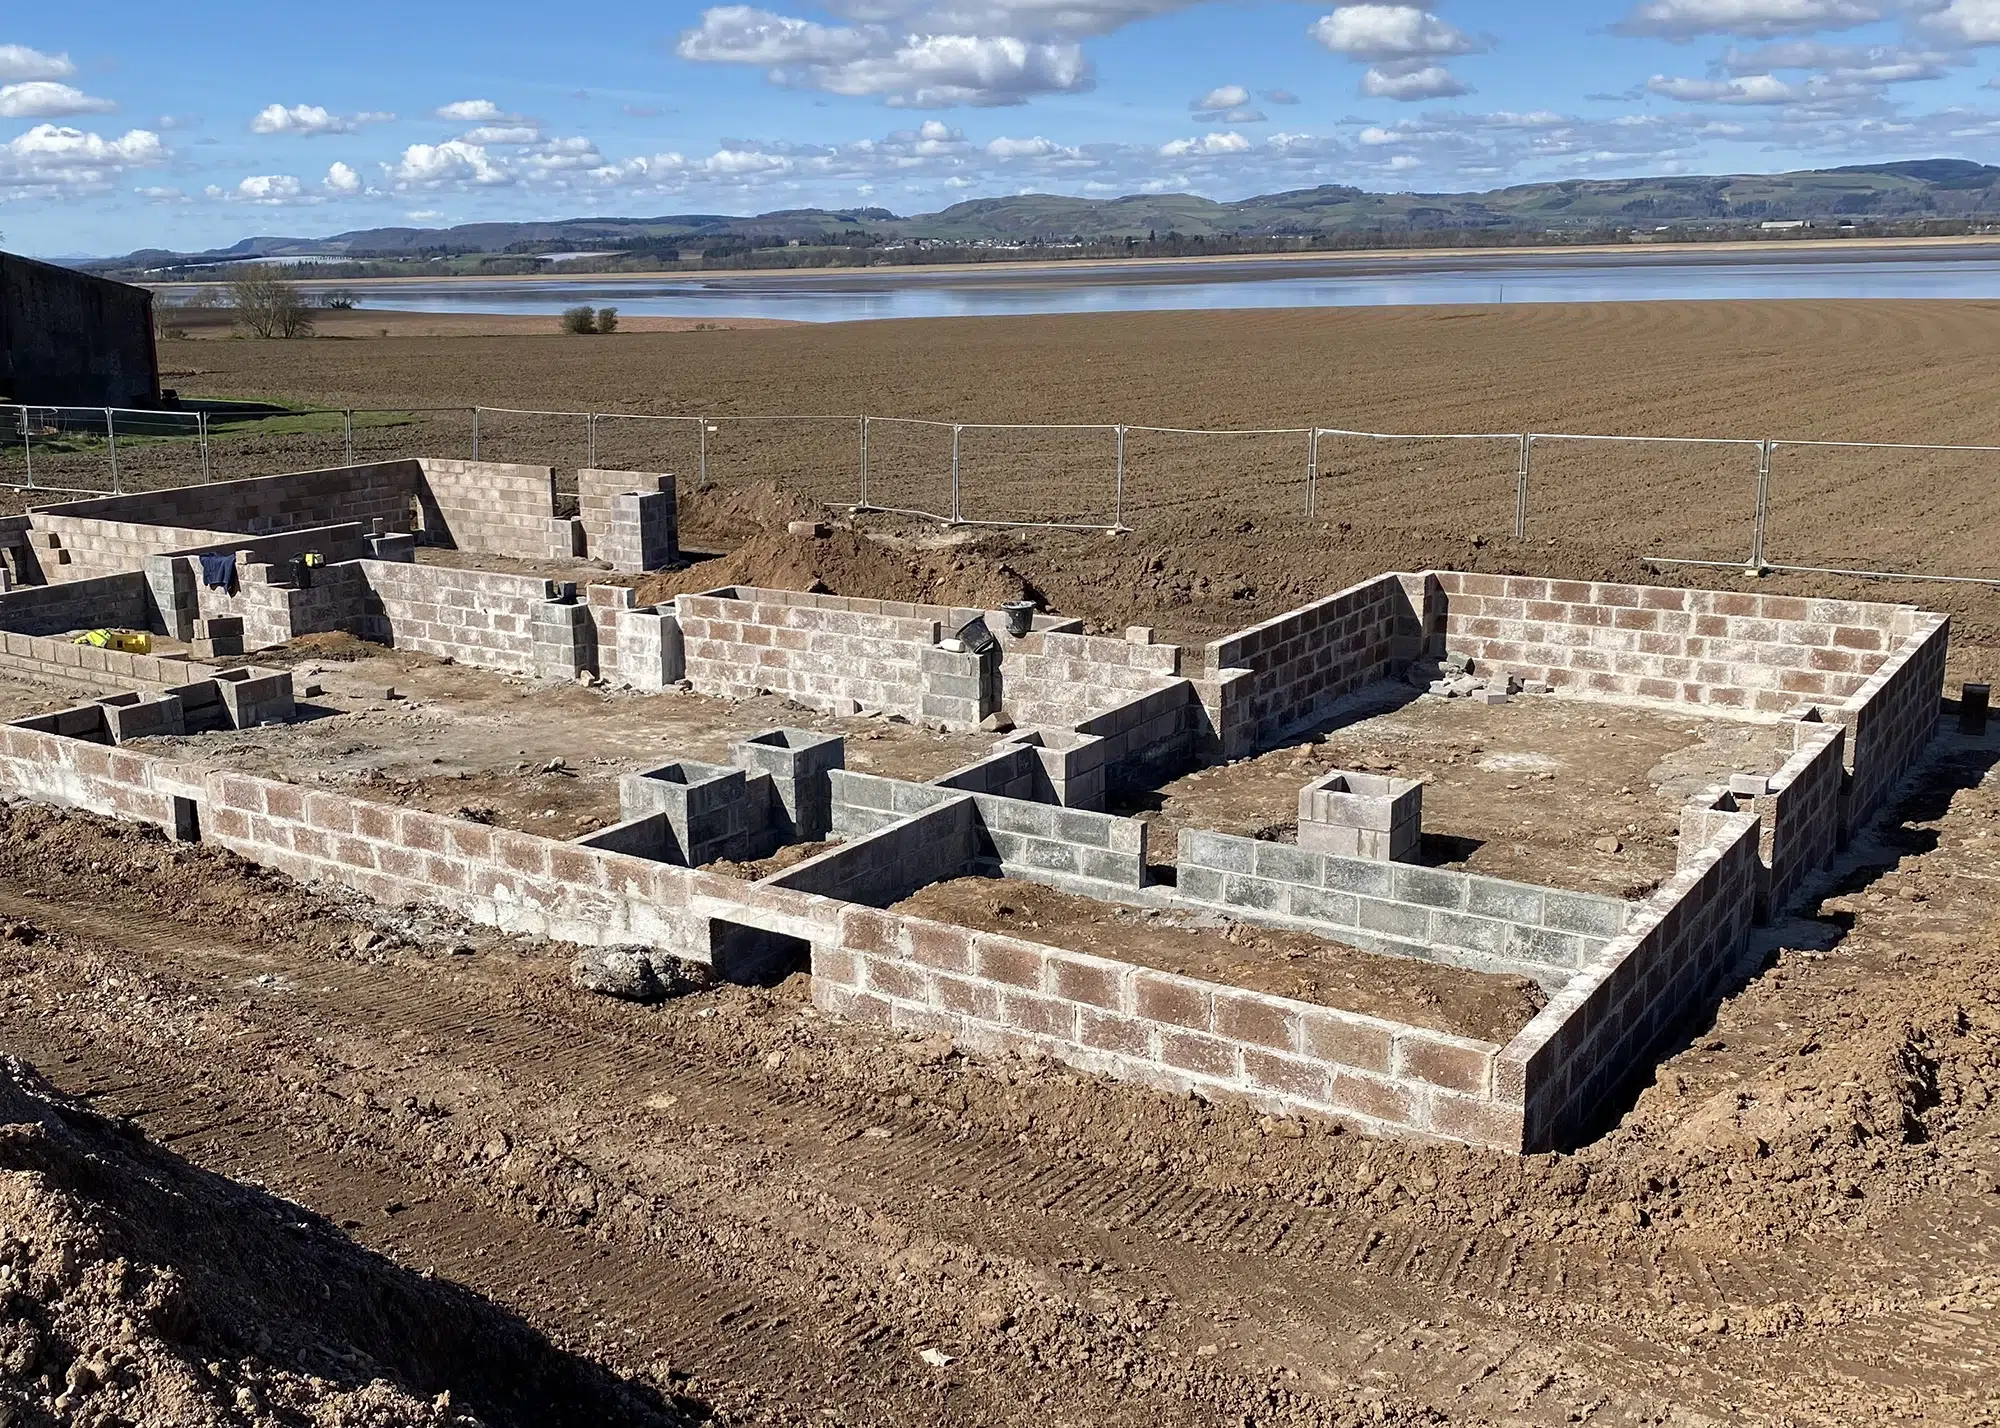
Your structural team will be looking to design the most appropriate building foundations for your project – so you won’t usually get a great deal of say in the matter. If ground conditions are good, then cost-effective strip or trench fill foundations may be suitable. But where there’s any complexity, a more costly engineered option might be the only solution. Here are the basics:
1. Strip foundations
These consist of continuous concrete footings, set into excavated trenches. They’re often used for brick and block builds, but can suit other systems. Strip foundations work well in soils with adequate bearing capacity and low risk of movement. They are generally the most economical option.
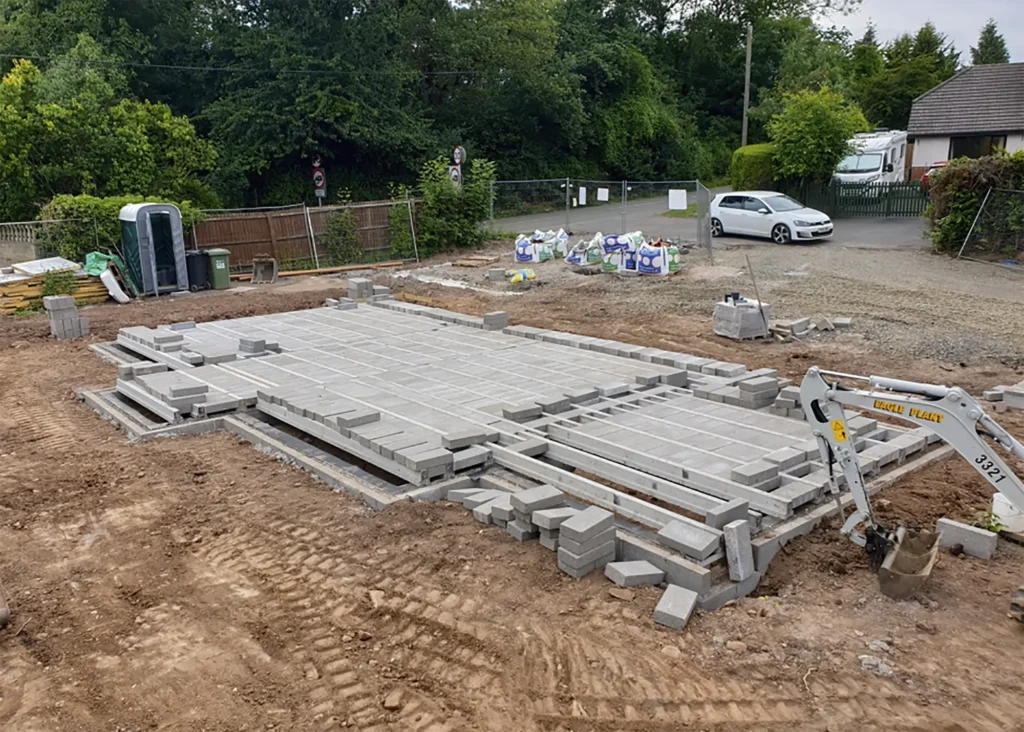
This concrete strip foundation with blockwork footing is by JML SIPs. The company offers a groundworks and sub-structure package alongside their supply-and-erect SIPs superstructures, so you have one point of contact to get you to the wind and watertight stage
2. Trench fill foundations
Quick and popular with self builders, this involves excavating trenches and filling them with concrete to create a continuous footing. As with strip, their depth is determined by the local ground conditions and building loads. They can be used in similar ground conditions to strip foundations where the risk of movement is low. Steel reinforcement (rebar) can be placed in the trenches to enhance the strength if required.
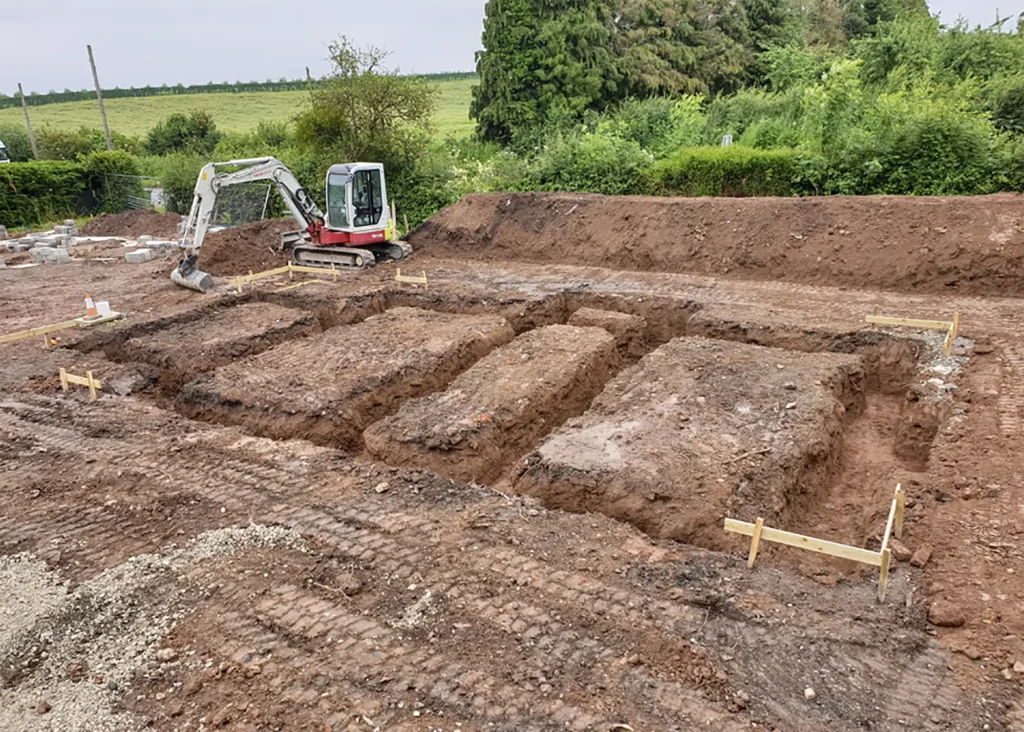
Foundation trenches dug out of the ground in readiness for concrete to be poured on a scheme by Oakwrights
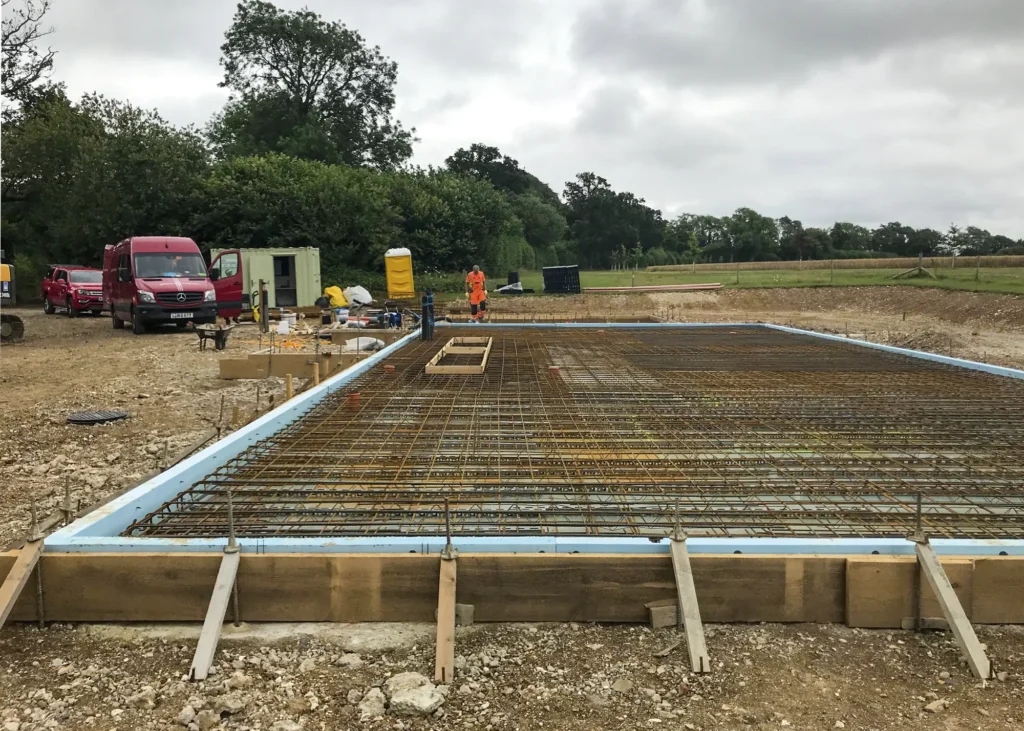
3. Raft foundations
A raft consists of a large, solid concrete slab that extends under the entire footprint of a building. It effectively floats on the ground, spreading the load over a much larger area compared to traditional foundations.
The thickness and reinforcement of the slab are designed to accommodate the building’s load and distribute it evenly to prevent settlement or differential movement. Raft foundations are often chosen when the site has challenging ground conditions, such as soil with a high water table or a history of subsidence. If you’re looking to optimise energy efficiency, you may consider an insulated raft for your house foundations. This option aligns with Passivhaus standards – the high-quality insulation minimises heat loss through the ground below.
4. Piled foundations
This variation is often incorporated when the soil near the surface is unable to support the building load, and the required depth of excavation is significant. Piled foundations involve driving or drilling vertical columns (the piles) into the ground to reach deeper, more stable ground. They usually require heavy machinery for installation, so site accessibility must be considered. While it doesn’t come cheap, piling may still prove cost-effective if it enables a site to be developed.

Helical pile foundations from Techno Metal Post being installed by a specialist hydraulic drill. This form of foundation does not require excavation or concrete pouring
Why are your foundations important to the local planning authority?
It doesn’t just matter to you that your first steps are correct, it matters to the local planning authority that your home is built in the position shown on the approved plans. Even when dimensions haven’t been specified, planning enforcement officers can scale off the drawings to check that your home is where it should be.
The distances to boundaries and the levels are both important from a planning aspect, because of the issues of overlooking and overshading neighbouring buildings. You and your builder are the only people who will check the setting out at the start, so take the time to get it spot on.
With pegs driven into the corners and chalk lines sprayed on the ground between them, you can start digging the foundation trenches. Mark the centre line of the foundations to avoid confusion; the wall positions will be set out with pegs and string lines later when the foundations have been concreted.
CASE STUDY Self build on a sloping site with concrete raft foundations
When Calum & Sally Land found a run-down bungalow in Bath, they decided it was the perfect spot to knock down and rebuild their new home. With the plot being on a slope, getting around a few construction challenges and incurring additional expenses were an inevitable part of the process.
The original bungalow was demolished due to subsidence, and the steep gradient was a concern. “We were worried we would need to have piled foundations,” says Sally, “but we were very lucky we hit bedrock.” This enabled their builder to lay a reinforced concrete raft with a mass-fill toe that sits on the rock to prevent any downward movement of the structure. The 224m² self build project cost a total of £550,000. Within this, the general preliminaries cost £11,000 (£49 per m²), while the bungalow demolition and groundworks cost £30,000 (£134 per m²).
When will building control inspect the house foundations?
You must notify your building control officer at certain stages and await their inspection when planning your house foundations. You can assign the task of giving notice to your contractor, but check for yourself that the works have been inspected and approved before covering that stage and continuing. Most building control authorities are happy to book inspections from a phone call or email, so long as they are given a day’s notice. The same goes for your insurance warranty inspector, who will also need to inspect at some stages.
Building control inspection schedule for house foundations:
- Commencing the work Give two days’ notice in writing
- Foundation excavations Give one day’s notice by phone, email or fax
- Oversite preparation Give one day’s notice by phone, email or fax
- Drains laid in trenches Give one day’s notice by phone, email or fax
- Drains testing Give one day’s notice by phone, email or fax
Premium Content
Downloadable E-Guide
Where should you start when planning your home building project? Build It’s in-depth downloadable guide to self building a house contains everything you need to know to make your project a success.
find out more
How deep should your building foundations be?
House foundations formed in rock and stony grounds can often be shallower than those dug in “shrinkable” soils such as clay. In the latter, at least 1m deep is normal. Nearby trees or shrubs may extend this depth to a good deal more. Your building control officer will guide you in these cases. Once the trenches have been dug and inspected, you will need to hammer pegs into the sides to mark the level for top of concrete. Timber pegs are safer than steel pins.
A beam and block ground floor in preparation for a structural frame and encapsulation system from Oakwrights
How much should you budget for foundations?
It’s difficult to give indicative costs for foundations – as both the type of foundation chosen and the ground conditions have a major impact. But there are elements you can factor into your plans to help give you clarity and certainty when assessing quotes.
Foundation costs are not limited to the concrete footings alone. “The whole solution also includes the blockwork underbuilding and concrete floor structure, which is why you need to be very clear on what you are being quoted for,” says Derek McIntyre, SIPs director at JML SIPs. Calling in multiple groundwork quotes, and sense-checking them with your design team, will help to ensure you’re comparing like-with-like and getting the service you need.
A ground survey is another key cost to consider. You may also want to commission a radon gas assessment which can affect foundation designs and carry out environmental searches to identify any contamination risks – issues that can be more costly to resolve if discovered after construction has begun. Ultimately, your engineer will be looking to design and specify the best possible foundation solution for your project – in other words, a system that does everything it needs to in a cost-effective package.
CASE STUDY Build It’s Self Build Education House
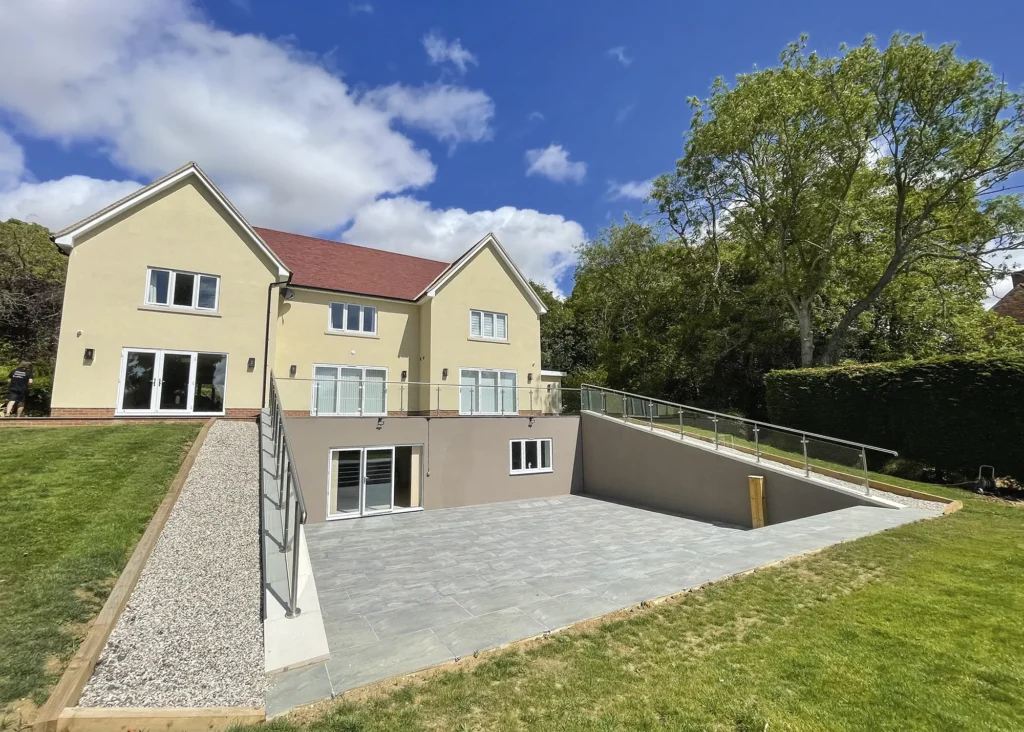
We decided to incorporate a basement into the design of Build It’s Self Build Education House located in Graven Hill, Bicester. The clay soil conditions on site helped to spur our decision; we needed to dig deep foundations anyway, so why not take advantage of this by creating a below-ground living space? Below you can see us reaching the basement floor level after digging down through the clay soil. Temporary works – in the form of sheet piles – were required to protect the road and prevent any risk of collapse.
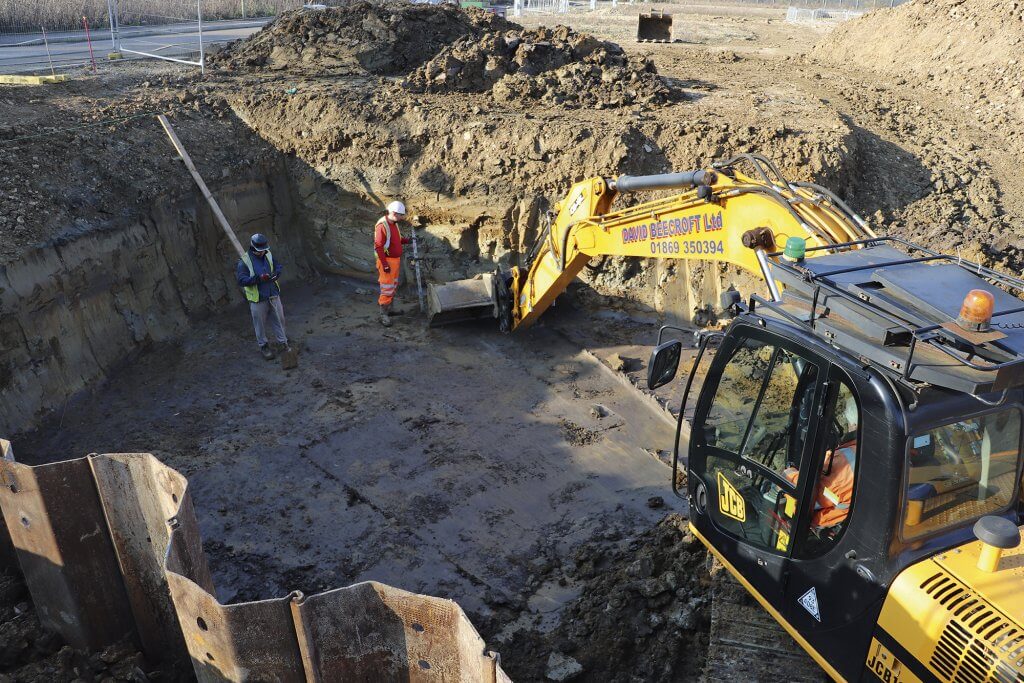
Photo: Build It
Twelve days after digging, laying out the concrete binding to protect the membrane beneath the slab and installing the steel rebar, and the basement floor slab (complete with moat) had been finished (below).
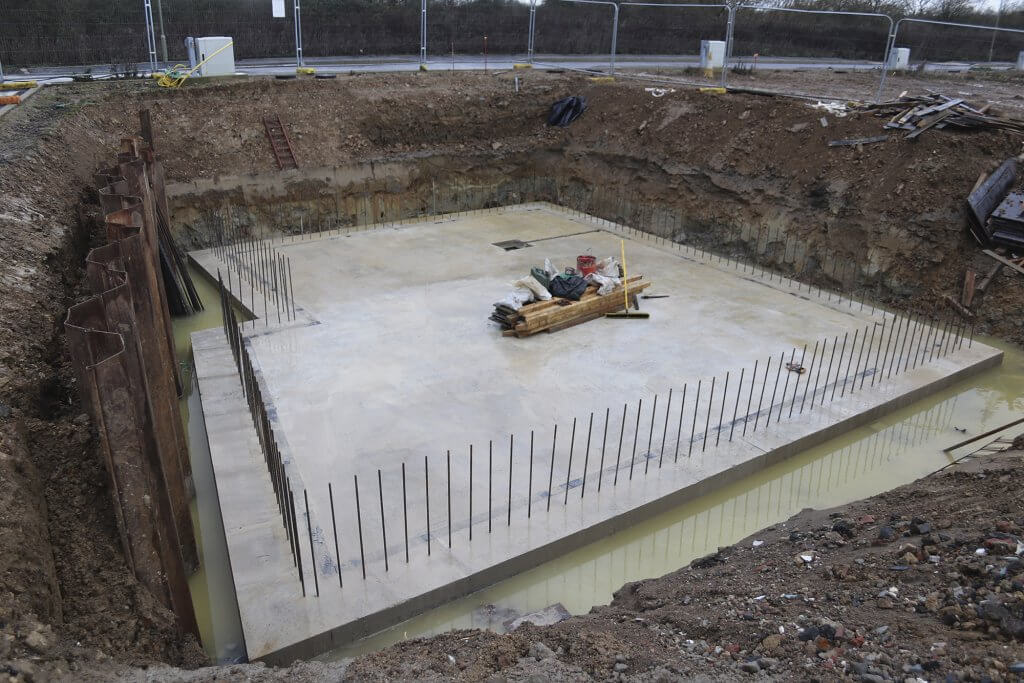
Photo: Build It
A total of 37m³ of concrete, delivered in five lorryloads, went into pouring the basement floor slab. Note the upright steel rods, which help to provide a strong connection between the floor and the ICF basement walls.
What do the key stages of laying house foundations look like?
Pouring the concrete
Make sure the ready-mix lorry can access the site. Readymix can be placed by pump if the foundation trenches are difficult to get to or the truck’s chute can’t be extended far enough. Pumps must be booked in at an early stage. One reason for doing so is because there may not be that many of them in your area – they’re often tied up with bookings on civil engineering works. Once poured, the concrete will need to be hand-raked into level against the pegs.
Preparing the oversite treatment
Beneath a ground-bearing concrete floor slab, the ground must be properly prepared with an oversite treatment. The site should have been stripped clear of topsoil and vegetation before the house foundations were dug. It’s from this reduced level the infill construction begins.
Hardcore should be used in a layer, at least 150mm thick, but no greater than 600mm, in selected aggregate. It’s then compacted down in layers with a plate compactor. If this task is done badly or with the wrong material, settlement is to be expected, causing the slab to crack.
Check out your options for oversite material locally. Hardcore rubble needs to be clean, broken brick, concrete or stone that has been crushed or is naturally available in less than 100mm particle sizes. Approved aggregates are available from merchants and some offer recycled glass and concrete crushings.
On sloping sites, where part of the oversite may exceed 600mm deep, it may be acceptable to use lean-mix concrete in layers with the hardcore to make up the difference, instead of switching to a suspended floor type.
Glatthaar Keller specialises in basements. If you need to dig deep anyway, adding a below-ground storey could prove a cost effective option
Take care not to push out the external walls if a round stone fill is used. Stone just rattles around and doesn’t exactly compact. Like water, it finds its own level very quickly. Lap and tape down 1,200 gauge polythene for the damp-proof membrane and make sure it is dressed up over the walls so it can be lapped with the damp-proof course later.
The insulation boards can be laid out over the damp-proof membrane and covered by an additional layer of polythene before placing the concrete. These boards should also be cut to an upstand around the external walls to encase the concrete slab fully in a warm tray. Angular hardcore needs binding with a thin layer of sand to protect the polythene damp-proof membrane from puncturing and also to create a level bed for the insulation to sit on.
Levelling the concrete
The hard work is in raking it out and tamping it into level using a straight length of timber that will span the distance between the walls on either side. Tamping the concrete helps to consolidate it in the same way that vibrating it does and, combined with a gentle sawing and tapping motion, will bring the surface to the level and finish needed.
Getting the drainage system in place
Levels are just as critical when laying the drainage system. The invert level is the bottom of the pipe and from this point the system falls are determined. The trenches need to be carefully dug to the right depth and gradient to avoid huge amounts of bedding being necessary to support the pipes.
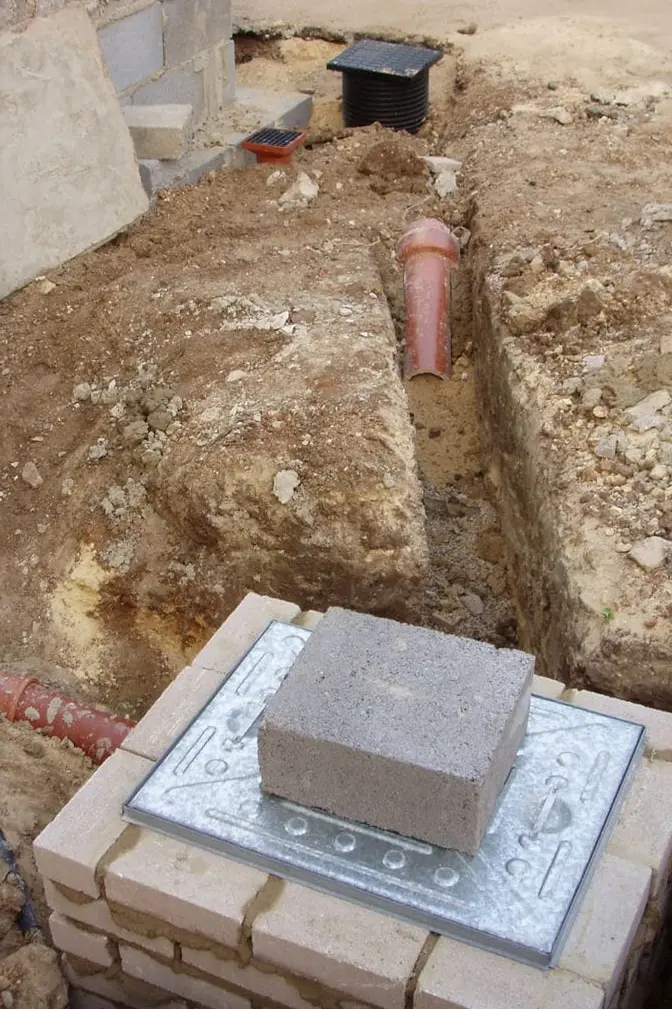
It’s important to get the drainage works done properly when laying your house foundations to avoid costly complications later down the line
Gravel is used to a depth of 100mm to 200mm thick for both bedding and surround material supporting and protecting the pipes at the correct fall. A gradient of 1:40 is ideal, but plastic drains will tolerate much shallower falls if it’s necessary. Look for at least half a bubble out on the spirit level and make sure they fall the right way. Eyes can be deceived when looking at drains in trenches, particularly when the ground slopes the other way.
Digging drainage trenches to run services
Using deep drainage trenches for running in other services makes good sense. Gas, electric and water cables all have to be provided at your expense, so laying them in position now will save time and money later. Getting the supply companies to connect them when the house is complete can be a slow procedure, so get the job registered, priced and booked in well ahead to avoid delays later.
Top tips for getting the drainage system right
- Lay pipes to an even gradient
- Lay pipes in straight lines and avoid bends
- Locate the soil vent pipe at the head of the run
- Provide rodding points or inspection chambers at bends and changes in gradient
- Connect water closets and soil vent pipes direct to inspection chambers
- Use at least 100mm of gravel to cover the pipes before backfilling the trench and don’t leave the trench open for longer than is necessary
Testing the drainage system
For peace of mind, a water or air pressure test should be carried out before drains are backfilled to ensure all the joints are watertight and everything works. Your building control officer may want to witness the test at this stage or when your self-build is complete. The reason for the latter is that drains can become displaced or damaged with careless backfilling and site traffic.
Drainage connections are usually best left until later, but if you do connect up at this stage to the mains system, make sure you fit manhole covers and fill gulley traps with water. The air will have turned foul on site before you’ve hardly started.
FAQs
What does a soil survey really involve?
A soil survey or ground investigation is undertaken to determine the chemical and engineering properties of the underlying soil profile. The study typically consists of two main parts. Firstly, a geotechnical examination will be carried out to determine the plot’s suitability for construction, including soil classification and strength tests to evaluate bearing capacity, settlement and stability. Secondly, a geo-environmental assessment will be conducted. This explores the specific soil and groundwater conditions to help identify any contamination risks and environmental impacts. A report can be required to make sure your project is meeting regulatory compliance.

Oliver Scott is a chartered geotechnical engineer (CEng) and director at Karn Geoservices.
How long does it take to carry out a ground investigation & how much does it cost?
Early engagement with a consultant is key to identify potential issues and getting them rectified. Desk-based assessments can be turned around in one to three weeks, but intrusive ground investigations can take around four to six weeks from instruction to issuing the final report. Costs are proportionate to the scale of development and the level of complexity involved. Widespread, heavily contaminated areas or abundant historic mine networks, for example, will make the investigation much dearer. Our investigations are always designed to minimise costs and maximise the information obtained. Typically, reports start from around £2,500 for a single plot build.
Oliver Scott is a chartered geotechnical engineer (CEng) and director at Karn Geoservices.
How do trees and topography affect your house foundations?
Trees and topography can both present challenges to foundation design. Very large trees near your plot can impact the soil’s stability, especially in clay-rich areas where roots cause shrinkage and swelling. This often necessitates deeper foundations, and the NHBC provides guidance based on tree type, height, and proximity to the structure. Topography matters too – if your site slopes, stepped foundations may be required to follow the natural gradient. These must meet specific standards for depth, length, and overlap to ensure structural stability.
If you’re building an extension, and it’s within six metres of a neighbour’s property or a shared boundary, you may need to arrange a Party Wall Agreement before excavation begins, in accordance with the Party Wall Act.
Are there eco-friendly foundation options for sustainable homes?
If you’re planning an eco house project, there are several sustainable foundation options to consider. Insulated raft foundations reduce the amount of concrete used and improve energy efficiency. Screw piles cause minimal ground disturbance and are ideal for smaller plots or those nearby to trees. Rubble trench foundations use reclaimed stone and offer excellent drainage for smaller self build projects. You should always aim to minimise excavation where possible, use recycled or local materials and maintain natural drainage for an eco self build.
How do I prevent water pooling in foundation trenches during excavation?
To prevent water pooling when digging foundation trenches, especially during wet weather, always plan excavation during dry weather. Only dig as much as you can at a time, make sure to pour quickly and cover open trenches overnight in case of rain. Create shallow channels around the site to divert rainwater and consider digging a sump at the lowest point to collect water, which can be removed with a pump. Avoid over-digging, too, and check the water table beforehand – managing moisture early on will save you delays, structural issues and extra costs later down the line.
Which foundations are best for an oak frame home?
If you are looking to build using an oak frame, the most critical drawing in the foundation planning process is the masonry levels plan, according to Oakwrights. This plan serves as the blueprint for ensuring the oak frame and encapsulation panels will fit seamlessly when they arrive on-site. Masonry plans are intentionally limited; they primarily focus on the essential aspects, such as the footing dimensions and baseline levels.
Ensuring the level and stability of the foundation is critical for the oak frame’s integrity. The foundation will feature cast pads or level blocks beneath the oak posts, and any irregularities in these elements could cause significant issues. Even a minor deviation could lead to the misalignment of multiple components, making it impossible to connect roof panels to wall panels, and affecting floor levels.
“The type of ground conditions, proximity of trees and the property’s location are likely to affect the choice of foundation. Clay cohesive soils and/or a high water table likely mean we’ll use pile or raft foundations. We usually recommend a high thermal grade insulation, such as PIR insulation boards, for the ground floor for optimum thermal performance,” says Chris Mullis of Oakwrights.
“More often than not, a beam and block ground floor structure is used for oak frame buildings. It allows greater flexibility for the layout of the frame, drainage and service runs under the house. It has the added advantage that it is relatively easy to adapt for small changes. A more traditional ground bearing slab means you have to have all the drainage and services in their final location.”
Scarlett Deamer
Anna-Marie DeSouza

You may be interested in


Our sponsors

