- Plan ItBack
- Design ItBack
- Build ItBack
- Homes
- ProductsBack
- CostsBack
- Self Build Cost Calculator
Estimate your project costs instantly with Build It's interactive self-build cost calculator
Calculate Now - Costs & Finance
- Contracts & Warranties
- Build It Estimating Service
Get an accurate, detailed cost breakdown of your project
Submit plans
- EventsBack


 Login/register to save Article for later
How to Insulate Foundations

When we think of foundations, most of us probably imagine straightforward strip or trench fill versions – where the concrete and blockwork footings are positioned only beneath the external and internal loadbearing walls. But if you’re thinking about your insulation strategy, you also need to factor in the ground floor type you’re using.
For instance, groundbearing slabs must have their own foundation of suitably compacted hardcore and sand blindings. Meanwhile, suspended floors – whether timber or concrete – are directly supported by the house’s external walls and foundations. So everything becomes part of the same thermal element.
Energy effiency
Nearly all houses built before 1980 have cold ground floors. No thought was given to heat loss through the supporting soil or, worse still, active draughts are present through gaps
in suspended structures.
Obviously, standards have changed considerably since then – but so have our expectations. The trend now is for wooden, stone or porcelain floors set atop underfloor heating, so we can have a snug feeling underfoot; and that automatically means we need better insulation.
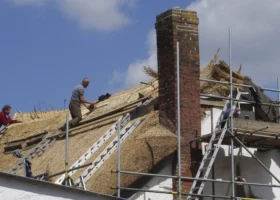
Putting this in place can be a challenge for renovators, but there are plenty of options for people self-building from scratch.
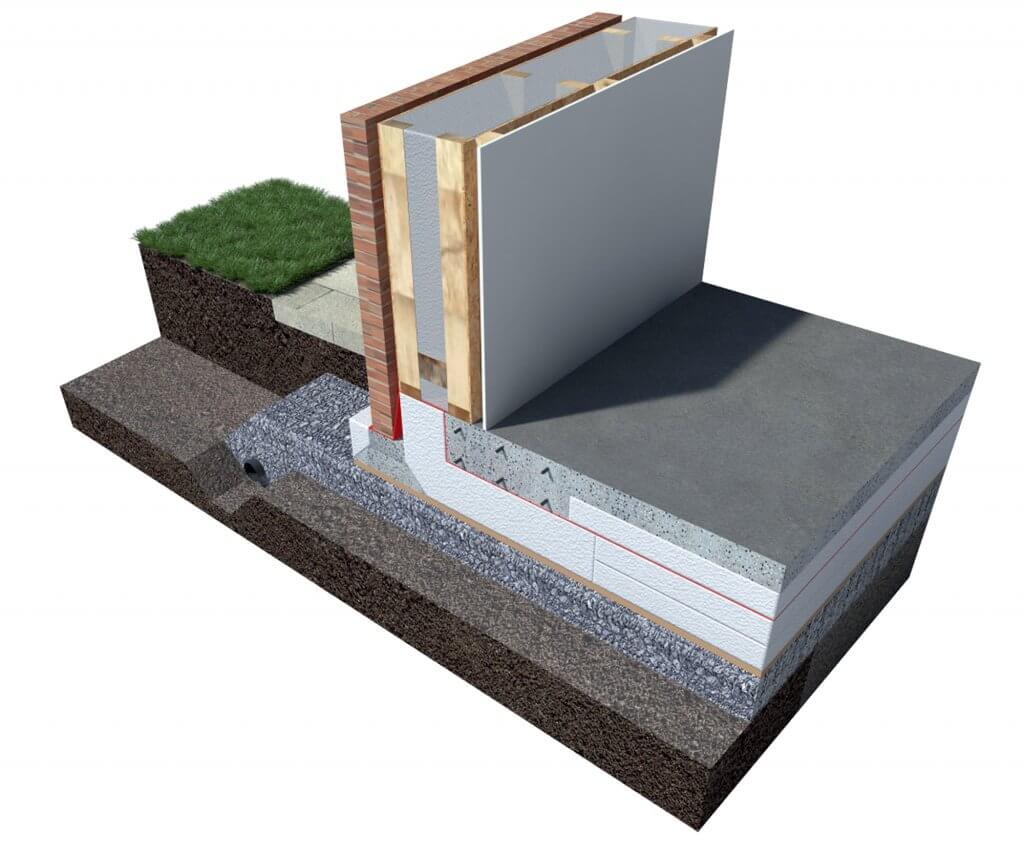
This illustration from Viking House shows its Passive House Budget Build package, which includes a highly-insulated foundation designed to achieve a U-value of 0.10 W/m2K
The Building Regulations set out target U-values for heat loss through foundations. The most common solutions typically sit at around 0.14 to 0.18 W/m2K, but the backstop is 0.25 W/m2K. There are also minimum standards for airtightness (10 air changes per hour), which the majority of self-builders will look to improve on.
Overall, this demonstrates our increasing intolerance for draughty house foundations that can undermine improvements in the insulation of the wall and roof fabric. So getting the thermal detailing of floor and foundation right is now considered to have a huge role to play in the building’s overall performance.
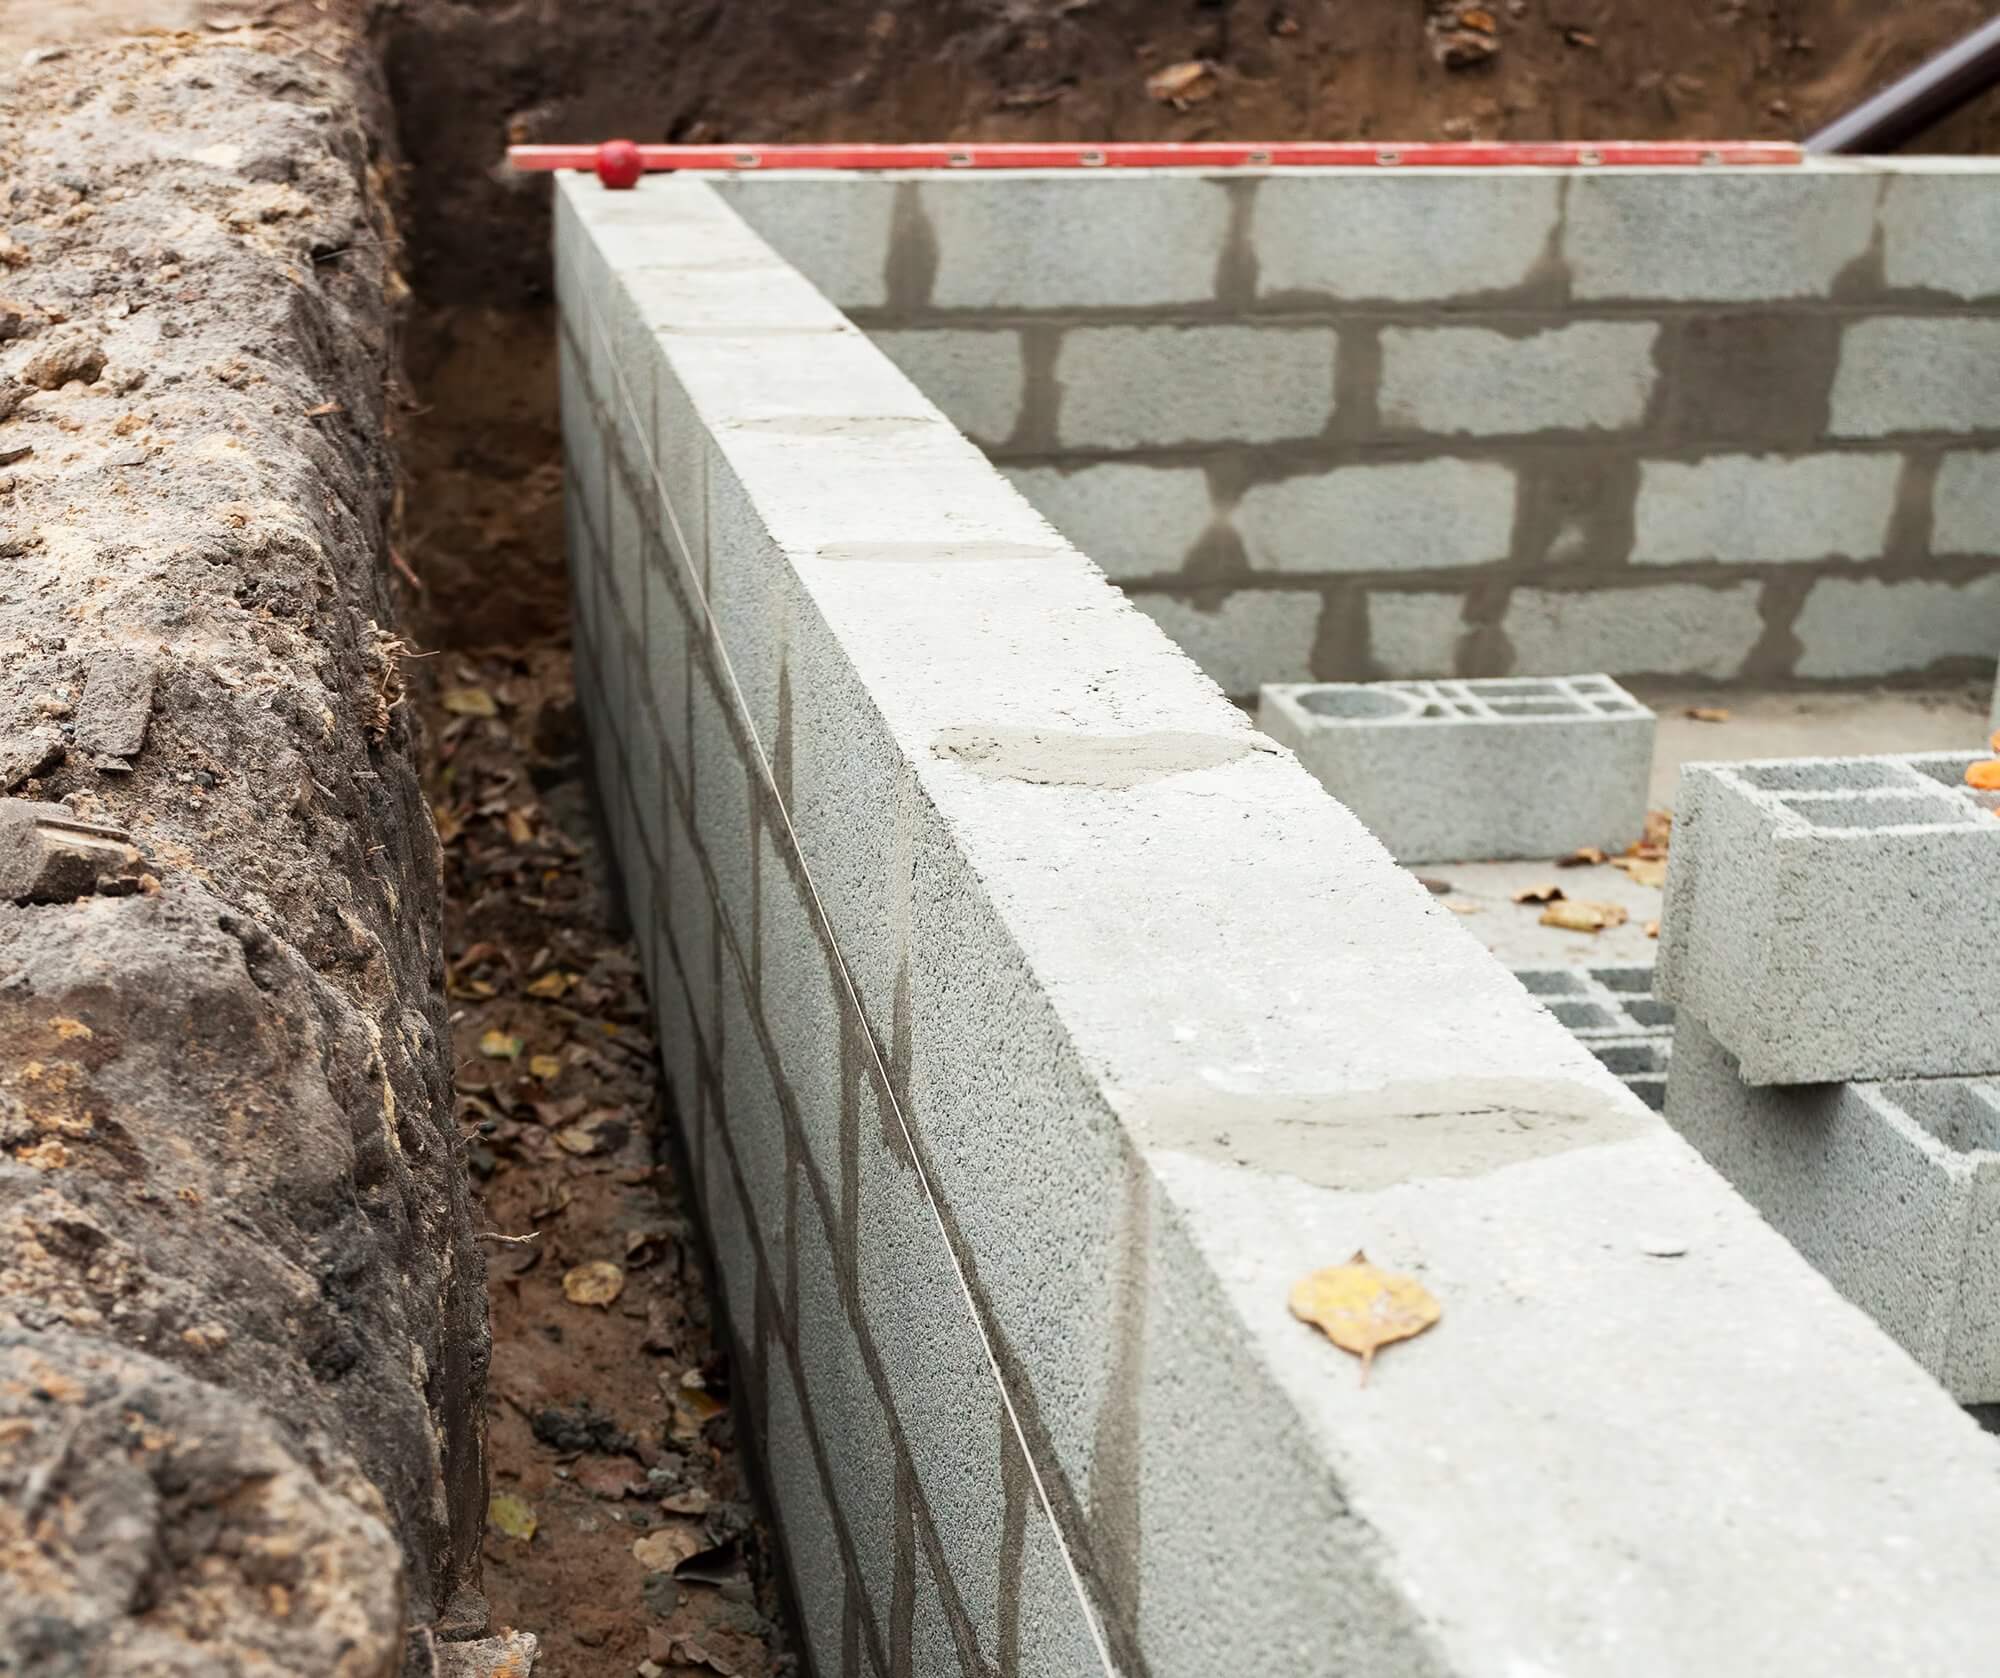
Groundbearing slabs & trench fill foundations
The most common type of foundation is trench fill, where an appropriately deep and wide trench is excavated, before being fully-filled with ready-mix concrete.
This approach is frequently partnered with a groundbearing slab for the floor structure, which usually takes the form of a 100-150mm thickness of concrete cast in-situ on top of a suitably compacted hardcore sub-base. This setup means the slab is independent from the perimeter wall foundations, so the insulation can be incorporated either underneath or on top of the ground floor structure.
In both scenarios, the type of insulation must have an appropriate density to be able to withstand the loads being applied. It will also need to have low water absorption qualities as well as be generally resistant to contaminants, especially where parts or all of it may be underneath a damp proof membrane (DPM).
The most commonly used products are therefore expanded polystyrene (EPS), which is moulded from expanded styrene beads; or extruded polystyrene (XPS), which is a homogenous cellular foam.
If you’re putting the insulation above the concrete slab, then you can also consider using polyisocyanurate (PIR) rigid sheets, which have an integrated foil backing to boost performance.
Whenever you or your designer are specifying the insulation detail and type, it’s vital that you follow the manufacturer’s technical guidance to ensure that the product you’re planning to use is appropriate for that application.
Never place an order for generic insulation, or rely on a merchant to get the spec right, as PIR and some XPS in particular are more susceptible to chemical attack when installed in damp conditions (ie below ground).
All three insulation products mentioned above also vary in terms of their energy performance; EPS is the least thermally-resistant, whereas PIR offers the best performance. Typically, you might need around 150mm of EPS insulation for a below-slab setup, while an above-slab set up could be 100mm of PIR – but the exact depth will depend on the energy efficiency level you’re aiming for.
Many well-organised and skilled builders prefer to opt for insulation beneath a floated concrete slab, as this eliminates the need for a secondary floor screed. Others might prefer to cast the slab first, anticipating that it will get some surface damage during the building works, then insulate above and finish with a screed (which could incorporate underfloor heating) when the superstructure is weathertight.
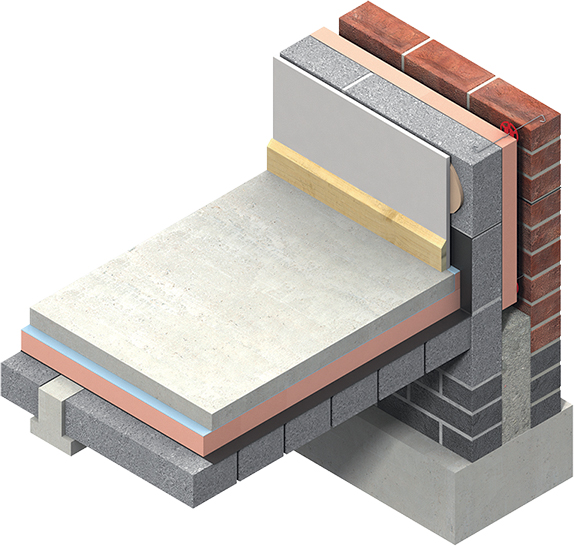
A CGI showing Kingspan’s K103 phenolic insulation, here installed above a beam and block floor, and under a screed
Source it: Find Kingspan insulation products in the Build It Directory
In either case, it’s crucial to eliminate thermal bridging at the slab/screed edge. This is typically done by fitting a thin vertical strip (usually 25-50mm thick) of the same rigid insulation between the external wall and the perimeter of the slab or screed.
The idea is that this small upstand of insulation will meet the external wall to reduce or eliminate the potential for heat to escape through the base of the wall. This is easy to do if the latter is being insulated on its internal face, but less so where the thermal protection is confined only to the cavity.
In these situations, a conventional solution is to run the cavity insulation down past the floor level and to use AAC (autoclaved aerated concrete) blockwork of a suitable compressive strength beneath the damp proof course (DPC).
Suspended concrete floors
This type of floor structure was developed to deal with situations where ground instability might otherwise require mass excavation and filling with new, suitably-compacted hardcore. If you face this kind of situation, it will often be more cost-effective to bridge over the problem area and perhaps have your foundation trenches dug slightly deeper to compensate.
Pre-stressed concrete beams are the most common option. These are designed to cope with spans of up to 4m or so between foundation blockwork. They can then be insulated in one of two ways.
The first is to use standard aerated (thermal) concrete blocks, which can sit on preformed ledges in the sides of the concrete beams to create a flush finish. At this point we have a structural floor acting in a homogenous way.
Atop this we would then need to install rigid insulation and a secondary floor screed (or floating tongue and groove chipboard/solid wood). This is done using the same options available for insulating above groundbearing slabs.
The second option is to use a specialist system, whereby preformed EPS or EPS blocks are manufactured to sit between and on top of suitably-formed concrete beams. These polystyrene units displace the need for concrete blocks to support the final floor screed laid above.
Suspended timber floors
Another familiar option, these can take the place of concrete beams – with an increasing emphasis being placed on engineered timber joists because of their greater strength and ability to span significant distances.
There are numerous ways to support the insulation, with the neatest and most efficient being side or bottom fixed battens on the joists with precast rigid board (OSB or similar) spanning the gaps. With certain types of engineered joist you can often just use the bottom flange of the joist web as your ledge.
Rigid or mineral wool insulation can be installed on top of these boards (between the joists) to the appropriate depth to achieve your target U-values. However, the joist itself will remain a cold bridge between the house interior and the void beneath the floor.
This detail will also be less airtight and complete, unless you incorporate continuous and taped vapour control layers (VCLs) and possibly (if you’re a real enthusiast) a thin layer of rigid insulation over the top of the whole floor.
Passivhaus-standard foundations & slabs
The traditional options we’ve detailed so far can attain ground floor U-values in the region of 0.14-0.18 W/m2K. However, those of you who want to build to the highly-efficient Passivhaus standard will need to aim for more like 0.08-0.09 W/m2K.
The way to do this is to put insulation not only beneath the ground floor slab, but also underneath the perimeter wall foundation – so that you end up with a continuous thermal envelop under the entire house.
From an engineering perspective, there are two choices. You can either use a raft foundation, which is a reinforced concrete slab and foundation cast in one, or opt for a perimeter-reinforced concrete ring beam arrangement to support the load bearing walls with a separate reinforced concrete slab for the floor.
There are now proprietary insulation systems – popularised in countries such as Sweden, Germany and Ireland – that use specially-shaped EPS insulation blocks as formers for highly-insulated ring beam or raft foundation designs.
These all require flat sites of good ground bearing capacity, with appropriately levelled and compacted hardcore, radon barriers and DPMs positioned to suit the soil conditions.
The principle is to build up thick insulation (200-300mm) in stable layers with an extra focus on cold bridging details at the slab perimeters, which integrate almost seamlessly with the external wall fabric insulation. They’re complicated, but the logic behind them and the performance they offer are highly impressive.
Like any type of engineered foundation, this will cost more than conventional routes. Pricing will ultimately depend on the complexity of the design and how much site preparation is needed, so the only reliable option is to get specific quotes from the manufacturer or supplier.
Tim Doherty

You may be interested in