


 Login/register to save Article for later
Keeley Sutcliffe is design manager at award-winning British bathroom designer, BC Designs. Over the last 22 years, the company has expanded their range of products to include both compact and spacious designs in luxury materials.
- Plan ItBack
- Design ItBack
- Build ItBack
- Homes
- ProductsBack
- CostsBack
- Self Build Cost Calculator
Estimate your project costs instantly with Build It's interactive self-build cost calculator
Calculate Now - Costs & Finance
- Contracts & Warranties
- Build It Estimating Service
Get an accurate, detailed cost breakdown of your project
Submit plans
- EventsBack
Designing a Wet Room – Bathroom Experts Reveal the Key Considerations
Considering a wet room instead of a conventional bathroom setup? This type of space is a great option for those seeking an accessible, futureproof space with a sleek, contemporary feel. Amandine Lefevre speaks to the experts about how to design a successful wet room, from materials and layouts through to waterproofing and ventilation

Increasingly favoured by self builders and renovators, wet rooms allow homeowners to combine their everyday bathroom needs with a sleek, accessible design that delivers a strong sense of luxury. With no separate shower tray or enclosure, wet rooms are fundamentally an open-plan bathroom, in which the entire space is designed to be a single, watertight area.
Excess water is guided towards a waste or drain by a sloping floor, and the shower is usually only separated by a singular shower screen. This not only optimises the available space, but it also enhances long-term accessibility while offering you greater freedom in your design choices.
From modern, industrial features, to traditional bathroom fixtures, wet rooms provide the perfect opportunity to create a design-led space that doesn’t compromise on comfort or practicality.
In this wet room design guide, I’m looking at:
Getting the wet room’s layout right
Building a wet room is about tailoring a space that works beautifully beneath the surface as well as showcasing a striking design. As an open, walk-in environment without a separate enclosure to contain water, the layout becomes the main framework that elevates the way the room is experienced.
In more compact spaces, placing the shower area at the furthest point so that the water naturally travels away from the entrance will maintain a feeling of ease and comfort. Larger wet rooms, on the other hand, offer a much greater creative freedom and movement through the space that can be enhanced and divided up through the use of partitions and half walls. “Keep everything on a completely flush floor, so the room reads as one continuous space without steps to trip on,” says Daniel Woolfson, architect at The DHaus Company.
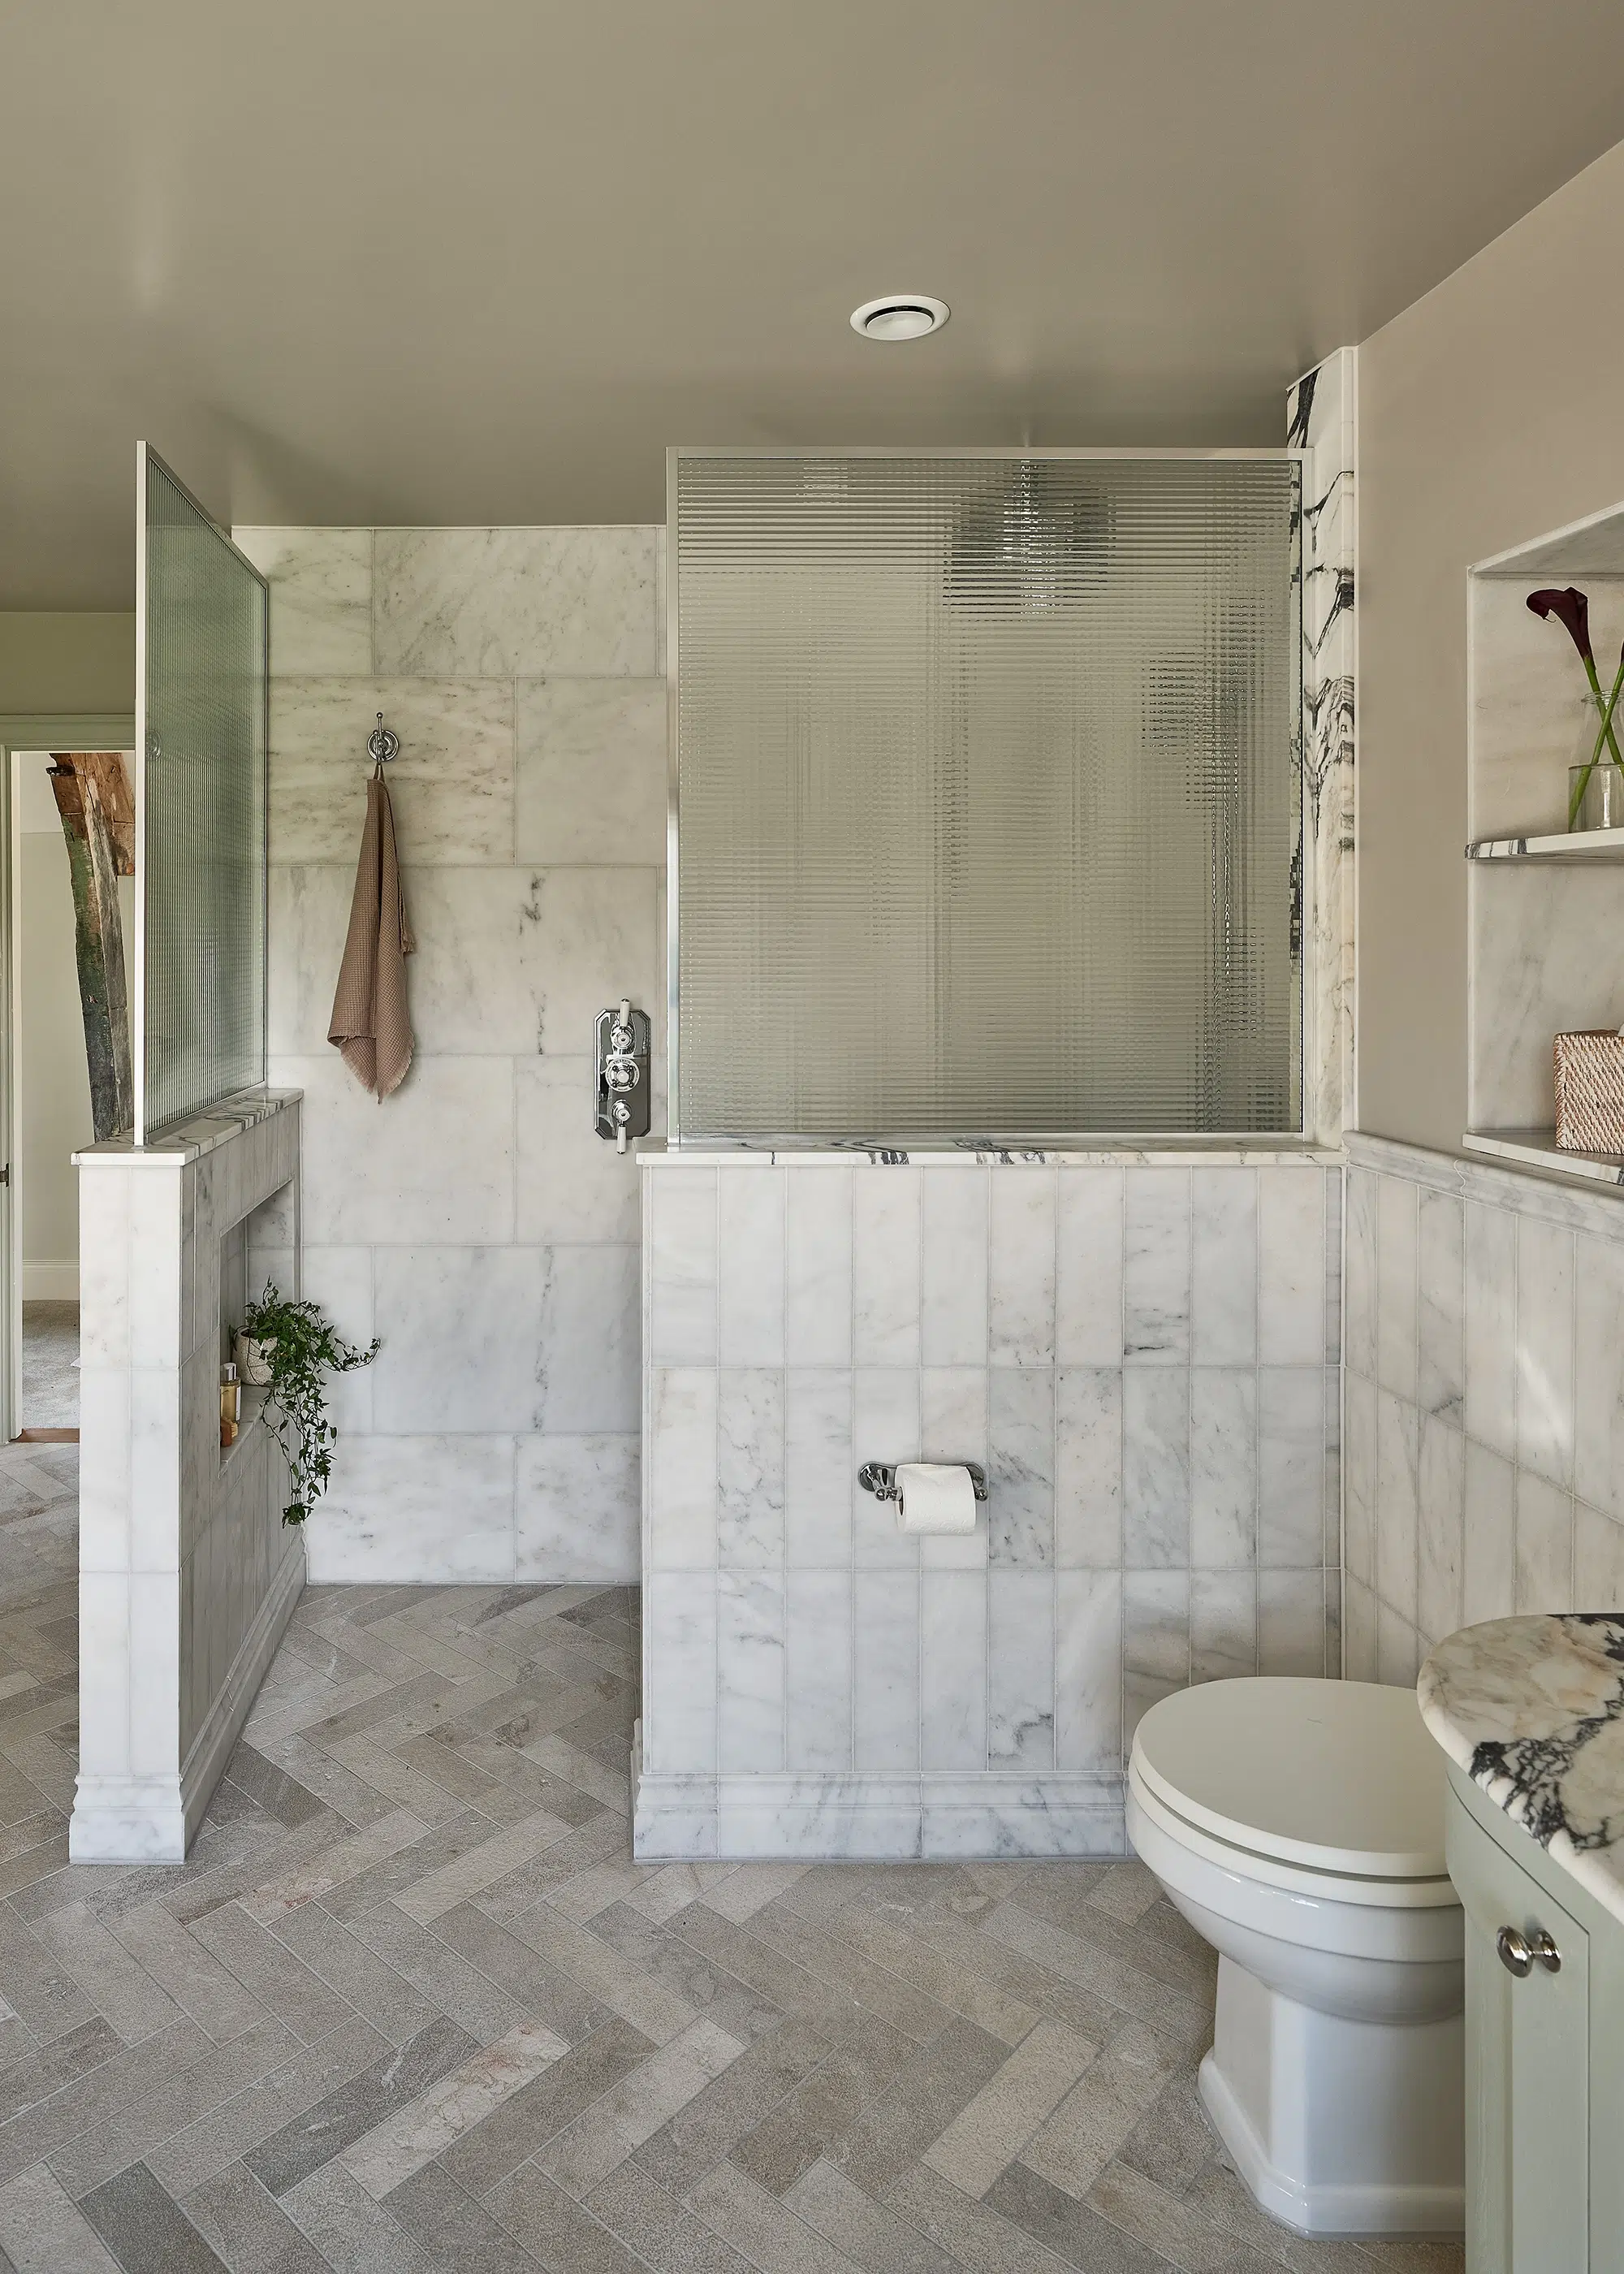
Although wet rooms often evoke contemporary or industrial design, Simply Bathrooms reimagined the concept through a traditional lens, enhancing the property’s original period character with classic brassware, heritage-inspired patterned tiles and a soft, understated colour scheme
Key design considerations around lighting and safety are particularly important in wet rooms. Keeping background lighting recessed in ceilings, niches and behind mirrors helps to prevent glare and reinforces architectural features. “Storage should be integrated from the outset in niches and alcoves, built-in mirror cabinets and simple shelving units that sit within the wall,” says Daniel.
For safety, the top priorities are correct tanking, non-slip flooring and a well-detailed, level threshold. The position of the door should feel unintrusive, too, and at a distance from the wettest zones for optimal comfort and accessibility.
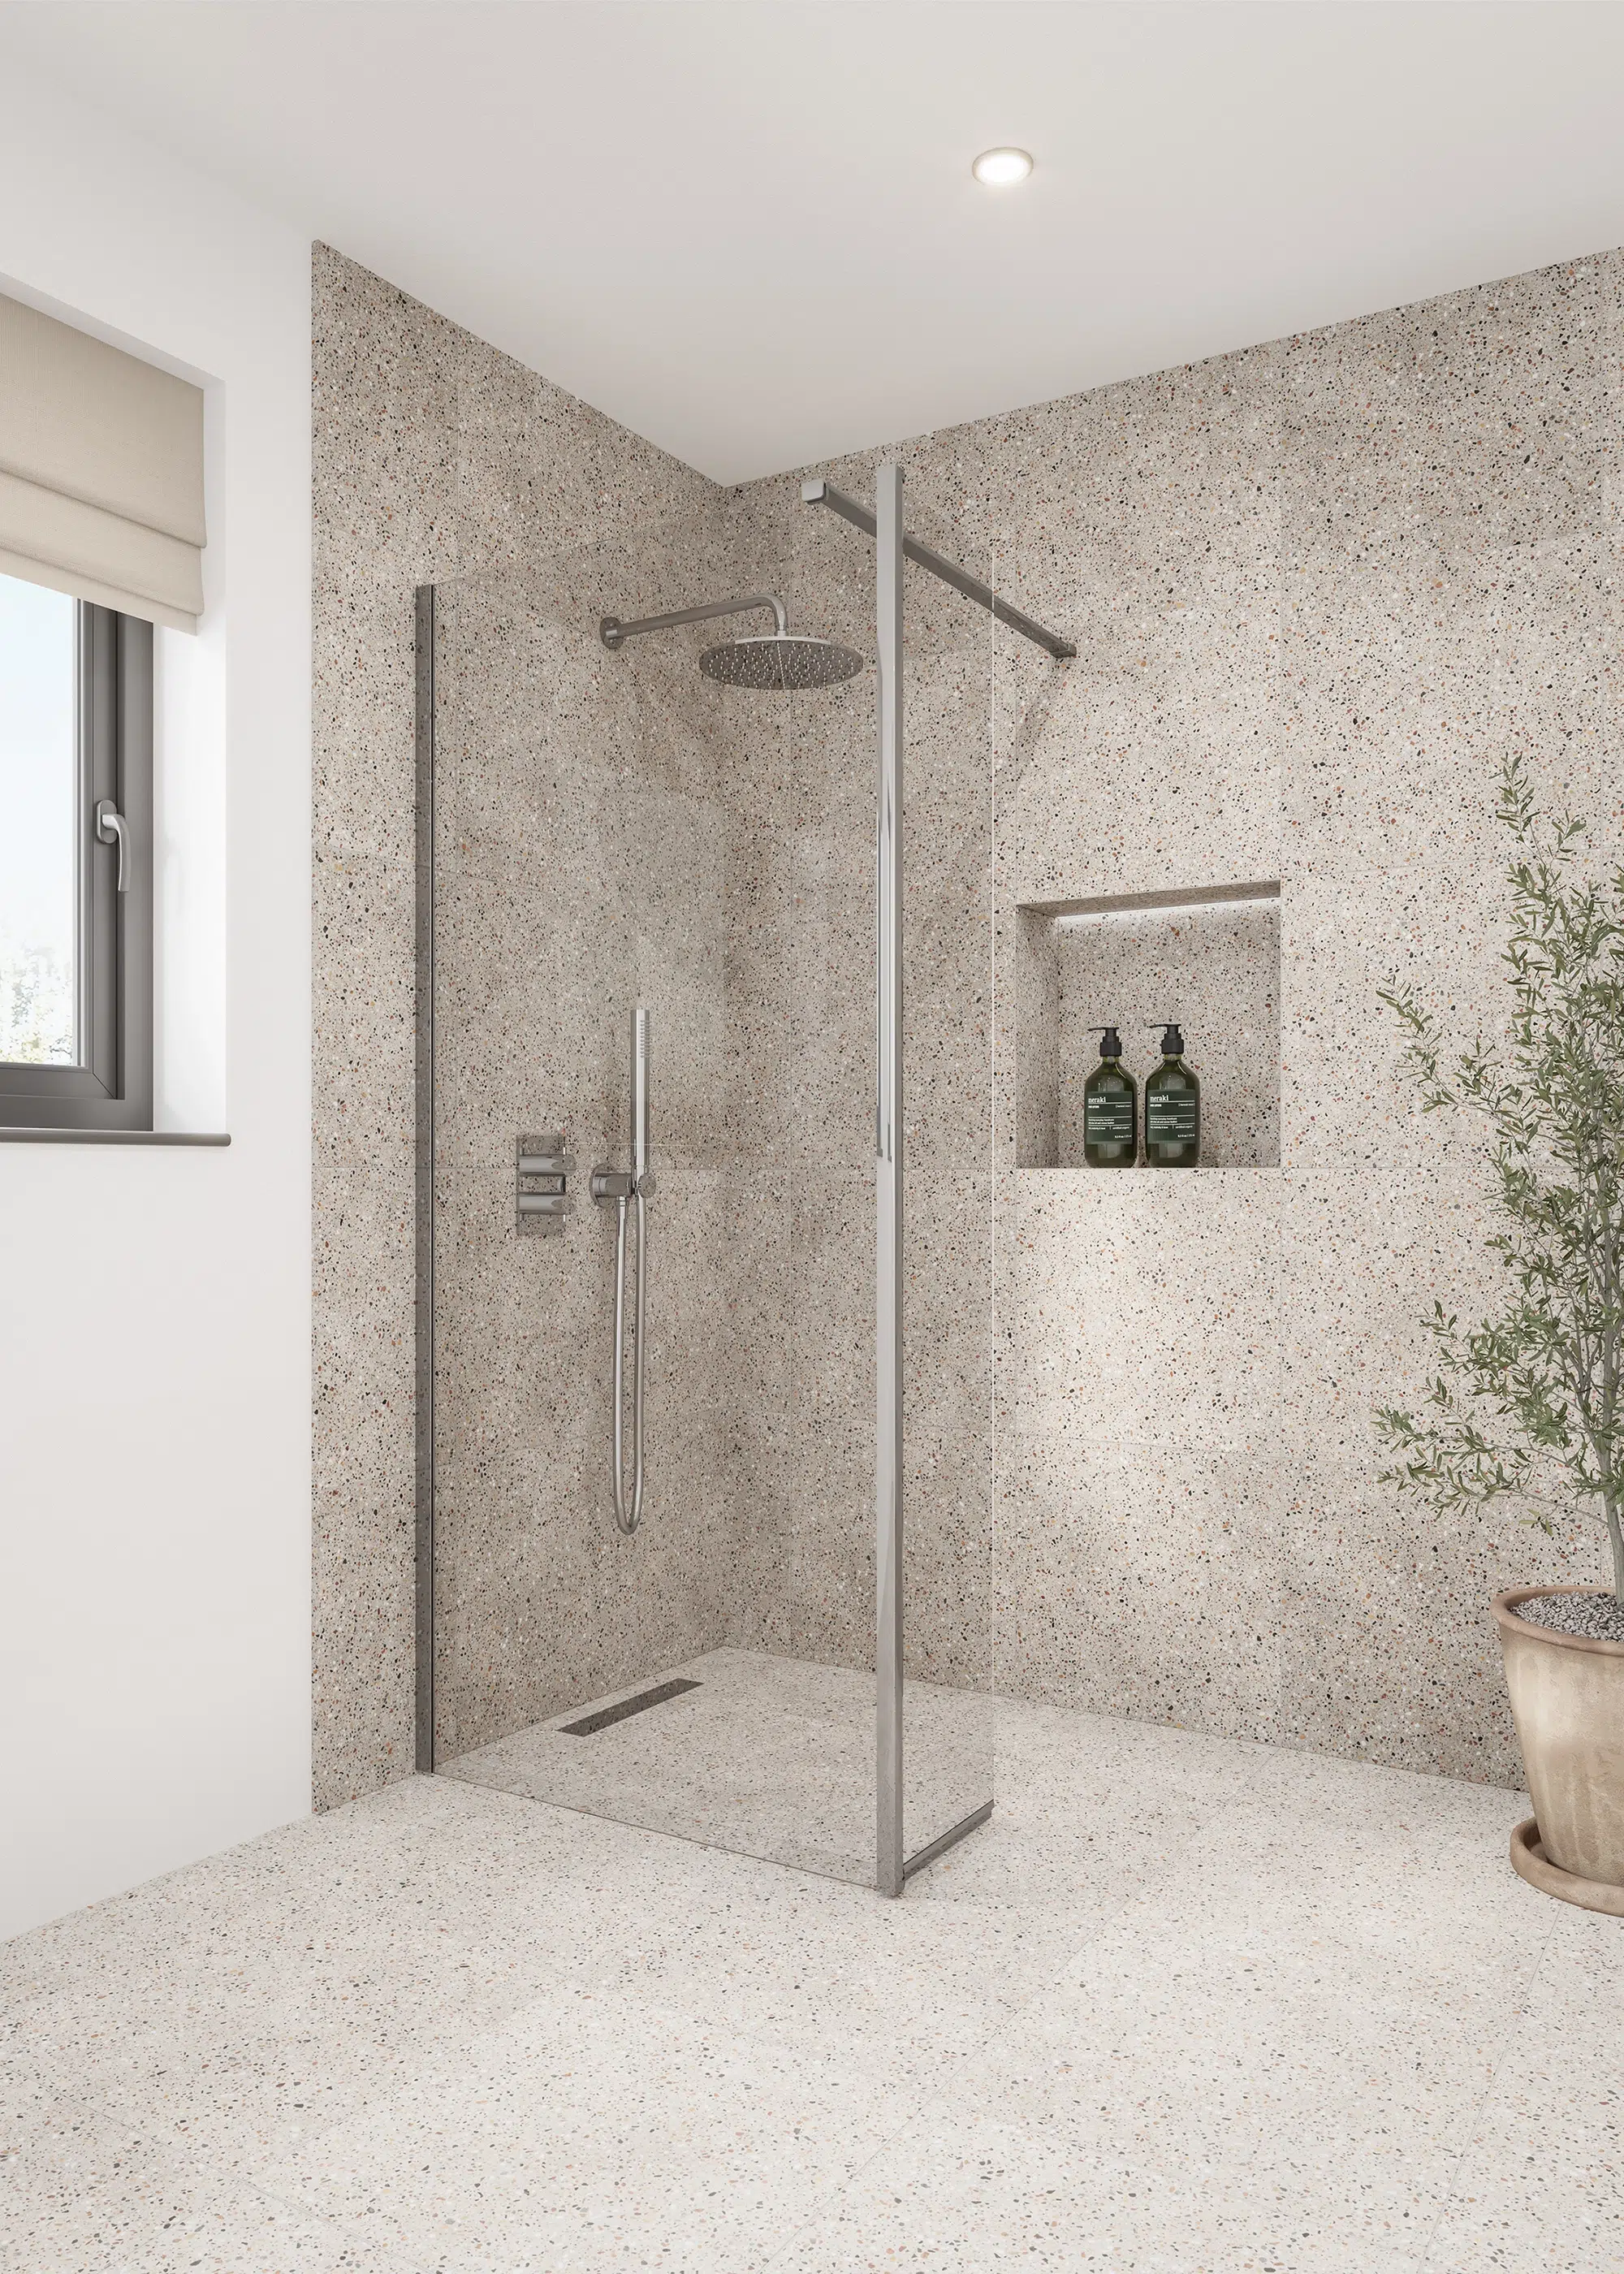
Drainage for wet rooms
The integrity of the floor itself is what will maintain the look and feel of luxury in a wet room. Effective drainage is crucial and getting it right starts with the sub-floor. “Concrete bases allow the gradient to be formed directly within the screed for a seamless finish, while timber floors require a strengthened structure capable of supporting a pre-formed tray with the slope already engineered in,” says Richard Eaton, senior design manager at Tissino. Both approaches create the same controlled path for water to reach the drain, but each require correct installation to ensure long-term stability.
This wet room scheme features the Tavo corner panel, plus a Vario shower head, handheld shower and square valve – all from Tissino
Because wood naturally absorbs moisture, it is prone to swelling, warping and potentially rot in the long-term, which can go undetected if it isn’t properly sealed. “Start by creating a stable, sloped sub-base to direct the water to the drain, then apply a full, multi-layer waterproofing system across the area, and only once this is complete should your tiles be laid,” says Alex Heslop, trend expert at Flooring Superstore.
The drainage itself will also determine how clean the room feels. In terms of performance, a high-quality stainless-steel drain with a removable tap for cleaning is an effective option for maintaining a well-functioning wet room.
“You want to make sure you have good maintenance access so that if anything does require fixing it is easy to get to,” says Daniel. “Aesthetically, we prefer linear channel drains because they sit flush with a wall or edge and can either be tiled or finished in the floor material.”
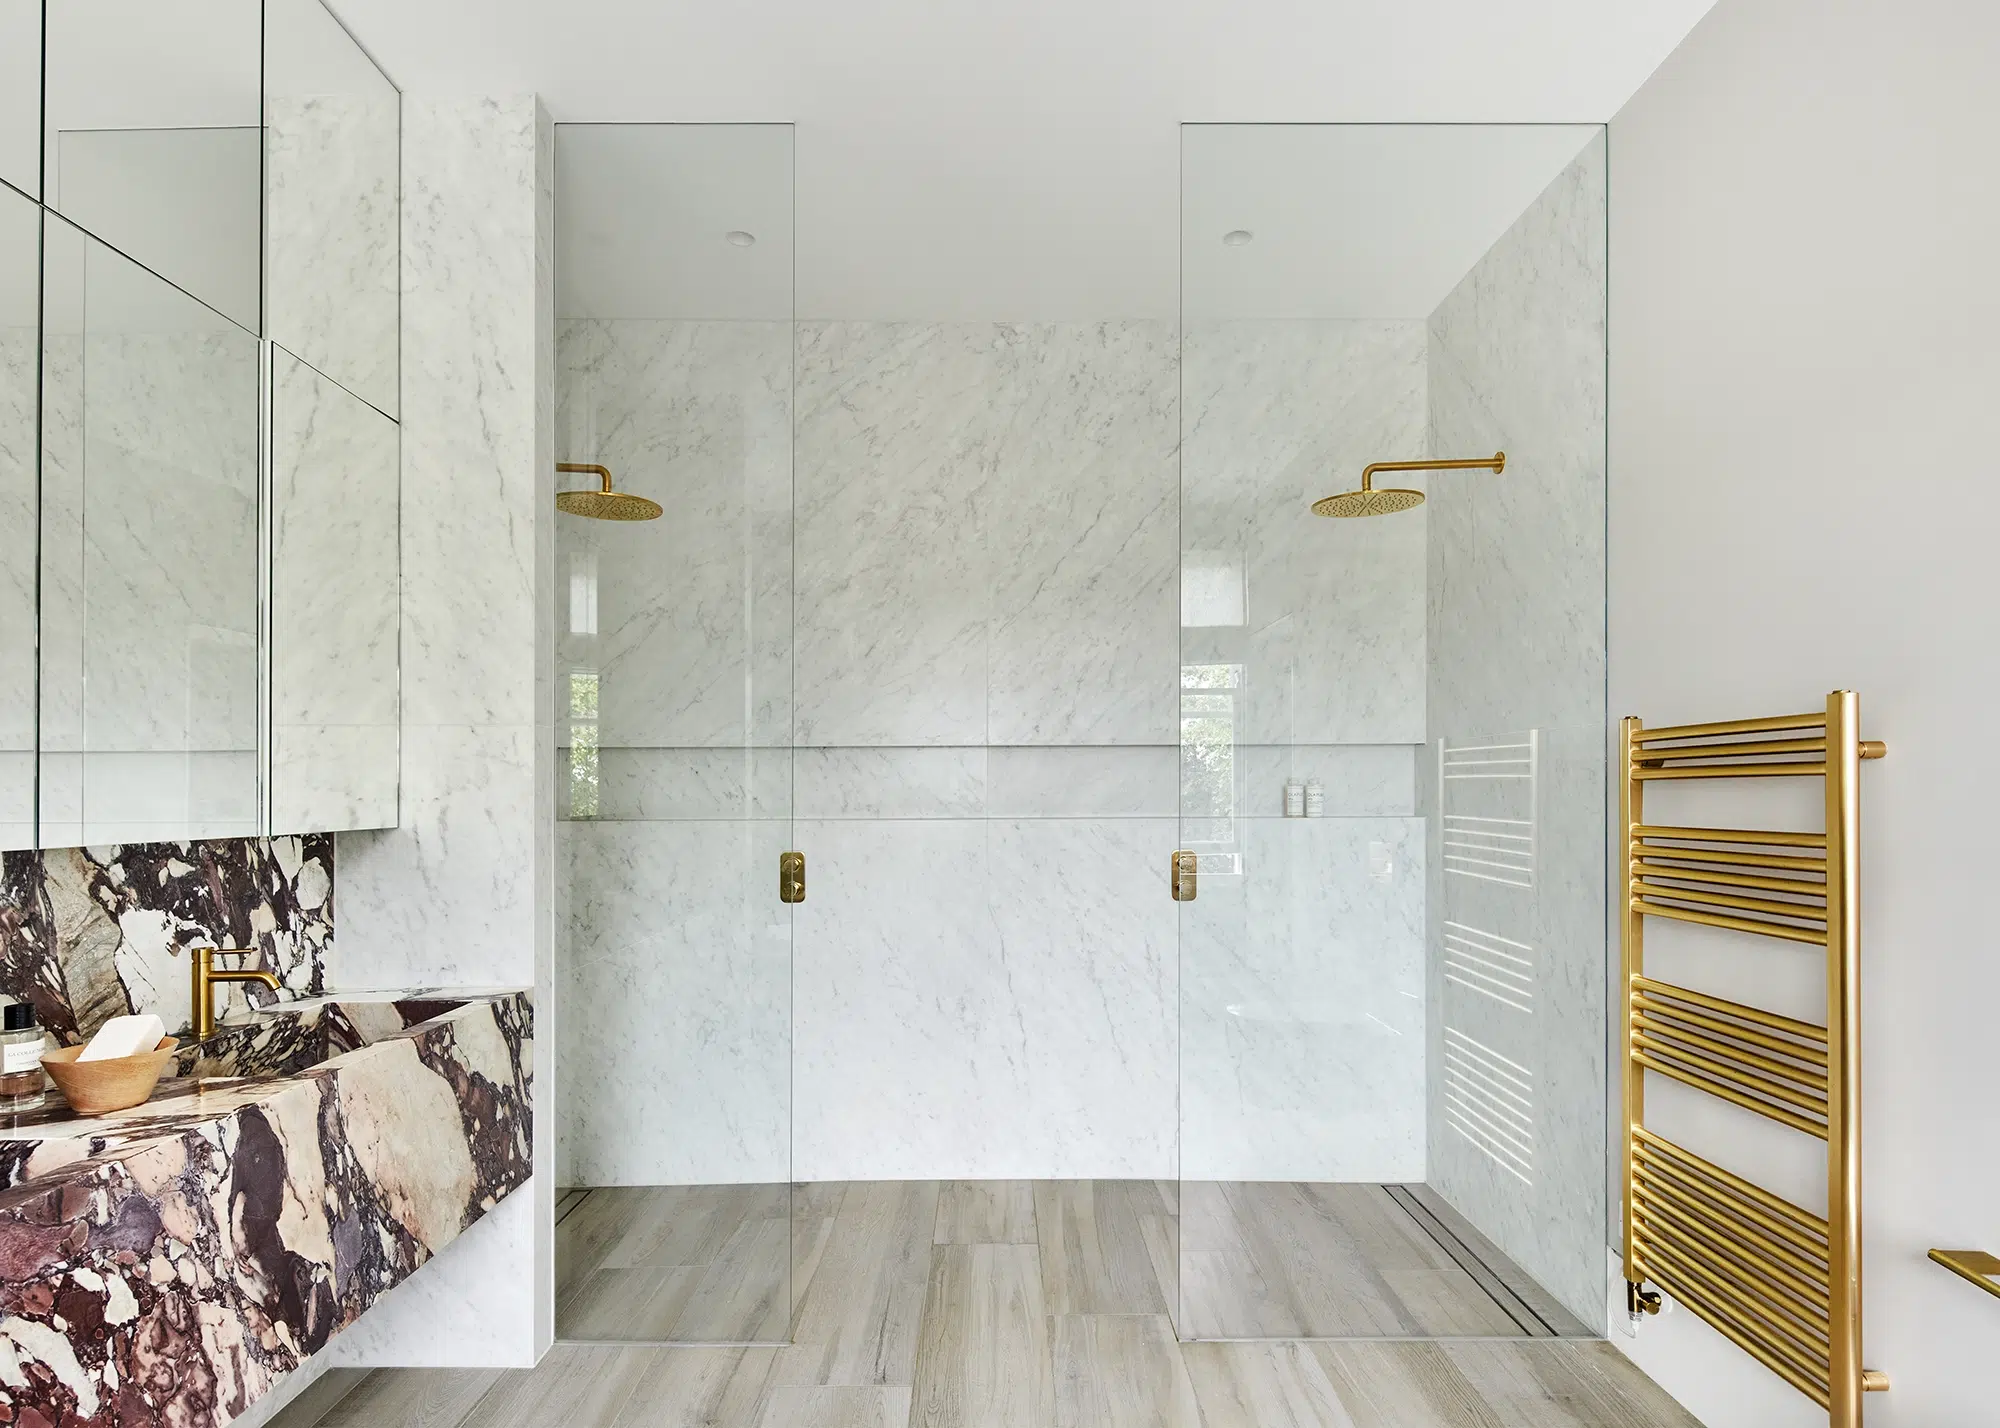
CASE STUDY Spacious wet room design
Designed by Mulroy Architects, Alan and Caroline Burns’ bathroom forms part of a main bedroom suite that extends across a double fronted Victorian house. The brief sought to achieve a luxurious finish, prioritising a spacious feel with a double shower area. Naturally, this lent itself to a wet room design, which would minimise the risk of separate enclosures breaking up the space and making the room feel smaller.

Photo: Dan Glasser
The bathroom was constructed on an existing floor, and to achieve the desired high-quality finish, it first needed to be levelled and reinforced. This was accomplished by bolting new joists alongside the existing ones, creating a flat, stable surface suitable for the linear slot drains installed against the wall. Importantly, the finished floor height did not increase.
Photo: Dan Glasser
Notable architectural considerations included the carefully integrated mirrors, task-specific lighting positioned exactly where required, thoughtfully located shower controls that prevent water exposure when activating the shower and a toilet set discreetly out of sight around the corner from the room’s entry.
| OWNERS | Alan & Caroline Burns |
| PROJECT | Renovation & extension |
| LOCATION | North London |
| SIZE | 294m² |
| PROJECT COST | £1,736,000 |
| COST PER M² | £5,905 |
Which surface materials work best in a wet room?
Surface design
In a wet room, tiles form the subtle but essential base that influences both the style and performance of the space. With no enclosure to contain water, the floor must work harder than in any other bathroom, making slip ratings key. “Mosaics are one of the most effective options, as the increased number of grout lines naturally improves traction while also allowing the surface to follow the fall with ease,” says Grazzie Wilson, head of creative at Ca’Pietra.
Material texture
Textured porcelains are another great choice, adding a soft, reassuring tactility underfoot without compromising the aesthetic of a seamless wet room. “An R10 anti-slip rating signifies a moderate level of slip resistance, providing a good balance between safety and aesthetics,” says Alex. For additional reassurance, it could be worth looking for tiles rated R11 and R12. Ultimately, the aim is to create a floor that you will feel confident walking on even when wet and functions effortlessly with the gradient below.
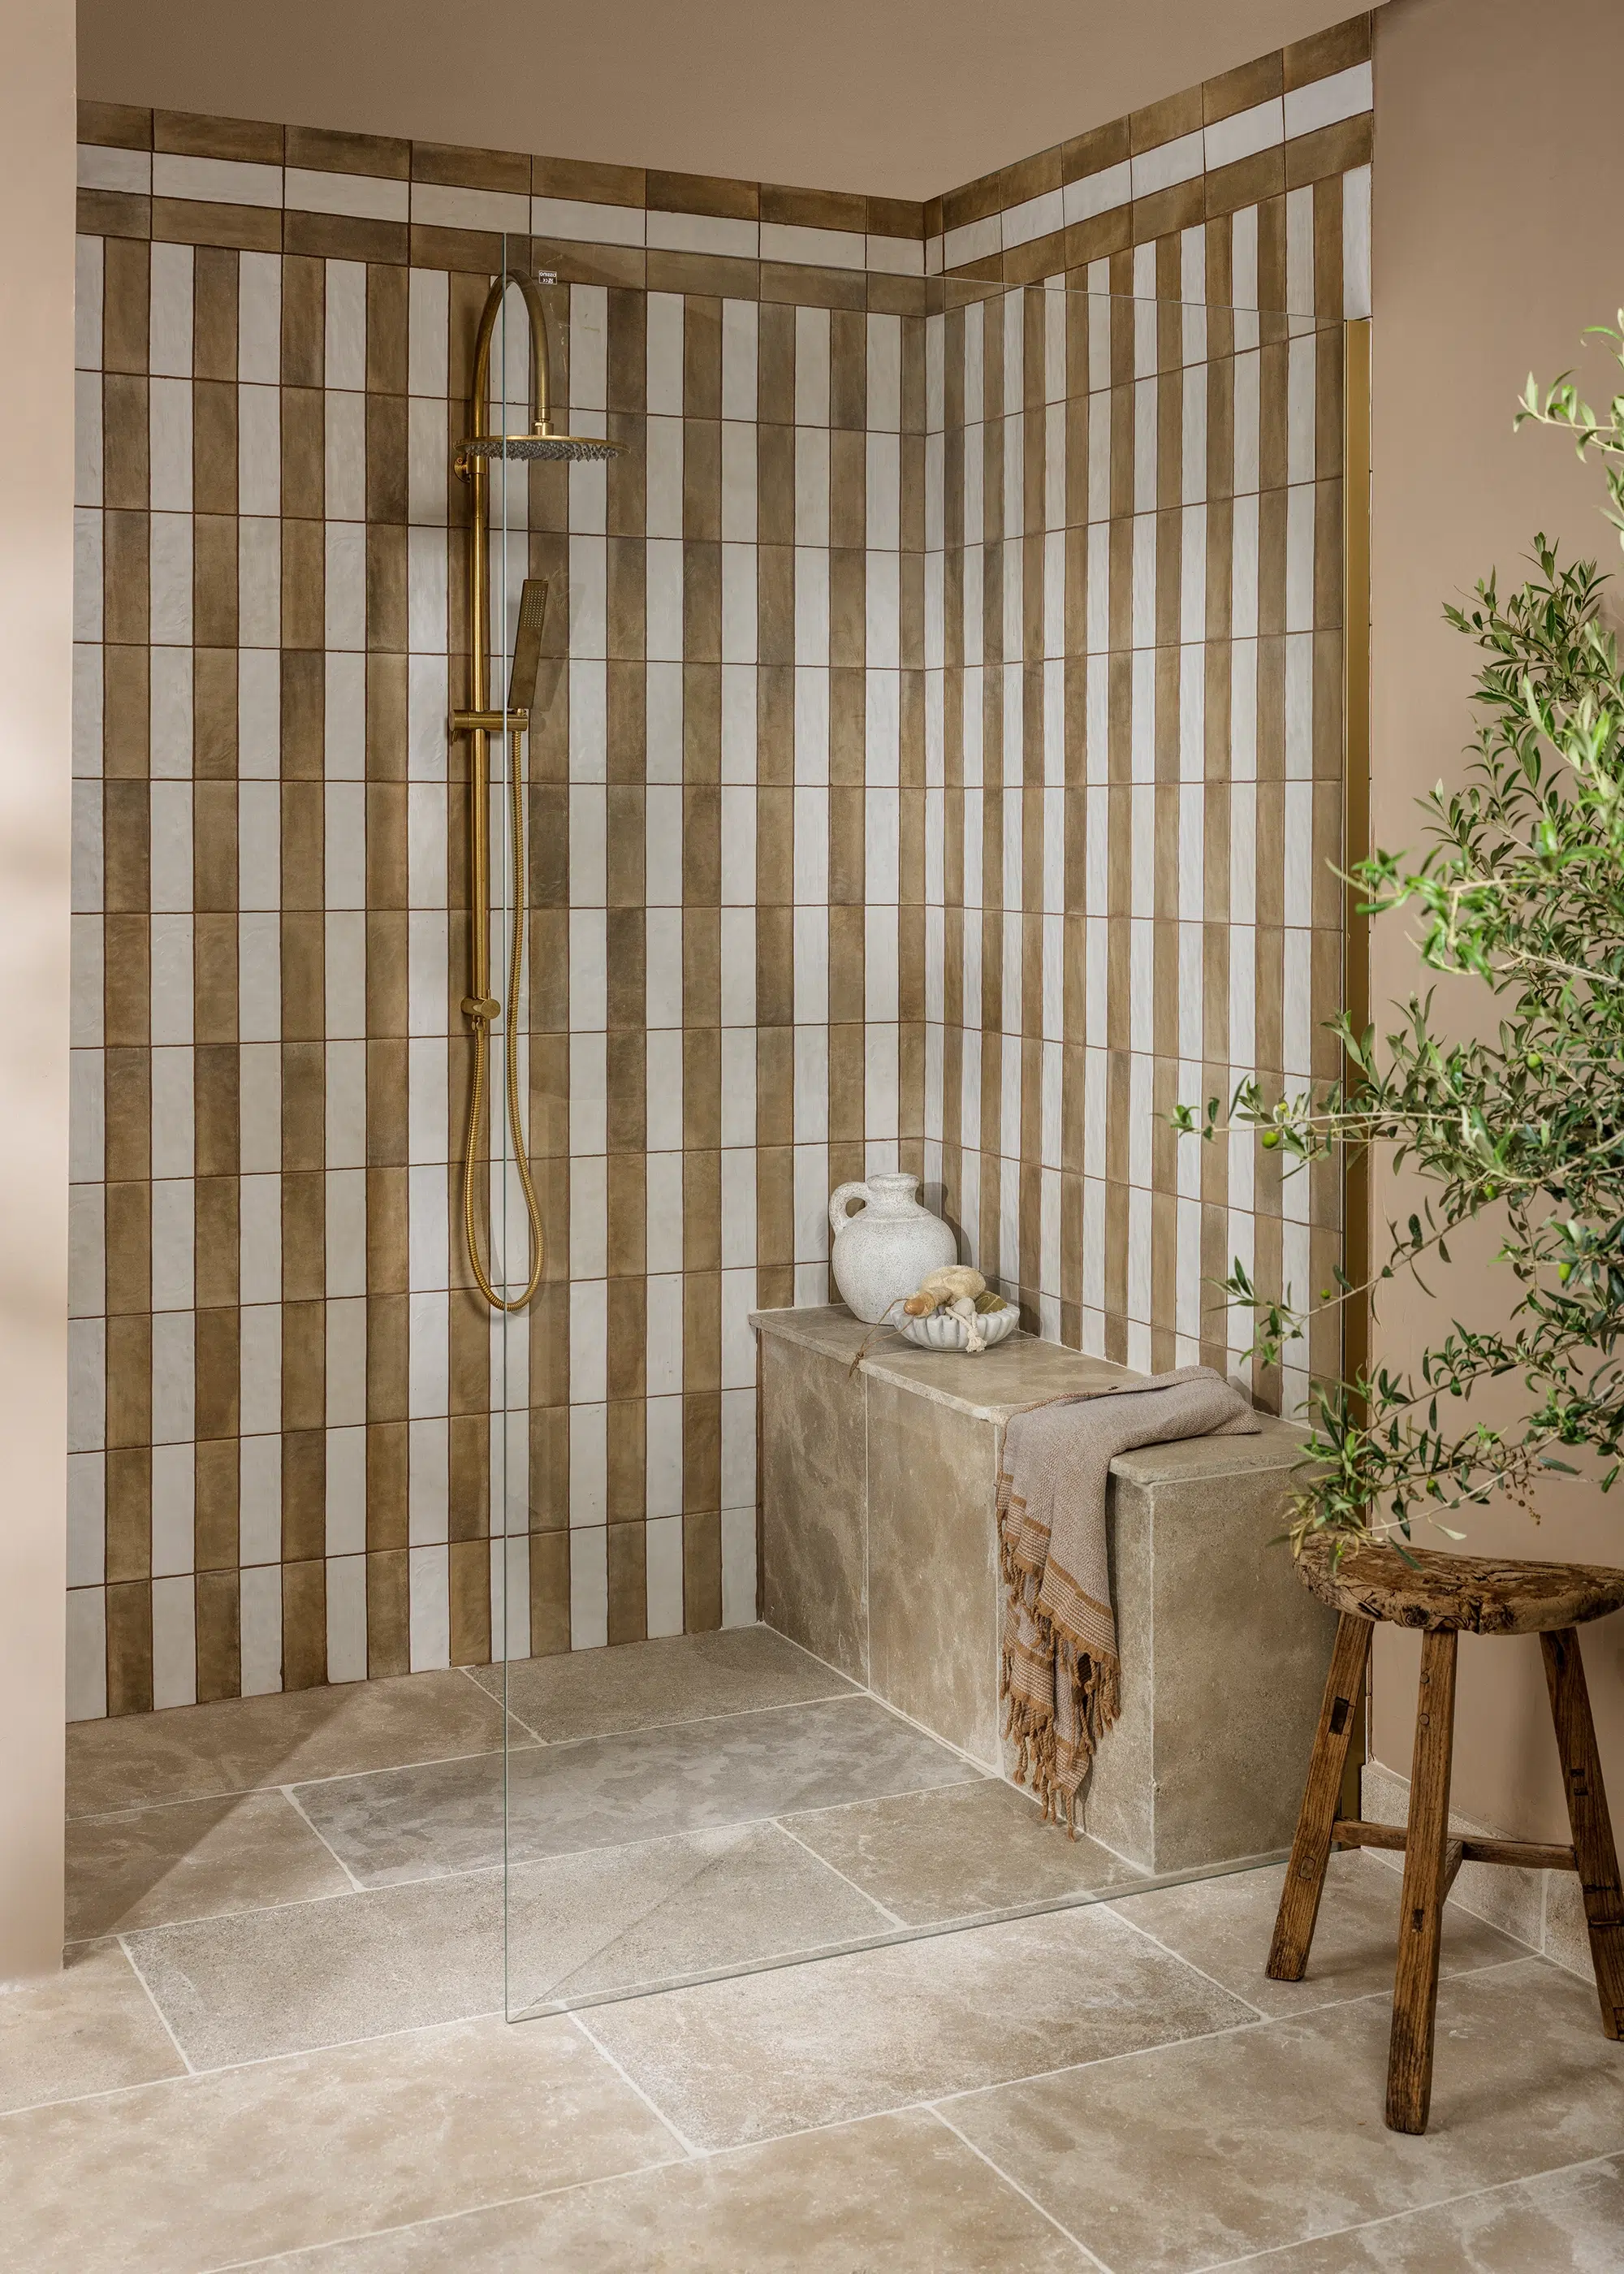
Inspired by the rustic nomadic tile trend, Ca’Pietra celebrates the use of raw materials and handcrafted character in this wet room design
Tile size
Tile size is ultimately a matter of preference. Small tiles make navigating drains simpler and can enhance slip resistance, whereas larger tiles deliver a serene, uninterrupted look that suits a minimal scheme. Blending the two can also introduce a creative design. “For grout, choosing an epoxy option is key, as its enhanced waterproof and stain-resistant qualities help mask the marks and mildew that often develop in wet room environments,” says Alex.
Wall tiles
Wall tiles carry a different kind of responsibility, although matching the floors to walls is a popular choice for wet rooms. Large formats create a sense of calm through uninterrupted planes of colour, whereas smaller tiles or decorative ceramics can help define specific zones and draw the eye to key architectural features.
Waterproofing & ventilation considerations
The layers beneath the tiles are equally important. A fully-tanked system ‒ where a continuous waterproof membrane wraps the floor and lower walls ‒ protects the space from daily water exposure, while insulation boards help stabilise surface temperatures and reduce movement that could otherwise compromise the tile finish. Installed in the right sequence, these components create a watertight, resilient core that allows the visible materials to perform without strain.
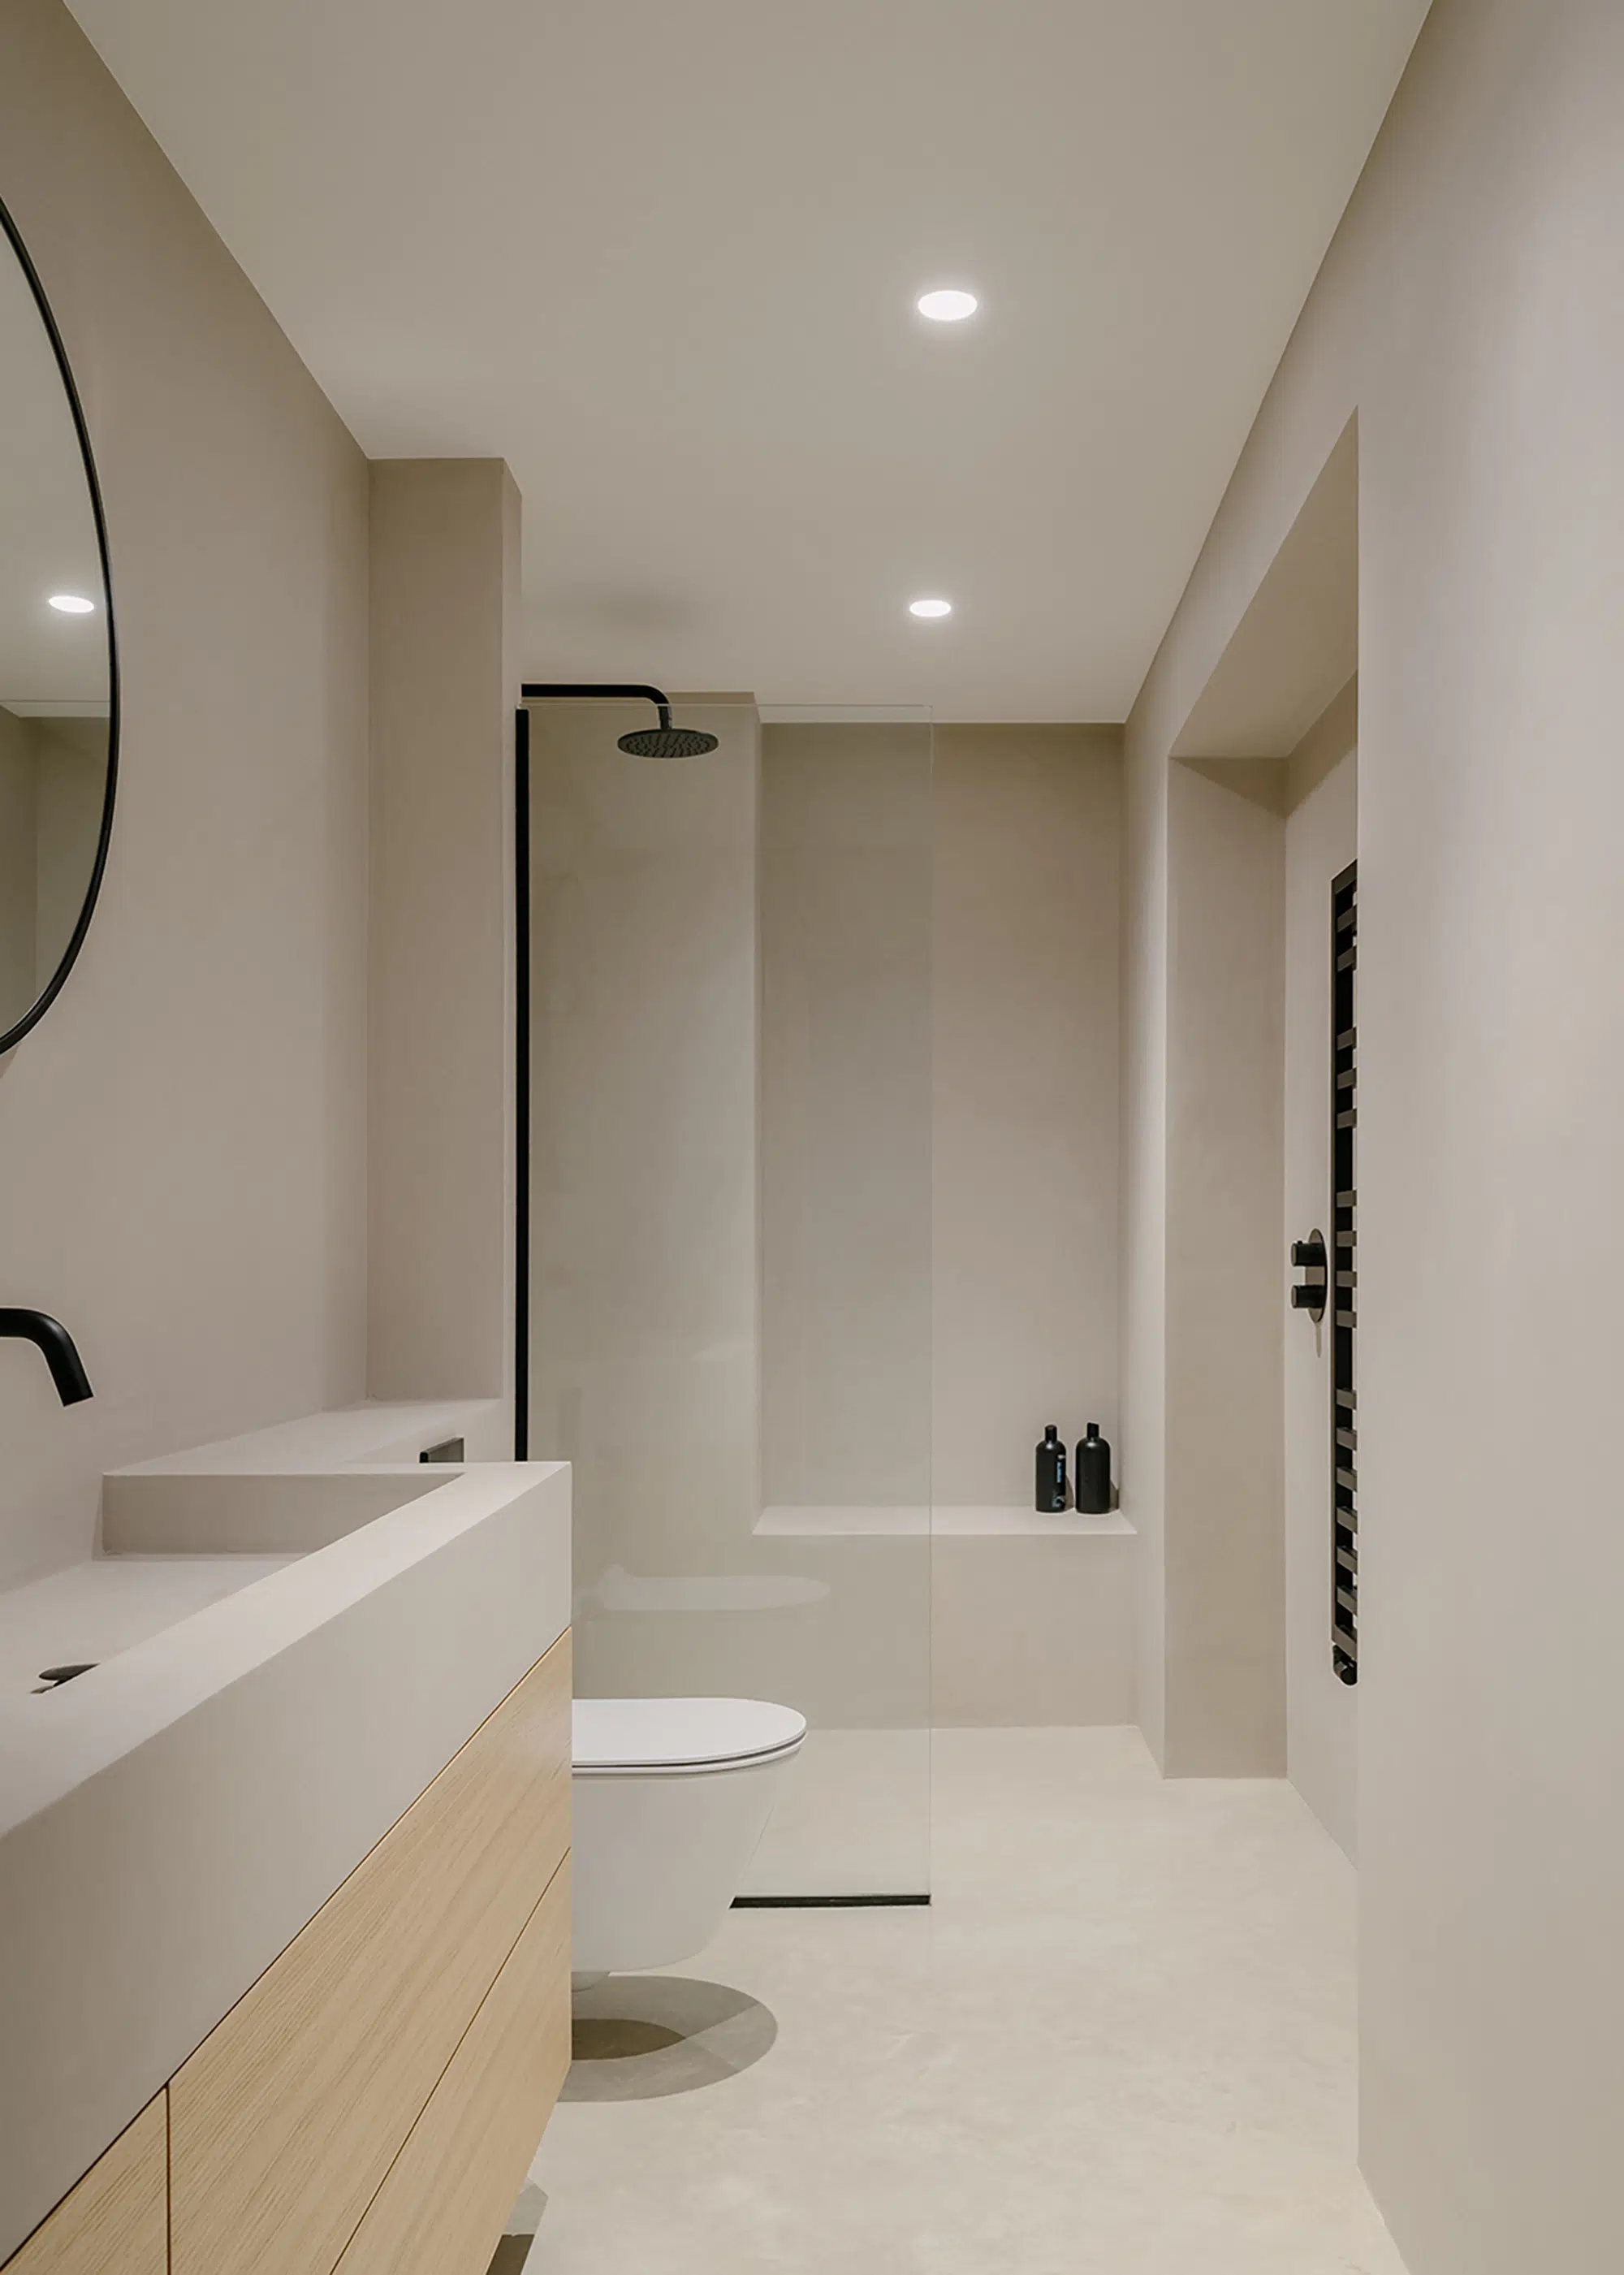
Designed by The DHaus Company, this wet room features microcement as its primary material, creating a sense of continuity with the rest of the property, which flaunts a modern, industrial style. Photo: James Retief
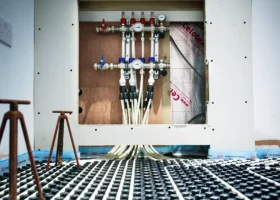
Pipe routes should be short and predictable, ideally running along one serviceable wall to make future maintenance easier and more accessible. Futureproofing means allowing space for shut-off valves, selecting high-quality concealed fittings and ensuring the waterproofing continues behind all built-in elements. “We usually specify concealed cisterns, wall hung appliances and underfloor heating as it keeps floors dry and removes the need for bulky radiators,” says Daniel.
Ventilation is the final component of the technical framework. Wet rooms generate more moisture and steam than ordinary bathrooms, so the extraction system needs to operate in accordance with how it is being used. Paired with humidity sensors, an extractor placed close to the shower area will be able to clear steam before it has chance to settle. “Even a modest opening window can help create gentle cross-ventilation when combined with a high-performance fan, reducing the risk of mould and preserving the condition of grout, silicone and finishes over time,” says Richard.
Wet room FAQs

Do wet rooms only work in large bathroom spaces?
Wet rooms can work beautifully in compact spaces as well as generous ones. In smaller rooms, the openness can actually make the footprint feel larger, provided the layout directs water away from the entrance and dry zones. Careful positioning of the showering area, good control of the fall and the right screen or panel will keep allow free movement within the space. Larger rooms offer more freedom, but the guiding principles remain the same: ensure there is a clear flow, controlled drainage and fully waterproofed surfaces.
How can I prevent a wet room from leaking?
A successful wet room starts with the structure you cannot see. The entire floor and lower wall sections should be tanked using a continuous waterproofing system with reinforced corners and fully sealed joints. The gradient must guide water to the drain without pooling, and the substrate needs to be stable, so tiles and grout are not put under stress. When the waterproofing, drainage and installation are carried out as a single, coherent system, the wet room becomes reliably watertight.
Can any bathroom be converted into a wet room?
Most bathrooms can be converted into wet rooms, but the method depends on the original building’s construction.
Concrete floors generally allow the fall to be formed directly in the screed, while timber floors usually require strengthening and a pre-formed tray to create the gradient.
Adequate ventilation, drainage capacity and a full tanking system are essential for any room. With the right preparation, even awkward layouts or older properties can accommodate a wet room, provided the technical groundwork is thorough enough.
What are the benefits of a wet room vs a walk-in shower?
A wet room offers a level of openness and ease of movement that a walk-in shower cannot quite replicate. With the floor uninterrupted and the drainage concealed within the overall construction, the room feels more spacious and less segmented. It also improves day-to-day practicality, especially for anyone with limited mobility. A walk-in shower remains a good option, but a full wet room introduces greater visual continuity, more accessible layouts and a design freedom that suits both small and large spaces.
How can a wet room be safely installed on upper floors?
Installing a wet room upstairs is entirely achievable, provided the structure is prepared correctly. Timber joists often need reinforcing to remove flex, as even small amounts of movement can compromise waterproofing over time. A tray former or compatible system is then fitted to create the fall. The room is fully tanked to form a continuous waterproof shell, and ventilation is improved to manage humidity. Once the technical work is complete, the tiles and finishes perform exactly as they would at ground level.
Amandine Lefevre

You may be interested in


Our sponsors


Comments are closed.