
Estimate your project costs instantly with Build It's interactive self-build cost calculator
Calculate NowGet an accurate, detailed cost breakdown of your project
Submit plans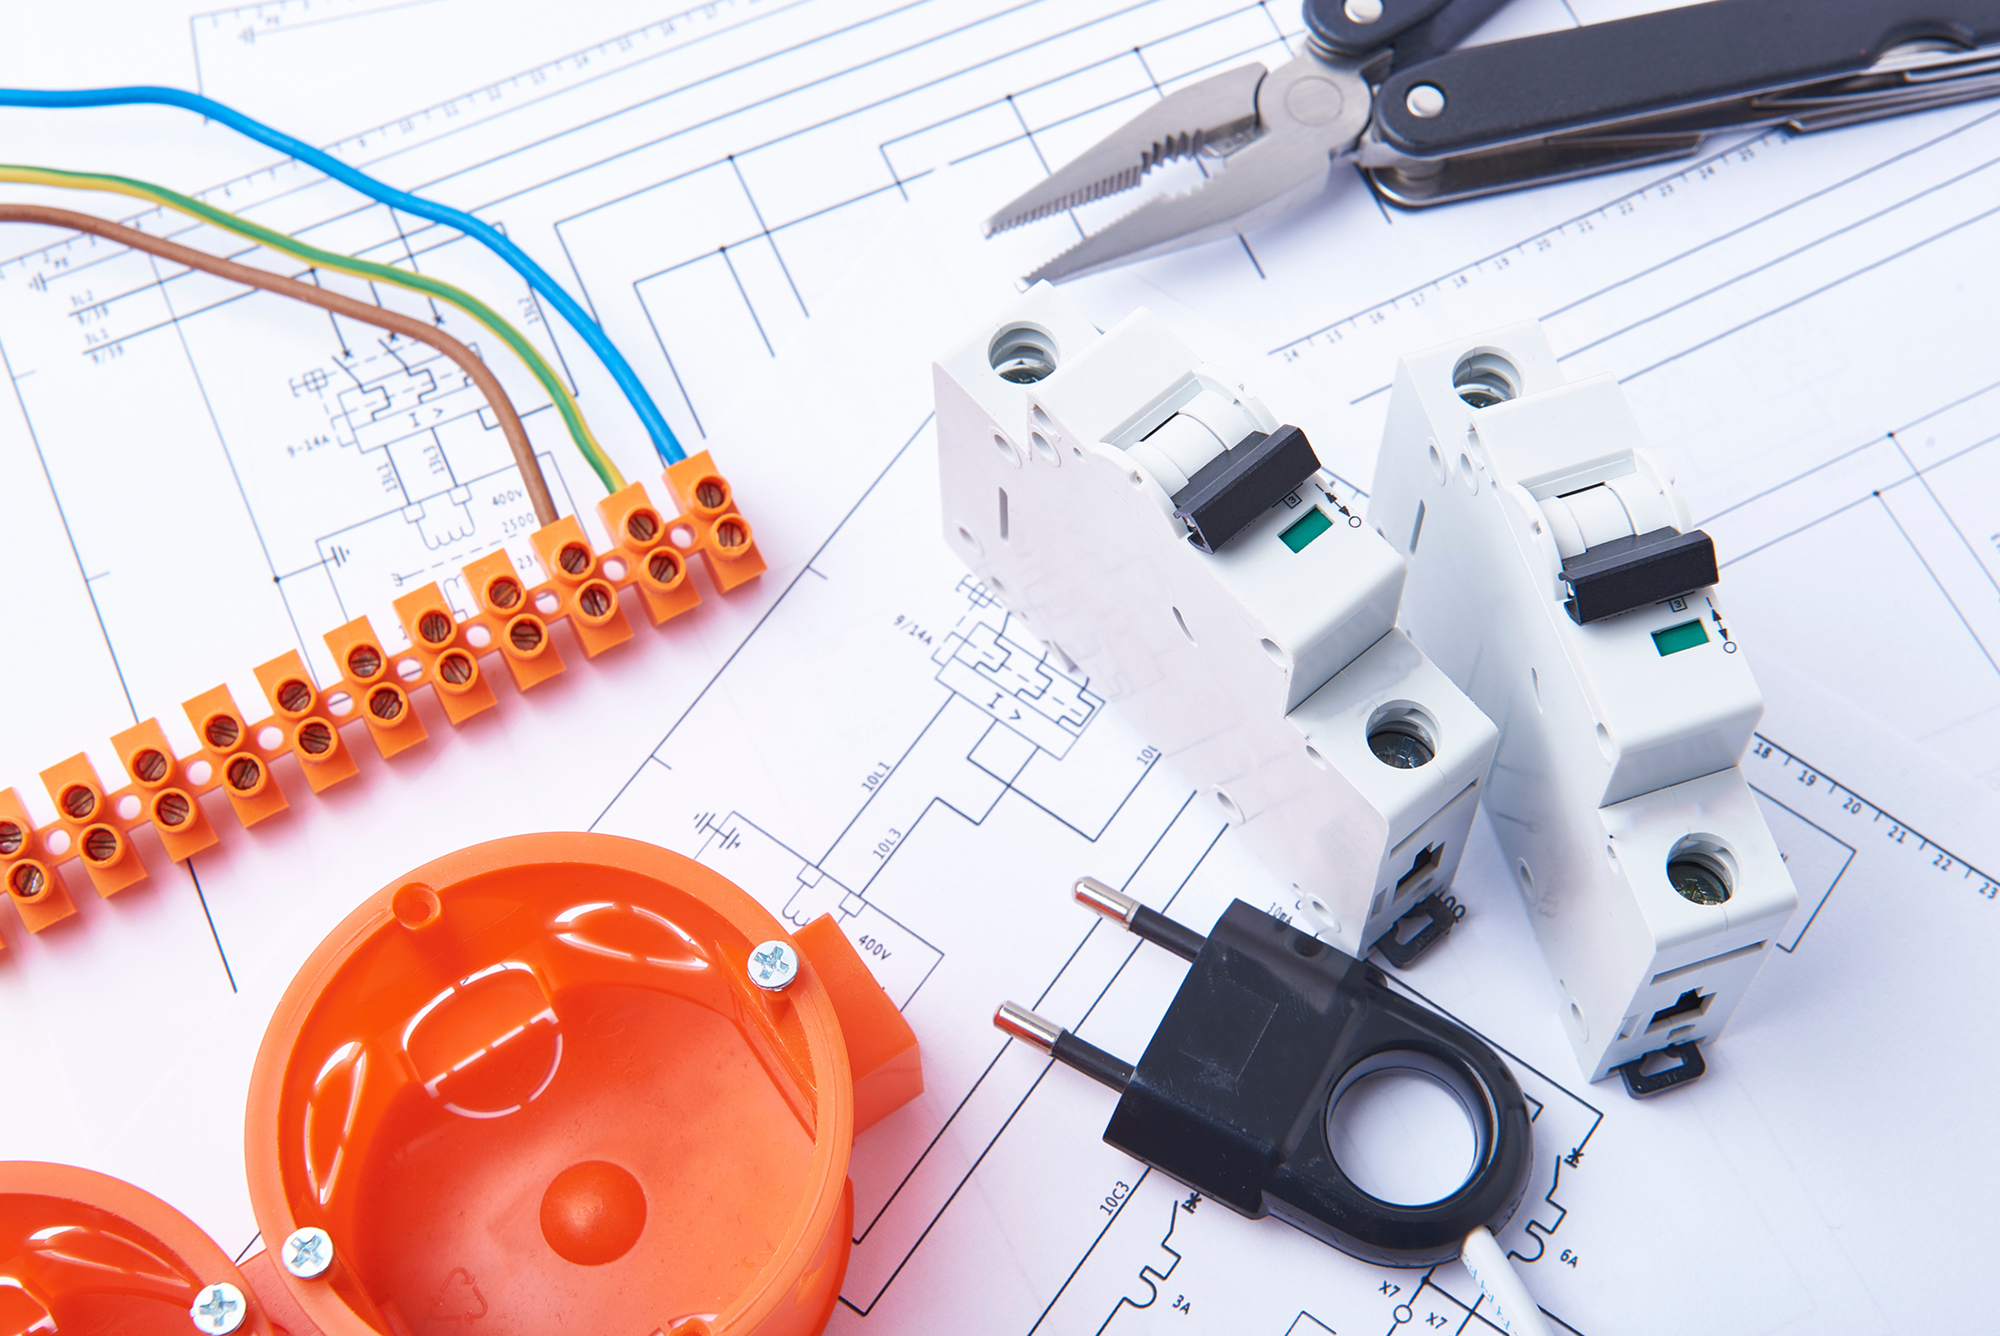
Electrical work is something you can do yourself but it is covered by the Building Regulations and so you will have to have it checked and approved by your Building Control service. Alternatively, electricians who are registered as ‘competent persons’ and able to self-certify their work under the Building Regulations (Part P in England and Wales) can provide certification on completion and thus avoid this process. It’s best to use an electrician – you can check that they are registered for Part P through their registered body (for example, NICEIC, ECA) by quoting their trading name, address and registration number.
The codes of the Institute of Electrical Engineers (IEE) – known as the ‘wiring regulations’ – are complex and come in many parts, but are considered to be the industry standard. Compliance with them is compliance with the Building Regulations – Part P and you should always insist of any electrician that when finished they commission and certify their work to be in accordance with them. Even if an electrician isn’t registered, they have a legal obligation to issue you with a certificate once the work is complete, verifying (or rather taking responsibility for) the installation.
Before you engage on the first-fix process of installing the electrical cables, it is worth marking up the floorplans with your requirements. Starting with the power circuits, identify the position of socket outlets and assume you are only going to install double or triple outlets – it isn’t worth bothering with single ones because the labour cost is the same and the material cost only marginal.
Accessibility requirements under the Building Regulations mean that switches and outlets have to be located between 450mm and 1200mm of finished floor level. Power points in new homes can no longer be fitted just above skirting level but instead have to be located in this higher, more easily reached zone, and your electrician will need to know where the finished floor level will be to get it right. Mark it on the walls, so there is no guesswork.
When it comes to locating the switches for lights, finding the right position on the wall is essential. For example, when you walk into a dark room you are going to need to find that switch instinctively by touch rather than sight, so spend some time walking from room to room before you settle on where to locate the switches and light fittings. Loop-in circuits are usually used. These pick up each light fitting as they go around the house, with four terminals in each fitting (including the earth terminal) allowing wires to run in from the switching as well as supply the electricity and loop-in to the next fitting on the circuit. They are usually laid out to cover no more than about eight lights, given the uncertainty over the wattage of the lamps that are going to be fitted to the circuit. This number could be significantly increased if lamps of no more than 100 watts, for example, were to be assumed but you also have to provide at least 30 per cent of them as energy efficient fittings.
Small compact tubular fluorescents can be fitted to recessed spot lamps as well as pendent lights as indeed can LEDs (light emitting diodes). You might consider using 2 watt white LED spotlights as wall lights in rooms such as bedrooms and lounges, where less light is needed, but remember that they are not easily repositioned if your furnishings are re-planned. The wall light cabling will be buried in a conduit within the wall finishings, and therefore inaccessible by the time the second-fixing is done. If they include bedside or picture lights, then getting them in the right position now is even more critical.
Although protection metal conduit isn’t required if you run the cable in permitted safe routes at 90º to fittings, it pays to insist on its use anyway. Do not allow cables to wander in wavy lines across walls and floors – straight lines are essential – and where they pass through they should do so through holes drilled away from the end-bearing quarter and the centre third of the span, in the zone between 0.25 and 0.4 of the span when measured from either end.
Because of the increased risk of electrocution in the wet rooms of your home, cross-bonding is required to all exposed metalwork (for example, pipes, metal baths, showers, etc) in these areas. Earthing clamps are used to attach the cables to the conductive parts (and labels identifying they are for safety and not to be removed are secured nearby the connection.) Earth bonding is insulated in green and yellow sleeving and the connection should be made to bare metal, not painted or decorated metal so make sure whoever does the decorating knows this.
Since April 2007 Building Regulations have stipulated that all new homes be installed with extended mains-powered smoke alarms. Outside of bedrooms, one can be positioned on the landing or hallway. However, since fires tend to occur in kitchens and living rooms more than anywhere else, these rooms should have alarms within them. Each one should be inter-linked to the others so that when one of the detectors is activated, it triggers the alarm in the others and they all sound off together.
Most of these mains-operated units are still equipped with batteries for a back-up supply should the electrics be knocked-out during a fire. You can also wire in mains-powered fire alarms from the lighting circuit if you don’t wish to install a separate fire alarm circuit from the distribution board. Kitchens and garages should be only be protected by heat detectors that activate when a certain temperature (around 57ºC) is reached. Leave their dust covers in place until you move in.
Rapid air removal is required for wet rooms such as bathrooms and kitchens whether windows open or not. In kitchens the most effective fans are the cooker hob extractors that suck out the steam direct from the source and expel it to the outside air. The charcoal filter types are not an acceptable alternative and you need to plan the position of the cooker with the fan, among other things, in mind to be sure that you can duct it to the outside air. They can be run between joists or over the top of wall units. Bathroom fans can be less powerful and typically need to extract at least 15 litres of air per second, whereas kitchens need at least two to four times that amount to cope with the condensation from cooking.
Arranging for the electricity board to connect your new home to the National Grid is something that needs doing well in advance. The meter box may have been provided by you, but the equipment in it will be installed on connection by them and joined up to the cable ‘tails’ left by your electrician, who should leave enough cable length for them. It may cost you if it has to be extended because they were too short. Electricity supply companies always reserve the right not to connect the supply (or alter it from temporary to permanent) to your home if they believe the installation is unsafe.


 Login/register to save Article for later


Comments are closed.