Just over two weeks to go until our brand new show!
Build your dream home with confidence
BOOK YOUR TWO FREE TICKETS HEREBuild your dream home with confidence
BOOK YOUR TWO FREE TICKETS HEREEstimate your project costs instantly with Build It's interactive self-build cost calculator
Calculate NowGet an accurate, detailed cost breakdown of your project
Submit plans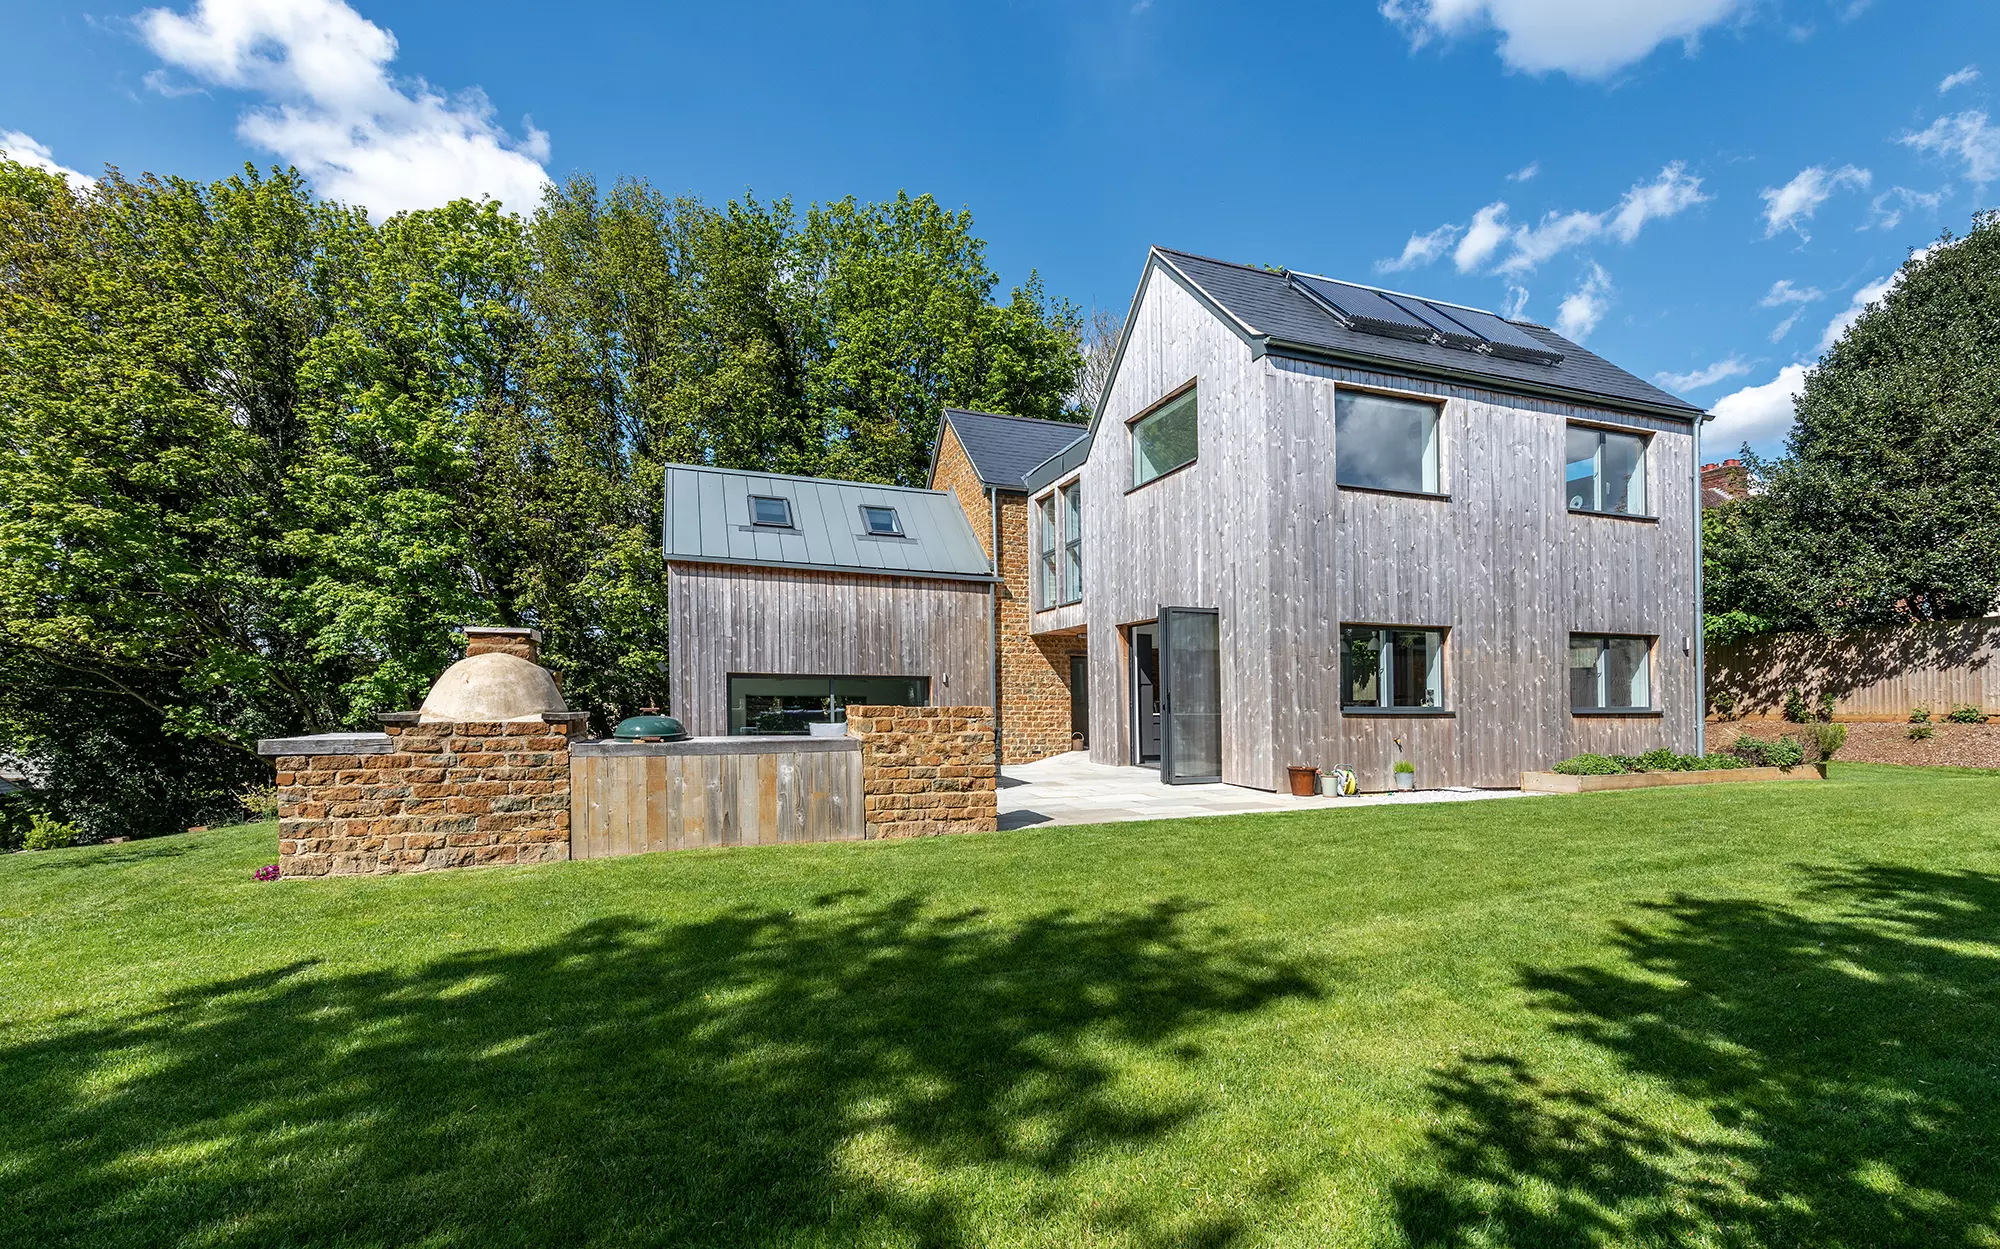
Frances and Tom Edwards pushed hard to achieve their self build home goals. Their decision to take on the project came after the couple converted a former village post office and had twin girls – now eight – and needed more space.
Frances wasn’t keen on moving far: “Tom felt we should build a big family home now while the kids were still young, which we could enjoy together,” she says. “I agreed, but only if we could find a plot close by.”
As a regional director for a global property design consultancy, one of Tom’s responsibilities is to technically appraise new sites for clients and bring them into the development cycle. He went about the search for their own plot in a similar way.
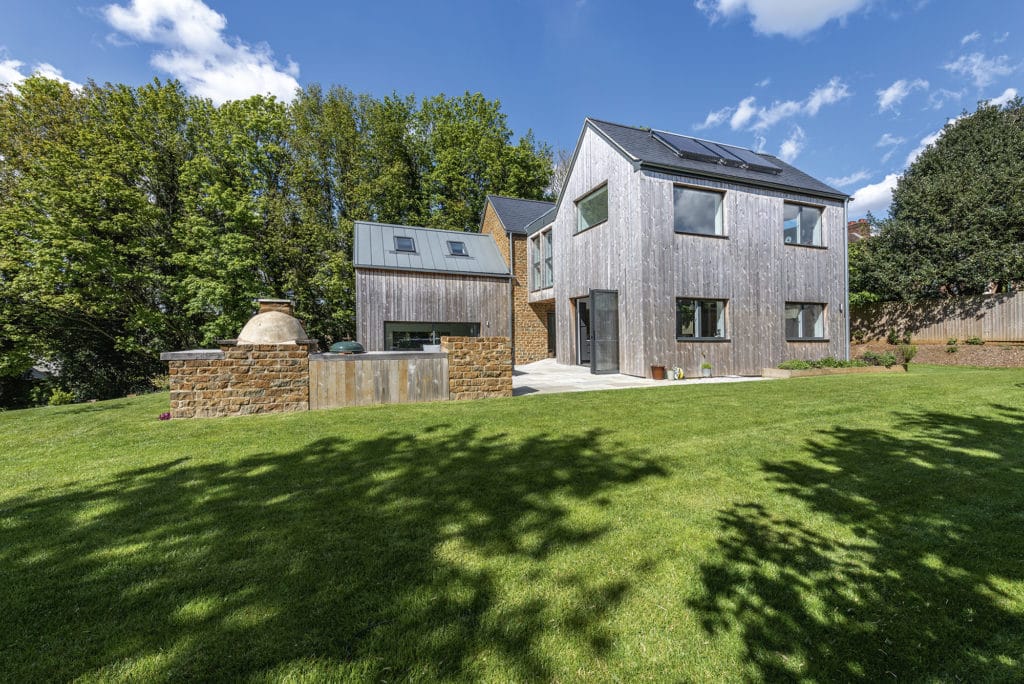
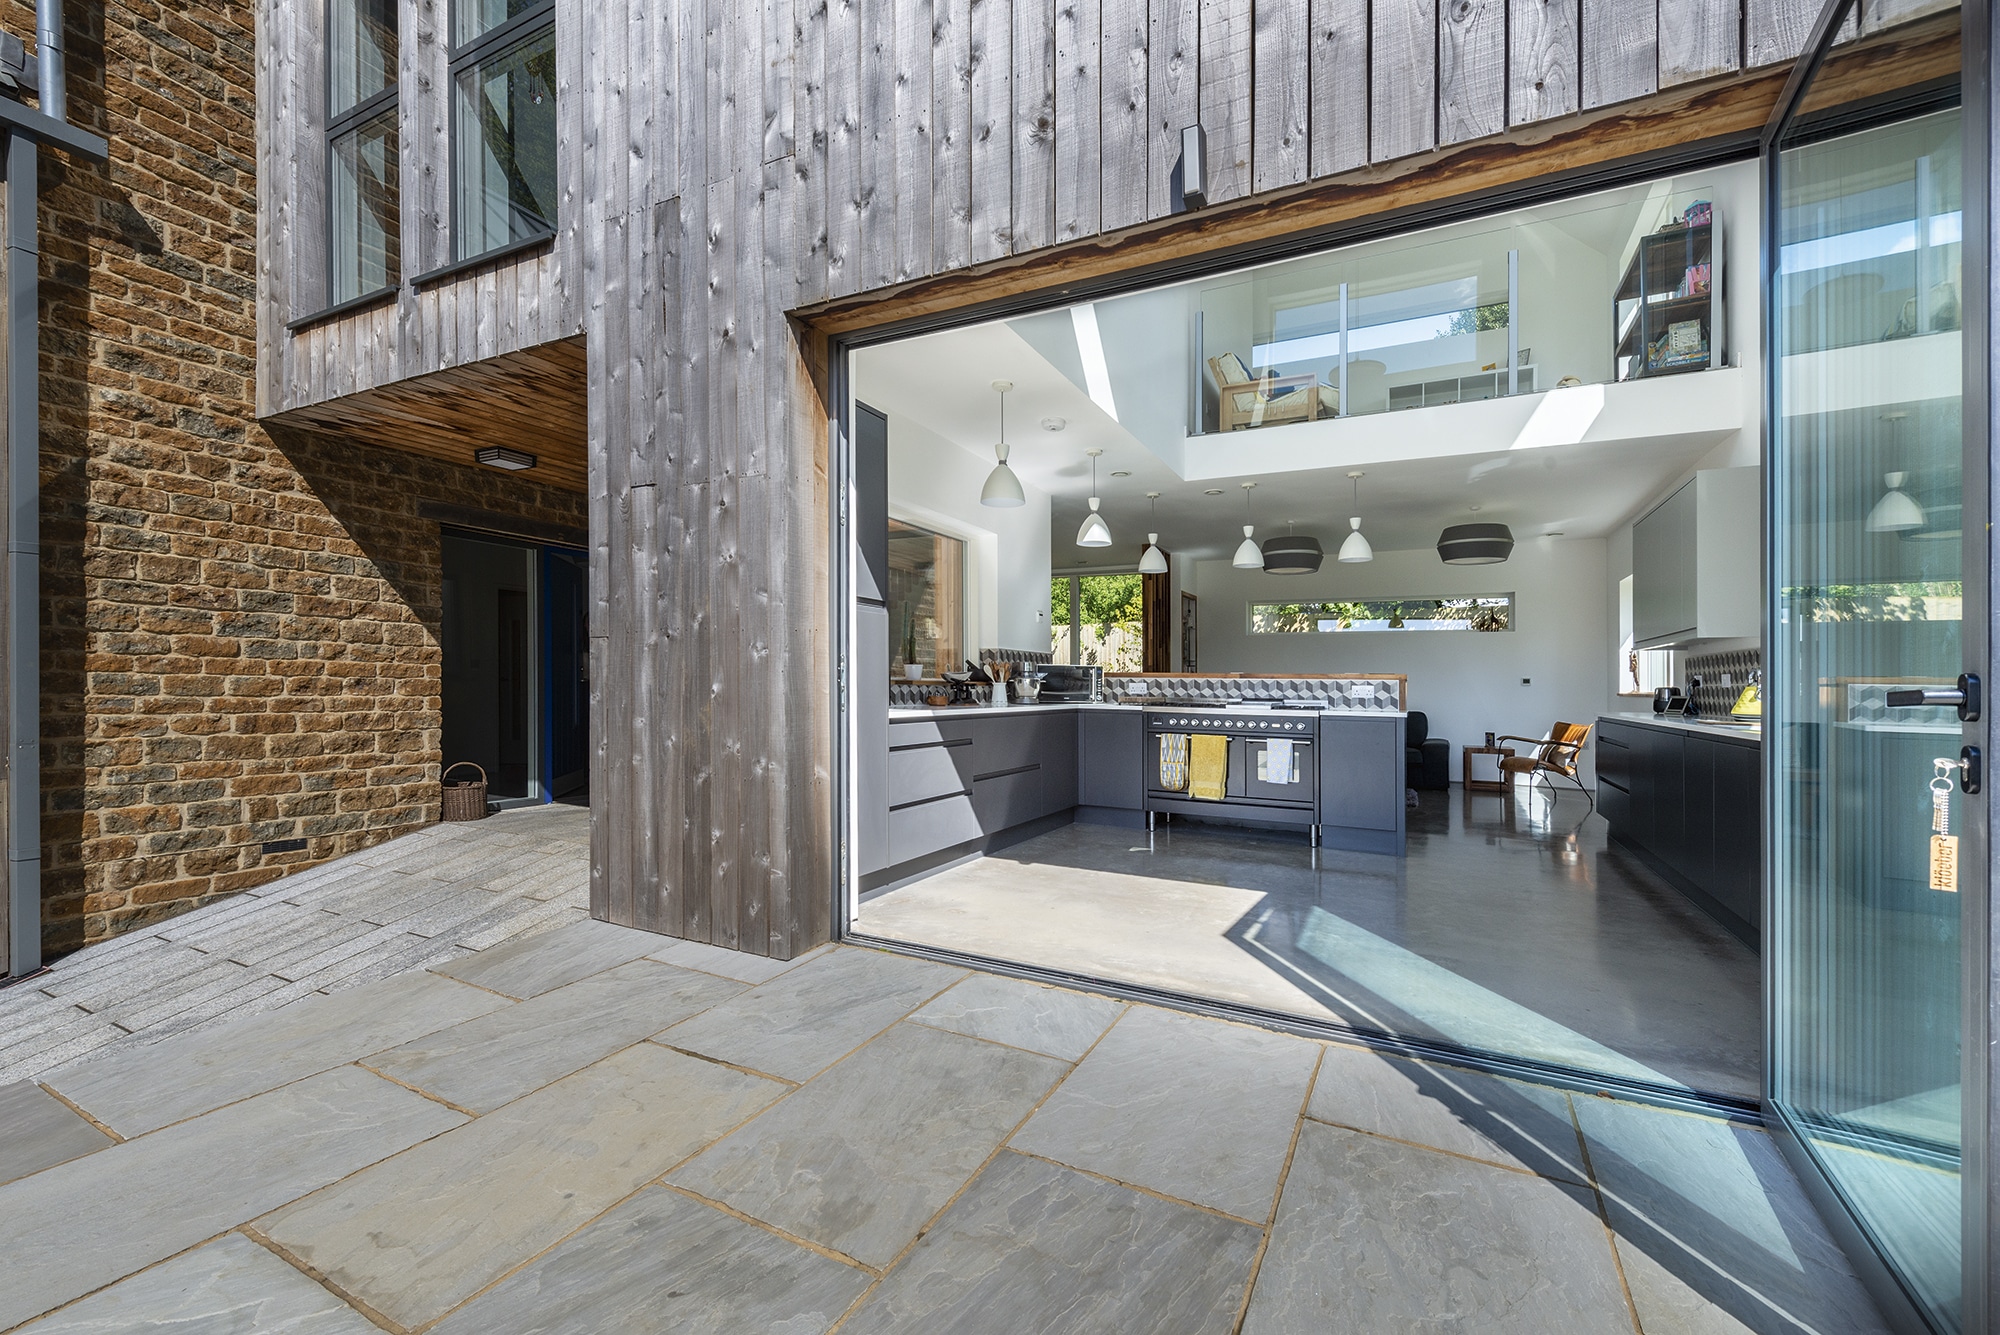
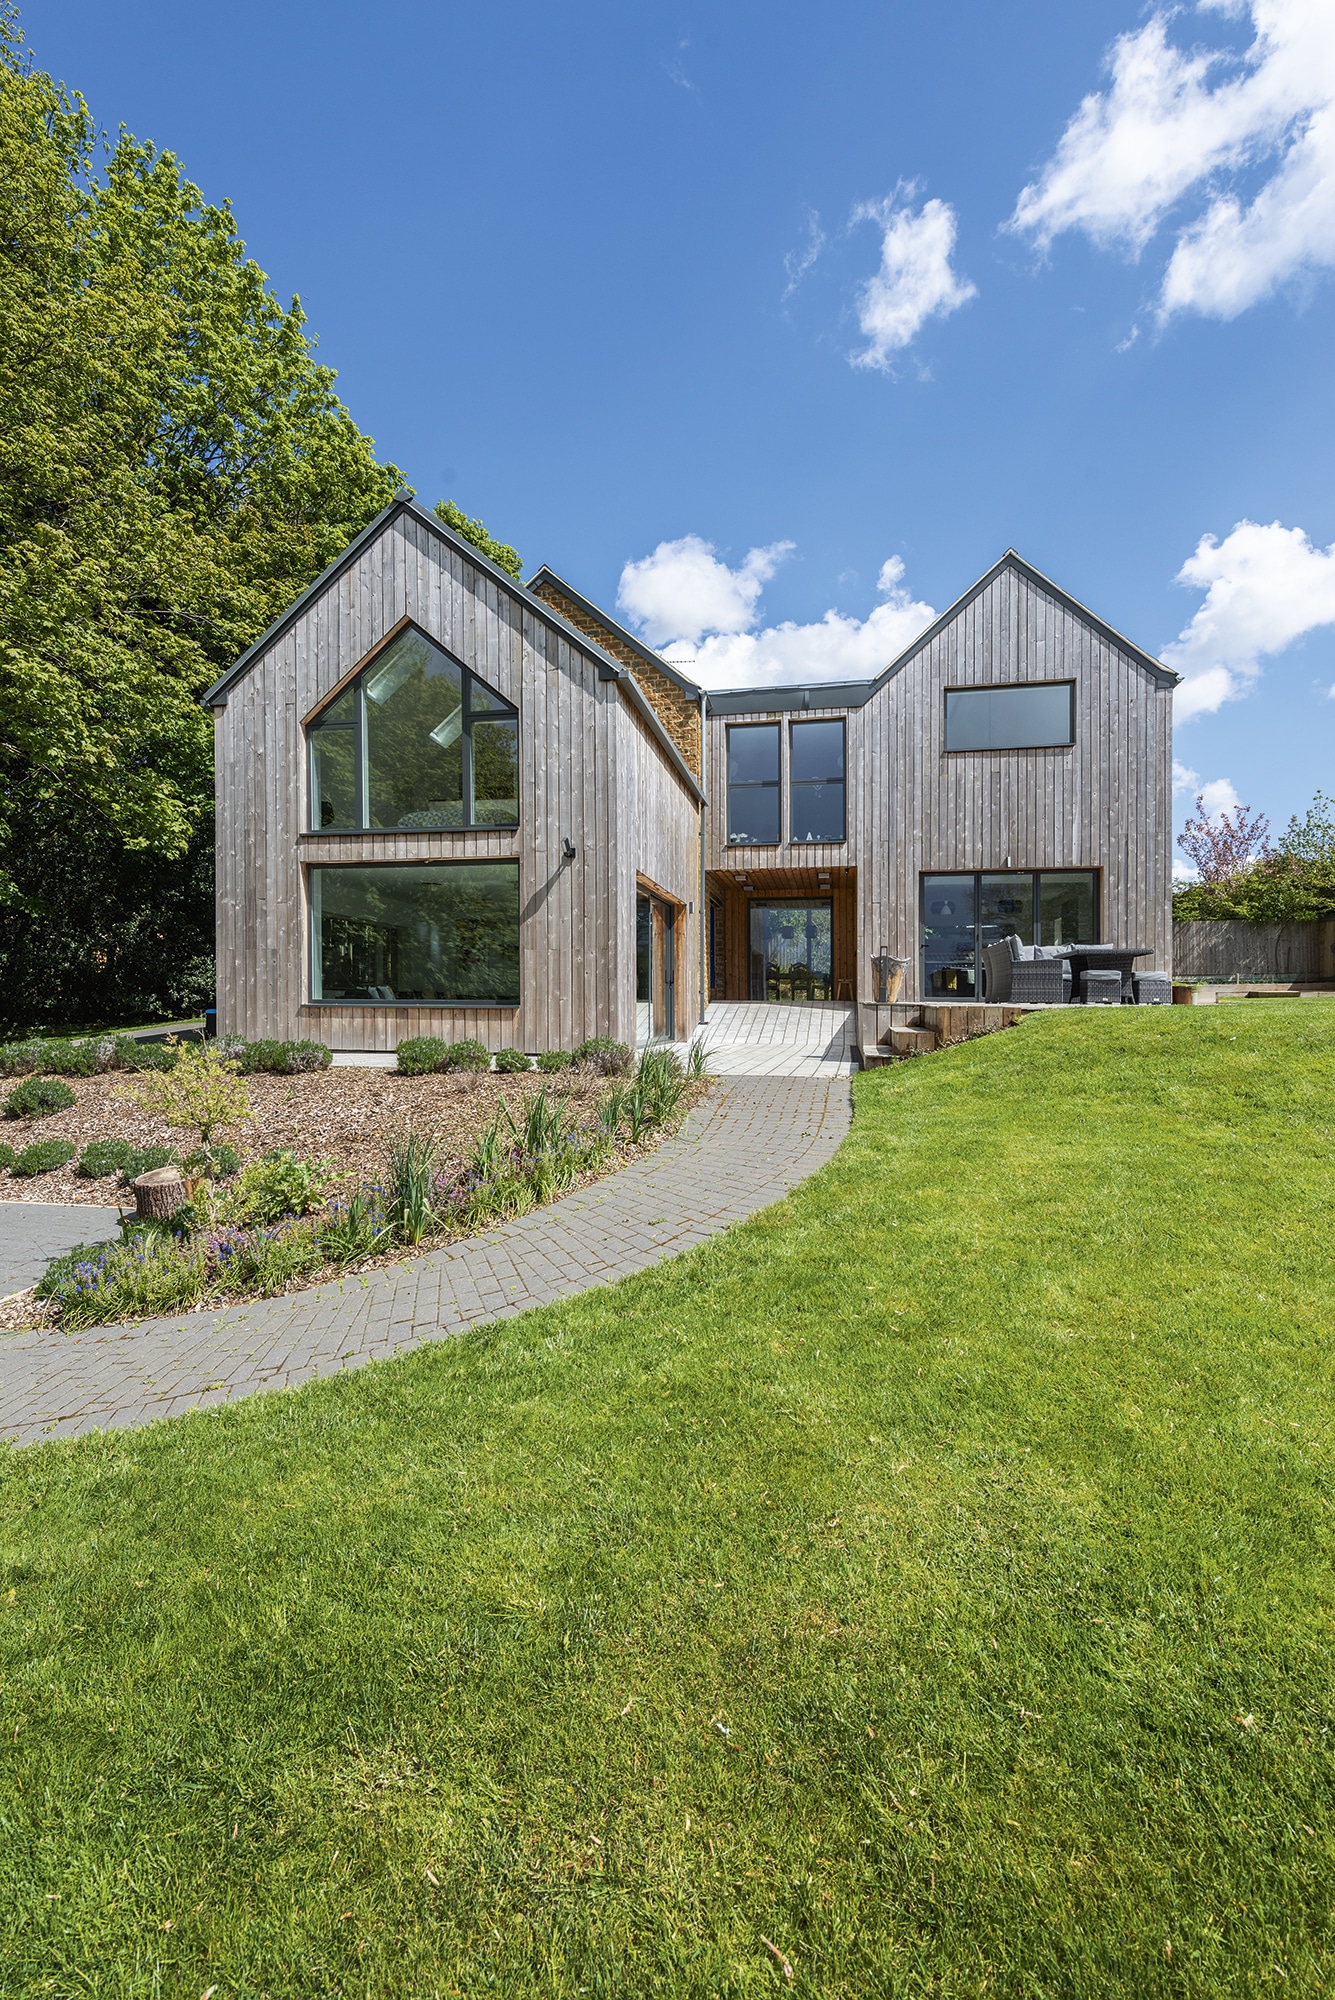
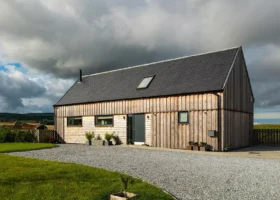
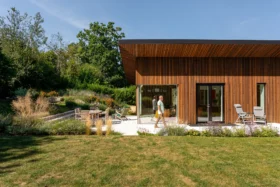
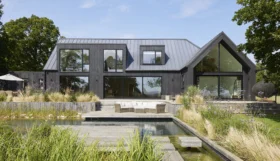
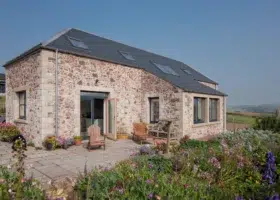
The house has been designed to look like it’s been extended over time
“Finding a plot with planning that ticked all the boxes was a tall order, so I used Google Earth for an aerial view of land in and around our village,” he says. “The key was to find somewhere with a viable planning argument, being mindful of the village boundary and the local planning policy.”
In early February 2016, Tom identified two acres of overgrown land along the main road into the village, flanked by mature trees and with good access. Crucially, part of the site sat inside the confines of the village boundary.
The couple earmarked a third of an acre section, which would align their new property with existing houses on the other side of the road.
“The boundary line dipped in and around the L-shaped site, and we would be smoothing off the development line with our new plot, giving us good leverage for planning,” says Tom. “You could almost see our old house from the site and the children’s school was only about 200m away, so we were really keen.”
When the couple bought the ownership details from the Land Registry, they discovered that it was linked to an office block in London. Frances was unfazed by the discovery as she works for an accountancy firm and assumed – correctly – that the land was owned by a pension scheme at the address.
“We discovered other local people had been interested in the land, but the lack of ownership clarity had been a stumbling block,” she says. “We found the owner and discovered her father had bought the land as a pension for his business 30 years before, which she now owned.”
Tom plucked up the courage to cold-call the owner with a proposal. “We entered into an option agreement,” he says. “We agreed a price for a third of an acre and had 12 months to get planning, then we’d have first refusal to buy the land. But if we didn’t get planning, we weren’t obliged to complete the sale.”
Frances had done her research on local land prices and the agreement in principle was set at £200,000 (which later went up by £18,500 when the couple decided to increase the plot to half an acre to have a bigger garden).
The following month, the pair attended their first pre-planning meeting. “The council had recently set up its self build register and we had our names down, so that helped our case,” says Frances.
“The planners wanted the vernacular of our new home to follow their rural design guide, which had been put together some 40 years before and was quite rigid. One of the major sticking points was the house couldn’t have an eaves width of more than 6m.”
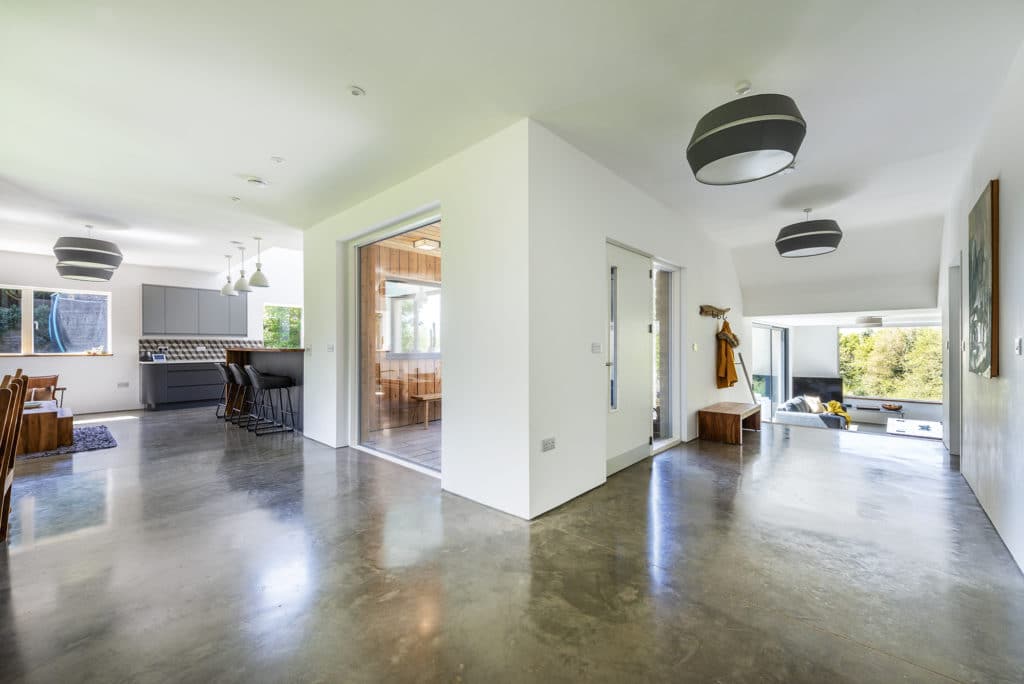
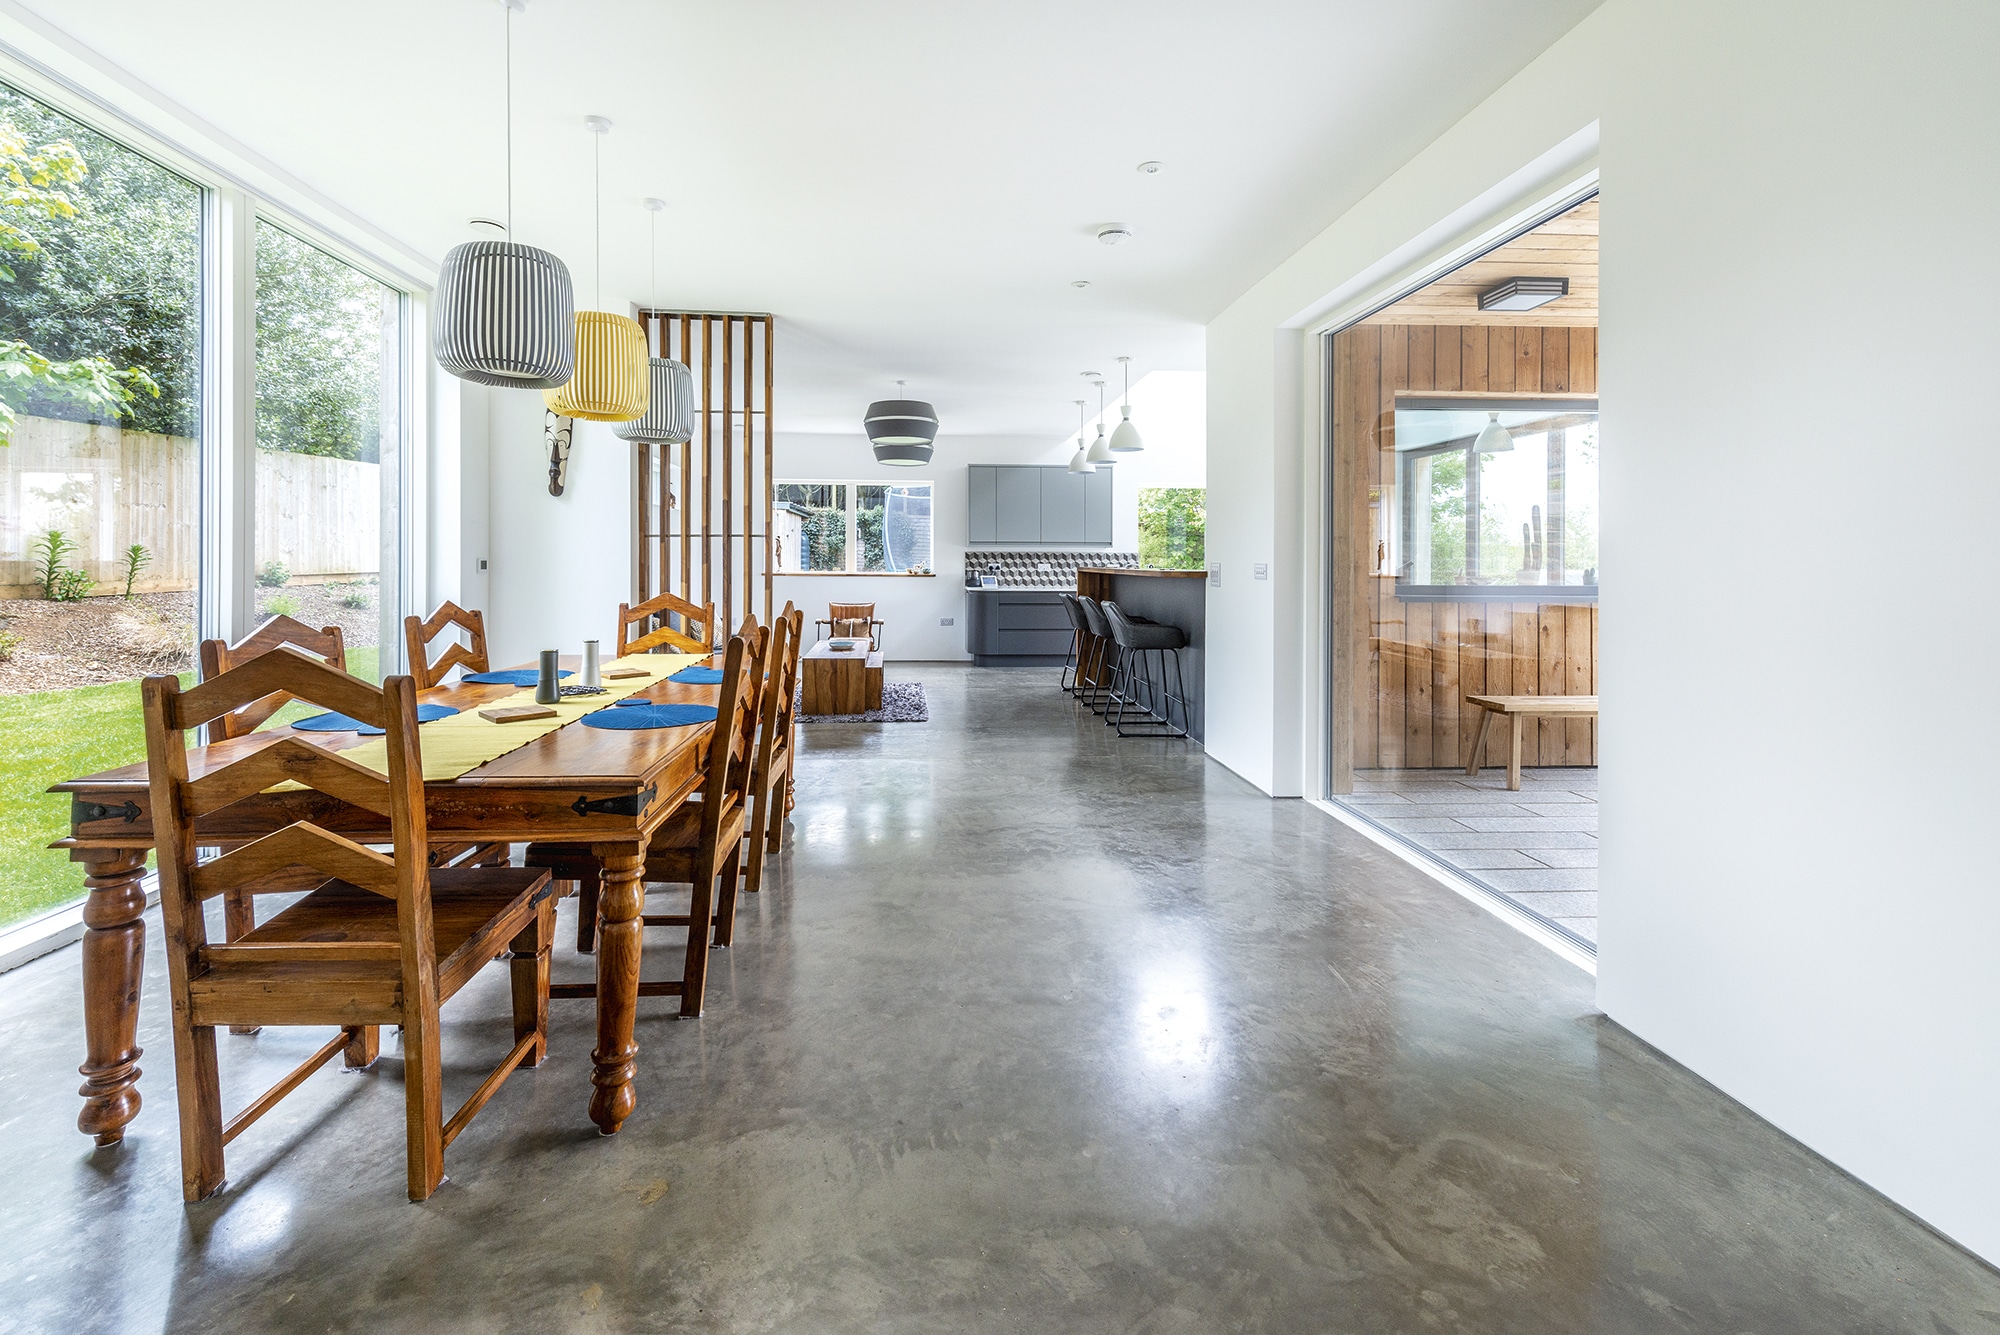
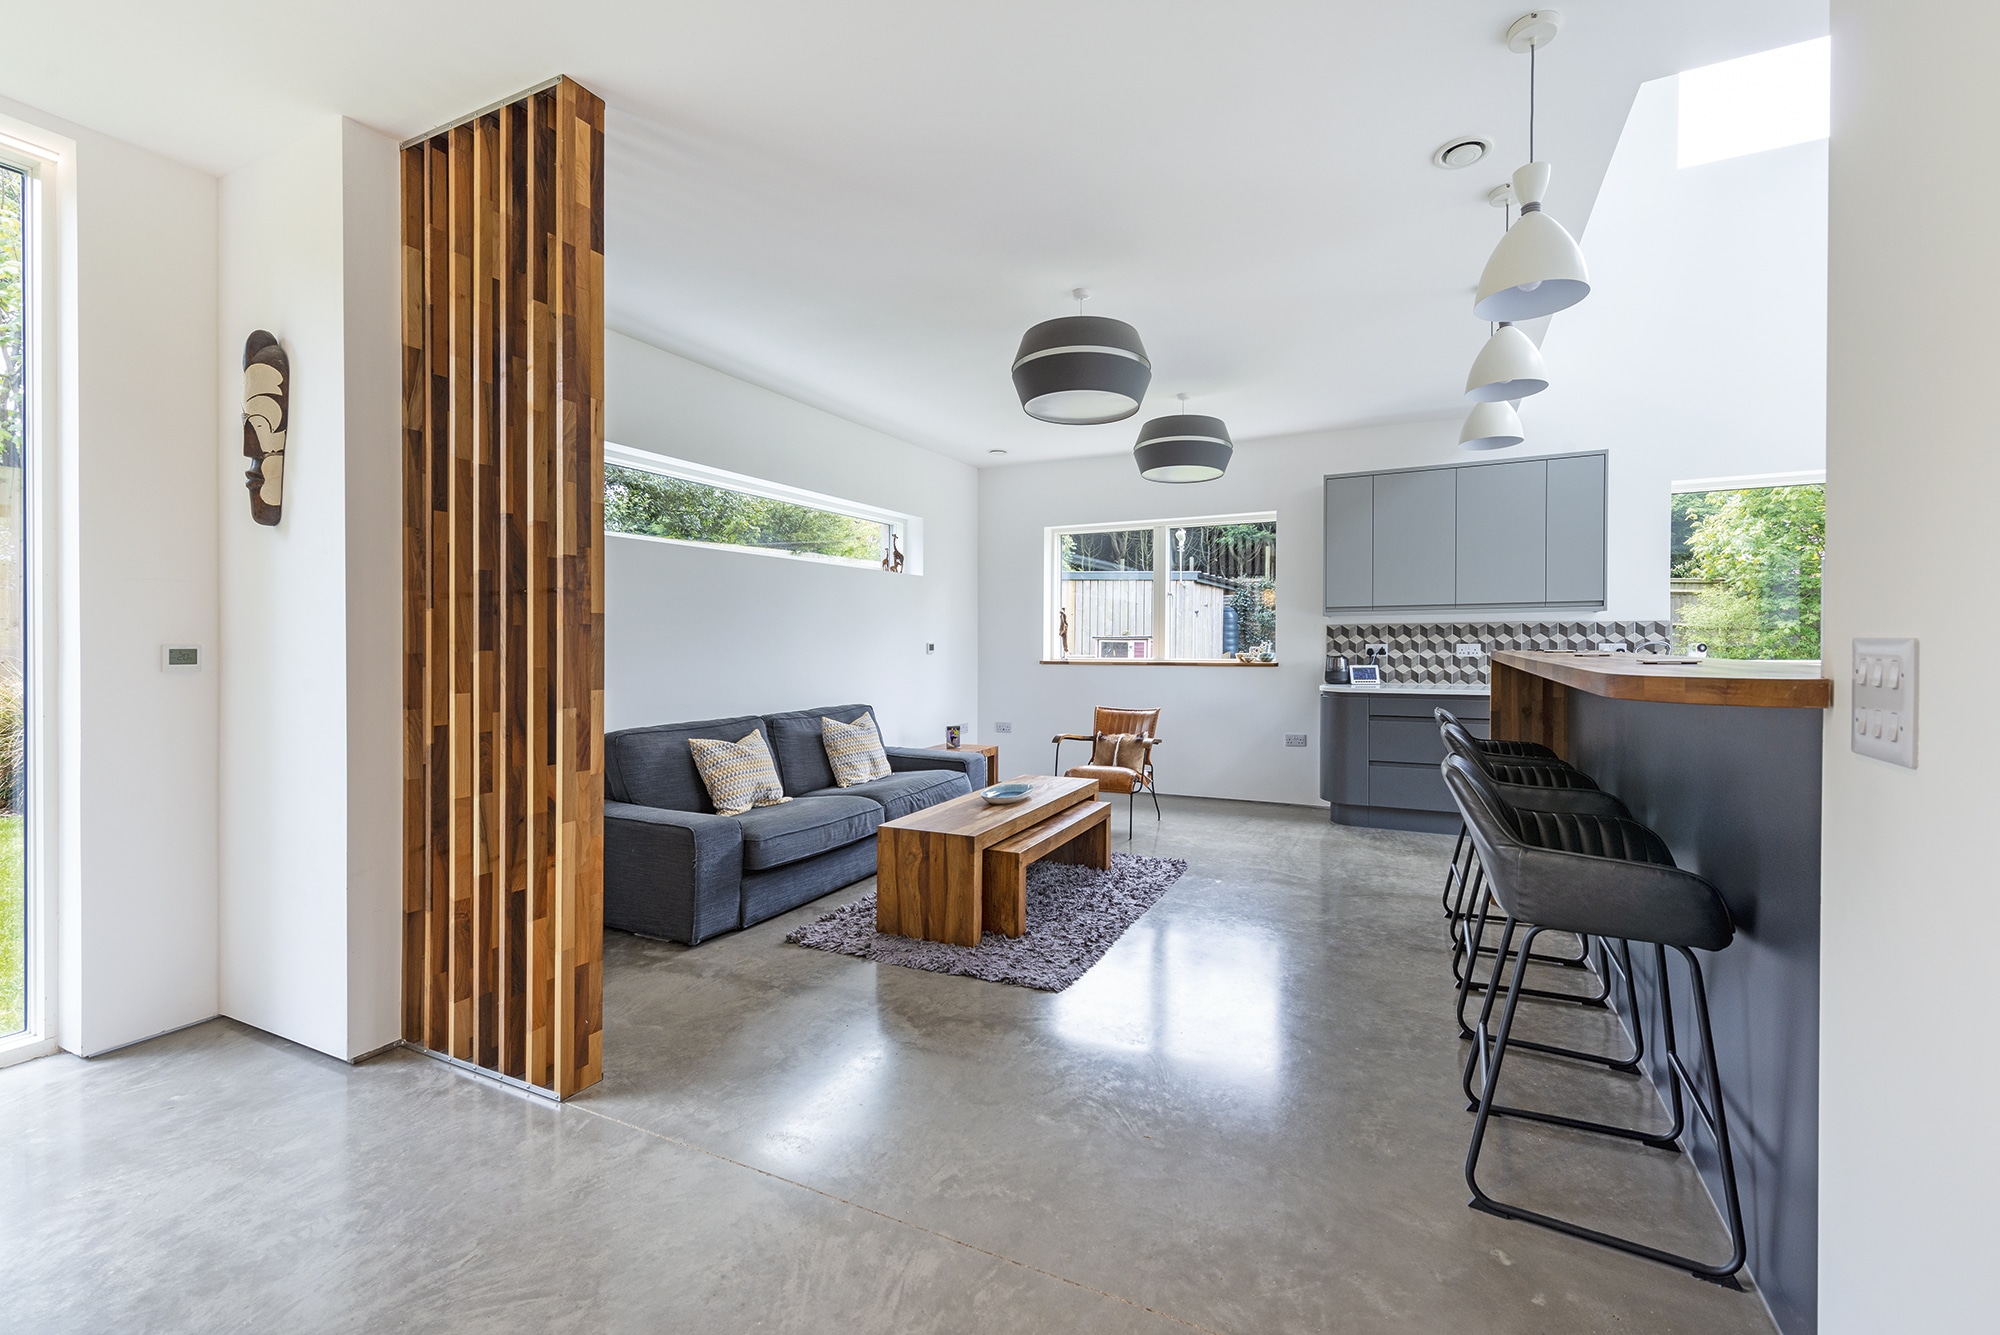
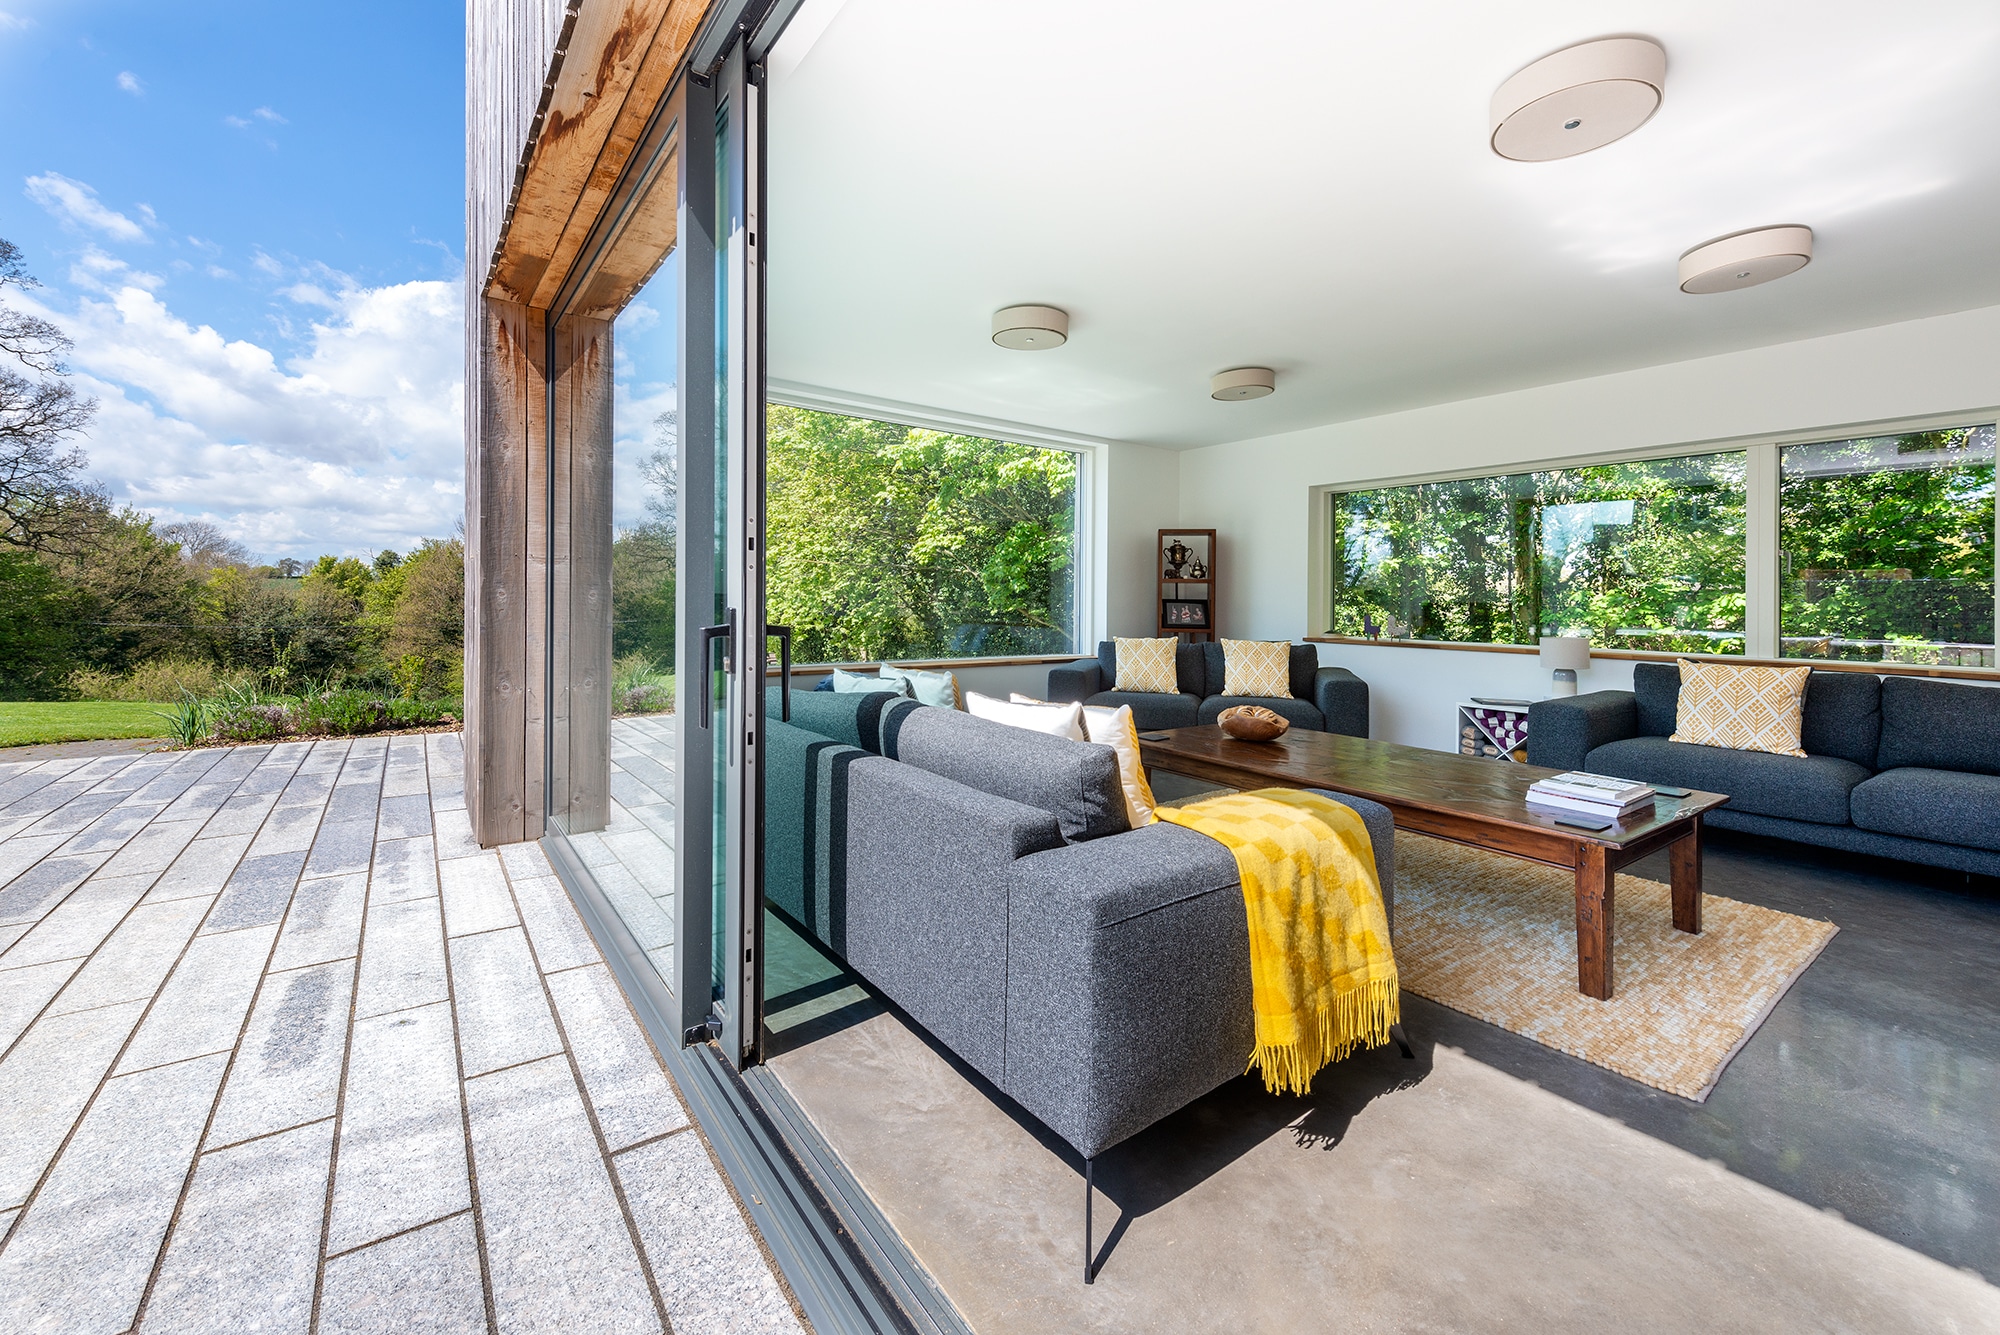
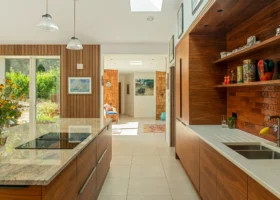
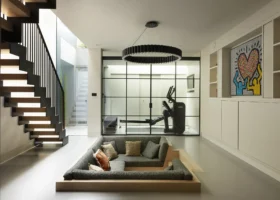
The front door opens into a generous space rather than a tight corridor, leading to the living room in one direction and the kitchen in the other
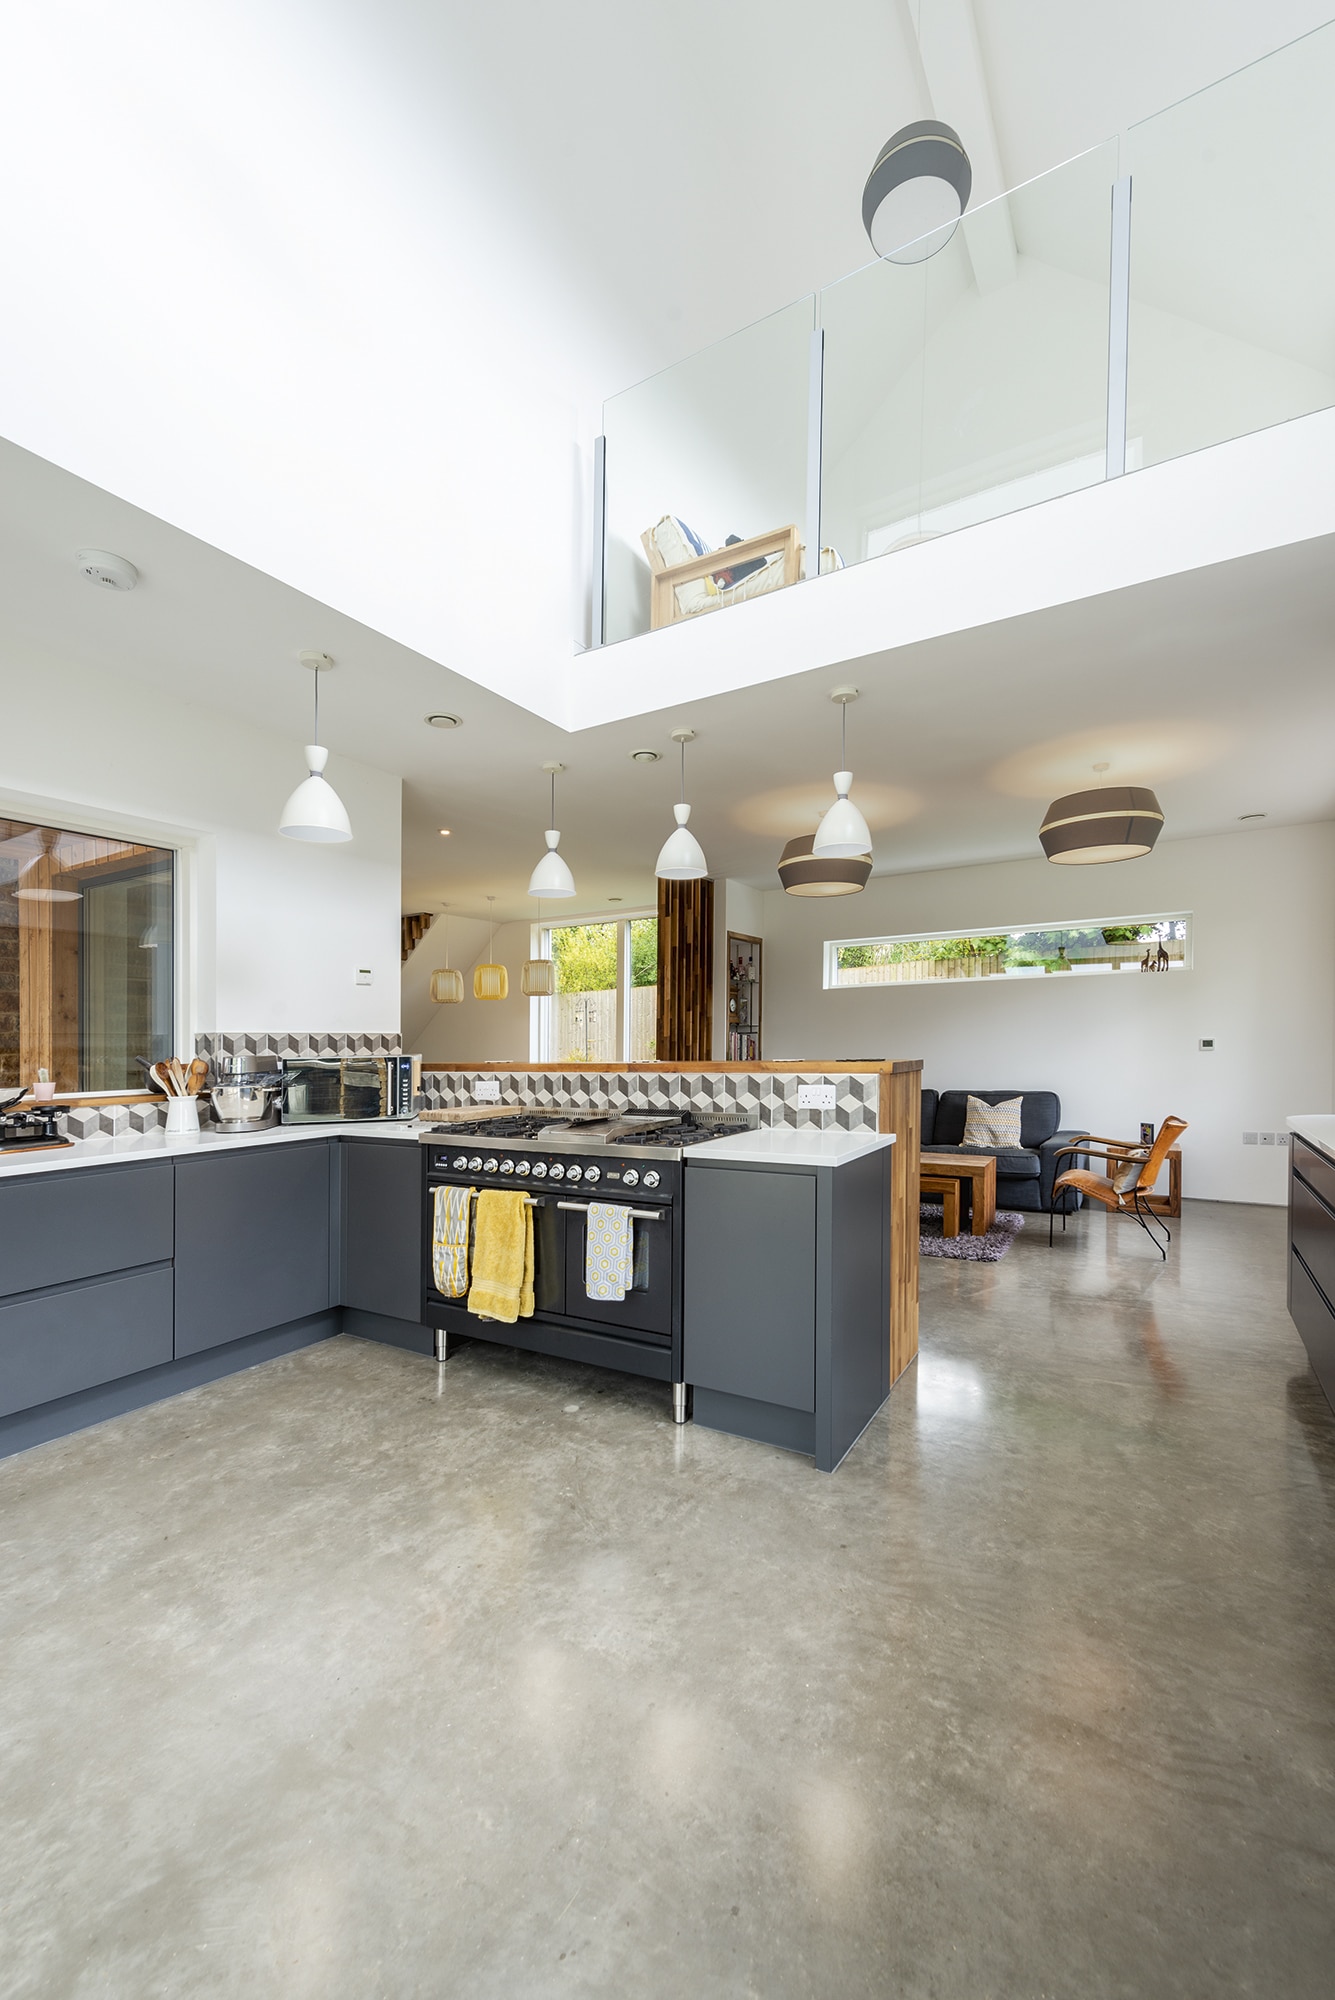
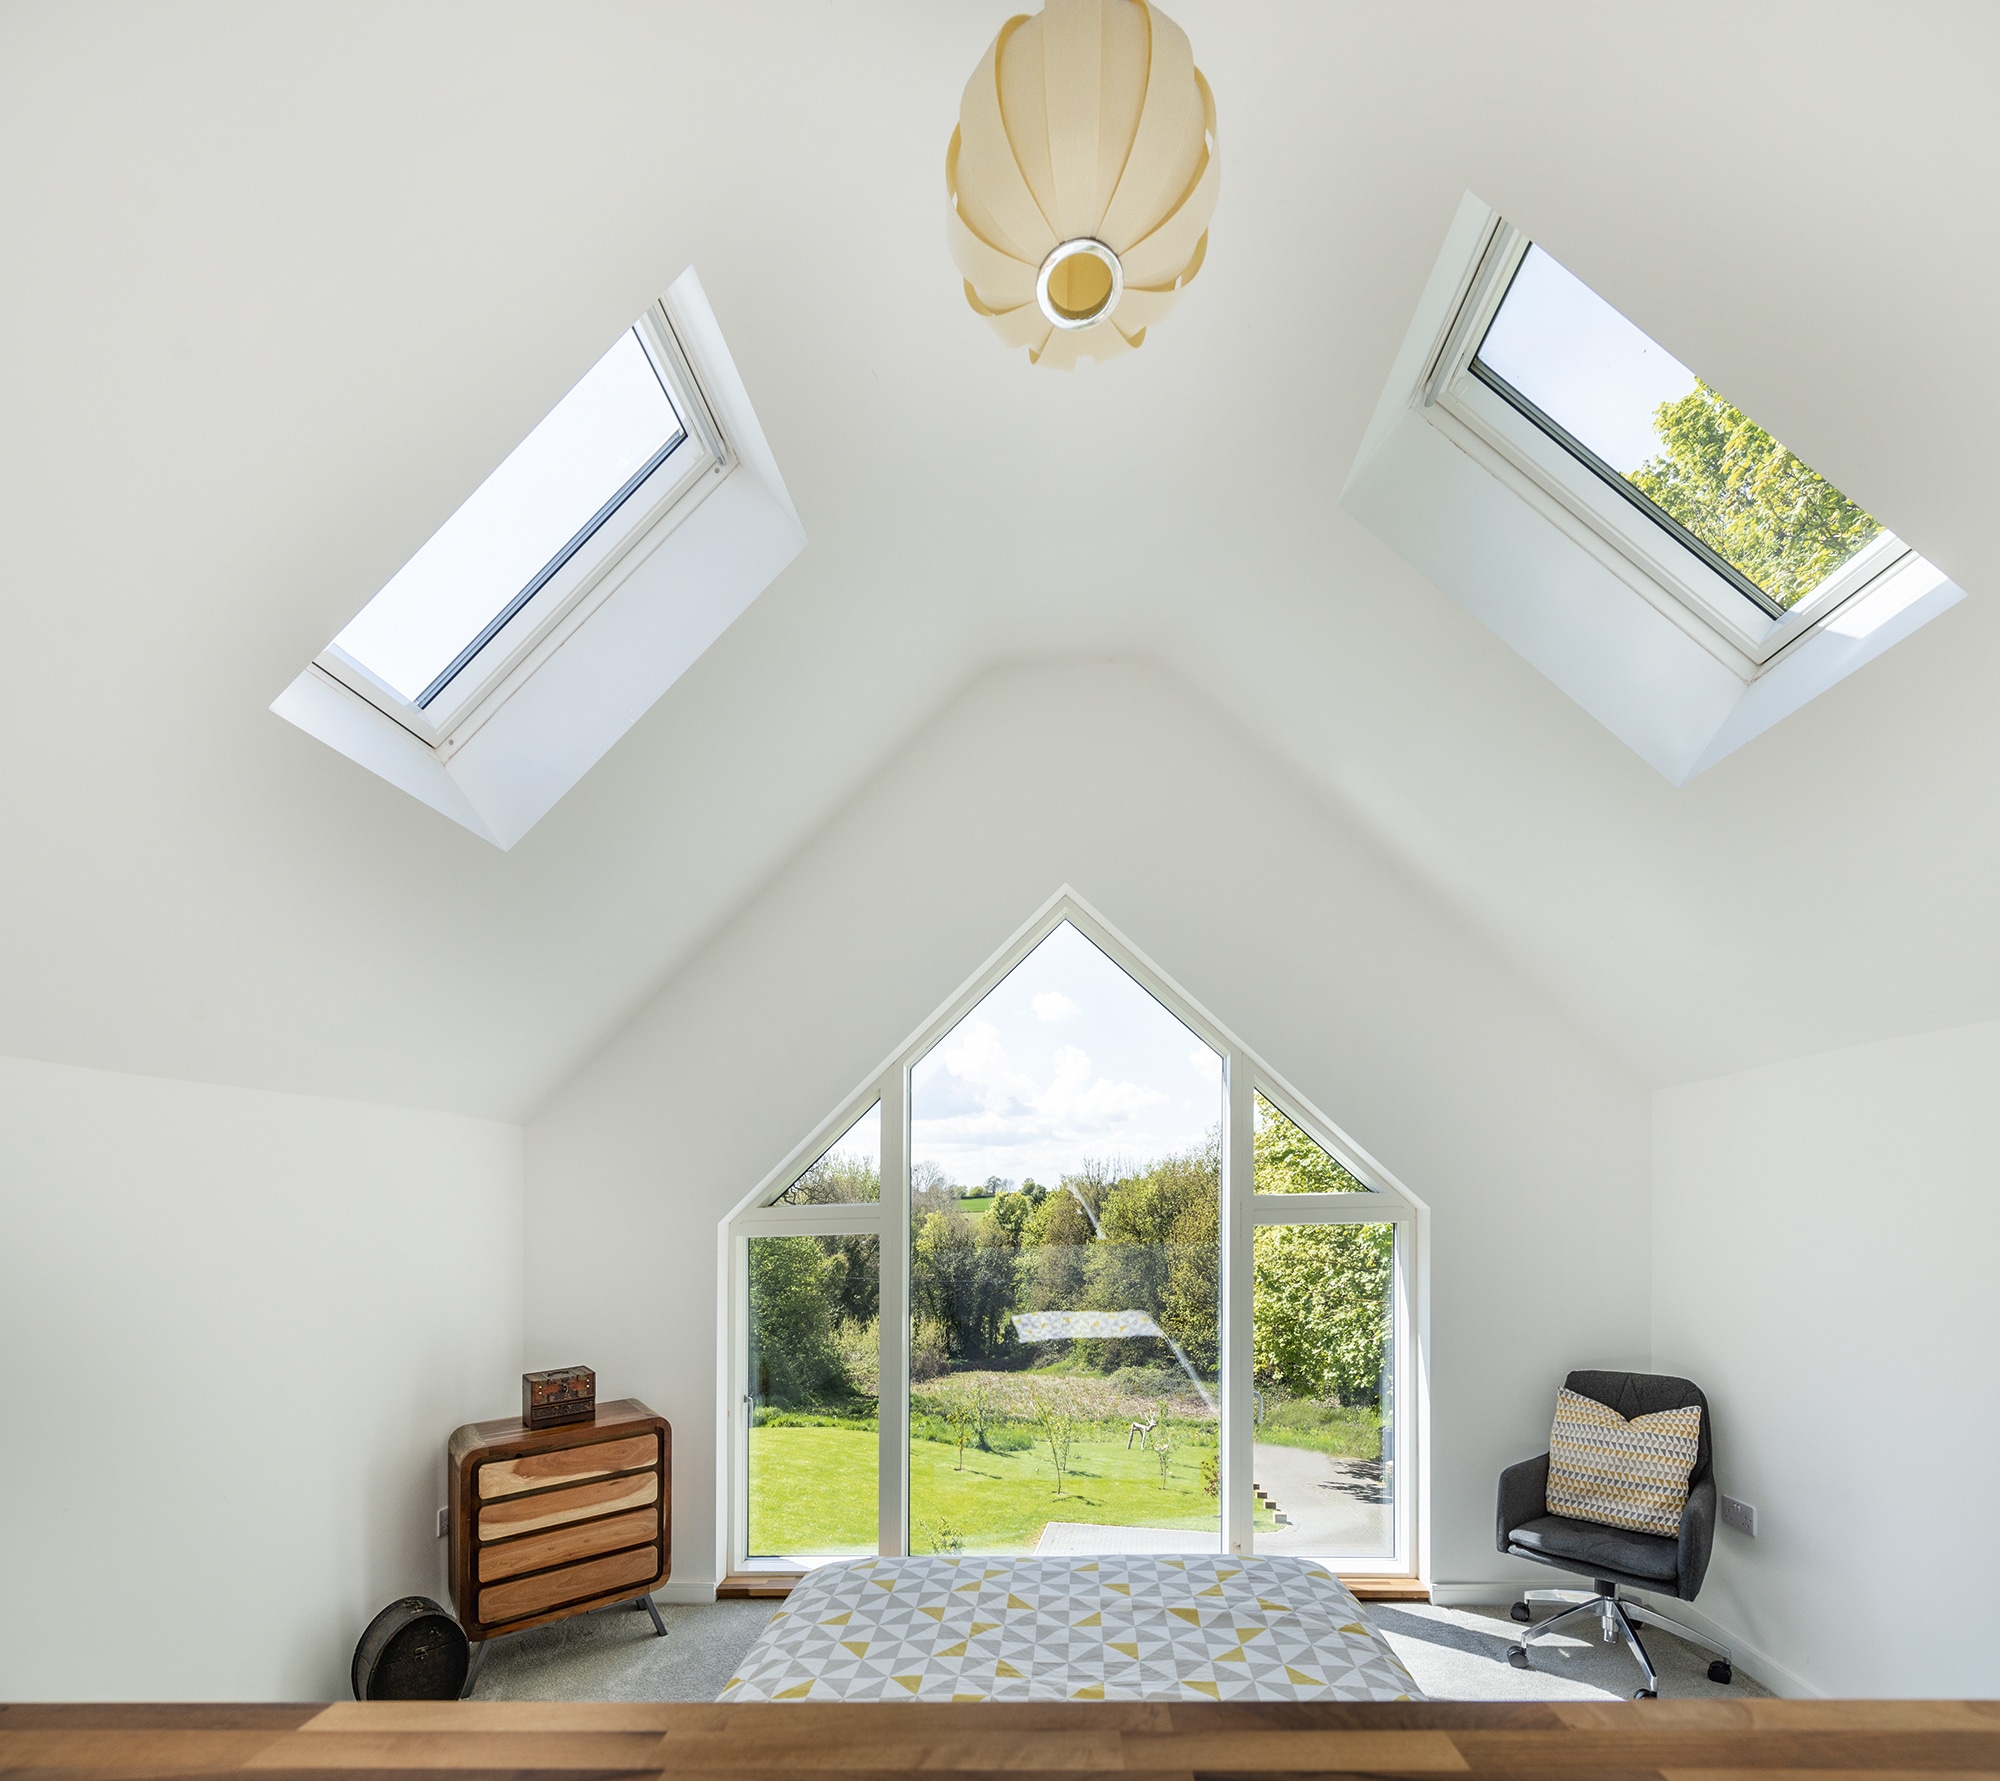
The couple went away and worked up a design using Sketchup, drawing floorplans accommodating an open-plan downstairs layout with no corridors, four bedrooms and a generous upstairs landing featuring vaulted ceilings.
They wanted to build to Passivhaus principles – high levels of insulation, triple-glazing, airtight membranes and tape – minus the pressure of seeking certification, which they felt would compromise their design and budget.
Working hard on the details, Frances and Tom were keen to reduce risk and make value-for-money choices where possible, such as planning for engineered posi-joists – instead of standard timber floor joists – on the first floor.
“We felt it would be far easier for the electrician and plumber this way, as the engineered ones are made with an open metal web to feed services through,” Tom explains. “It cost around £400 more, but the price is negligible across the total build outlay, especially as you’re not paying a trade £200 a day to drill holes into standard floor joists or box-out exposed pipework.”
The couple got to a point where they couldn’t resolve the external appearance to meet the rural design guide. So, they bought local architects, Clare Nash and colleague, Julia Healey, on board.
What we learned…
|
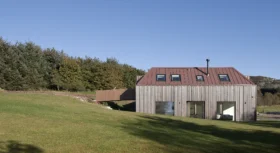
Clare proposed a design that suggested an old stone cottage once stood on the site, which would then be linked to a pair of timber-clad barns. Delighted with the scheme, the Edwardses submitted plans in October 2016 and consent arrived the following January.
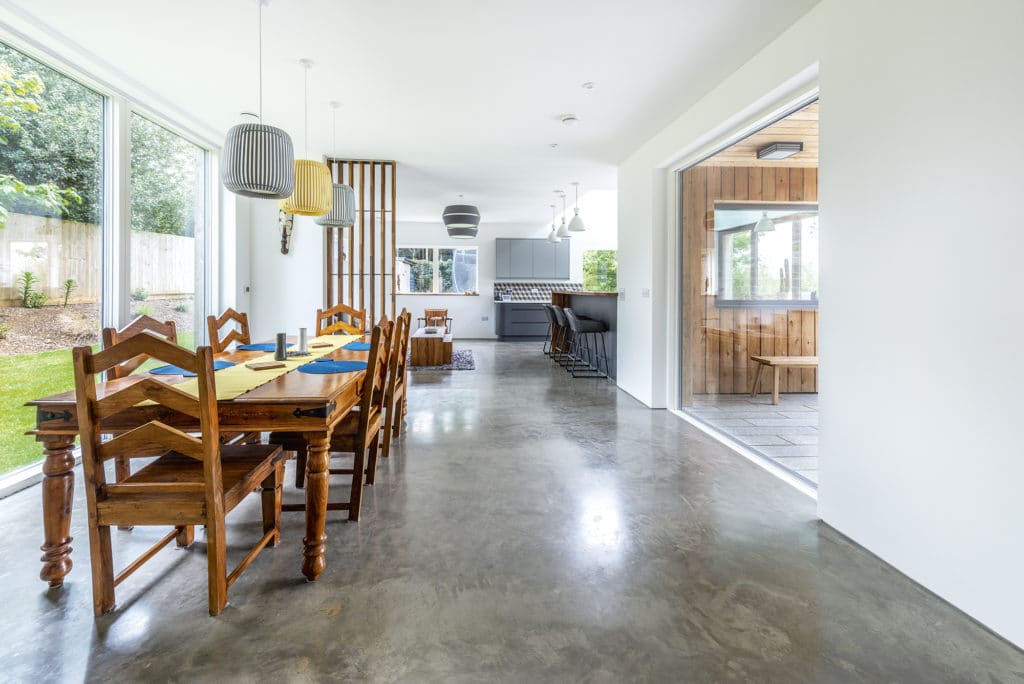
The dining table has been designed to be within reach of the kitchen but not in view, to keep dining a relaxed experience. Full-height glazing provides a view to the garden
The couple completed the plot purchase, but Tom is quick to point out that using an option agreement isn’t a straightforward win-win situation.
“This type of approach to planning seems like a no-brainer, but instead of using consultants, we did all the surveys and reports ourselves. If we hadn’t manage to gain planning, the risk to us was only a few thousand pounds instead of £20,000 or so,” he explains.
Frances and Tom sold their house and moved into a rented property; they proactively approached the owner of an empty house on their street to see if renting it was an option. The couple had decided to project manage alongside their full-time jobs, but didn’t take control until all the design decisions had been made.
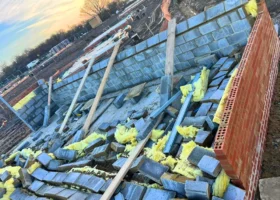
There were several hurdles to overcome along the way. One of the biggest emerged when Tom discovered that the steel portal frame constructed above the bifold doors stopped short of the foundation level by around 300mm.
“The builder suggested pouring concrete to bring the foundation level up, but that would have added delays. So, I went to a nearby steel fabricator and told them that we had an urgent problem, and could they fabricate an extension piece to be welded to the bottom of the frame,” he explains. “The issue was resolved by 10am that morning, but only because I was able to give them the exact dimensions and precise instructions.”
Work had begun on site in July 2017; six weeks were allocated for the groundworks, but they finished in four. Delays to the frame set progress back a month, but finally in October the crane arrived to lift the panels into place.
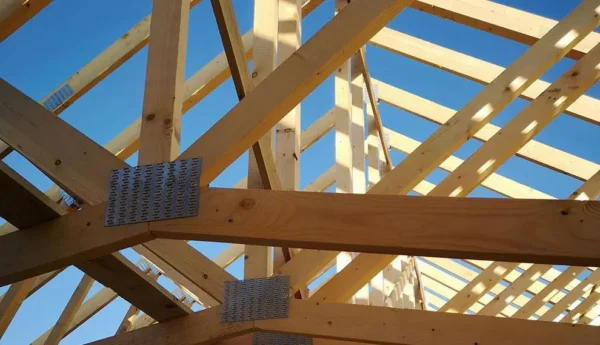
“Scotframe were brilliant. There’s no room for error as the panels are cut to the design in the factory. They’re injected with expanding insulating foam that fills the void, rather than sandwiched between boards and relying on glue like you would with structural insulated panels (SIPs),” says Tom. “We had a fully insulated, watertight envelope in seven days.”
Staying on budgetProject management was very much a joint role, with Frances coming on site as often as Tom, leading the way in cost management – and keeping Tom in check. She kept a meticulous account of their £400,000 budget, using her train journey home from work to update the spreadsheet, including developing a housekeeping system in line with how HMRC wanted to see their VAT reclaim. “It’s really important you get a good understanding of what you should and shouldn’t be paying VAT on, as you can’t claim it back if you make a mistake,” she says. “Our return was £38,000, which is a lot of money, so as soon as we got building control sign-off, the receipts and paperwork were ready, and I put in our application.” |
The next job on the couple’s list was to find a roofer for the standing seam metal roof, but installers were hard to come by. Once again, they thought outside the box.
“There was nobody available, so we offered to pay a local roofer that we know to do Tata Steel’s installation course at their factory in Warrington, which cost us £150,” says Tom. “He was really keen to do this so he could gain another skill set, and he did a great job for us.”
Meanwhile, work inside the house had gotten off to a slow start. Trades had been pushed back by a month for the late frame delivery and seemed surprised when the house went up quickly and Tom’s timeline was, in fact, spot on.
As the project edged towards the finish line, underfloor heating went down on both floors, the concrete floor was poured, walls decorated, and walnut introduced in the staircase, steps and window sills. On the first May bank holiday in 2018, the family were finally able to move in.

The couple embraced the change in levels on the gently sloping plot with steps down to a sunken living room that adds character to the design
“Sometimes we can’t actually believe we created this house ourselves,” says Frances. “The real success has been in Clare’s external design of the building and the way the materials have come together.
“Even living here during the pandemic was so comfortable, which is a testament to our careful planning – even finding spaces to work from home, which was unexpected. It just goes to show that if you plan ahead and knuckle down with costs, anyone can build an amazing, low energy house without spending a huge sum of money.”


 Login/register to save Article for later