

- Plan ItBack
- Design ItBack
- Build ItBack
- Homes
- ProductsBack
- CostsBack
- Self Build Cost Calculator
Estimate your project costs instantly with Build It's interactive self-build cost calculator
Calculate Now - Costs & Finance
- Contracts & Warranties
- Build It Estimating Service
Get an accurate, detailed cost breakdown of your project
Submit plans
- EventsBack


 Login/register to save Article for later
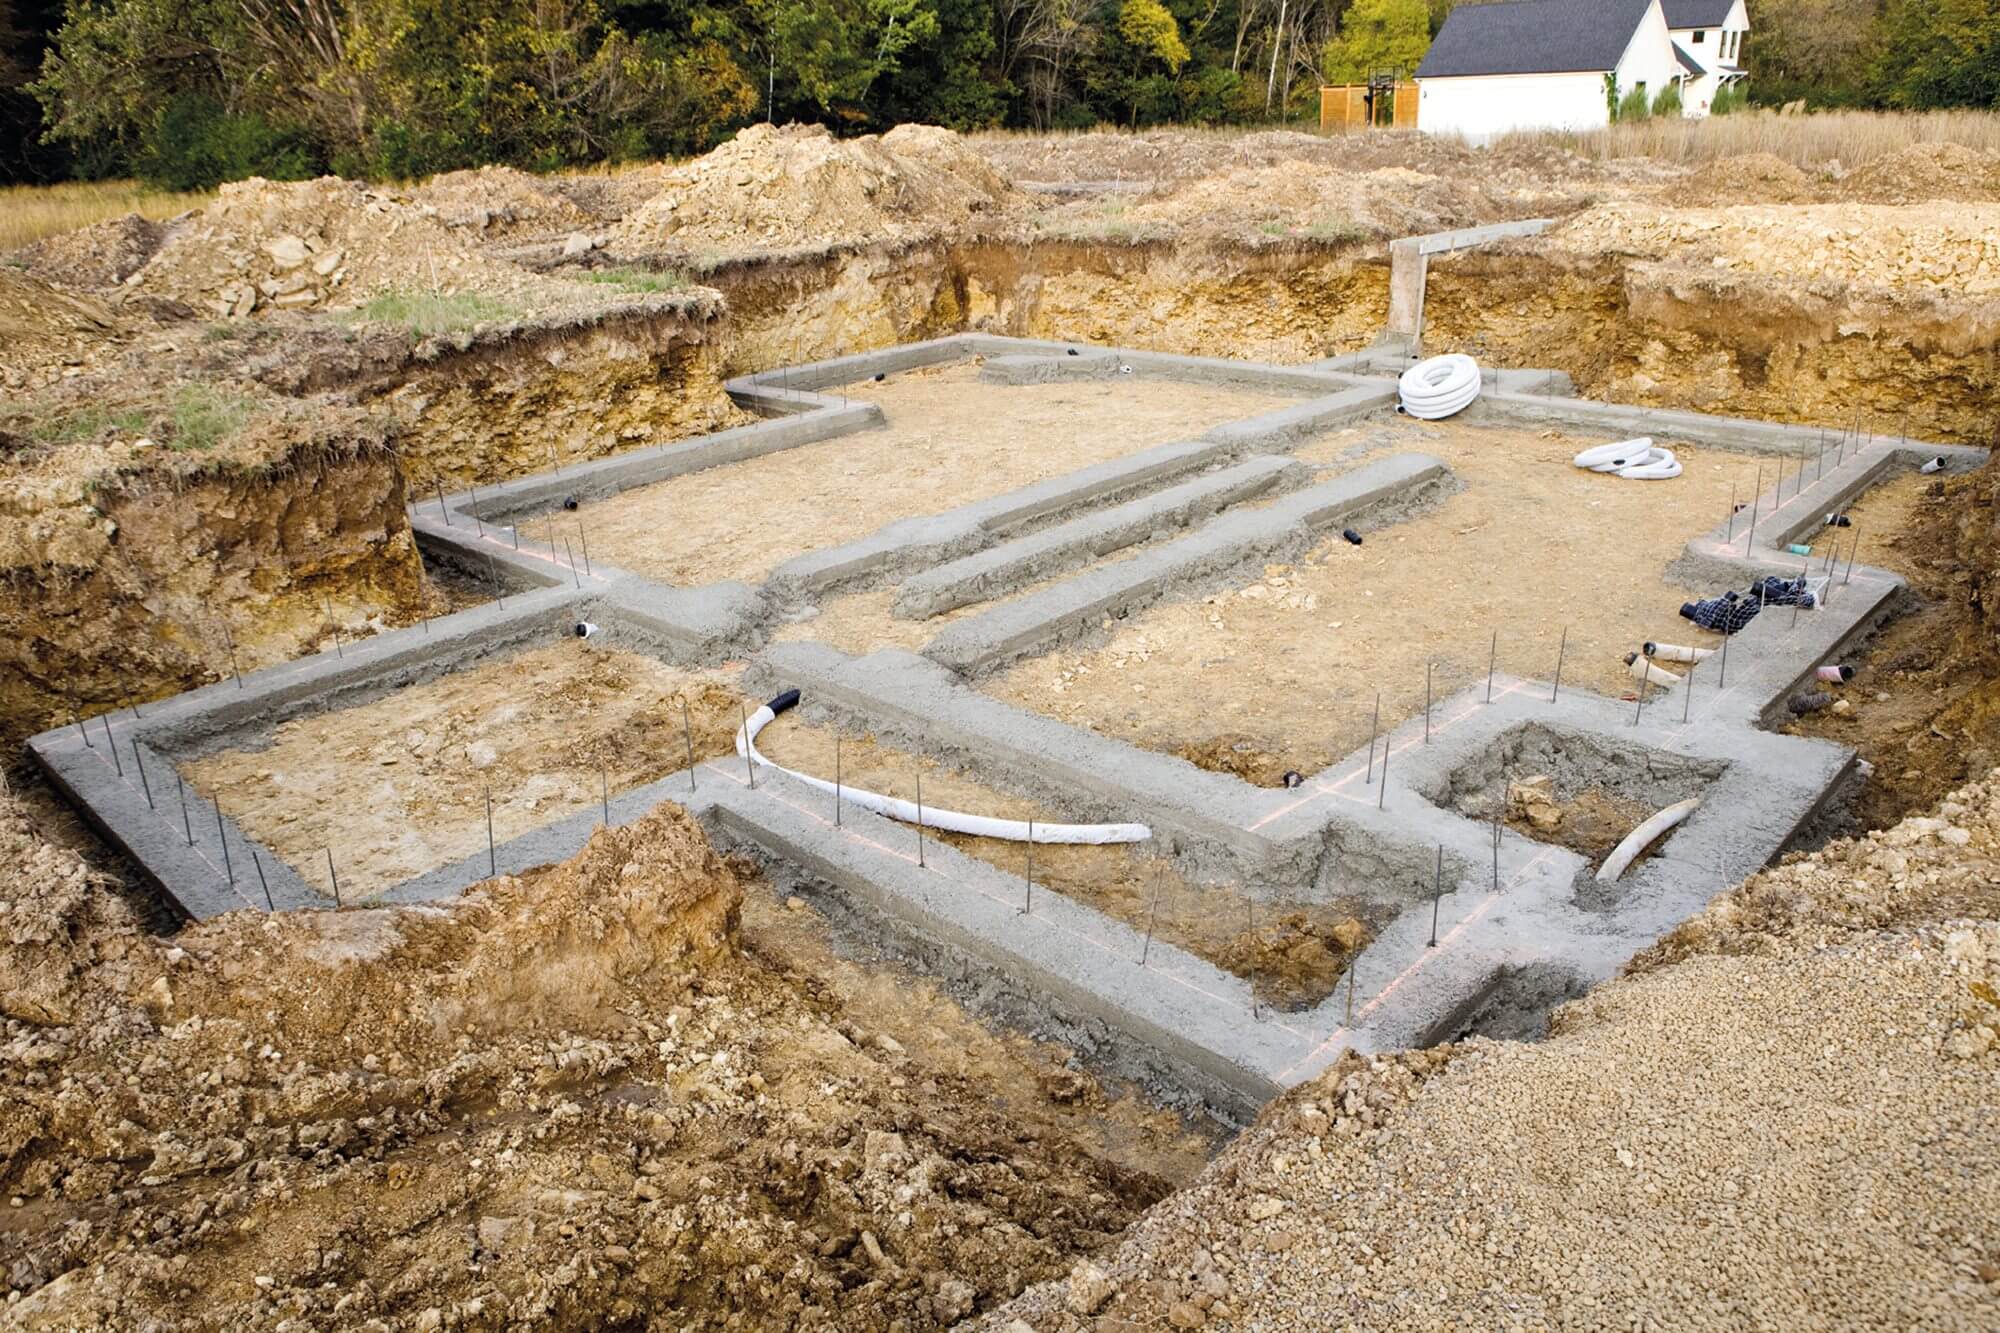
How to set out for foundations

Getting your foundations sorted out is one of those major jobs that you just have to get right – make a mistake and it will cost you, especially as the local planning authority will insist that your home is exactly where it’s supposed to be on your site.
Guide to setting out foundations
Armed with timber profiles, string lines and chalk spray, the centre line of foundations can be marked on the surface of the ground.
Take measurements to the site boundaries, corners and diagonals. Double check them before you start digging and make sure that they match the approved plans.
In reality not all of the dimensions may be critical, but if you have some discrepancies between the plot and the plan now would be the time to get them resolved and the actual dimensions accepted – before you start digging.
| Health & Safety: Concrete |
| Working with concrete can be hazardous, so you need to ensure you handle it safely.
Concrete can be laid in three ways: deposited directly by concrete truck; delivered using a concrete pump for awkward sites; or by the old fashioned wheelbarrow.
|
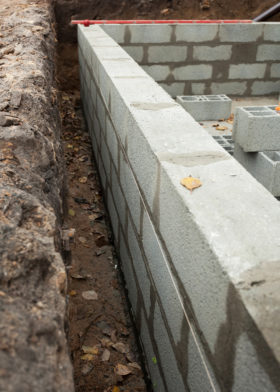
What depth should foundations be?
The average depth for foundations is 1m below ground level. At this depth, frost doesn’t penetrate the ground, load-bearing subsoil tends to be present and in clay soils, seasonal shrinkage only occurs if trees are nearby.
Foundations formed on rock and stony soil can be a little shallower, but not so shallow as to be affected by frost.
Getting a flat bottom at the right depth in trenches means taking levels repeatedly, something that laser levels are ideal for. Equipped with an audible alarm fitted to the staff, one person can guide the digger driver.
Once the trenches have been dug and inspected, you will need to hammer pegs in to the trench sides to mark the next level as the top of concrete. Timber pegs are safer than steel pins
How to shore up foundations
In made-up ground or granular subsoil the sides of trenches can be prone to collapse during excavation and immediately afterwards.
Shoring them up can be done with plywood sheets supported by timber struts across the trench or with specialised metal sheet profiles and propos.
Not only is it essential for health and safety purposes to protect workmen in and around the trenches, it can avoid you having to re-dig the trench bottoms before you concrete.
Site access for concrete mix
Make sure the ready-mix lorry can access the site. Ready-mix can be placed by pump if the trenches are difficult to get to or the truck’s chute can’t be extended far enough.
Pumps need booking at an early stage – there may not be that many of them in your area and they are often pre-occupied with civil engineering works.
Without them a dumper truck can be used to transport concrete to the trench. Once poured, the concrete will need to be raked to level against the pegs.
Take special care that you don’t collapse the sides of the trench – this can cause the dumper to slip and spoil your foundations, too.

You may be interested in


Comments are closed.