- Plan ItBack
- Design ItBack
- Build ItBack
- Homes
- ProductsBack
- CostsBack
- Self Build Cost Calculator
Estimate your project costs instantly with Build It's interactive self-build cost calculator
Calculate Now - Costs & Finance
- Contracts & Warranties
- Build It Estimating Service
Get an accurate, detailed cost breakdown of your project
Submit plans
- EventsBack


 Login/register to save Article for later
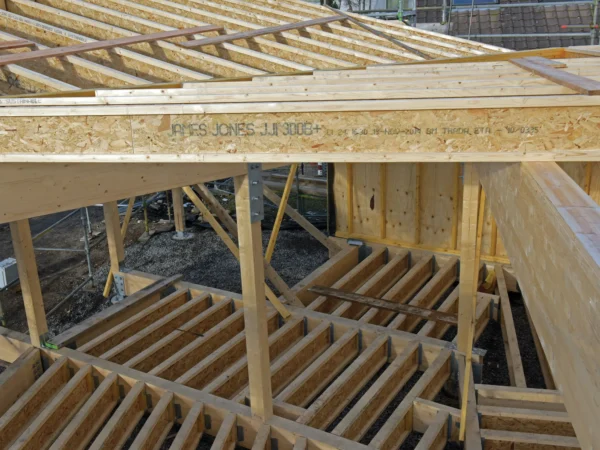
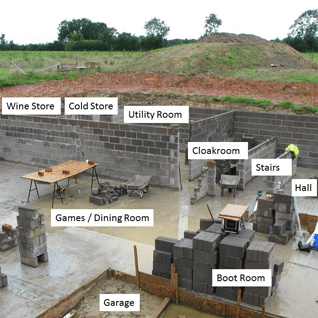
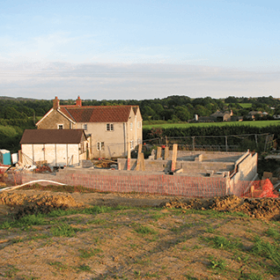
Towards the end of last month, the pace really picked up on site.
The beam and block floor over the basement was coming along well, and the builders were getting excited about the speed we could push on at now that the house was heaving itself clear of the surrounding swamp (caused by one of the wettest summers on record).
After things dried up, the builders really took advantage of the weather to clean up the site, assess the amount of scaffolding that we’d need and backfill the trench (between the basement wall and surrounding mud) with stone. We did have a couple of issues slowing us down, however.
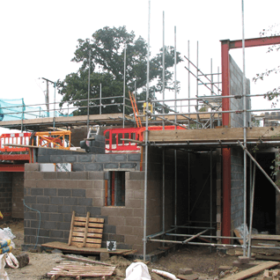
The dreaded cable was one of them. Getting the steels fixed for the beam and block to sit on has been a major palaver, because the overhead cable – 11,000 volts worth – runs right over the site.
This meant we had to gingerly manoeuvre steels and beams around with a forklift, rather than using a crane, to ensure we didn’t go near it. There was a frustrating and enforced ‘go slow’ until we managed to get the cable buried. Thankfully, the new (underground) cable is now in place around the back of the house.
We’ve also had to put up a new post to carry it over the lane. It would have been nice to have extended the buried bit into the next door field, but we’ve got rather more pressing things to spend the money on. Anyway, it’s progress, and once it was done we could zoom along with work on the main floor.
The other issue was damp proofing, which has turned out to be more difficult to do than expected, and much more expensive.
We’re using an integrated system from America, which involves black (very gloopy) polymer that you paint on, followed by a primer, then geo-membrane, protection boards and so on. Applying all this stuff looks pretty straightforward in the instructions, but it is far from easy when you’re standing in two feet of mud in the pouring rain.

Nick Mann
You may be interested in