Become a plot hunting pro with our next online training course!
Use code BUILD for 20% off
Book here!Use code BUILD for 20% off
Book here!Estimate your project costs instantly with Build It's interactive self-build cost calculator
Calculate NowGet an accurate, detailed cost breakdown of your project
Submit plans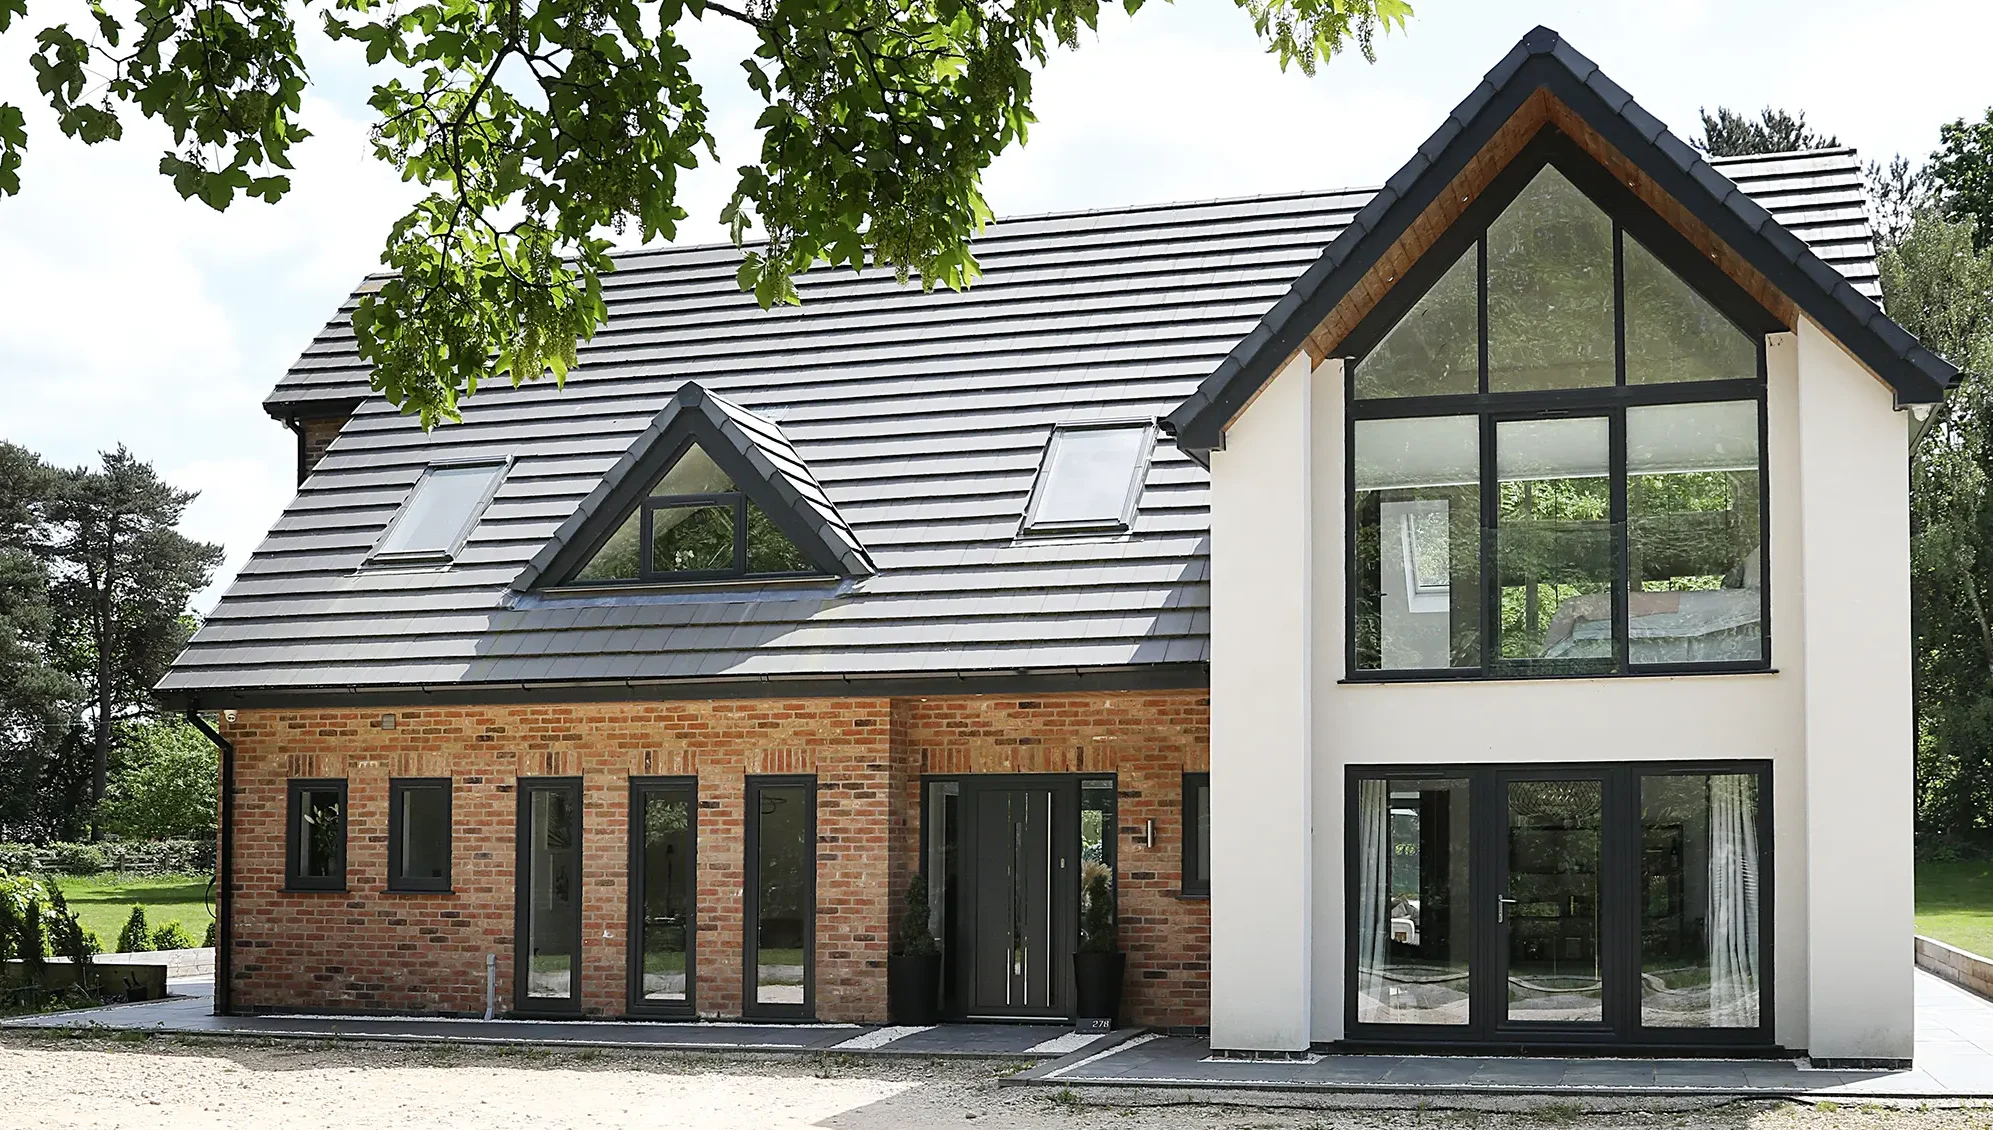

Since she bought her first home, Kellie Wyles had always lived in new build developments. The idea of a blank-canvas property that was ready to move into and make your own appealed to her. Unlike her parents and sister who had experience in renovating houses, taking on a build project was unfamiliar territory for Kellie.
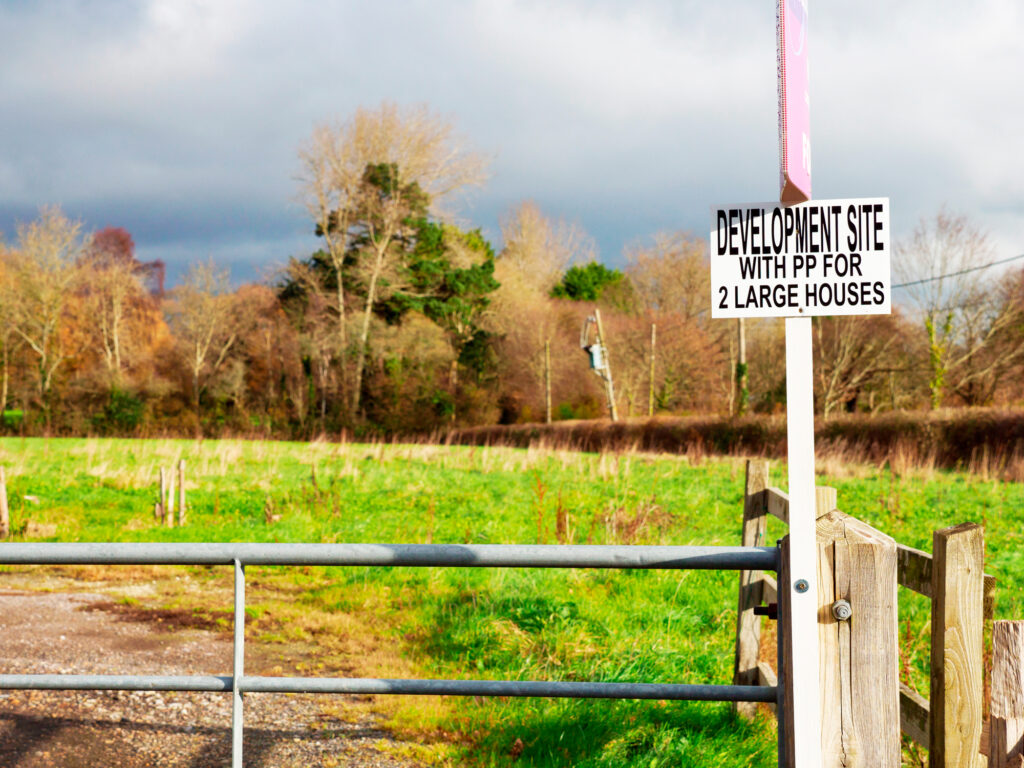
This all changed when a greenbelt site adjacent to her parents’ land became available, which was home to a craft centre. Located in a quiet village in Nottinghamshire, the site offered privacy and the potential for a spacious back garden. As a family, she and her parents purchased the land with the view of changing the use to residential.
Kellie’s interest was piqued, although she was daunted at the prospect of creating her own home from scratch. After speaking to other self builders in the area, she realised it could be the perfect route to her dream home. Once the craft centre was demolished, the land was divided into three individual self build plots, and Kellie took the plunge and bought one of them for herself.
A key motivator for Kellie to take the self build route was the financial aspect. “When I did the maths, it looked more sensible financially to build my own house rather than move up a gear in new build developments,” says Kellie.
She purchased the plot in cash and funded the project itself with a self build mortgage, although she financed parts of it with her own savings where she exceeded her initial budget. Kellie lived in her previous property for the duration of the build.
Looking for building plots for your self build project? Look at PlotBrowser.com to find 1,000s of plots and properties to nationwide, all with outline or full planning permission in place
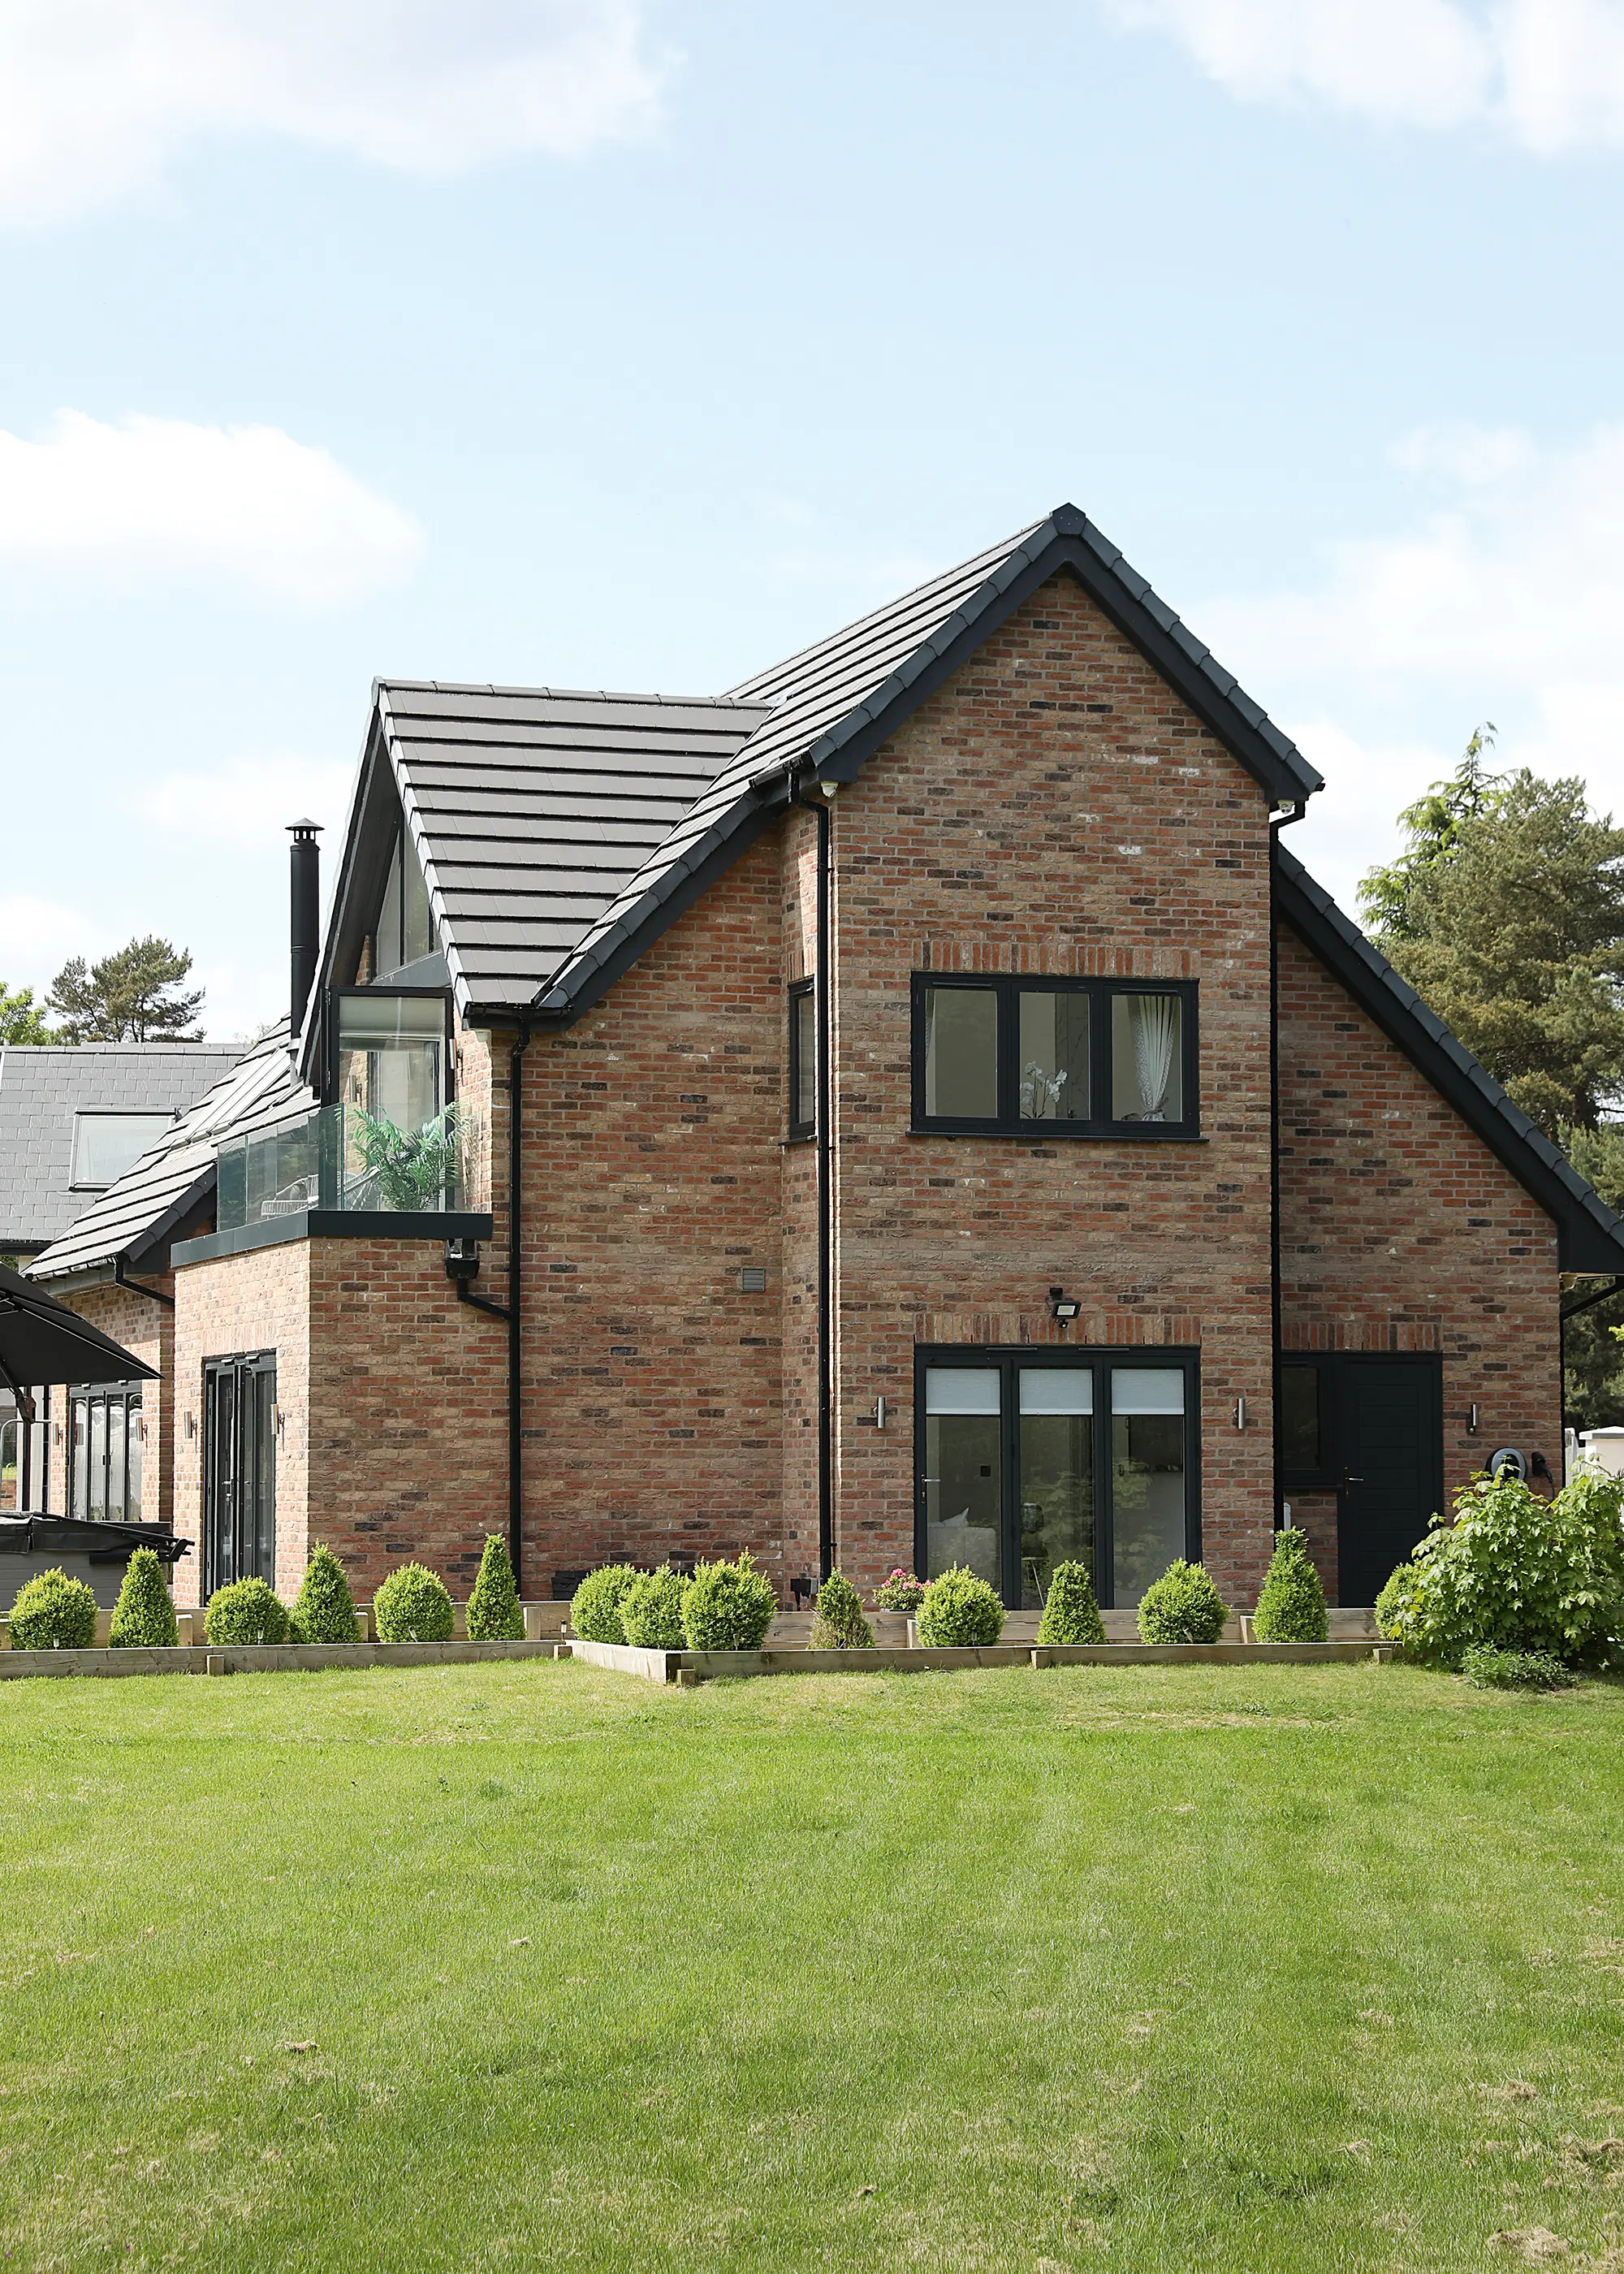
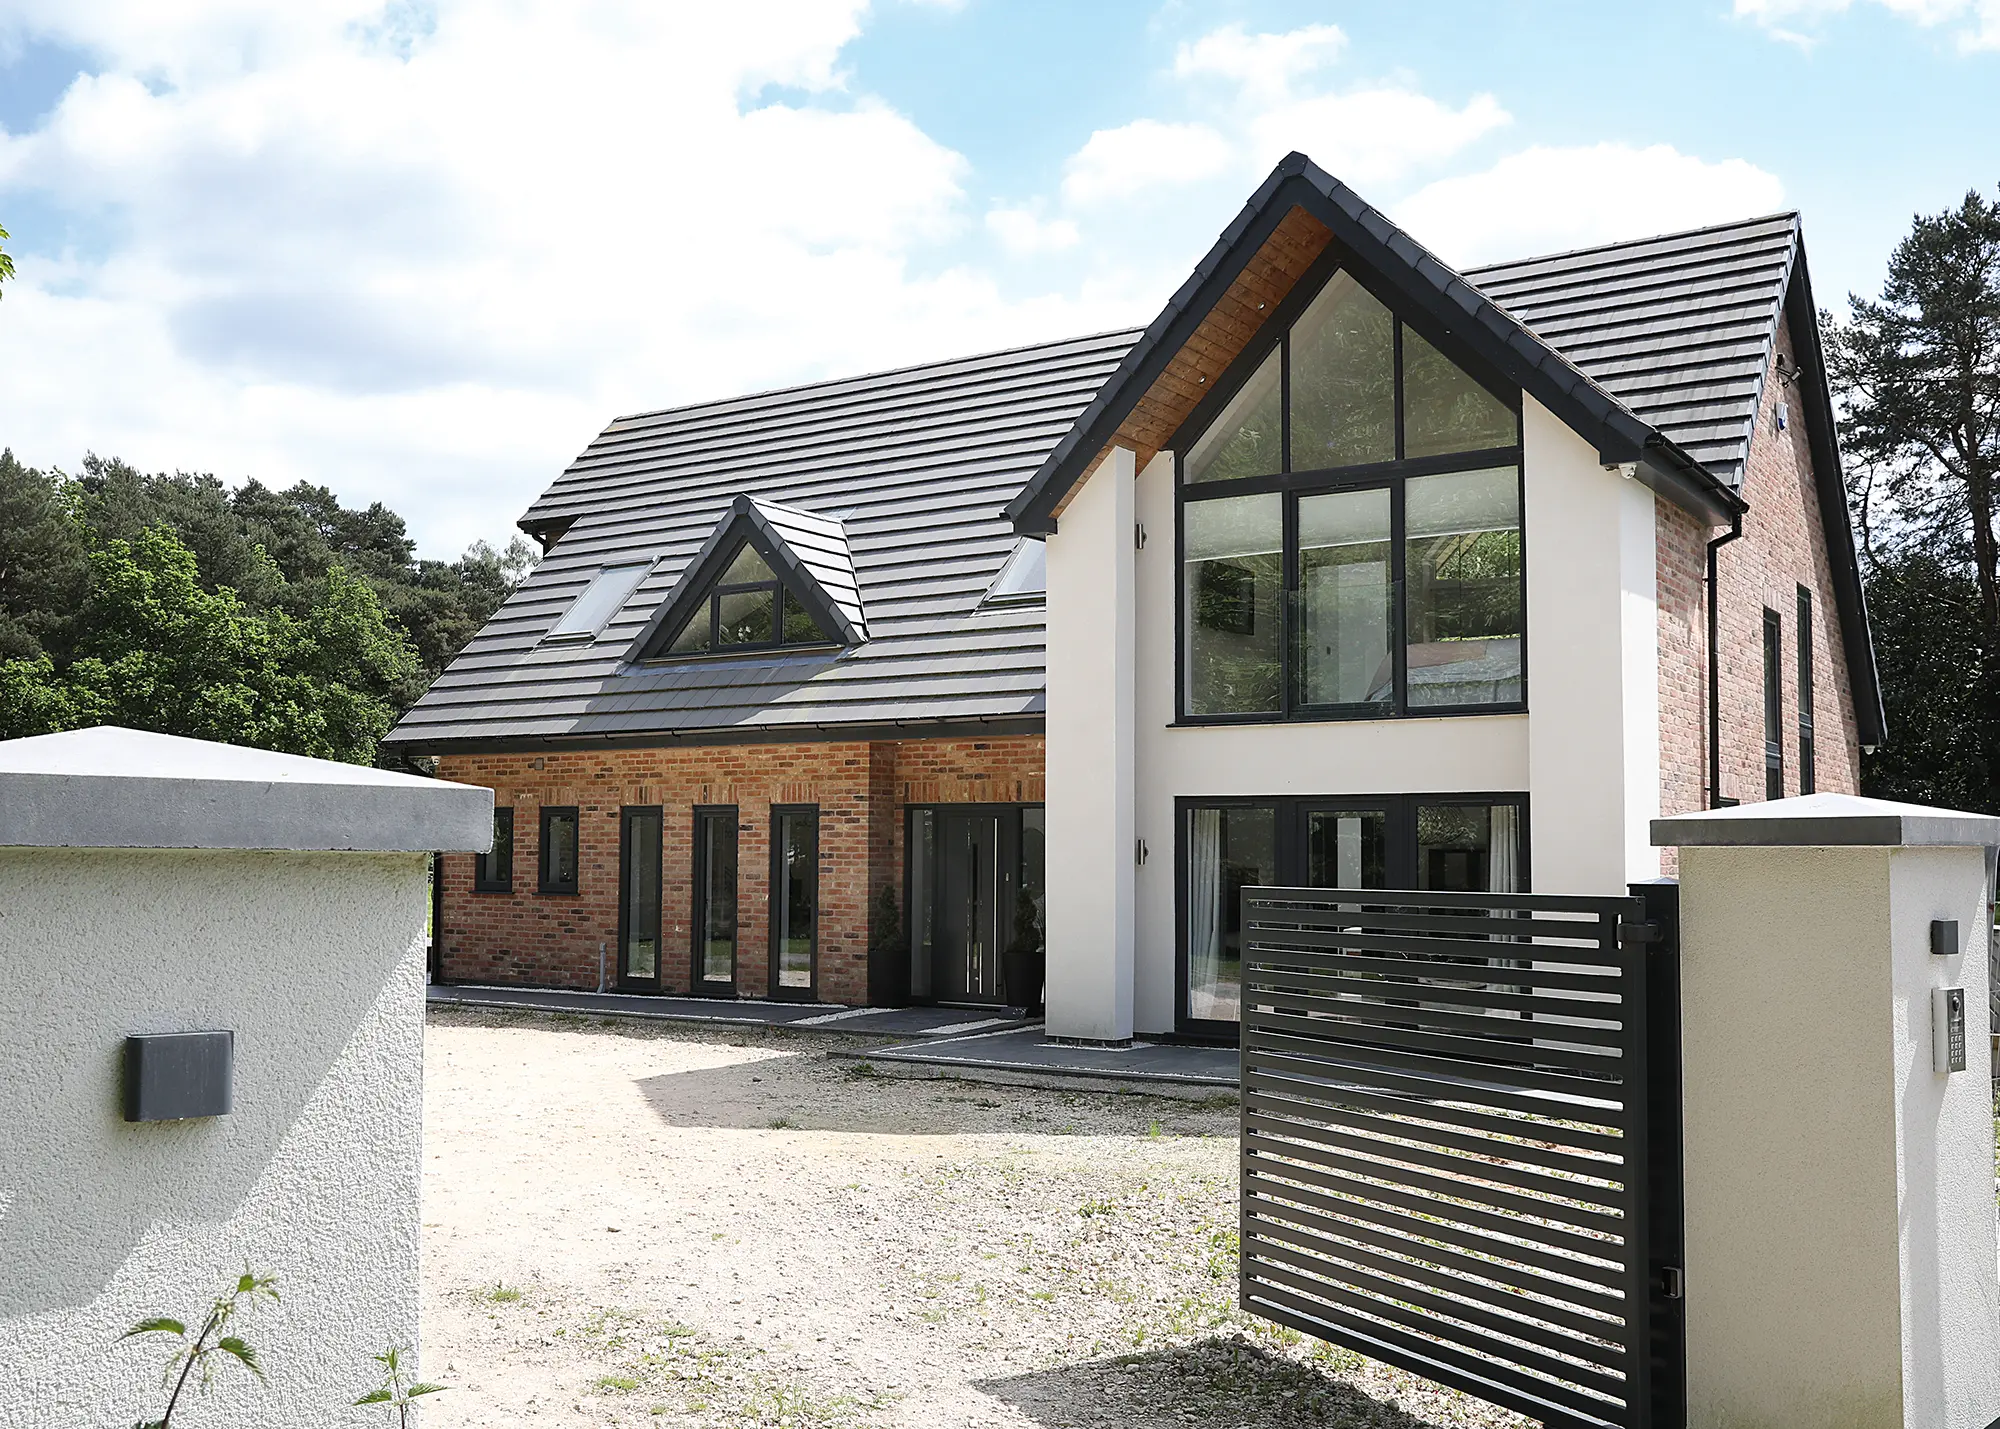
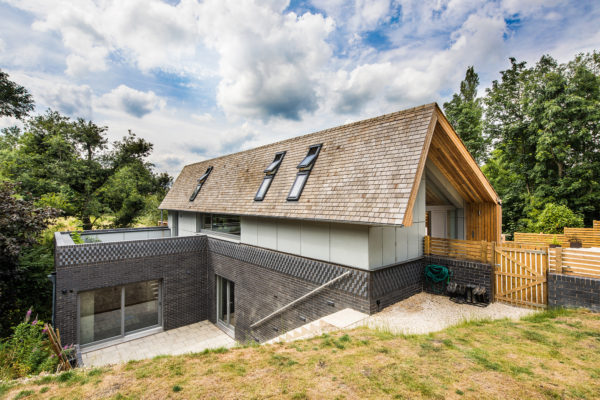
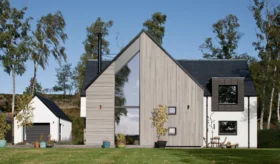
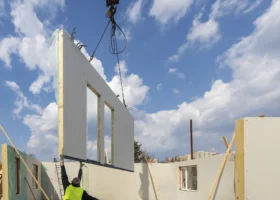
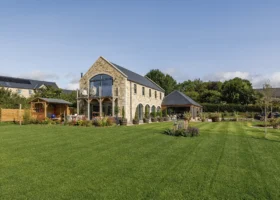
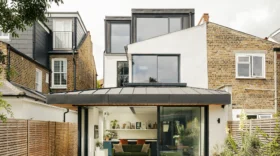
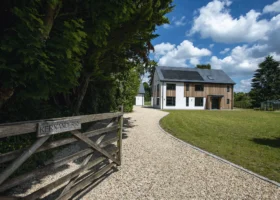
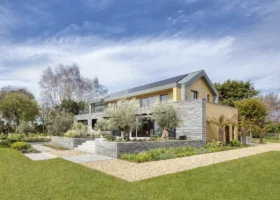
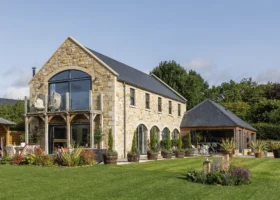
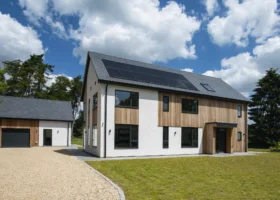
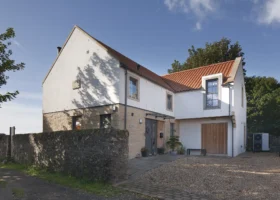
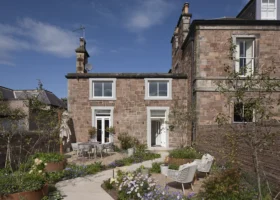
Kellie chose masonry as the structural system for her home, opting for white render on the front gable and a brick finish for the rest of the exterior
“My old house was then sold to a cash buyer and I moved into my new home once the build had reached a certain stage.” Before the project could be set in motion, Kellie needed to secure permission to change the use of the greenbelt site to residential.
This was the most drawn-out part of the process. Each plot then required outline planning permission before being sold to ensure the houses wouldn’t look too different from one another. Once sorted, Kellie employed an architect to produce drawings for the detailed planning application for build, and approval was secured in six to seven months.
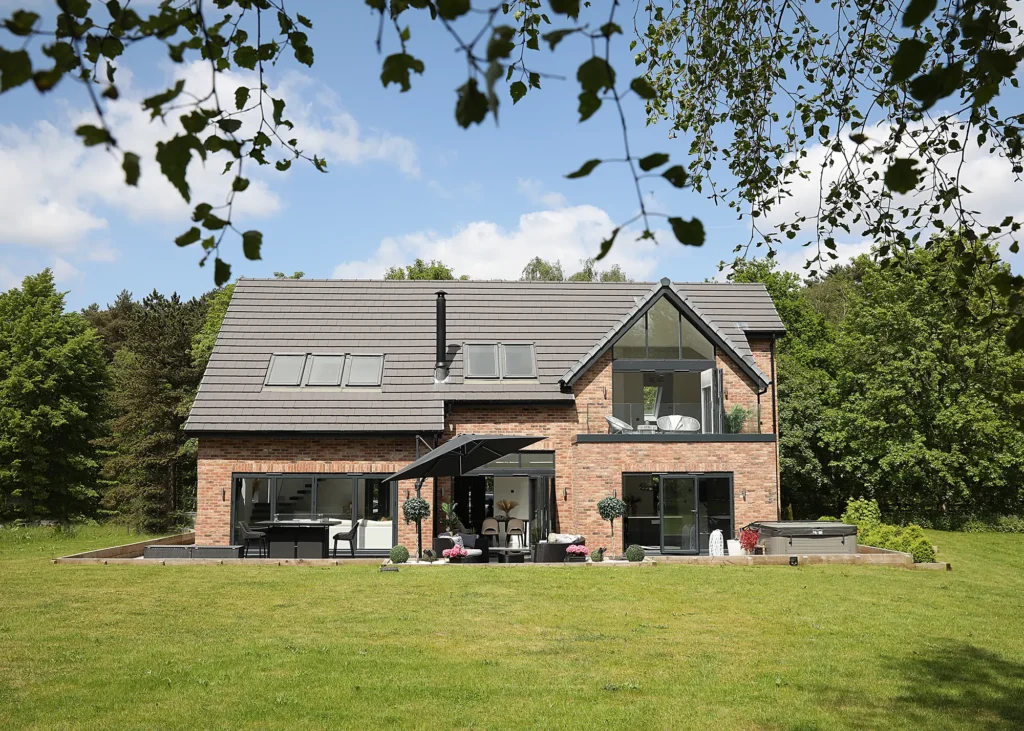
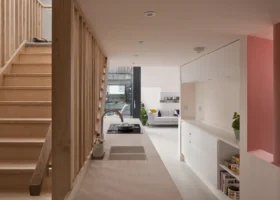
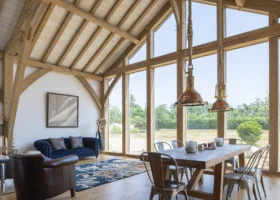
The site’s greenbelt location meant there were planning conditions to be met. For example, the fences had to allow for badgers to easily cross the three plots and Kellie had to install habitat boxes. There were also restrictions to the height of the build. Together with her architectural designer, Kellie planned a one-and-a-half storey house to get around this. “Having an entire first floor would have made it look much smaller on the outside,” she says. “The design creates the illusion of scale, making it appear bigger than it actually is.”
Kellie had attended several self build exhibitions where she weighed up the pros and cons of the different structural systems. She decided that the traditional brick and block method would be the most cost-effective for her, given the steady cashflow it offers.
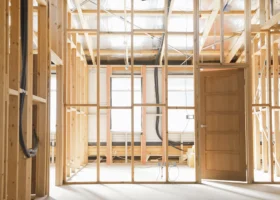
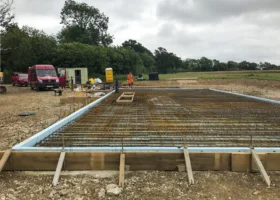
It took some time to complete the preliminary work before building work could begin. Because of how remote the site was, connecting the services took a long time, but once they were in place, the rest was smooth sailing. “We didn’t have any problems putting the foundations down and the brickwork went up surprisingly fast,” says Kellie.
“It was nearly winter at that point, so we were racing against the clock to get it done while the weather conditions were suitable.” With the walls up, it took another eight weeks to get to weathertight stage.
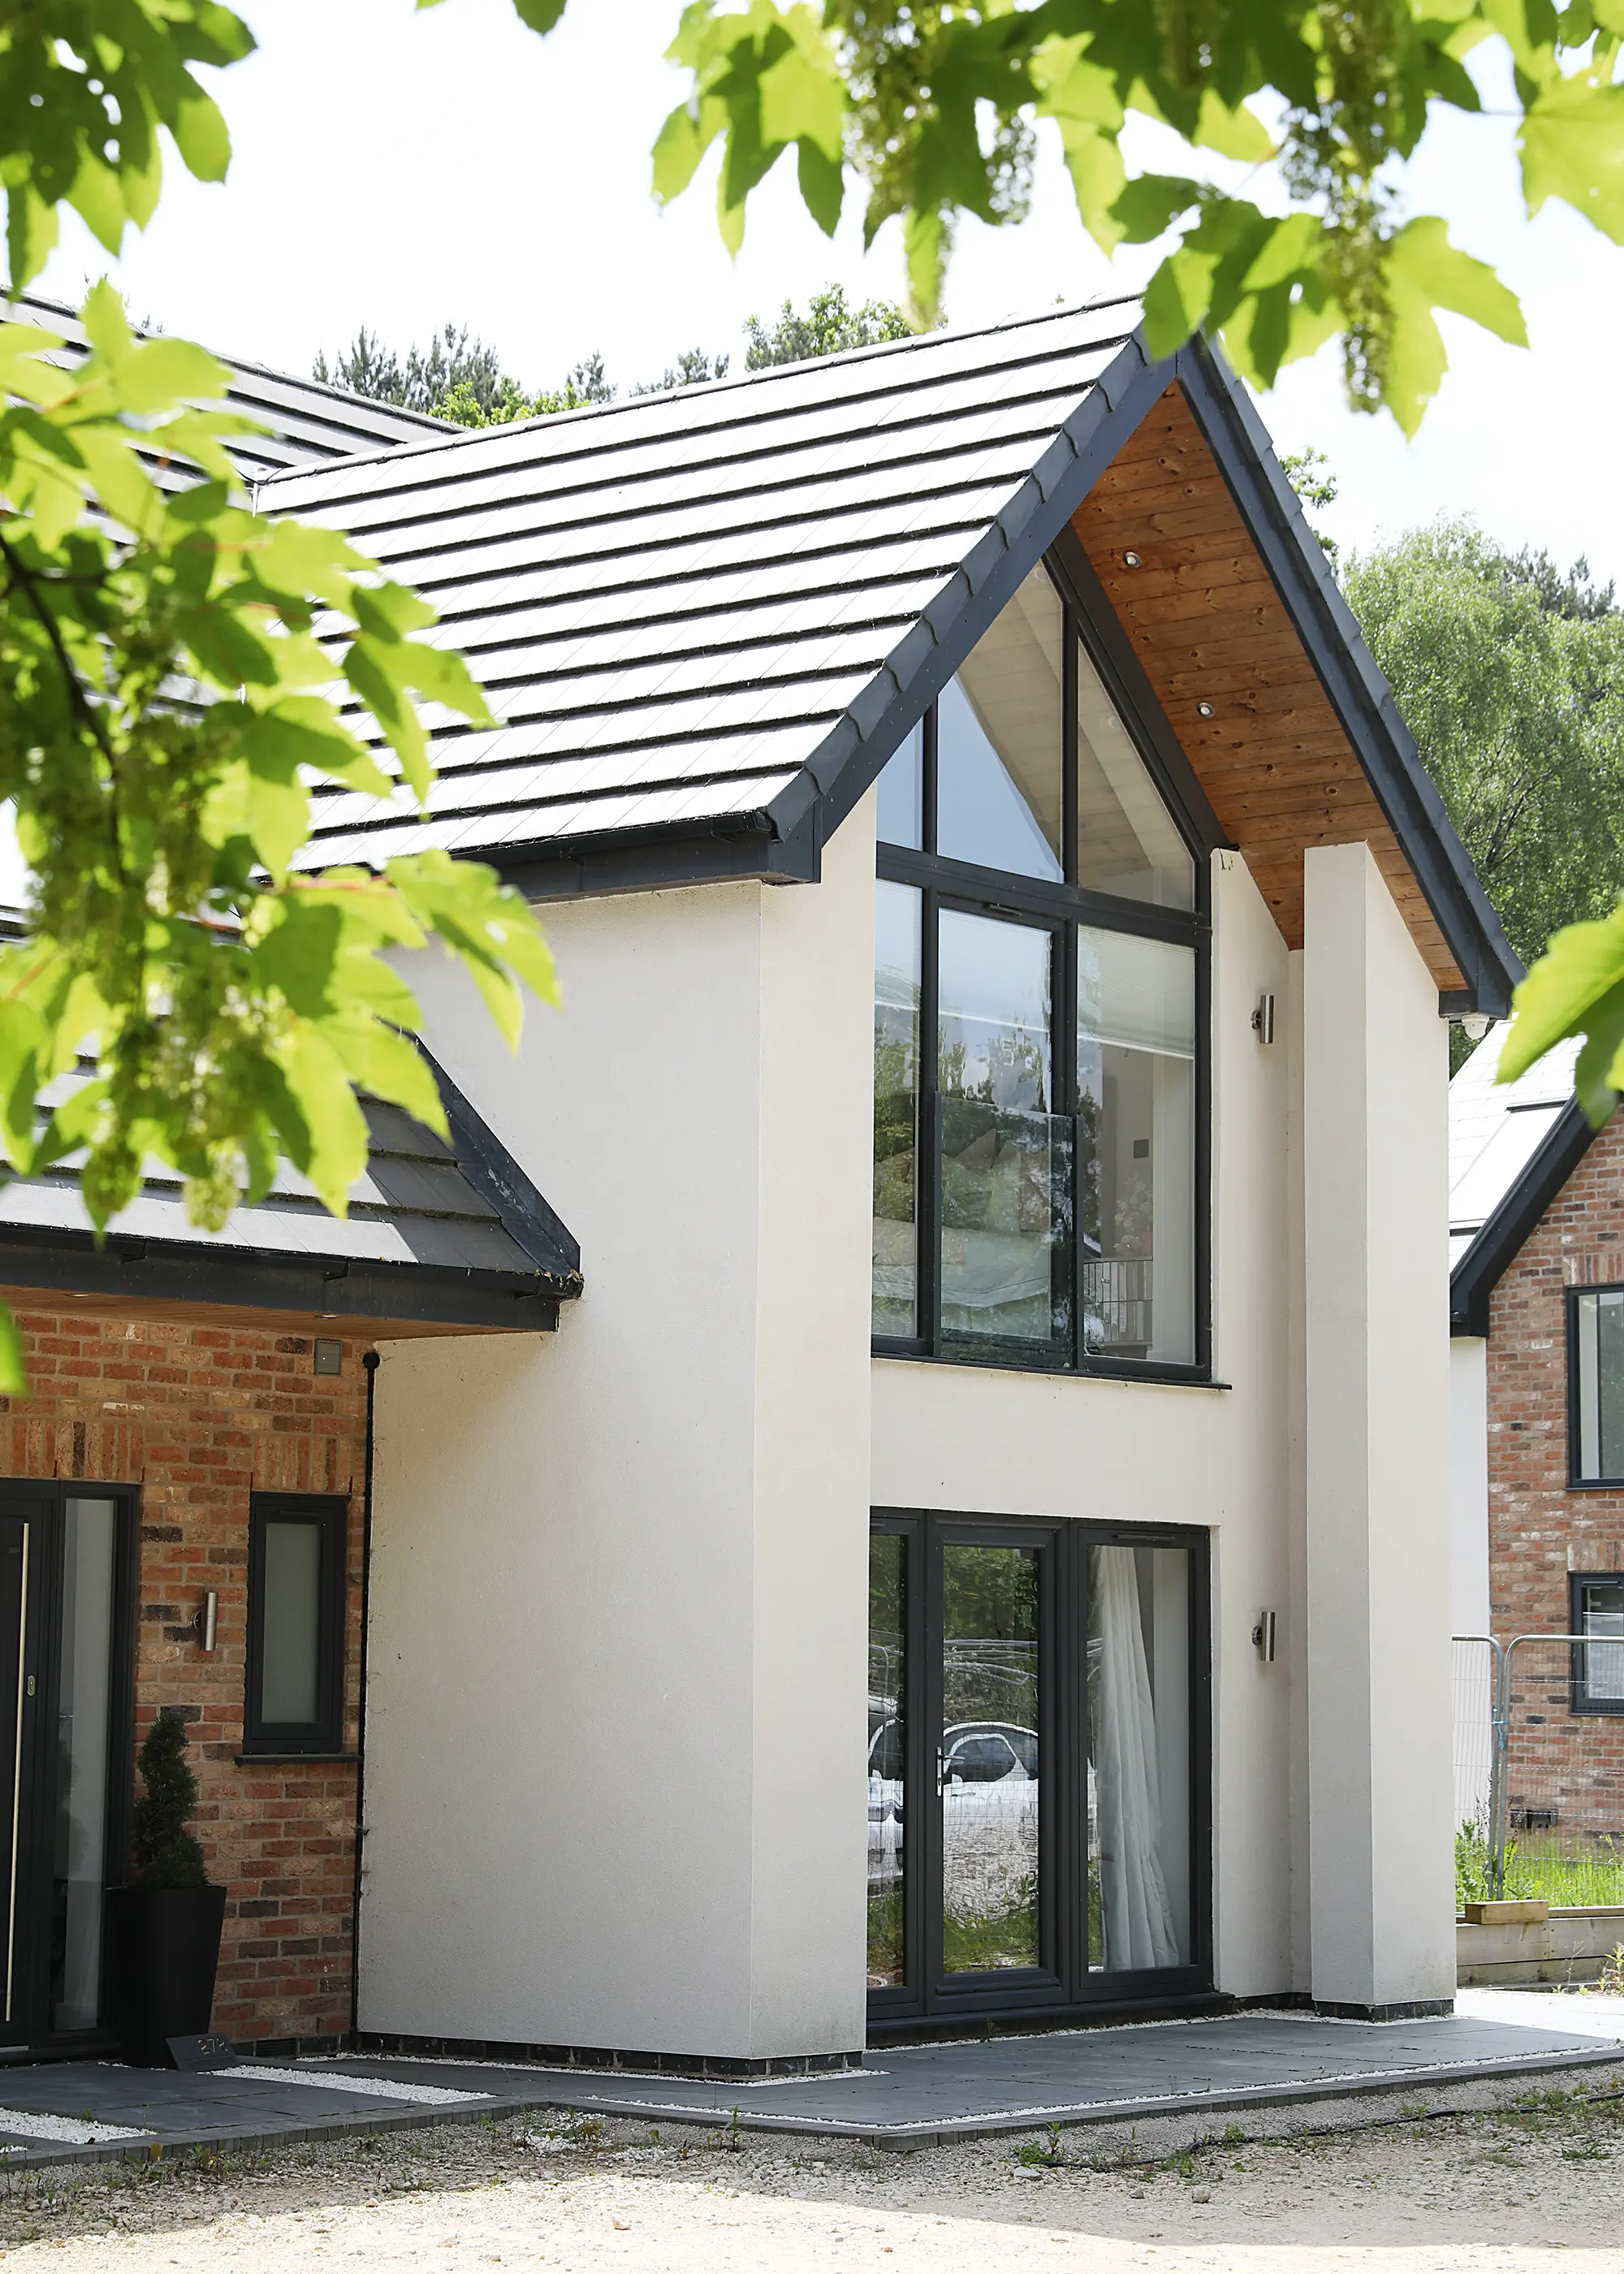
Kellie chose masonry as the structural system for her home, opting for white render on the front gable and a brick finish for the rest of the exterior
Once the structure was in place, Kellie walked through the house as a shell. It was at this stage she discovered the upper storey ceiling was too low. “At that point, we stopped construction to adjust the roof and make the rooms more useable,” says Kellie. “If I’d been away at the time, I wouldn’t have been to make those changes.”
Kellie also took the opportunity to take down stud walls where she thought the rooms were too small, such as the cupboard in the utility room and one of the ensuite bathroom upstairs. “It was good to be able to walk through the shell before committing to the layout,” she says.
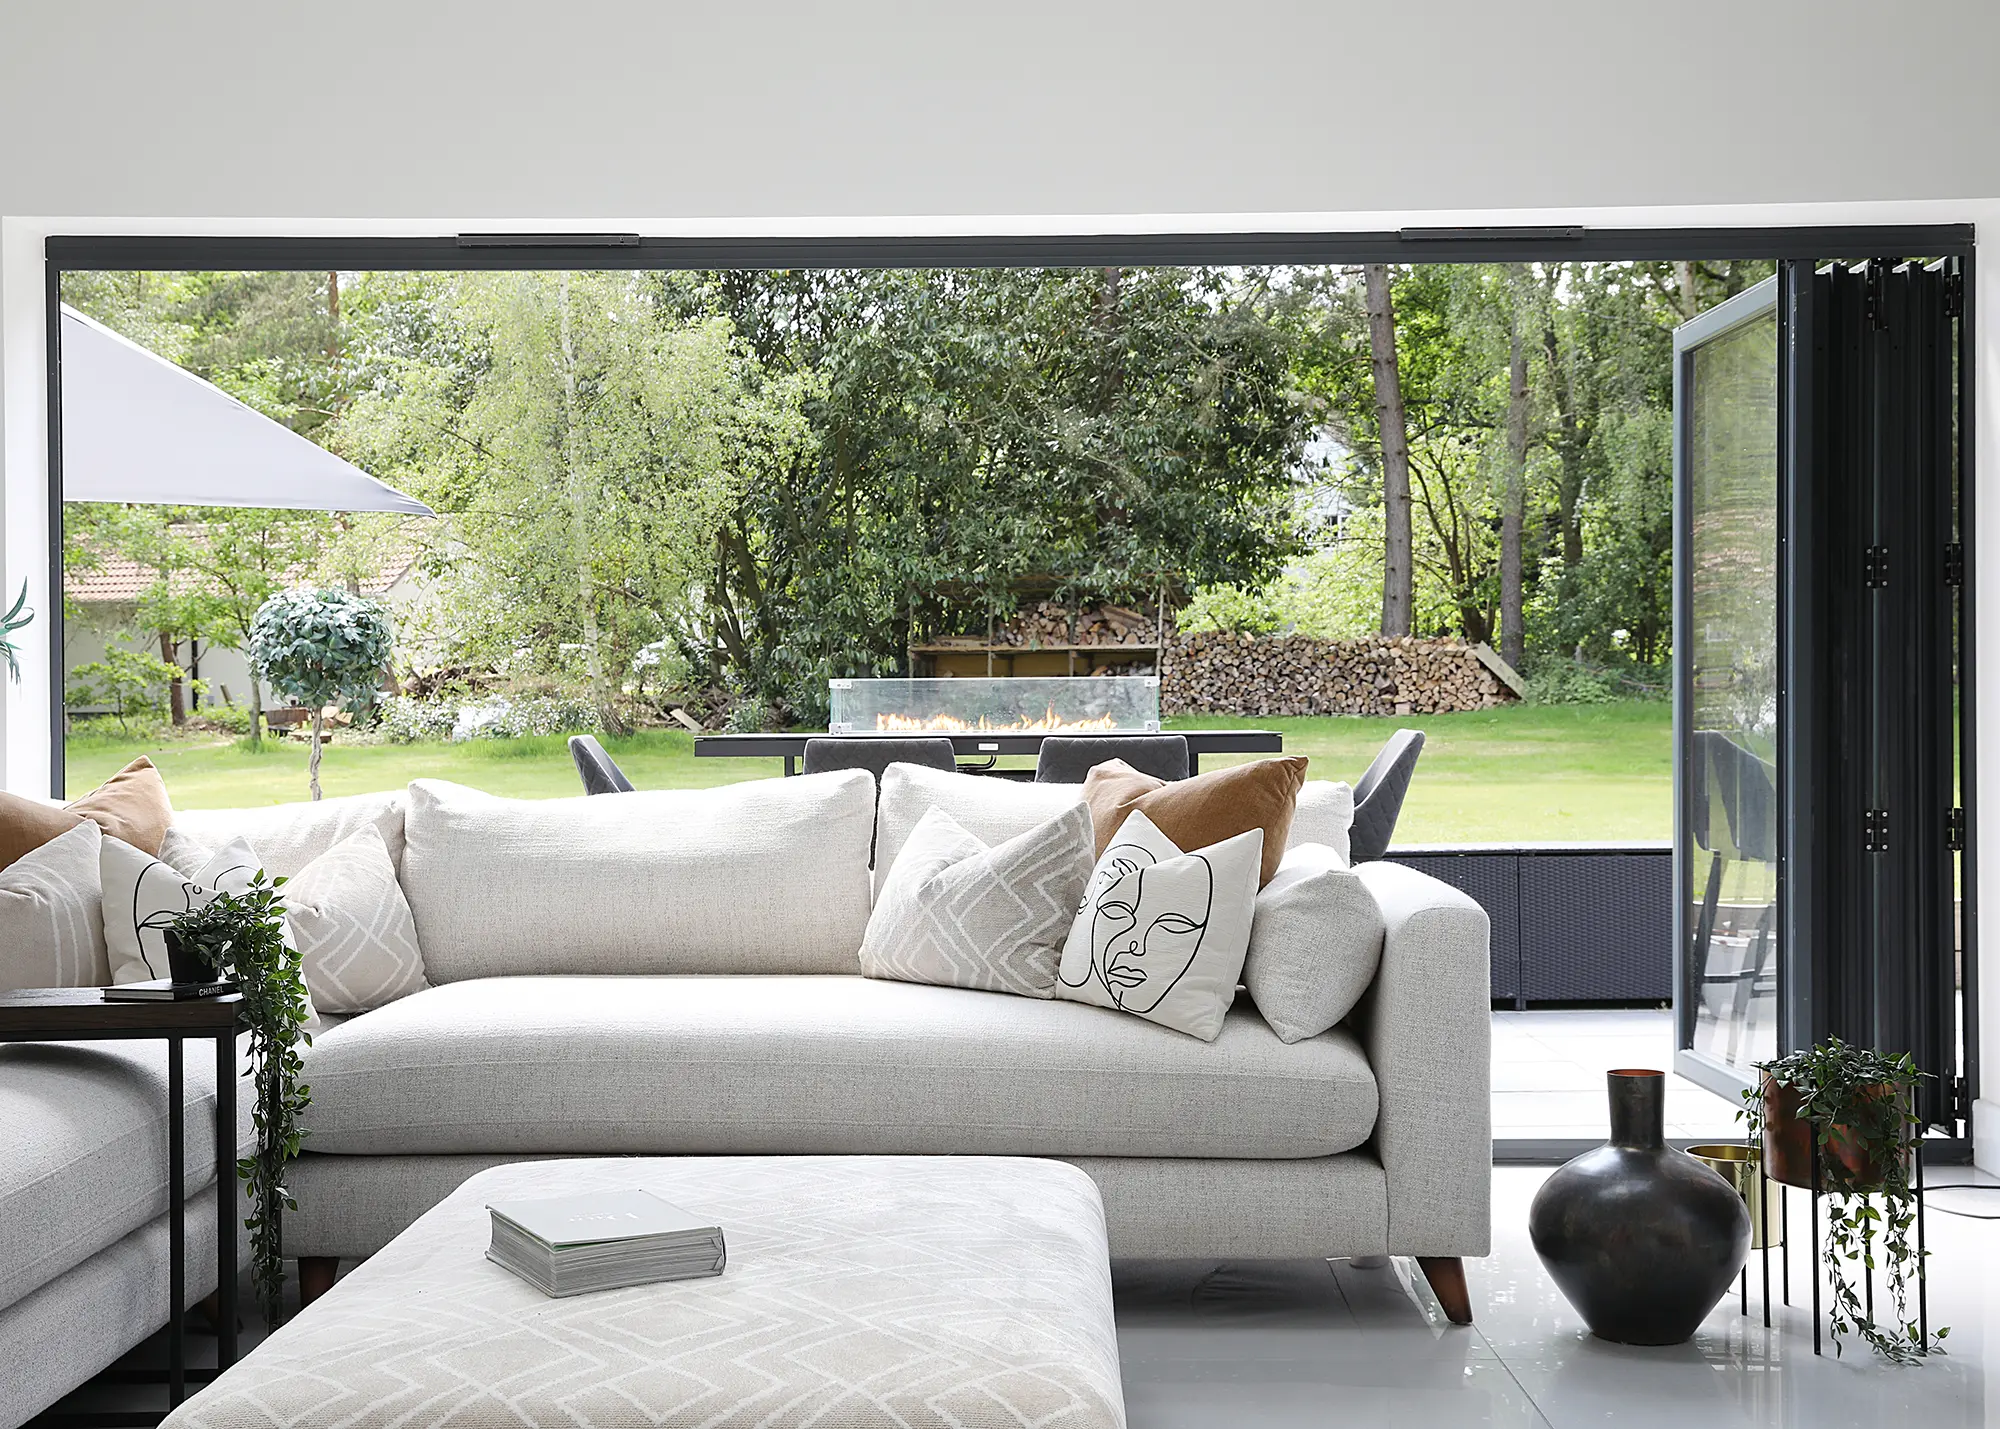
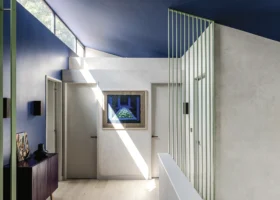
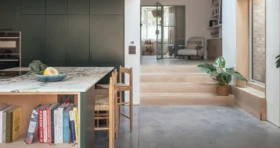
For Kellie, the internal fit-out and finish was of huge importance. “I didn’t want to create what would be a lovely house and have it look really ordinary on the inside,” she says. Kellie invested in high quality specifications throughout the interior, which she supplemented with her own funds. “I was doing the build over a 12-month period, so I always made sure I had enough in the bank. If it wasn’t affordable for me, I’d have stuck with the standard spec where necessary.”

Kellie furnished her new home from scratch, selling her old furniture on eBay to create a completely contemporary interior finish
Kellie worked very closely with her contractor, Terry Smith Builders, who checked in regularly with her at each stage of the build to ensure she was happy with the work and to run any key decisions by her. Terry would show her the standard specification for the fit-out, from the staircase to plug sockets and light switches, and give Kellie the option to upgrade these features at an additional cost.
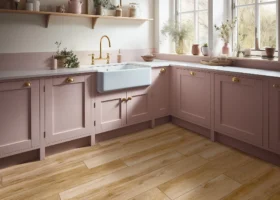
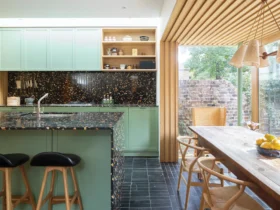
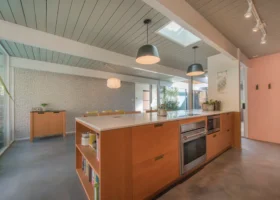
“If there was something I wanted to change, I would source a specification and give him a clear brief. He would then cost it and see it through,” says Kellie. She pulled on Terry’s contacts where she could for any upgrades, but for features such as the kitchen, the designs available from his list of suppliers didn’t offer what she was looking for.
Learn More: Kitchen Design & Costs: How Much Does it Cost to Design & Fit a Kitchen?
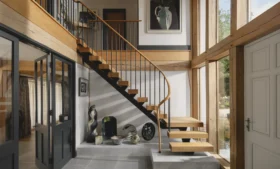
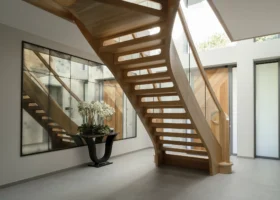
CLOSER LOOK Floating staircase…Kellie went to great lengths to make her vision for a floating staircase and glass balustrade a reality. This was one of the most difficult parts of the build, but is a show-stopping design feature. She wanted to see real-life examples of this style of staircase, but couldn’t find any in showrooms or at home design exhibitions. “I tried to get advice from people who had similar flights to find out how they had gone about it and looked online to source one myself,” says Kellie.
She then appointed bespoke staircase specialists M-Tech Engineering to carry out the design. In order to create a true floating effect, the walls need to be constructed to adequately support the treads. However, the builders had already planned for a standard staircase to be installed, meaning they had to go back and reinforce the walls before the flight could be fitted. Kellie also chose to incorporate LED lights, which required wires that needed to be hidden. “With features like this, it’s important to plan in as much as possible before the building work starts and avoid deviating from it,” she says. More Inspiration: 20 Staircase Design Ideas: Plan & Design Your Perfect Staircase |
After browsing social media for inspiration, reading reviews and seeing as many products and materials in person as she could, Kellie identified a supplier to deal with directly for the kitchen – and surprisingly close to home.
“I’d visited a neighbour’s house whose kitchen I really liked and asked where they got it from, so the supplier was local.” Terry was given the task of overseeing the work of any trades she brought in herself, keeping Kellie in the loop with any concerns he had when they were on site.
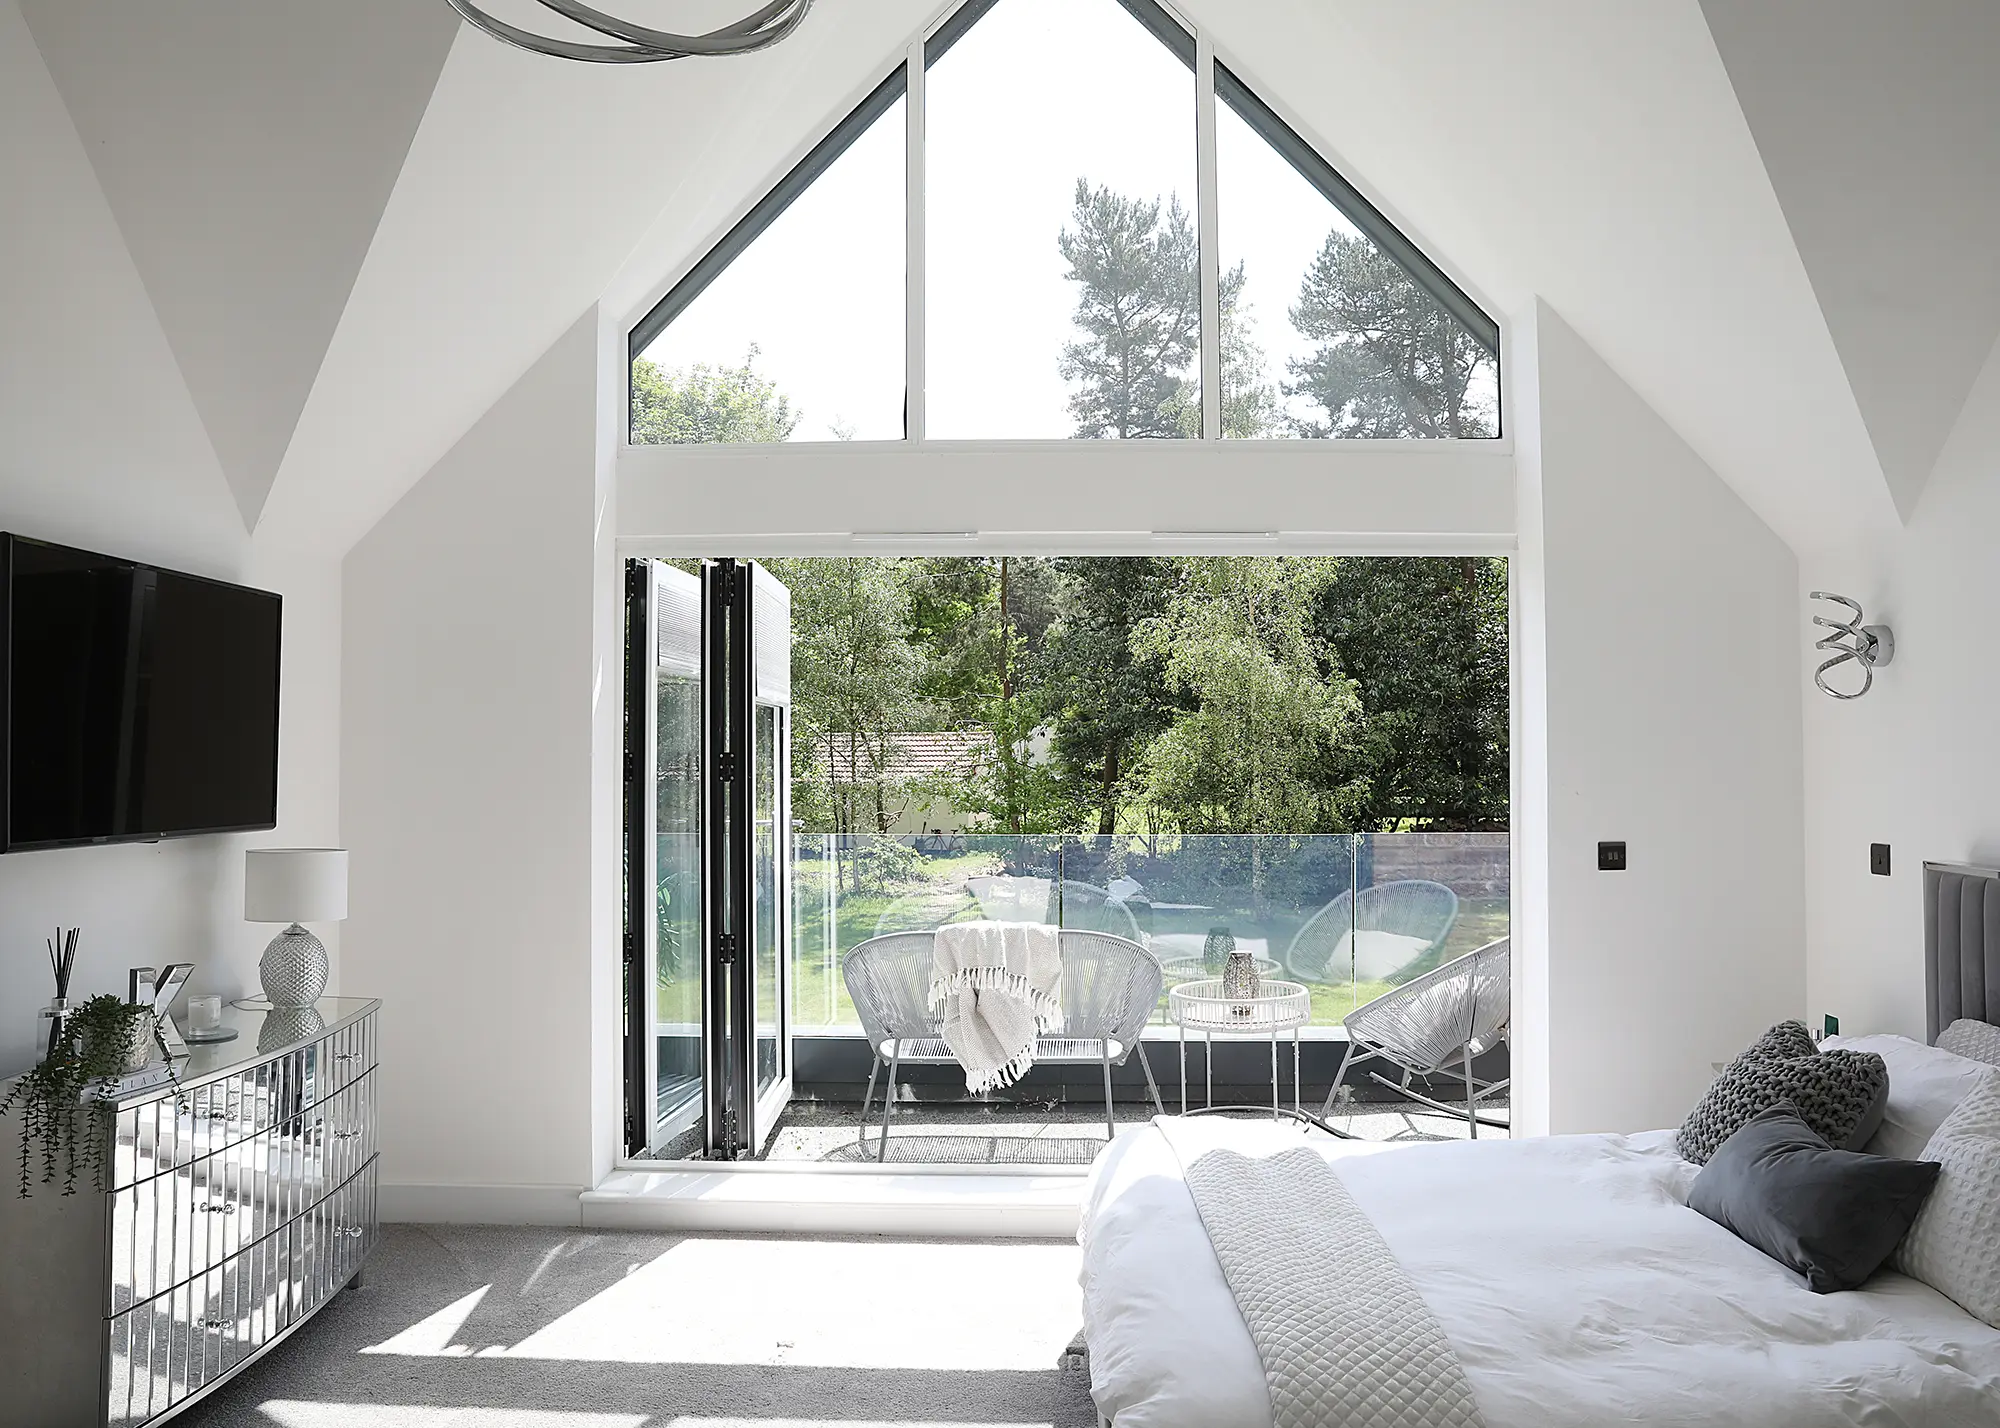
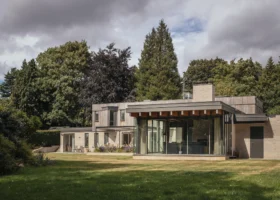
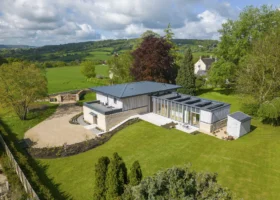
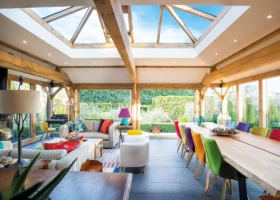
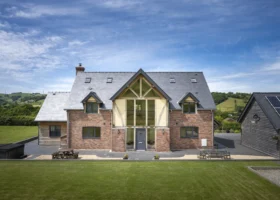
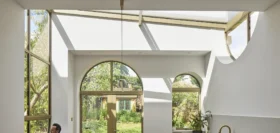
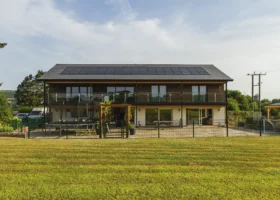
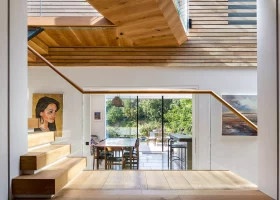
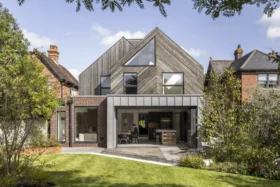
A half-storey upstairs enables vaulted ceilings. Wide spans of rooflights and statement light fixtures accentuate the contemporary architecture
For the exterior finish, Kellie opted for render on the front gable end and brick for the rest of the build. “I took ages to source the brick. I went to people’s houses to find the style I liked,” says Kellie. “I wanted the external design to have longevity, so I opted for a mix of different claddings as I thought render alone may have dated quickly.”
Moving into her new home, Kellie wanted a clean slate. “I didn’t take any of my old furniture. I sold everything on eBay,” she says. “I bought everything brand new to style it exactly how I wanted.”
More Ideas: Brick Design: The Best Brick Ideas for Your Project
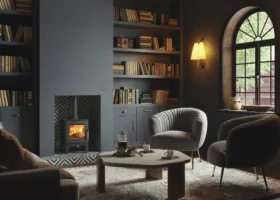
When it came to achieving the energy performance she wanted, Kellie had the choice of installing solar panels or opting for a secondary heating system to help her home run more efficiently. She opted for a woodburning stove, which resulted in some unanticipated expenses. “I didn’t want a traditional log burner, so I did a lot of research on the style I wanted,” says Kellie.
The model she chose wasn’t a standard design; the flue was much wider, making it trickier to install. Despite exceeding her budget, it was a worthwhile investment. “It’s the show piece when you enter the living room, and the heat output adds another 10°C to the house. When you think about the amount of space it’s heating, it’s doing a really good job, and with the rising cost of energy, it’s worked out well.”
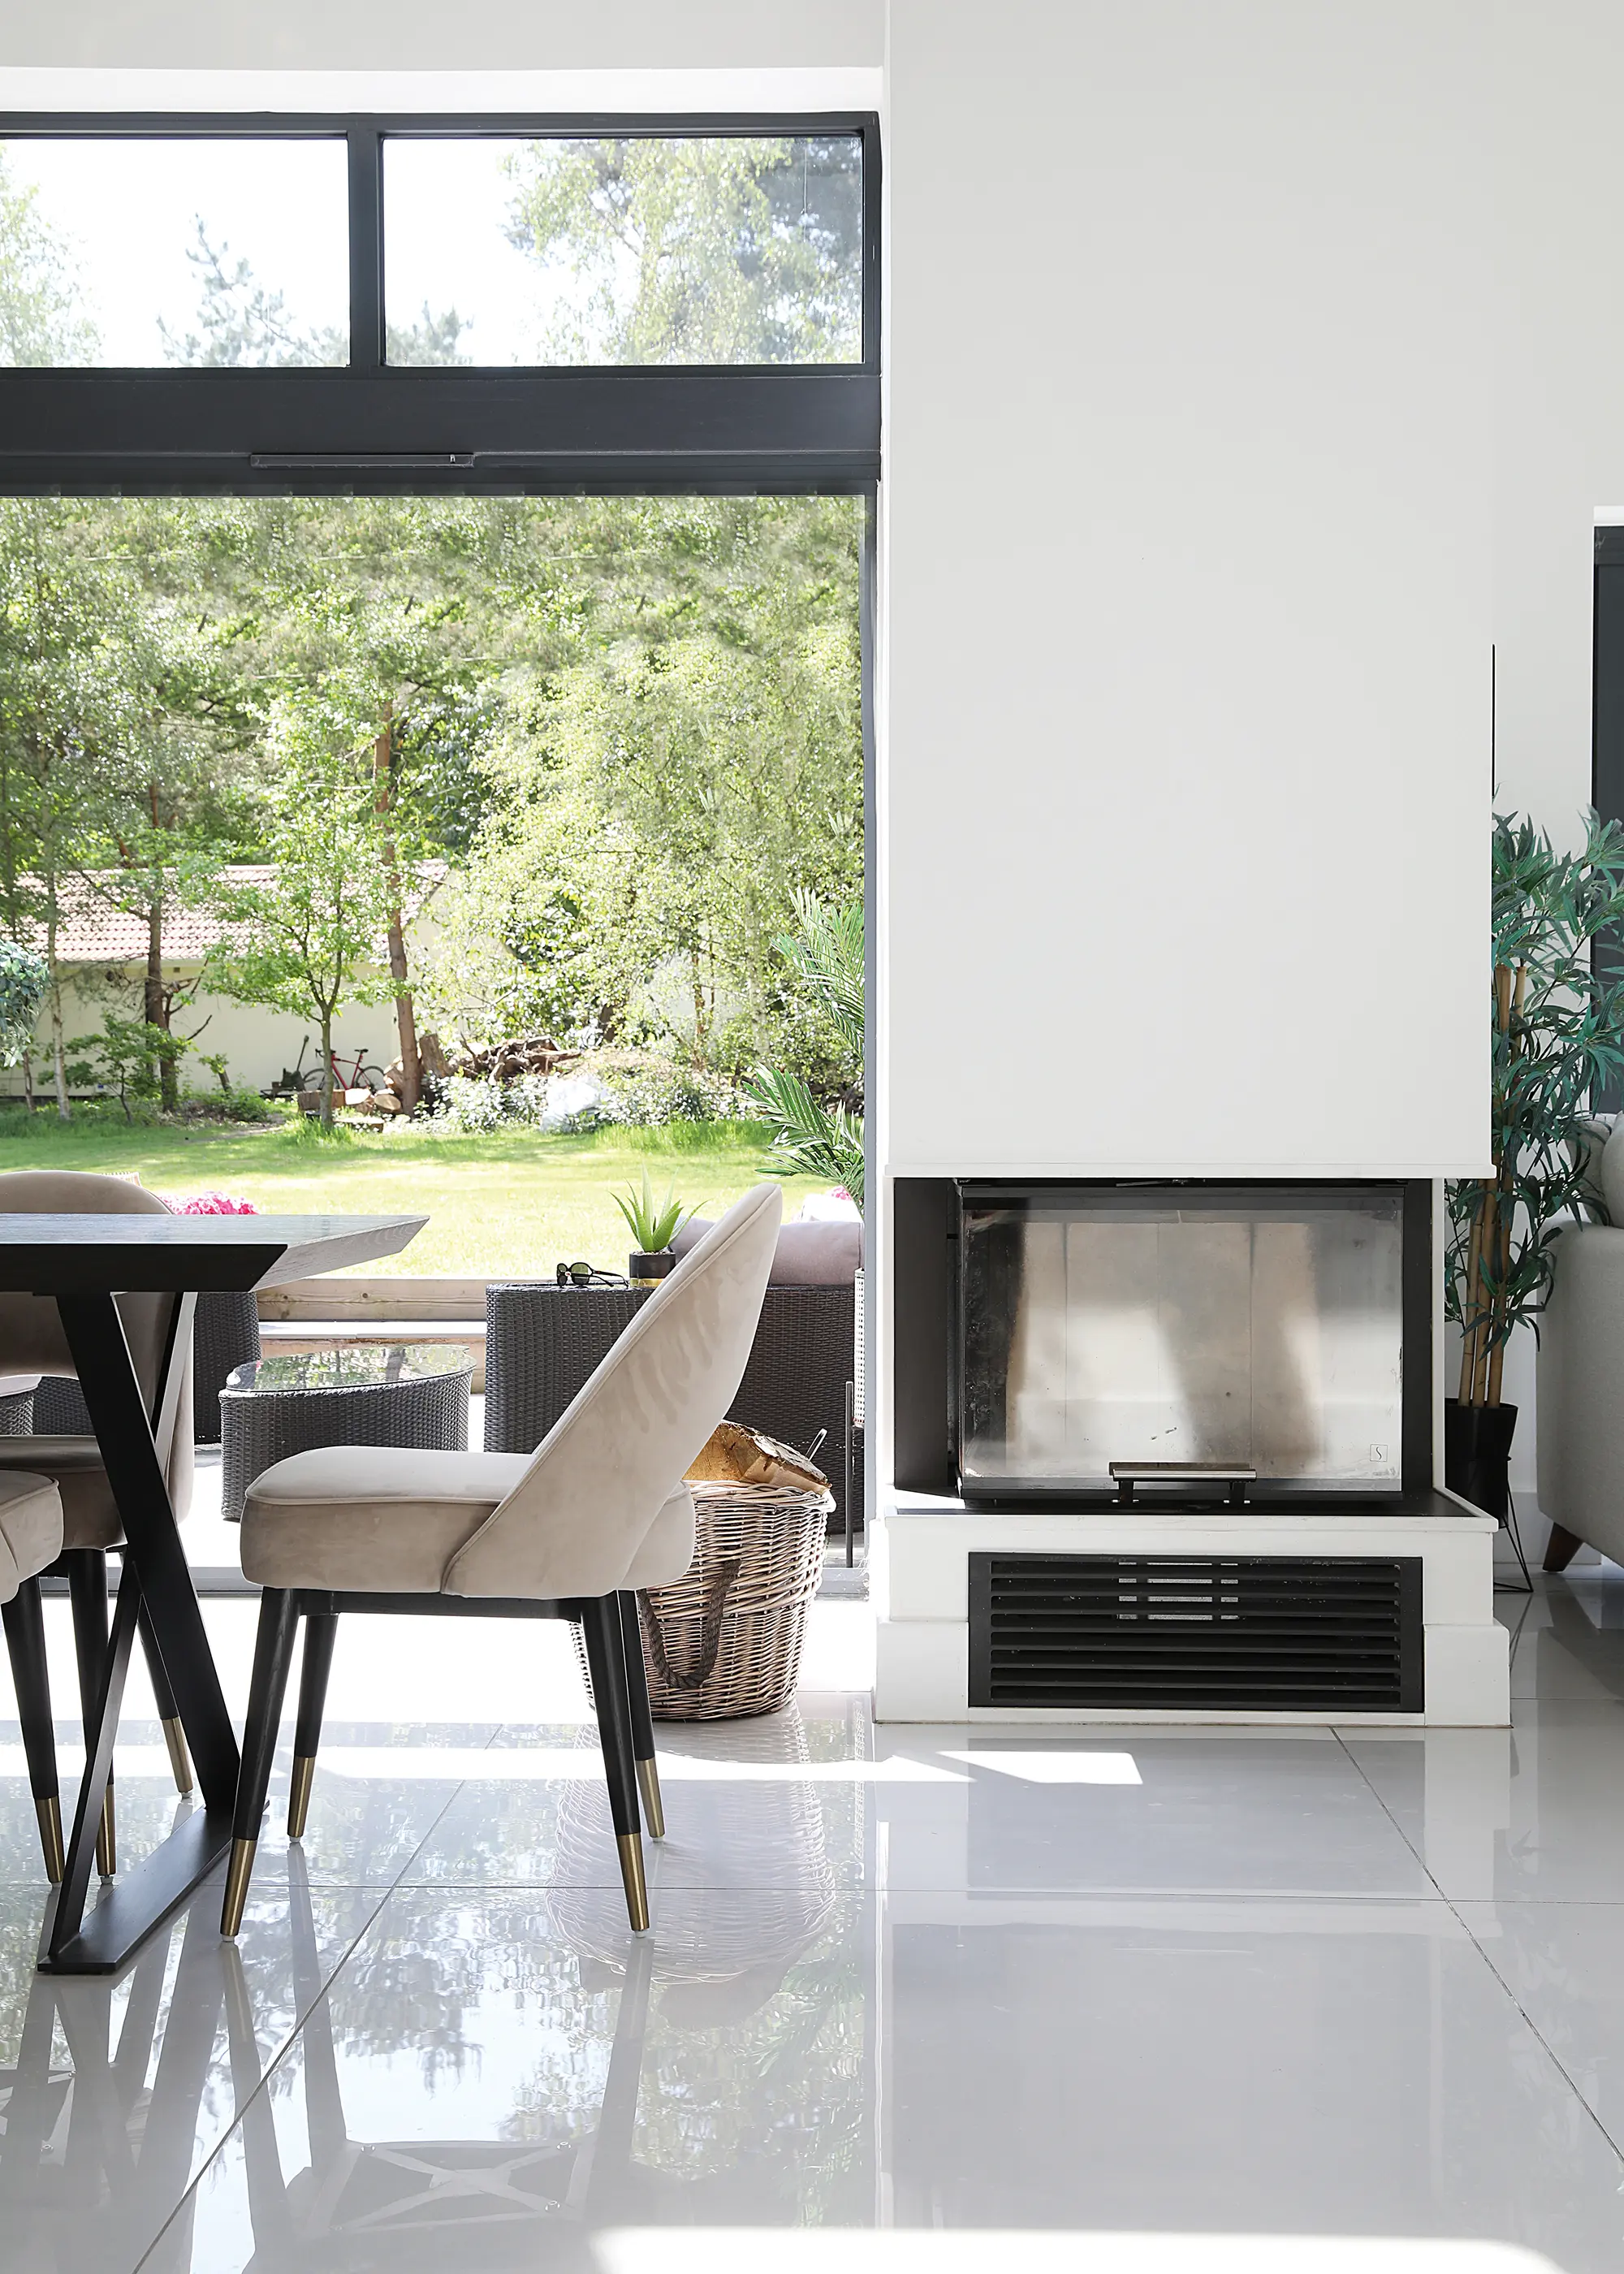
Kellie chose a modern woodburning stove as her home’s second source of energy
Another wow-factor feature is the balcony off the master bedroom, which sits on a flat roof terrace above the kitchen. Originally, the master bedroom was going to be bigger, but Kellie wanted to take advantage of the views to the rear. Getting to the finished result wasn’t straightforward, however.
“I hadn’t anticipated how difficult it was going to be. It wasn’t something the builder would have done as standard,” says Kellie. The roof was the cause of the problem. When it was first installed, the kitchen flooded when it rained. In the end, it took three attempts to get it watertight, using fibreglass and resin bound surfacing.
Local supplier Kitchen World Mansfield fitted the sleek handleless kitchen, featuring all black cabinets and a white countertop
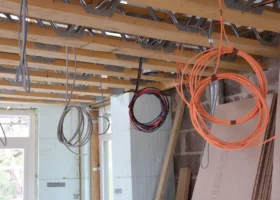
The home audio system was a much smoother process. Before the internal walls were plastered, Kellie had a sound engineer perform tests. They then mapped out where the ceiling speakers should be placed to get the best sound quality.
This was then factored into the electrical plans so that the sparky could wire the system in before the walls were plastered. “It had to be planned really early on in the process,” says Kellie. “Before I’d even designed the roof, I had to decide where the speakers were going to go!”
Completing the build was a sigh of relief for Kellie. “I felt proud when I showed people round my new house for the first time,” she says. “It looks great from the outside, but inside, it has real wow factor.”
Looking to create your own impressive self build? Take inspiration from these 25 Window Design & Feature Glazing Ideas
I LEARNED…Think about the non-standard features you want and the installation process required. Plan them during the drawing phase with your architect and structural engineer to avoid retrofitting and revisiting work that has already been completed. Plan the layout of every room so you know where best to place fixtures and furniture before trades come in. If you know where the bed, sofa and TV will be, you can locate plug sockets accordingly. Living in your home before it’s finished has its benefits because it gives you a better idea of how you’re going to use the space. Parking on my driveway made me realise it was too narrow to turn around easily, so I’m glad I found that out before I put the tarmac down. Don’t be scared to change things. If you’re really not happy, ask the question as to whether it can be altered. It’s worth challenging if you’re truly not satisfied with something. |


 Login/register to save Article for later