- Plan ItBack
- Design ItBack
- Build ItBack
- Homes
- ProductsBack
- CostsBack
- Self Build Cost Calculator
Estimate your project costs instantly with Build It's interactive self-build cost calculator
Calculate Now - Costs & Finance
- Contracts & Warranties
- Build It Estimating Service
Get an accurate, detailed cost breakdown of your project
Submit plans
- EventsBack


 Login/register to save Article for later
A Period Home Expert’s 6-Step Guide to Repointing Brickwork & the Mistakes to Avoid

Repointing brickwork can sometimes be necessary to ensure a home’s structural integrity. Masonry walls are built of a series of individual units – generally brick, stone or flint – with mortar acting as the glue that holds them together. The external face of the finished wall therefore consists of masonry units separated by mortar joints. These joints are known as pointing.
Paying attention to the current pointing and in when necessary pointing brickwork again is an essential part of moisture control while ensuring the building’s structure can live on for generations.
Mortar basically comprises an aggregate (sand) held in a matrix by a binder. In old walls the latter ingredient was usually lime, but might be earth or a combination of the two. Stone walls were often built with earth-lime mortar, for example, but pointed using lime. In this guide, I’m looking at the essential information you need to know and answering your repointing FAQs.
Jump to my step-by-step repointing guide
What is brick pointing & why does brickwork need repointing?
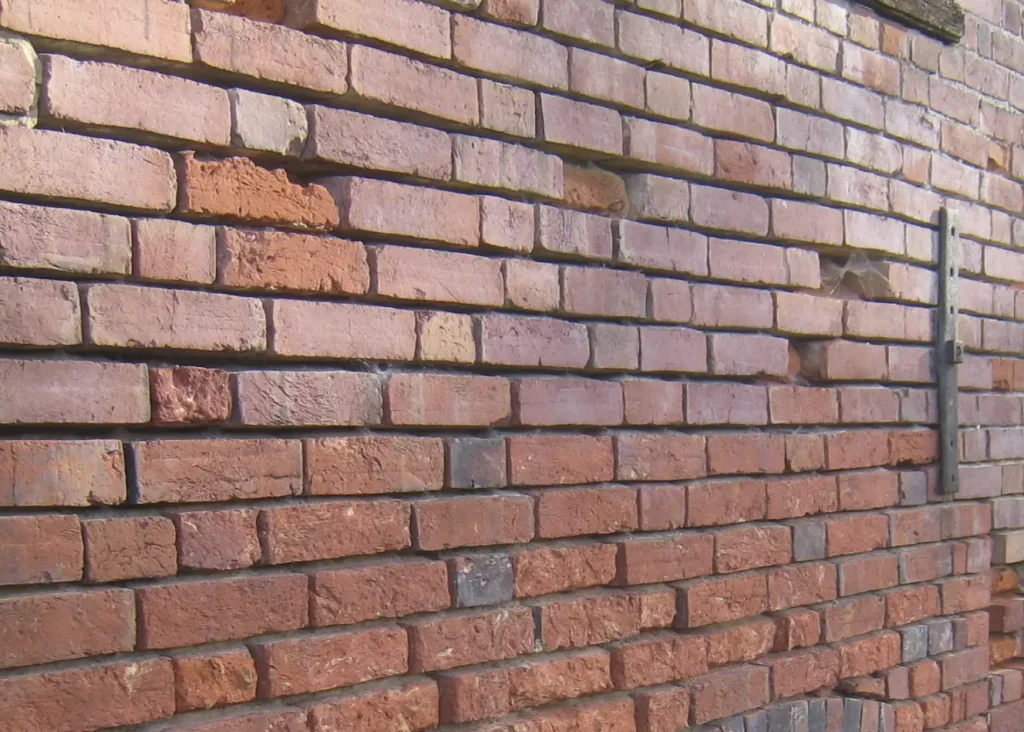
The most obvious purpose of pointing brickwork is to fill the gaps between the masonry units. This stops the brickwork from becoming loose and prevents water, draughts and foreign material such as dirt and vegetation from penetrating the wall.
Even more crucial is brick pointing’s role in managing moisture in the wall fabric. Old bricks are soft and permeable, while stone varies greatly from soft sandstones to very hard flint – but is generally relatively soft and permeable.
These materials absorb water readily; becoming wet when it rains and then drying through evaporation. The lime mortar brick pointing is also soft and permeable, which helps to ensure that this cycle of absorption and evaporation can continue to take place over the whole wall surface.
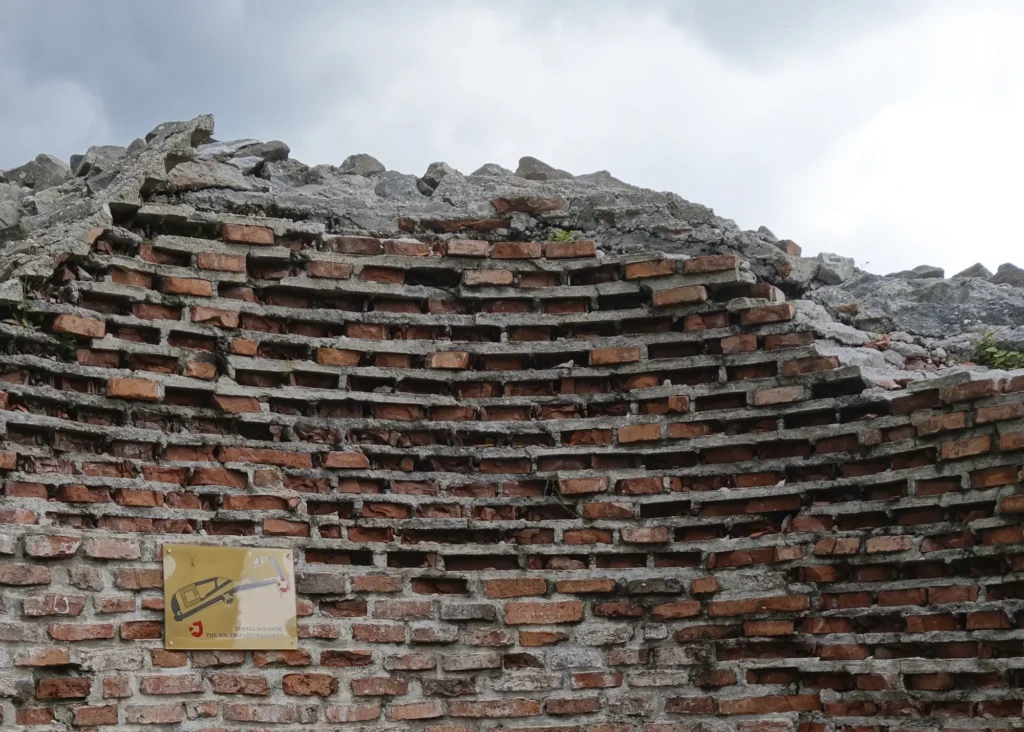
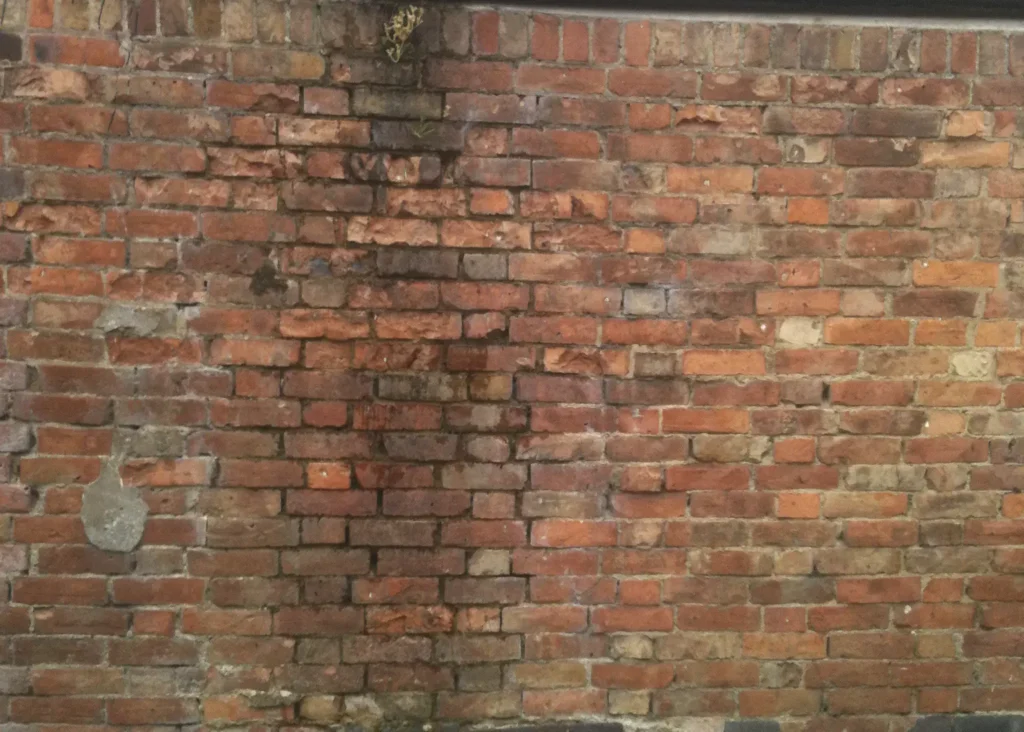
This wall was 500 years old when it was pointed with cement and now, most of the bricks have completely gone
Over a long period of time, this repeating cycle causes erosion of the surface of the material and brick pointing. If there is a frost while the wall fabric is still wet, the water in the wall freezes and expands, causing damage to the surface. This is when repointing brickwork is necessary.
To mitigate this, the pointing mortar is intentionally made softer and more permeable than the masonry units. This ensures moisture is concentrated in the mortar joints as opposed to the wall fabric. Most of the evaporative drying therefore happens in the pointing rather than the bricks or stones.
My 6-step expert guide to repointing brickwork
- The cause of the damage
- Working with wet bricks
- Removing cement pointing
- Identifying whether repointing is essential
- Repairing & replacing any damaged bricks
- Repointing the brickwork
1. Identifying & addressing the cause of the brick damage
With any repair to building fabric, the first step must be to assess what is causing the damage – in this case what damage has been done to the brick pointing. Otherwise the same issue is likely to be repeated in the future, making your hard work pointless. In very old buildings, wear and tear due to age is always a significant possibility. But unless the bricks were of very poor quality in the first place, this is less common than you might think – there is plenty of Roman brickwork still functioning perfectly well.
Physical damage can occur, sometimes from a single event, such as a vehicle collision, but more often as the result of frequent abrasion over time. By far the most common damage is brick spalling (disintegration of the face) as the result of freeze/thaw action when the bricks are wet. In this instance, it is essential to identify the reason the bricks are wet and sort that out first rather than going straight in and hiring trades that specialise in pointing brickwork.
2. Are your bricks wet & what does this mean?
Most old brickwork is formed of soft bricks, fired at a much lower temperature than modern bricks. This makes them more absorbent, but they should not be persistently wet in normal conditions. The most common cause of wet walls is inadequate or leaking rainwater goods (gutters and downpipes). These might be causing water to run directly into the brickwork or saturating the ground near the wall.
Because old buildings were generally built without a damp proof course, this can result in excess moisture in the base of the wall. The solution is to sort out the gutters first, not to install an injected DPC.
A leaking gutter is saturating the brickwork, causing it to fail
Poor detailing, particularly around roofs, windows or junctions can lead to rainwater runoff into a section of wall, causing saturation. High ground levels or hard landscaping against the base of walls can also increase the moisture load in the bricks.
Soluble salts can be absorbed by bricks over time. These are hygroscopic, which means they attract moisture and tend to hold it in the bricks. This can happen in chimneys where salts in the burning fuel have contaminated the bricks. Excess groundwater rising up the walls often carries dissolved salts, depositing them in the bricks (this might be the result of a past problem, now resolved).
Road splash can also make walls very wet and may carry high salt concentrations if the road is gritted in winter. Unfortunately, there is very little you can do about salts in brickwork apart from taking steps to prevent it happening in future, by maximising the potential for the bricks to dry out.
3. Removing any existing cement pointing
Old walls built using soft, low fired bricks used lime mortar both for bedding and pointing. The lime mortar is both more absorbent and softer than the bricks. This means that water is concentrated in the mortar rather than the masonry. When cold weather strikes, thaw action erodes the mortar and not the bricks.
An inevitable result of this process is that old brick walls need to be periodically repointed (about once in a generation). As cement became the predominant material for mixing mortar during the 20th century, it was common for old walls to be pointed using it.

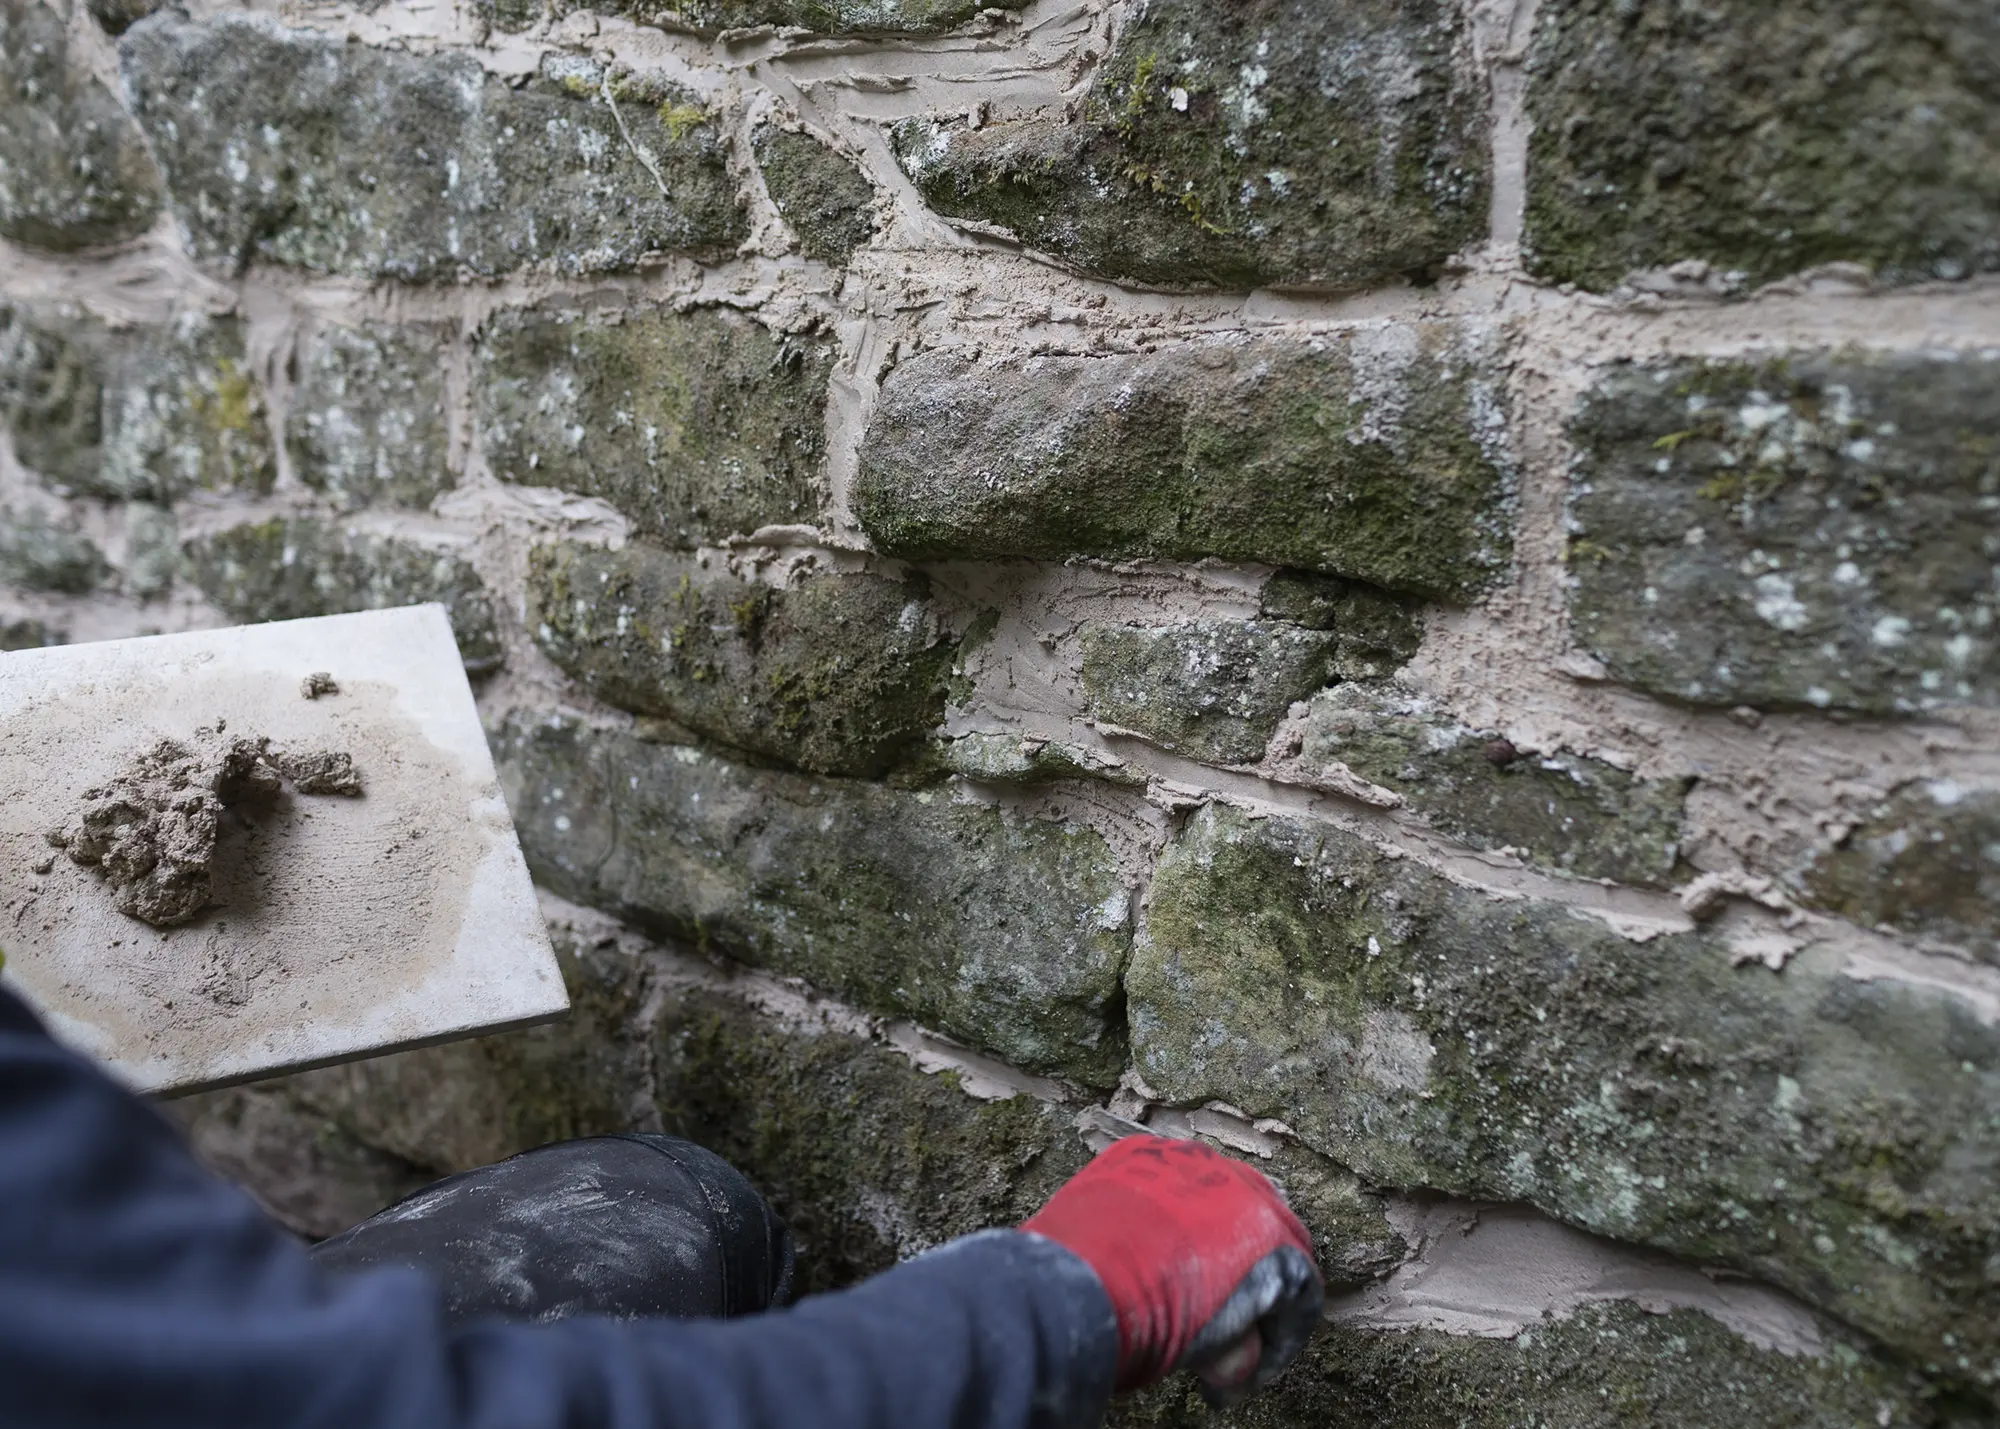
This stone wall is being repointed by a SPAB member using a non-hydraulic hot mixed lime mortar of local quick lime and quarried sand. Photo: SPAB / Ralph Hodgson
This mortar is much harder than the bricks and almost completely non-absorbent. As a result of pointing brickwork with cement, water becomes concentrated in the bricks, meaning they erode instead of the mortar. If there is excess water in the bricks because of one of the factors described above, this damage can be very severe and threaten the structure.
An additional problem with pointing brickwork with cement mortar is that it is very rigid, while the underlying brickwork is quite flexible. This causes the pointing to crack and begin to fail, which allows water to penetrate the joints, where it is trapped. The only route out of the wall is through the soft bricks, increasing any damage even further.
4. Identifying whether your brickwork actually needs repointing
Repointing brickwork and repairing bricks is a large scale intervention in the fabric of an old building. Any time that work like this is carried out there will be some inevitable damage to the fabric, so it’s always important to consider whether the repair is absolutely necessary.
If bricks are damaged, is it really a problem that needs to be fixed? An example is where there are old marks from passing carriages or score marks from ropes.
These are most unlikely to be a structural issue and add to the overall character of the building, making repair inappropriate. It’s not usually that straightforward. Very severely spalled brickwork is likely to need repair – it is unsightly, might weaken the wall and is potentially progressive since the core of a brick is much weaker than the face. Slight spalling is more of a judgement call. If it’s just the odd brick it might be best to leave it unless there is work already being carried out.
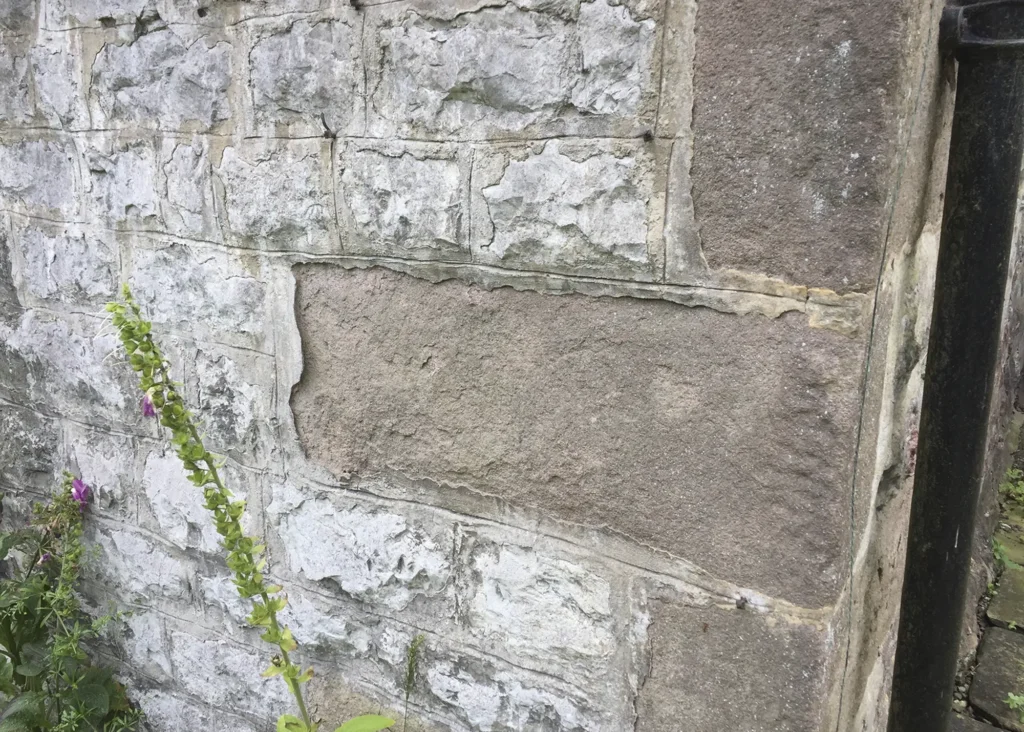
Use of inappropriate cement pointing has caused the face to blow off this stone
While cement brickwork pointing is potentially very damaging, whether it is actually causing a problem depends very much on other factors, including the nature of the actual bricks and the degree of exposure. A dry wall with good quality bricks might manage indefinitely without any damage. Removing cement pointing (especially if it hasn’t started to fail) is a very physical process during which it’s almost impossible not to damage the bricks, so it should only be carried out when absolutely vital.
If the pointing is failing, and bricks are wet and spalling, obviously it must then be raked out and you should have the brickwork repointed. Most cases will fall somewhere between these extremes and can need careful judgement.
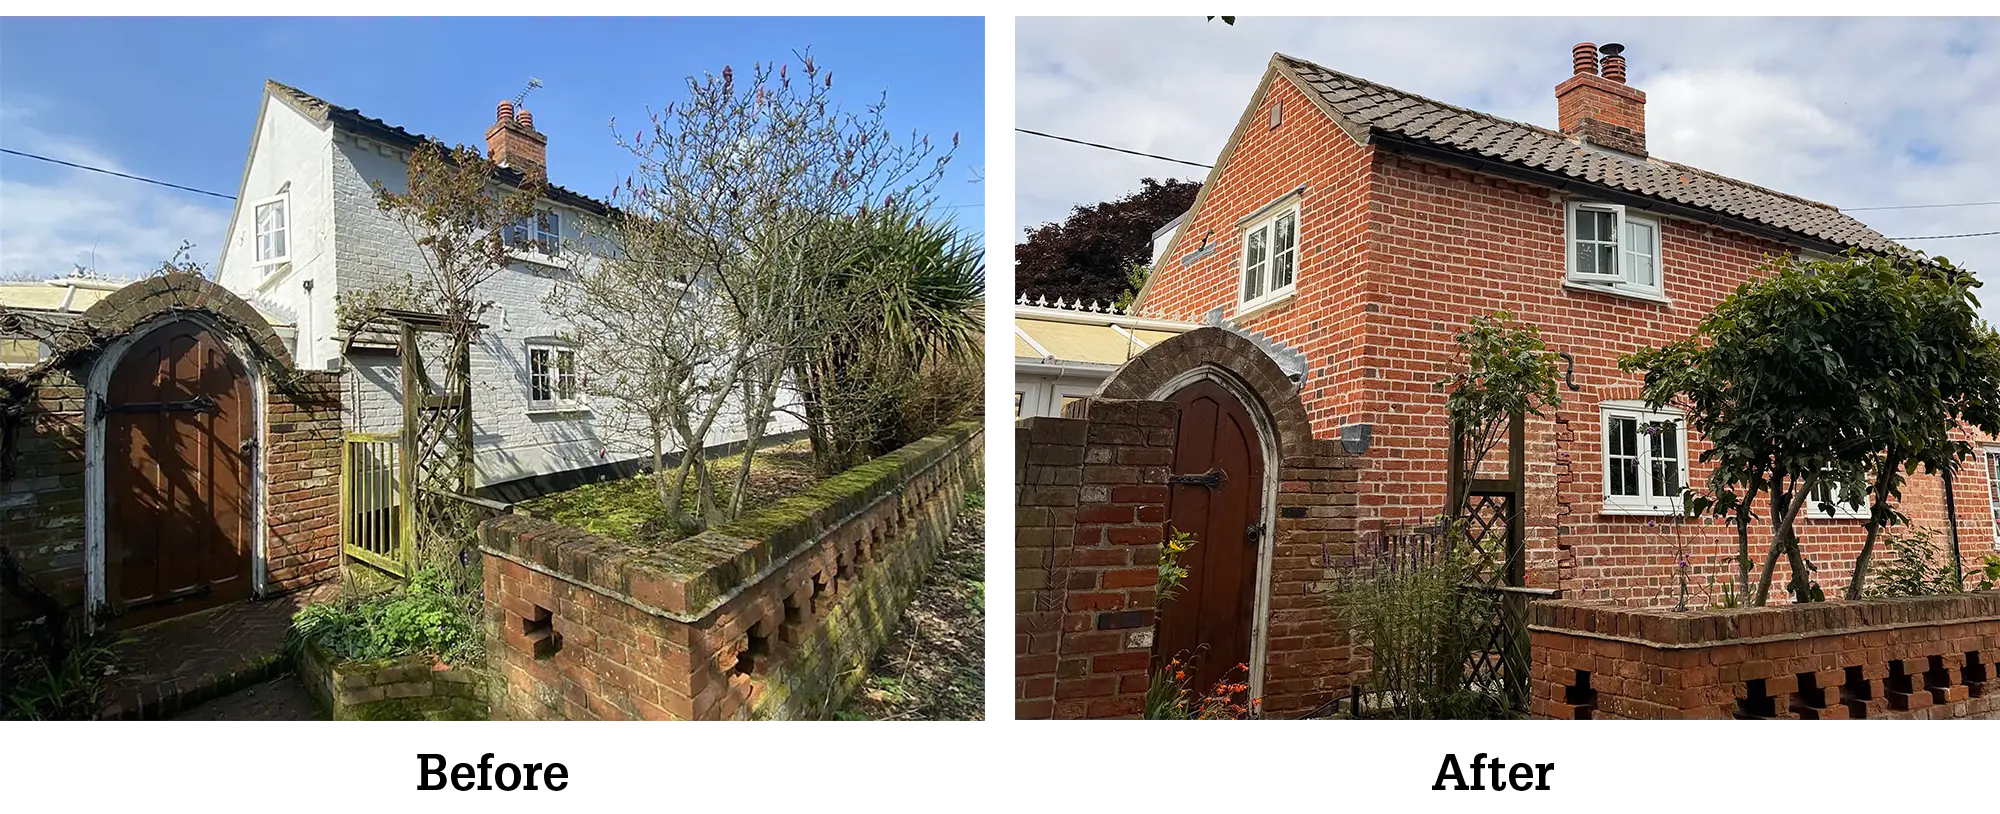
CASE STUDY An 1800s cottage before & after repointing
Build It readers Wil and Sarah bought an 1800s cottage in the Suffolk countryside in August 2023. “We had a level 3 survey carried out prior to the purchase, which revealed penetrating damp caused by a rubberised paint,” says Wil. “This prevented the original lime-pointed walls from breathing.” It was clear from the outset of the renovation project that the walls would need to be stripped back to bare brick. “The walls were a variation of double- and single-course brickwork and were saturated with moisture,” says Wil.
Choosing the right products
The couple specified dry, ready-mixed pure lime NHL 3.5 from Anglia Lime. The 25kg bags produce 15L of lime mixture and typically cover 3m² of wall space. The 25kg bags cost £14.99 + VAT each. “We used 29 bags for repointing and a further five bags of mortar-laying lime, which we used to replace any bricks which were taken out or replaced,” says Wil.
How much did the repointing cost?
The repointing work covered a stretch of 60m² and took a total of 20 days, spread across multiple weeks. The total cost, including prep work, came to £3,485.94 (£58.10 per m²). Here’s a breakdown of the costs:
| Pure lime dry ready mix (29 bags) | £521 |
| Pure lime mortar dry ready mix | £89.94 |
| Delivery | £75 |
| Reclaimed bricks | £100 |
| Sandblasting | £1,610 |
| Tool hire | £350 |
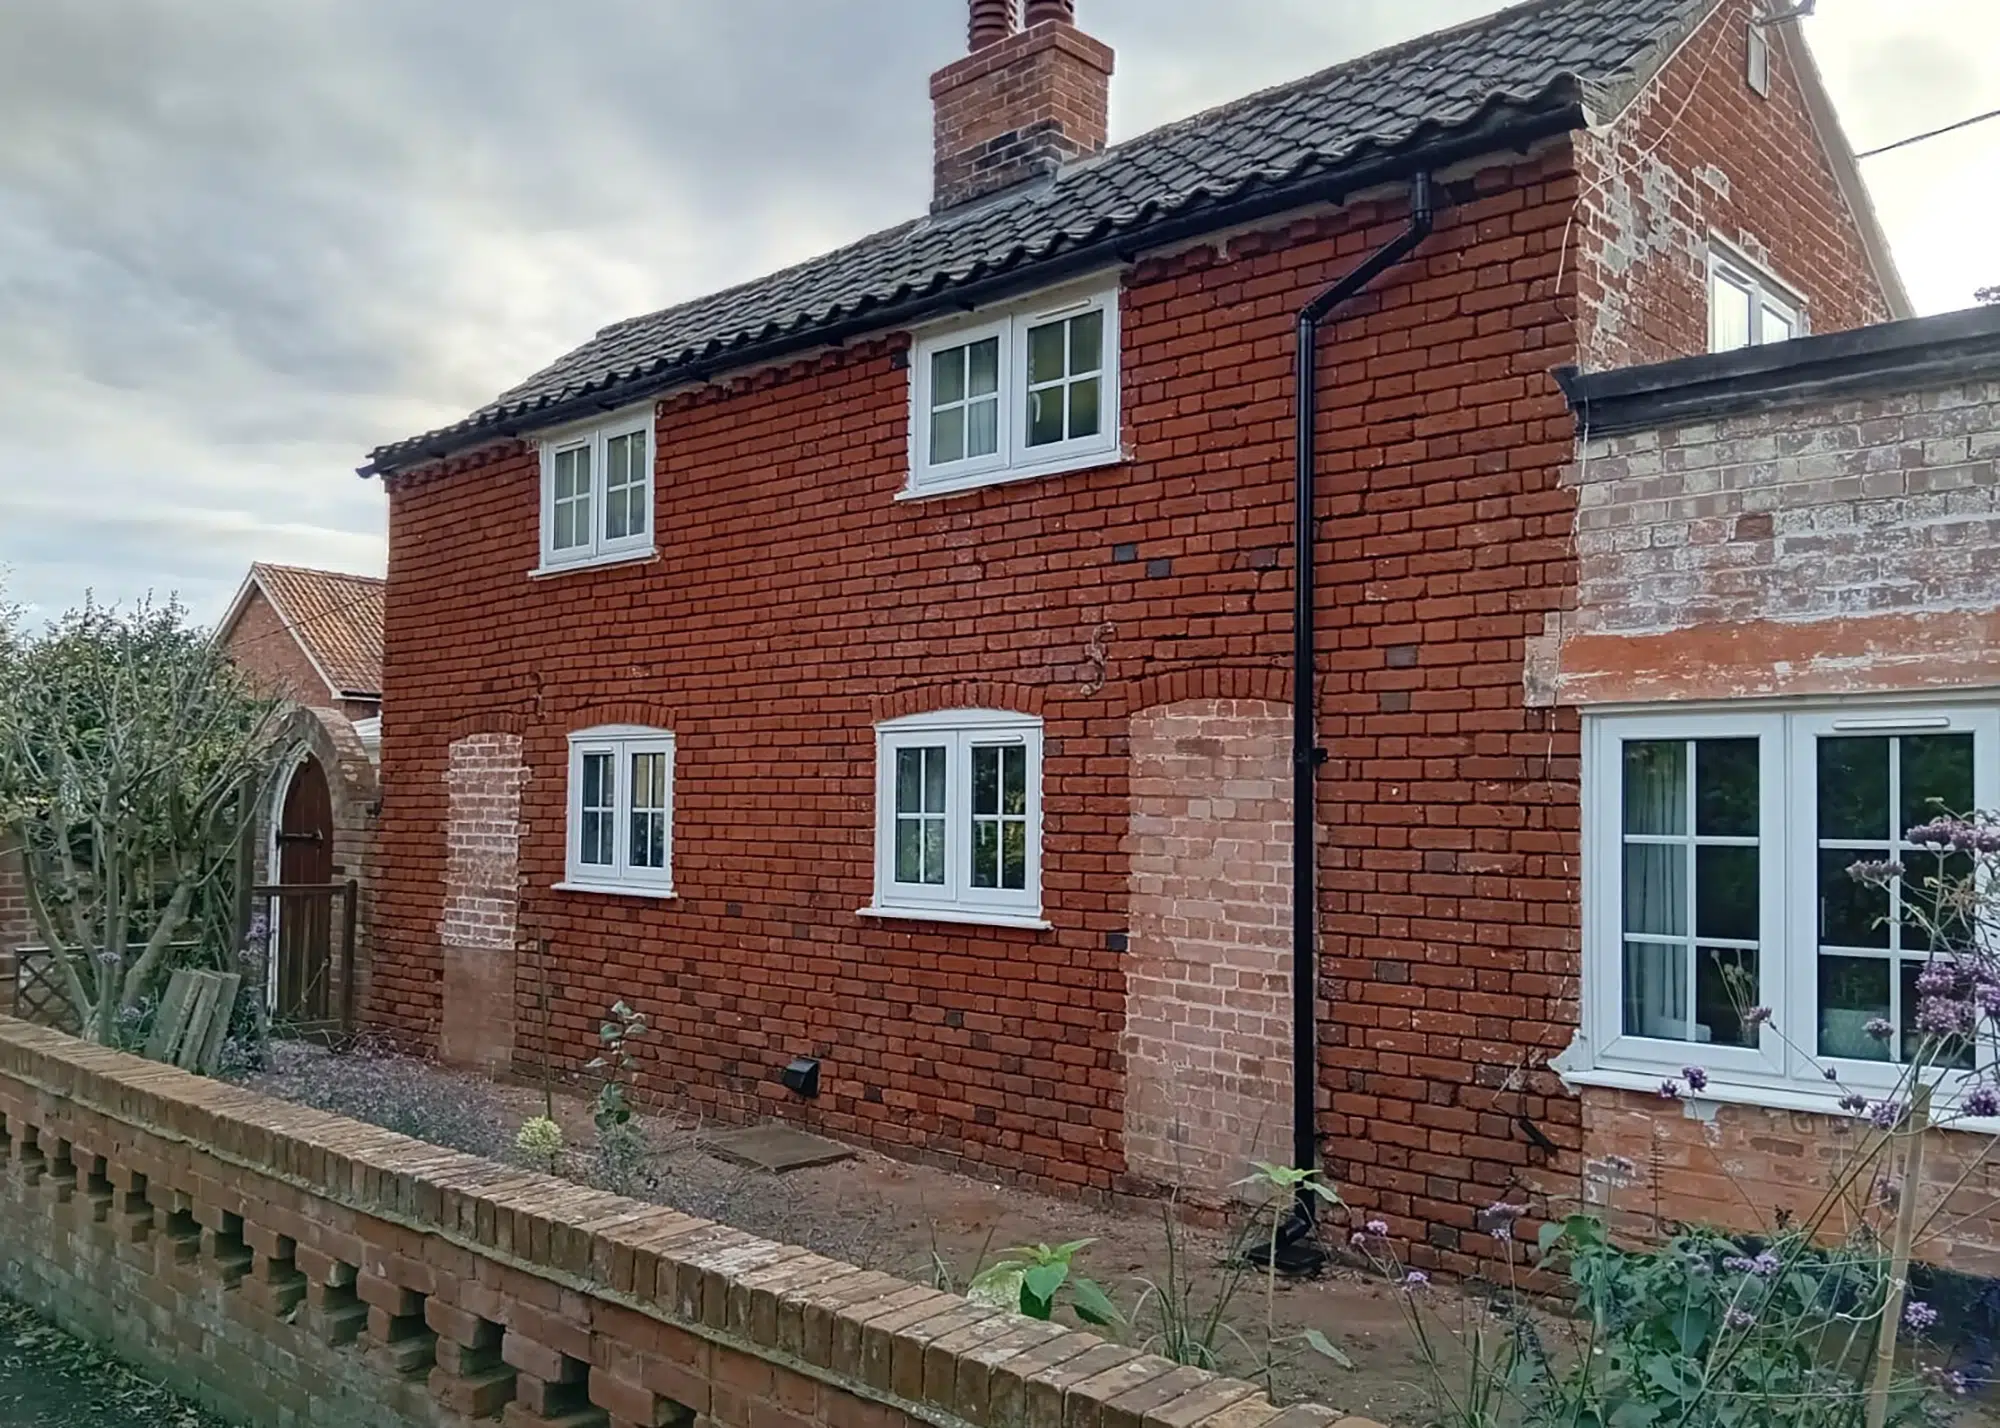
The process
“Removing the paint was challenging,” says Wil. “We hired a commercial steam pressure washer, and whilst it took off the top layer of rubberised paint, it revealed a further layer of waterproof resin, which was difficult to get rid of.”
In the end, the couple settled on sandblasting the affected areas. “We took some advice from the surveyor as sandblasting strips away the top layer of the brick, leaving it slightly more porous,” says Wil. This part of the project had to be done in spring due to moisture and temperature levels.
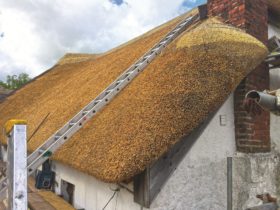
The house after raking out the existing pointing
Removing the existing pointing Anglia Lime suggested removing at least twice the thickness of the mortar joint from the mortar layer (which was 25mm). “We opted to take out 40mm to ensure there was a good base for the new lime to bond with the old lime,” says Wil.
During the repointing project
Replacing bricks Wil had to remove and replace a proportion of damaged brickwork. “In some cases, we were able to replace them with a similar brick from reclamation yards. Across the four walls we replaced around 125 bricks,” he says.
Hydrating the lime An important part of repointing is bonding the old and new lime. “To achieve this, we were advised to water the wall we were going to point twice a day for two weeks,” says Wil.
Preventing future water damage
The penetrating damp was exacerbated by the fact that the house was surrounded by solid concrete, which directed rainwater back into the foundations. The lower areas of the facade had been finished with a cement-based render, too, which held onto the moisture. This prompted the need to revise the house’s current drainage system.
“In between the pointing projects, we put in a new rainwater and land drainage system complete with a new soakaway,” says Wil. “All rainwater discharges into individual bottle gulleys. The whole system was designed with inspection and rodding points at key locations. The land drainage system (50m in length) encircles the whole property and both systems drain into the soakaway.”
The drainage works were subject to a building notice and once complete were signed off by local building control inspector.
5. Repairing & replacing any damaged brickwork
Damaged brickwork should be repaired using materials as similar as possible to those used to build it so that the repair is compatible. Using modern bricks and cement mortar will create a section of wall that behaves differently to the rest, setting up stresses that can cause structural failure.
The best bricks to use are the actual bricks from the wall, wherever possible. In the case of physical damage most of the bricks will themselves be in tact and can be used in the repair. Because they were bedded in lime mortar they can easily be cleaned and reused. Where additional bricks are needed, the best solution is usually to find used bricks from the local area, so long as they are in good condition and from a reputable source. If you have to source new bricks they should be handmade in the closest possible match.
Spalled bricks can often be removed from the wall, rotated and reset in lime mortar with the undamaged face to the outside. If they are too badly damaged replacement bricks can be sourced as above.
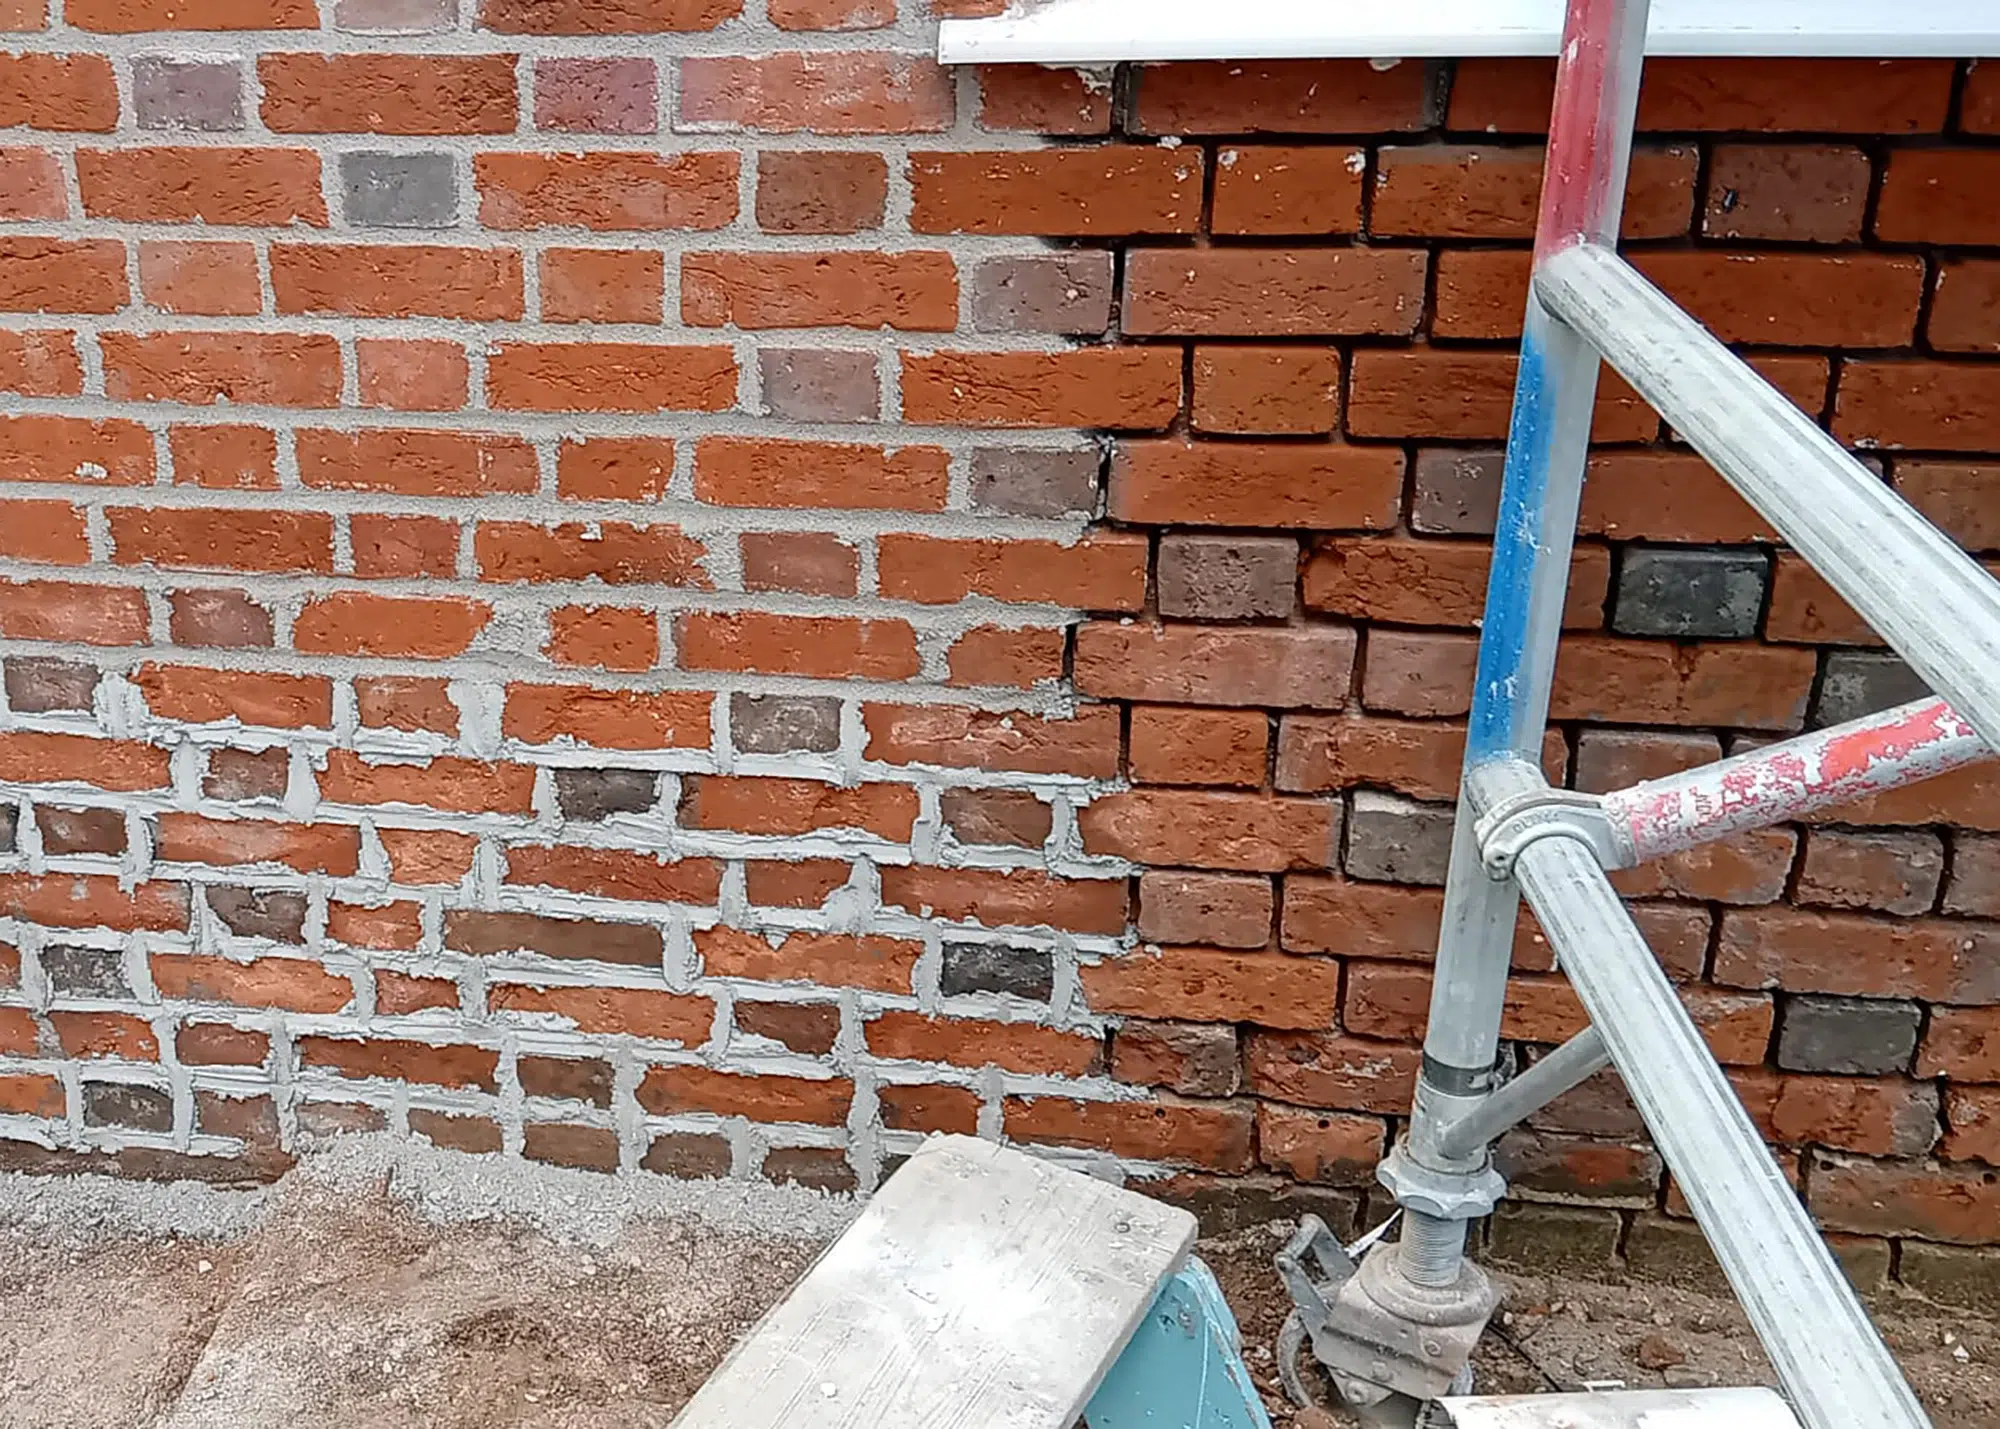
6. Raking out the old mortar & repointing the brickwork
The good news is this is a relatively straightforward job that can be undertaken by any competent person with a bit of instruction and training. The first stage is to rake out the old brick pointing to remove any failing mortar and provide sufficient depth (10mm) to key the new pointing. You’ll also need to get rid of any very loose and friable mortar, which might involve going deeper.
With a stone wall in poor condition that might be very much deeper. If you get to the stage where the stability of masonry units or integrity of the wall deteriorates, then it is time to call in an expert.
Cement pointing has been removed and repair decisions must be made before repointing. Some bricks can stay as they are, others rotated; but some must also be replaced
Once the joints have been raked out, they must then be dampened with a fine water spray. This step helps to prevent the new pointing from drying too quickly and failing. The new mortar is then forced into the joints with a pointing iron or small trowel, ensuring that it is well packed and finished slightly proud. For very deep joints this will be a two stage process, allowing the first stage to go off before progressing to the second.
Once the mortar has started to harden (when it can just be marked with a thumbnail) it should be knocked back into the joints. Finally the pointing should be rubbed back to just behind the masonry units, making sure that it does not go over their edges.
The surface finish should be a rough, open texture to maximise the potential for evaporation. Struck pointing or ribbon pointing, seen much too often in the repair of old walls, is not appropriate either visually or functionally.
Some walls were originally pointed using specialist decorative techniques. These include tuck pointing – popular in Georgian brickwork – and galleting (the incorporation of stone chips in thick joints of stone or flint walls). These are specialist techniques that will require an experienced craftsman. Repointing brickwork is a process that can be undertaken by practical people as a hands on project. One of the most accessible guides available can be found at The Society for the Protection of Ancient Buildings.
QUICK SUMMARY How to point brickworkPointing bricks requires skill and attention. Here’s 9 top tips for getting it right:
|
What common mistakes should you avoid when repointing brickwork?
The most common problem you’re likely to encounter when repointing brickwork is that previous pointing has been carried out using inappropriate mortar. Modern versions use Portland cement as a binder. This creates a hard, impermeable mortar that suits modern bricks that have been fired at very high temperatures. When used with the softer masonry units in old walls, however, it can have very serious consequences.
In period properties, cement mortar blocks the evaporation route through the mortar joint and concentrates water in the bricks or stones, causing these to erode instead of the pointing. When there’s a frost the wet masonry units are then subject to freeze/thaw action. This causes spalling of the face of bricks, where the protective skin on the surface is blown off. In severe cases whole bricks or soft stones can completely disintegrate.
The hard, inflexible modern cement pointing is incompatible with the soft, flexible mortar behind it and begins to crack and fail. This allows water into the wall fabric, where it becomes trapped, which can ultimately cause the core of the wall to degrade. In addition, contrary to what you might expect, cement pointing in an old wall will fail much more quickly than softer lime versions.
When pointing does start to fail, whether through natural erosion of lime mortar or the failure of inappropriate cement mortar, the ability of the wall to manage moisture is compromised and it will tend to become damp. Ultimately, the wall’s structural integrity will be compromised. Roots and germinating seeds of plants can start to grow in failed joints, causing serious problems as they expand.
Which mortar should I use & what makes each solution different?
It’s best try to match the original pointing mortar as closely as possible. This is most likely to be compatible with the particular brick or stone used to build the wall originally. It will also maintain the appearance of the wall and help to ensure it fits in with the local vernacular tradition.
Lime mortars fall broadly into three categories, each of which has different properties and applications:
Hydraulic Mortars
These include material that causes them to set quickly and develop higher strength than other lime mortars. They vary greatly in strength, with those at the top of the scale becoming even harder than cement. They are rarely appropriate for repointing old masonry but the weakest hydraulic mortars can be used in exposed situations with very hard stone. Great care must be taken if you’re considering them.
Lime Putty-Based Mortars
These are non-hydraulic. Formed by slaking quicklime, the putty is used as the binder and mixed with carefully-selected sharp sand. This is widely available in ready-mix form, and can be stored almost indefinitely before use, provided air is excluded.
It is straightforward to use and sets as a result of exposure to CO2 in the air. It provides a soft, flexible and highly breathable pointing that is compatible with most old masonry.
Hot Mixed Lime Mortar
This is also non-hydraulic, but is made onsite by combining quicklime, sand and water. Quicklime is hazardous and requires careful handling – nobody should attempt hot mixing without proper training. It makes a very workable mortar that is extremely easy to use.
Hot mixed lime mortar pointing has exceptional moisture management properties, actively wicking water from the surrounding fabric. It is by far the best material to use in damp masonry, as it dries walls out quickly and effectively.
Brickwork repointing FAQs

How can I tell the difference between superficial and harmful damage to the original brick pointing?
If the pointing is just slightly soft and not greatly recessed, then it’s best left. However, if it’s eroded or you’ve got open joints and, in some cases, it’s emitting moisture, then it’s time to consider repointing. Depending on the scale of the damage, you could patch point and focus on a specific area of erosion rather than repointing the whole facade.
What’s the biggest mistake you see people make when repointing older brickwork, and how can these be avoided?
The use of inappropriate methods and materials is a big area to avoid. Cement can disrupt the fabric of older buildings, which rely on breathable materials. Moisture needs to move through the joints, and cement effectively traps moisture in the walls due to its tough, durable nature. This can be extremely costly, both financially and in terms of the building’s historic properties.
Using harsh methods, such as angle grinders to cut out old pointing can also cause an immense amount of damage where they overrun and nick the edges of the bricks.
When is the best time of year to repoint?
You should look to line your repointing up with lime season – so from around March to October, ensuring your walls aren’t catching any frost. I’ve seen some projects take place outside of this period due to small bouts of warmer weather, but then a few nights of harsh cold ended up causing significant damage. Heated scaffolding can help combat this, but will add significant costs.
Do you need planning permission to repoint brickwork on older properties?
You don’t need formal planning permission for a standard repointing project, but you will require listed building consent (LBC) if you’re working on a listed property, as you are effectively making a material change to the building.
What should I look out for when hiring a person to do my repointing?
The best place to start is by asking them about their approach. For example, are they insisting on repointing a whole facade that perhaps might not need the work? You should also ask them about which materials and methods they use.
The SPAB has a technical advice line, offering free, confidential guidance to those with a technical enquiry. We can suggest the names of professionals, contractors and specialists, and can talk through any issues or other concerns.
This article was originally published in January 2024 and has been updated in October 2025.
Alan Tierney


You may be interested in