- Plan ItBack
- Design ItBack
- Build ItBack
- Homes
- ProductsBack
- CostsBack
- Self Build Cost Calculator
Estimate your project costs instantly with Build It's interactive self-build cost calculator
Calculate Now - Costs & Finance
- Contracts & Warranties
- Build It Estimating Service
Get an accurate, detailed cost breakdown of your project
Submit plans
- EventsBack


 Login/register to save Article for later
30 Ways to Save Money on Your Home Extension Project – Our Top Tips

Taking on an extension project is a great way to transform your existing home and the way you use it. Whether you’re looking to build a new open-plan kitchen-diner to enjoy with friends and family, an extra bedroom or a cosy snug to escape to, with careful planning and the right approach, you can ensure a smooth process from start to finish.
So, what can you achieve with a slightly more limited budget, and what are the best ways to keep costs down when extending? Here, I’m looking at 30 great tips to note if you’re looking to stick to budget while achieving a fantastic extension design.
1. Calculate how much space you can afford
Building a smaller addition doesn’t mean it’ll be cheaper. There’s an economy of scale on every project, so you’ll want to strike a balance somewhere in the middle to get maximum value per m². Every project will incur set up and running costs and you’ll need to account for things like insurance, scaffolding, skips etc. The smaller the job the higher these are as a percentage. You may be able to create a project that’s big enough to build efficiently, without it being too overly complicated that it swings the other way.
Your guide to building an extension
2. Think carefully about the type of extension you want
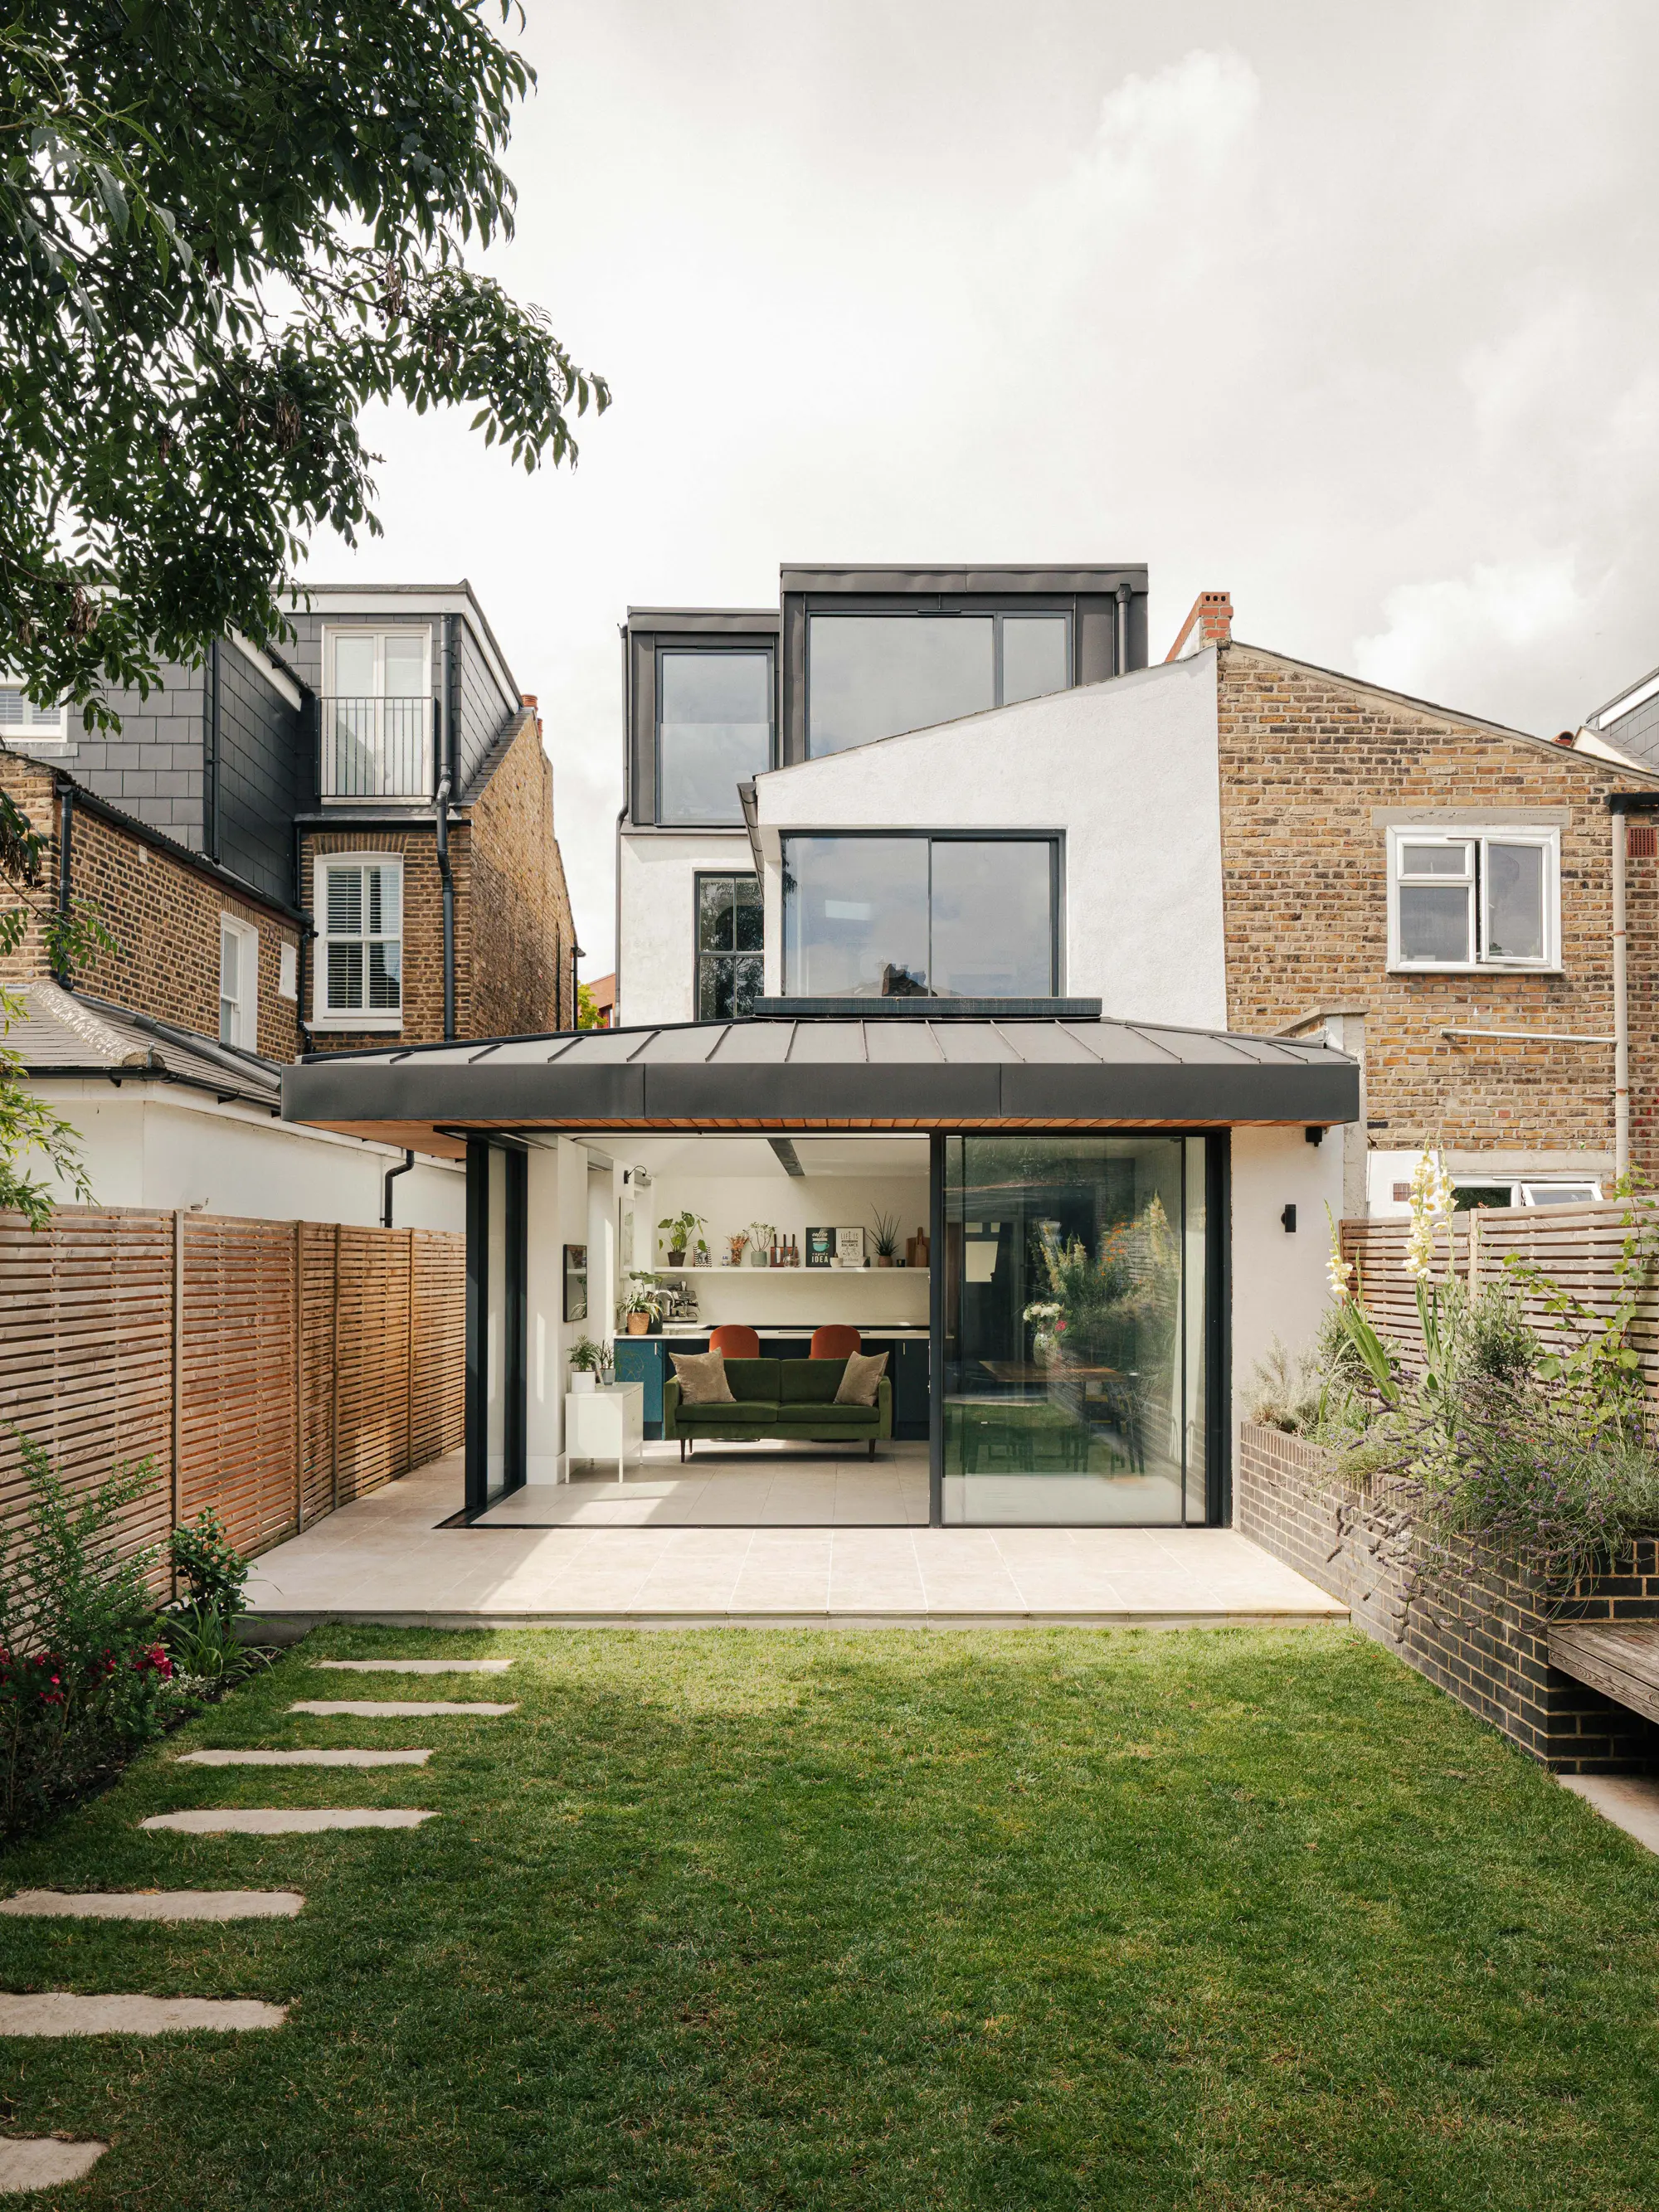
The scheme that offers best value (single-storey, double-storey, side return or loft extension) hinges on the unique features of your existing property and what you hope to gain from the project. On a per m² basis, double-storey additions tend to reap high returns as you’re building one set of foundations and roof for potentially double the floor space than what you’d get with a single-storey structure. If you’re looking to add value to your home, however, a loft conversion might be the best way to go. The costs will be influenced by what you need to do to the existing structure, too, in terms of re-jigging the layout.

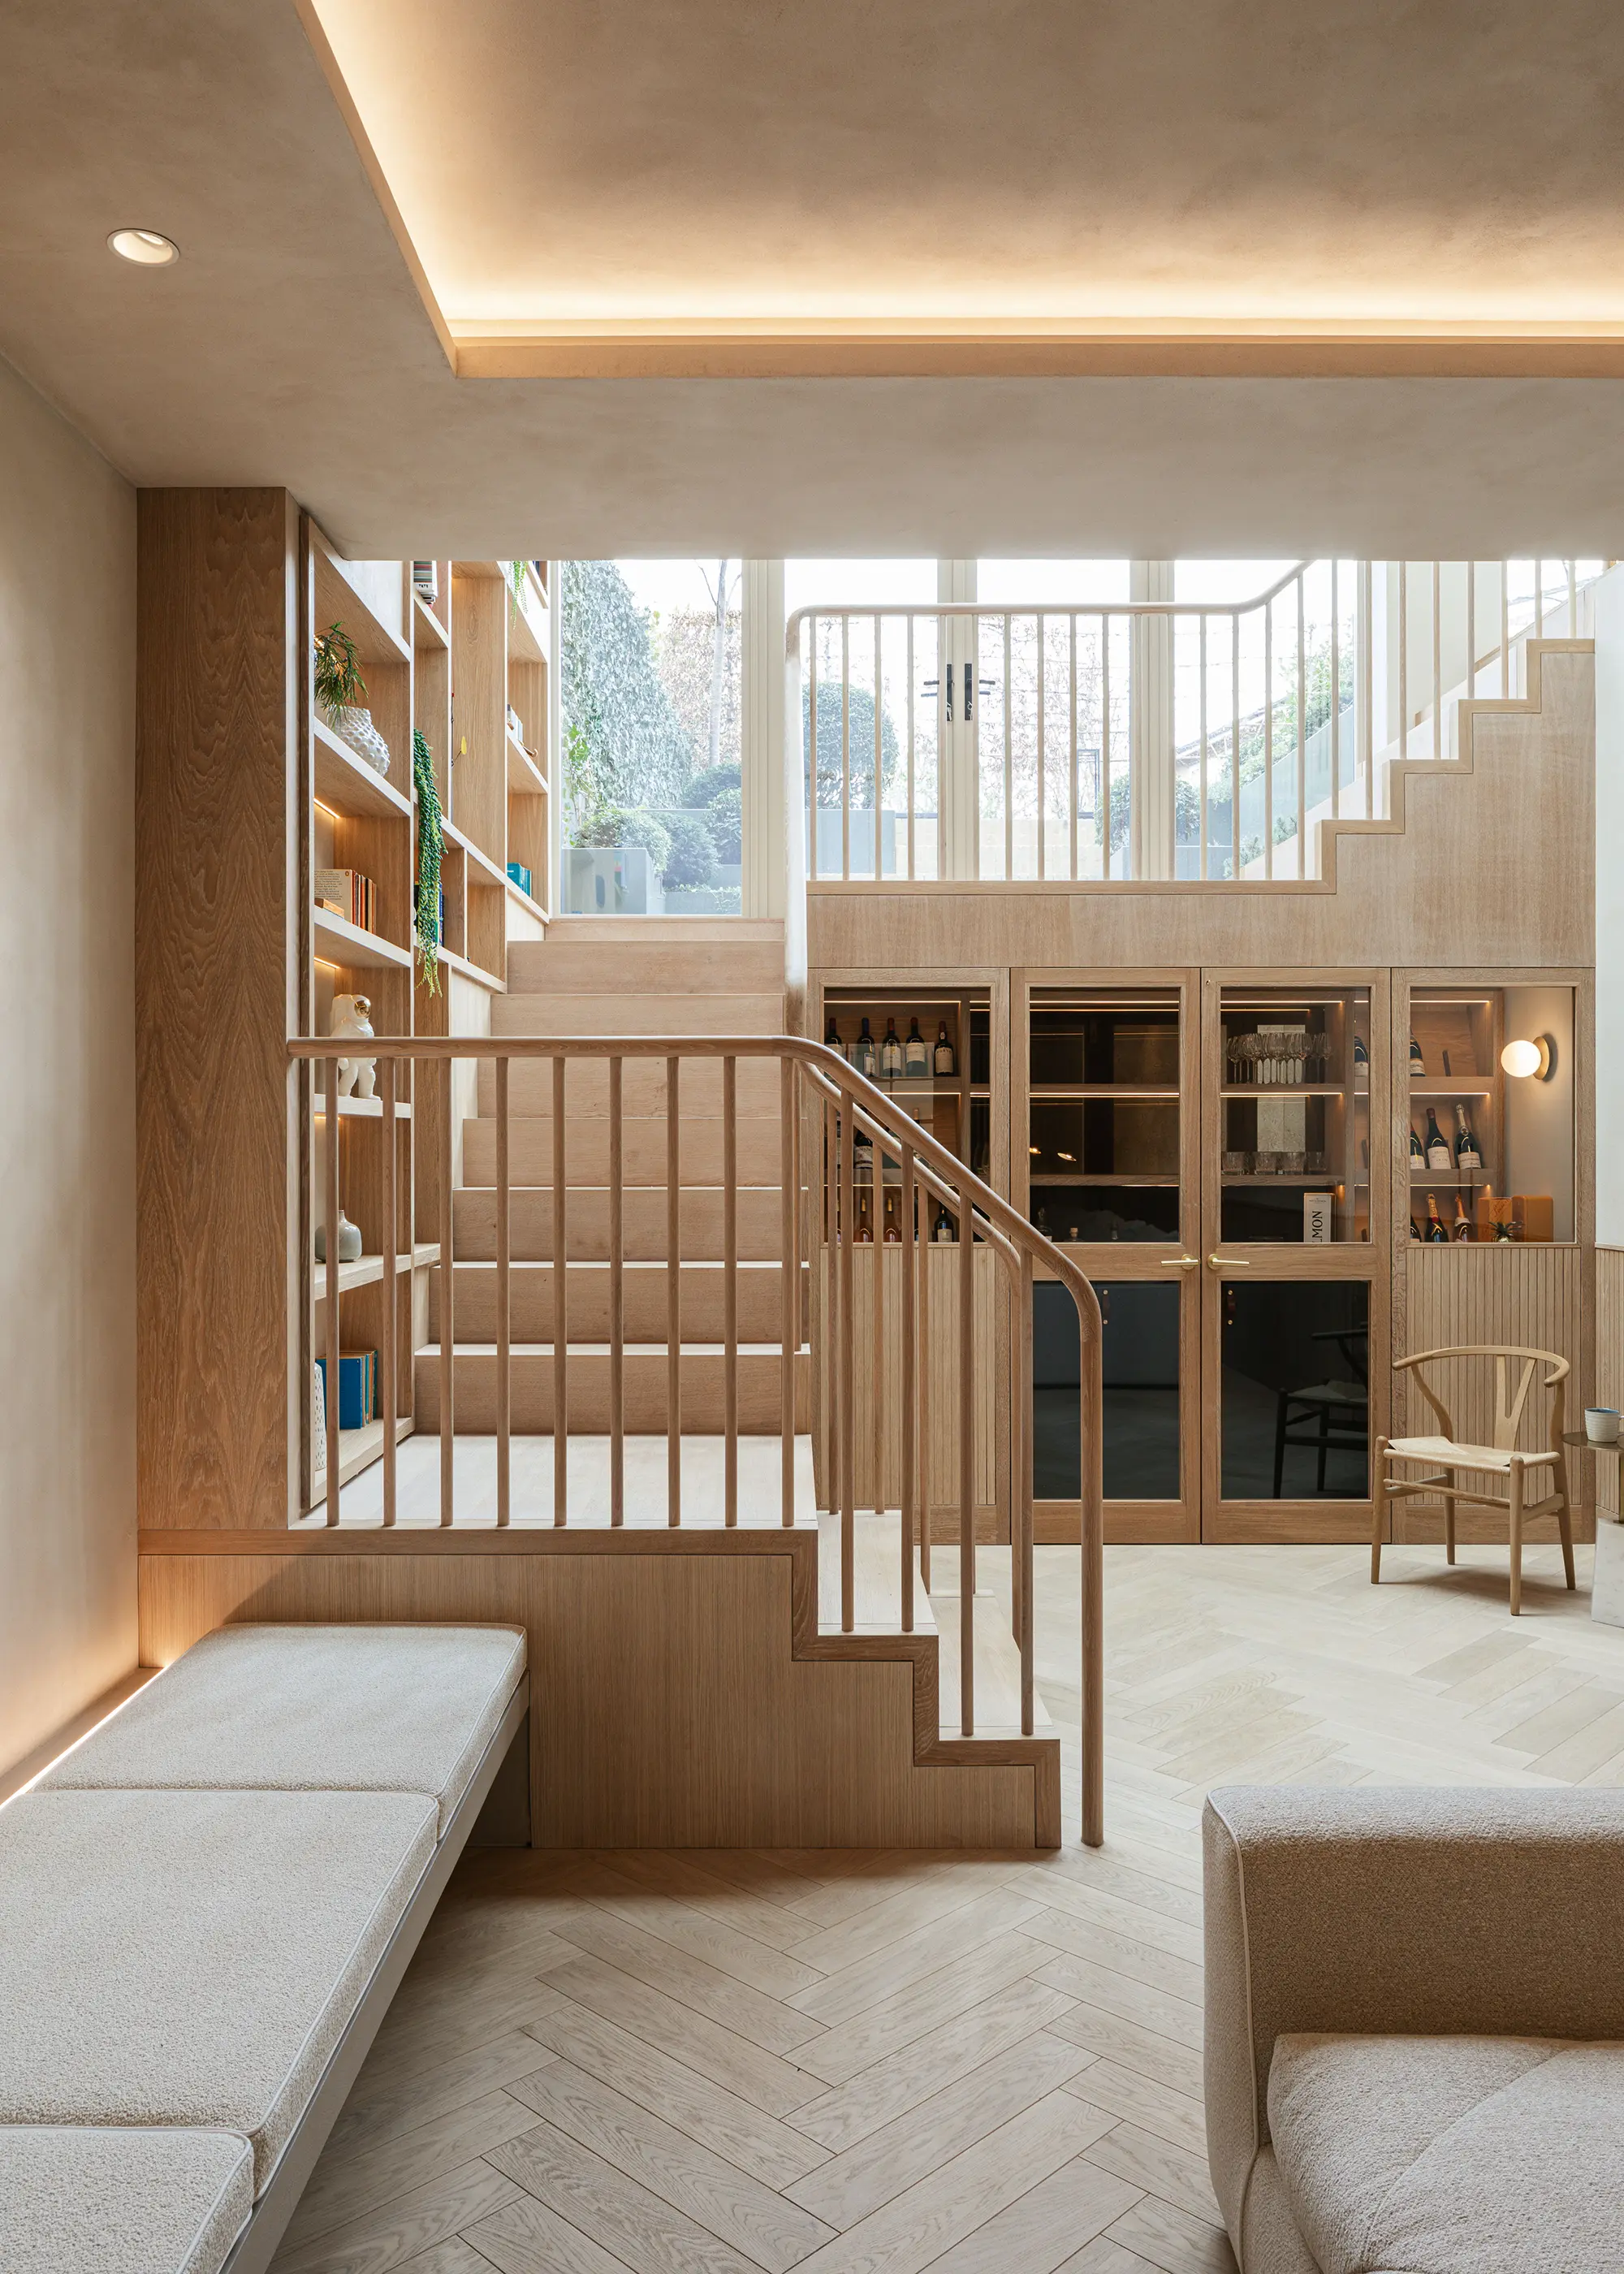
Studio BAD Architects won the 2025 Build It Award for Best Architect for an Extension Project for Brockenhurst House. The 50m² extension completely reshapes the flow of the existing 1970s chalet house, bringing in abundant natural light and strengthening the connection to the garden
3. Stick to a simple extension design
Building your extension in a straightforward, boxy shape will be cheaper to execute. The moment you start to add curved walls, clever angles or cantilevered structures, you can expect costs to rise. Think about what these standout architectural features will add to your lifestyle, and whether they are really an essential part of the design. Complicated structures can also be more expensive to finish – such as cladding a curved wall.
4. Invest in the design & planning stages
It’s hard to know how much your extension will cost, but an architect can help you determine the best areas to spend money for maximum wow factor. If you’re working to a tight budget, it makes sense to invest money in your architect at the pre-planning design stage of the project, rather than having them administer the contract later on. “Like many practices we offer a fixed fee up to planning, before moving into something more bespoke after that,” says Simon Drayson, director at George & James Architects.
Designed by Adam Knibb architects, Cakeham House reimagines a series of unsympathetic additions, creating a bold modern extension that balances open-plan with private retreats. Photo: Richard Chivers
5. Get detailed drawings done
Spend plenty of time in the design phase refining your drawings to avoid any headaches later. “At the early concept stage, we undertake a review of estimated costings on a m² figure to ensure we’re not getting carried away with a design that’s going to be prohibitive,” says Ben Embrey, senior associate at Base Architecture.
Premium Content
Downloadable E-Guide
Build It’s house extension downloadable e-guide will help you plan, design and construct an addition that enhances your existing property while meeting your needs and budget.
find out more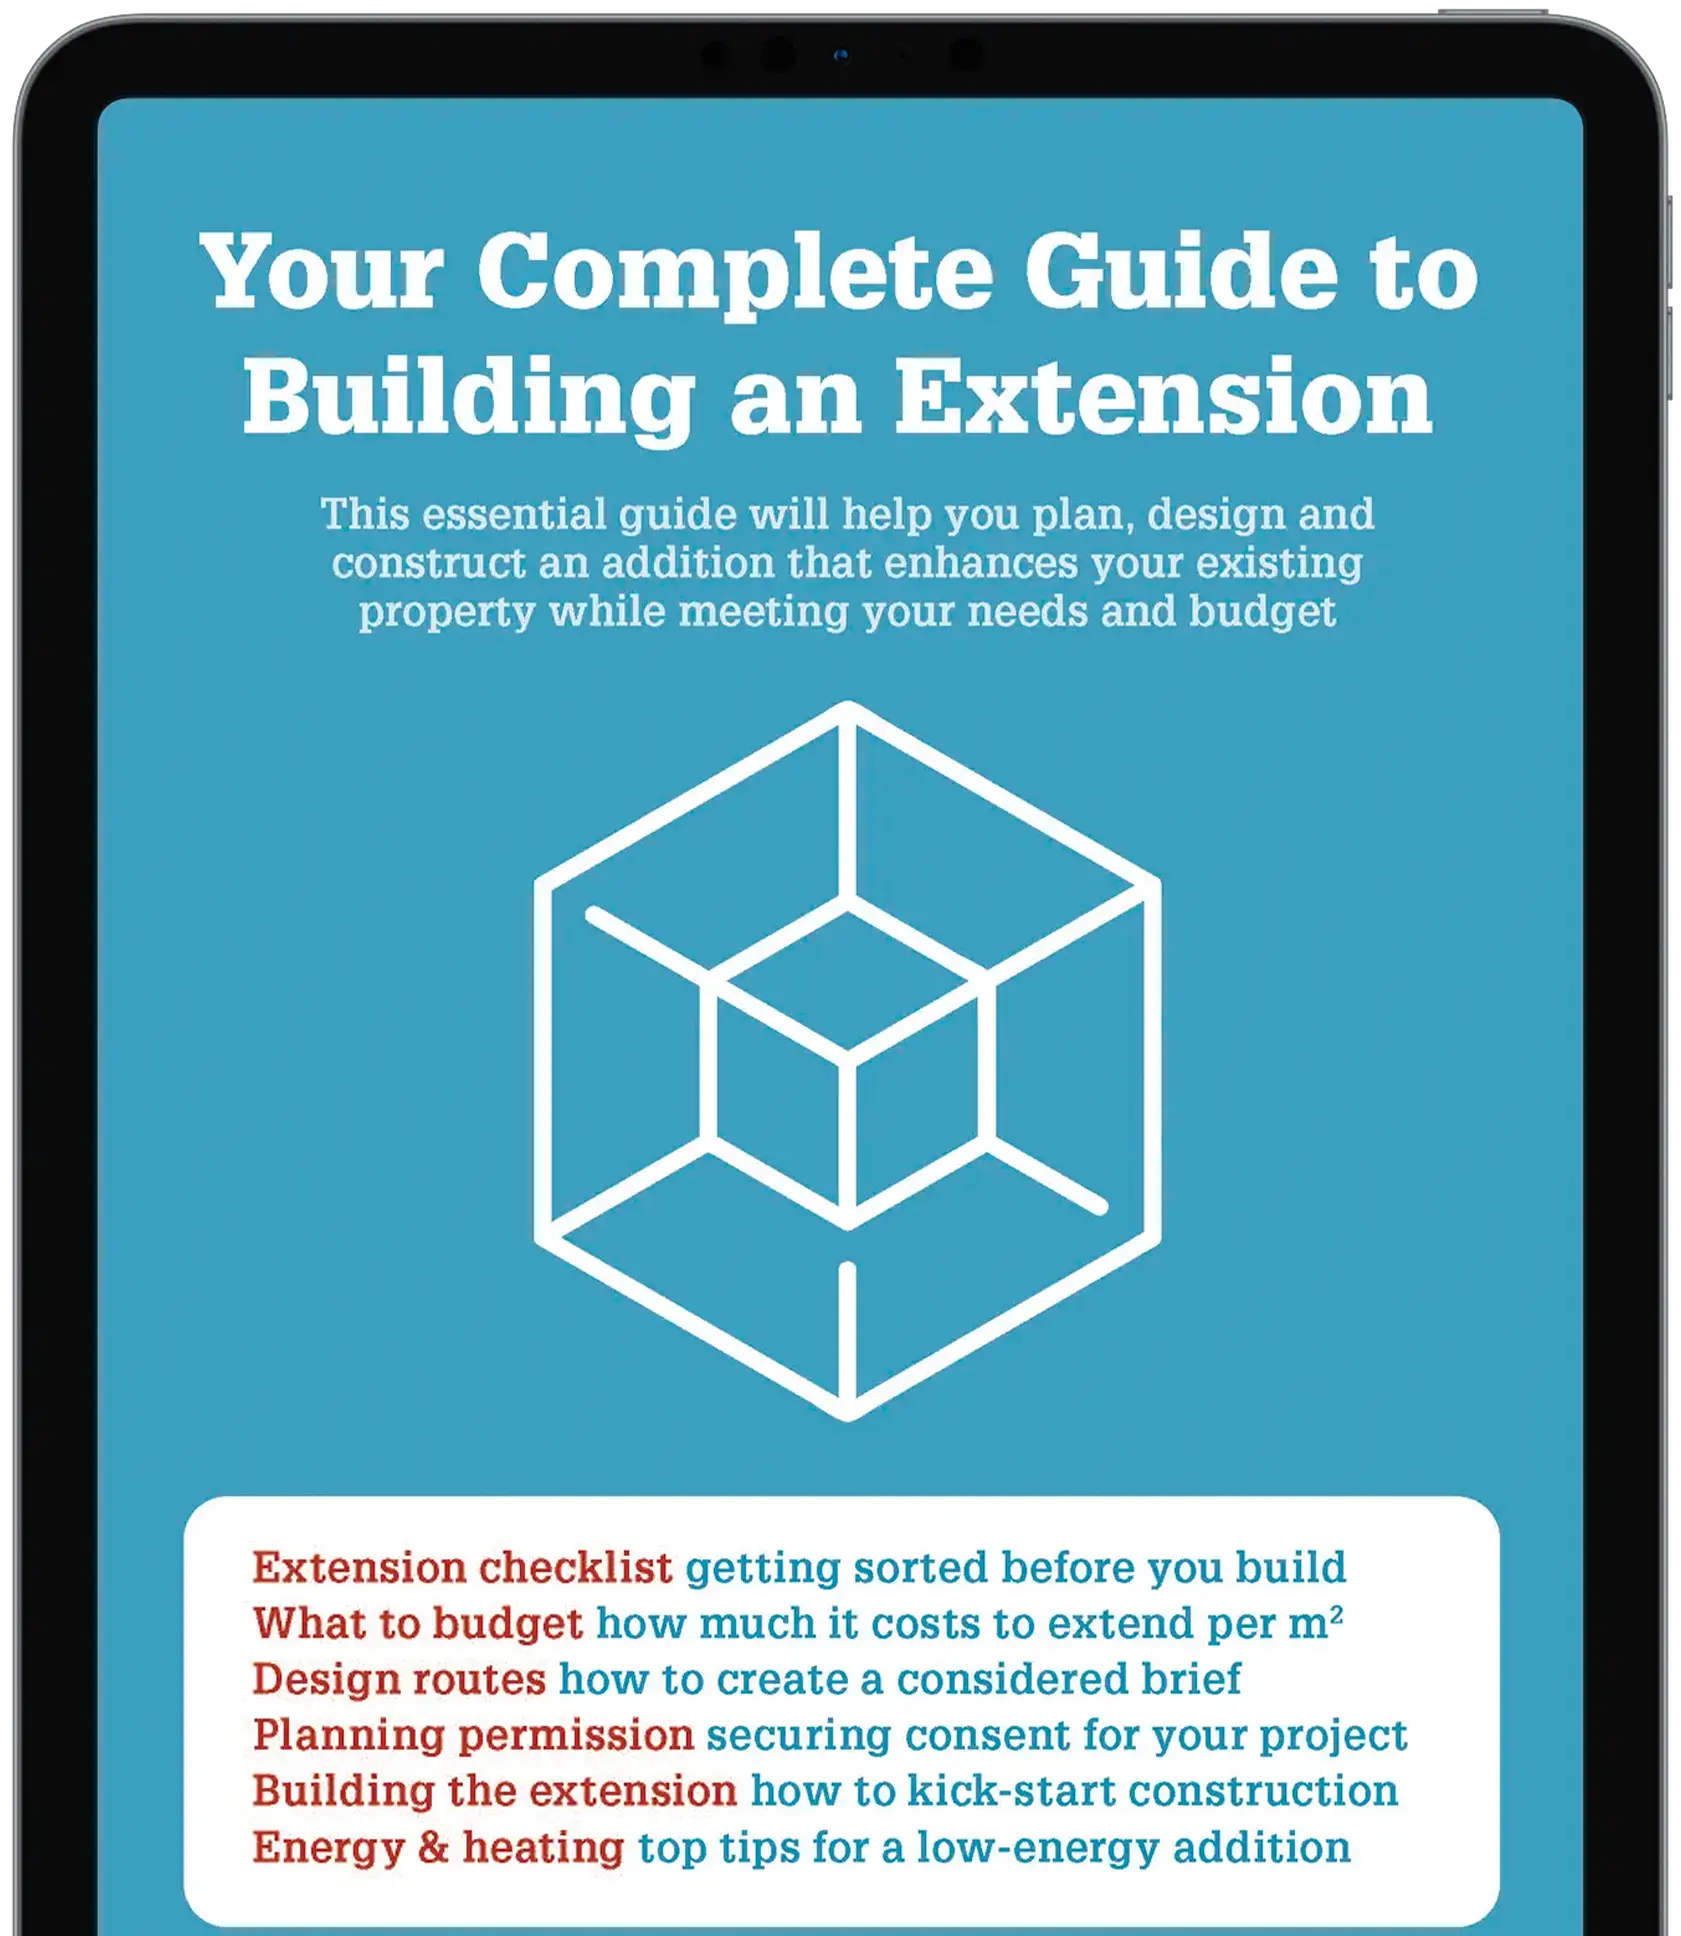
6. Think carefully about how your extension will be constructed
Be sure to use a build method your contractor is familiar with to avoid having to go back and fix any mistakes later. A traditional build of brick and block, or block with render is hard to beat in terms of cost efficiency. Oak frame will add wow factor but isn’t always the most budget-friendly structural method. Depending on your type of project, a prefabricated timber solution might be an appropriate option. Offsite manufacture will likely be more cost-effective when working on a larger extension project.
7. Ensure you have robust contracts in place
Even if you’re undertaking a small extension project, a large sum of money is going to change hands. A contract doesn’t have to be a vast tome – just a five-page document that outlines where you, the client, and your builder stand. Having everything nailed down – particularly regarding when payments will be made and what happens in the event of any dispute – could pay dividends later.
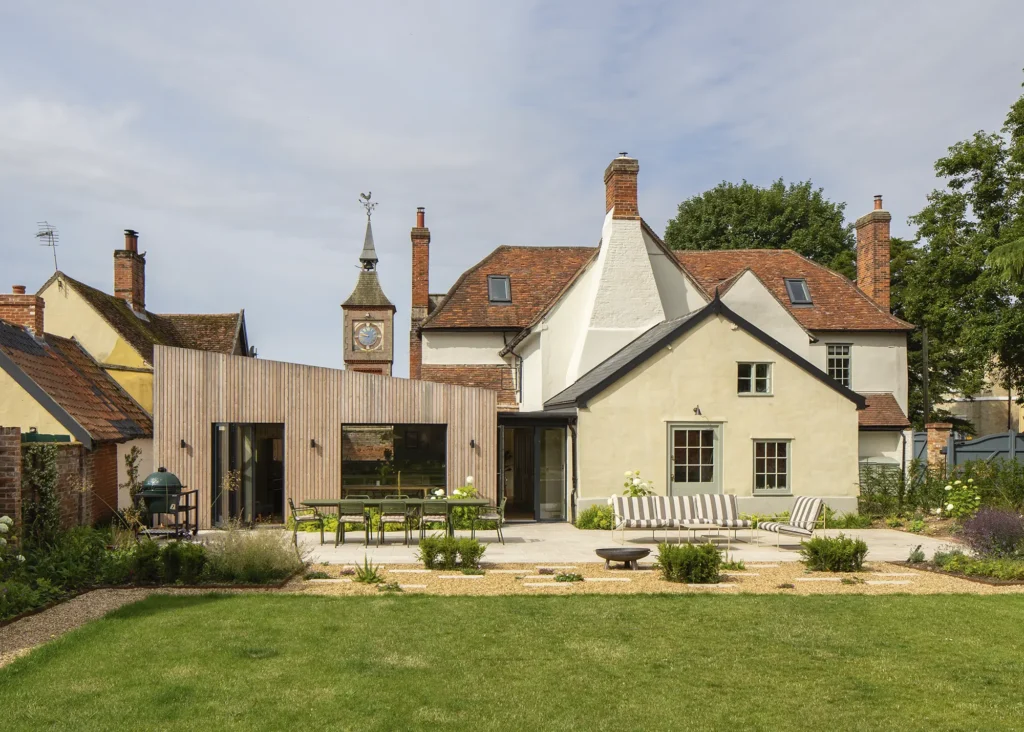
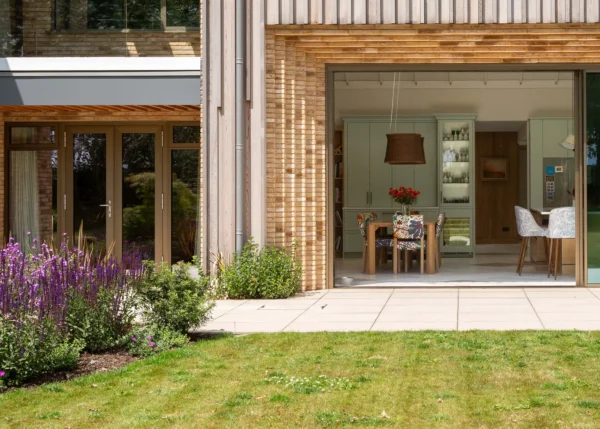
The owners of this grade II listed property in Suffolk briefed Andrew Hughes Architects to extend their home with a modern kitchen-dining space that offers a strong connection to the garden. Photo: Alex Parnell
8. Seek multiple quotes from contractors
You should always look to obtain three to five quotes when you put the project out to tender – this will give you a good feel for the market rate for the job and see who will offer you the best value for the quality of their work. Remember, though – cheapest isn’t always best. If a quote looks too good to be true, ask yourself how the builder came to this sum and triple check the elements that are (and aren’t) included.
9. Check what is covered by quotes
There’s a difference between getting an estimate for a job and getting a quote. “For quotes, you need to create a tender pack that includes architectural plans, technical plans, structural design, schedule of works and specification. It should also have a list of client supply items and a pricing schedule against whish the builder will input prices,” says Johnny Lovett from Grangeway Partners. “Sending out this information means all the invited builders have a standardised set of info and a pricing schedule to complete and you’ll get prices back in the same formatted document. This will make your tender analysis a lot simpler.”
10. Think twice before moving or knocking down load-bearing walls
If your project involves drastic changes to the floorplan, consider the cost implications that will be involved in re-locating or knocking through load-bearing partitions. Even lightweight partitions may have developed a structural function over time, so it’s essential to get expert advice before making any changes. It can be easy to check whether a wall is load-bearing by knocking on it. If it sounds hollow, then it is often simply a studwork partition with no load-bearing responsibilities – but be sure to have this checked by a professional. If your wall is structural, the process of removal involves:
- Temporary support Before demolition, acrow props and strongboys (or a temporary stud wall) must be installed to support the weight above.
- Demolition The wall is carefully knocked through in manageable, marked sections.
- New permanent support A steel beam (RSJ) or lintel is installed to replace the structural function of the wall that’s been removed.
- Decorating Once the new support is in place, the space will need finishing with plasterboard, skimming and decorating.
11. Stick to your extension’s agreed design
Making ad hoc alterations as you progress through the build will increase your costs, particularly if the change has a knock-on effect to a particular structural element, or the placement of a rooflight, for example. “The golden rule of construction is not to change your mind once the building contract has been signed,” says Simon from George & James. “It can lead to additional construction costs from the builder and professional fees from the architect, amongst others, for abortive or additional work.”
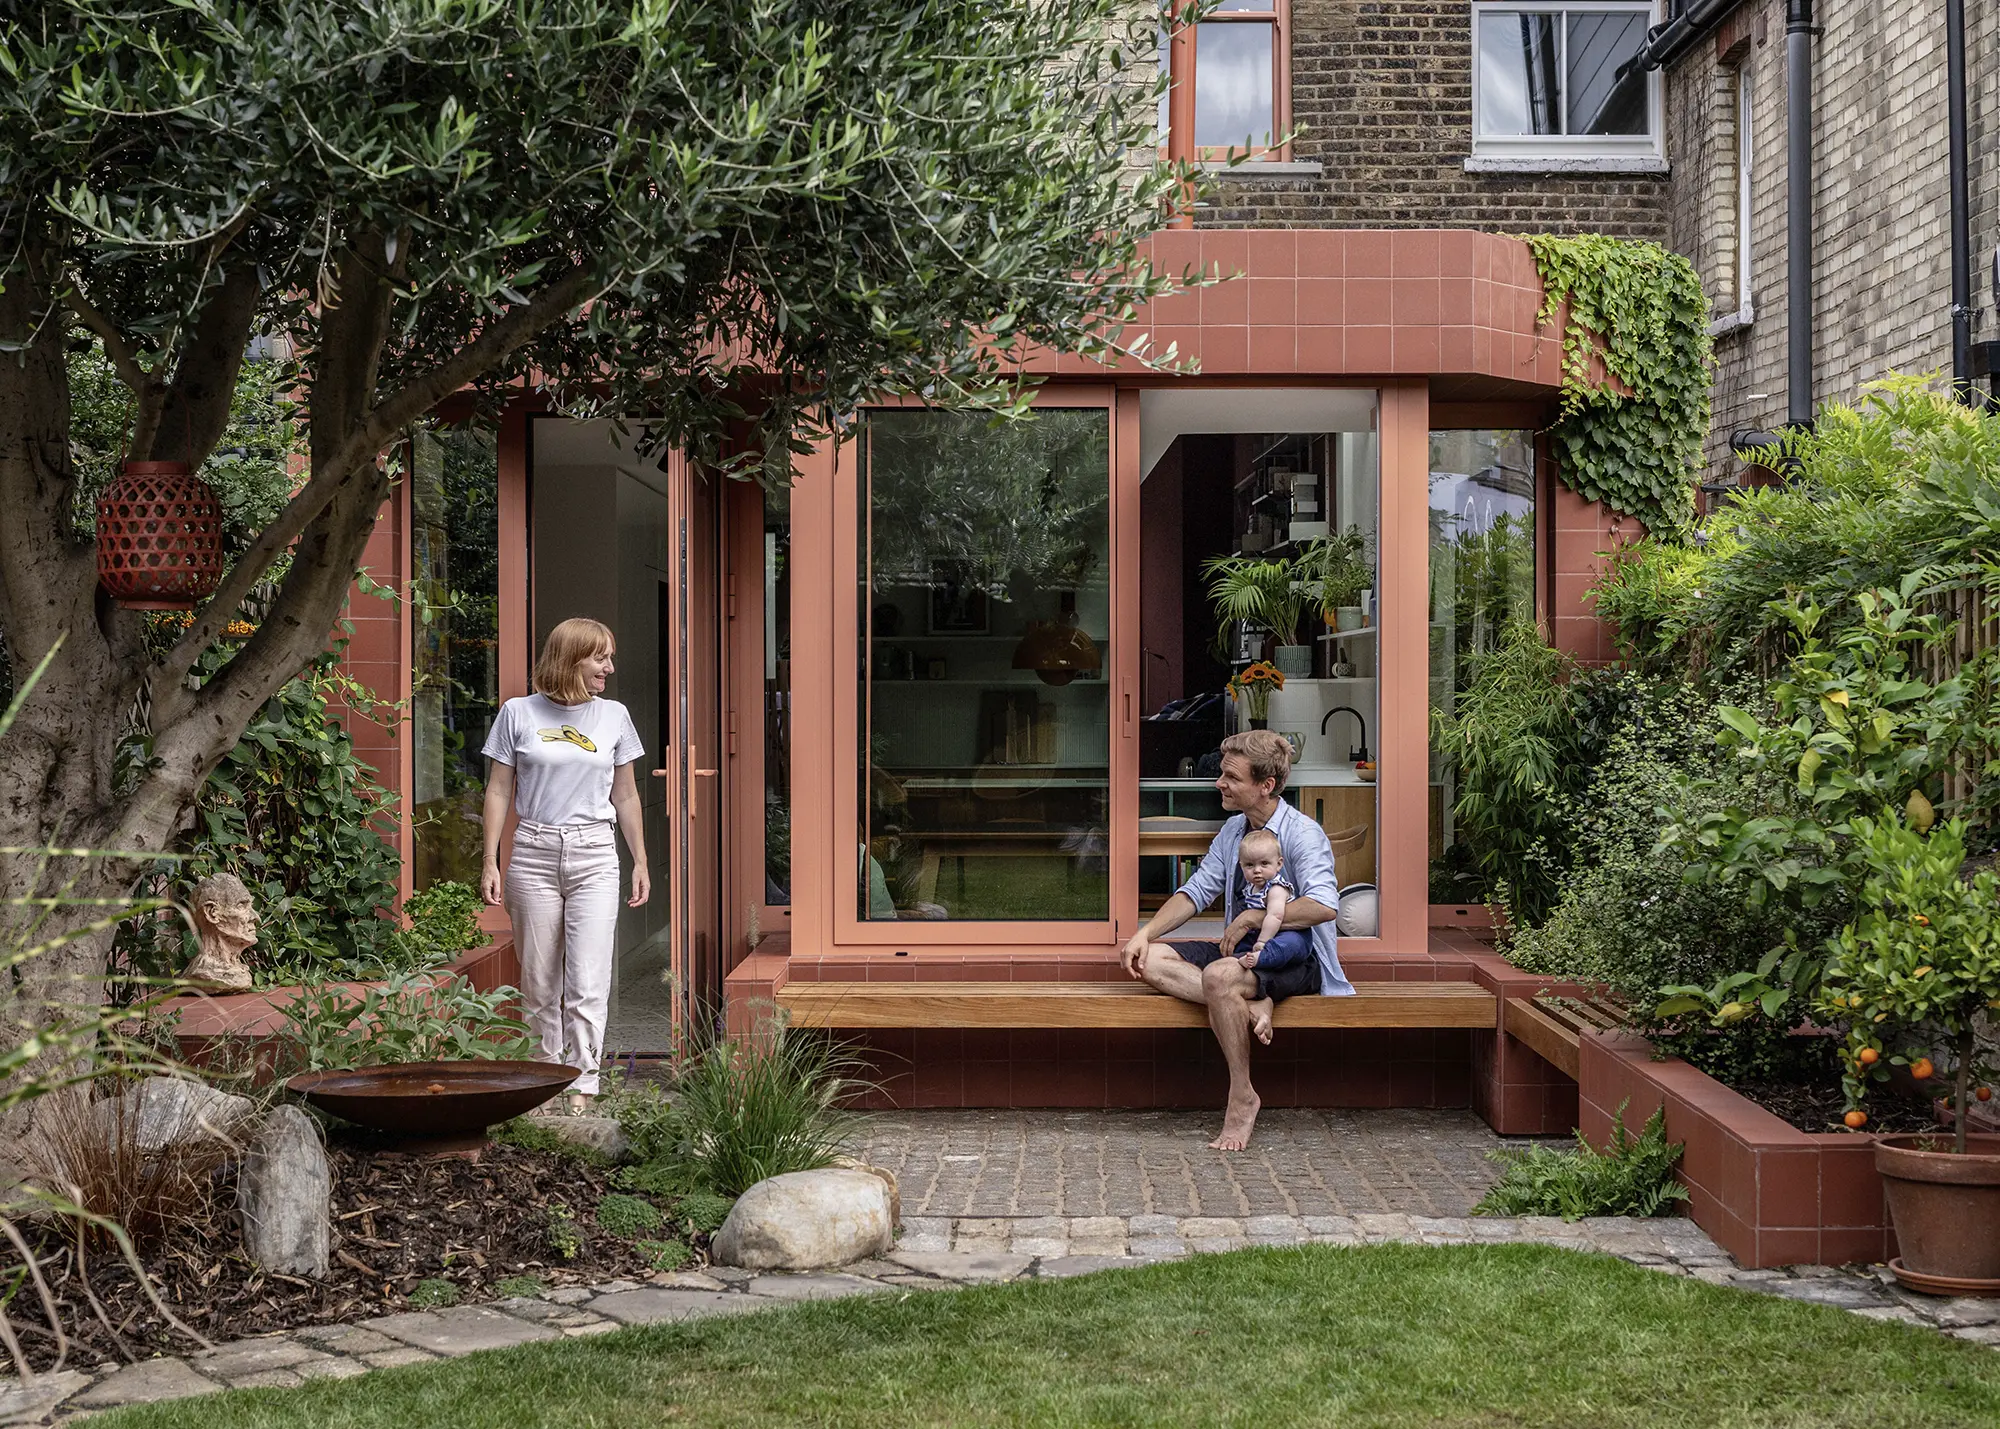
This East London home features a small rear extension designed Emil Eve Architects. The addition features geometric terracotta tiles and full-height glazing, with warm, earthy tones inside softening the transition between old and new. Photo: Taran Wilkhu
12. Re-use materials & source recycled elements
As well as helping you save money on buying new items, recycling elements from your existing home will save on skip hire costs as you’ll be generating less waste. Bricks, roof tiles and slates could all be incorporated into your new extension. “For example, the table in my kitchen is made out of old decking joists with legs fabricated from the old garage purlins,” says Ben. “It cost me £30 in screws, paint and wood stain.”
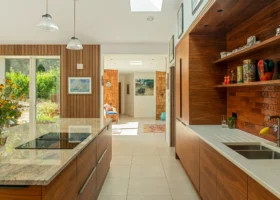
13. Recycle your existing kitchen
The same reuse logic applies to kitchen units and appliances – if they’re still in good condition, reuse your old kitchen-diner until your finances have recovered from the project. At that point, you’ll be in a better position to invest in a new suite.
14. Think about who is best to project manage the build
Taking on this role yourself is one way to save pennies. However, don’t underestimate the time, skill and organisation that’ll be required to run the build effectively. If you’re working to a tight budget, it may be that you can share some of the management responsibilities with your contractor. The builder could manage construction until watertight stage, for instance, at which point you could take over and manage the rest of the sub-contractors.
15. Hire trustworthy builders & trades
This is probably one of the most important tips on this list. Hiring reputable professionals will save you pouring money down the drain on remedial work that might be needed to correct sub-standard jobs. There’s a theory that a builder or trade is only as good as their last job. Most operate fairly locally, and word tends to travel fast, so they have a reputation to uphold. If they’ve done quality work for their recent clients, they should uphold this standard on your project. It’s always worth asking neighbours, colleagues, friends and family who they used on their projects and if they’d recommend them.
your guide to finding a builder
Cantilevering the first floor outrigger adds drama to the interior of this side-return extension and loft conversion project, designed by BetterPAD Architects
But don’t limit yourself to this route. “Sometimes the chemistry worked for that client, but doesn’t for you,” says Calum Taylor, Build It’s managing director. “Perhaps the two of you simply don’t gel, the trade doesn’t like your particular type of job, or they’re too busy on other sites.”
16. Avoid paying for the building work upfront
Protect yourself by avoiding any hefty upfront payments before work has started. Deposits may be required on some projects, especially those that will run over a long period. However, the Citizen’s Advice Bureau advises against parting with any more than 25% of the whole project fee. Even then, make sure you get a receipt for your deposit that corresponds to your legal contract. If a deposit is required for materials, one way around this is to purchase the materials yourself.
17. Focus on the big-ticket items that will transform the scheme & your day-to-day life
Invest in the structure and materials you know you won’t be changing later, such as exterior finishes, roof tiles and quality glazing. “We advise clients to invest in long term decisions, such as structural elements, with a view to saving money on short term solutions, like paint or a kitchen,” says Simon from George & James. Items that fall into the latter category can be upgraded later when your cash has had the chance to build up again.
18. Get value-for-money wow factor
A professional designer can help you identify where best to spend your money to create impactful design features that don’t blow the budget. “The choice of materials is a big factor,” says Ben from Base Architecture. “There are various solutions that can give 80% of the aesthetic at 50% of the cost. Another way to incorporate striking design details on a budget is to use expensive or exotic materials on a smaller scale, to accent certain features in the build.”
19. Specify off-the-shelf products & solutions where necessary
Buying off-the-shelf rather than going bespoke is another way to conserve cash. Design your extension to include standard window and door widths, for instance. Made to measure glazing is one area likely to boost the cost of your build substantially.
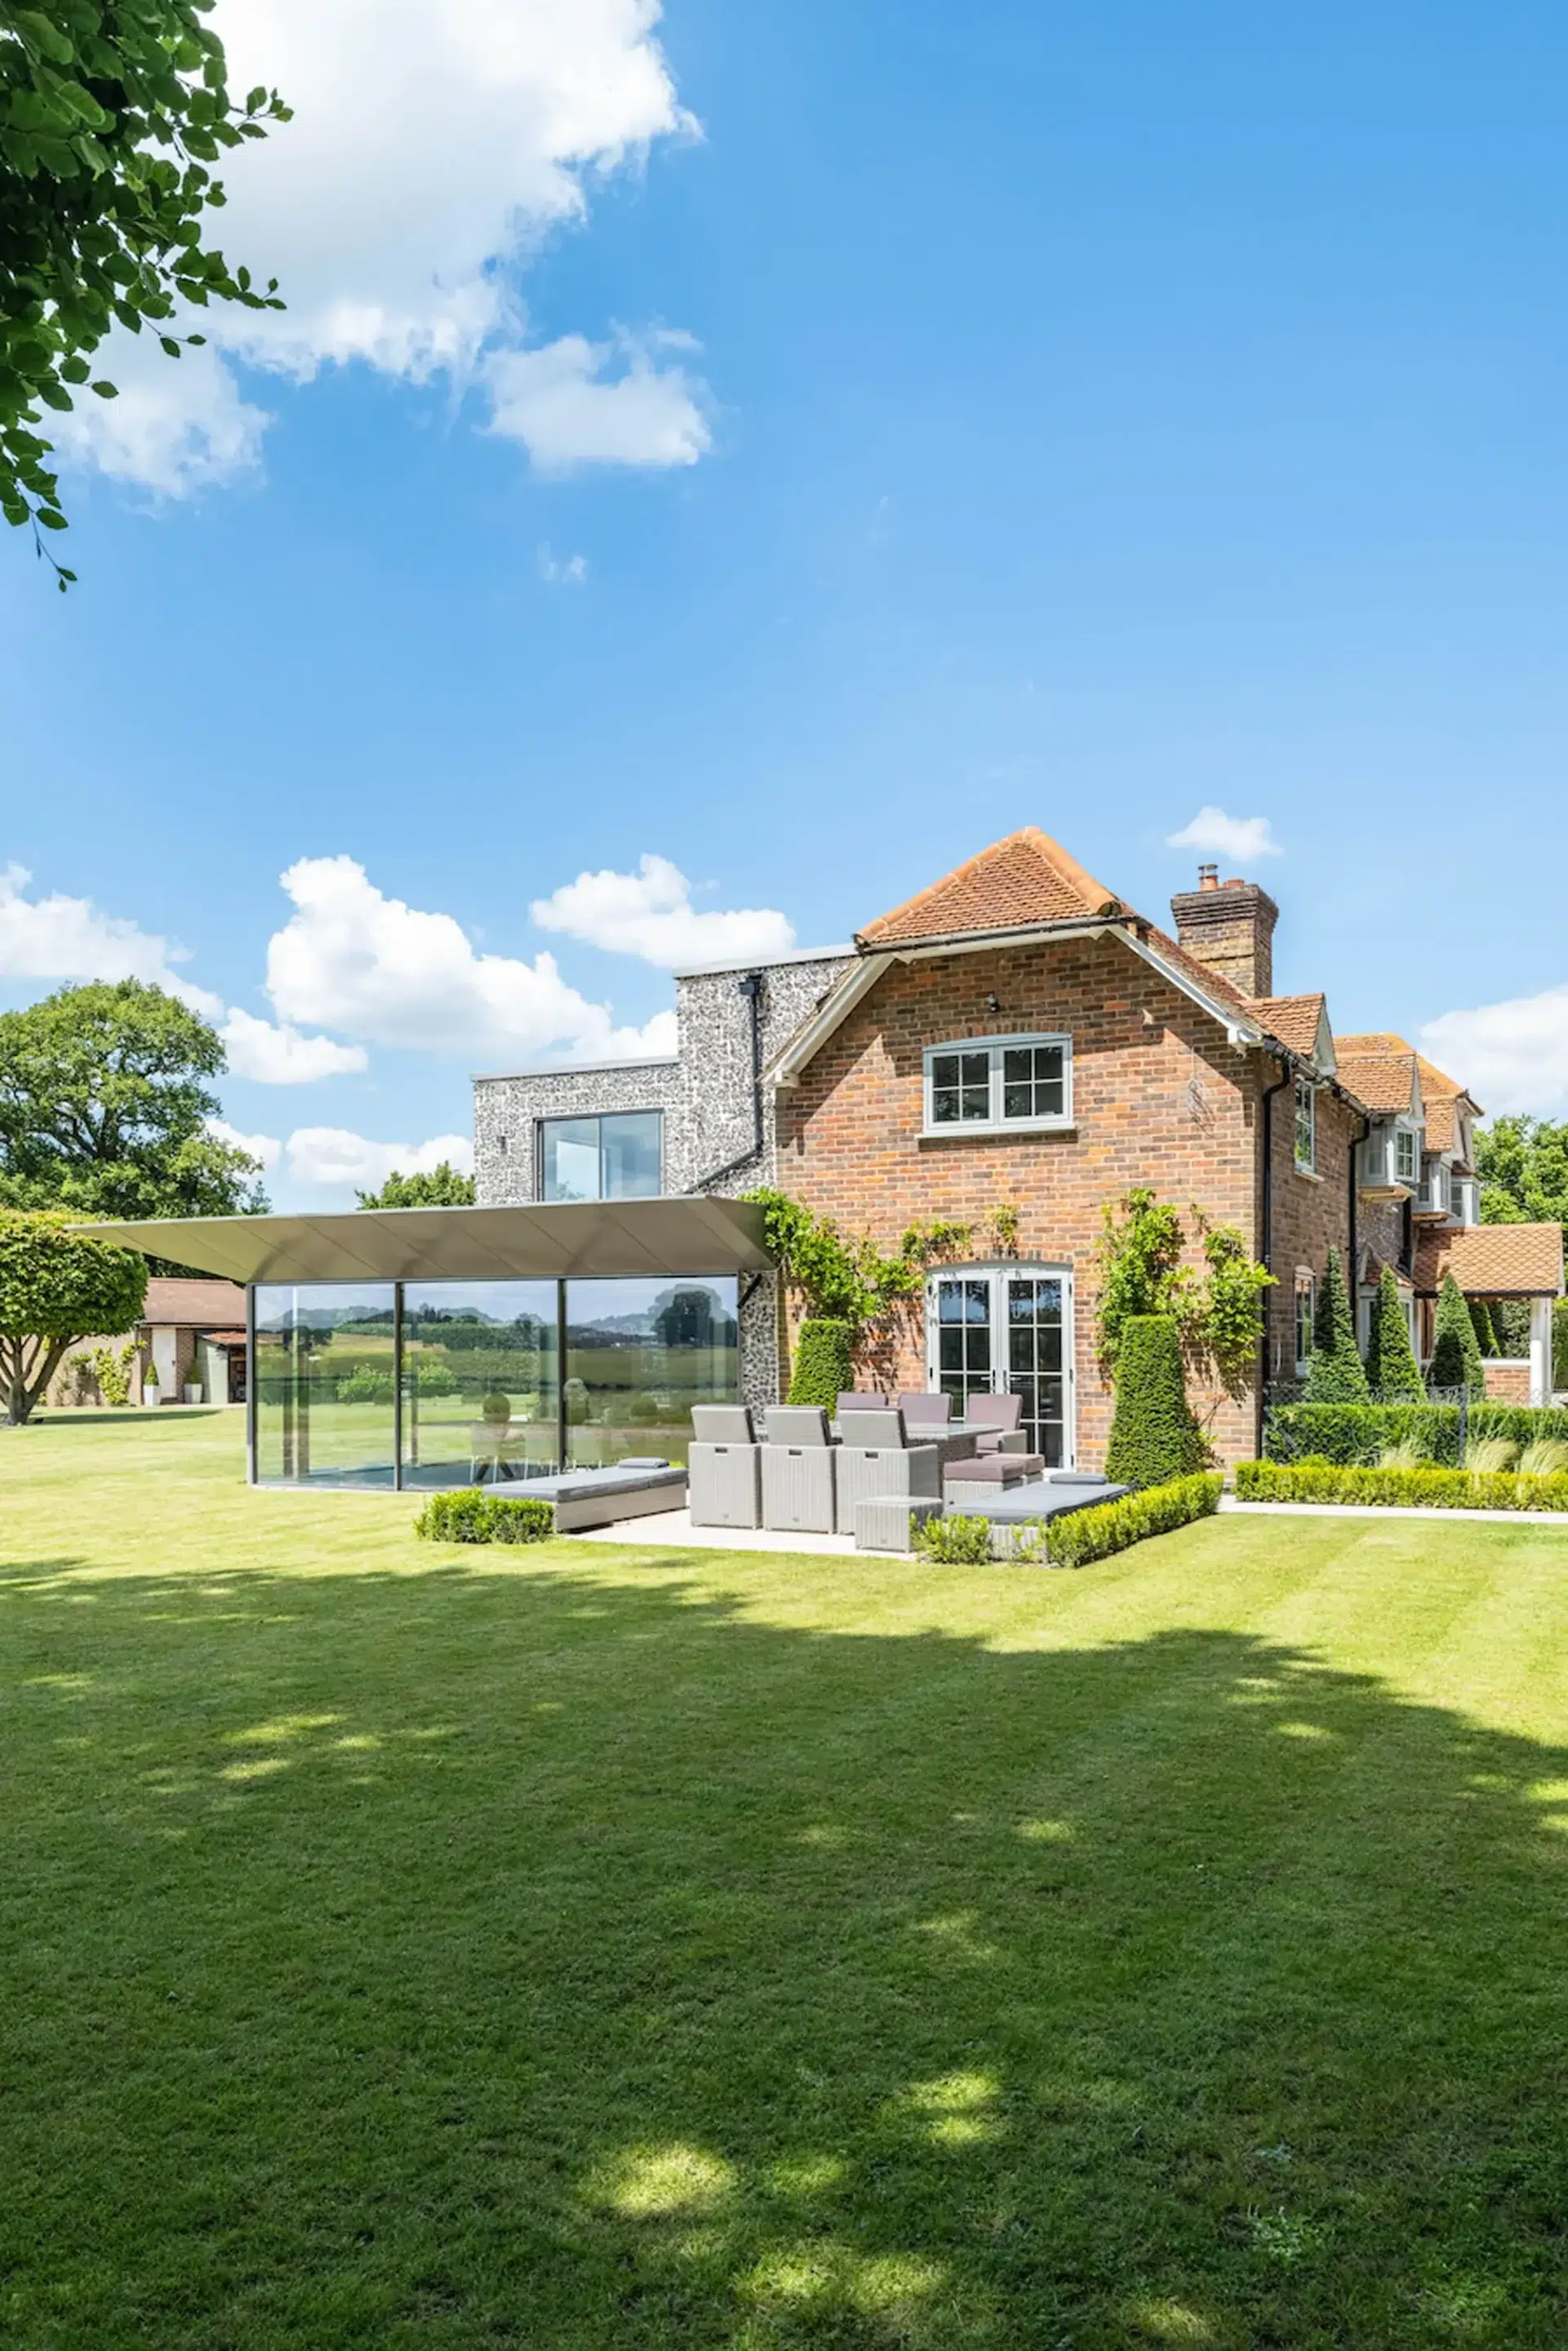
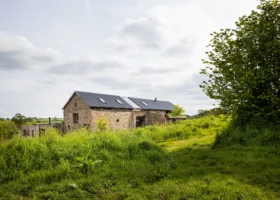
This reconfiguration and extension, designed by BARC Architects, rejuvenates a cliffside 1950s bungalow into a tranquil, contemporary house
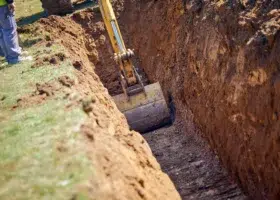
20. Ensure you investigate ground conditions & drains early on
Don’t get tripped up by surprises once the build is underway. Ground conditions are one of the most unpredictable areas of any project, so digging trial holes early will give you a feel for what the terrain is like, minimising your exposure to risk. “It’s also a good idea to establish drain conditions where you can,” says Ben. “Usually, you can get anything to work but it brings the cost down substantially if a simple drainage connection is achievable.”
21. Get in the know with Party Wall agreements & speak to your neighbours
If you’re building up against a Party Wall, it may be that you can come to a written solution with your neighbour(s) without having to spend money drawing up a formal agreement. This has the potential to save £1000s, especially if you need to bring in a specialist surveyor to negotiate. However, it is dependent on a good relationship with the people living next door, so it’s worth getting neighbours onside early and maintaining cordial lines of communication throughout.
“I’d also advise undertaking a photographic condition survey of your neighbour’s home. This will help to avoid any uncertainty, for example, about whether a crack was there before or whether it’s a result of your renovation works,” says Emma Perkin from Emil Eve Architects.
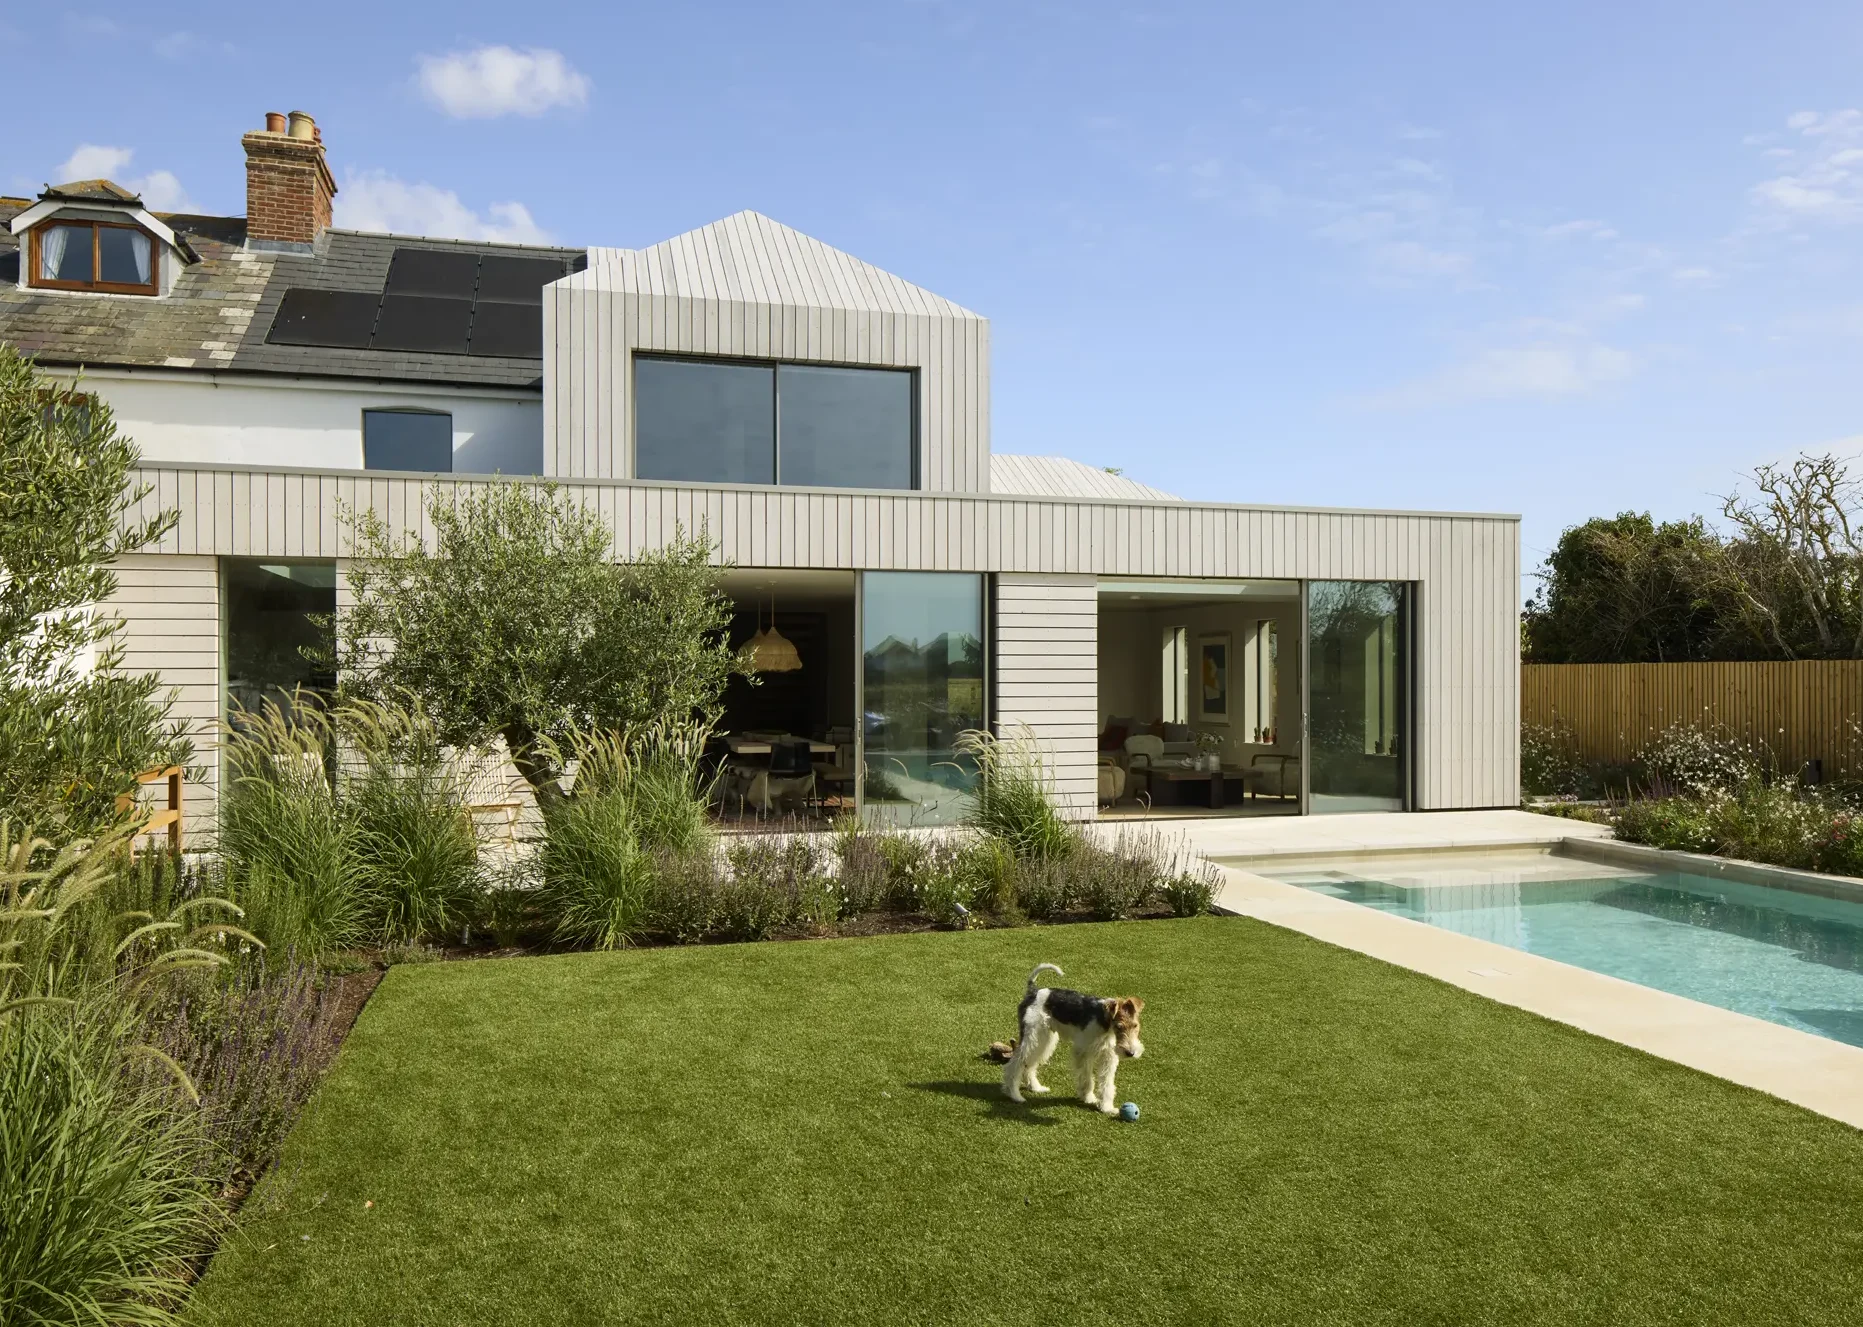
A 1920s house has been overhauled with 138m2 of extra space, including a rear extension that connects seamlessly to a raised garden and swimming pool. The project was masterminded by Paul Archer Design
22. Make sure your project is insured to cover you against any accidents
This perhaps won’t help you save money on the project itself, but it will definitely save you in the event of an accident on site. “Most home insurance doesn’t cover structural alterations or works worth over £25,000. So, before doing an extension, you need to ring your home insurer and notify them of your plans. If they say they won’t cover the works, then you’ll need to arrange specific site insurance,” says Jake Fitness, team leader at Self-Build Zone. “This specialist policy will provide protection for the existing structure (including if any damage occurs during the project), along with anyone you engage to work on the build (employer’s liability), public liability, theft, fire, storm damage, plant hire, tools, legal expenses etc.”
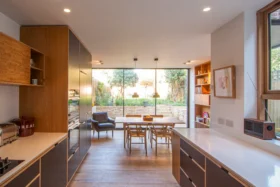
23. Reconsider open-plan living
A spacious open-plan kitchen-living-dining zone may be at the top of your wish list, but the more open the space is, the more structural steels are likely to be involved. This, in turn, will add to costs. If you live in a property with more than two-storeys, going open-plan on the ground floor may call for extra fire safety measures (such as sprinkler/misting systems or fire curtains) to be installed, too.
Local materials and expansive glazing help connect this striking contemporary project to its rolling countryside setting. The extension was designed by Tye Architects
24. Think about the interior fit-out
Dedicate plenty of time to researching good quality fixtures, finishes and fittings that will offer a long service life and therefore good value for money. Strategise by investing in a few luxury items and pairing them with lower-cost solutions for maximum effect. For example, high-end worktops could be laid atop cost-effective units from IKEA.
25. Think twice before going DIY
While getting hands-on could save money on small, straightforward tasks, it’s best to leave the more complex jobs to the professionals. You could end up spending more in the long-run if you need to bring in a decorator to fix the feature wall you made a mess of – even getting a good paint finish is harder than you might think!
26. Schedule the building works carefully
Work closely with your main contractor to plan an efficient build programme. If you are project managing the extension’s build, this means getting materials delivered at the right times, so goods are on site and ready for the relevant trades. Taking this approach to your project will avoid subbies having too much downtime on site, which will end up costing you money.
27. Check your house’s existing services
Using current outlets will avoid your electrician/plumber having to spend time re-routing pipes or cabling to fit a new layout. The average hourly rate for each of these trades is typically around £60, so you could potentially save £100s by keeping the job simple and sticking to what’s already there.
Fraher transformed this Edwardian house with a basement renovation and rear extension – improving the relationship between the ground floor, garden and subterranean living area. Photo: Chris Wharton
28. Visit the building site & communicate with the trades
This is essential to ensure the extension work is progressing as you intend it to. Regular discussions with your contractor and trades mean that any issues will come to light sooner rather than later. This gives an opportunity to fix these details before you need to backtrack too far, which would result in greater costs if more work needs to be undone.
29. Maintain a tidy site to prevent any accidents
This is an easy job to keep on top of yourself. A clean and organised site means everything’s easy to see and access. Plus, your build team won’t need to spend 30 minutes shuffling materials around and tidying up every morning before cracking on with their work. This will also prevent any accidents as things won’t be scattered around the site, creating potential trip hazards.
30. Make sure snagging is included in the contract
Hold back a retention fee of the agreed contract with your builder to cover snagging. The final walk-through should take place at an agreed time and date. By this point, any major niggles should already have been addressed during your regular visits to the site. This final inspection provides an opportunity to have any minor faults remedied.
Rebecca Foster
You may be interested in