- Plan ItBack
- Design ItBack
- Build ItBack
- Homes
- ProductsBack
- CostsBack
- Self Build Cost Calculator
Estimate your project costs instantly with Build It's interactive self-build cost calculator
Calculate Now - Costs & Finance
- Contracts & Warranties
- Build It Estimating Service
Get an accurate, detailed cost breakdown of your project
Submit plans
- EventsBack


 Login/register to save Article for later
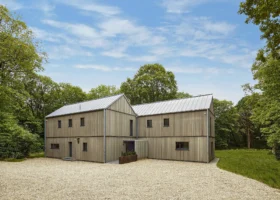
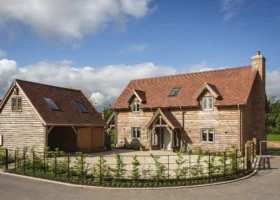
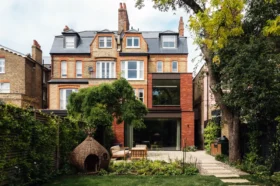
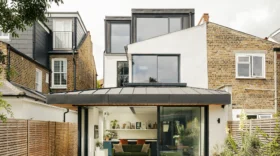
This 1970s House Has Been Brought Up to Modern Standards with an Energy-Efficient Retrofit

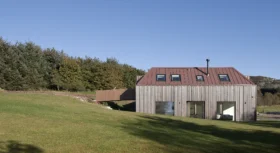
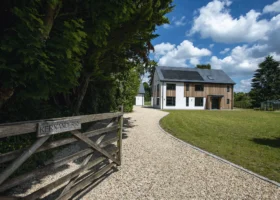
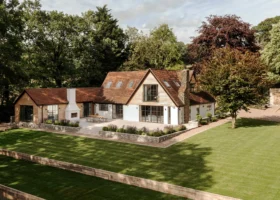
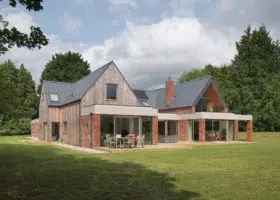
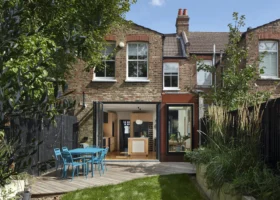
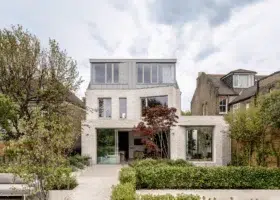
This contemporary-looking home in Kent couldn’t be more different from the boxy 1970s brick house next door. Which is amazing when you learn that it used to be more or less exactly the same. The property’s transformation, with a side extension built over the original garage and rendered finish, is more than just skin deep, though: driven by Matt and Emily Lightbody’s desire to live more sustainably, it’s also a brilliant case study for retrofitting in a pragmatic way.
The couple bought the house in late 2016, moving from a nearby new build in search of a place for their growing family. “We wanted somewhere with more space and a bigger garden, that had potential,” says Matt.
They did some modernisation work before even moving in, mainly centred around knocking through to create a big open-plan kitchen-diner across the back of the house, at a total cost of £62,000. In 2022, with their finances in a more comfortable place, and feeling like they and their (now older) children (who are currently nine and six) could handle the disruption, they felt ready to tackle the extension and wider renovation.
Undertaking phase two of the renovation
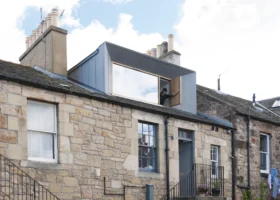
The builder on the original project, Chris Jeggo, was a friend, and worked with architect Andy Lanham to bring the project to fruition. So, when it was time to undertake the next phase of works, Matt and Emily saw no reason to look elsewhere. The neighbours to one side of them had already completed something along the lines of what they wanted, with a side extension wrapped in white render with anthracite glazing: “It helped us see what we could do, and that from a planning point of view there wouldn’t be too many constraints,” says Matt. Accordingly, getting planning permission for their own project proved to be no problem.
Matt and Emily replaced the side garage with a two-storey extension, giving them a new master suite upstairs and a snug, WC and utility room on the ground floor
Chris and Andy work together under the name Colston Homes, and Matt says that it worked brilliantly to hire architect and main contractor as a package. “If you have an architect and builder that aren’t communicating well, it brings challenges,” says Matt.
“Chris and Andy spoke every day, and felt that Andy would only ever put forward something that worked aesthetically and practically, and was buildable.” And, in terms of sub-contractors, “I knew they would only work with people who shared their values and were interested in getting the detail right.”
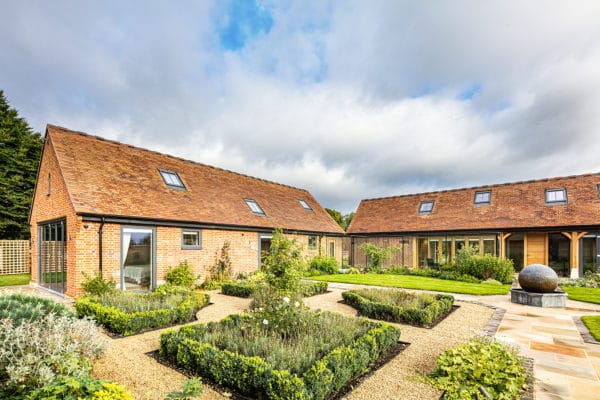
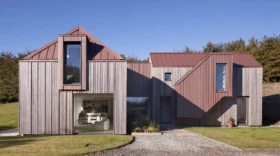
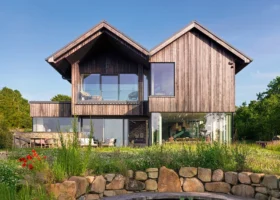
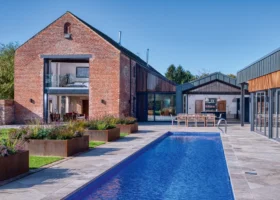
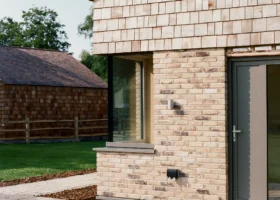
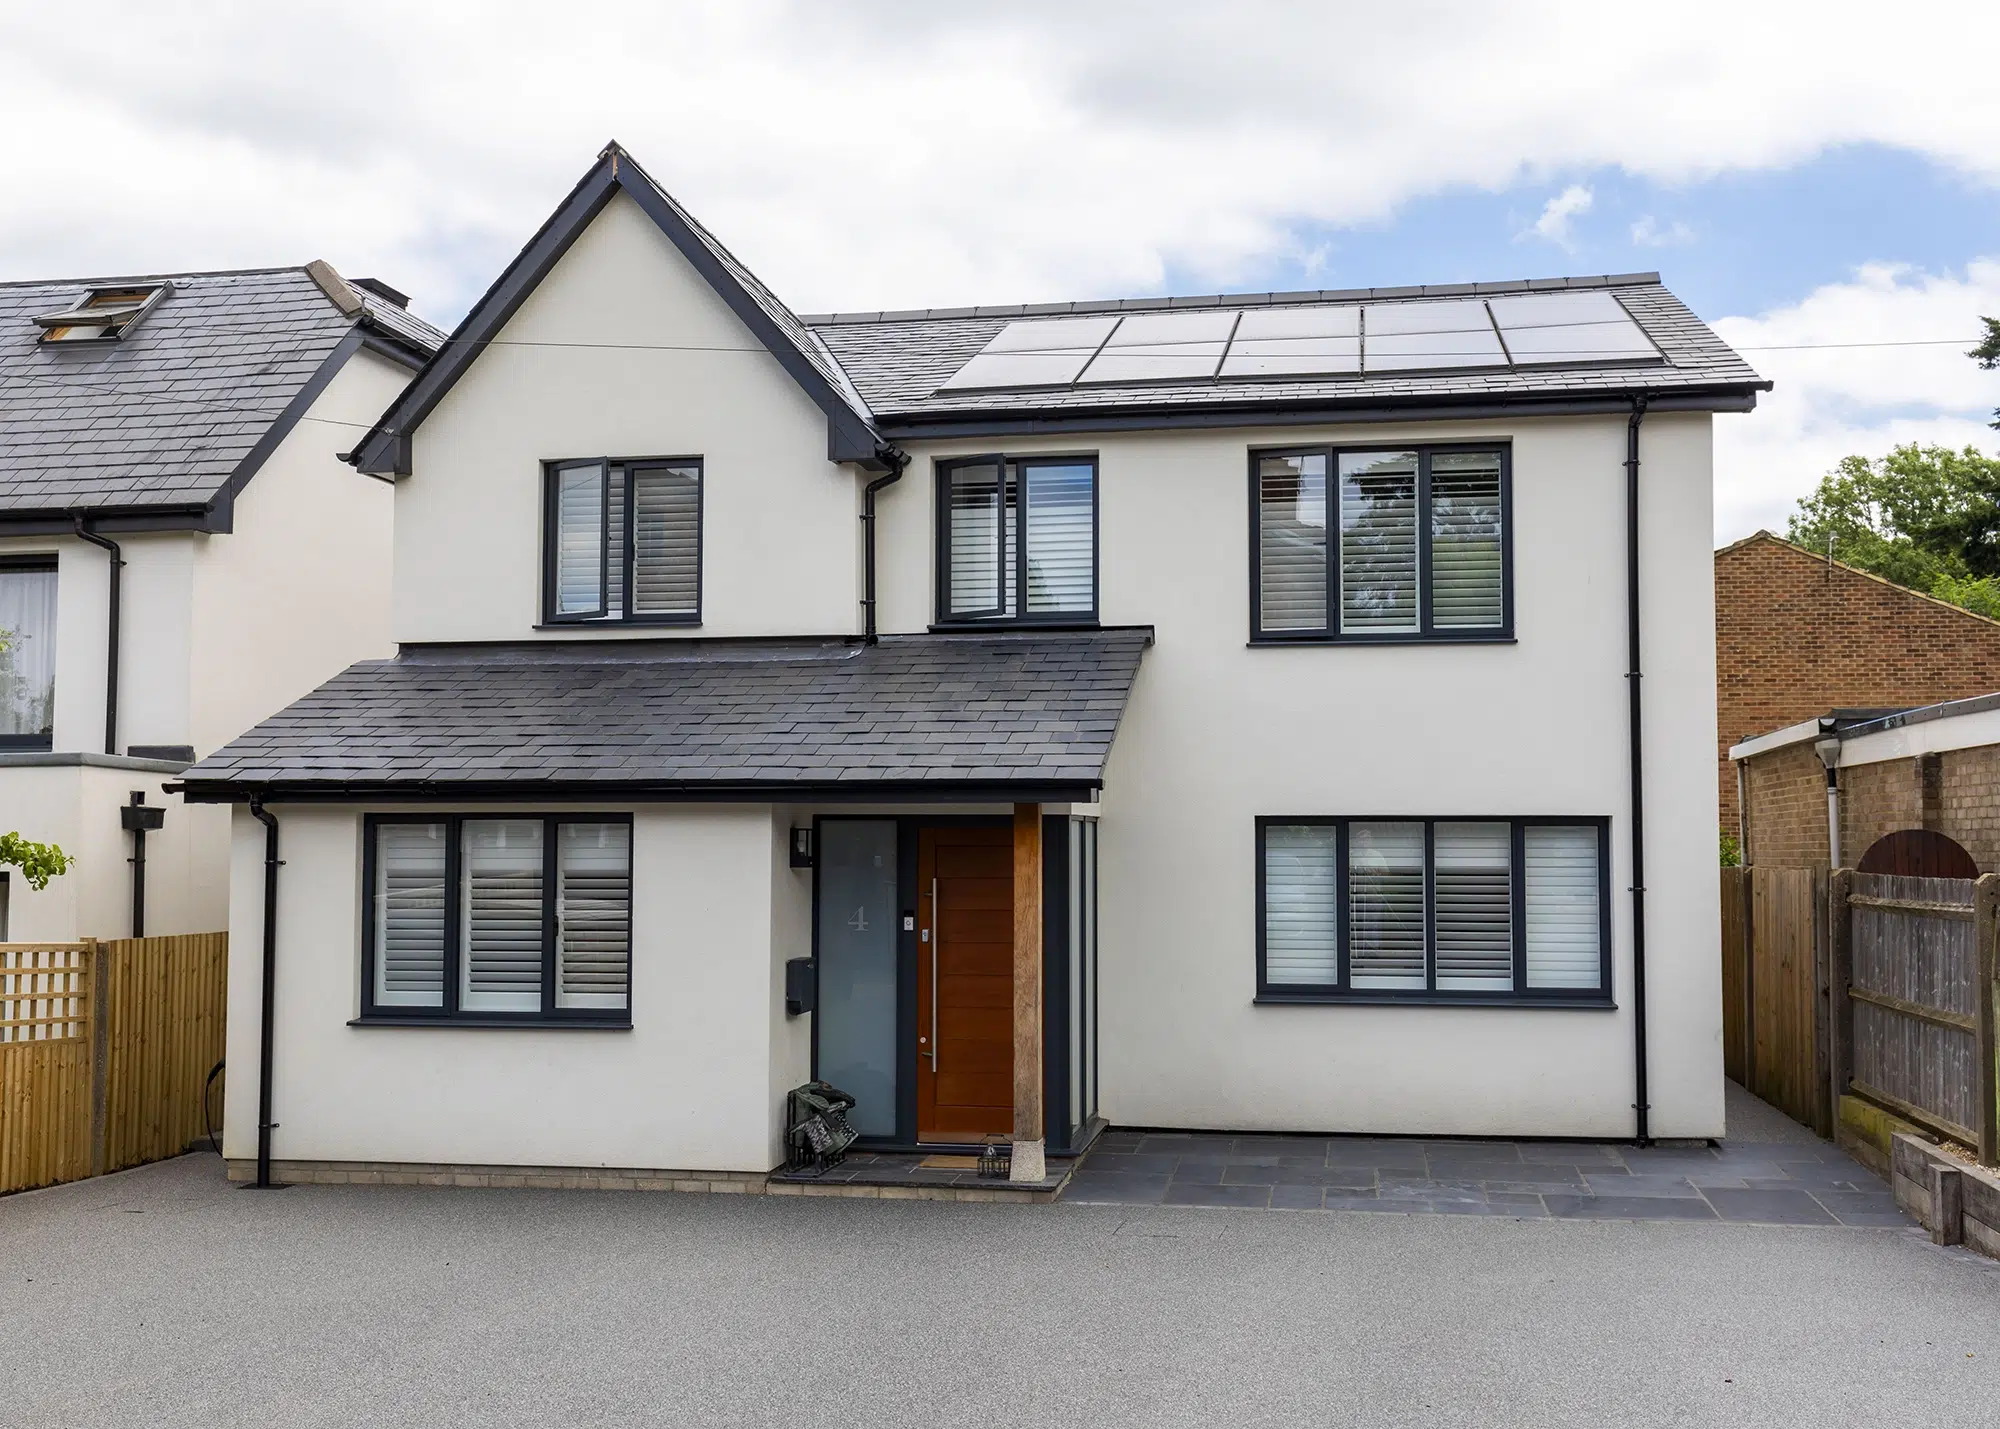
The original home and extension has been finished with Baumit silicon render, creating a seamless, thermally-efficient facade
A £155,000 additional mortgage on the house was taken out to pay for the work, but in the end it wasn’t quite enough, with the couple having to borrow an extra £50,000 to take it to completion and get the high spec finish they wanted, like their smart resin-bound driveway. “You get to a point where you don’t want to compromise; we chose what we wanted, even if it ended up costing more,” says Matt. At a time when interest rates were jumping sharply, he is pleased that he managed to borrow the bulk of the money at a reasonable rate.
- NAMESMatt & Emily Lightbody
- OCCUPATIONSManaging director/commercial director of a drainage company & teacher
- LOCATIONKent
- TYPE OF PROJECTRenovation & extension
- CONSTRUCTION METHODTimber frame for the extension; the original house is brick & block
- PROJECT ROUTEPackage of architect, builder & project management working for a single company
- PLOT SIZE319m2
- HOUSE COST £455,500
- BOUGHT2016
- HOUSE SIZE144m2
- PROJECT COST£265,321 (plus £62,000 in 2016)
- PROJECT COST PER M2£1,843
- TOTAL COST£782,821
- BUILDING WORK COMMENCEDJuly 2022
- BUILDING WORK TOOK24 weeks
- CURRENT VALUE£900,000
Developing the plans for a sustainable retrofit
Initially, the idea was to go all-electric with an air source heat pump – and give up fossil fuels altogether. “I’ve become more and more interested in sustainability, and this seemed like an opportunity to do our bit and make sure we can live a life where our personal carbon footprint isn’t very high,” says Matt. However, Andy suggested that this wasn’t a cost-effective solution given that the boiler was still pretty new.
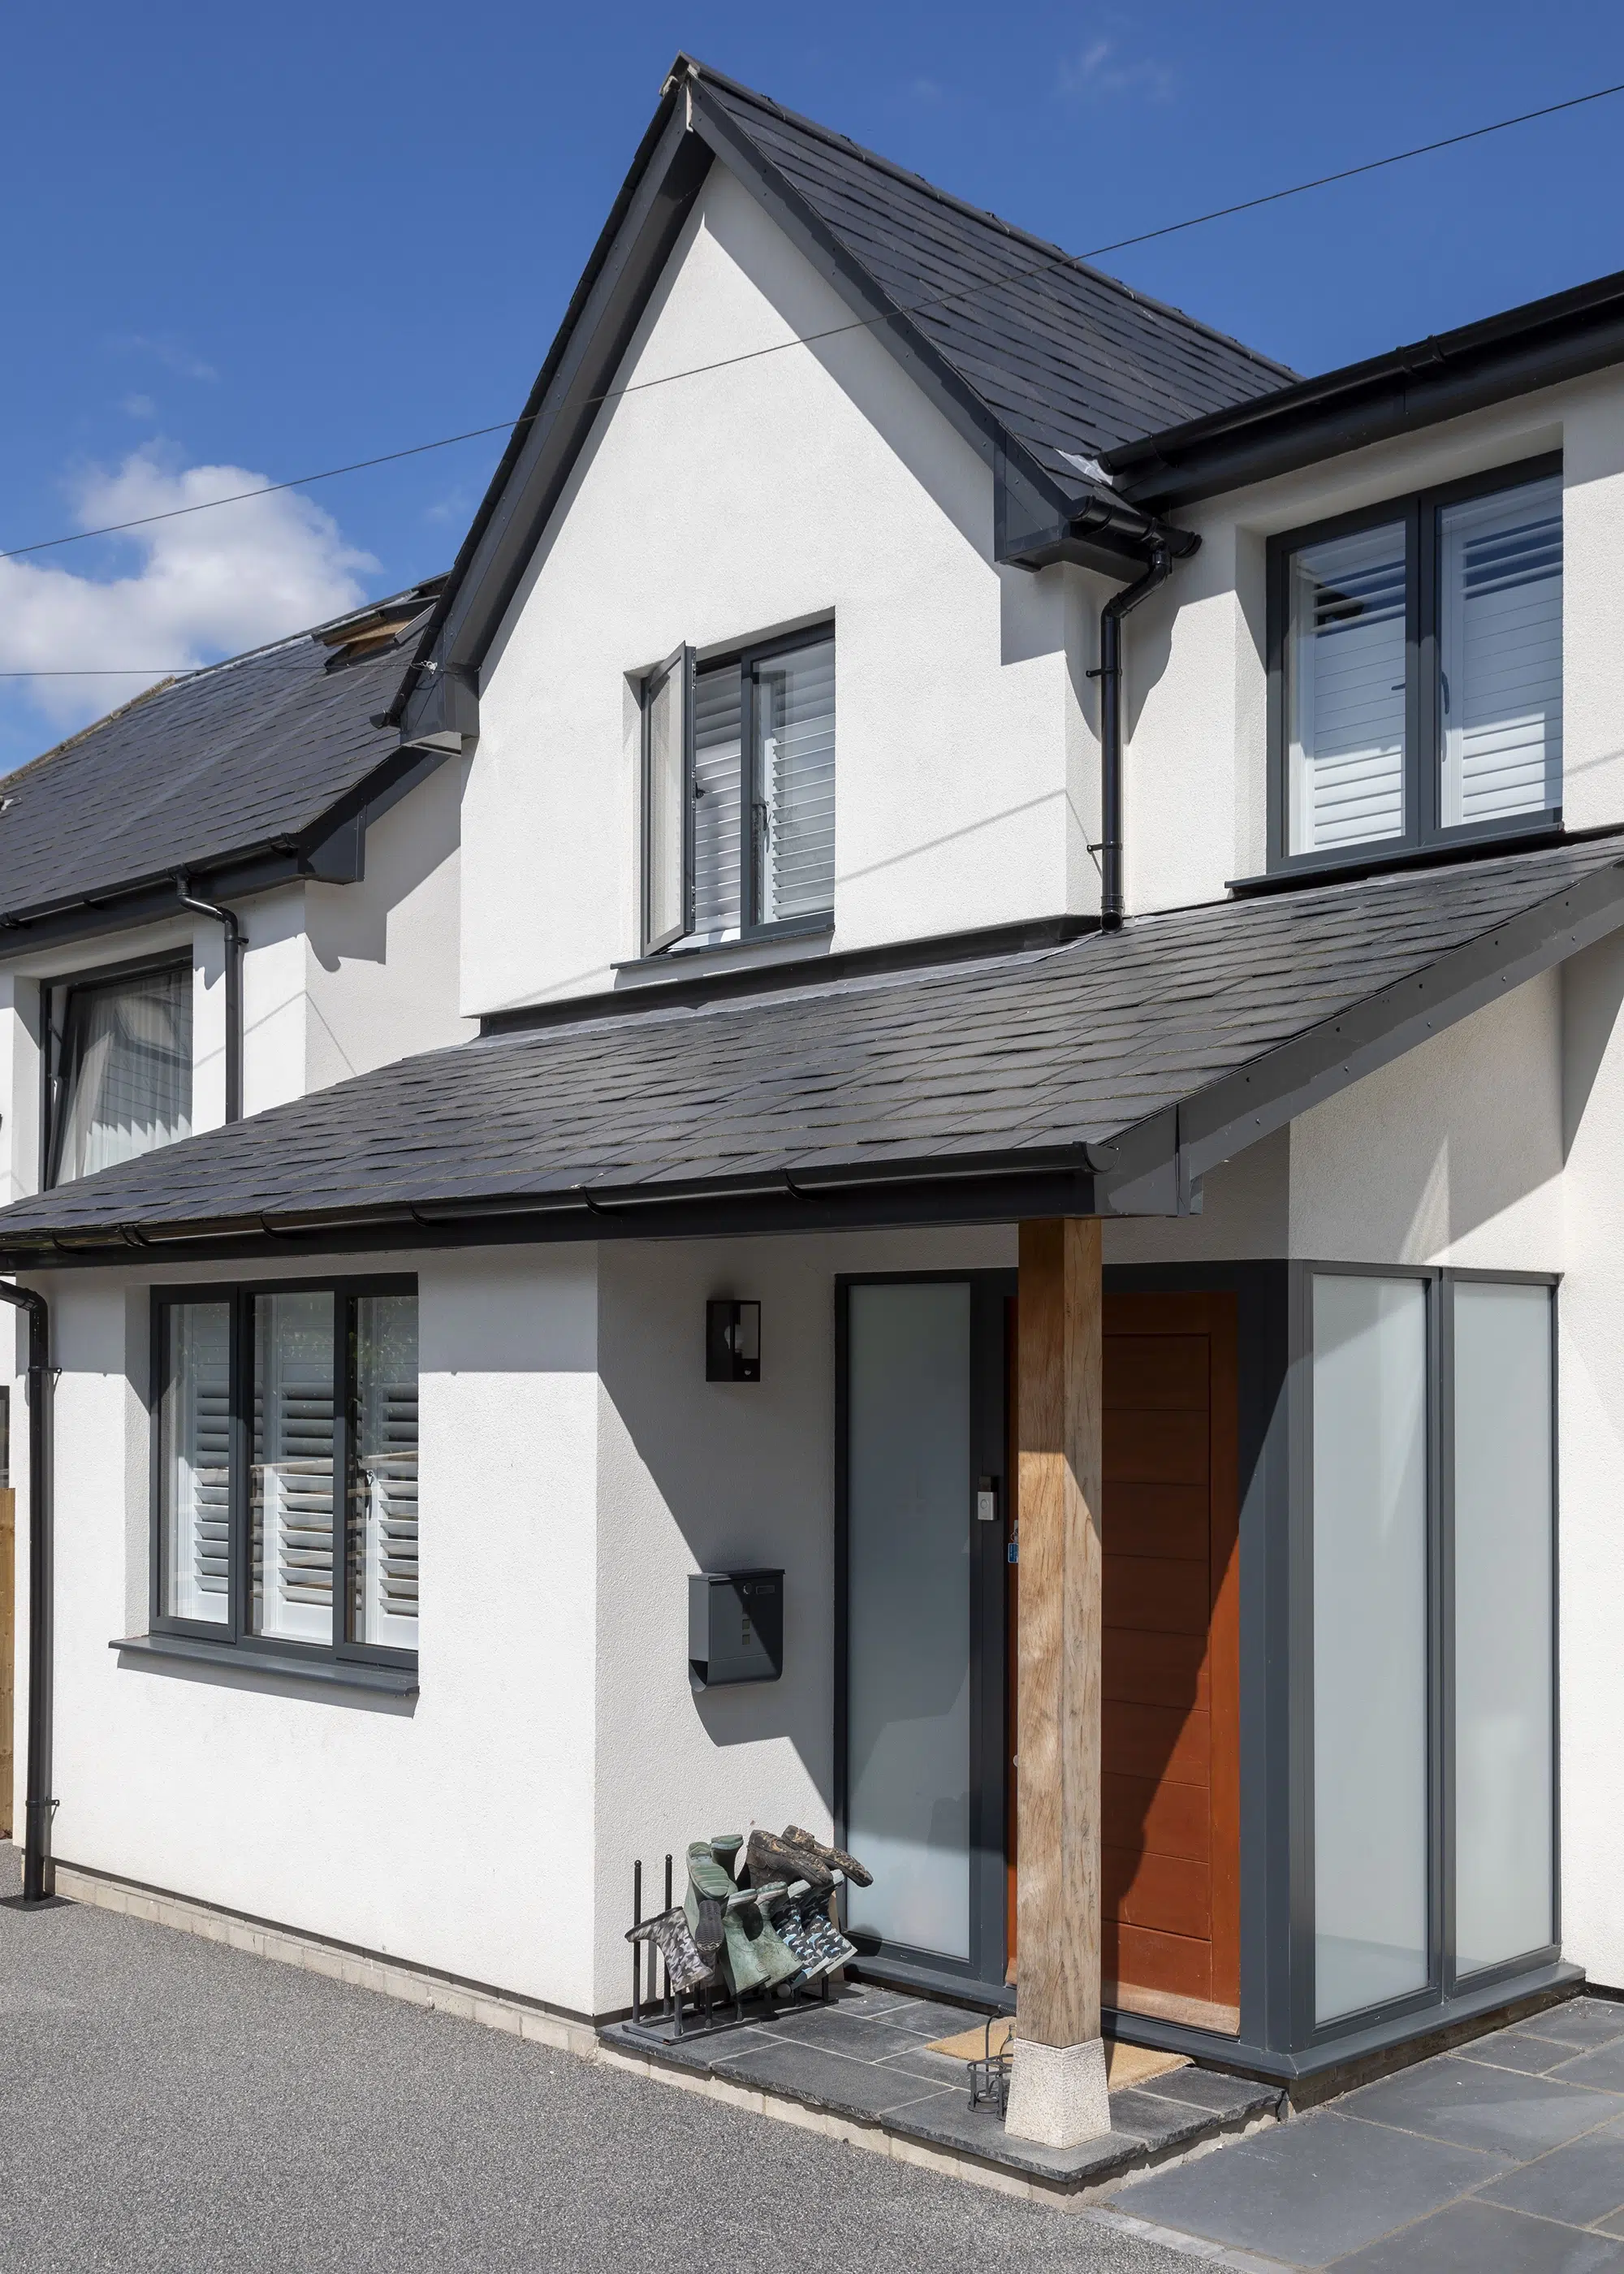
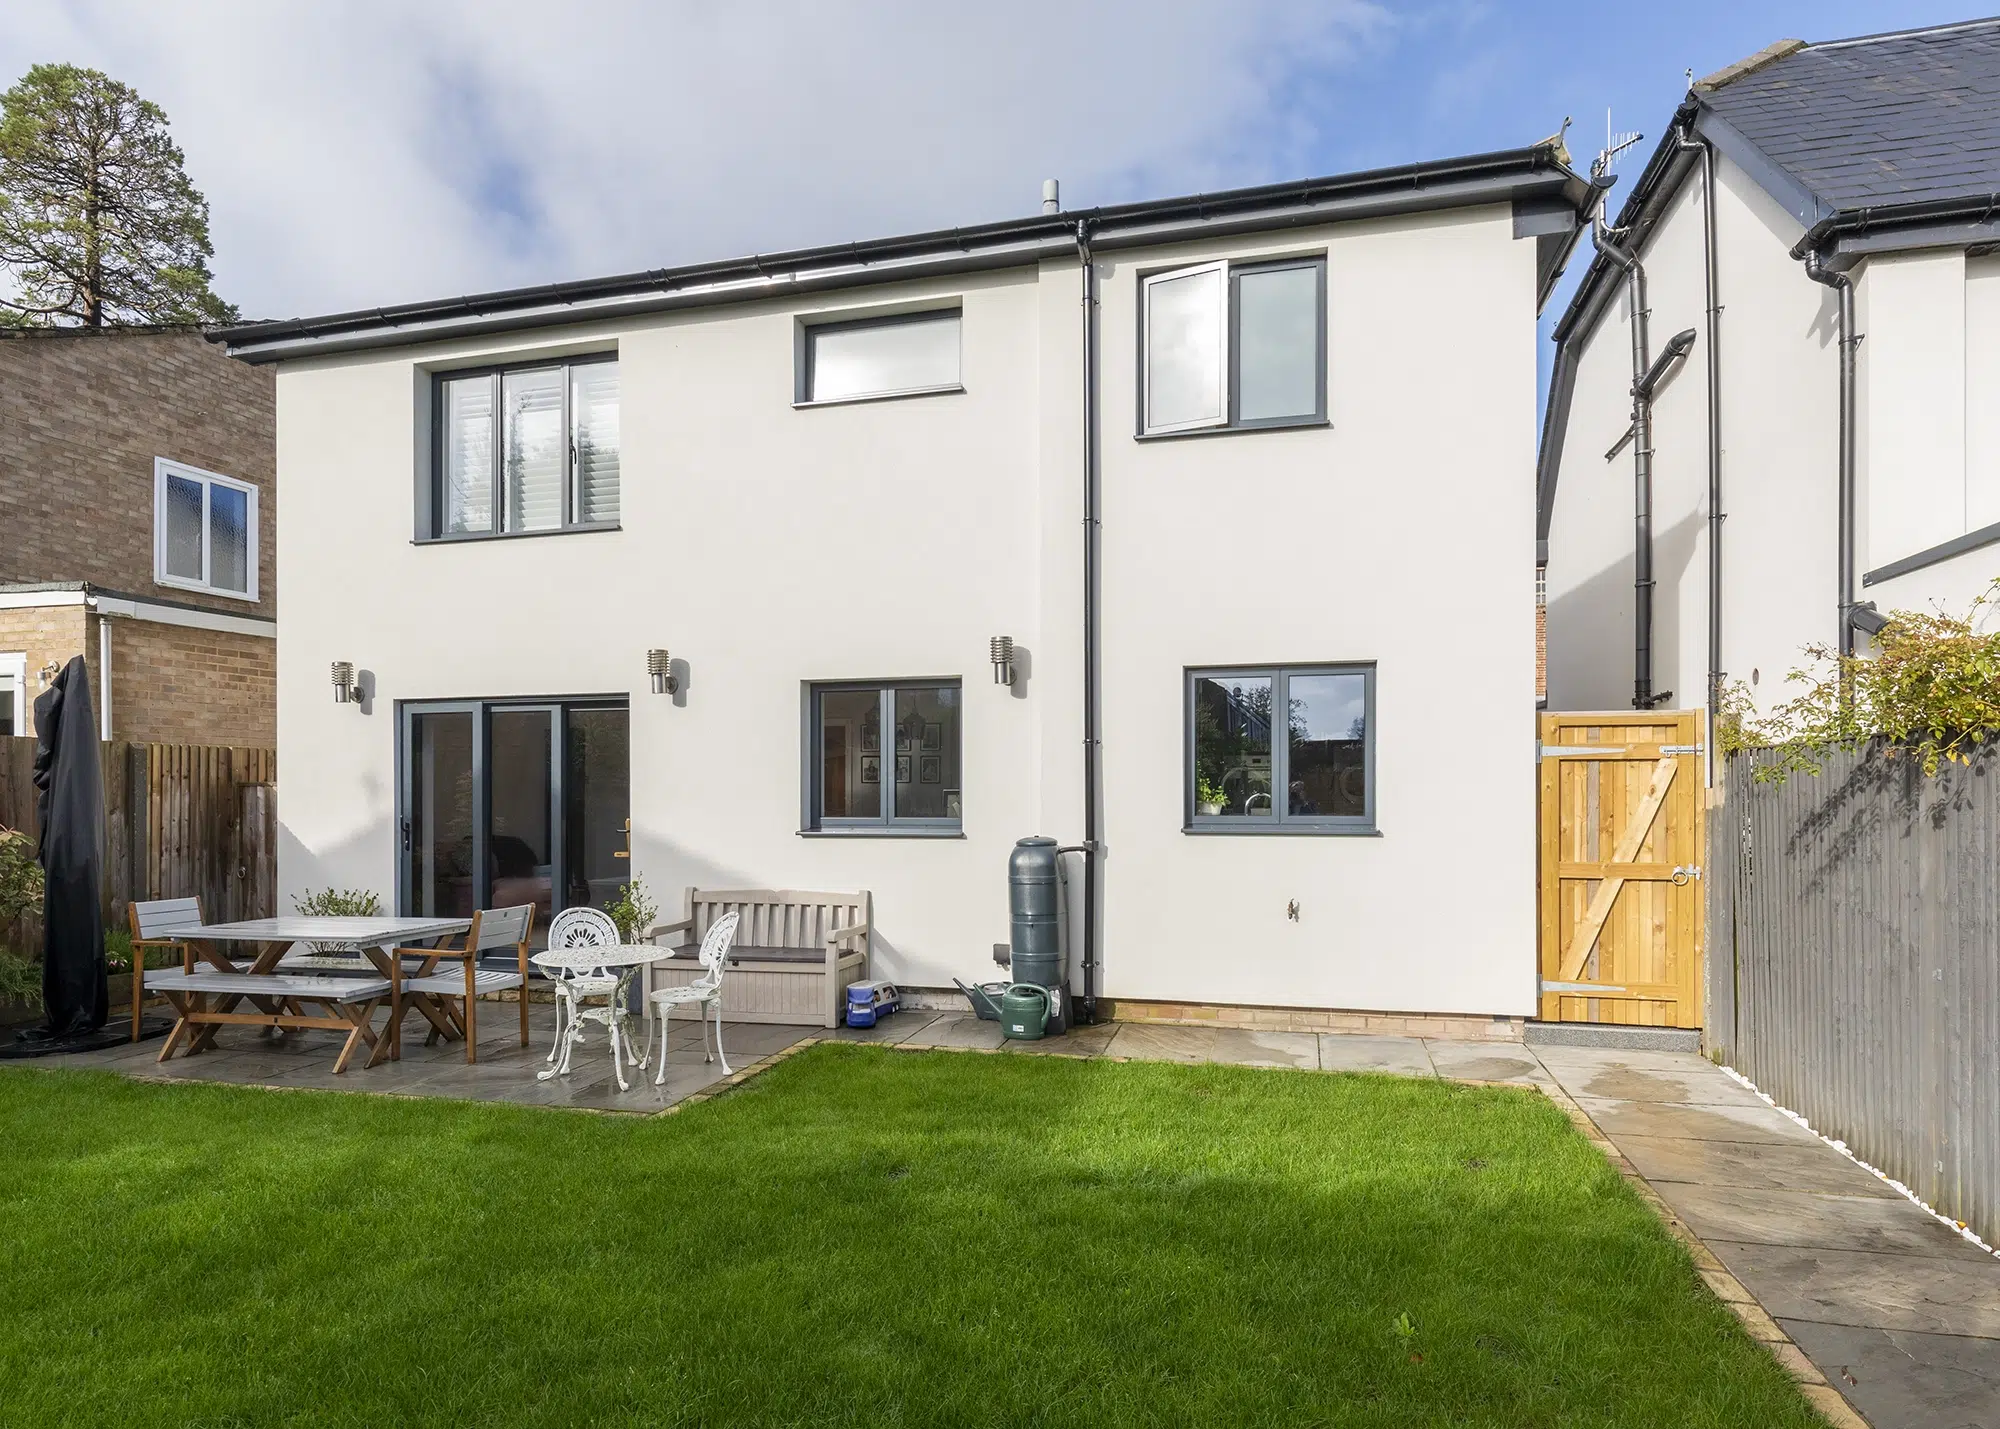
The old white PVCu windows have been replaced by anthracite aluminium units, to match the new glazing at the front (the old windows were sold rather than thrown away, so they have been reused)
“I said, don’t chuck away the infrastructure you’ve already paid for in order to pay thousands more for a heat pump,” says Andy. “What we should be doing is trying to reduce the need for energy in the first place, so that the gas boiler will hardly ever need to be on.” Now wrapped in expanded polystyrene external insulation with render on top, with new double-glazed windows, the house is fulfilling that promise.
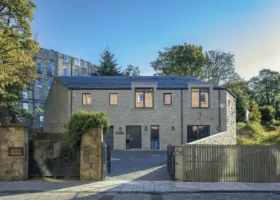
The new addition to the side completely replaces the garage, rather than building on top, with new foundations. The footprint is slightly larger than before, with an extension to the front on the garage side, too; this has allowed enough room for a generous entrance hall (sandwiched by two doors, to keep out the cold) as well as a run of new rooms – from front to back, a snug, WC and utility room, the latter connected to the kitchen.
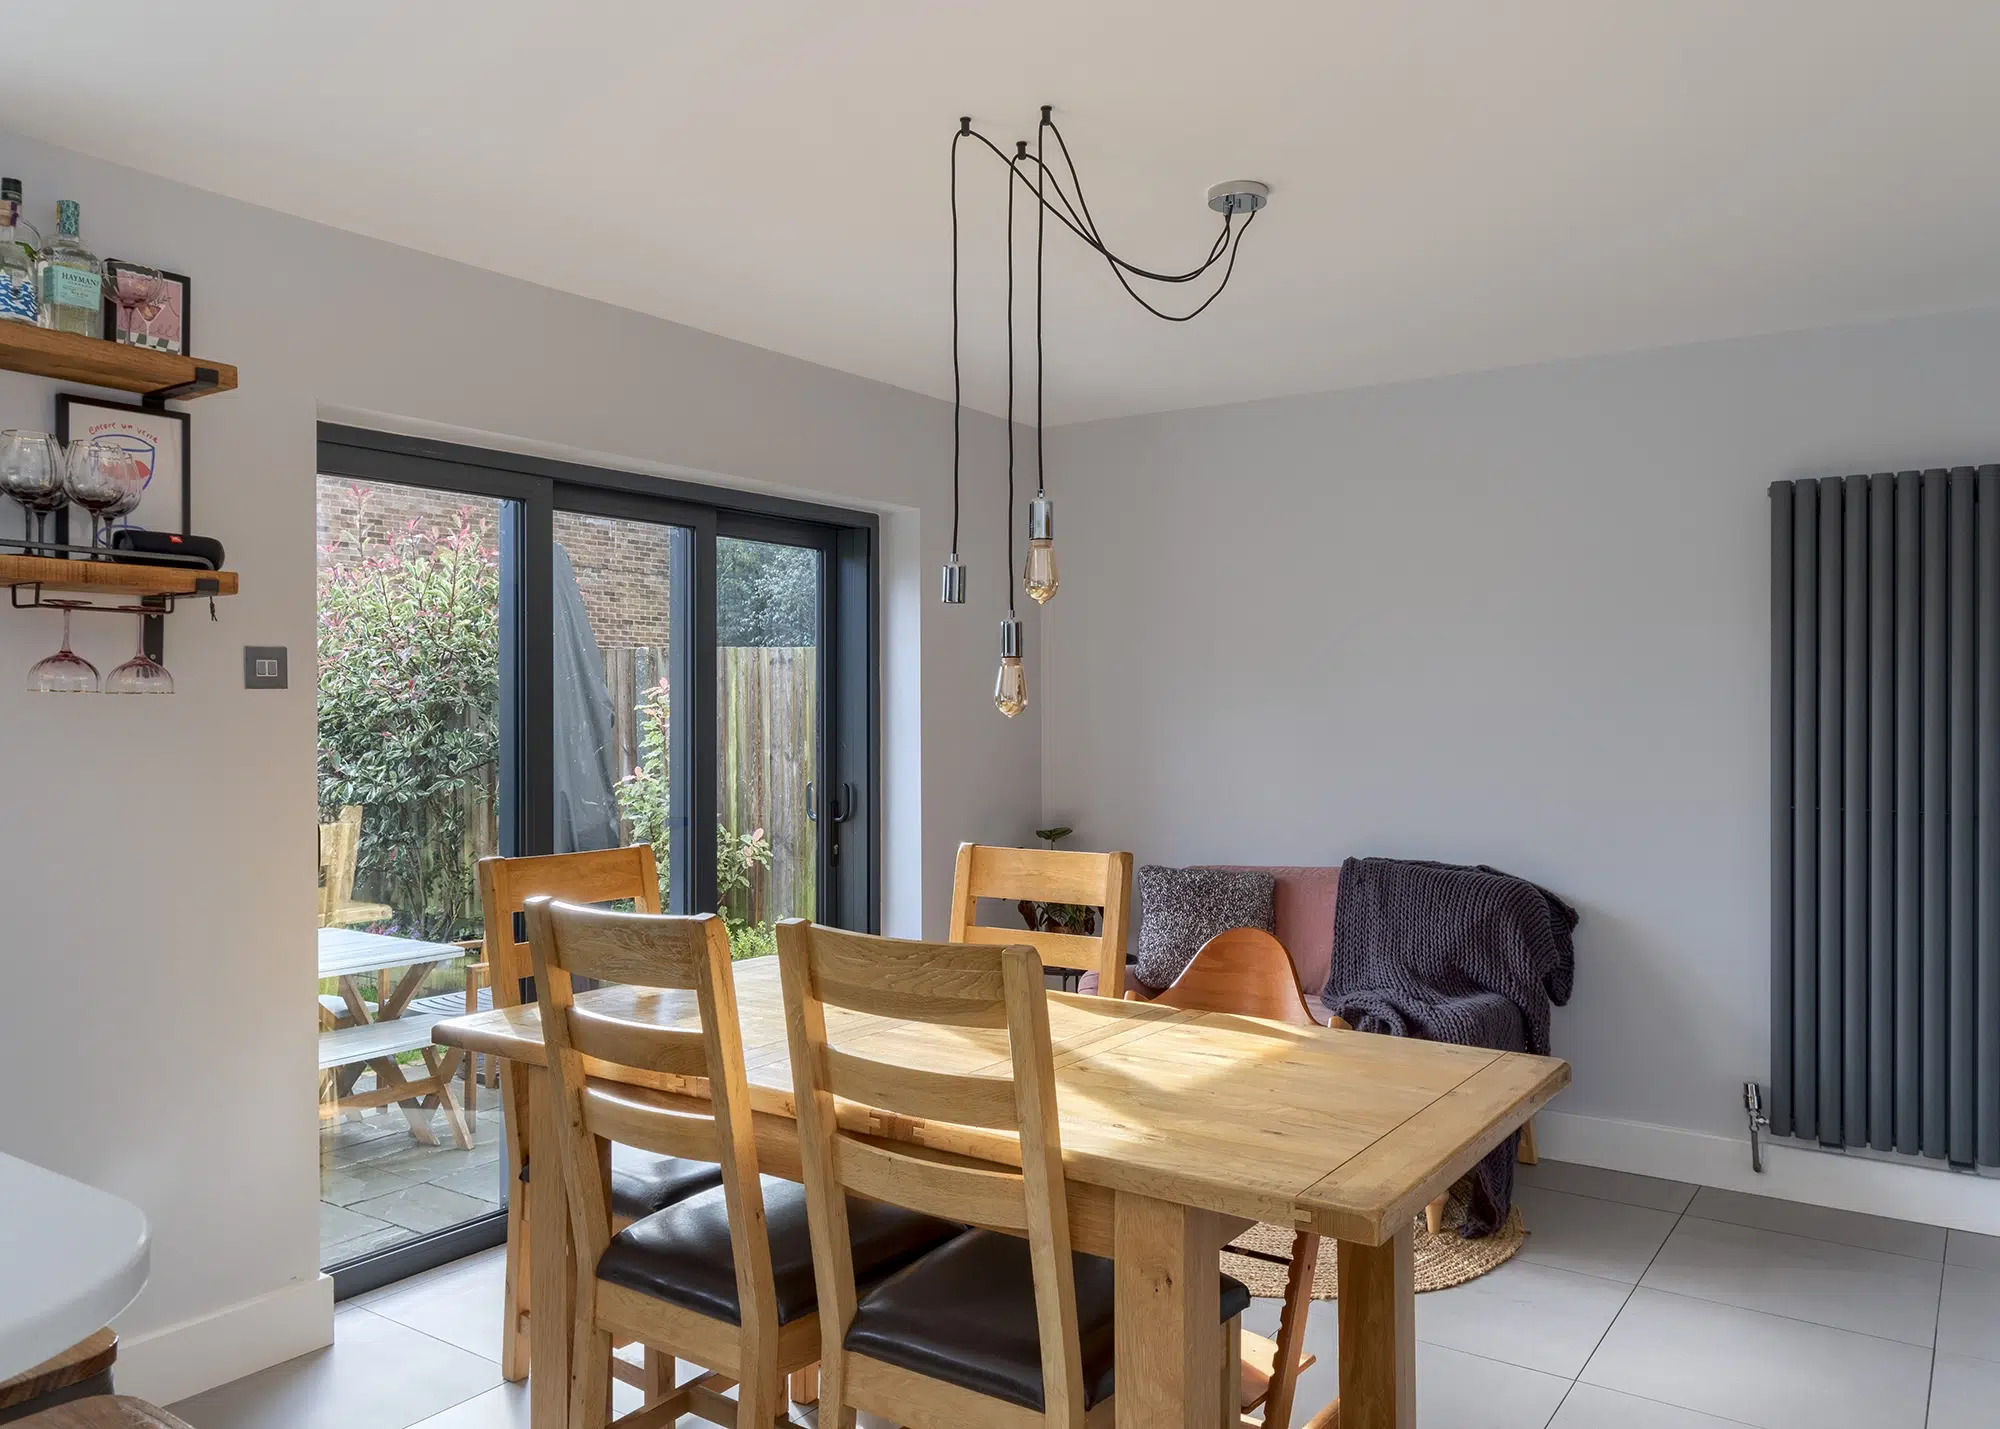
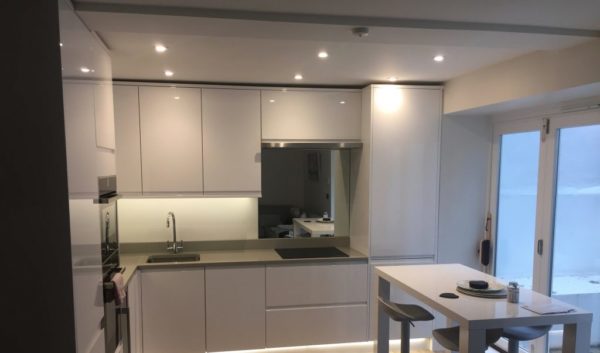
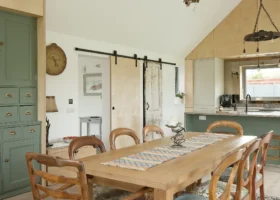
As part of the new work, the kitchen was made smaller – the couple realised they’d made a mistake by having the breakfast bar come too far into the room, giving less space to the dining area, so a piece of the worktop was cut out and the peninsula shunted closer to the rest of the kitchen. It means there’s now room for a sofa for hanging out, too
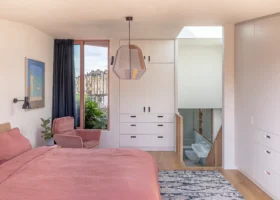
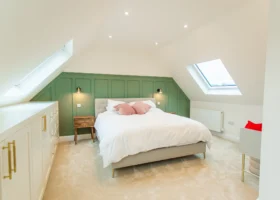
Upstairs, the extension houses a new master bedroom suite: you walk in via the dressing room, with the bedroom off to the left and a shower room to the right. It’s a relatively narrow space, and the choice of timber frame for the extension was partly to retain as much internal floor space as possible – a cavity wall would have gobbled up a few incredibly precious centimetres. Where the old external wall has now became an internal wall, the second skin has been removed, again to maximise liveable floor area.
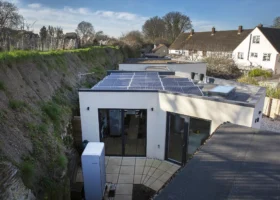
In terms of the new energy setup, there is an 18kW solar PV array that feeds into battery storage. The roof pitches both east and west, so the panels are on both sides – front and back. In the extension, the new rooms are so highly insulated that there was no need to extend the gas-fired central heating: they just have electric underfloor heating on the ground floor, with a small electric radiator in the master bedroom and an electric towel rail in the ensuite.
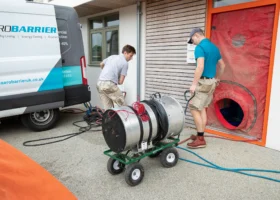
Improving the 1970s house’s airtightness & ventilation
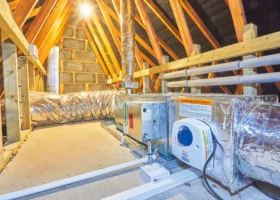
Upgrading the insulation would go a long way to fulfilling the couple’s goal of minimising reliance on the gas boiler – but as the house got more tightly sealed, so a new challenge emerged. The increased airtightness was very likely to result in poor indoor air quality and a build-up of moisture inside. Andy proposed a mechanical ventilation and heat recovery (MVHR) system to solve the problem.

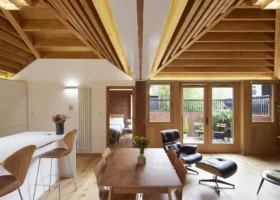
New flooring, windows, shutters and decoration in the main living room have refreshed this space as part of the wider renovation
Although relatively easy to install on a new build, retrofitting MVHR requires some clever thinking about where to put the ducts and vents. “Extracting the hot, damp air is easier, because most of it’s on the top floor, from the bathrooms, plus there’s one riser from the kitchen; that all goes to a heat exchanger in the roof,” explains Andy.
Warmth from the extracted air is then channeled into a pre-warmed incoming supply of fresh air. Getting the ducts from the loft level to the ground floor is where it gets a little tricky: while, for example, it makes sense to put a duct in a first-floor wardrobe where it’s not really seen, that wardrobe might be sitting on top of an internal wall, or a floor joist.
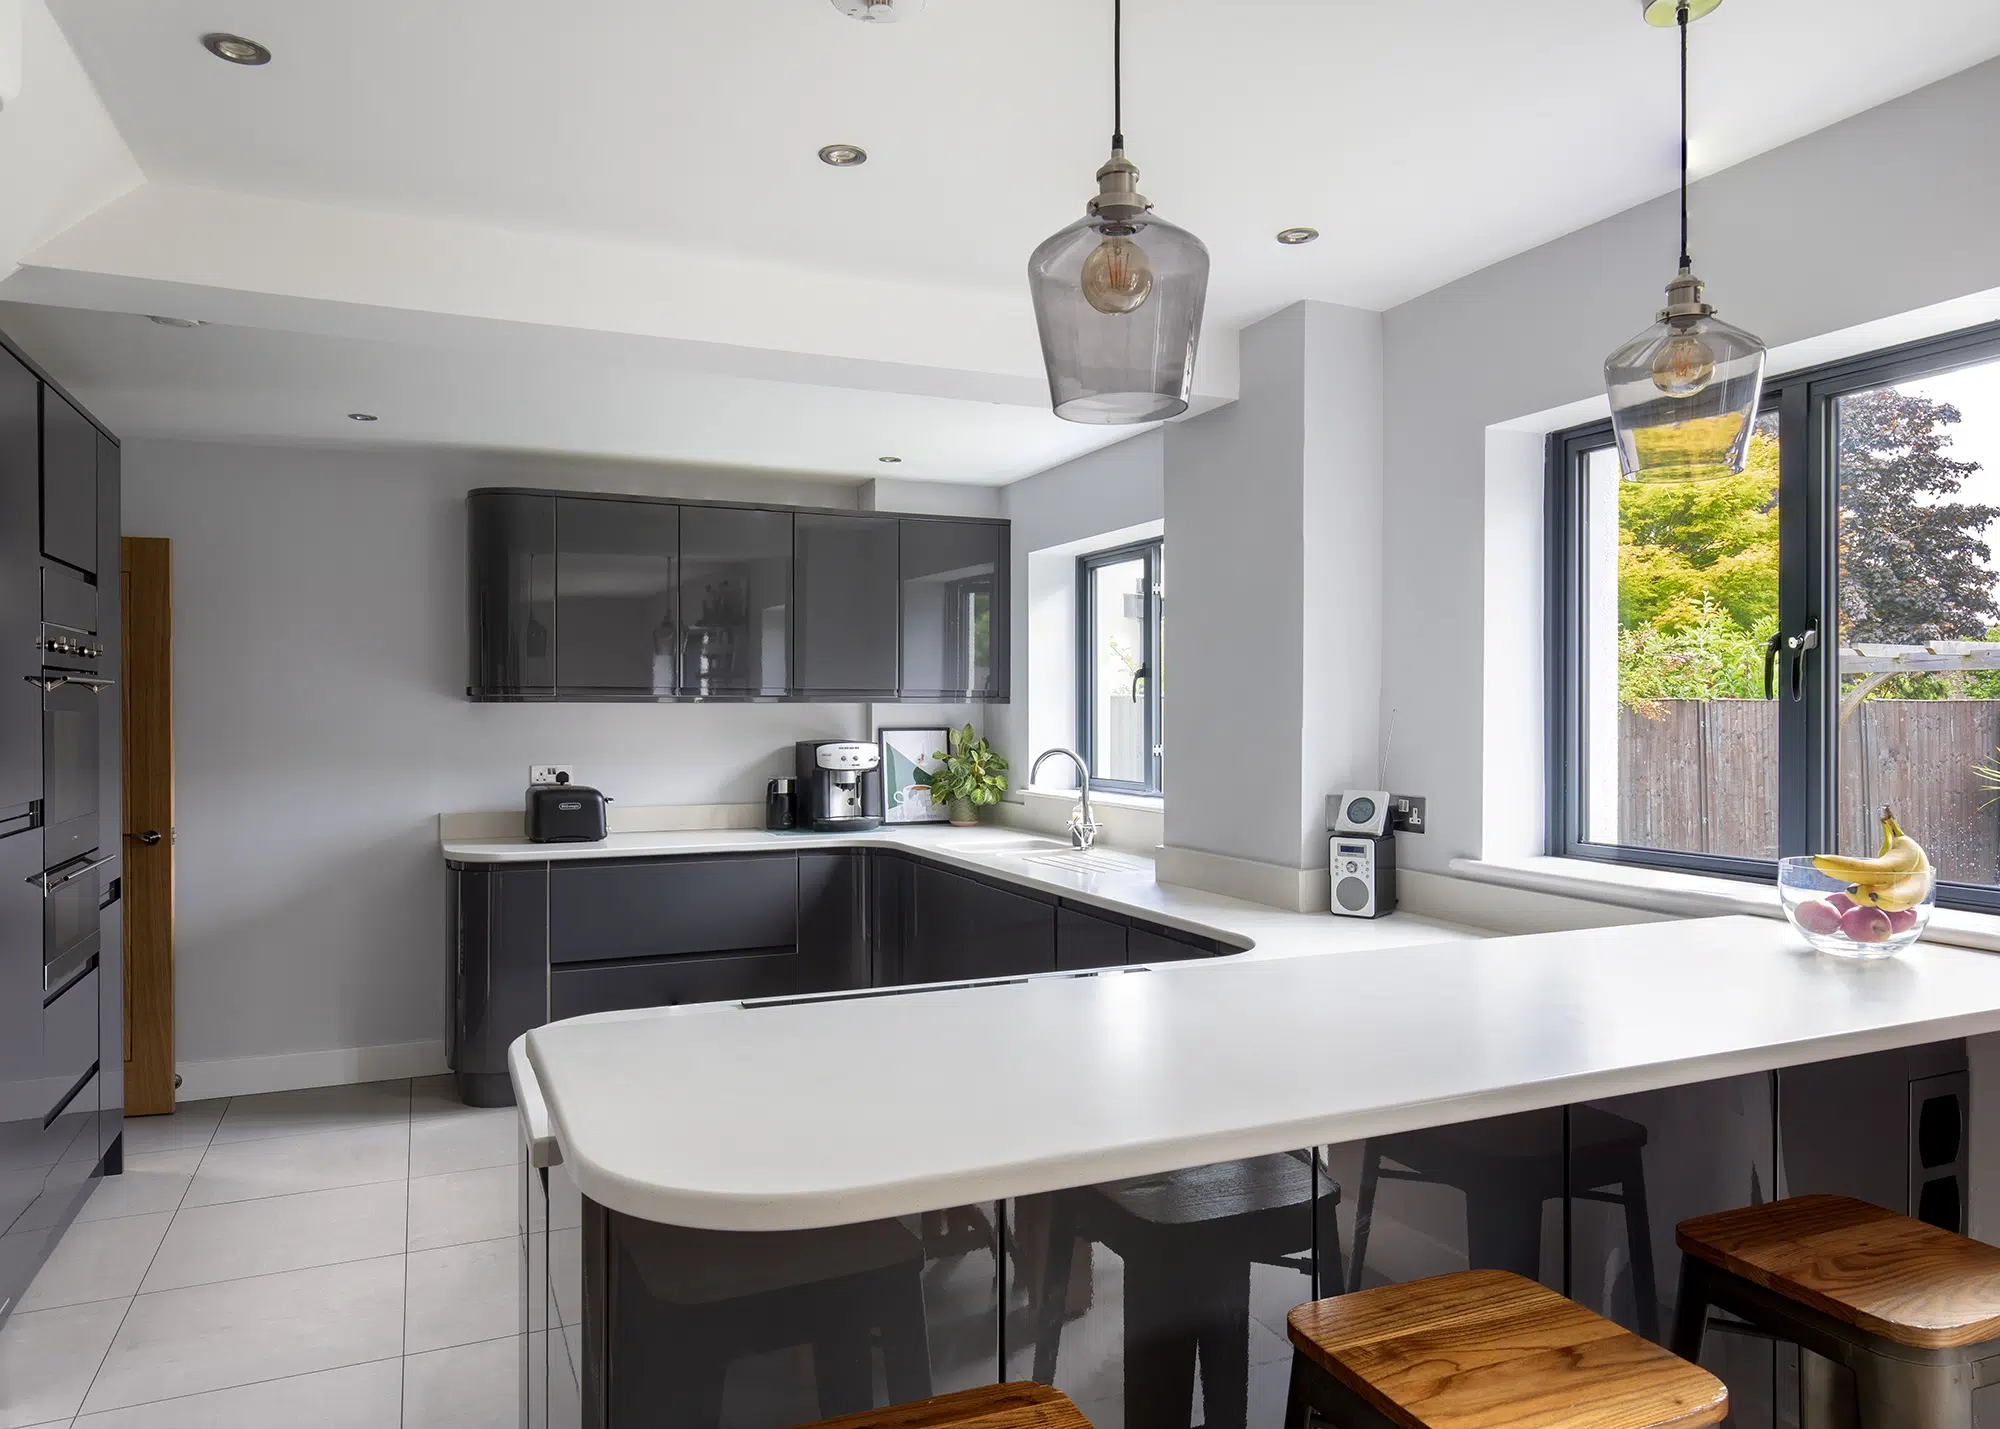
The Wickes kitchen was installed as part of the original 2016 renovation works to the house
“The installer we found for the MVHR was a commercial contractor, and they were a bit difficult to deal with,” says Matt. “They were a growing business with a lot of work on, and we were a small project to them. They knew what they were doing, which was great, but they were used to working with multiple trades on site who would do the prep work for them. Suddenly these variations for the builder were popping up that hadn’t been initially quoted for, like creating an OSB framework in the loft to screw in the MVHR. Because I wasn’t experienced enough in that area, I didn’t know I needed to take these things into account.”
Getting the timing right was also crucial – making sure the ductwork was installed in the new extension before those areas could be closed off or boxed in, so that the next phase of the build could progress.
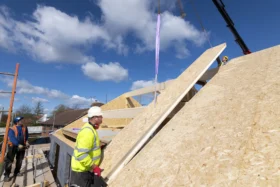
CLOSER LOOK External wall insulationWrapping the exterior of Matt and Emily’s home in insulation was key to improving its thermal performance. The house uses Baumit’s EPS (expanded polystyrene) insulation, a rigid board that is waterproof, withstands temperature extremes and can reduce noise. In order to be effective, there needed to be a continuous skin of insulation, with 120mm used on the original cavity brickwork (giving a U-value of 0.18 W/m²k). Slightly thicker boards were needed where the old tiled wall panels were, to give a flush finish. The timber frame extension has 100mm external insulation, with less needed here because there is an additional 100mm of Celotex PIR board between the studwork.
Knauf Aquapanel cement board is used as sheathing to the outside of the timber frame, with the insulation fitted directly on top. The whole house was finished with Baumit silicone render, resulting in a home that’s not only thermally efficient and airtight, but seamlessly unifies the old and new structures from a visual perspective, too. |

Living in the renovation throughout the works
The family stayed in the house throughout. “It might not be okay for some people, but it was fine for us, although Emily found it more stressful than me. The boys actually liked living on a building site,” says Matt. “Although there was one point in November where we just had ply where the porch used to be, and there was a cold spell. There was no point putting the heating on; we just wore more coats.”
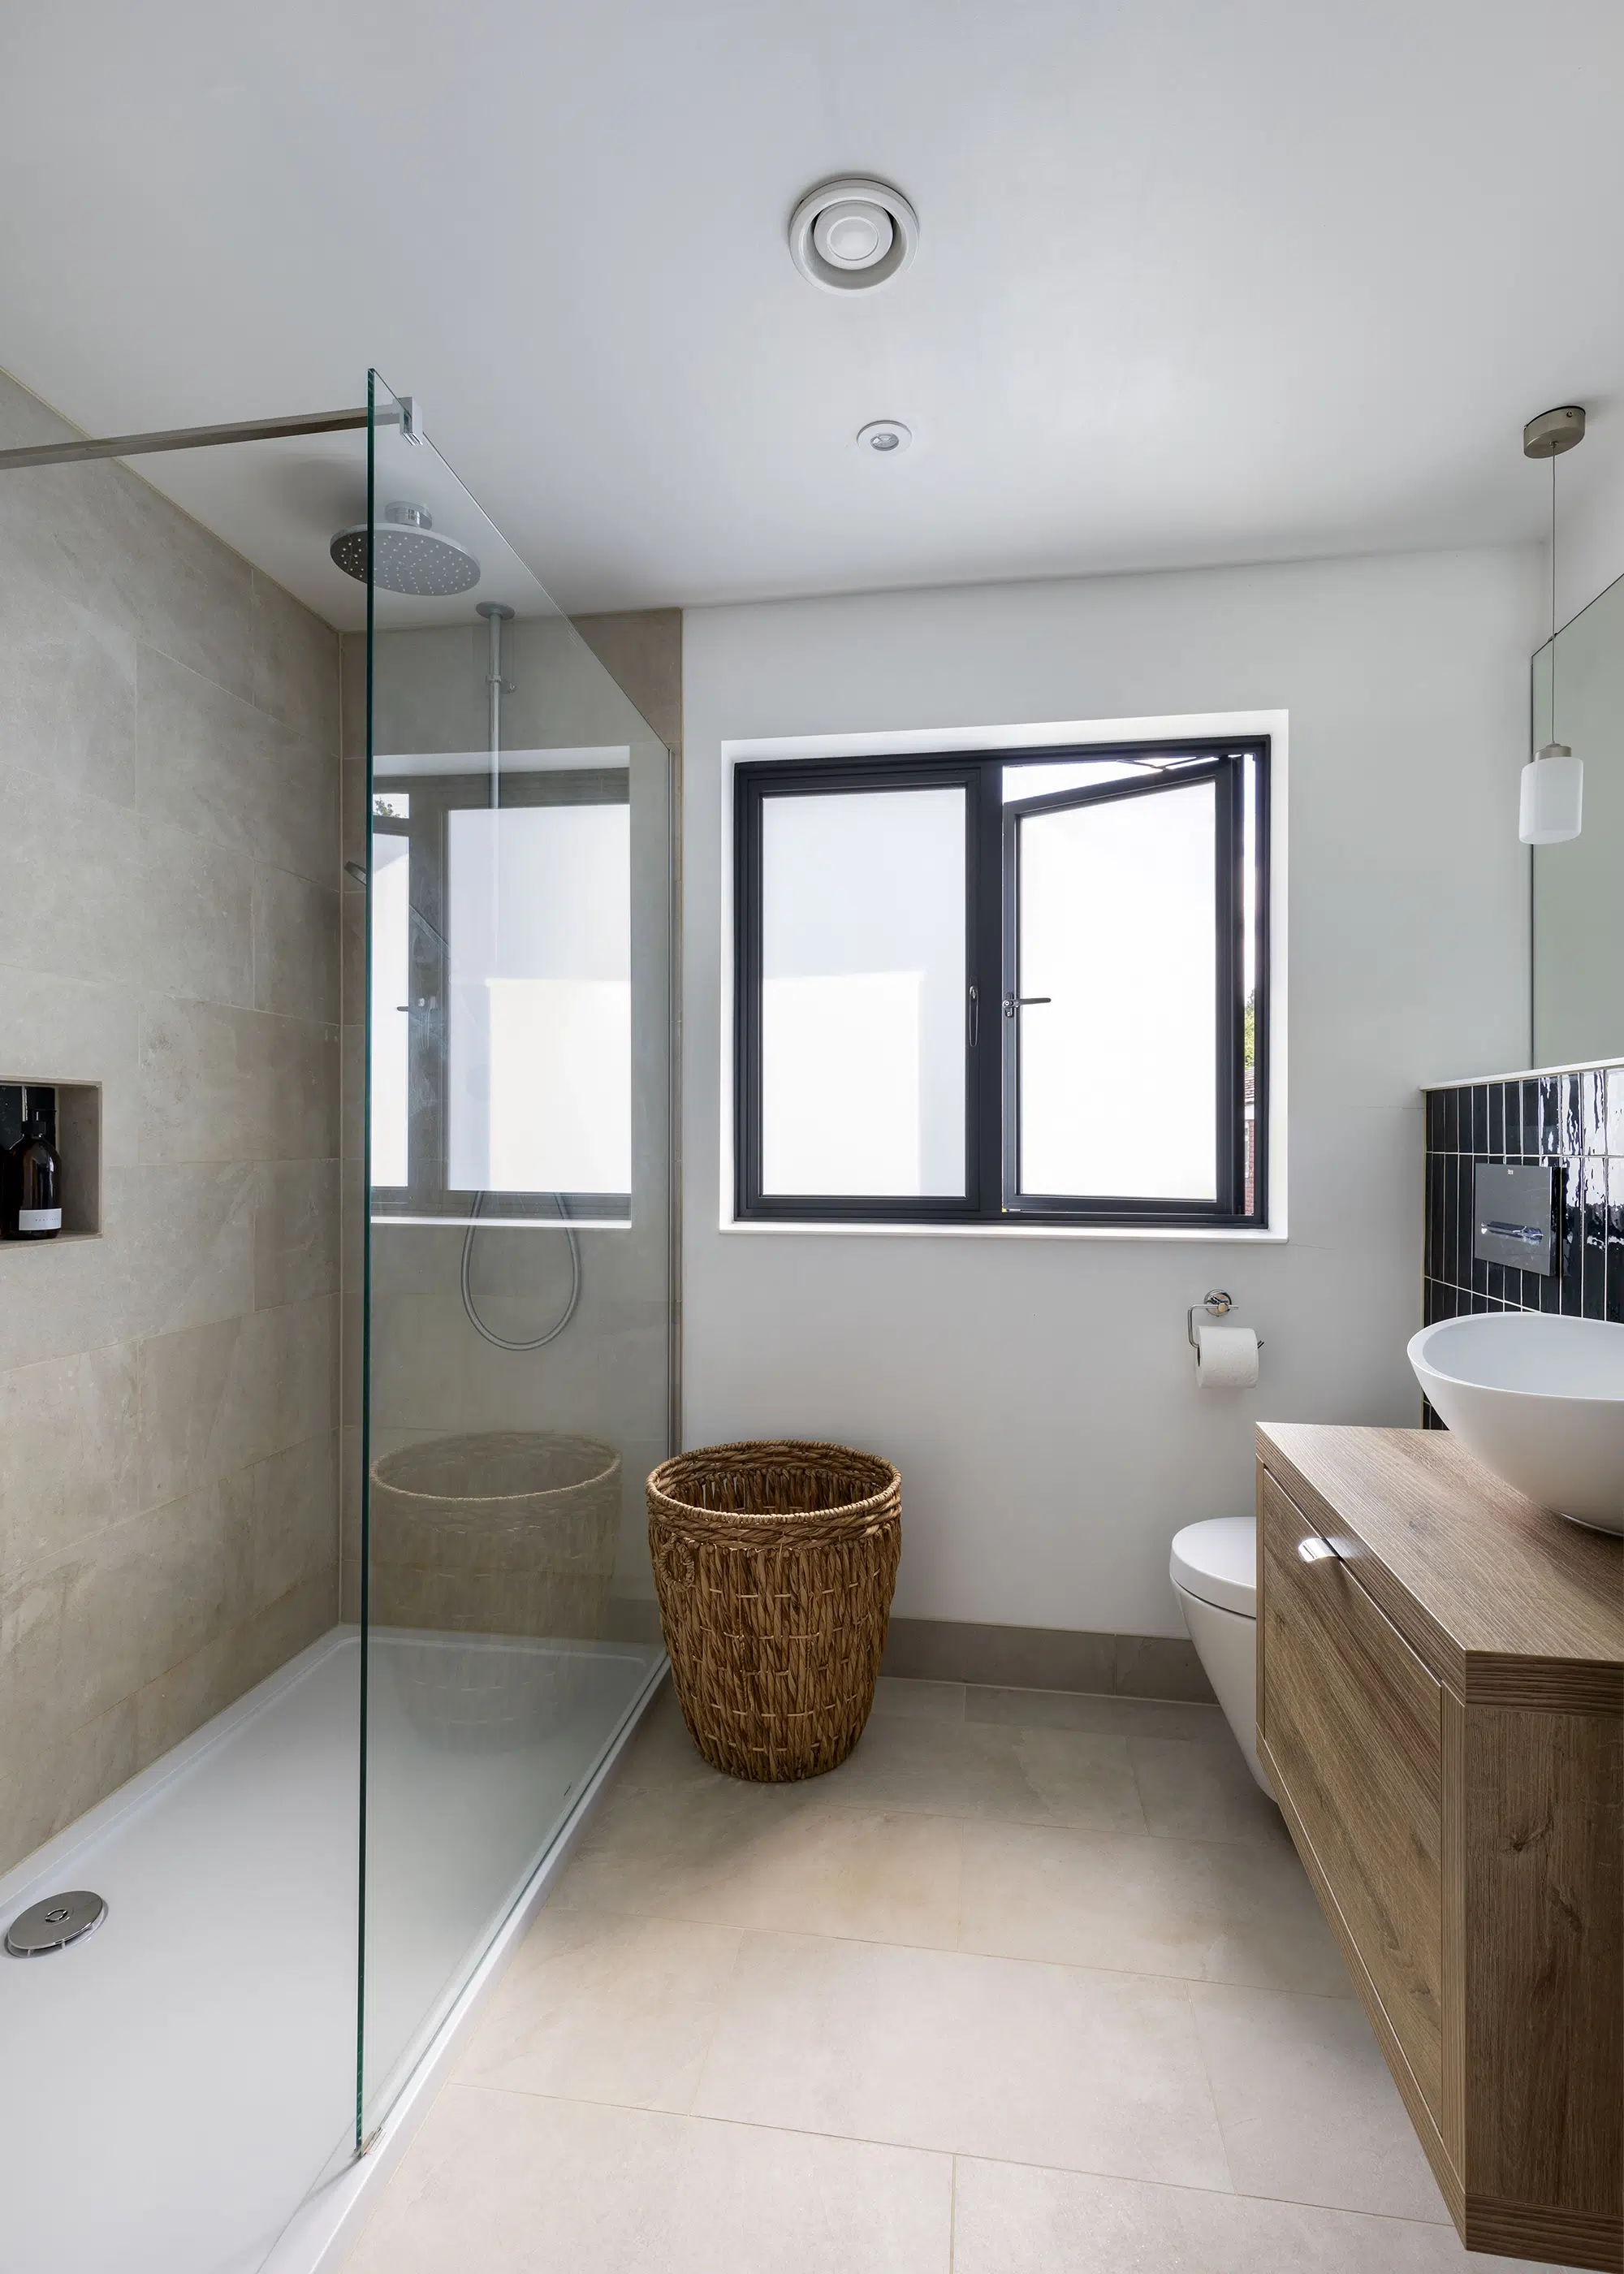
The new ensuite gives Emily and Matt a grown- up bathroom of their own. An elongated shower tray makes the showering area as generous as possible, while a wall-mounted vanity gives the illusion of more space, too
The solar PV, in conjunction with the battery storage and insulation, is now paying dividends in terms of household bills. “In summer we were producing 30-40 kWh per day, which is more than enough to charge Emily’s electric car, and most of mine,” says Matt. “Now, we’ve realised we can export the excess, selling to Octopus at 15p per kwh, and charge the cars at night when it’s only 7p per kWh. I don’t pay for electricity for eight or nine months of the year. And the gas is not really an expense at all anymore.”
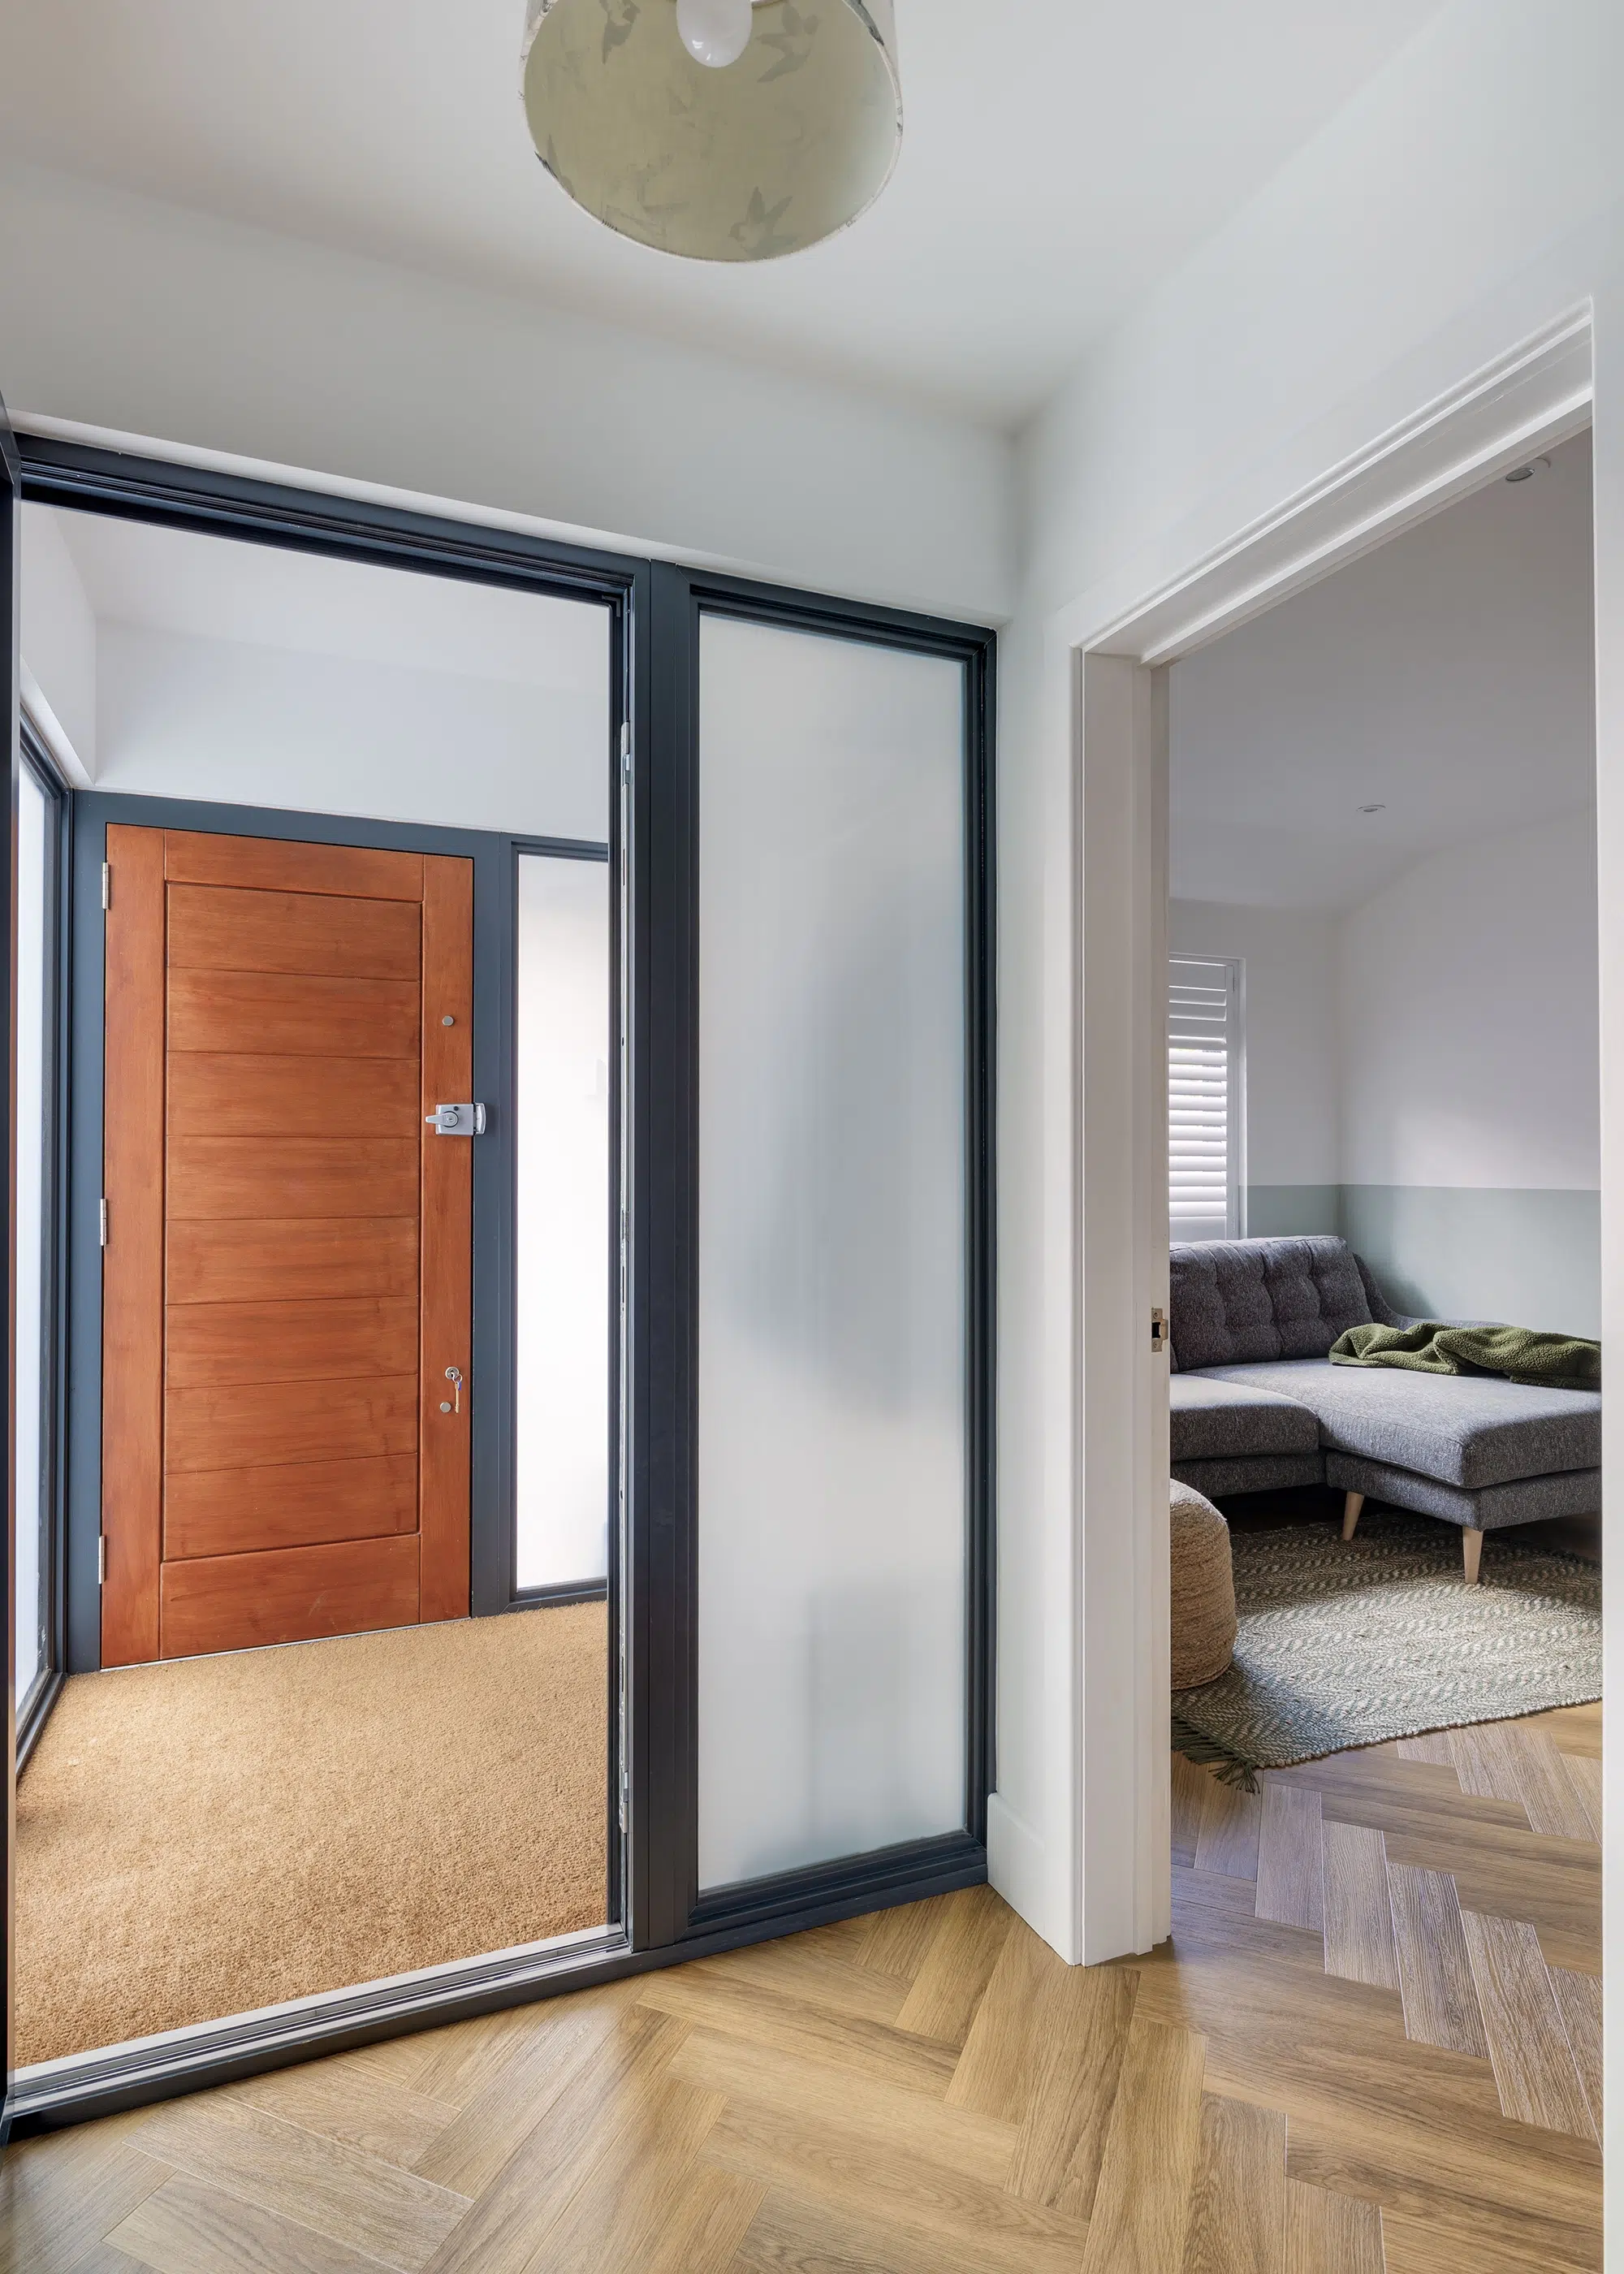
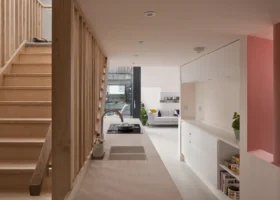
A generous entrance vestibule has plenty of room for coats and shoes, with edge-to-edge coir doormat. The extra door into the hallway keeps the warmth in and the cold out. The house used to step straight into the living room, but a new dividing wall creates a proper hallway
When you’re retrofitting an existing property with energy performance in mind, it might initially seem like a good idea to rip everything out and start again. Life is much more nuanced than that, though. Homeowners must balance what’s theoretically achievable with reality: the available budget, the level of disruption they’re prepared to put up with, and the materials they could potentially save by not diverting them to landfill. Matt and Emily’s finished house is the result of a lot of sensible thinking, achieving still-brilliant results with a slightly lighter touch.
WE LEARNED…
- Choose an architect and builder that work in partnership. Ours considered issues early and resolved them together.
- Plan early when sourcing systems that are not commonly used in home improvement projects. Designing, estimating and installing an MVHR system for our house was a challenge.
- Be pessimistic with your costings; things will end up being more expensive than you think. In hindsight we should have borrowed more money when the interest rates were low.
- Don’t compromise on quality. Do the project in phases if you need to. We actually got more of a sense of fulfilment doing up our house over multiple projects across a few years.
Emily Brooks
You may be interested in