Estimate your project costs instantly with Build It's interactive self-build cost calculator
Calculate NowGet an accurate, detailed cost breakdown of your project
Submit plans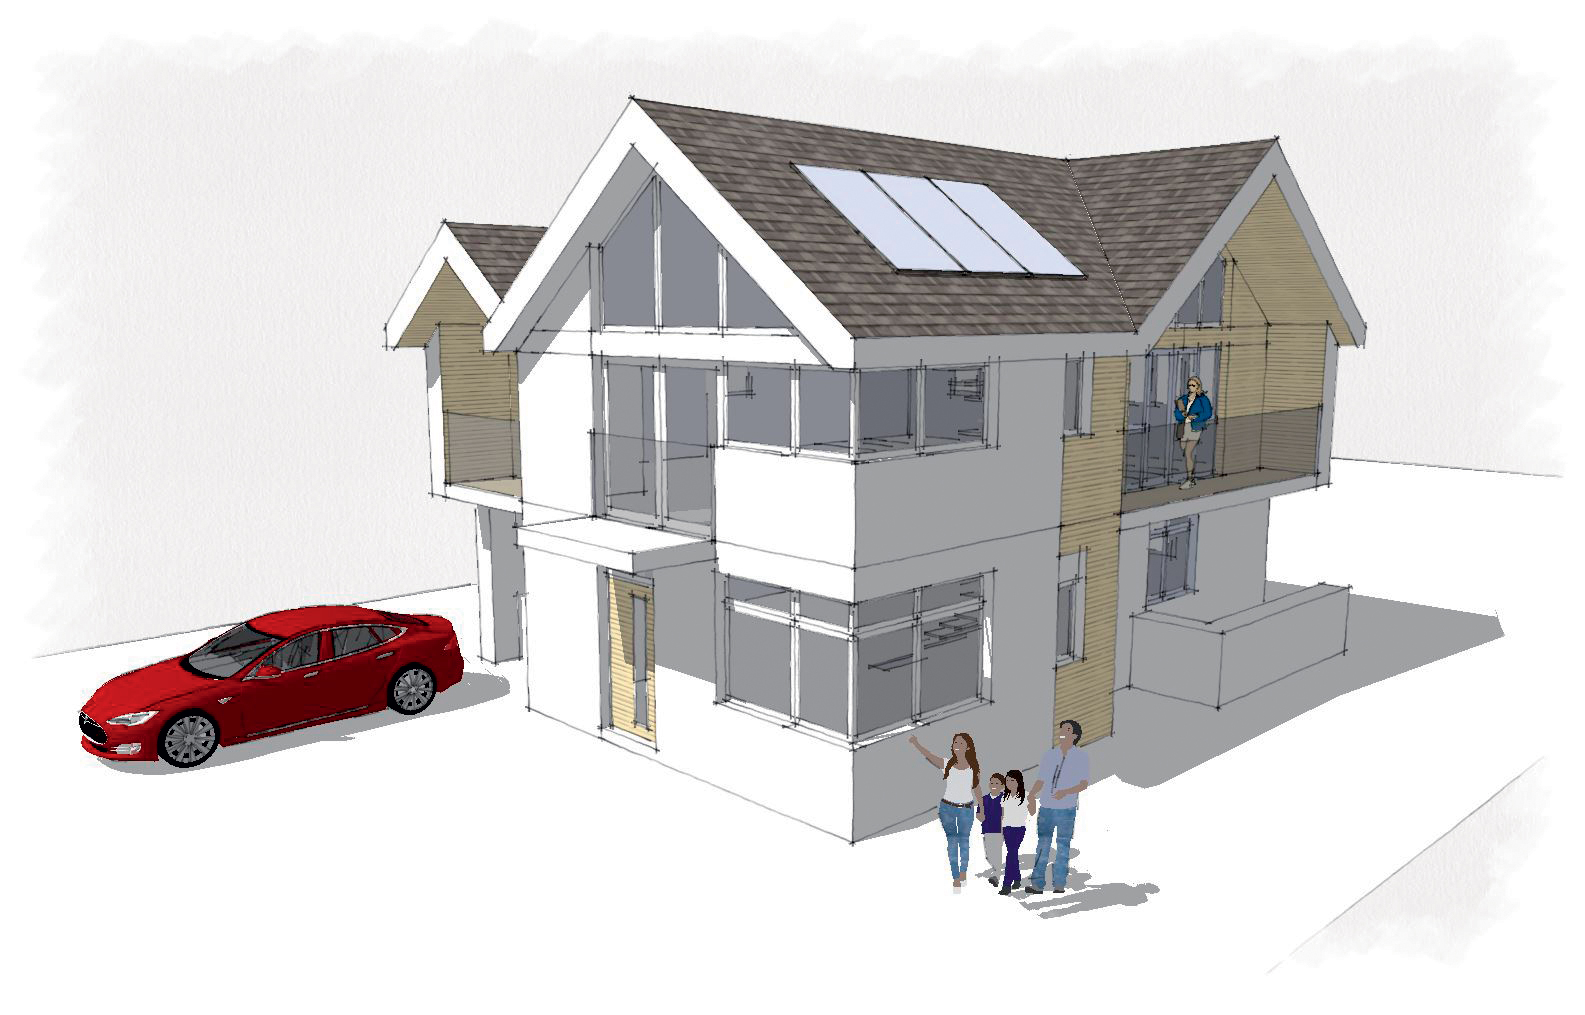

Self building represents your chance to create a value-for-money home that’s perfectly tailored to your household’s needs, in a location that works for you. And a a large part of the secret to success lies in the very early stages of your project. If you can find a good plot and get the design right, then you’re probably at least half-way there.
Over the course of designing Build It’s Self Build Education House, a couple of things have stood out.
Firstly, communication is key. You need to have a good rapport with an architectural team that understands what you do and don’t want from your new home. And that principle stretches to all the other parties involved in getting your scheme realised – from the structural engineers to planners, surveyors and suppliers whose input will shape the design.
As the process evolves and you finesse the initial drawings, you’ll also quickly find that the devil is in the detail. The technical phase can be intensive, but stick with it and keep maintaining those communication channels, and you’ll stand the best chance of getting your project off on the right footing.
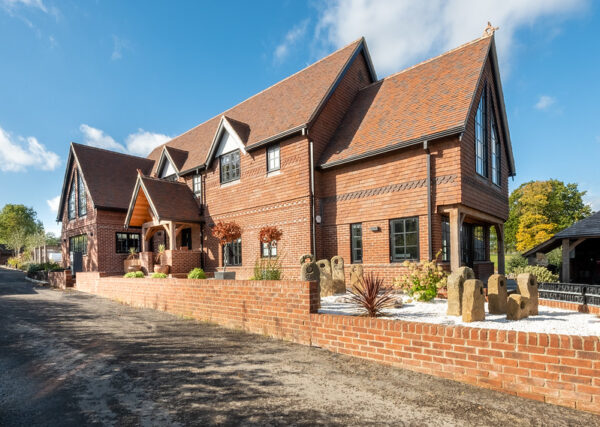
Quick Guide: What is the Build It Self Build Education House?The Build It House is a pioneering real-life project designed to give you a unique insight into the process of self building your own bespoke home. We’ll be following the design and build journey both in the magazine and online – sharing the highs Once it’s completed, the Self Build Education House will showcase the design possibilities and practical choices you’ll need to make on your scheme. You’ll get to see a wide range of innovative products in situ, with cutaway panels demonstrating how they’re installed, plus informational graphics explaining the decisions Build It made on this project and how different choices would have affected our construction schedule and costs. |
Getting the brief right is a crucial first step in any self build project. You’re commissioning a bespoke home designed to suit your household, so you need to give your designer a clear picture of what will work for you.
Once you’ve identified a plot, often the best place to start is with list of priorities for your scheme, including how you want to live, key features you can’t do without, nice-to-have elements and absolute no-nos.
This information will help your designer understand where you’re coming from, and they can then add their flair to your ideas.
Our full brief for the Build It House was too detailed to reproduce here. So here’s an overview of the headline considerations we had in mind prior to our first meeting
with our designer, Opinder Liddar from Lapd Architects.
Build It has worked with Lapd Architects for a number of years – including on previous versions of a virtual ‘Benchmark House’ – so we’ve seen first-hand how they work. But this is the first time we’ve built together.
As former Build It Award winners, Opinder and his team aim to take the kind of personal, collaborative approach to the design process that we feel is crucial to a successful scheme.
Indeed, in our initial meeting Opinder was clear that the house had to work for Build It first and foremost. His role as the architect was to guide us through the journey and add value to the project through his creative flair, experience and technical knowledge.
Lapd is also based just a few miles from the Graven Hill site, so appointing them as our architect made sense from a practical perspective, too – especially given I would be commuting in from London for site visits.
Read more: Choosing an architect
We spent a good deal of our first session going over the brief and the nature of our plot. For Opinder, drawing up a design starts with working out the site parameters (ie any constraints or special features of the land and planning situation). From here, he can start to visualise how the brief could be met within the context of the plot and budget.
Our design route is a little different to the experience a typical self builder would have at Graven Hill, in that we needed to go in for full planning permission, rather than taking the fast-track Plot Passport route (which can allow for approval in just 28 days).
Nevertheless, we still wanted to follow the design code principles in our scheme, in order to demonstrate the kind of home that might be possible on this potentially game changing self build scheme.
To that end, we’ve been supplied with some overarching parameters by the Graven Hill team – so Opinder and I ran through this at our first meeting, along with some of the general rules that apply to the whole development.
Key details of our Graven Hill plot parameters:
|
We also discussed some of the opportunities the plot offered – the street-facing facades had views over woodland and Graven Hill itself in the distance, for instance. And the south-facing aspect here, with some shelter from trees, might allow for a free boost of warmth from solar gain in winter to help keep heating bills in check.
I was particularly keen to talk about an area we know a lot of self builders regret when they come to the end of their projects – namely not thinking about storage at the design stage.
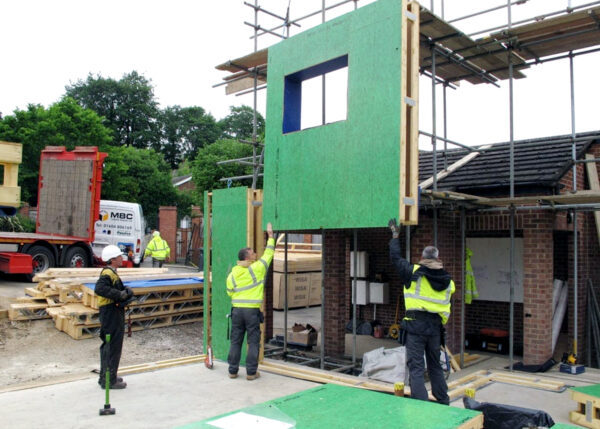
Early on, we identified the possibility of including a basement as a good route to overcoming this issue – not least because our chosen structural system, ICF, lends itself to this kind of application.
Basements are common in Europe, yet they barely get a look-in here in the UK. But on a fairly tight plot like this, with a restricted ridge height to boot, it seemed a good
way to maximise the size of house we could get on our site.
The Plot Passports at Graven Hill don’t count underground space in the total GIA. In fact, they give a specific directive that you can build a basement that delivers up to 40% of the permissible gross internal area.
On the basis of a 160m2 house, that would equate to the potential for 64m2 of extra living accommodation (ie 40% more space).
Not long after the meeting, we commissioned a soil test on the plot (some bore holes were dug using a hand auger and samples sent away for analysis).
It’s not always necessary to carry out a full soil test – usually a standard site investigation is sufficient. But when you’re planning on building a basement, you need to get a clearer picture of what lies beneath the top layer of soil.
The soil report revealed our site features made ground for the first 1.5m, and good clay to a depth of 5m.
This confirmed our suspicions that building a basement would be a good investment. In fact it will cost relatively little more than using a standard foundations and floor slab, whilst also giving us valuable extra space for storage and a plant room.
Plus, adding a basement gives potential for a home cinema or games room if a future owner wanted to invest in these much-desired features.
After six years of manning the Ask Our Experts zone at Build It Live, Opinder and I know each other pretty well, so I was confident he’d be on the right track.
But first impressions mean a lot in the design world – and when Lapd Architects presented its initial ideas, just a few weeks after we’d met, it was an thrilling moment.
When I saw the mockups, there was that same mixture of excitement and relief other self builders must experience when they get that first tangible evidence that they’ve made the right call on their architect or designer.
Opinder had done a fantastic job of interpreting the brief, achieving the wow factor we were after and already looking for ways to add value to the scheme – and this was just the first draft of the design.
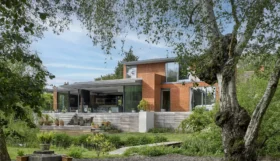
This wasn’t simply a case of being shown flat elevations or hastily hand-drawn scribbles. Opinder uses SketchUp Pro to create a 3D render (above) of what your scheme could actually look like on site. He also supplied floorplans showing a suggested layout for the internal spaces.
Software like this is helping to revolutionise the way designs are presented to self builders, giving those of us without seven years architectural training an accessible way to visualise how a design would work in the real world.
If you want to try playing with design ideas yourself, an accessible alternative is the Build It 3D Home Design Software.
I now had a live design in front of me, ready to be poked and prodded into shape until it delivers everything we want the Build It Self Build Education House to achieve.
Up next: Developing the design for the Build It Education House


 Login/register to save Article for later