- Plan ItBack
- Design ItBack
- Build ItBack
- Homes
- ProductsBack
- CostsBack
- Self Build Cost Calculator
Estimate your project costs instantly with Build It's interactive self-build cost calculator
Calculate Now - Costs & Finance
- Contracts & Warranties
- Build It Estimating Service
Get an accurate, detailed cost breakdown of your project
Submit plans
- EventsBack


 Login/register to save Article for later
6 Vital Considerations for Your Loft Conversion

There are 5 steps in this guide
1. Installing loft stairs
With the exception of the potential for a slightly reduced floor-to-ceiling height, the building regs for loft stairs are fundamentally the same as for any other flight.
The ideal scenario is to have your access run on from the existing stairwell. This could be enabled via a dormer or other extension if there’s not currently enough headroom available where the flight would land in the attic.
Learn more: Can I Convert my Loft?
If this route isn’t possible, you’ll need to repurpose another area of the floor below for the stair – but make sure you don’t end up losing so much space that the loft extension’s no longer worthwhile.
If things are really tight, you may be able to switch to a space-saving fixed ladder or alternating tread staircase. However, these are only acceptable to building control if you’re creating a single habitable loft room and there’s genuinely no other reasonable way to provide a full flight.
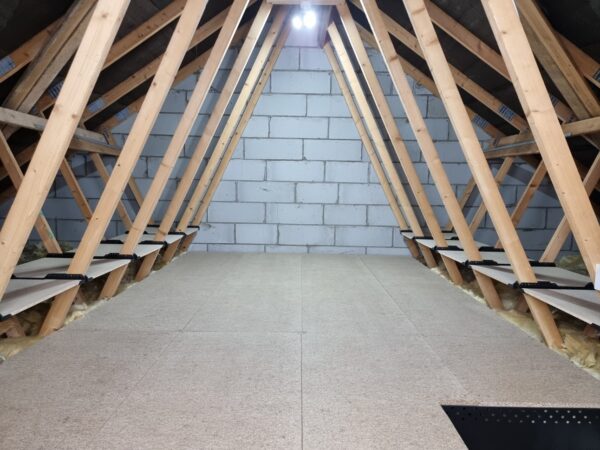
2. Strengthening floor joists
Unless your home was built with suitably-sized attic trusses to start with, the chances are parts of the structure will need beefing up – and that’s especially the case with the floor joists.
There are numerous ways to achieve this, the most common of which is to insert new joists either immediately alongside the existing ones or at appropriate centres in between. In some cases, these may need to be thicker than the current examples, which will raise the floor height, whilst RSJs may also be required in order to support the loads. Where access is difficult, telescopic solutions such as TeleBeam are a good option.
Learn more: Flooring Costs Explained
Note that works affecting the structural integrity of your roof (whether the joists, rafters or bracing) should never be undertaken without project-specific professional advice and calculations completed by a structural engineer.
Premium Content
Downloadable E-Guide
Build It's loft conversion downloadable e-guide takes you through the essential considerations, from costs to an estimated project timeline. Click below to find out more.
find out more
3. Loft insulation & ventilation
To truly feel part of your living space, a conversion needs to offer similar comfort levels, which means upgrading the insulation at rafter level.
In a basic retrofit scenario, this is usually done by packing rigid insulation between and under the rafters, with a 50mm void left between this and the underside of the existing roof to allow for ventilation (which will prevent condensation). The downside of this is that even high-performance products will encroach on headroom.
If you plan to remove the existing roof covering, it could make sense to insulate above the rafters, as this can offer improved performance. This can be allowable under PD rights, providing you add no more than 150mm to the roof height. Any gable walls and stud partitions inserted to box off the eaves should be insulated, too.
Learn more: Specifying Wall and Loft Insulation
You’ll also need to provide background ventilation, usually in the form of windows fitted with trickle vents. Rapid extract ventilation (ie fans) will be needed in any bathrooms.
4. Soundproofing your loft
There are two fundamental strands to this: blocking out external and internal noise. Tackling the first of these comes down to the materials that go into the fabric of your roof – so if road traffic is an issue, look to specify items such as acoustic plasterboard for ceilings (and party walls), and consider using glazing products that are designed for sound deadening. Ensuring good airtightness will help, too.
Internally, the main consideration is the floor structure. As a rule, packing this with Rockwool or a similar mineral-based insulation will give you good results. A well-laid floor deck will also help. If you want to go the extra mile and soundproof a cinema or music room, look to noise-cancelling solutions that employ resilient bars, such as those available from British Gypsum’s Rooms Made for You range.
Difficult roofs: How to gain head height in a loftThe trickiest lofts to convert are those where the roof has shallow pitches or only offers limited headroom – but it is still possible to progress with a project. The downside, of course, is that it will be much more complex and involve a whole lot more work – with the costs rising accordingly. The two key options for gaining floor-to-ceiling height are: 1. Replace the roofQuite simply, this involves demolishing the existing roof structure and replacing it with a larger one – usually achieved by craning in either attic trusses, which are designed to retain an open void, or modular sections of loft. The advantage of the modular route is it minimises the amount of time the house is left without a roof and allows you to complete the project much quicker, although as with any prefab building operation the cost is likely to be a little higher overall. Any project that raises the ridge height will need planning consent, however, and even modest increases run the risk of being refused permission. That’s especially true of terraced and semi-detached houses, as the street scene would be compromised. 2. Drop the floor levelThe second solution is to lower the attic floor in order to gain more height in the newly converted loft storey. This will involve fitting a completely new ceiling structure, appropriately specified to deal with the building’s loads, before cutting away the old floor. It’s a cheaper solution than building up and, as the work is internal, it shouldn’t require planning consent (unless it would cause other material changes to the exterior of the house). However, it’s only really viable in properties that benefit from impressive first floor ceiling heights. |
5. Fire safety for loft conversions
A safe means of escape is absolutely vital from a building regs point of view. This doesn’t have to be complex.
Extending into a bungalow’s loft means you’re basically creating a double-storey home, with no extra requirements beyond the standard provision of escape windows upstairs.
If you’re adding another floor to a two-storey property, however, you’ll usually need to provide a protected stairway leading down to the main exit. This means using fire-resisting partitions (in most cases the existing ones will do the job) and fitting 30-min fire doors to any rooms that open onto the stairway or any connected landings/hallways (across all storeys). Smoke detectors will also be needed.
If your ground floor is open plan, you may need to cordon off the stairwell. The use of automated sprinkler systems can relax some of these rules.
6. Installing plumbing & electrics
One thing that’s easy to overlook with an extension project is the implications of extending services. Always check whether the existing central heating and electrical systems have enough capacity to supply the new space – and that their distribution networks are up to the task.
Old circuitry may need replacing, for instance, while gravity-fed hot water might not deliver enough pressure to showers and other outlets on a loft storey (switching to an unvented, mains-fed cylinder could overcome this).
If you’re planning a bathroom, bear in mind the fixtures and fittings will add considerable load, so floors may need further strengthening. You’ll also need to consider drainage; if possible, aim to site the bathroom close to existing drainage and soil vent pipes.
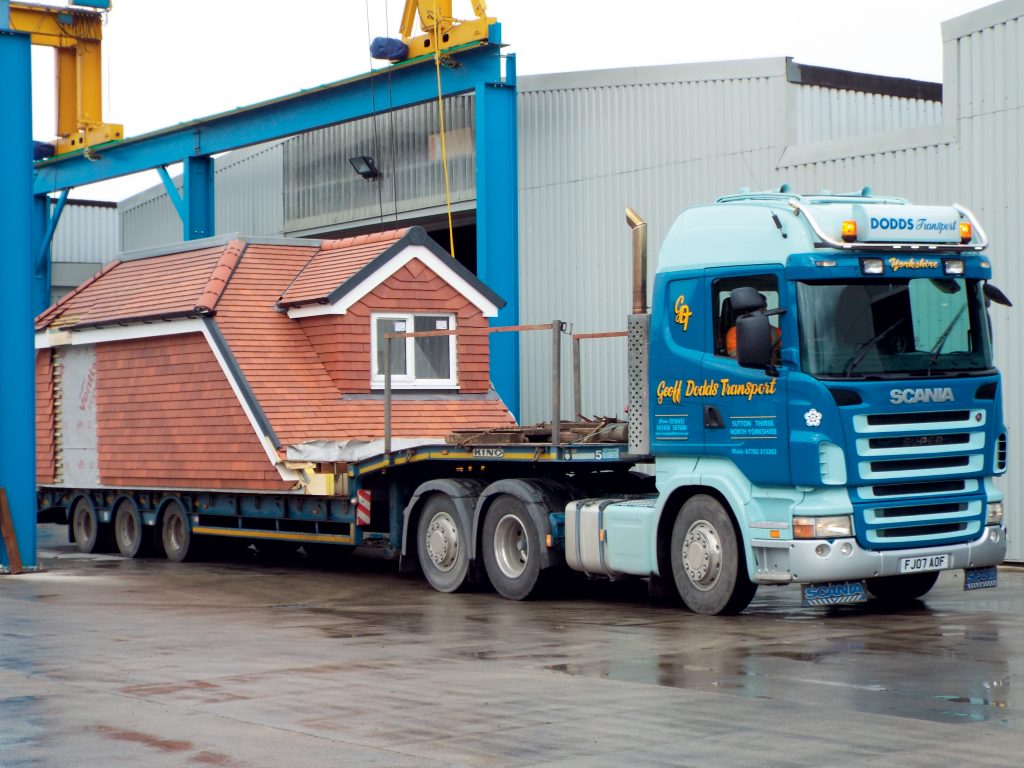
Closer Look: A Modular ApproachLocation: Hampshire Type of project: Prefabricated loft conversion & extension Floorspace added: 65m²
When Mark and Sally found a tired detached house in a leafy part of Hampshire, they instantly recognised its potential for a full refurb. As part of their plans, the couple wanted to extend into the loft and create an open family space where they could play pool, listen to music, watch TV and simply spend quality time together. Both Mark and Sally were keen to move into the finished house as quickly as possible, so they decided a factory-controlled, offsite construction route would suit their goals – and soon found Moduloft by searching online. The speed and convenience of the company’s bespoke, pre-manufactured solution ticked all the boxes. Designed to the couple’s specification, the modular building sections were fabricated in 12 weeks in the factory, complete with all fixtures, fittings and electrics in place – ready to simply be hooked up on site. A trip to the factory during the early stages was invaluable in helping the couple to finalise their decisions on elements such as lighting, windows and the staircase. On site, the construction phase was completed in just three weeks. The finished loft is bright and spacious, and encapsulates gorgeous views to the rear. Moduloft projects start from £110,000 including all fixtures and fittings (but excluding VAT) and are individually designed to respond to the property and space required. |
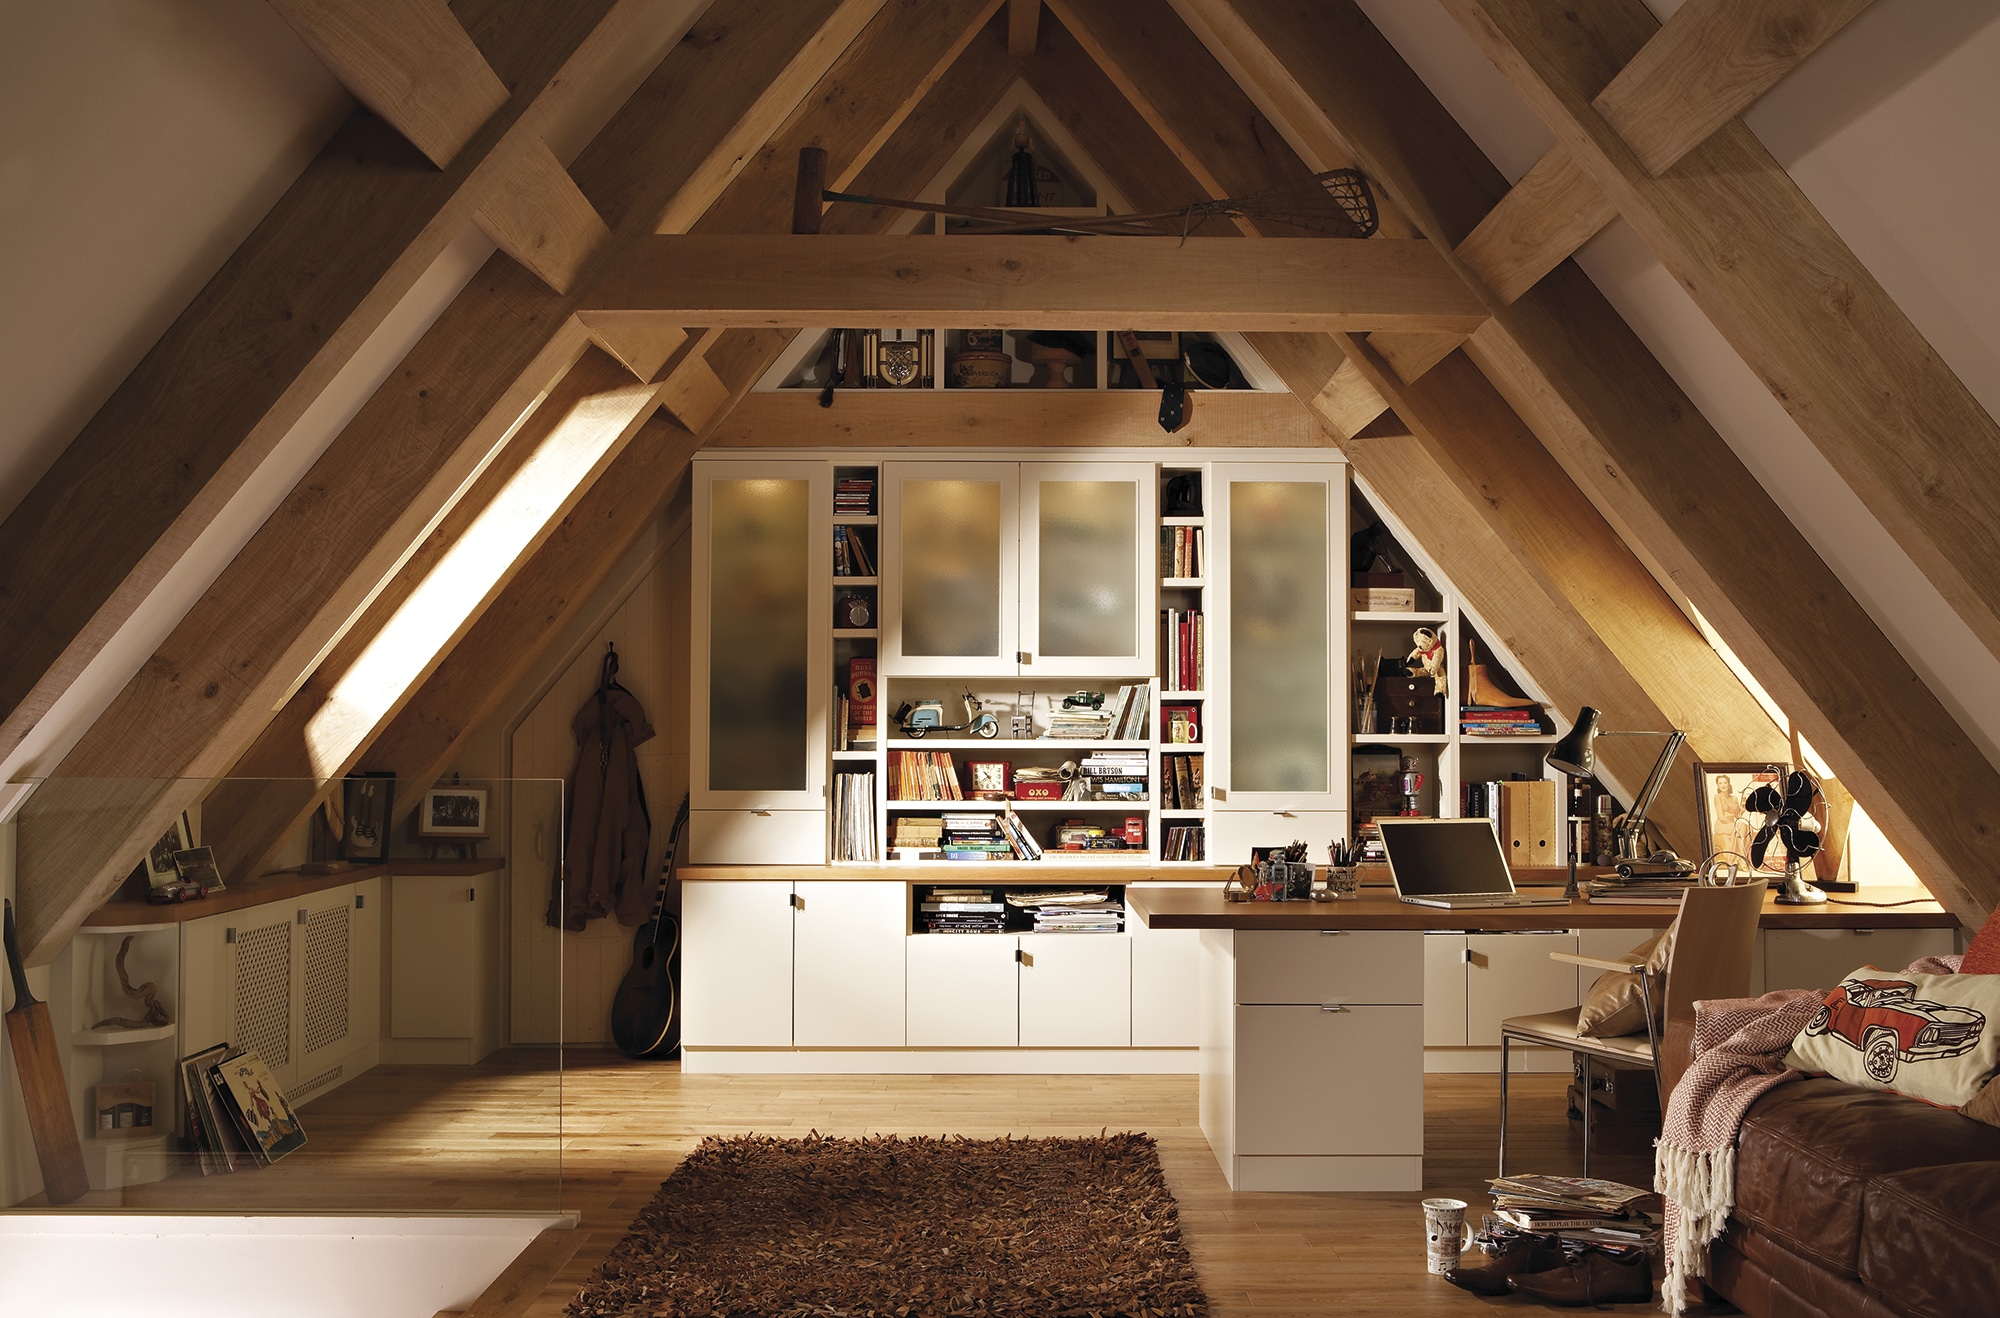
Main image: Bespoke loft storage solution by Neville Johnson
You may be interested in