- Plan ItBack
- Design ItBack
- Build ItBack
- Homes
- ProductsBack
- CostsBack
- Self Build Cost Calculator
Estimate your project costs instantly with Build It's interactive self-build cost calculator
Calculate Now - Costs & Finance
- Contracts & Warranties
- Build It Estimating Service
Get an accurate, detailed cost breakdown of your project
Submit plans
- EventsBack


 Login/register to save Article for later
Pouring the Ground Floor ICF Walls

There are 6 steps in this guide
In my last update, we finished waterproofing the basement and were about to start erecting the main walls of Build It’s Self Build Education House.
As it turns out, this next phase has been the most challenging of the Education House build so far, with a variety of factors slowing down our progress. The good news is, that means there are plenty of learning points to share from our real-life self build!
Building with ICF
If you’ve been following the Build It Education House project, you’ll know we’ve chosen insulating concrete formwork (ICF) as our main walling system. We’re combining this with a roof of structural insulated panels (SIPs).
These modern techniques offer a number of built-in advantages that make sense for our project. They can be very quick to build with, for instance, and offer excellent insulation and airtightness performance out of the box.
What’s more, ICF is easy to waterproof. That made it a common sense choice for our basement – and we wanted continuity from the groundworks up.
Read Our Detailed Guide to ICF
Meanwhile, SIPs can deliver great energy performance in a super-thin panel profile, which is great for maximising headroom in loft spaces – so it will help us to future-proof the house.
Read more: Benefits of insulating concrete formwork
A change in site team
ICF Supplies is providing the Nudura insulating concrete formwork system for the build. With conventional self builders, they would normally specify and deliver the formwork package for your own contractors to erect.
For the Education House, ICF Supplies is also sourcing much of the labour to get the project to wall plate level (where the walls join the roof).
Their in-house training team erected the formwork and most of the bracing for the ground floor walls, but technical challenges and weather delays meant they ran out of time.
So another experienced ICF crew have taken over for the rest of the walling and associated works (including fitting the posijoists, which we’ll cover in the next instalment).
Switching between teams at this stage isn’t ideal, as it blurs boundaries. But our unusual project and circumstances – we’re building an Education House, after all – dictated we do things this way.
As a self builder, you can simplify the process by appointing one point of contact for the main structural works.
Of course, some things are out of everyone’s control – the weather, for one. And while ICF is more robust then standard masonry in this respect, as with any system, it’s never going to be totally immune!
Erecting the ICF formwork
With the Education House’s basement shell already in place, we have an existing template for building up the main structural walls.
It’s not as simple as just slotting the next layer directly onto the last, however. To accommodate the beam and block ground floor structure, ICF Supplies’ team needed to saw off about 150mm the bottom of the inside face of each Nudura unit to accommodate the beam and block floor structure.
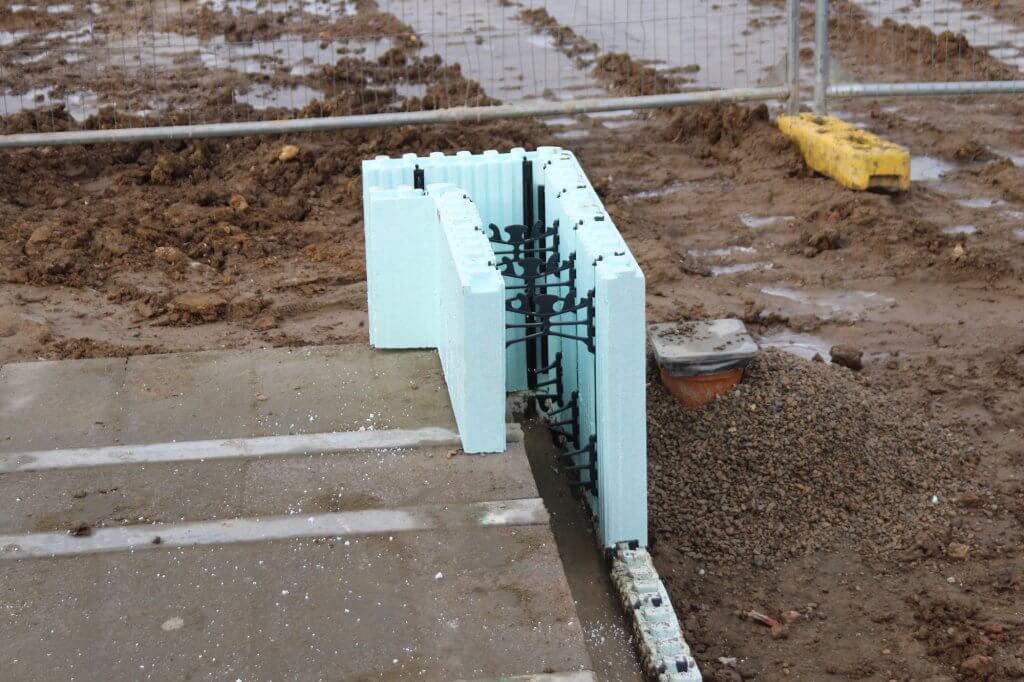
The first ICF corner block is stacked in place. This initial course of ground floor walling was cut back on the inside face to accommodate the beam and block floor
The crew also fitted a waterstop bead here. This will reduce any risk of moisture getting through the concrete joint between the basement and ground floor walls.
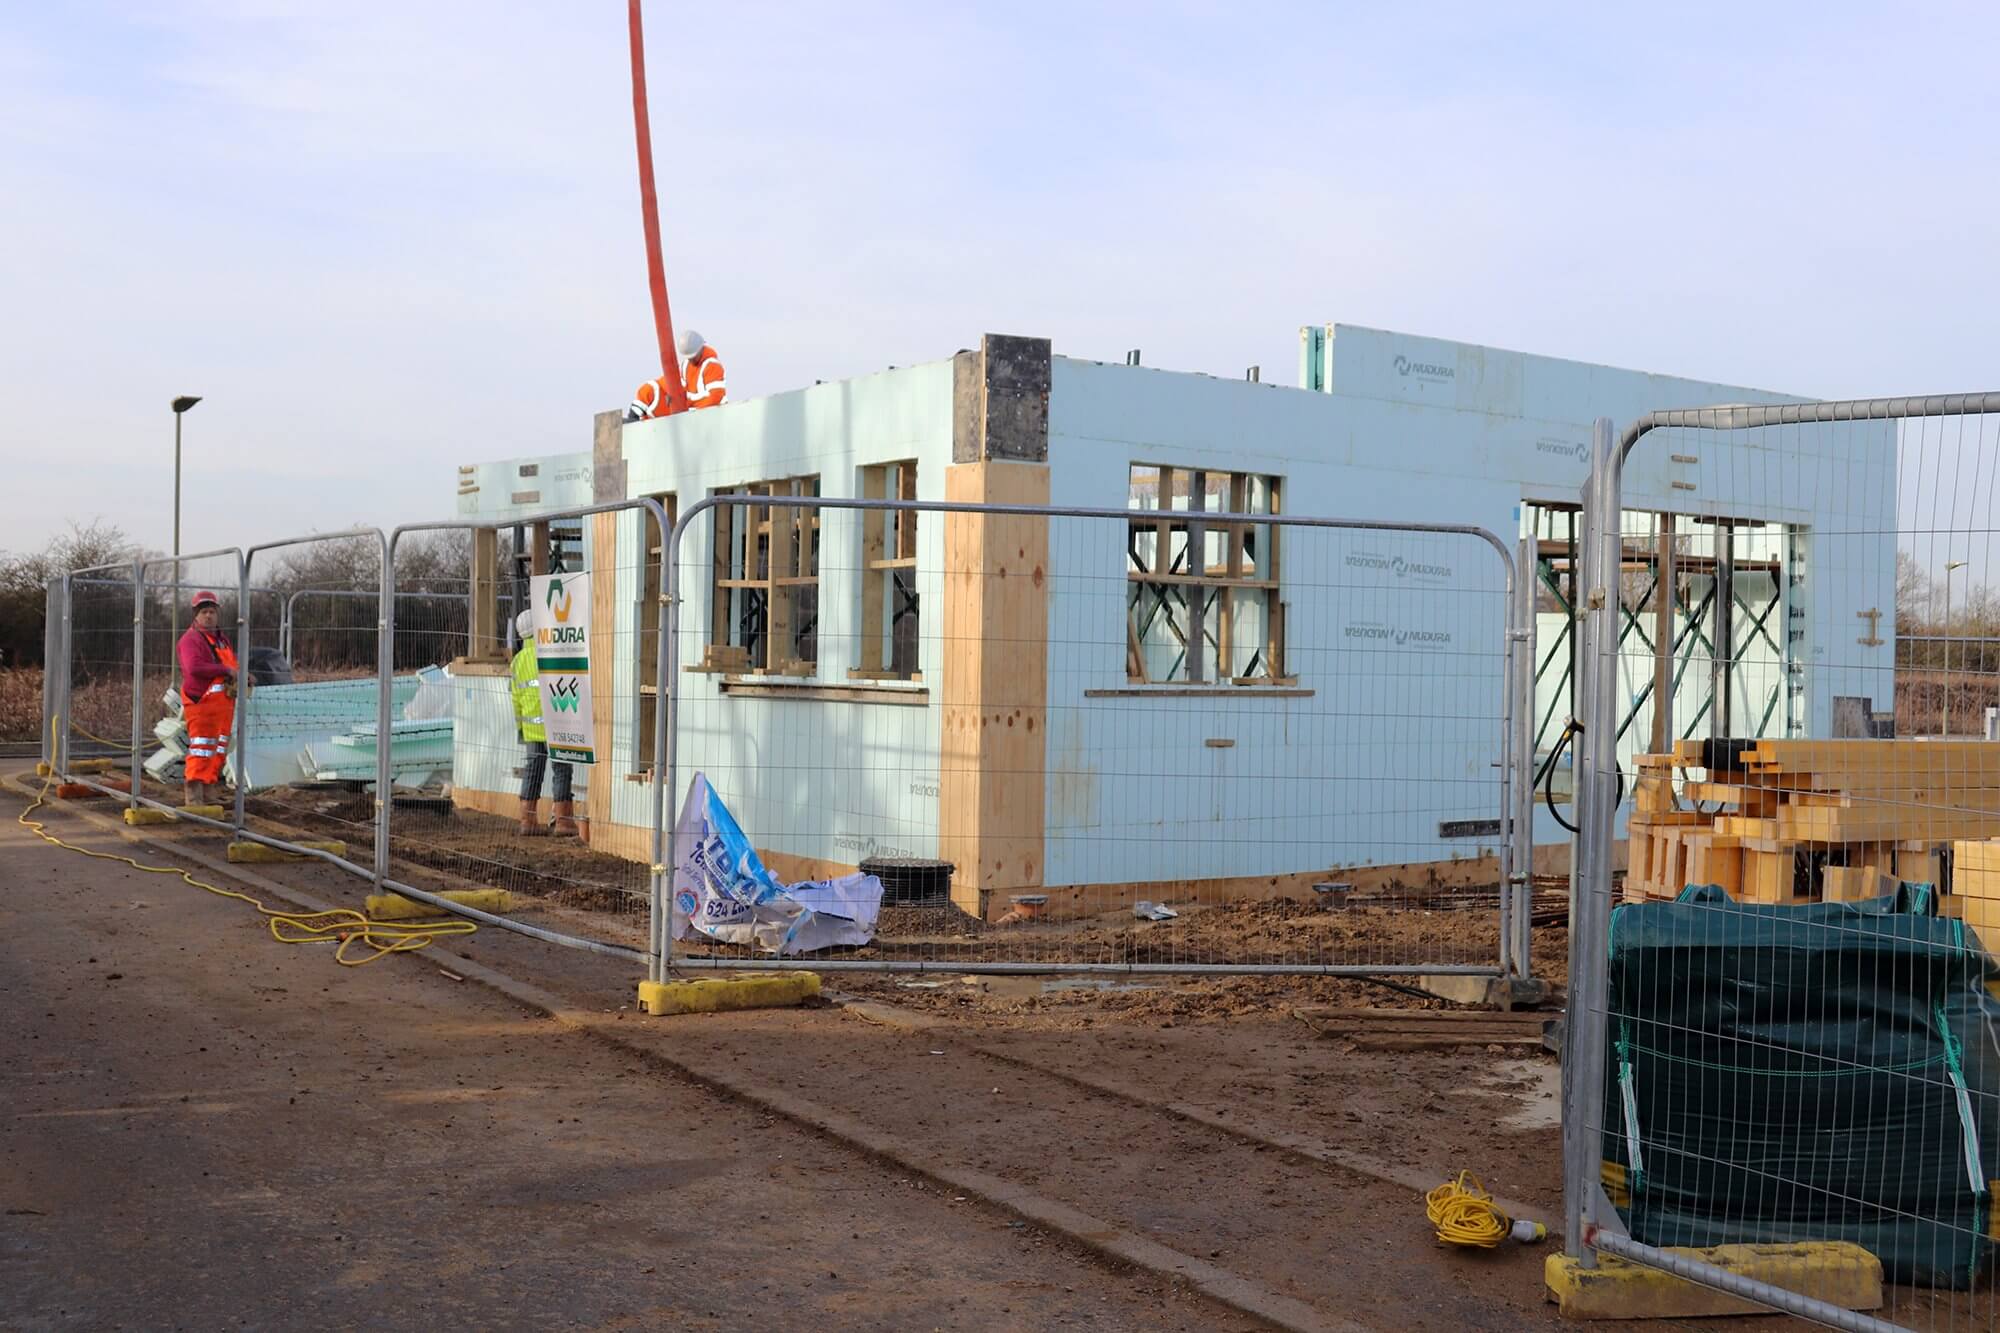
The lightweight, interlocking expanded polystyrene (EPS) blocks are easy to handle and install. So once the first course was sorted, things started to speed up.
Before long you could see the structural openings forming, and it really started to feel like we had an actual house on our hands. The crew went up seven courses of block for the ground floor, ready to pour concrete and fit the first floor structure.
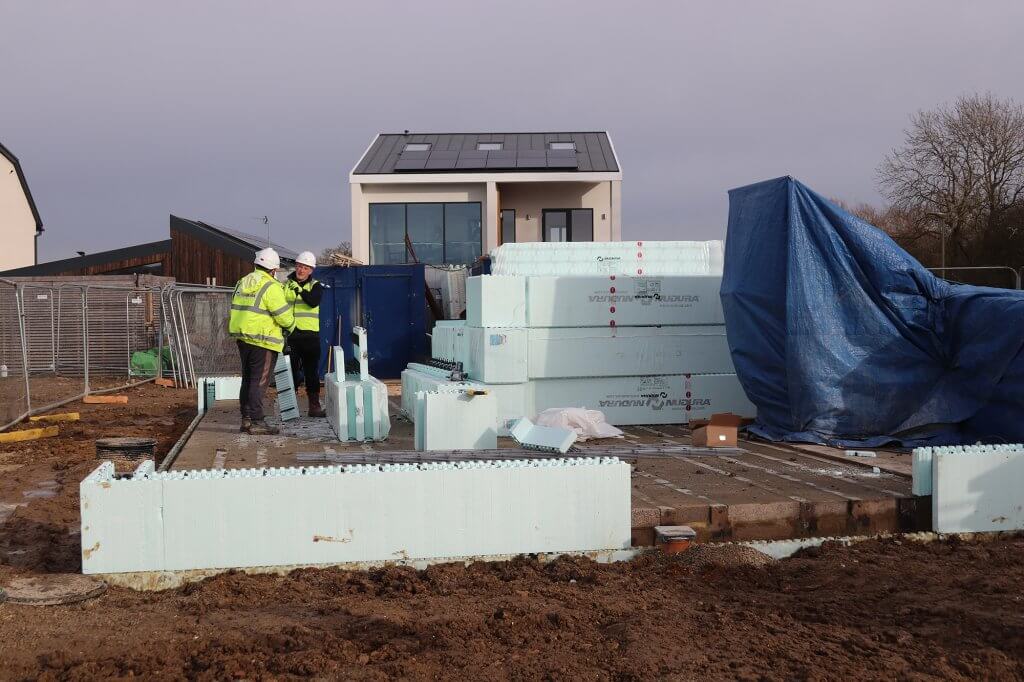
The first course is critical, as it sets the pattern for the rest of the formwork
A temporary alignment system is screwed into position as the Nudura formwork goes up. This is a clever bit of multi-purpose kit. It not only allows the contractors to make minute adjustments to get the walls straight prior to the pour, but also acts as a bracing system, as well as forming an internal scaffold.
This creates an in-built working platform to erect the higher block courses and pump in the concrete.
Cutting the EPS blocks
If you’re value-engineering a project, you’ll aim for a design that features straight lines, 90-degree corners and whole blocks (or panels, depending on the structural system). This can also help to minimise wastage.
We’re hoping to be able to recycle any EPS offcuts through a private firm that deals with insulation products.
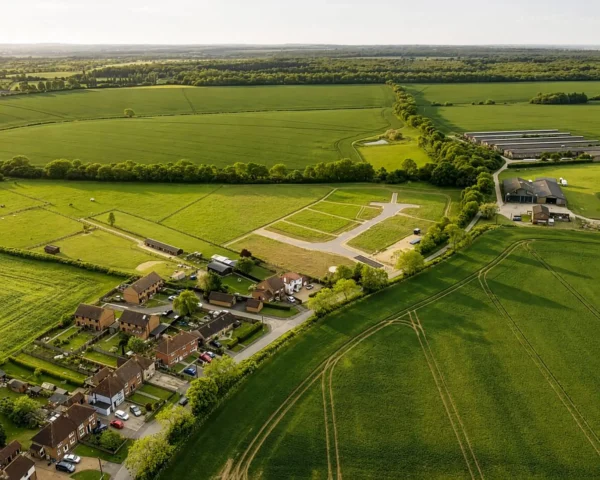
But if you want to eke out every last bit of footprint on a relatively tight plot – which is the case on our project at the innovative Graven Hill self build development – then you’ll probably need to make a few tweaks.
The Nudura units feature vertical cut lines at regular intervals. This makes sizing them up a doddle. On site, the crew literally call out to each other how many sections need to be trimmed off a given block, and slice through it in seconds using a conventional handsaw.
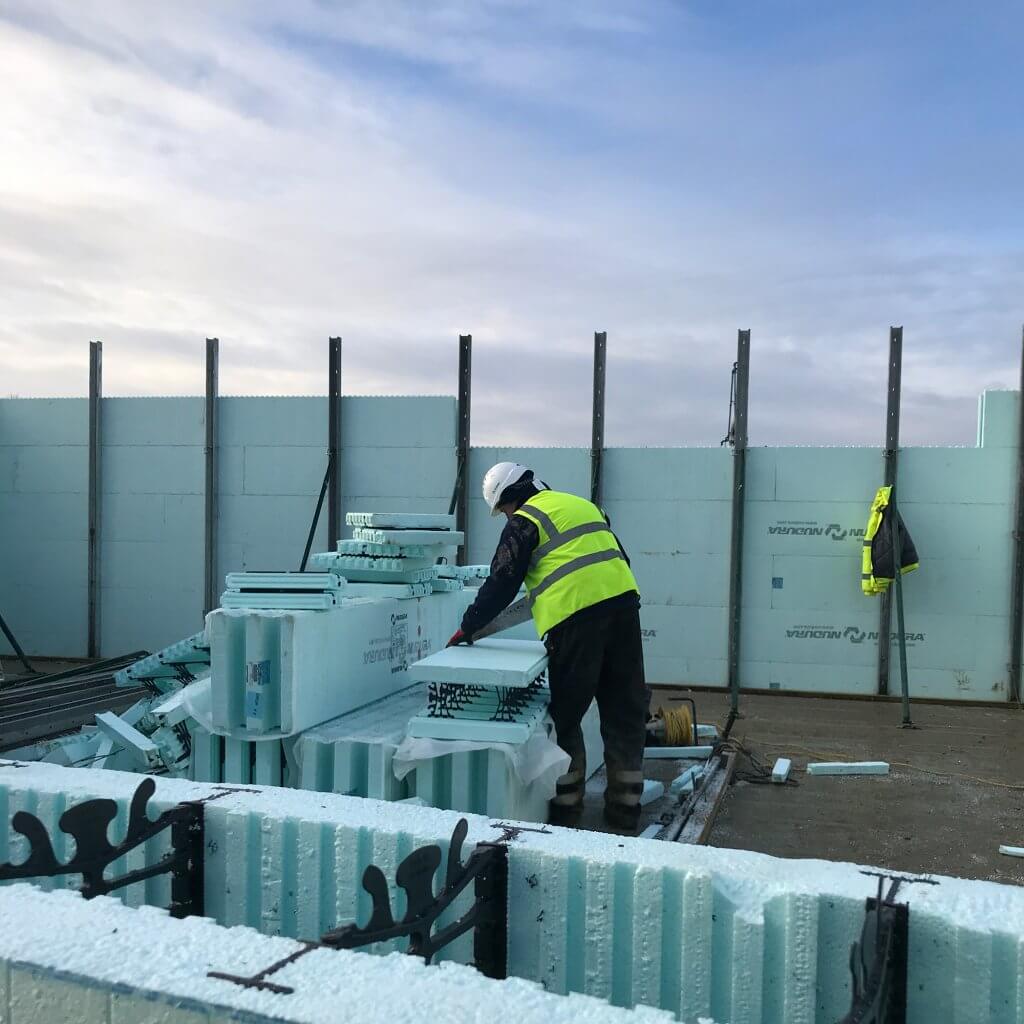
Cutting the ICF blocks to size on site. The polystyrene forms feature regular trim lines and are super-quick to saw
Special corner blocks are available for 90-degree angles, with a long and a short edge to create a natural bond as you stack them. The one place we can’t use these is the angled gable wall on the street-facing side elevation.
We added this feature in order to go right up to the build zone identified on our Graven Hill Plot passport. This means we can maximise the finished size of the house. But it does make things a little more complicated on site, as the team needs to make cuts at both ends all the way up this wall.
Whilst this work continued, ICF Contractors (who built our basement) briefly came back to erect the single internal load-bearing concrete wall on the ground floor, located in the hallway.
We need this to support one of the steels in the first floor structure above, as well as to provide a fixing point for our feature staircase.
Forming door & window openings
Concrete isn’t easy to cut through, so with ICF you form the structural openings before the pour. The Nudura ICF system uses pre-formed polystyrene closers (with integrated fixing points). These serve to both contain the pour and maintain the thermal envelope.
At the sides, the closers slot into dovetails in the blocks. This basically gives you 10mm increments to play with – a quick, clever solution that makes sense for most projects.
It causes a slight challenge for us, though. We’ve already placed our order for most of the windows with our supplier, Kloeber. So the dimensions, tolerances and setbacks are set in stone.
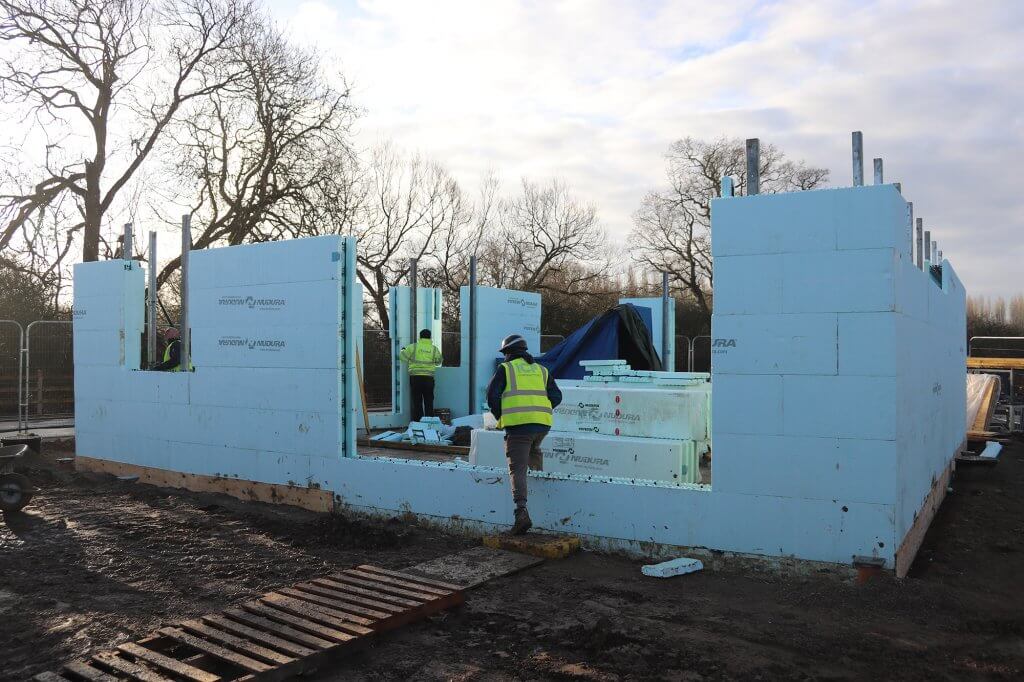
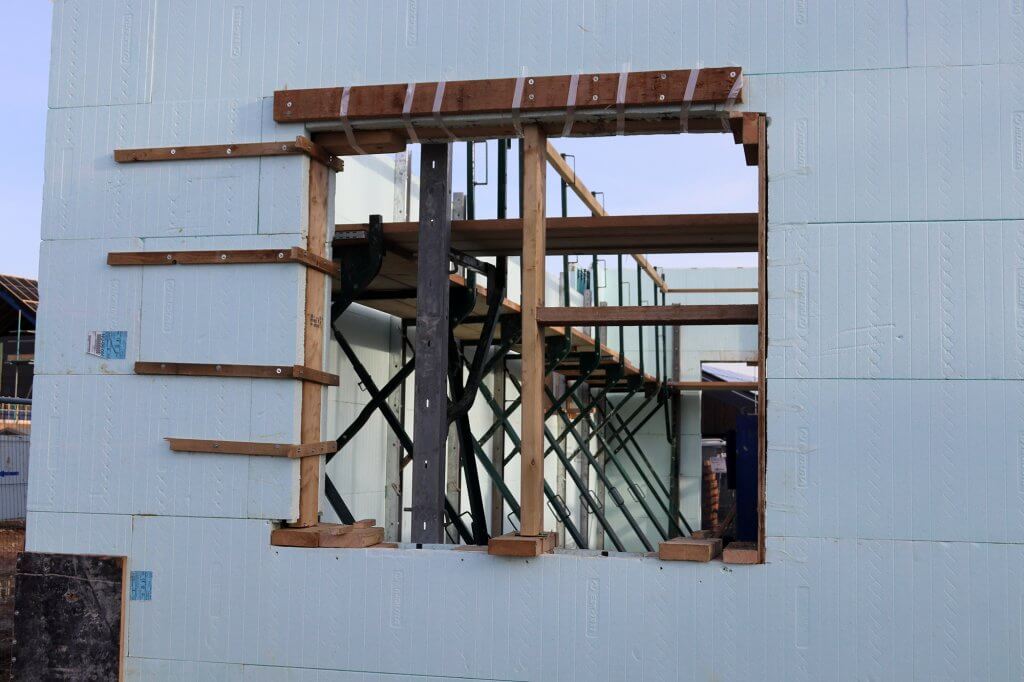
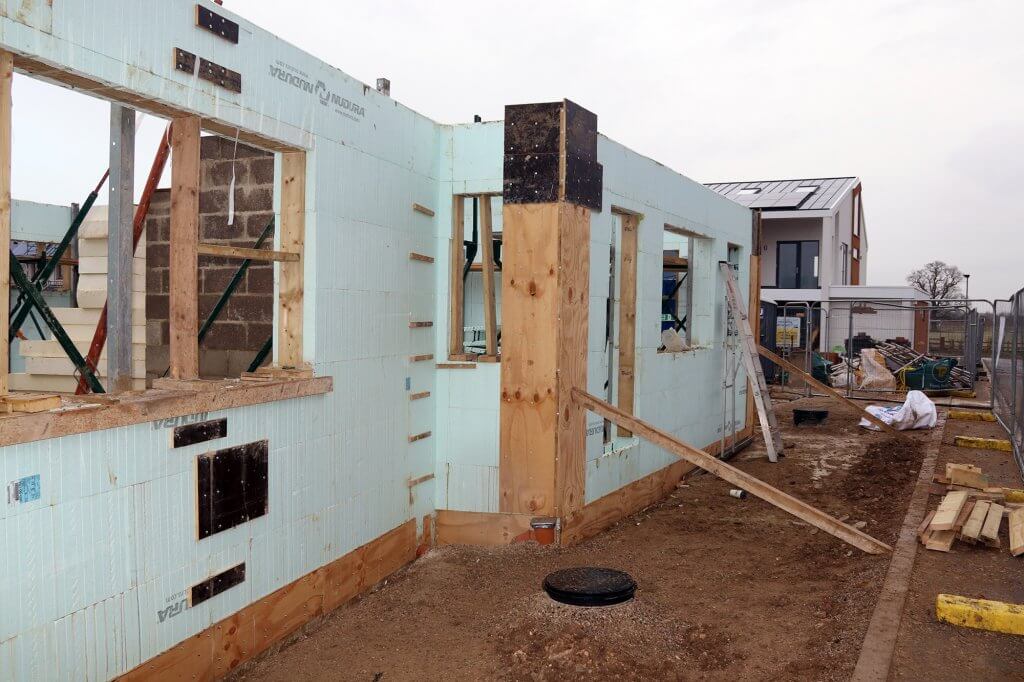
Door and window openings take shape as the ICF formwork goes up
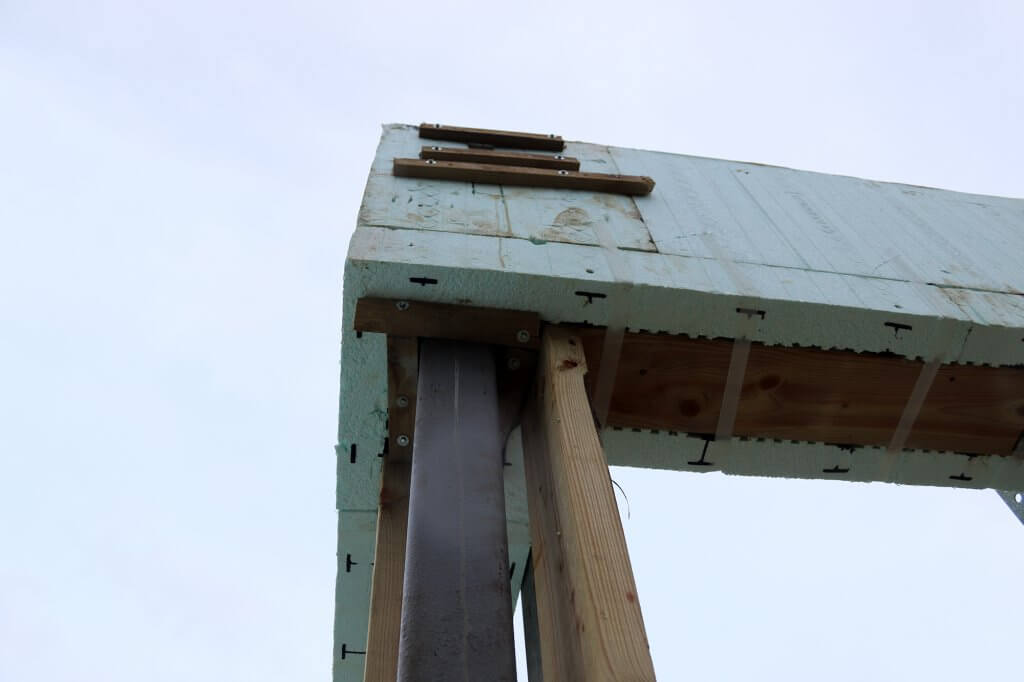
Finalising the steel post detail for the corner windows involved coordinating the architect, engineer, builders and window supplier
The only exception is the apex glazing on the front gable. Both our architect (Build It expert Opinder Liddar from Lapd) and Matt Higgs from Kloeber felt would be best to measure up on site for these after the pour.
Kloeber has been involved with the Education House from the very early stages, and is proving a valuable partner.
While they generally prefer to have the openings built first, they understand our rationale. They’ve worked with us and have been proactive in making suggestions and answering queries. In fact, Matt Higgs has already visited site on several occasions to help us finalise decisions.
Ordering windows in advance
We decided to order in advance for two key reasons. Firstly, we want to streamline the build programme. Most windows have a lead-time of around eight weeks between order and delivery to site. We don’t want to wait that long before first-fix trades can crack on with internal works.
Secondly, the position of our fenestration is crucial to the house’s sharp, contemporary look. So we don’t want to move the windows around to suit standard details.
At the end of the day, nobody cares about the final effect of your project quite
as much as you do. Even apparently small changes can add up to a different end result. Sometimes you just need to dig in your heels – even if you understand why a designer, builder or supplier is suggesting doing things their way.

To accommodate the pre-ordered windows, the site crew will need to make some small post-pour modifications on site – adding a little time to our build programme.
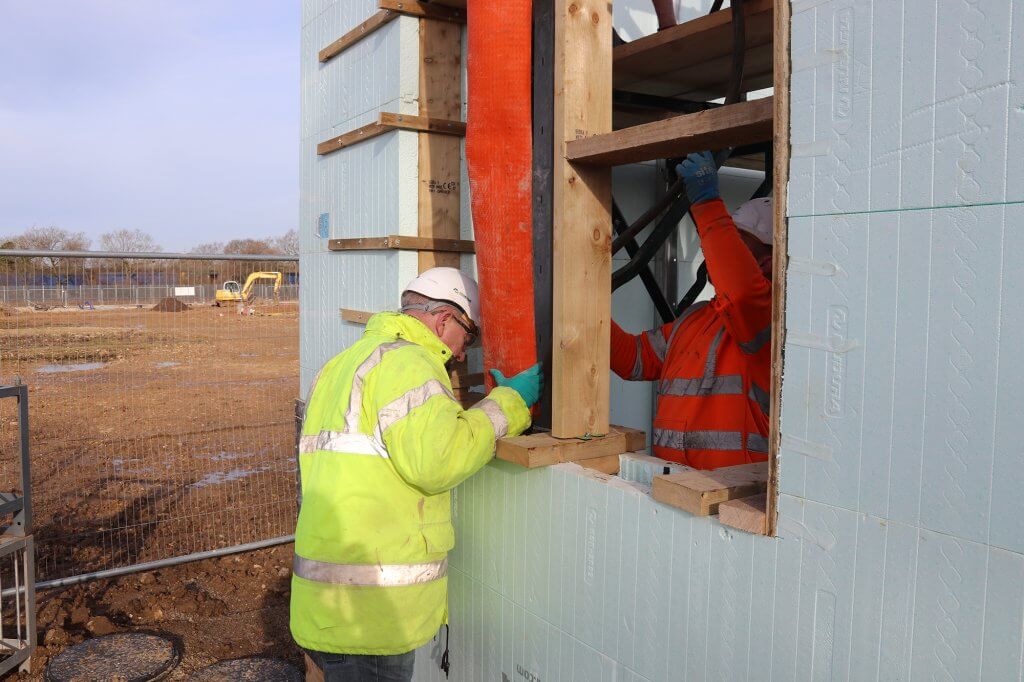
Some side closers will need to be slightly trimmed back, while others will need to be packed out with timber (sheathed in insulation front and back) to get the openings bang in line.
We’ve also agreed with ICF Supplies that the tops and bottoms of the window apertures can be lined with timber rather than the usual EPS lintel inserts. This should maximise flexibility for when Kloeber come to install.
Ground floor concrete pour
Pouring ICF walls is a bit like making a slap-up dinner. You spend all your time on the prep, but the main event is over in double-quick time.
One thing I hadn’t realised is that, while you can technically pour concrete into ICF blocks in very cold conditions, in places like Canada they bring the stuff over in heated vats.
In the UK, if conditions fall below 4°C, you have to sign a disclaimer from the concrete supplier accepting liability if it doesn’t cure to the designed strength. This isn’t something your warranty provider is likely to be happy with!
Unfortunately, our planned pour happened to coincide with a particularly cold snap in February. As a result, ICF Supplies’ in-house training team ran out of time and had to hand the job over.
In the run-up to pumping the concrete, the new crew spent a few days perfecting the wall alignments and adding extra bracing and strapping around potential weak points, such as structural openings.
This is a critical part of the process: wet concrete exerts a lot of force, and the bracing minimises the risk of bulges and blow-outs.

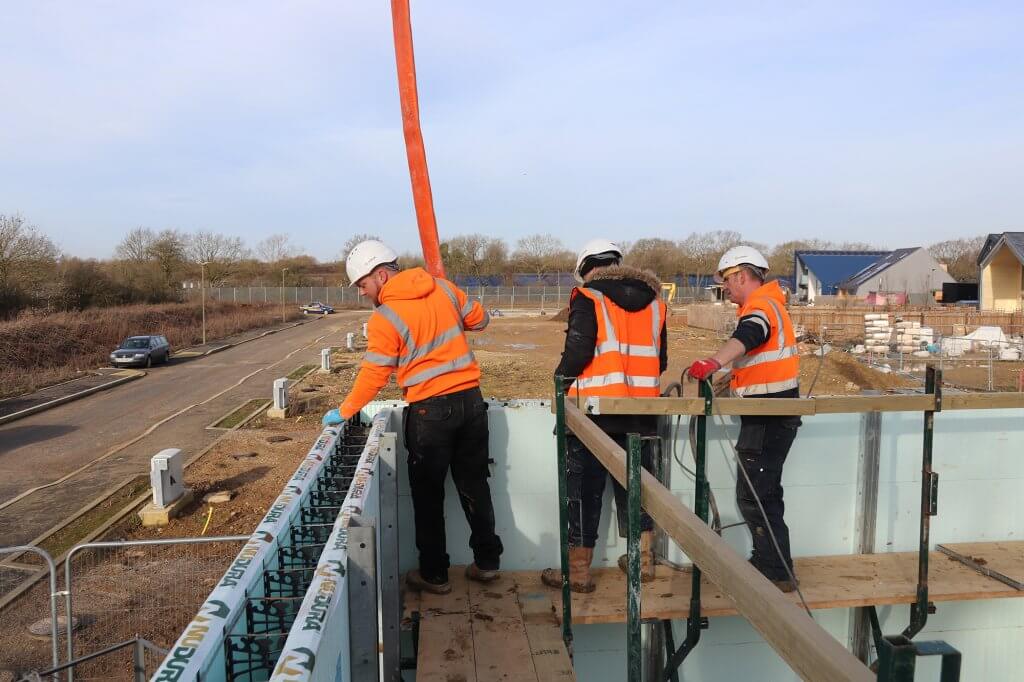
A special concrete boom is used for the pour, so the team can easily reach across to all the walls
Just as with the basement, this pour was very smooth. The installer’s site foreman took a methodical approach, with each lift being consolidated using a concrete vibrator to ensure a full fill.
At the joins between blocks, you may see a little bit of dirty liquid seeping out, but it’s nothing to worry about – this is just the excess water, not concrete!
Benefits of using experienced builders
In the event, there was just one area where we had a slight issue during the pour. Remember how the bottom row of blocks needed to be trimmed where they join the basement walls? Well, that included taking out some of the internal webbing.
In most places the bracing was up to the job, but next to the opening for rear sliding doors a slight bulge started to appear as the concrete was being poured in.
Because they hadn’t built up the polystyrene forms themselves, it wasn’t an issue the crew could foresee. Thankfully, they spotted it immediately and moved quickly, propping this small area with extra bracing to get it back in line.
It just goes to show the value of having an experienced team on site, who can prep properly and respond efficiently should a problem arise. Not every build needs to have a Grand Designs disaster!
Careful attention to detail is needed at window openings to ensure a full fill of concrete
Taping the tops of the ICF blocks helps to keep them clear of concrete, so there’s no cleaning up to before stacking the next course
The finished walls need a couple of days to cure before we can insert the first floor steels and posijoists
Chris Batesmith
You may be interested in