Estimate your project costs instantly with Build It's interactive self-build cost calculator
Calculate NowGet an accurate, detailed cost breakdown of your project
Submit plans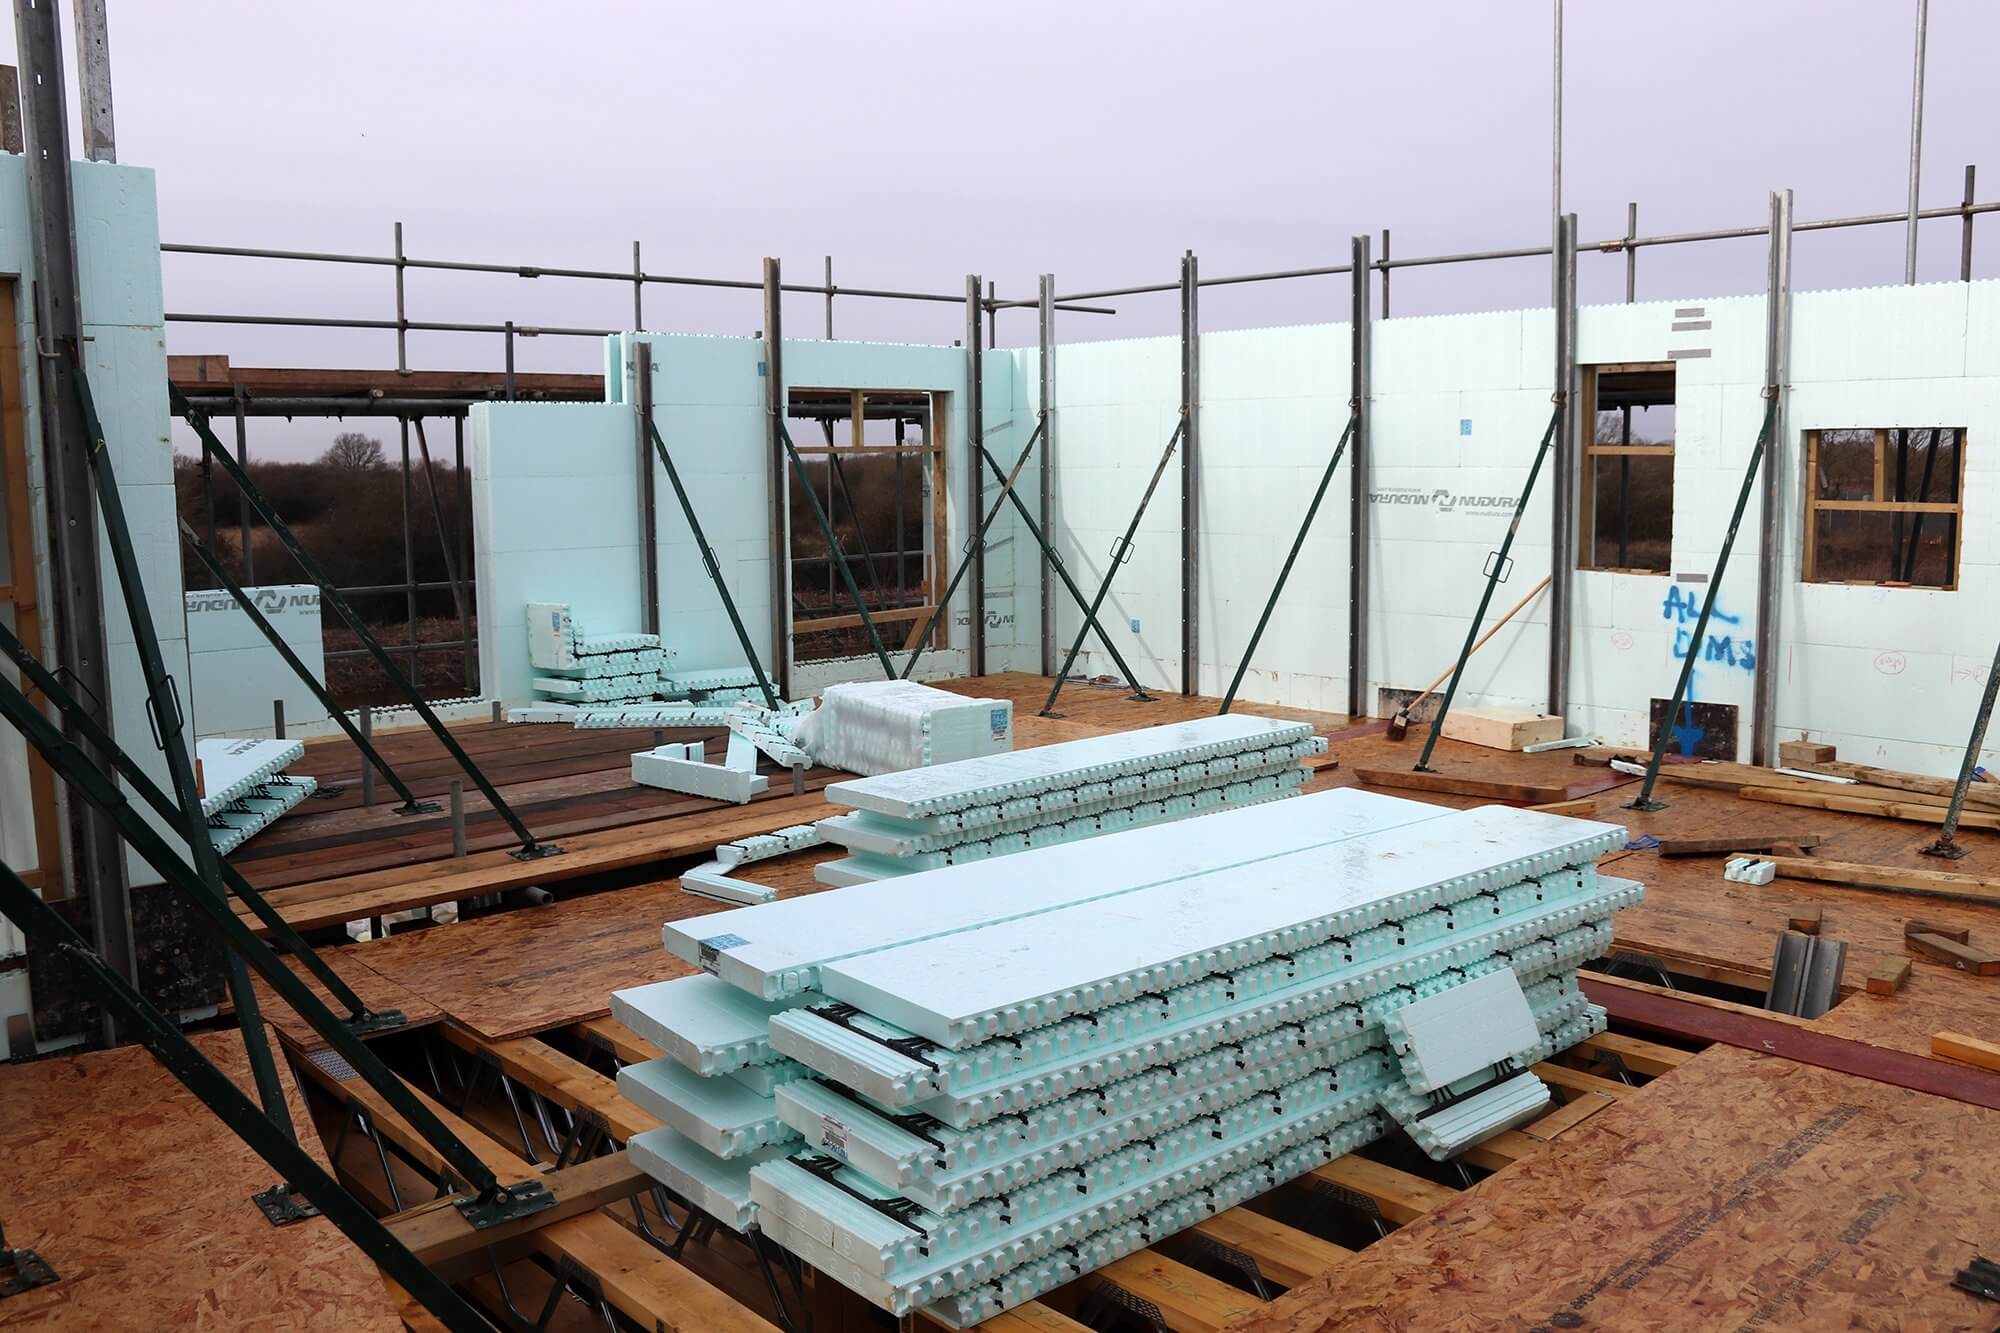

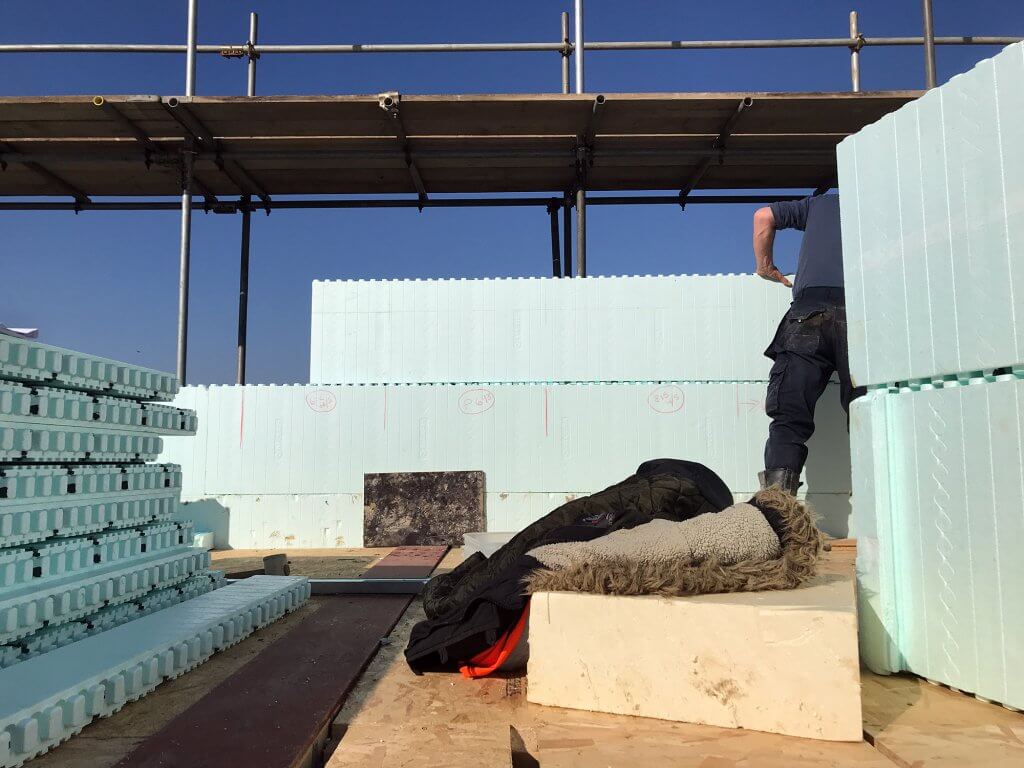
With the first floor structure and scaffold in place, and temporary decking down, ICF Supplies’ sub-contractors could get started on building the first floor walls.
We’ve already seen how the process of building an ICF house works with the construction of our basement and ground floor walls. But as a brief overview, the team will first stack the interlocking polystyrene formwork. This includes cutting for structural openings etc where necessary and inserting steel rebar to the engineer’s spec.
As you reach a few courses up, a metal bracing system is erected to hold the blocks in place. This doubles up as the alignment system for the pour itself.
Once the all the interlocking forms are in place, the crew applies extra bracing at any potential weak points. Classic culprits include the junction between storeys and around window openings. After a final alignment, it’s time for the concrete pour, which typically takes less than a day for a standard storey.
By now, your crew will be familiar with the project, so progress should be pretty smooth.
There are a few key considerations at this stage. One is aligning window openings – especially if you’re looking to run feature glazing up across multiple storeys, as we are. The ICF installers did a great job with this. The exact height of the apertures in relation to finished floor level (FFL) proved trickier, but we got there in the end.
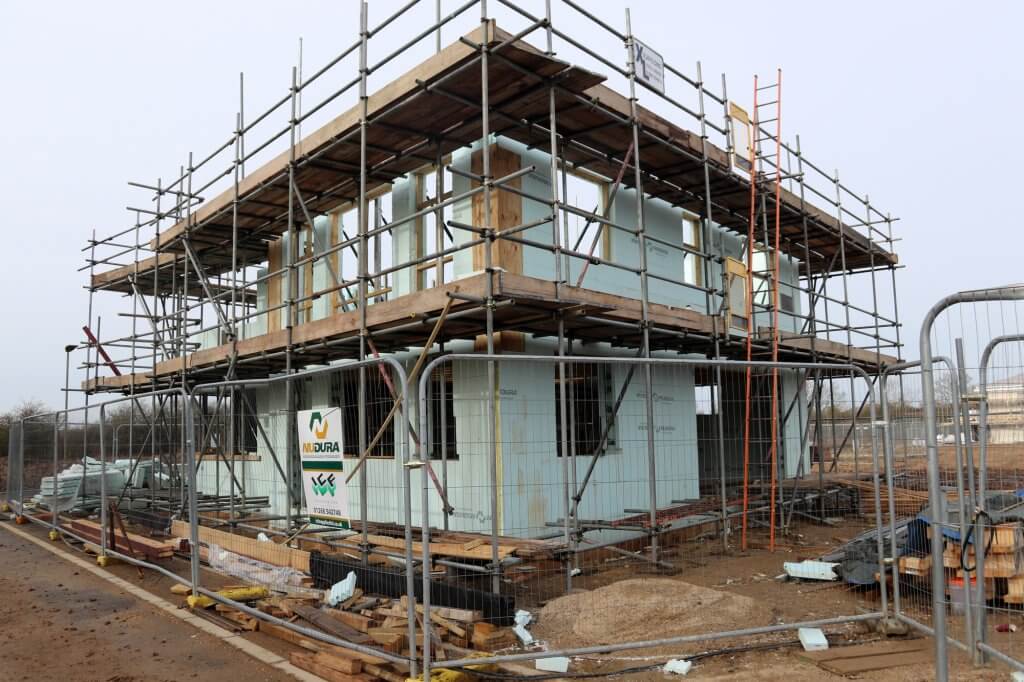
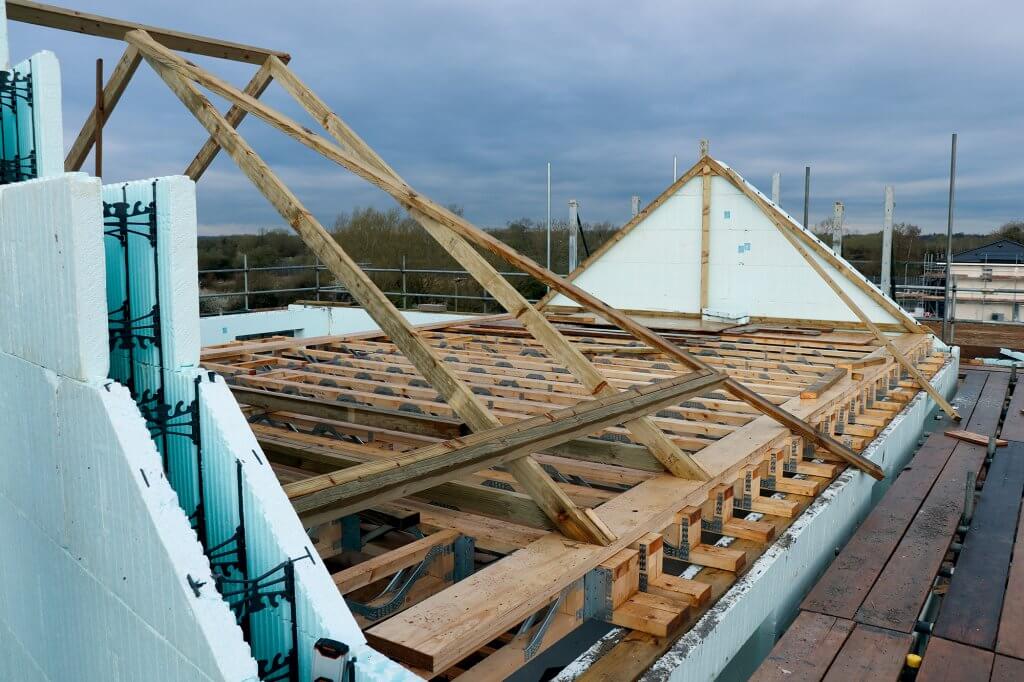
The biggest area on the Build It Education House project, however, was confirming the correct wall plate levels. We need to get these very accurate to accommodate the structural insulated panels (SIPs) that will form our roof.
We have a tight ridge height to work with on our Graven Hill plot, so it’s crucial the attic floor is fitted at the right level to hit that.
Just as import, we want to ensure there’s enough headroom in the loft. One of the reasons we’re using SIPs is that it creates a pre-insulated roof space. This can give an element of future-proofing, as the attic could be fitted out as living space (planning permitting) further down the line.
When using a factory-manufactured system like SIPs, you’re dealing with very tight tolerances. So tight, in fact, that the ICF crew were asked to get the building within 2mm of perfect for the wall plates and gable ends (the triangular bits of wall that go up into the roof apex) to ensure the SIPs panel installation would go smoothly.
There was quite a bit of to-ing and fro-ing involved in co-ordinating this. Most builders would probably say 2mm over a whole building is a pretty tall order. So when you’re getting to this kind of accuracy on your own dream home, the buck will ultimately stop with you.
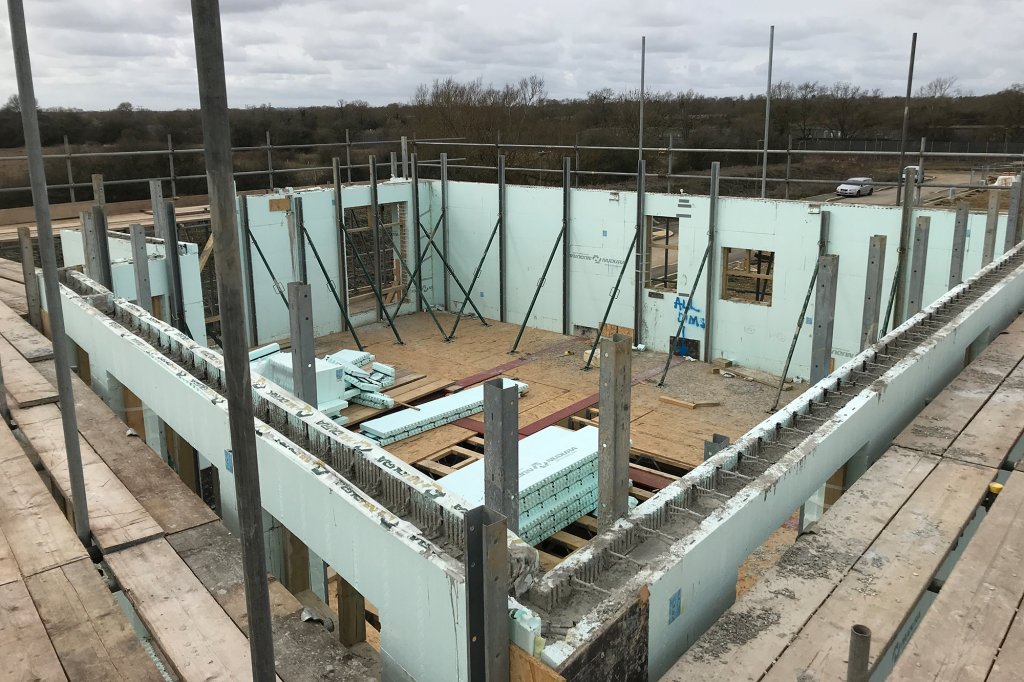
With the first floor ICF walls poured, the next job is getting the internal load bearing partitions up
We’ve experienced that common self build situation where different suppliers require exact tolerances from others; but don’t necessarily deliver on those themselves. That can lead to finger-pointing when things don’t work out perfectly. Communication up front is clearly the key.
In the end, we agreed to finish the first floor concrete pour about 20mm low at the eaves. This would allow us to put in a mortar bed and laser-level the wall plates to get them as close to dead-on as humanly possible.
The ICF walls were poured without incident. Once they were in, Build It’s own appointed main contractor, Drewett & Hunt, constructed the load bearing internal first floor walls.
We need these to help carry the loads of the SIPs roof and attic floor structure. Three are in blockwork, while one is of timber stud construction.
Our chosen SIPs panel supplier, SIPCO, was tasked with translating the architect’s drawings into a workable roof plan, via their own structural engineer.
As their technical design was developed, we discovered the triple-ridge roof was going to be a bit more complex than we’d imaged. That’s partly because of the open-plan space we want to achieve on the ground floor and basement.
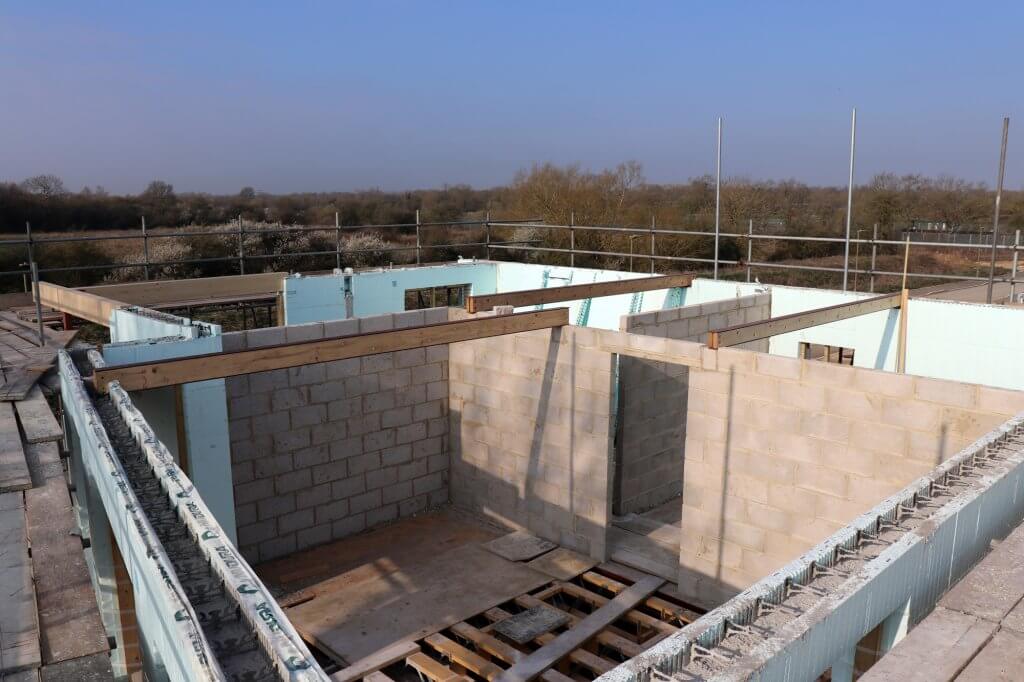
Drewett & Hunt installed the steels for the attic floor and the glulam wall plates at the front corner. They rest in pockets in the ICF walls, and on load-bearing blockwork internally
As a result, we’ve spent a lot of time coordinating with the ICF wall engineer and the SIPs roof engineer to nail things down. The final solution involves using supporting beams (a mix of steels and glulams) at first floor and attic floor level to transfer the roof loads.
Indeed, the attic floor itself is structural, which is relatively unusual in a domestic project. Normally, you’d have a non-structural first floor ceiling.
Supplied by SIPCO, the attic floor includes special plates made of kerto laminated veneered lumber (LVL). Interlocking fillets will be fixed to this to prevent the biggest section of roof (at the rear of the house) from spreading.
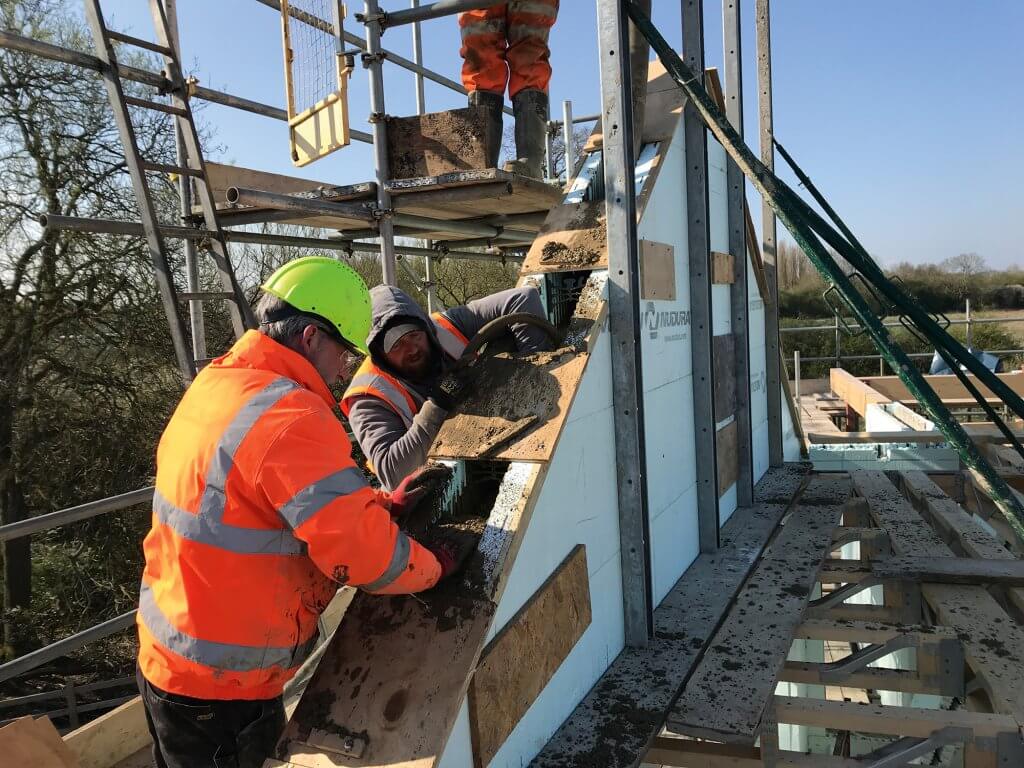
With accuracy vital at the gables, we decided the best approach was to get one of Drewett & Hunt’s regular chippies to draw up templates for the ICF installers to work from.
The trickiest part would be shaping the gable on the angled external wall. That’s because the intersection with the roof pitch creates a compound angle along the wall thickness.
Drewett & Hunt’s carpenters created full-size templates for the gable walls
Something got lost in translation between trades here, and unfortunately we didn’t spot it until we were already manoeuvring the SIPs panels onto the roof, well after the concrete had been poured. It’s solvable, but will involve cutting back some of the concrete, which will delay us slightly.
Pouring ICF gables is a slightly more complex operation than for standard storey-height walls. Wet concrete won’t just sit at an angle without something to hold it back. So the ICF crew used a slightly drier mix combined with small sections of plywood as shuttering, screwed into the top of the polystyrene blocks.
Starting near the bottom, they would remove a piece of ply, pour in concrete and vibrate it to consolidate the concrete into the corners. You then quickly re-attach the shuttering and repeat.
Pouring the ICF gables was a little more fiddly than standard walls, involving a system of temporary shuttering to help mould the concrete
They worked their way up the gable methodically until the whole thing was filled. The last bit was hand-bucketed, as pouring little loads of concrete can block the pump.
After a couple of weeks scratching our heads over technical details, prepping the gables and waiting for the wind to be quiet enough to allow the pour, it was suddenly all guns blazing.
All three of the gables were concreted in a single morning. Once they’ve had a day or two to cure, we’ll be ready to prep the house shell for the installation of the SIPs roof.


 Login/register to save Article for later