- Plan ItBack
- Design ItBack
- Build ItBack
- Homes
- ProductsBack
- CostsBack
- Self Build Cost Calculator
Estimate your project costs instantly with Build It's interactive self-build cost calculator
Calculate Now - Costs & Finance
- Contracts & Warranties
- Build It Estimating Service
Get an accurate, detailed cost breakdown of your project
Submit plans
- EventsBack


 Login/register to save Article for later
How to Specify Roof Windows & Overhead Glazing for an Extension

Incorporating a rooflight or roof lantern into an extension project is one of the most effective ways to enhance natural light and create a bright, open and inviting addition. These glazed features not only improve access to daylight but also contribute to the aesthetic appeal of your home; ideal for blending functionality with architectural interest.
Whether your aim is to make a small space feel larger, bring light deeper into your floorplan, or create a striking focal point, overhead glazing offers a range of benefits. Indeed, with good, detailed design and proper installation, the right rooflight will elevate your home. Here’s what you need to know to make the most out of this feature.
What benefits can overhead glazing bring to an extension project?
A common post-extension complaint is that the existing house is now darker. “When extending, windows and doors will inevitably be further away from the original interior zones – what architects call a deep-plan problem,” says William Tozer, director at William Tozer Associates. Rooflights and lanterns address this issue, bringing sunlight in from above and deeper into the layout. This reduces reliance on artificial lighting and creates a more enjoyable living environment.
When planning overhead glazing, location is king. “The junction between existing house and extension is usually the optimal position for rooflights in terms of bringing light into the interior,” says William. “It also creates a useful visual break between the original property and the new addition.”
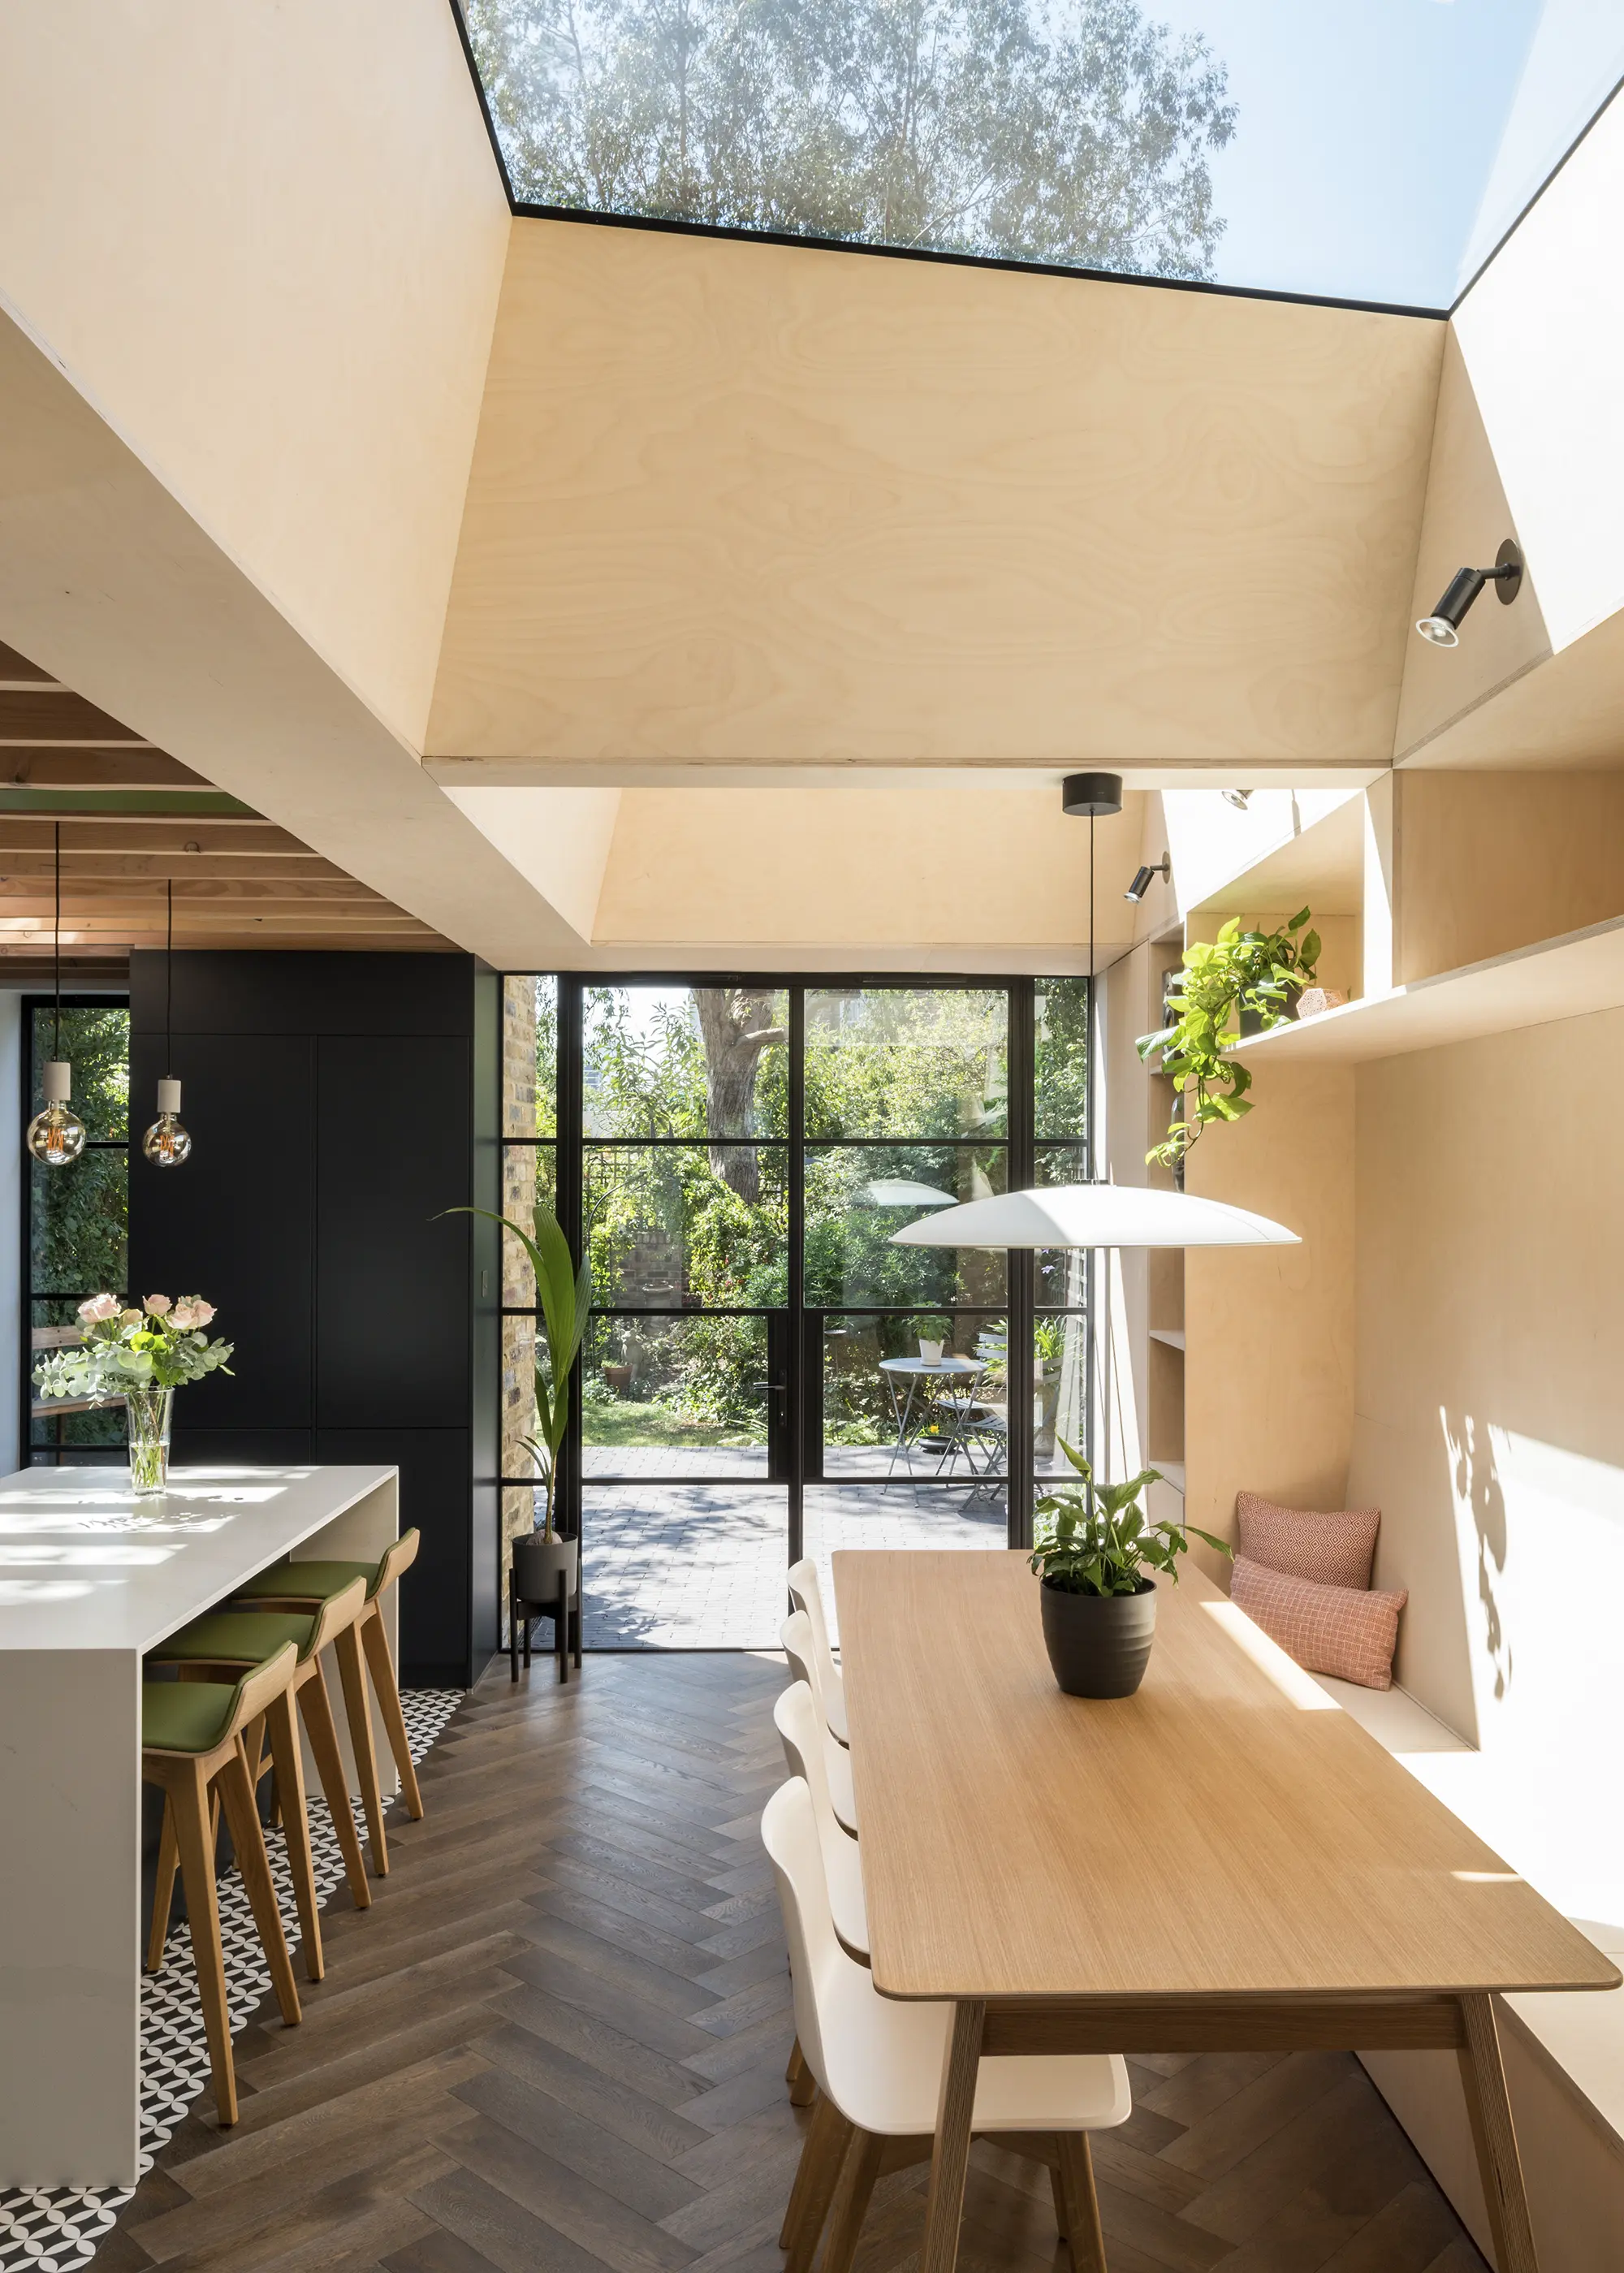
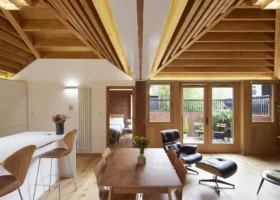
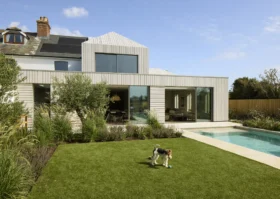
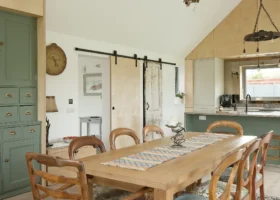
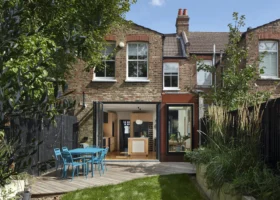
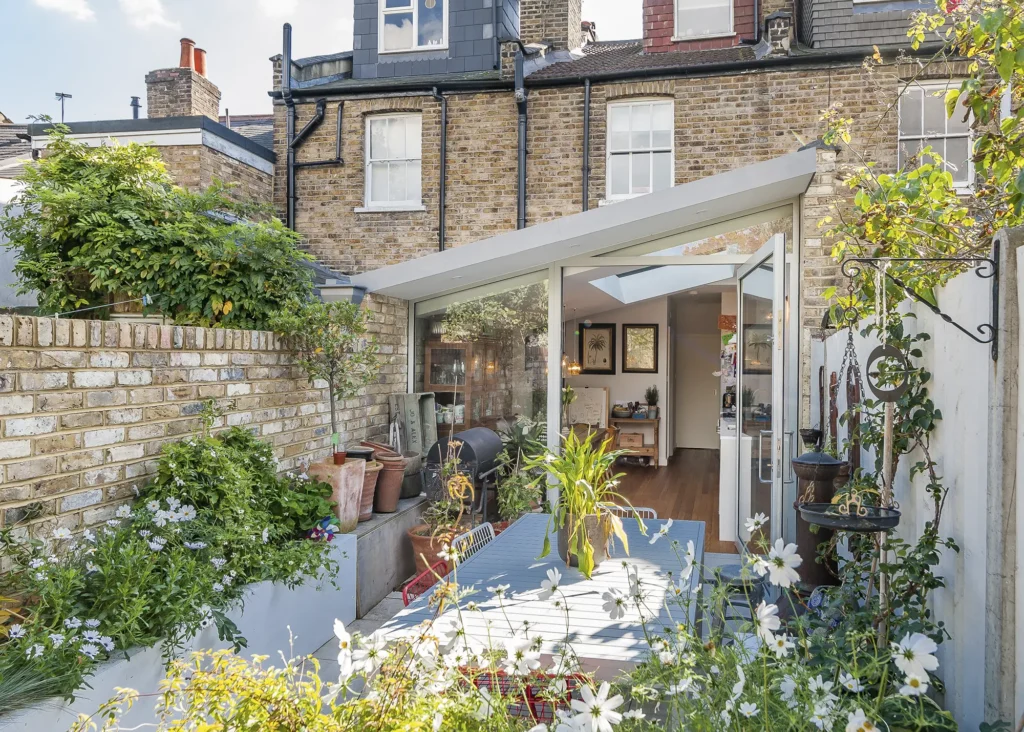
This sympathetic rear kitchen-diner extension, designed by Bradley Van Der Straeten Architects, features two raised rooflights from Maxlight which flood the space with natural light. Inside, exposed timber ceilings and angled lightwells with a plywood finish add a dynamic, lofty feel to the addition. Photo: French + Tye
These features are also ideal for zoning a space and highlighting key areas within it, such as a dining table or island unit. “An extension often creates a single, open-plan room,” says William. “Rooflights can be provide a sense of separation between kitchen, living and dining areas.”
Beyond the functional benefits, rooflights and lanterns can help to make a room feel more open and airy, which is particularly valuable in extension projects where space might be limited. “They visually enlarge rooms by connecting indoor spaces seamlessly with the sky, improving overall aesthetics while boosting the house’s value,” says Annabel Fenwick, director at Just Roof Lanterns. Even a small unit can create the illusion of a larger area by drawing the eye upwards.
What are the different rooflight options for a house extension project?
One of the first decisions to make is whether to opt for a fixed or opening unit. Fixed roof glazing can maximise the viewing area and deliver robust performance, with best-in-class thermal efficiency. They should also be lower-maintenance, as there’s no mechanisms to go wrong. But openable rooflights offer purge ventilation – very handy for dispersing excess heat or cooking smells in kitchen-diner extensions. They can also be automated for added convenience.
Premium Content
Downloadable E-Guide
Build It’s downloadable e-guide to choosing windows & doors offers ideas and advice on every aspect of planning your home’s glazing and entrances, including expert tips on the key specification decisions you’ll face. Click below to find out more.
find out more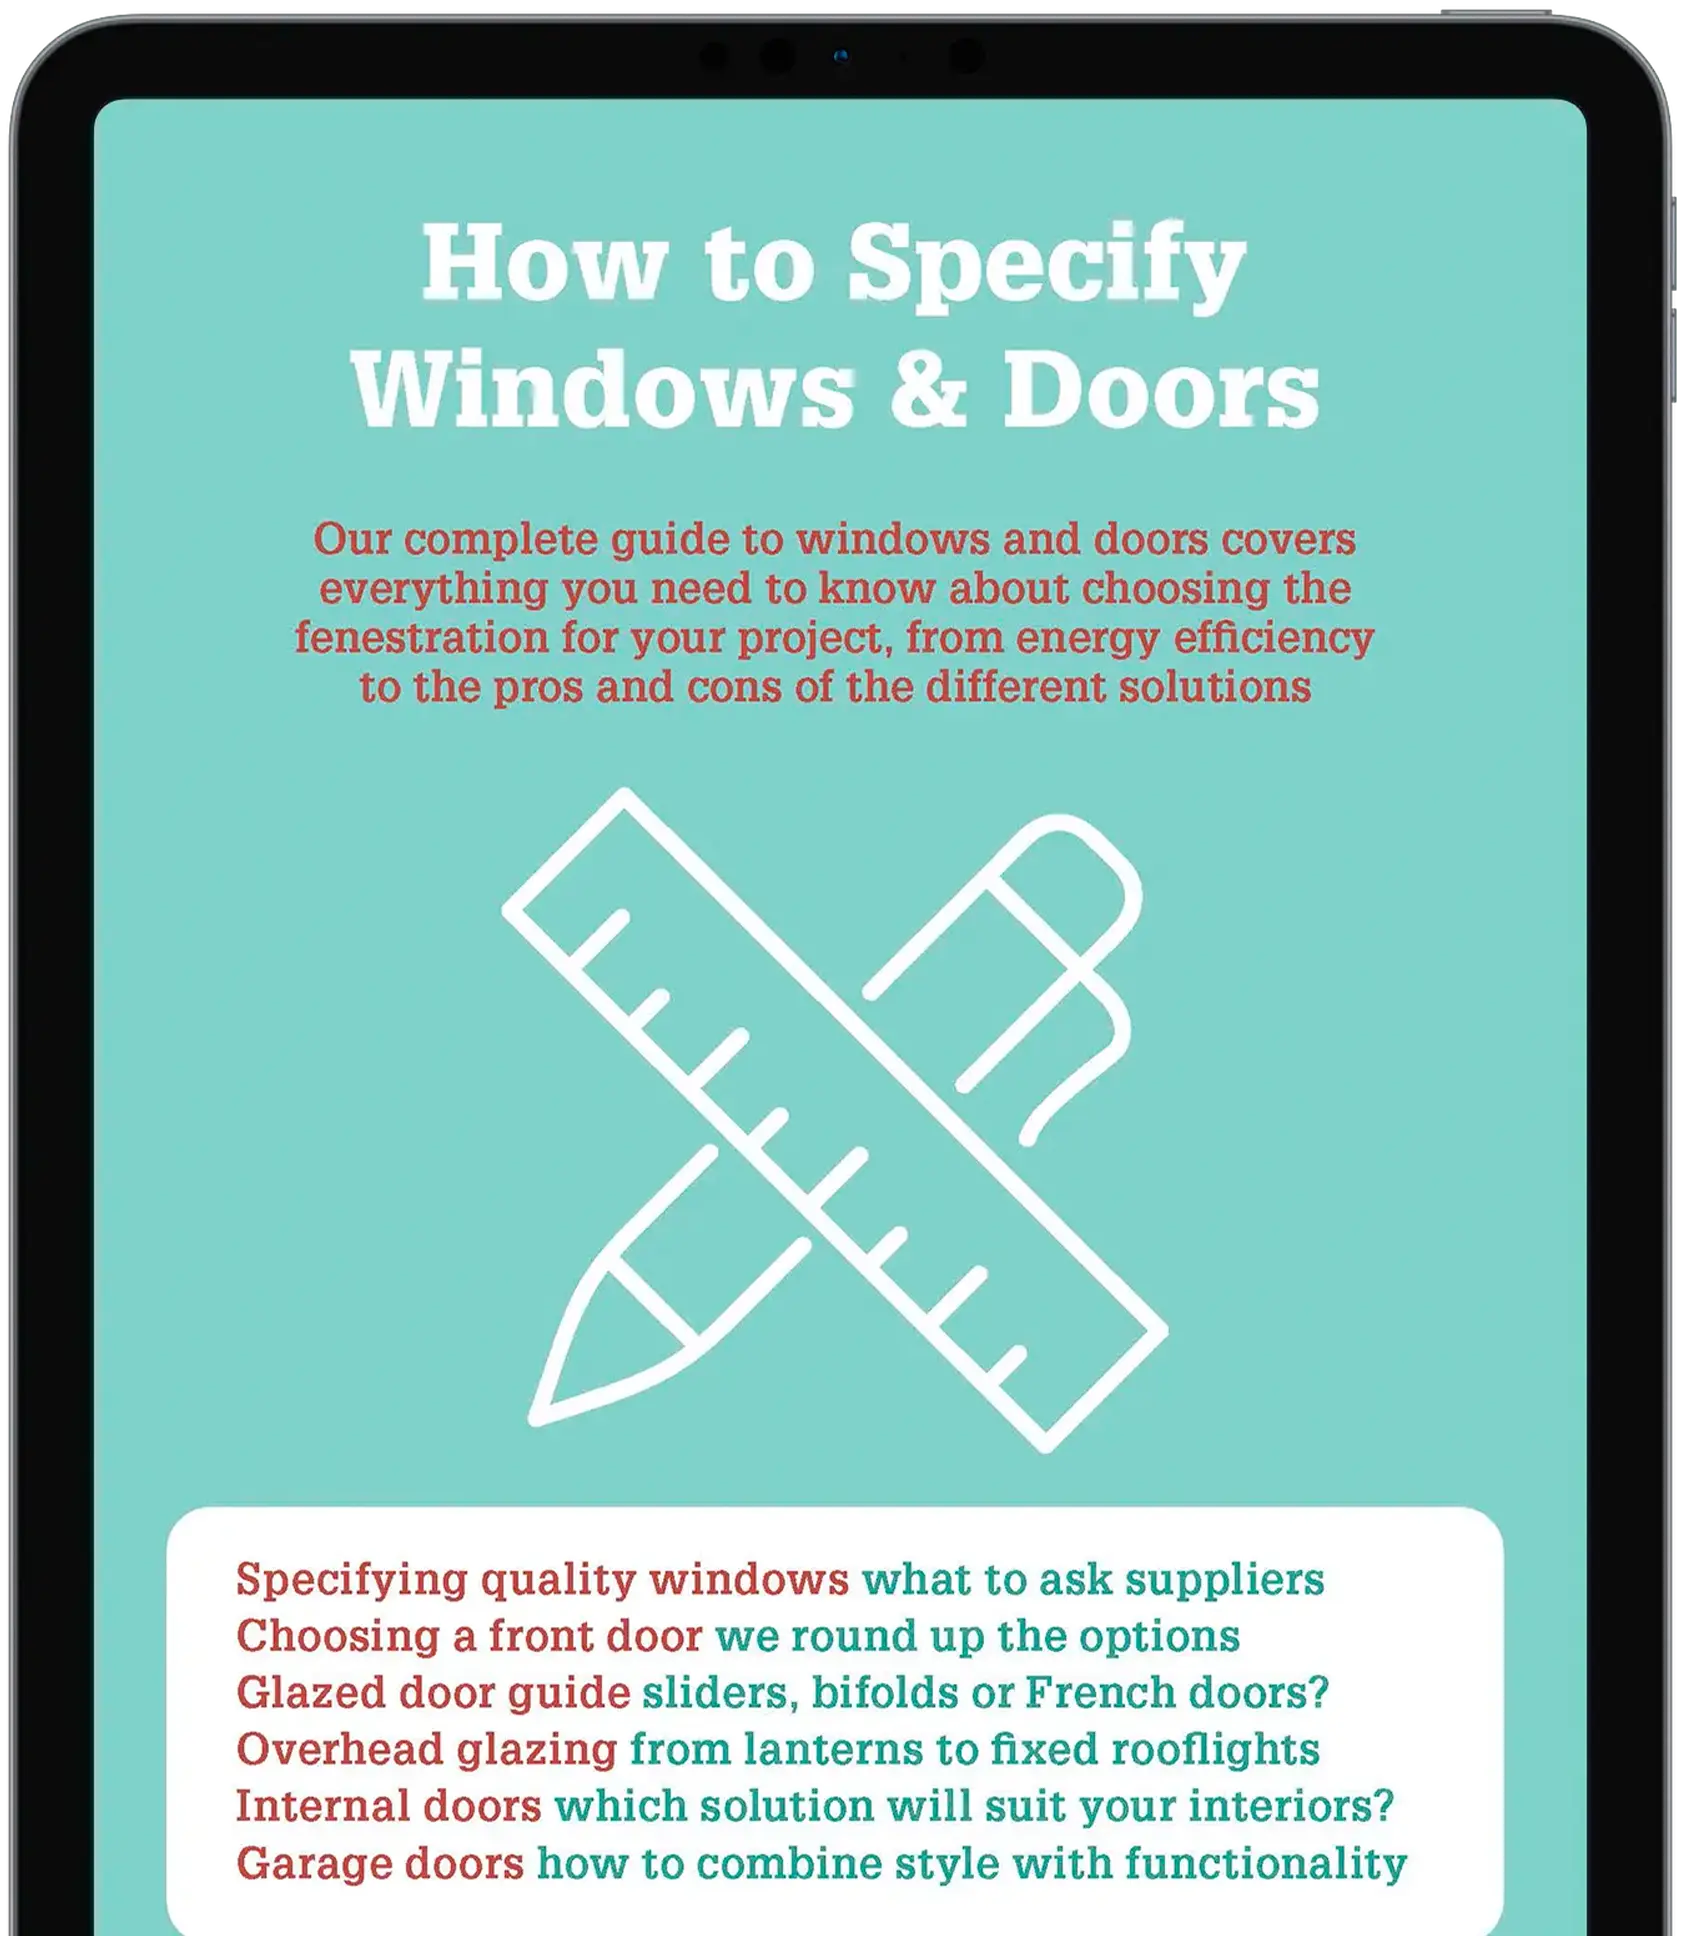
Traditionally, lanterns are fixed units, but modern solutions can include openable sections to allow some air flow. Keep in mind that any opening rooflights must comply with fire escape regulations if they are positioned in habitable rooms. Your choice of frame material is also an important consideration. Common options include timber, aluminium and PVCu, each offering distinct benefits.
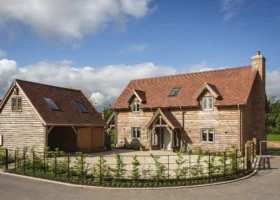
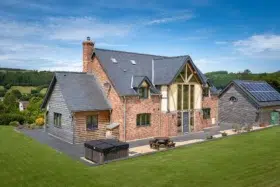
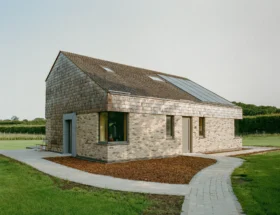
This timeless extension design features a timber roof lantern from Just Roof Lanterns, filling the entire room with daylight and providing an impressive feature
Timber products provide a classic, natural look that works well in traditional homes but require periodic maintenance, unless the frame is externally clad.
Aluminium frames offer a sleek aesthetic and are highly durable, with minimal upkeep, while PVCu solutions are a cost-effective and low-maintenance option. Consider if you want your overhead glazing to discreetly blend in with your roof and interiors with minimal framing, or create a standout, elevated feature.
Think about the glass type, too. “Prioritise products with high impact resistance as standard, to ensure added home security,” says Sarah Hastings, head of marketing at Fakro. Triple glazing enhances heat retention, while laminated or toughened options improve security and safety.
Modular windows, featuring multiple units, can be a boon for the right project. This 2-in-1 rooflight by Velux has one fixed and one openable pane, providing ventilation and ample natural light
The size and shape of the rooflight or lantern should be proportionate to the scope of your extension, ensuring it provides adequate light without overwhelming the space. “Explore options for unconventional sizes or colours to match your design preferences and the nature of your addition,” adds Sarah.
While budget will be a key driver, custom shapes and sizes can add a unique architectural feature. Bespoke overhead glazing could seamlessly fill a whole length of the new roof, or you might insert a run of three or four standard rooflights to achieve a similar effect. Up-and-over designs (where vertical windows return into roof glazing) are a great solution for maximising light flow, framing views and creating a dramatic focal point.
How does your extension roof type impact your overhead glazing options
The design of your extension’s roof will impact on glazing choice. “Products like domed or flat rooflights are ideal for pitches between 0-15°, offering versatility in the design, such as walk-on windows or ventilation” says Sarah.
Standard rooflights are designed for steeper pitches, ensuring proper water runoff and integration. “Centre pivot, top hung, or even more unique solutions like balcony-style rooflights are all great options for this type of structure,” says Sarah. Pitched windows can be installed flush to the roofline or slightly raised, depending on the desired aesthetic and practical requirements, such as rainfall levels.
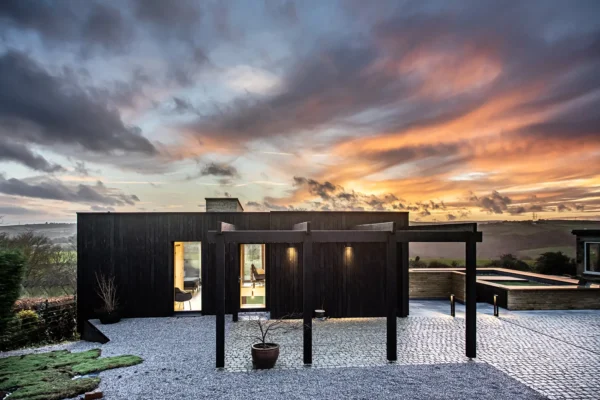
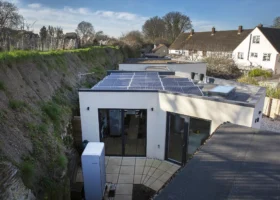
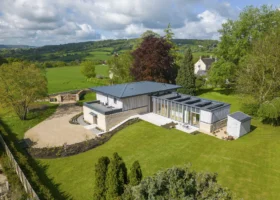
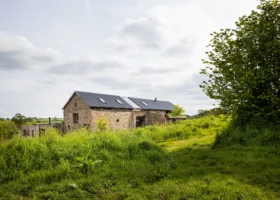
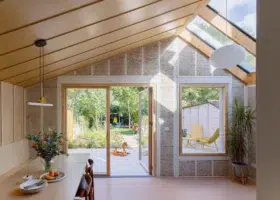
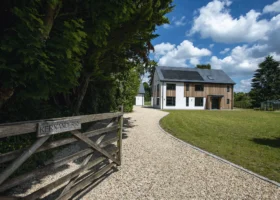
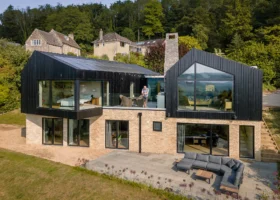
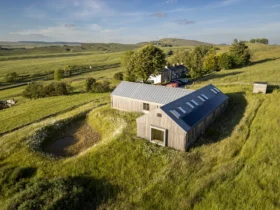
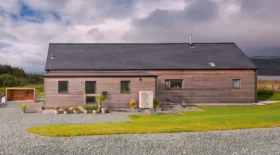
This extension by 50 Degrees North has a zinc-wrapped monopitch roof in line with the homeowners’ desire for crisp, modern architecture. An oversized rooflight floods the kitchen with light and a feature pivot door to the garden opens up the space for indoor-outdoor living
Roof lanterns are highly effective for flat roofs, adding height and visual interest, while allowing light to flood the space below. “Roof lanterns can also enhance sloped structures,” says Annabel. “However, installation may require careful integration with the roof’s precise pitch.”
Regardless of your roof type, it’s crucial to ensure the new structure can support the weight of your chosen unit. Large glass panels may require additional reinforcement in the roof, which will require a structural engineer’s input. “Early discussions with reputable suppliers allow you to integrate specific dimensions, structural requirements and bespoke features into your plans, ensuring smooth installation and avoiding costly design revisions later,” says Annabel.
What maintenance does overhead glazing require?
Accessibility for cleaning and general upkeep should be considered from the outset. For hard-to-reach installations, it’s worth opting for self-cleaning glass. This has a special coating that breaks down dirt when exposed to sunlight, allowing rainwater to wash it away – though it’s important to note that self-cleaning glass isn’t totally maintenance-free. Rooflights positioned at higher elevations may require additional equipment or professional cleaning to ensure proper upkeep and the longevity of your product.
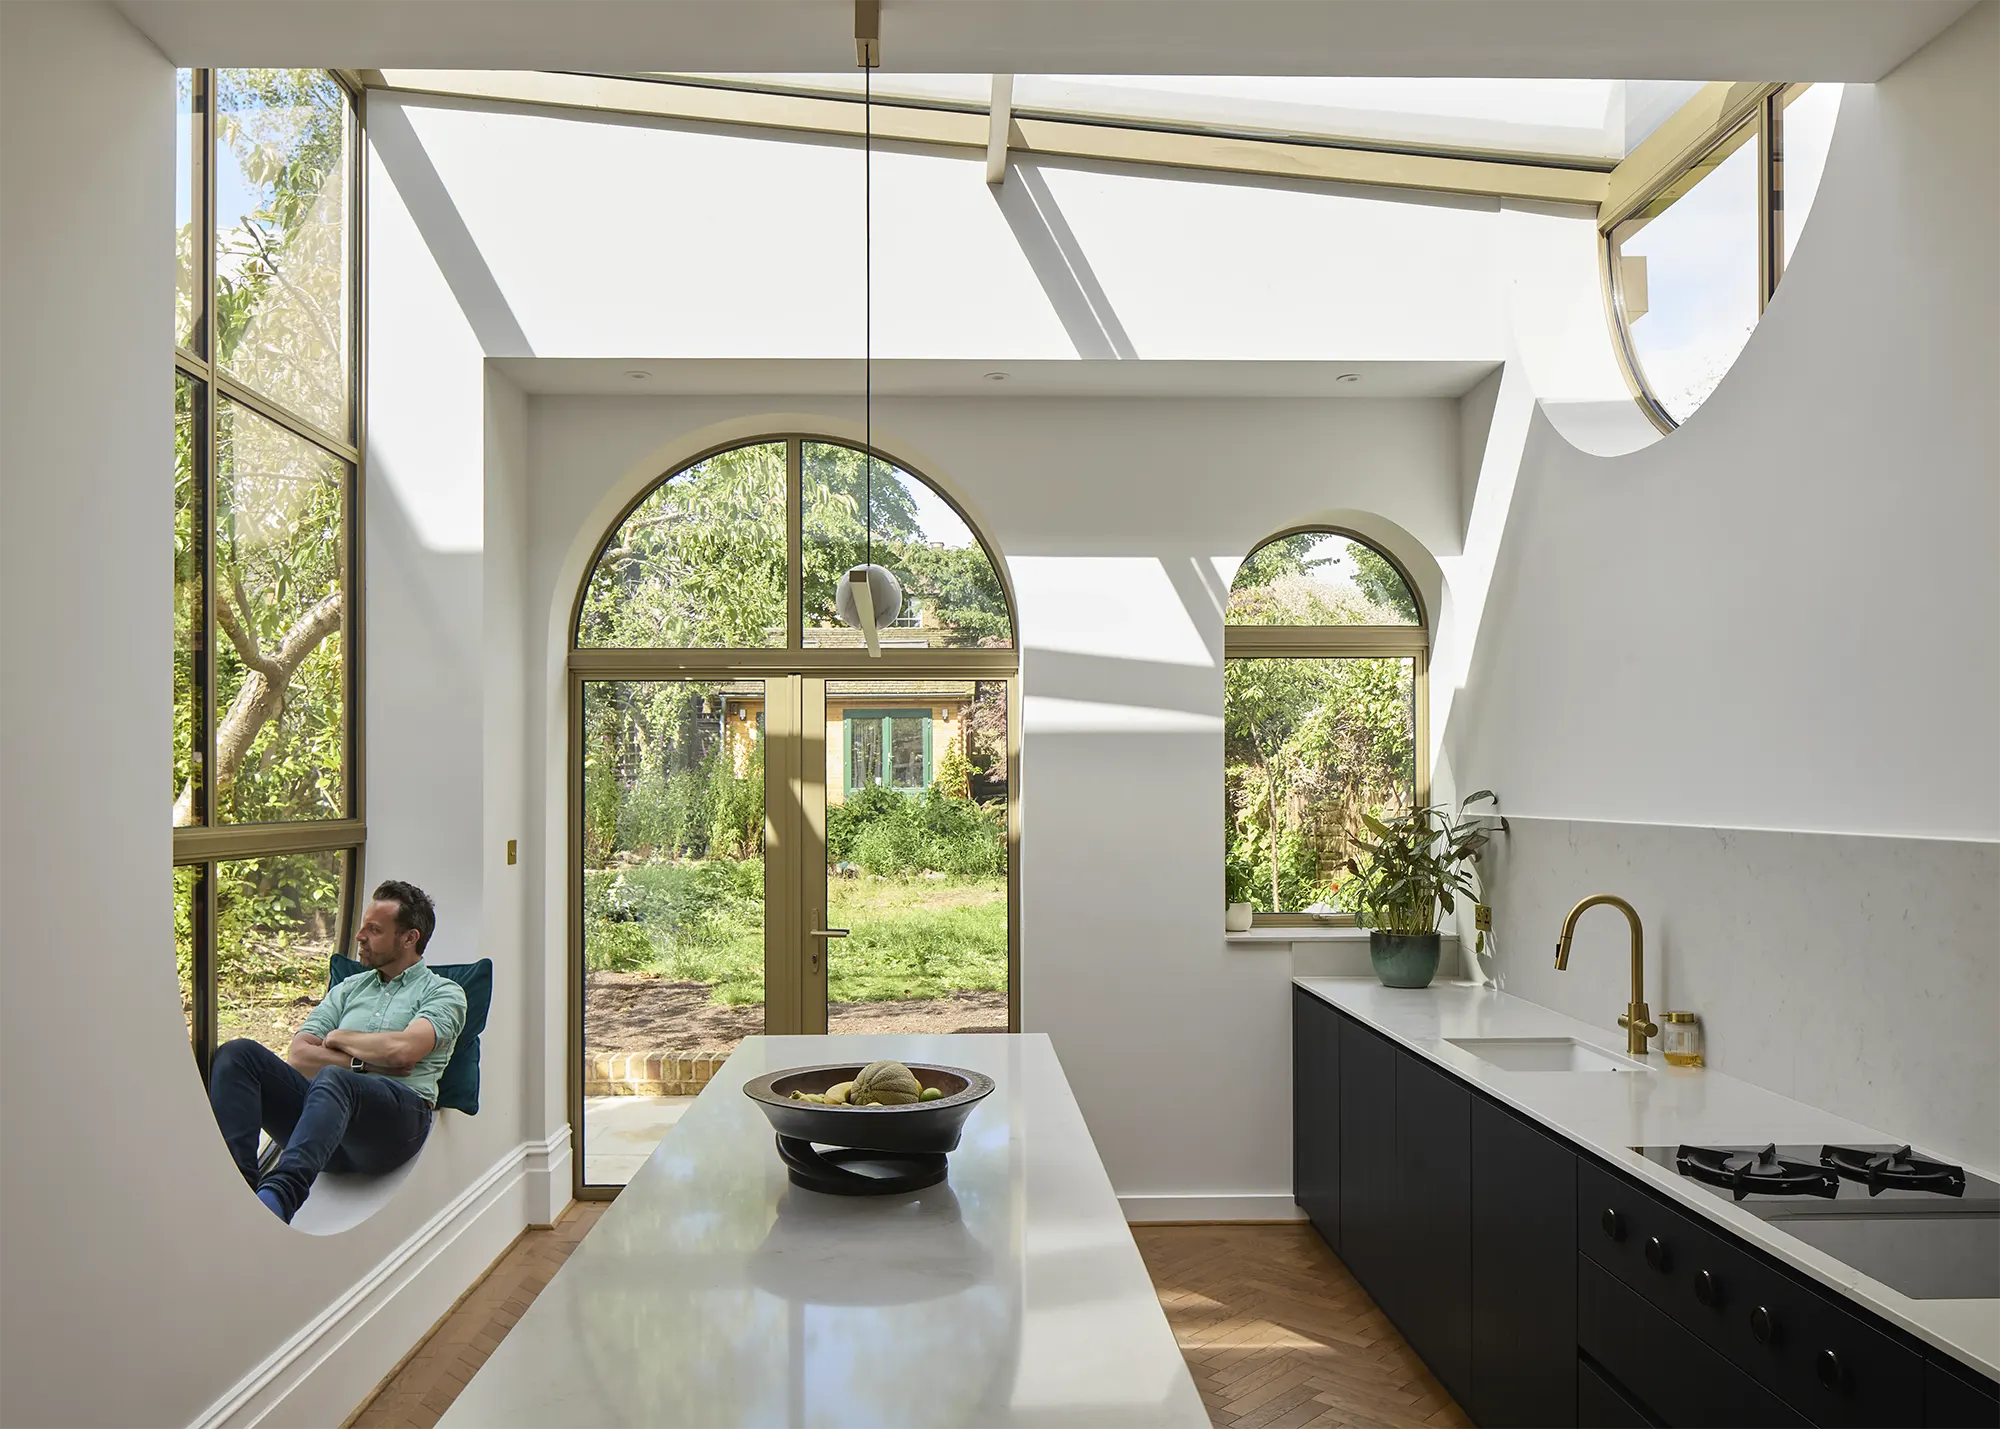
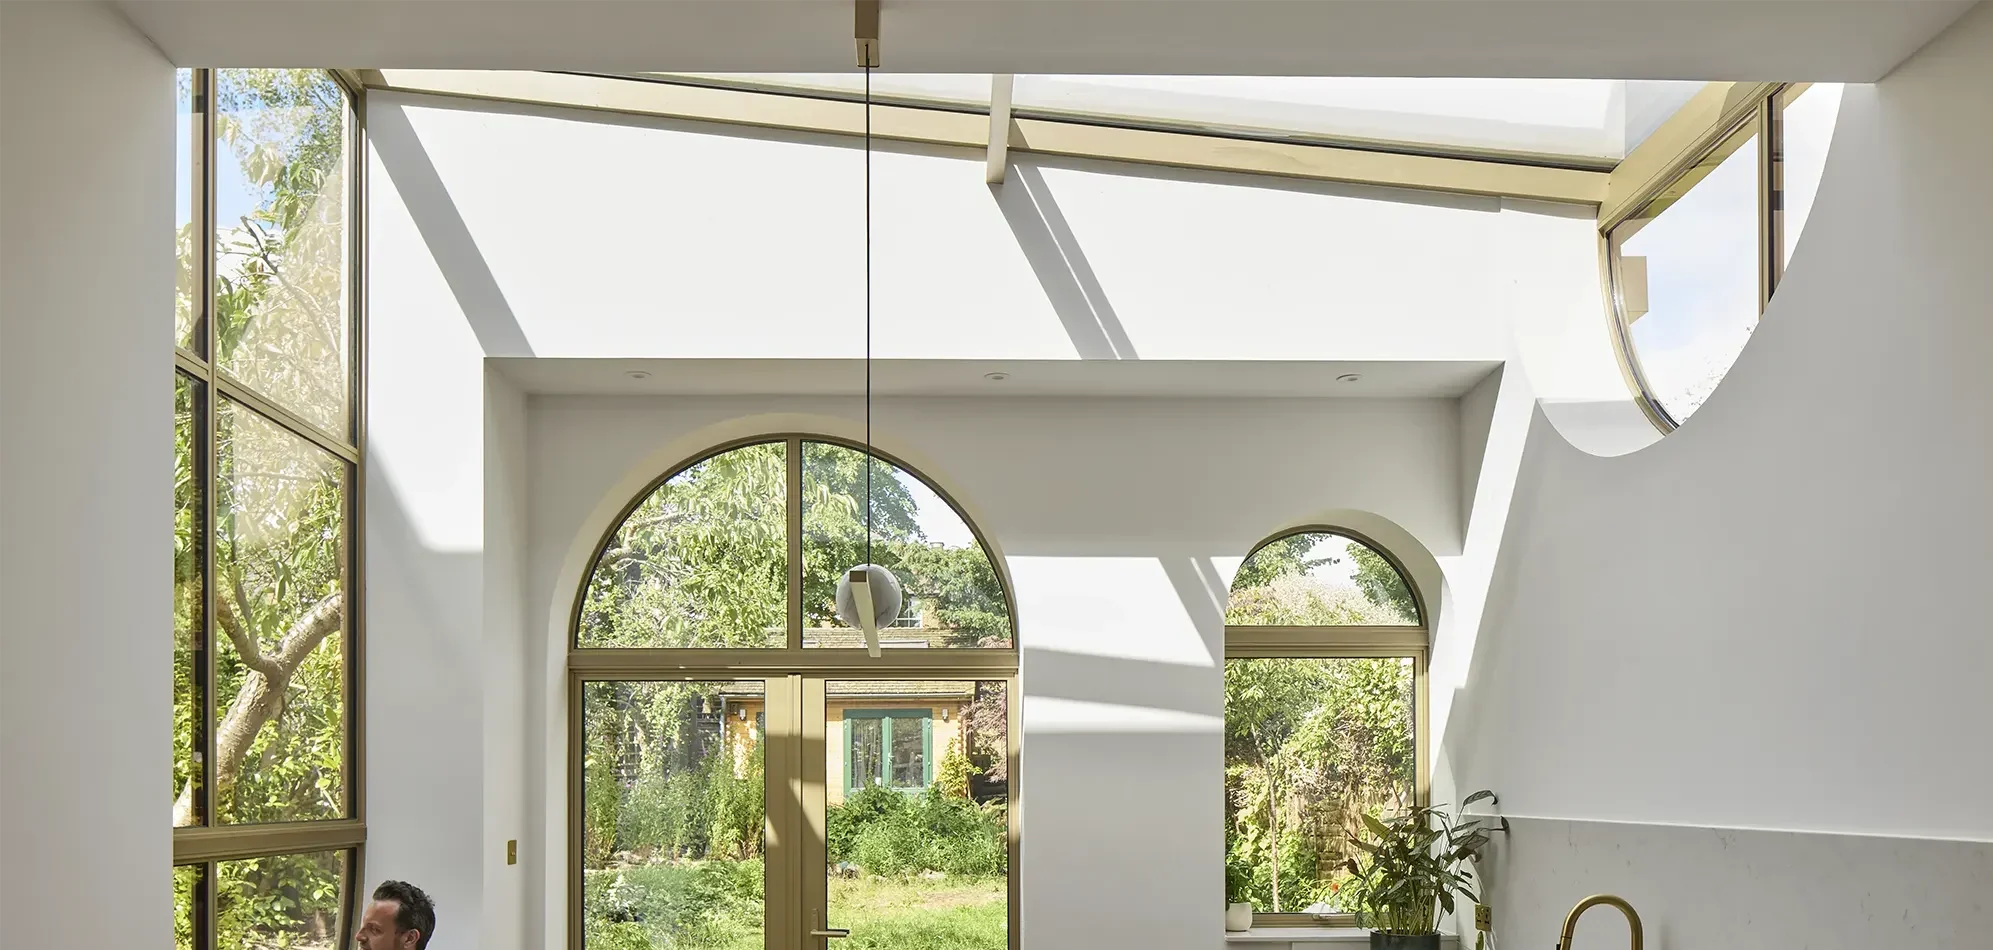
This kitchen extension to an Edwardian house, designed by Wellstudio Architecture, features a breathtaking up-and-over, inverted arched window that perfectly captures views of the sky. Photo: Chris Snook
Regular maintenance of flashings, seals and frames is also essential to prevent leaks and maintain insulation. Opening mechanisms should be checked regularly to ensure they function smoothly, particularly if automated.
How can you ensure privacy with overhead glazing on extensions?
While natural light is a valuable asset in any home design, excessive solar gains can lead to overheating, particularly in spaces that receive a lot of direct sunshine. Managing this effectively is crucial to ensuring year-round comfort. Solar control glazing can help. This features advanced coatings on the glass to reduce heat transmission, while still allowing plenty of daylight to filter into the space.
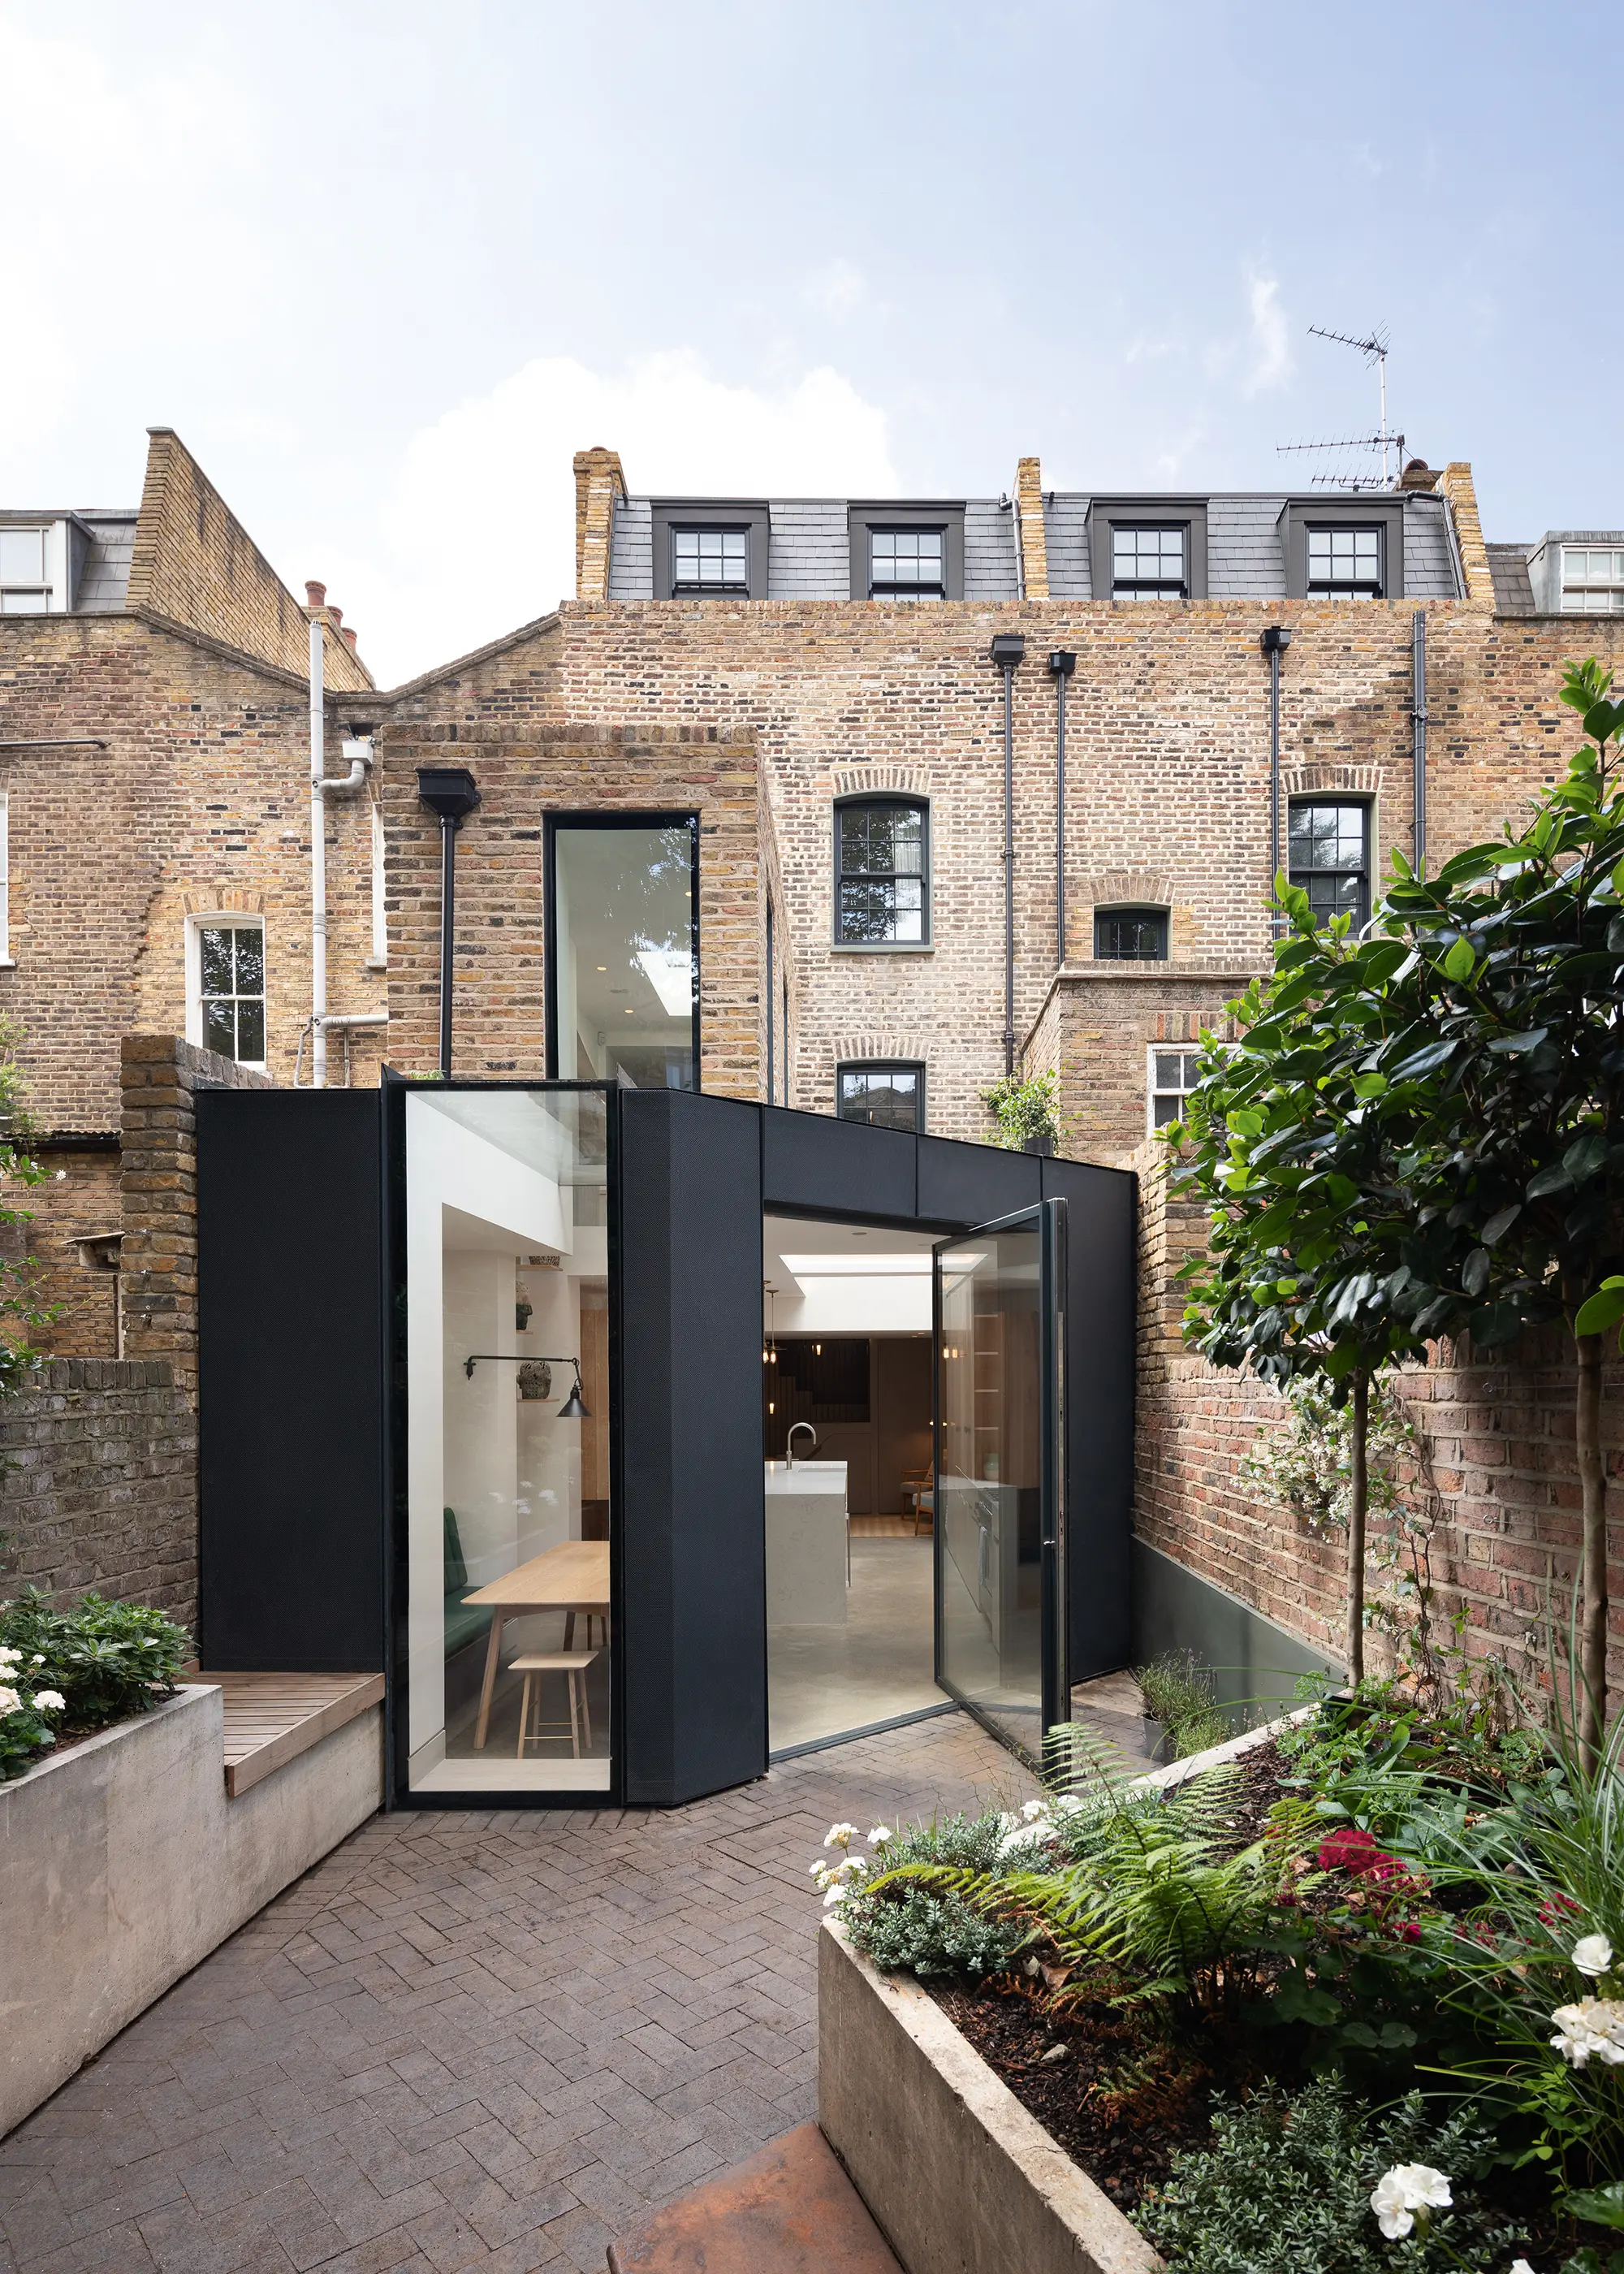
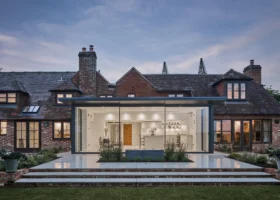
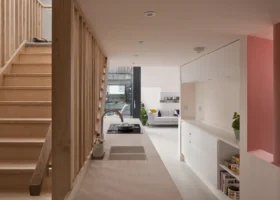
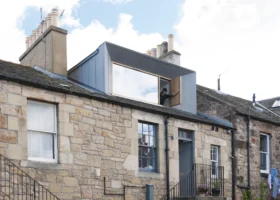
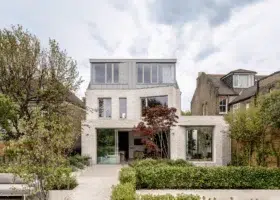
A clever angled extension, designed by Fraher & Findlay Architects, has brought a new, open feeling to this townhouse in London. The staircase has been relocated to the centre of the building to allow for maximum floor space and improved, dynamic living areas. Spectacular glazing wraps up from the ground floor and over the rear extension, making an eye-catching feature and light-filled home. Photo: Adam Scott
The orientation of your roof windows is another key factor – although you may not have full control over this aspect when extending . “Sometimes, the necessity for light or views in a particular location will determine the position of a rooflight, but this will be at odds with other considerations like heat gain or privacy,” says William. “Sand-blasting glass can block views to or from neighbours, while still allowing light where it’s needed, and integrated blinds can be concealed if the issues are intermittent.”
Additional measures, such as canopies, louvres and blinds can be used to regulate the amount of sunlight entering your extension. Automated internal blinds and automated smart glass options that tint in response to heat levels are also available for those looking to use smart tech to enhance convenience.
How much does overhead glazing for extensions cost?
So, how much does overhead glazing cost for an extension project? Frame material, opening configuration, motorisation, glass type and coatings will all affect the overall cost for your ideal rooflight or lantern. Depending on these key drivers, units can cost anywhere from a few hundred pounds to easily running into the £1,000s for large, bespoke, high-spec solutions; or for rooflights that provide roof access.
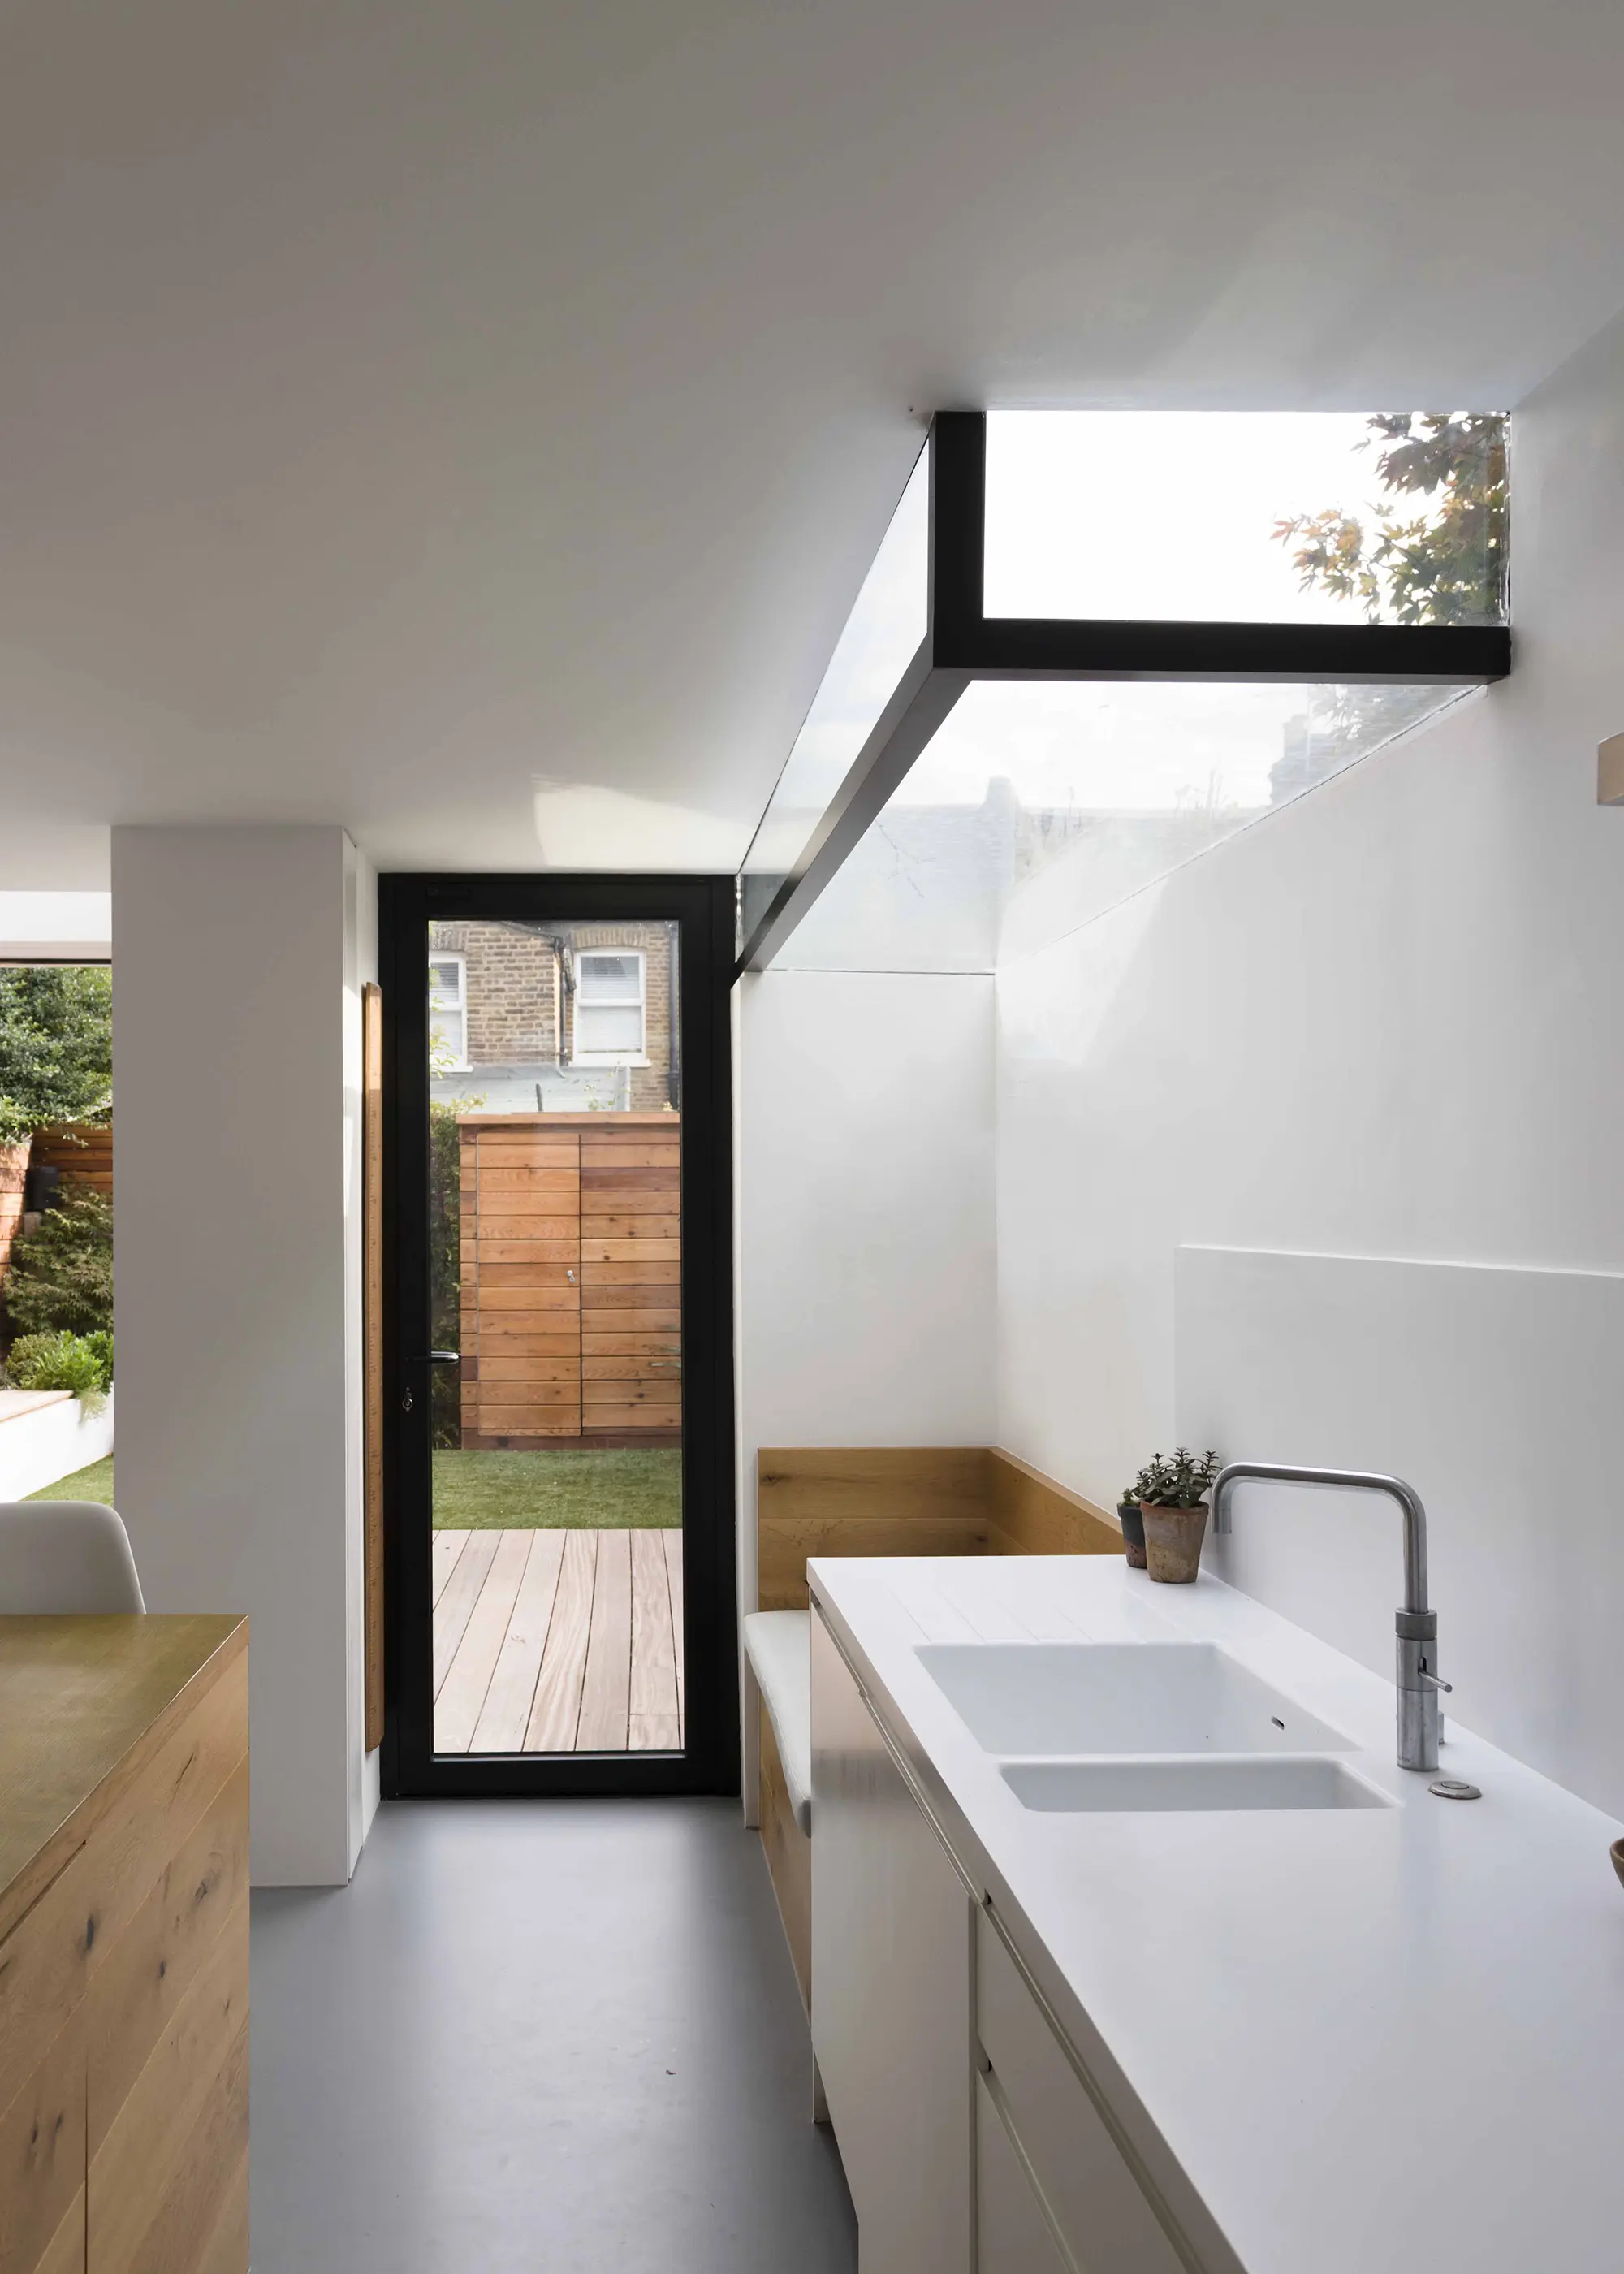
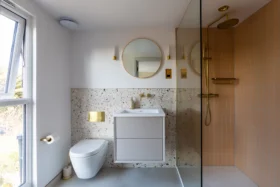
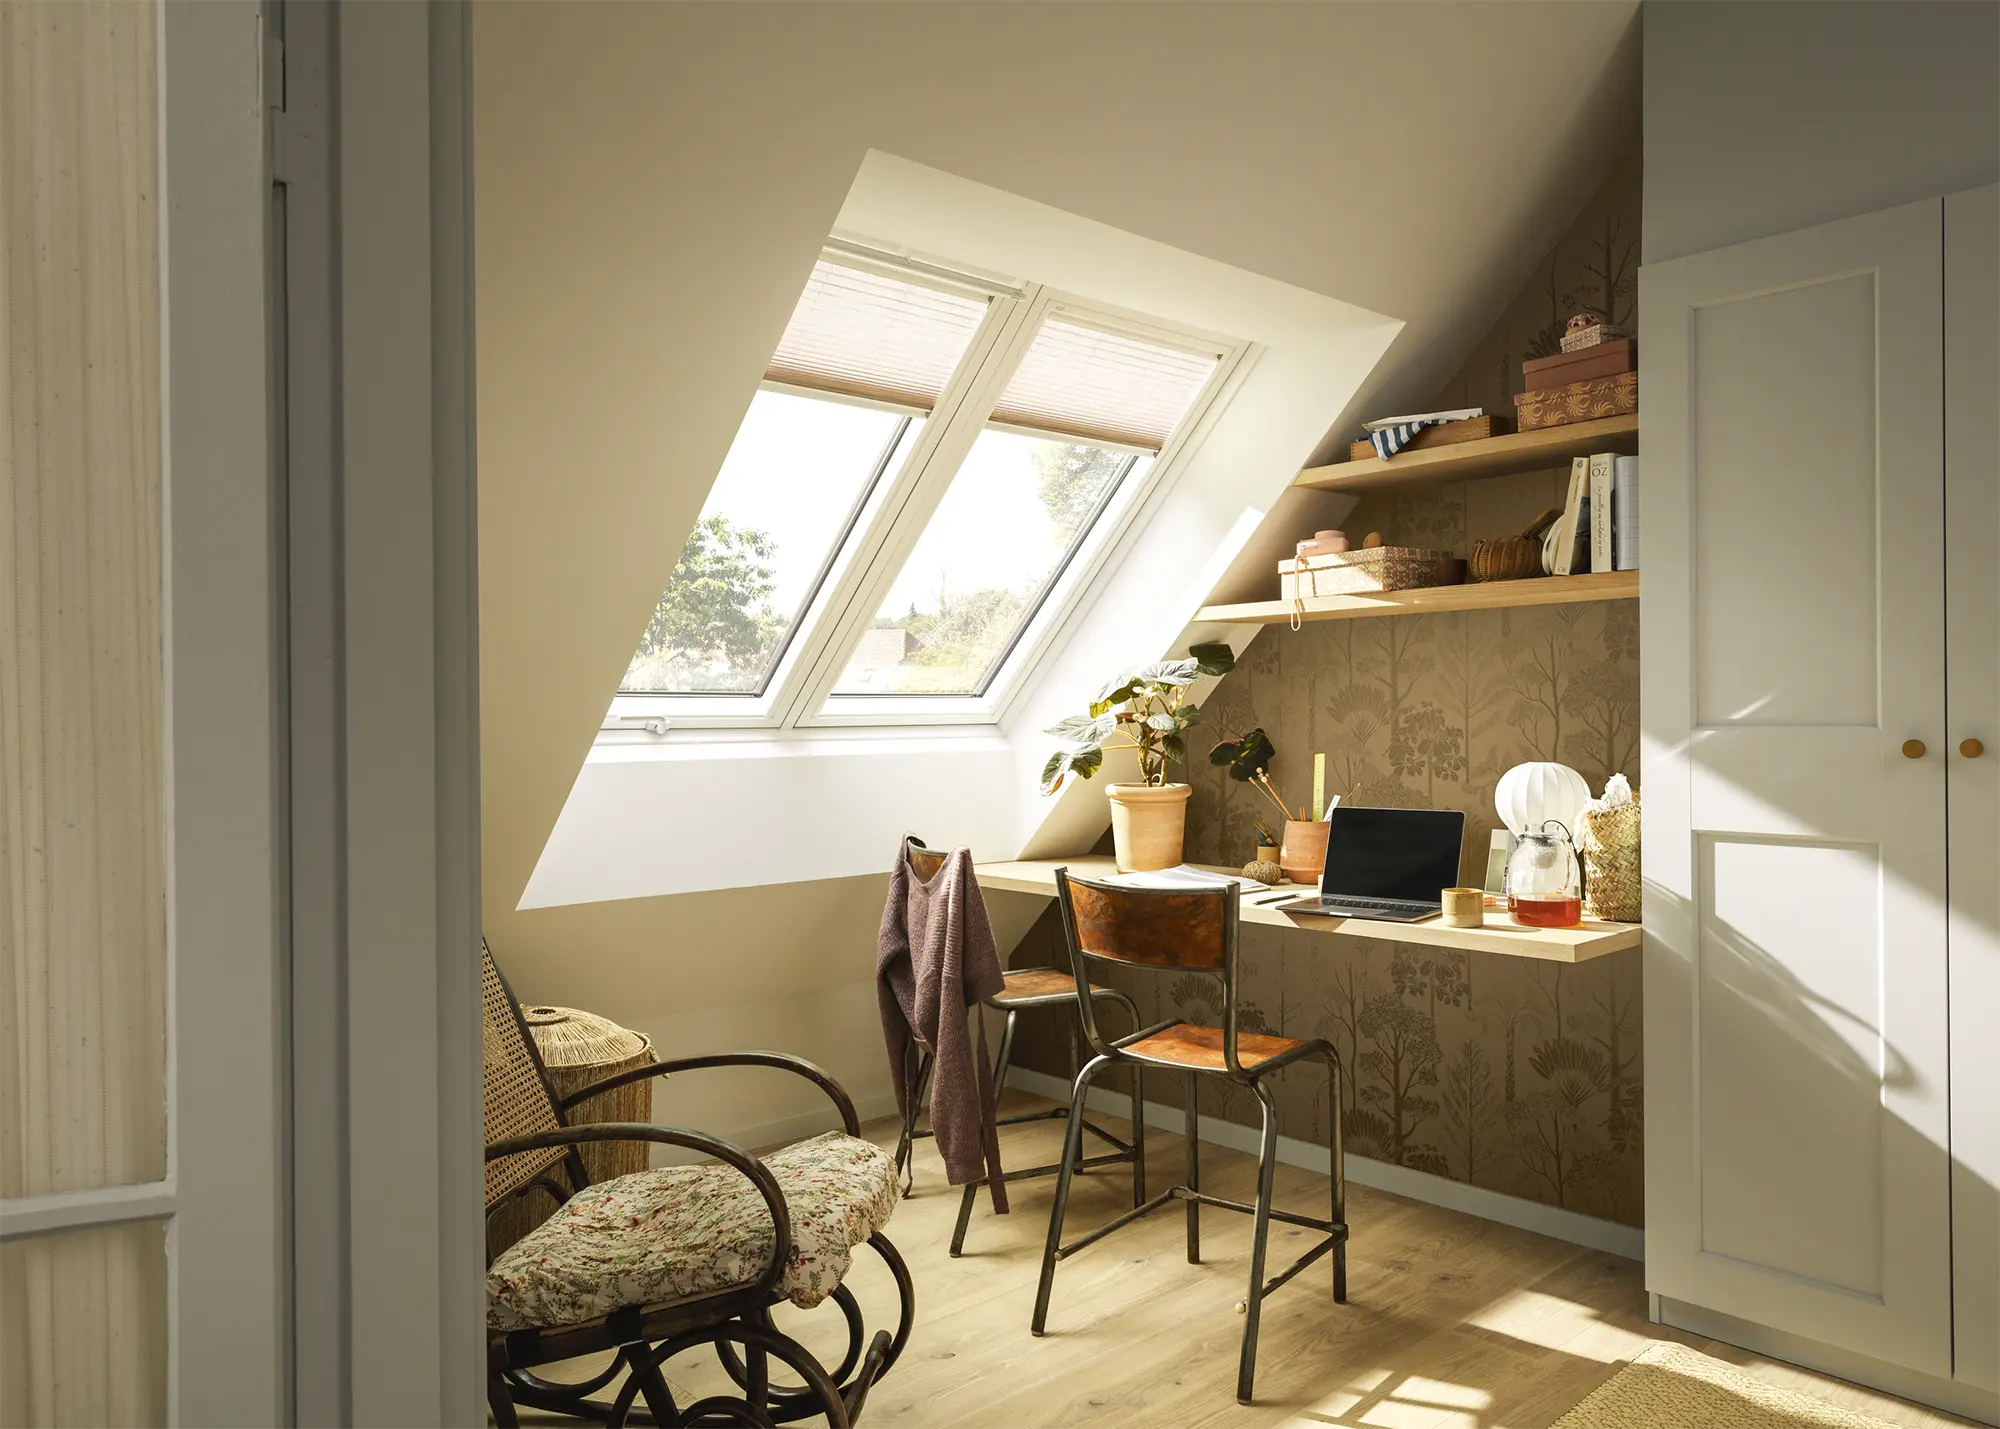
Designed by William Tozer Associates, this sleek box rooflight neatly highlights a discreet seating zone in the open-plan extension, while bringing natural brightness into the task zone around the sink
For example, a 550mm x 780mm centre pivot pitched rooflight from Keylite, in clear lacquered pine with hi-therm glazing and manual opening, starts from £406.80 (including VAT but excluding installation). For the largest size available in this same style, 1,340mm x 1,400mm, the base price increases to £817.20.
Taking that 550 x 780mm unit with all of the same features, upgrading to triple-glazing puts the price at £670.80; while opting for electric opening rather than manual will cost £914.40. Adding an electric integral blind to the spec brings the price up to £1,220.40.
For a standard rooflight, installation should cost a few hundred pounds on top of the unit price. Expect that figure to rise significantly for large or complex installs, especially those that need lifting equipment and more experienced labour to ensure a quality result.
For roof lanterns, you can find good-quality, smaller products starting at around £500. These will suit compact spaces that are after a generous boost of daylight. “Our Slimline roof lantern starts at £473 (+ VAT) for a 400mm x 500mm lantern with toughened, double-glazing and jet-black frame,” says Scott Nicholas, owner of Roof Maker.
Building an extension FAQs

How easy is it to get consent for an extension to a listed building?
Listed building consent (LBC) covers an entire building, its interior and its surroundings, so most work on a listed building requires listed building consent. For homes that aren’t listed, you don’t need planning permission to change the internal layout or add a bathroom. However, with a listed building, even moving an internal door requires consent. Repairs don’t usually require consent, as long as they are completed using the same materials as the existing feature.
The application process for LBC is similar to a regular planning application, but it can require a lot more information to be submitted, included very detailed drawings. We find some conservation officers are more open to changes to a listed building than others, so it can be a bit of a lottery in terms of how many changes you can actually make.
Can my neighbours reject my extension plans?
Neighbours can’t reject your extension plans, only the planning officer can do that, but they can object if they think they are going to lose daylight or privacy, or they don’t like the extension’s design, for example. It’s wise to speak to your neighbours before you make a planning application for an extension. Show them your extension plans, design ideas, listen to any concerns they may have and try and address these before you make a submission.
Opening a clear line of communication will usually prevent neighbours making objections when you make your submission, meaning you are more likely to gain approval smoothly. Objections are weighed up by the planning officer and an objection doesn’t automatically lead to refusal, if the officer doesn’t think the objection is valid.
Do I need to pay a Community Infrastructure Levy (CIL) on a house extension?
You don’t have to pay CIL unless you are building a very large extension of over 100m². If you are rebuilding a house, then the rules are different, and you may have to pay CIL if the floor area is increased or if there is any change of use in a conversion. There are exemptions for self builders, though. The Planning Portal gives more information on CIL and when it might be applicable.
What hidden costs should I be aware of when undertaking a home extension?
Discovering structural defects you weren’t aware of can impact costs. Existing shallow foundations which need underpinning, asbestos, and dry rot etc can have a big impact on your budget. Try and investigate the existing building as best you can before you start the house extension – dig trial pits and have an asbestos survey done. The more you know at the outset, the less likely you are to encounter additional works that could impact your overall extension costs.
How long will my extension take to build?
Loft extensions and conversions can take around 16 weeks, while large projects with a ground-floor extension six to seven months, and complex whole-house refurbishments with an extension take up to a year. Living in the house while work is going on will slow things down (unless you are completing a loft conversion or extension with the structure above ceiling level). Not making decisions or choosing fixtures and fittings in a timely manner will also affect progress.
Erika Chaffey

You may be interested in