Estimate your project costs instantly with Build It's interactive self-build cost calculator
Calculate NowGet an accurate, detailed cost breakdown of your project
Submit plans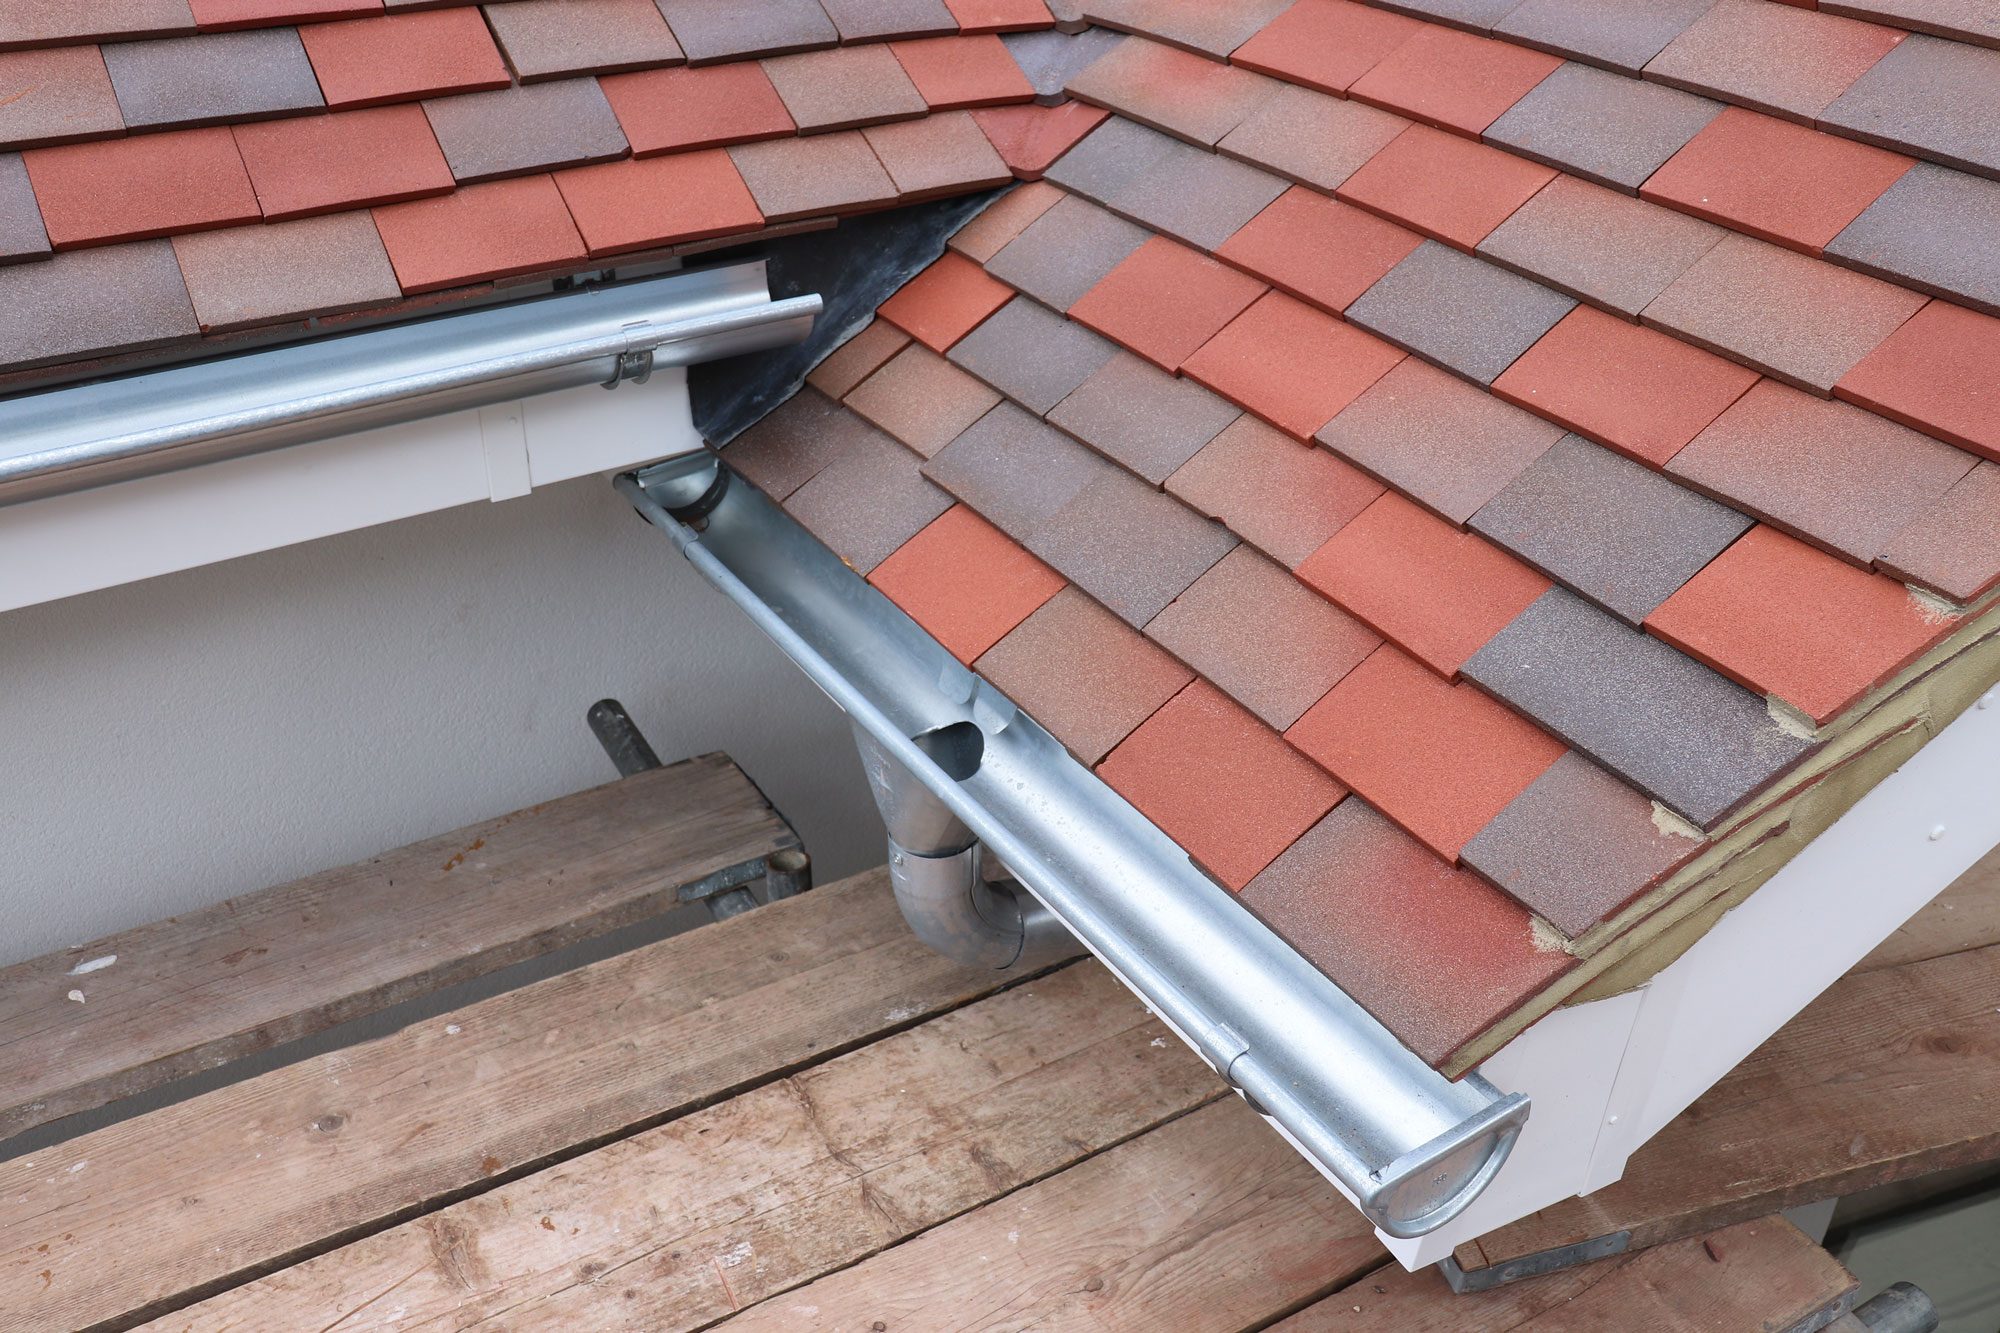

Once you’ve got your roof tiles on, it feels like the hard work is over with this section of your build – but there are plenty of decisions to come. Some, such as the type and specification of guttering, are pretty obvious (although bear in mind that your architect’s drawings are not the same as a fully realised drainage plan). Others – the exact detail of how to box in the ends of a gable roof, for instance – probably need to be worked out on site.
We want to get these elements right to complement the fantastic look of the Dreadnought roof tiles. So we’ve partnered with Rainclear Systems, a leading UK supplier of metal rainwater and drainage solutions, for this part of our project.
They provided just the kind of customer service we were looking for, steering us towards good quality solutions and working with us to ensure we ordered the right products in the right quantities.
Peter from Thames Valley Guttering Services prefers to fit the ventilation at the fascia, rather than the soffit, so it’s more hidden and you get a really clean finish when you look up at the roof from ground level.
Peter McKibbin from Thames Valley Guttering Services is taking care of the installation (including sourcing and fitting the roofline products).
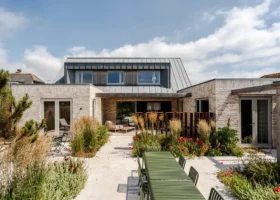
They may not be the most glamorous part of a finished home, but the soffits, fascias and bargeboards fitted to the outer edges of your roof play an important role in protecting it from damage. Combined with the adjoining wall claddings, these elements are collectively known as the roofline.
Fascias are fixed vertically at the eaves of a roof to close the gaps between the rafters, while soffits horizontally below to hide the underside of the roof structure. Behind the fascia is usually a timber fascia board to provide a fixing point for rainwater goods.
The bargeboard is the finishing section at gable ends – and, as it doesn’t get covered over with the guttering, it can make or break the finished look of a house.
These components act as a physical weatherproofing barrier and enable ventilation – ensuring any moisture that does get past the first line of defence is evaporated off. They also provide a handy guide for where your render and other external finishes need to come to. So you could think of them as decorative trims with a practical purpose.
By and large, soffits, fascias and bargeboards will be doing their job most effectively if you barely notice they’re there. That said, some homeowners do seek to make a feature of them.
The risk here is your eye could be drawn to the depth and dominance of the roof, rather than the overall aesthetic of the house. We’ve seen a few instances of exactly this issue over the years, and that helped to persuade us a subtler approach was needed for the Build It House.
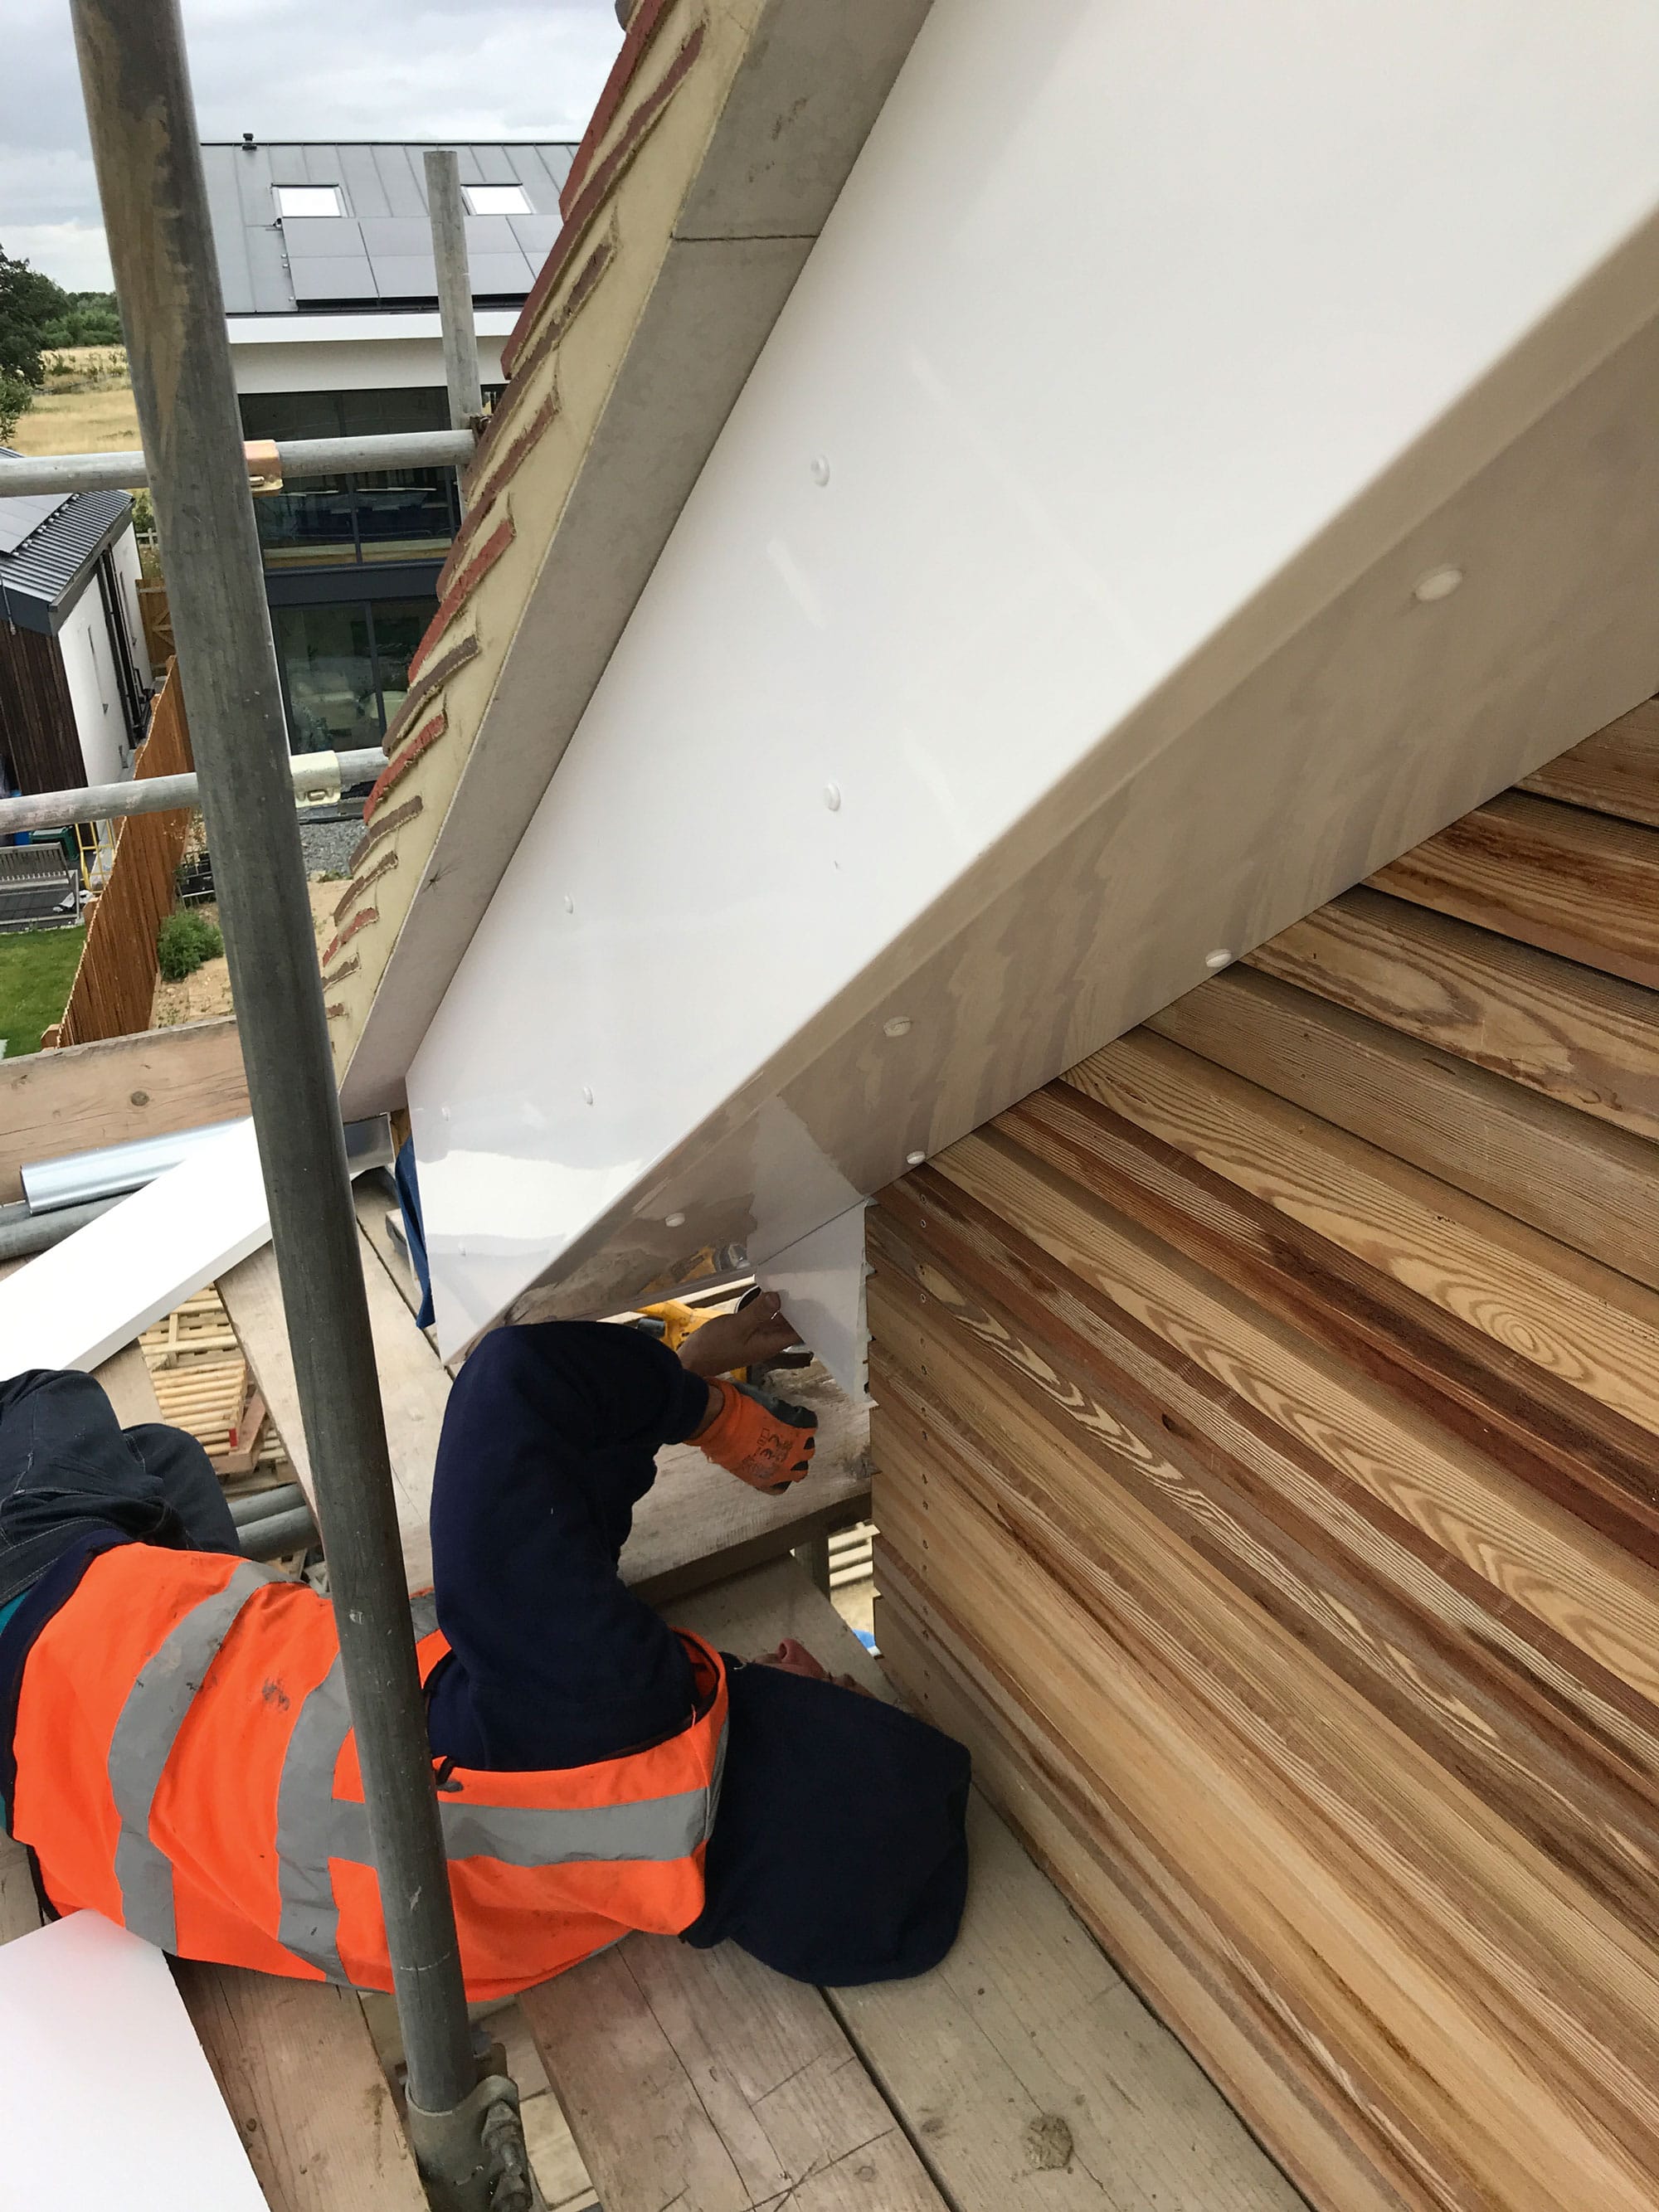
So in the early stages of the project, when Scott (our main contractor from Drewett and Hunt) and I briefly spoke about the best options during a preliminary visit from the roof tilers, I mentioned that I’d assumed we’d go for understated white PVCu products. They’re cost-effective, quick and easy to install and – probably most importantly, given how high up the roofline components are – ultra low-maintenance.
When we settled on galvanised steel for our rainwater goods (more on this in a moment), it seemed sensible to take a moment to revisit that initial decision. For a good few weeks we investigated various metal options, which would offer a similarly maintenance-free solution in a sleeker profile.
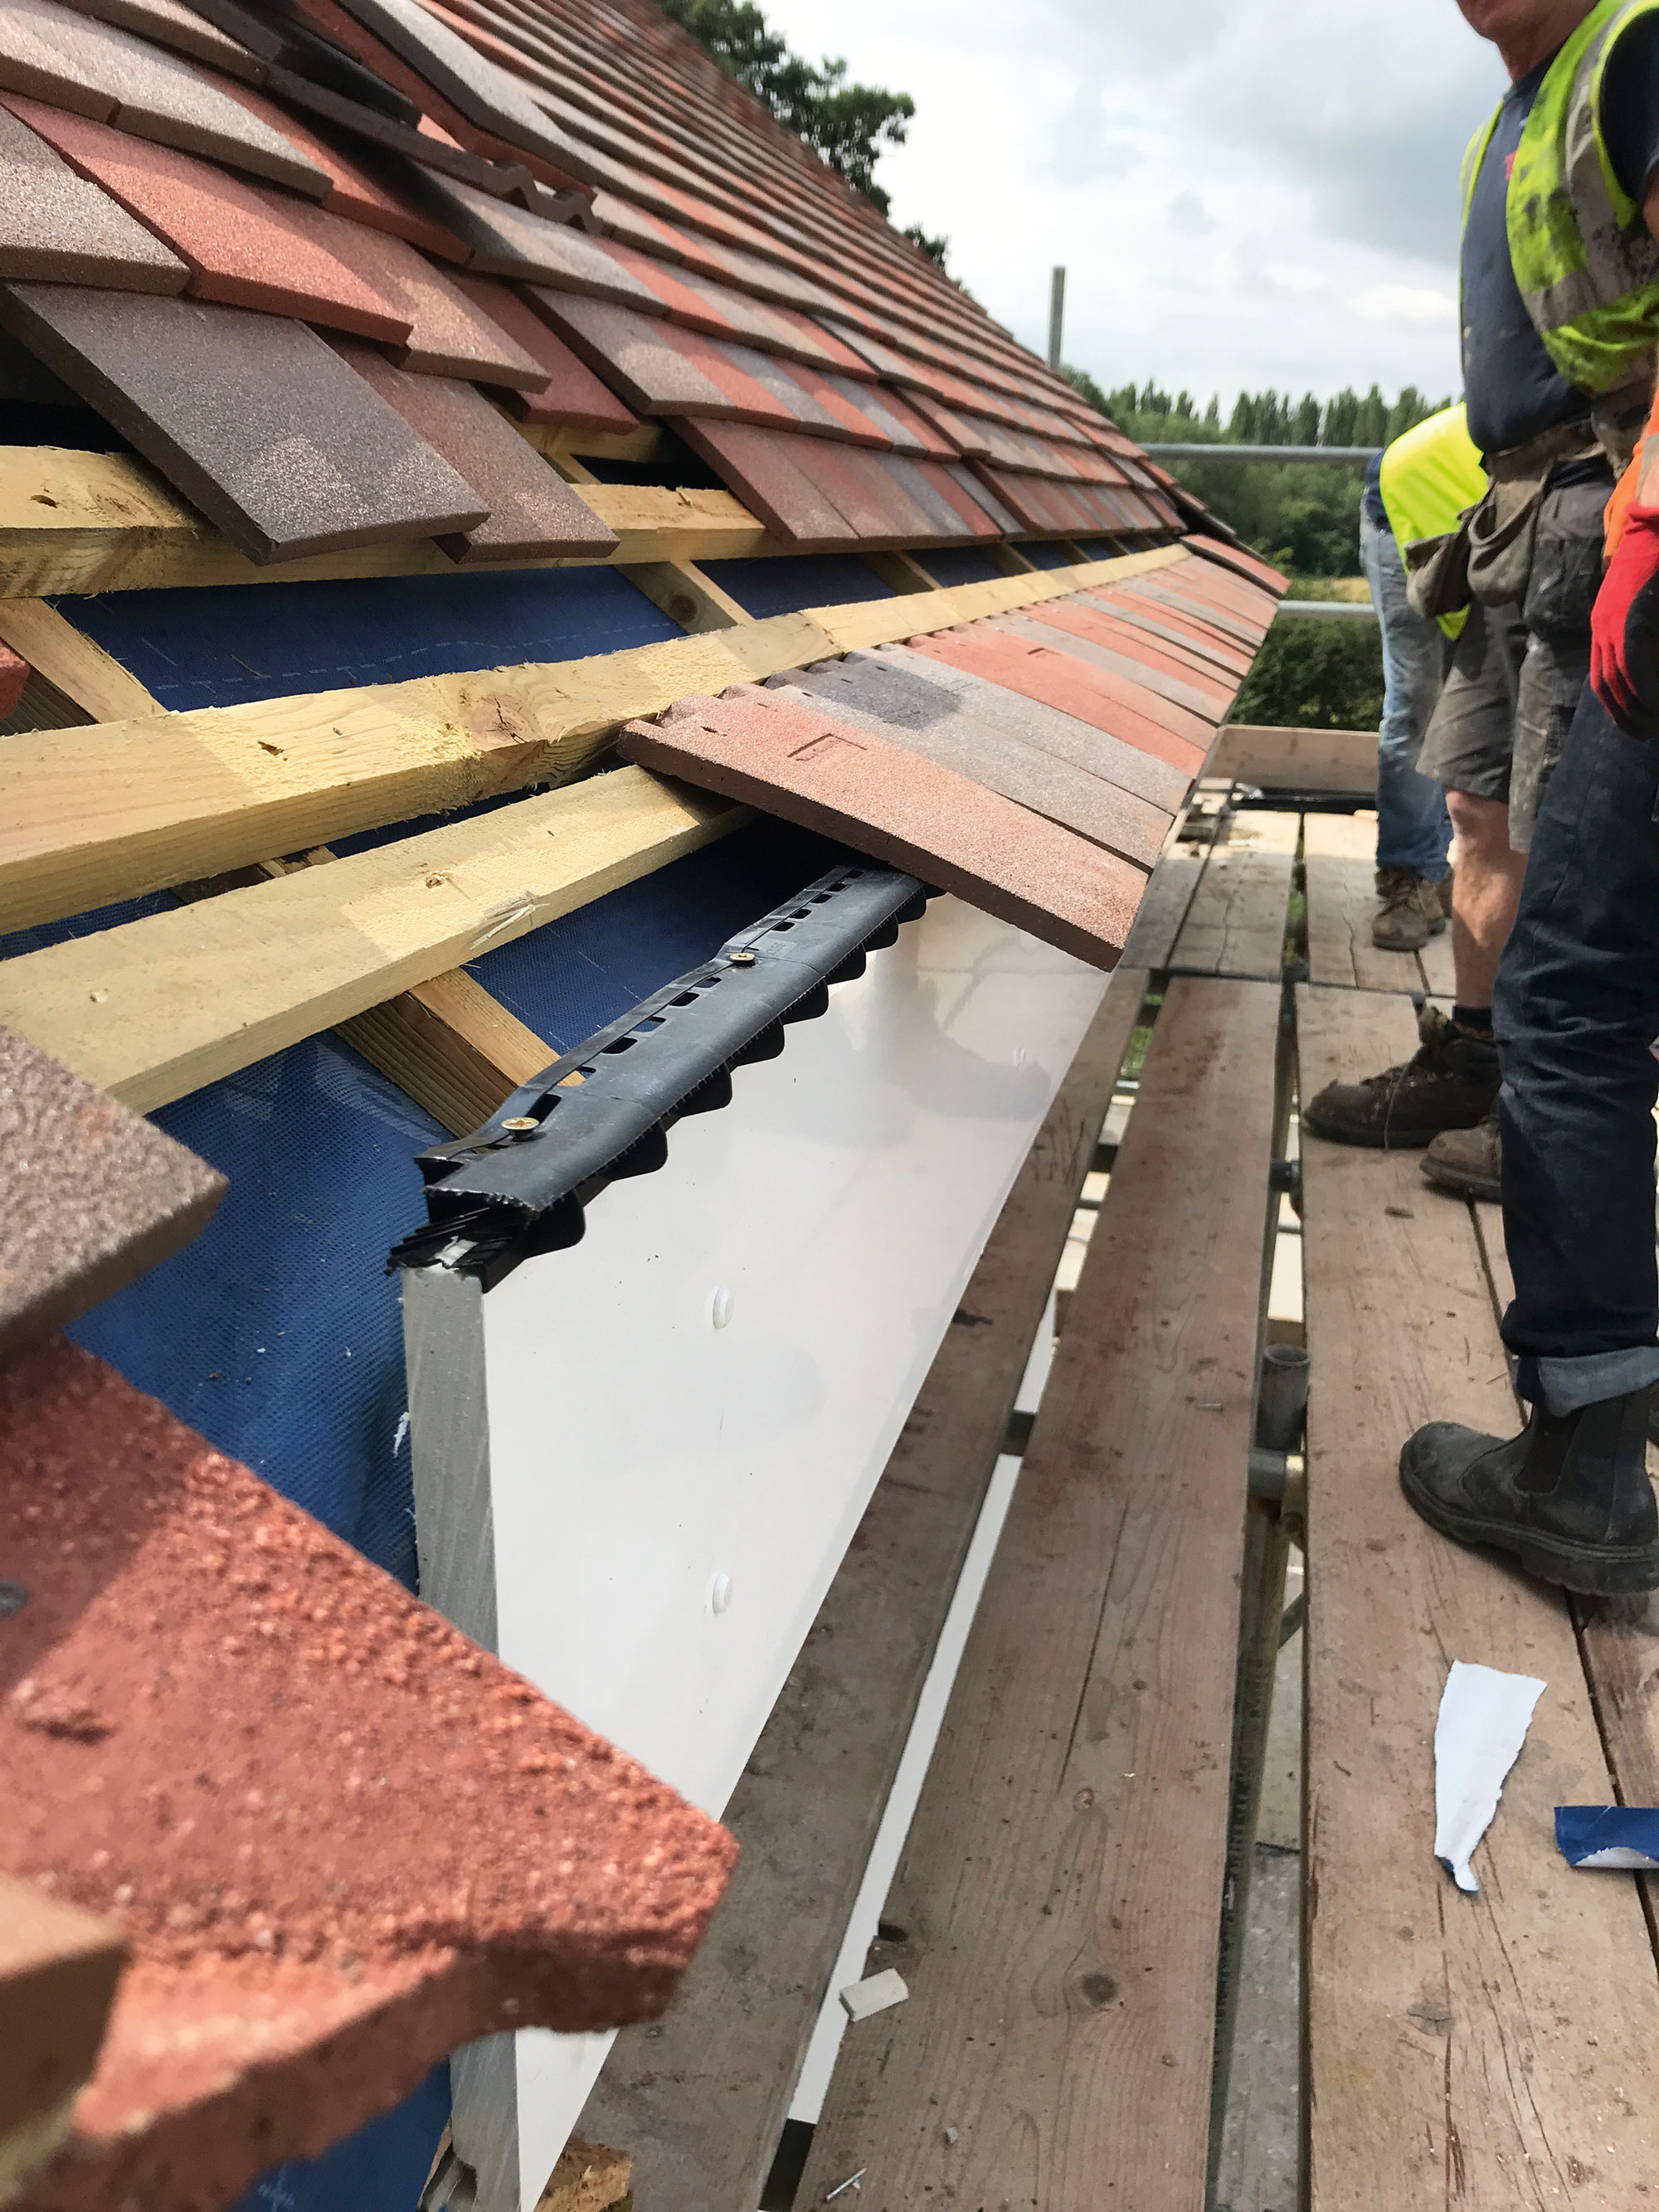
Getting the box ends right is the trickiest detail of the roofline install – so be prepared to talk it through in detail with your contractor
But it turns out the depth of the Education House’s roof overhangs is just too great for off-the-shelf options; and we couldn’t afford the three week lead time to have them manufactured (nor the difficulty of cutting them on site).
So we ended up going back to white PVCu – and I have to say I’m pleased with the results. We’ll see the full effect when the scaffold comes down – but to my eye, it meets our goal of hiding a deep roof profile while remaining discrete. Peter has done a great job and was very communicative, which was valuable given that we have a lot of highly visible box end details at the bottom of the rakes (the sloped sides of the gables).
We need these to look ‘meant’, as seemingly small issues such as how the fascia and claddings interact here can have a surprising effect on the overall aesthetic.
This is another of those decisions that often gets overlooked during the early design phases, but has a major visual impact on a finished house. We probably first realised just how important it was when we started looking at samples to understand how the window frames, cladding, render and roof tiles would all interacted.
This helped us visualise how the blend of products can completely change the character – and apply that thinking to other areas. For instance, should the guttering and downpipes pop out in contrast or blend in?
We went through a raft of ideas. At one point, rain chains were mentioned, but our architects weren’t too keen as they can be overwhelmed by heavy rainfall. One thing we did know was that we wanted to steer clear of plastic for this element.
It works well for the roofline, but PVCu guttering – especially the cheaper stuff – has a habit of expanding and contracting due to thermal movement (which can be noisy and will ultimately lead to it falling apart). So for this particular application, it doesn’t offer the kind of lifespan we want.
Our key considerations were to find something that offered durability, minimal maintenance and an attractive aesthetic at an affordable price point for self builders. And that’s when a conversation with Rainclear led us towards galvanised steel (in a half-round profile).
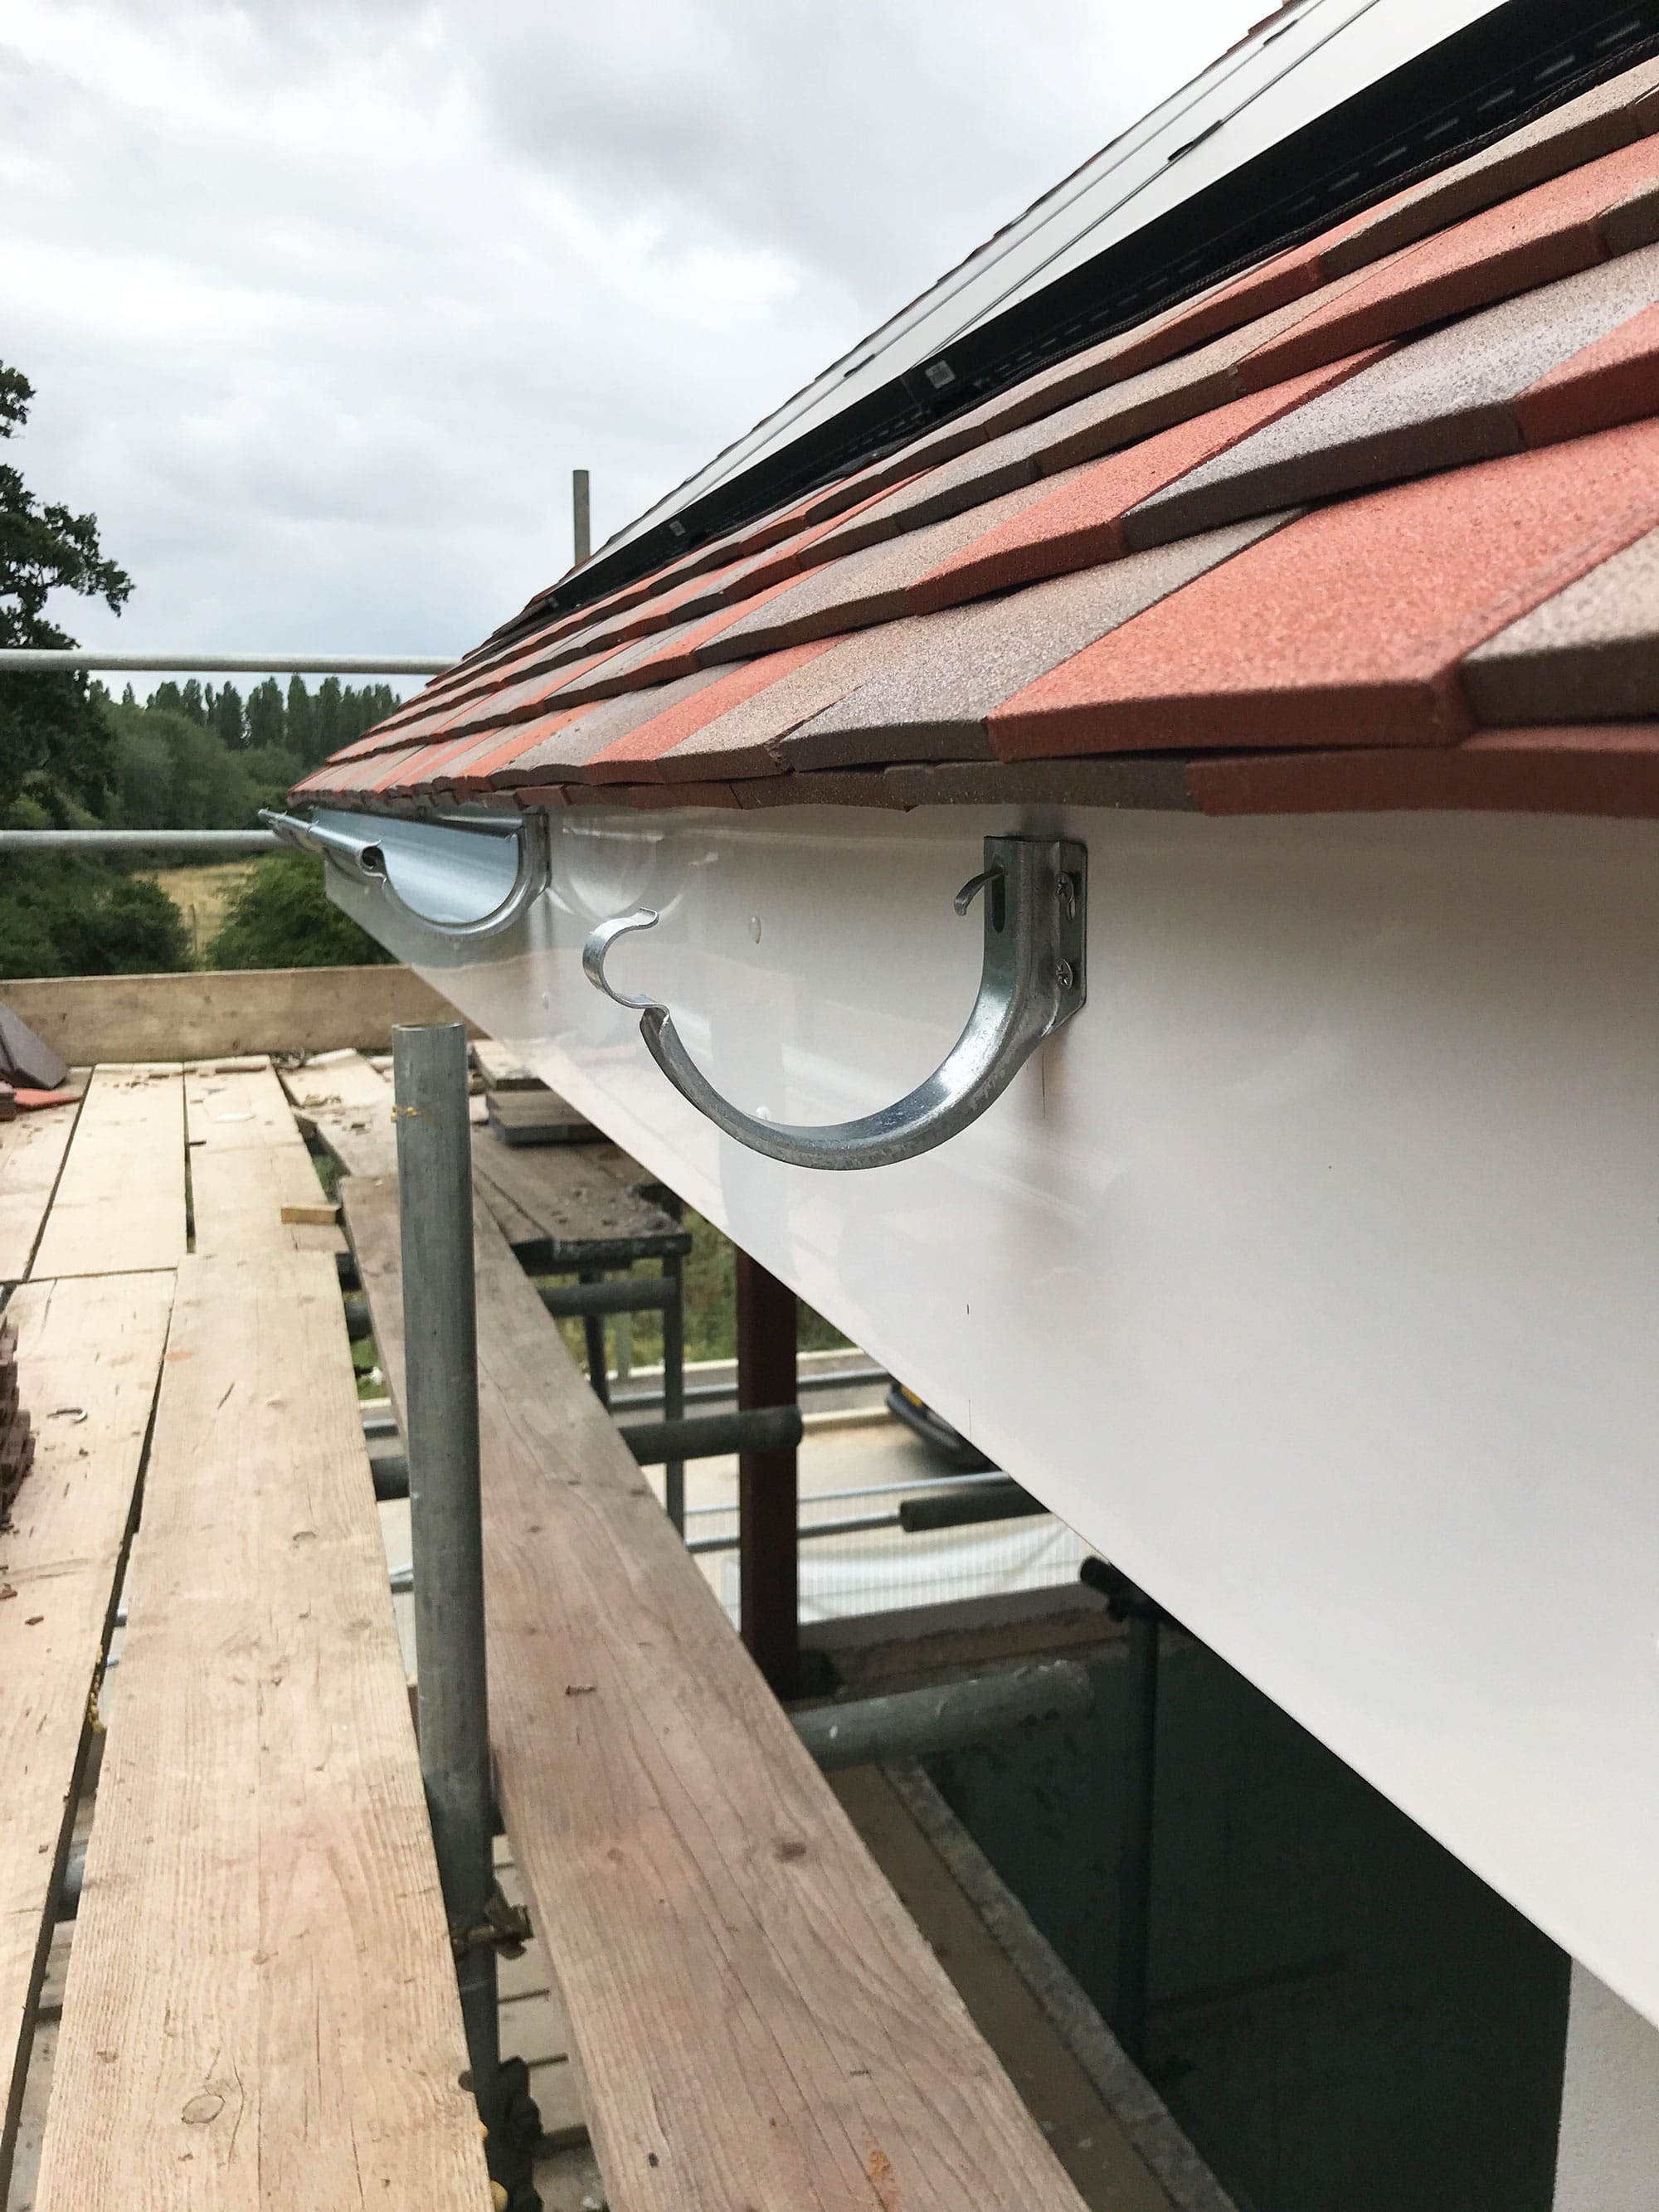
The Infinity system is simple to install, with dedicated brackets to suit the gutter size and profile.
Because it uses a bonded zinc coating, rather than being polyester painted, there’s not really anything that can go wrong with it. The finish will never fade or peel off. What’s more, Rainclear are really transparent about pricing.
You can literally build your system on the website and get an immediate quote – or get in touch with the team to discuss your requirements in detail and get a full component and cost breakdown to meet the expected rainfall volumes in your area.
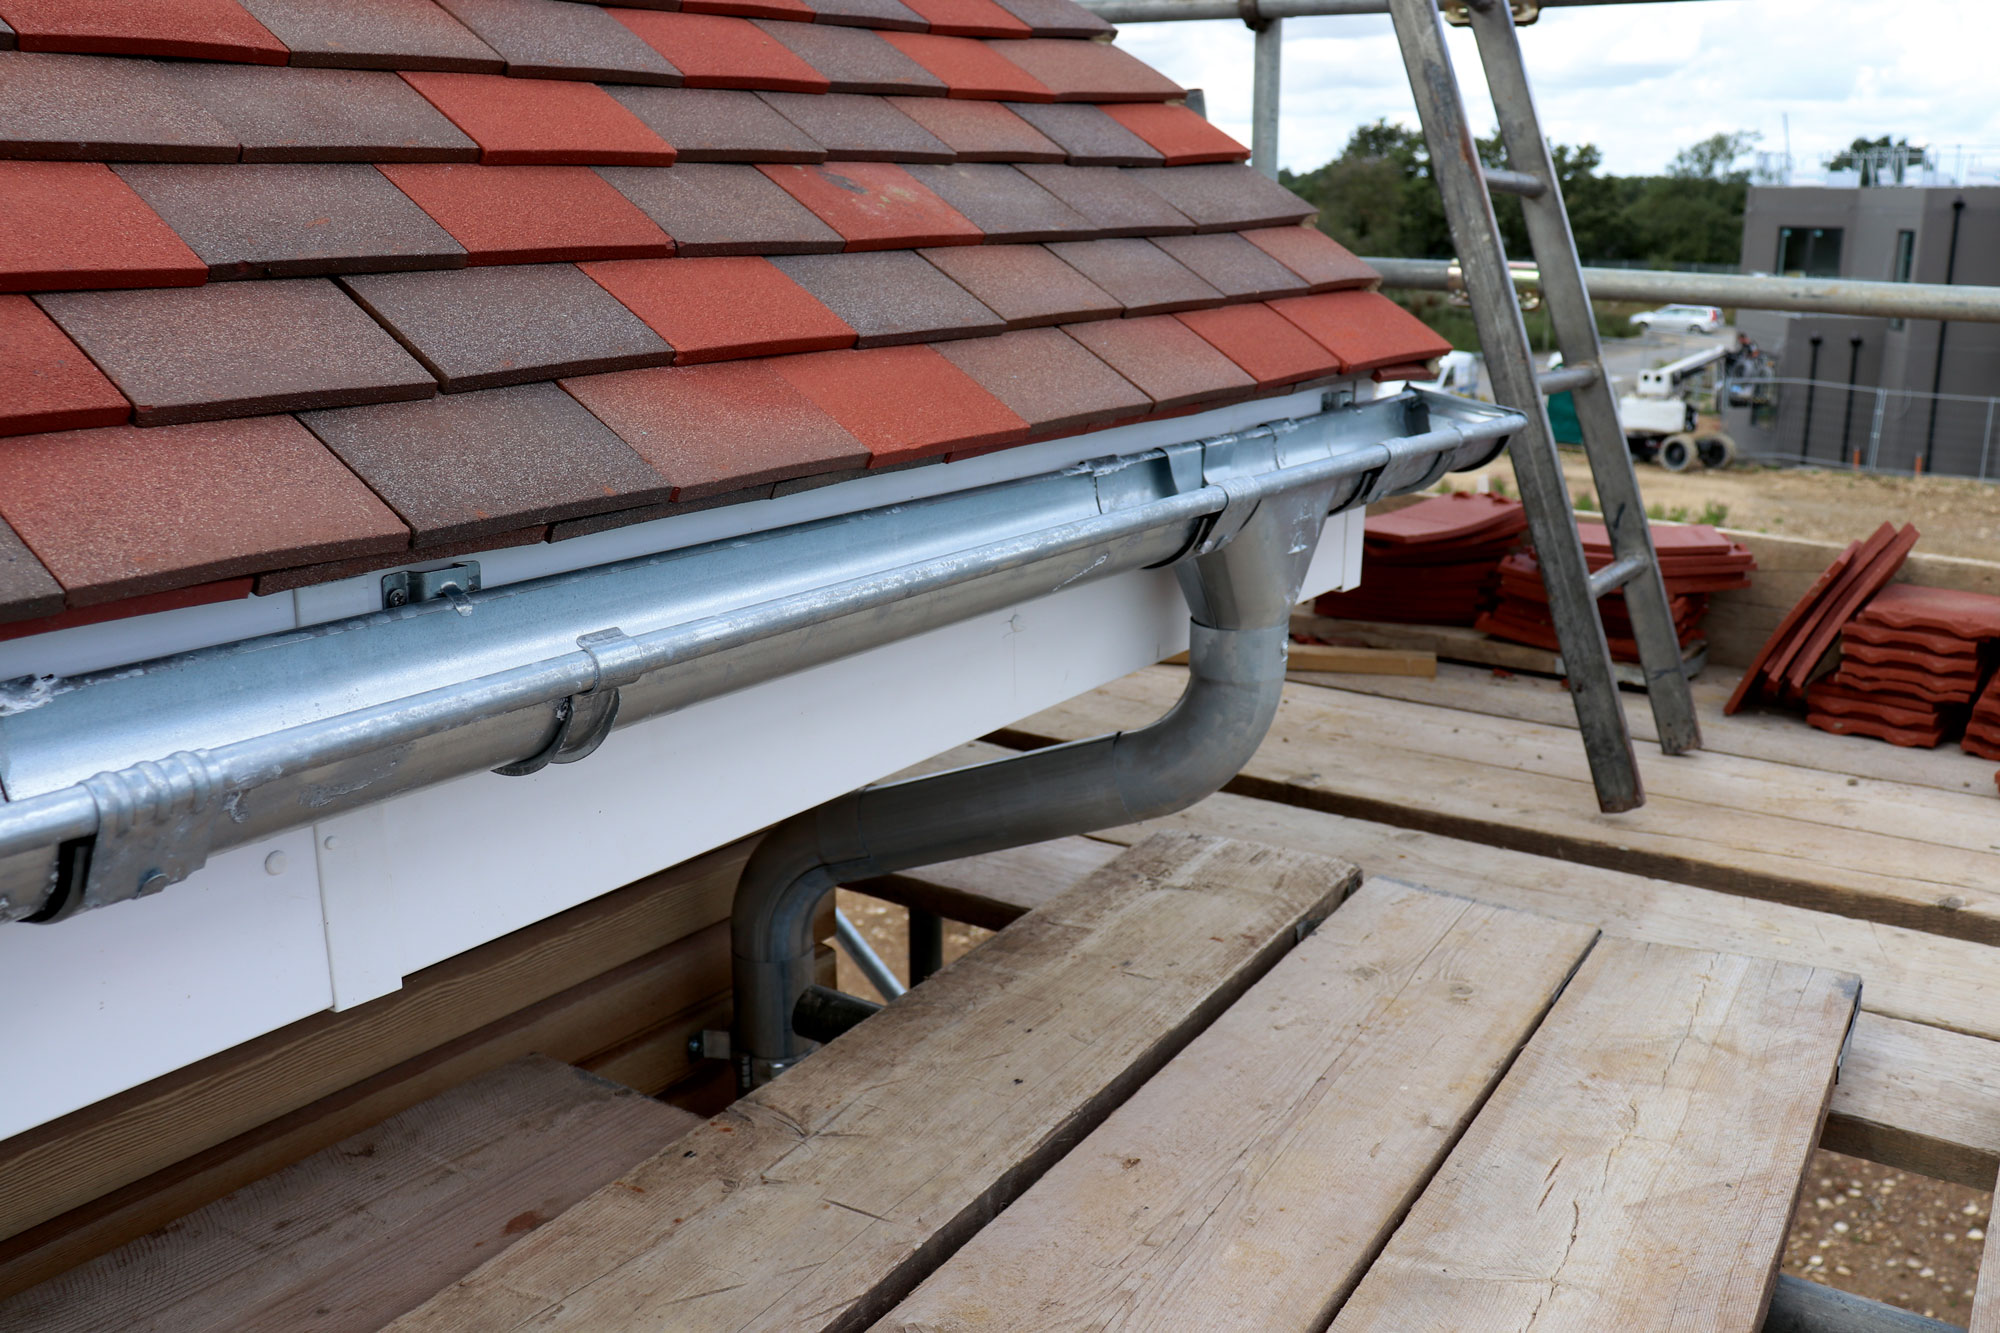
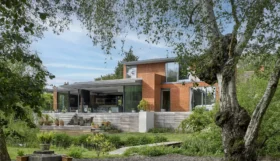
A run of guttering with a wraparound outlet to the downpipe.
I was pleasantly surprised to find that galvanised steel is actually a really cost-effective option for bespoke homes. Rainclear’s pricing for the Infinity Guttering range came in within a whisker of an equivalent PVCu setup, but gives us a more contemporary look and vastly improved durability.
The steel is also recyclable at the end of its lifespan. Installation is straightforward, too. Steel is lightweight and easy to handle, and the Infinity system uses rubber-lined connectors for watertightness, so there’s no need to mess around with silicone.
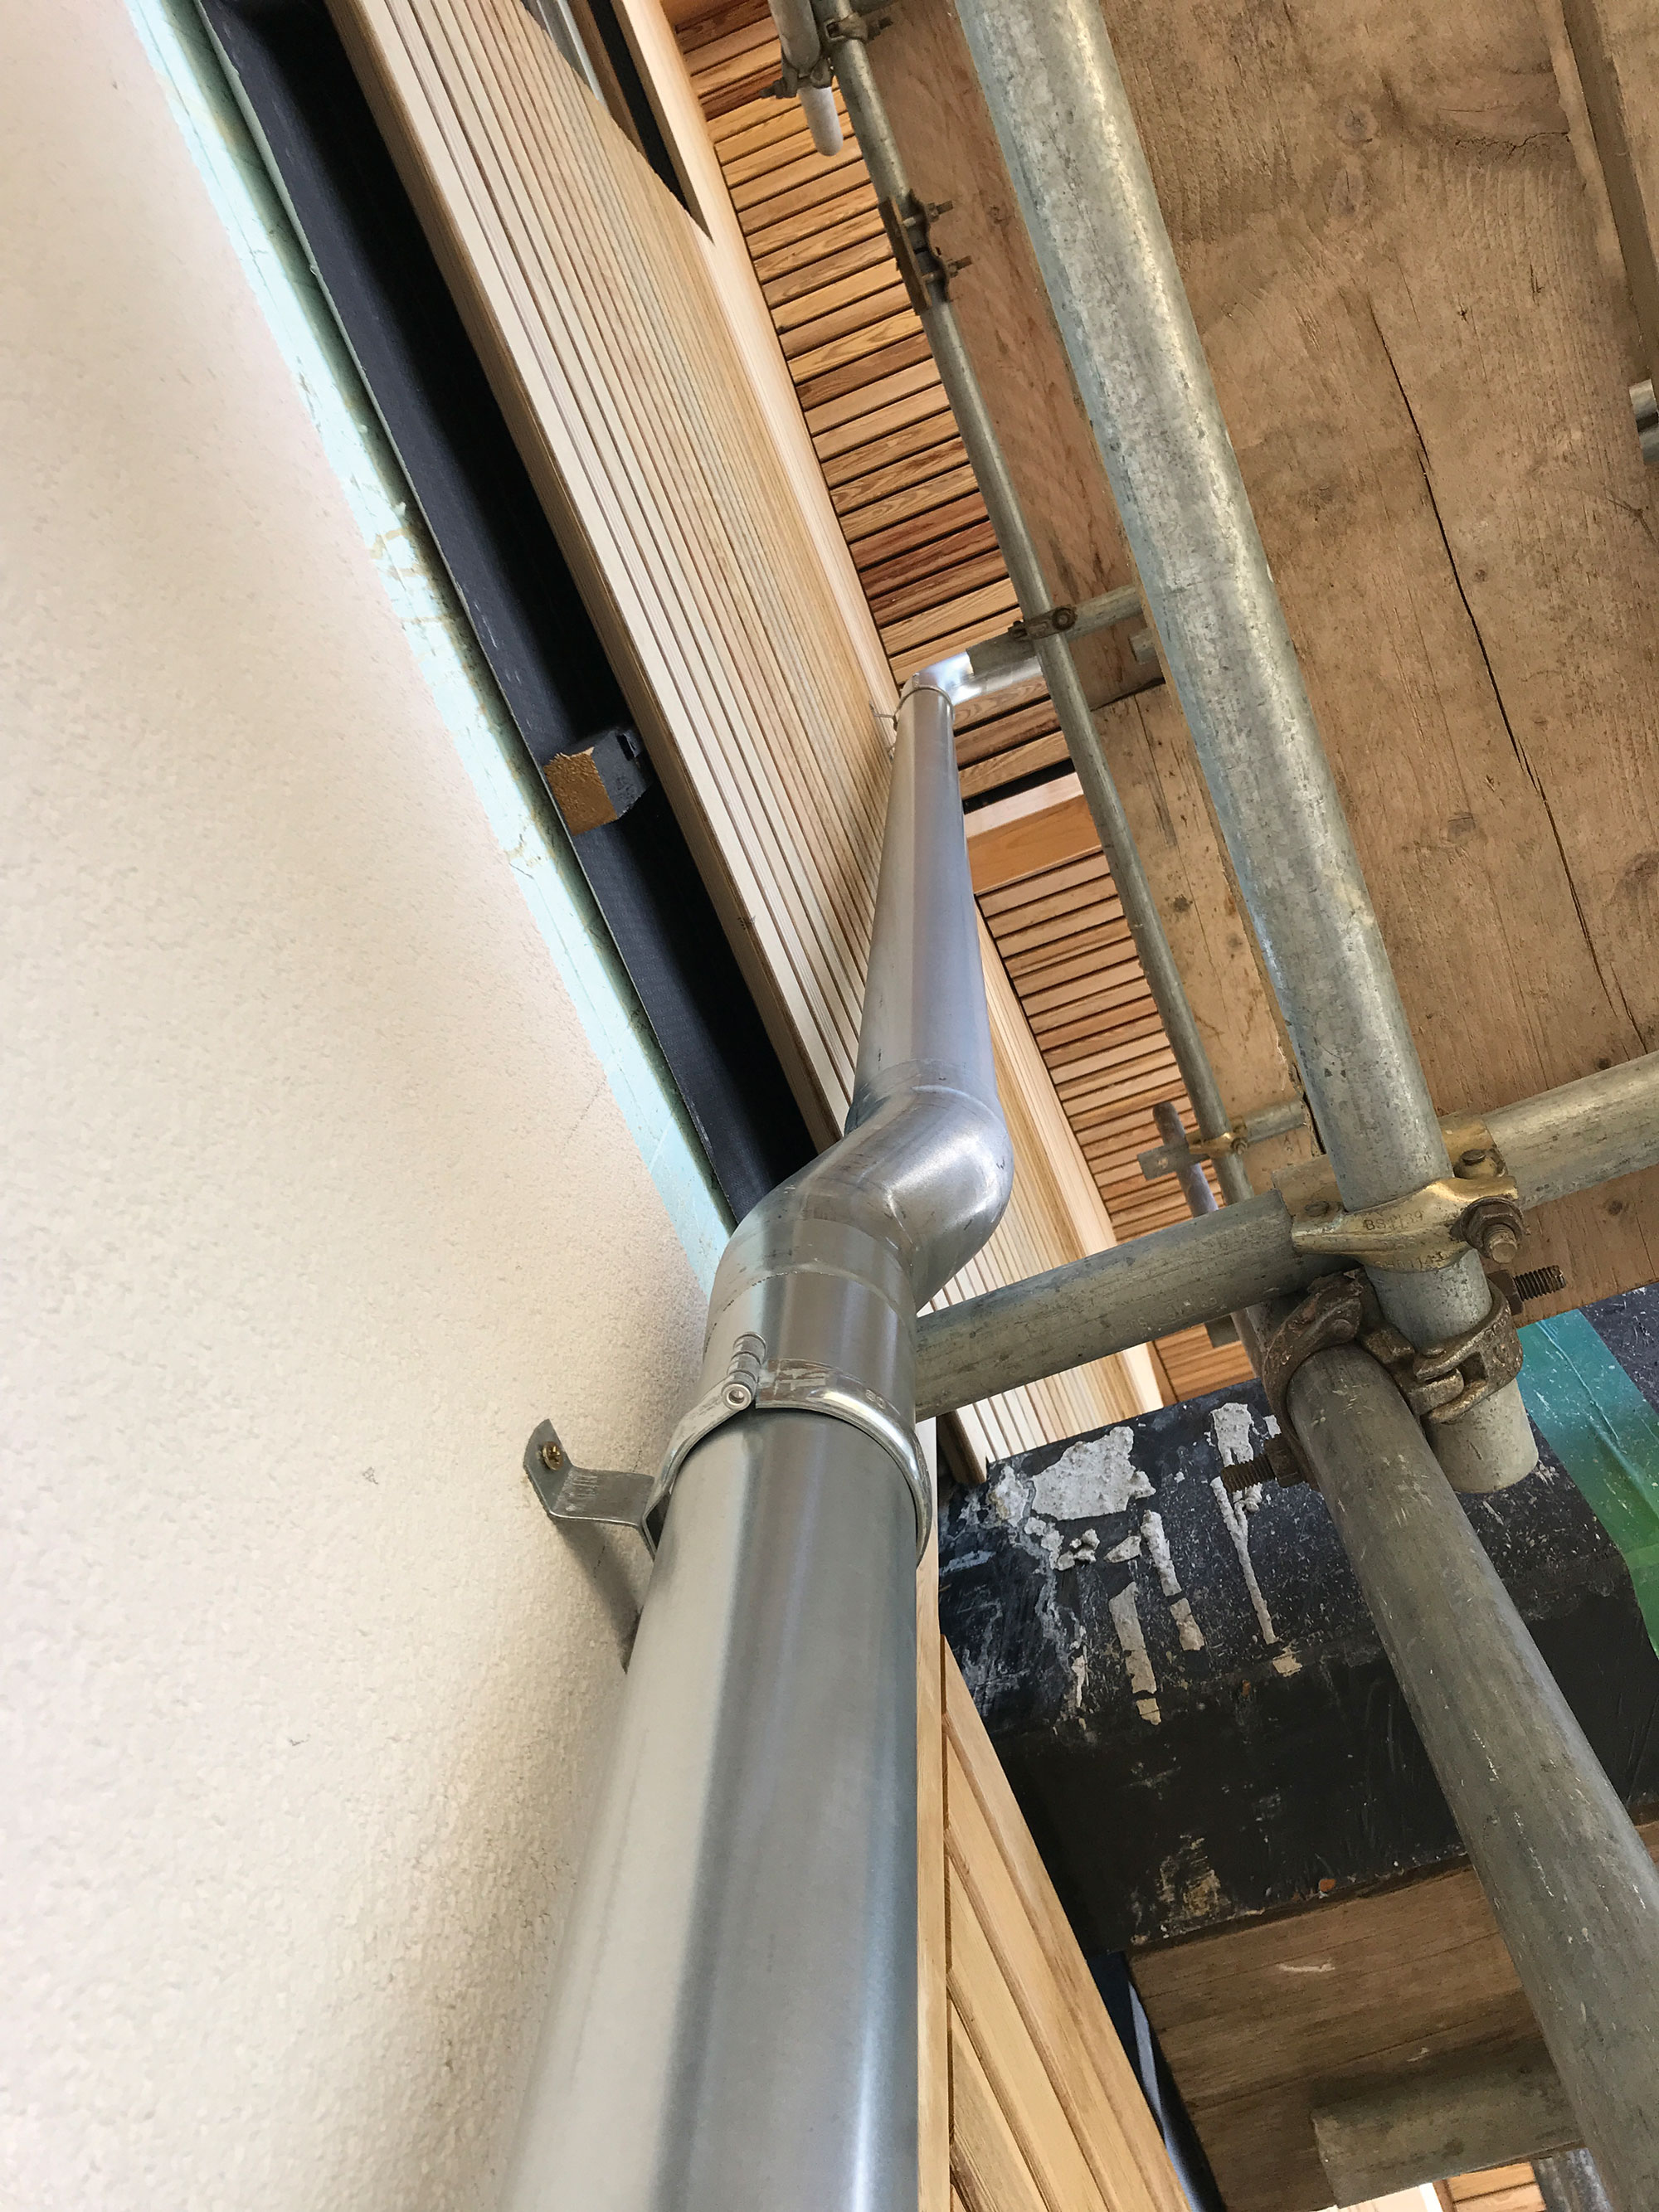
Offset bends to bring the downpipe around a section of first floor cladding (which sits proud of the render). The bare section of wall is where our balcony will be fitted once the scaffold comes down
Peter’s team found it a doddle: simply run a stringline to get your falls, screw in the clips and click your gutters into place. Where the runs meet the downpipes, there’s a bit of cutting to do to attach a wraparound outlet. Offset bends are used where necessary, for instance to bridge the gap between the gutters on our gable roof overhangs and the wall-mounted downpipes (which are attached with a simple, matching bracketing system).
There was really only one tiny issue during the install, at the corners of the angled side elevation walls. The crew had a little trouble locating a fixing point for the downpipe clips because the corner is largely insulation.
With the apex glazing area still open, I was able to double-check the depth of the polystyrene to make sure we found solid wall. So we just had one rogue hole to fill. From there it was plain sailing, and the job took just a few days from start to finish (much quicker than the fiddly task of getting the roofline right).


 Login/register to save Article for later