- Plan ItBack
- Design ItBack
- Build ItBack
- Homes
- ProductsBack
- CostsBack
- Self Build Cost Calculator
Estimate your project costs instantly with Build It's interactive self-build cost calculator
Calculate Now - Costs & Finance
- Contracts & Warranties
- Build It Estimating Service
Get an accurate, detailed cost breakdown of your project
Submit plans
- EventsBack


 Login/register to save Article for later
Installing the AV and Invisible Speakers

There are 9 steps in this guide
- First Fix Smart Home Electrics at the Build It Education House
- Heat Pump Ventilation: a Modern Home Heating System
- Underfloor Heating Installation
- Fitting the Rainscreen Cladding
- Installing the Rear Sliding Door
- Applying the Modern Silicone Render
- Plastering Internal Walls
- Roofline and Rainwater Goods
- Installing the AV and Invisible Speakers
If you think of sound systems as an add-on at the end of a project, think again. Should you want good quality audio for music and entertainment, then you’ll need to work with an experienced team early on in your scheme to determine how to achieve the best acoustics, speaker tech and locations, cabling infrastructure etc.
On the Build It House, we’re taking audio seriously, so we’ve partnered with Amina UK to install their innovative invisible speakers, hidden in the walls and ceilings behind a plaster skim.
What are invisible speakers?
Amina’s design replaces the standard cone used in most loudspeakers with a flush-fitting flat panel that uses smaller vibrations to generate sound. The tech delivers 180° audio, avoiding the directionality conventional products suffer from. With Amina’s range, the sound is just as good whether you’re stood next to a speaker or at the other end of a room.

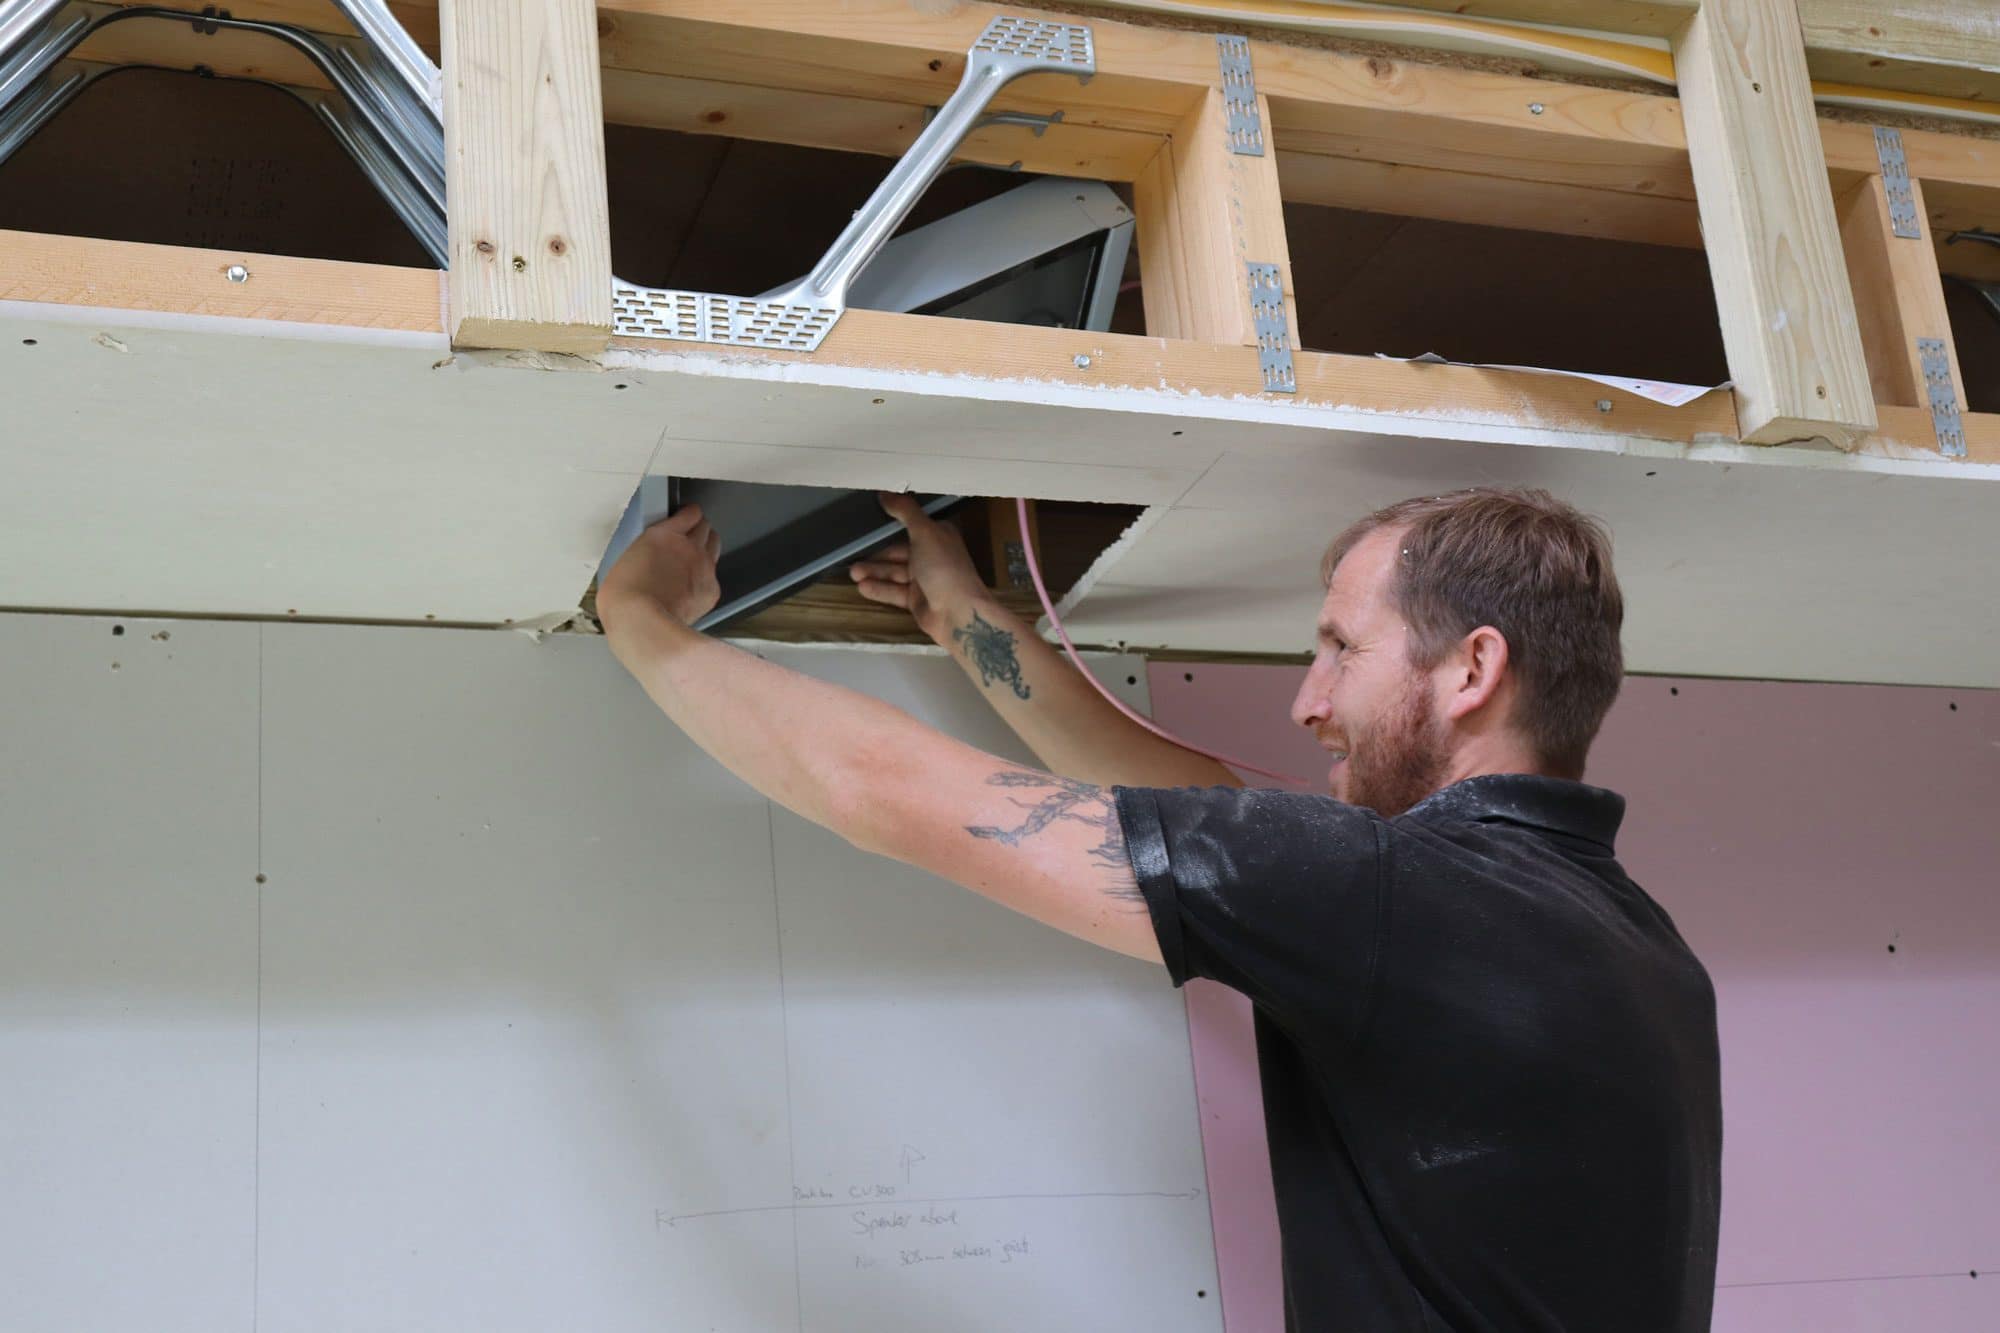
One of the Moss Technical crew (Leigh Ivins from Rockfield Smart Homes) installs the back box for a hidden speaker in the hallway
And the quality truly is fantastic, as I discovered when I met with Amina director Babs Moore at one of their partner showrooms, Redline in Essex . Babs ran me through how the panels work and put the tech through its paces with a series of film clips and music.
One test pinged sounds around the different speakers, underlining why they call the setup ‘invisible’. The panels seamlessly integrate into the walls and ceilings, and the omnidirectional sound means you simply can’t tell where they are in a room.
I’m a fairly techy person, and have always loved listening to music, but I can’t claim to be anything close to an expert when it comes to audio setups.
The zone’s iQ3 panel in position, flush with the face of the plasterboard
Thankfully, Babs has a knack for explaining even the most technical concepts in a way that pretty much everyone can understand. She was also hugely enthusiastic about what we’re trying to do with the Education House – and I very much had the sense she
puts just as much care and energy into every project.
In all honesty, the sound quality blew me away. Within seconds, I was certain we had to demonstrate this tech in the Education House. It needs to be heard to be believed.
The invisible speakers are one of our bigger luxuries, along with features such as the statement staircase, but this is by no means the most expensive sound system out there. And it will give our finished home cutting-edge wow factor.
The benefits go beyond sound quality, too. One of the big attractions of another relative newcomer to our homes, underfloor heating, is that you can save valuable floor space compared to using conventional radiators.
It’s a similar story with invisible speakers. By integrating these panels into walls and ceilings, you avoid the need for hulking great floorstanding models and escape the alternative of, as Babs describes it, “ceiling acne with visible overhead speakers.”
Specifying our setup
Initially, we’d envisaged a 5.1 surround sound media room in the basement, with no other audio. But talking it through with Babs and Moss Technical, our smart home installer, we decided to go further to future-proof the house and fulfil our remit as an Education House.
In the basement, we’re fitting Amina’s ALF120 subwoofer. This is the only part of the installation that won’t be completely hidden: a small grill will be left open at the bottom of the unit
So in the basement, we’ve fitted seven of Amina’s entry-level iQ3 speakers (great bang for your buck) and its ALF120 passive subwoofer. These are in a 5.1.2 Dolby Atmos configuration, with five wall speakers, two in the ceiling and the sub to give an immersive, 3D audio experience. We’ll be installing a projector later in the build.
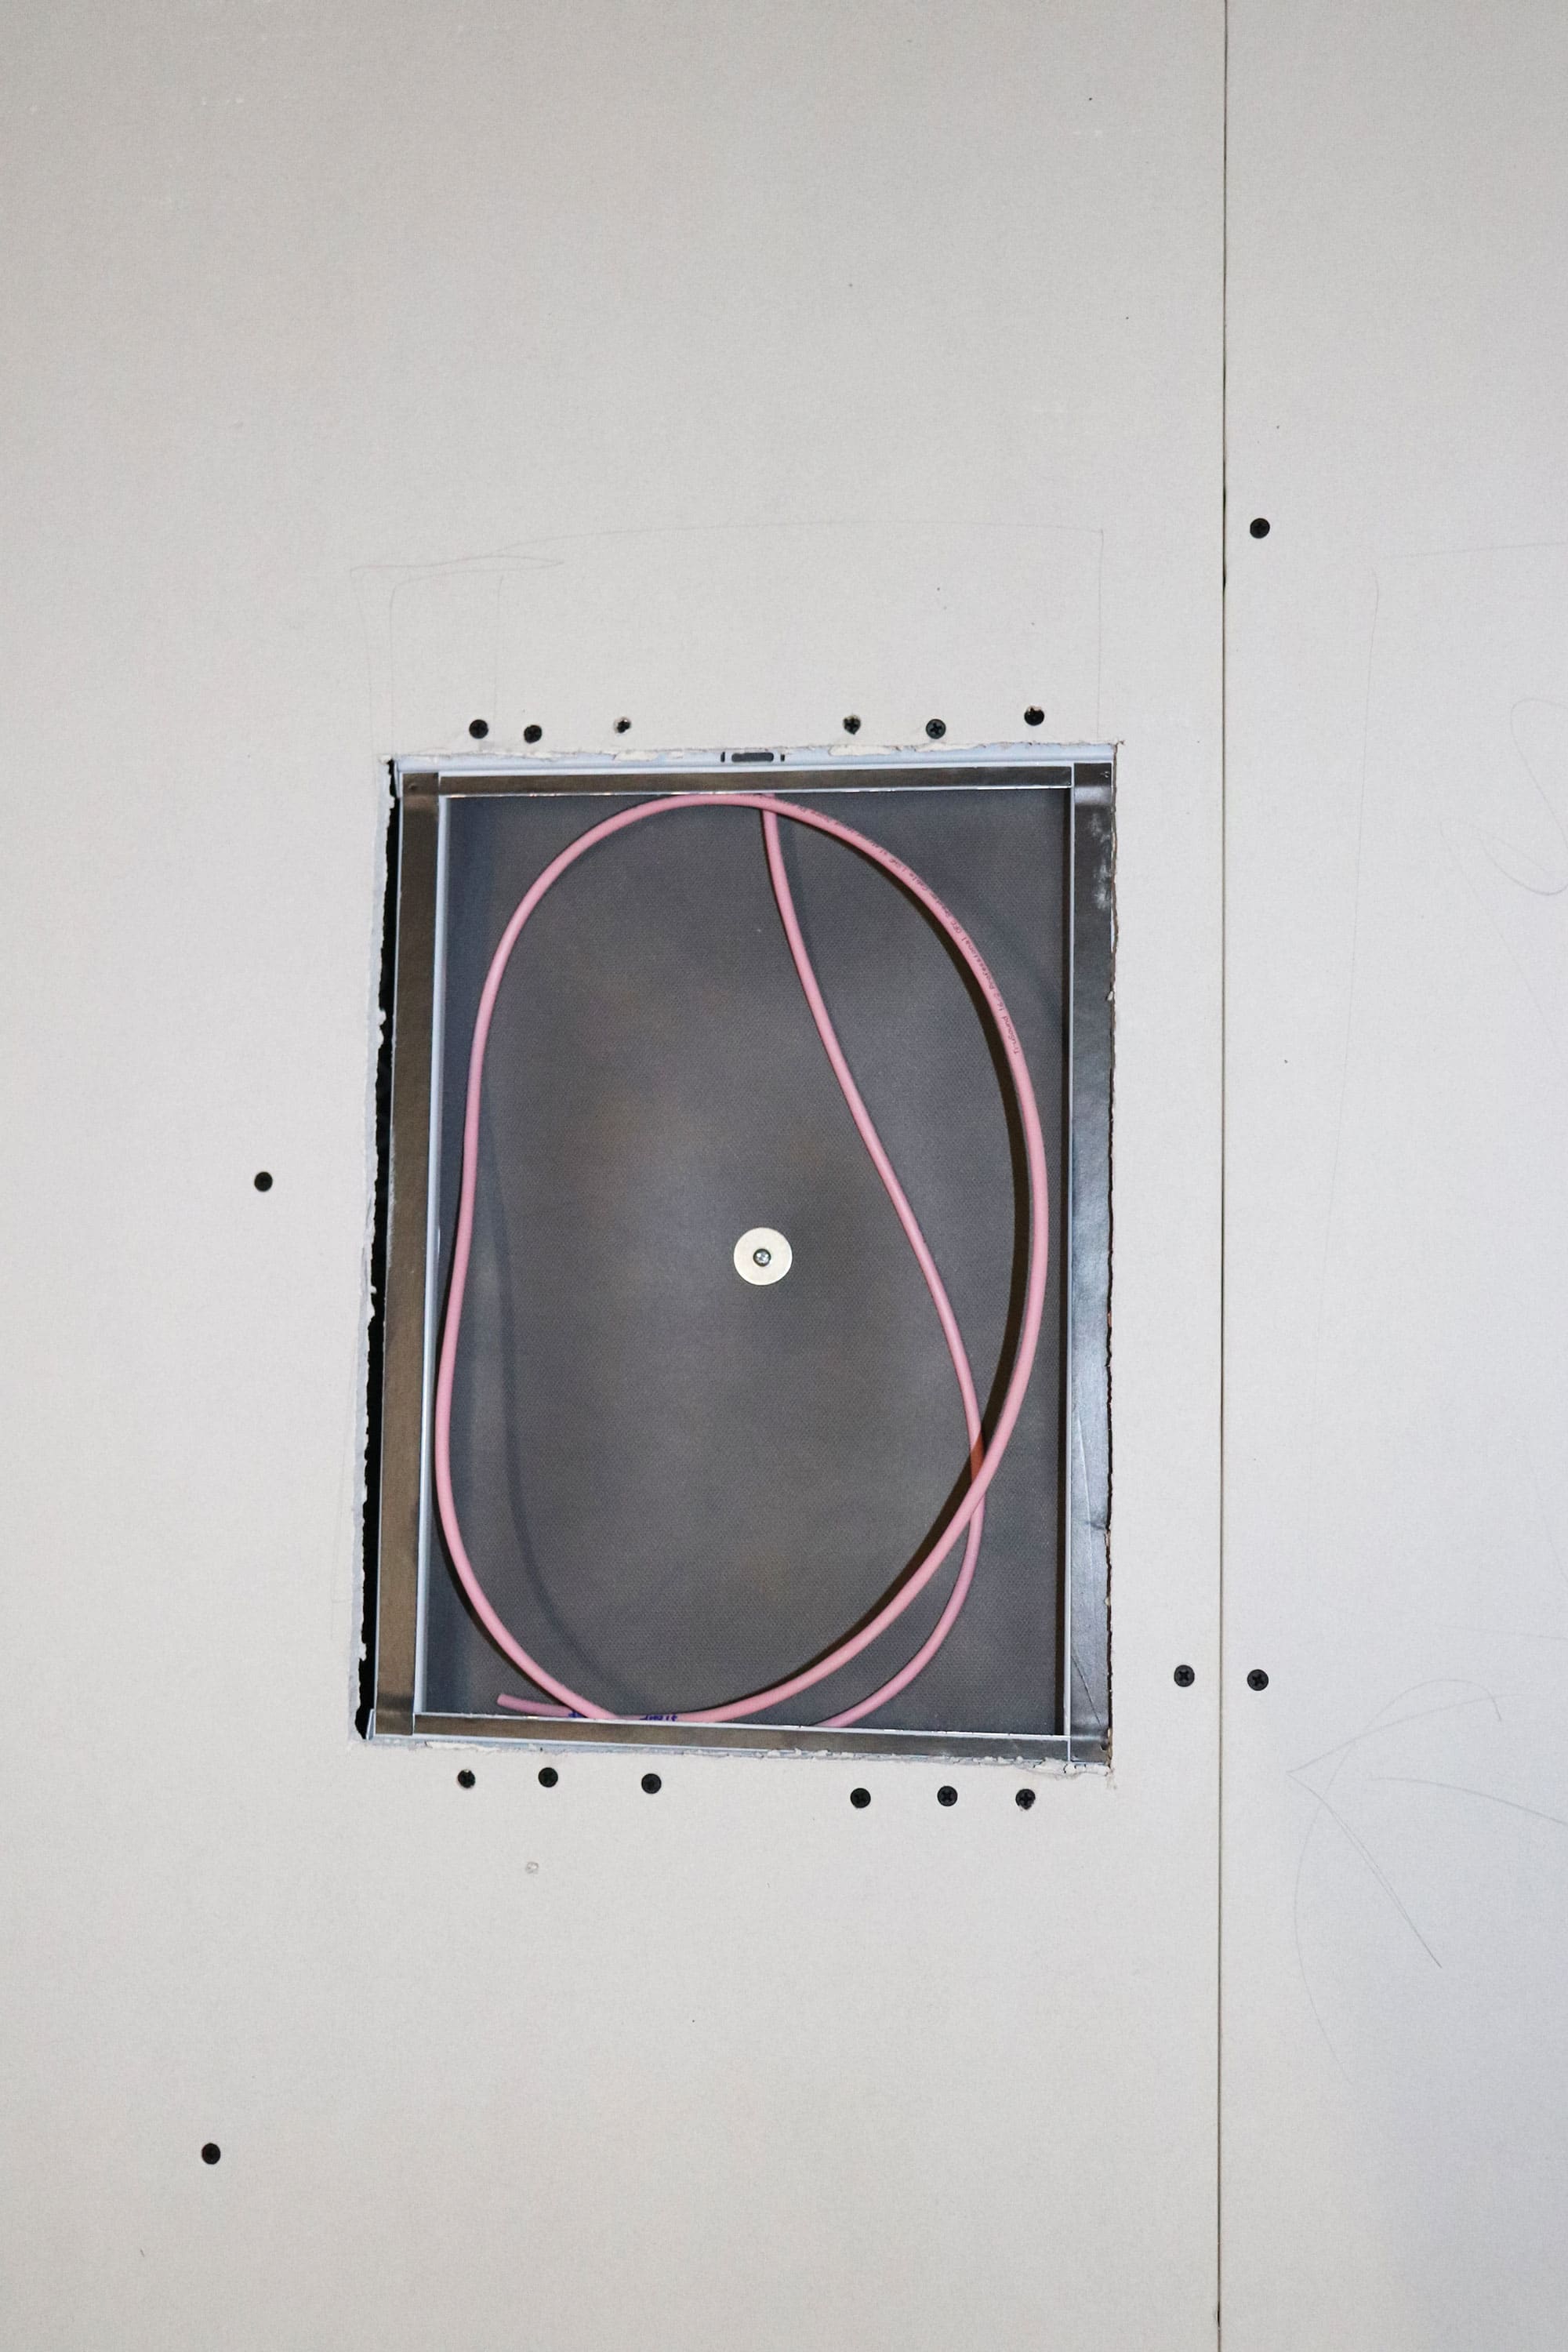
The black box for an Amina iQ3 speaker installed. We’ve chosen pink cabling for all our audio to make it easy for all our trades to identify.
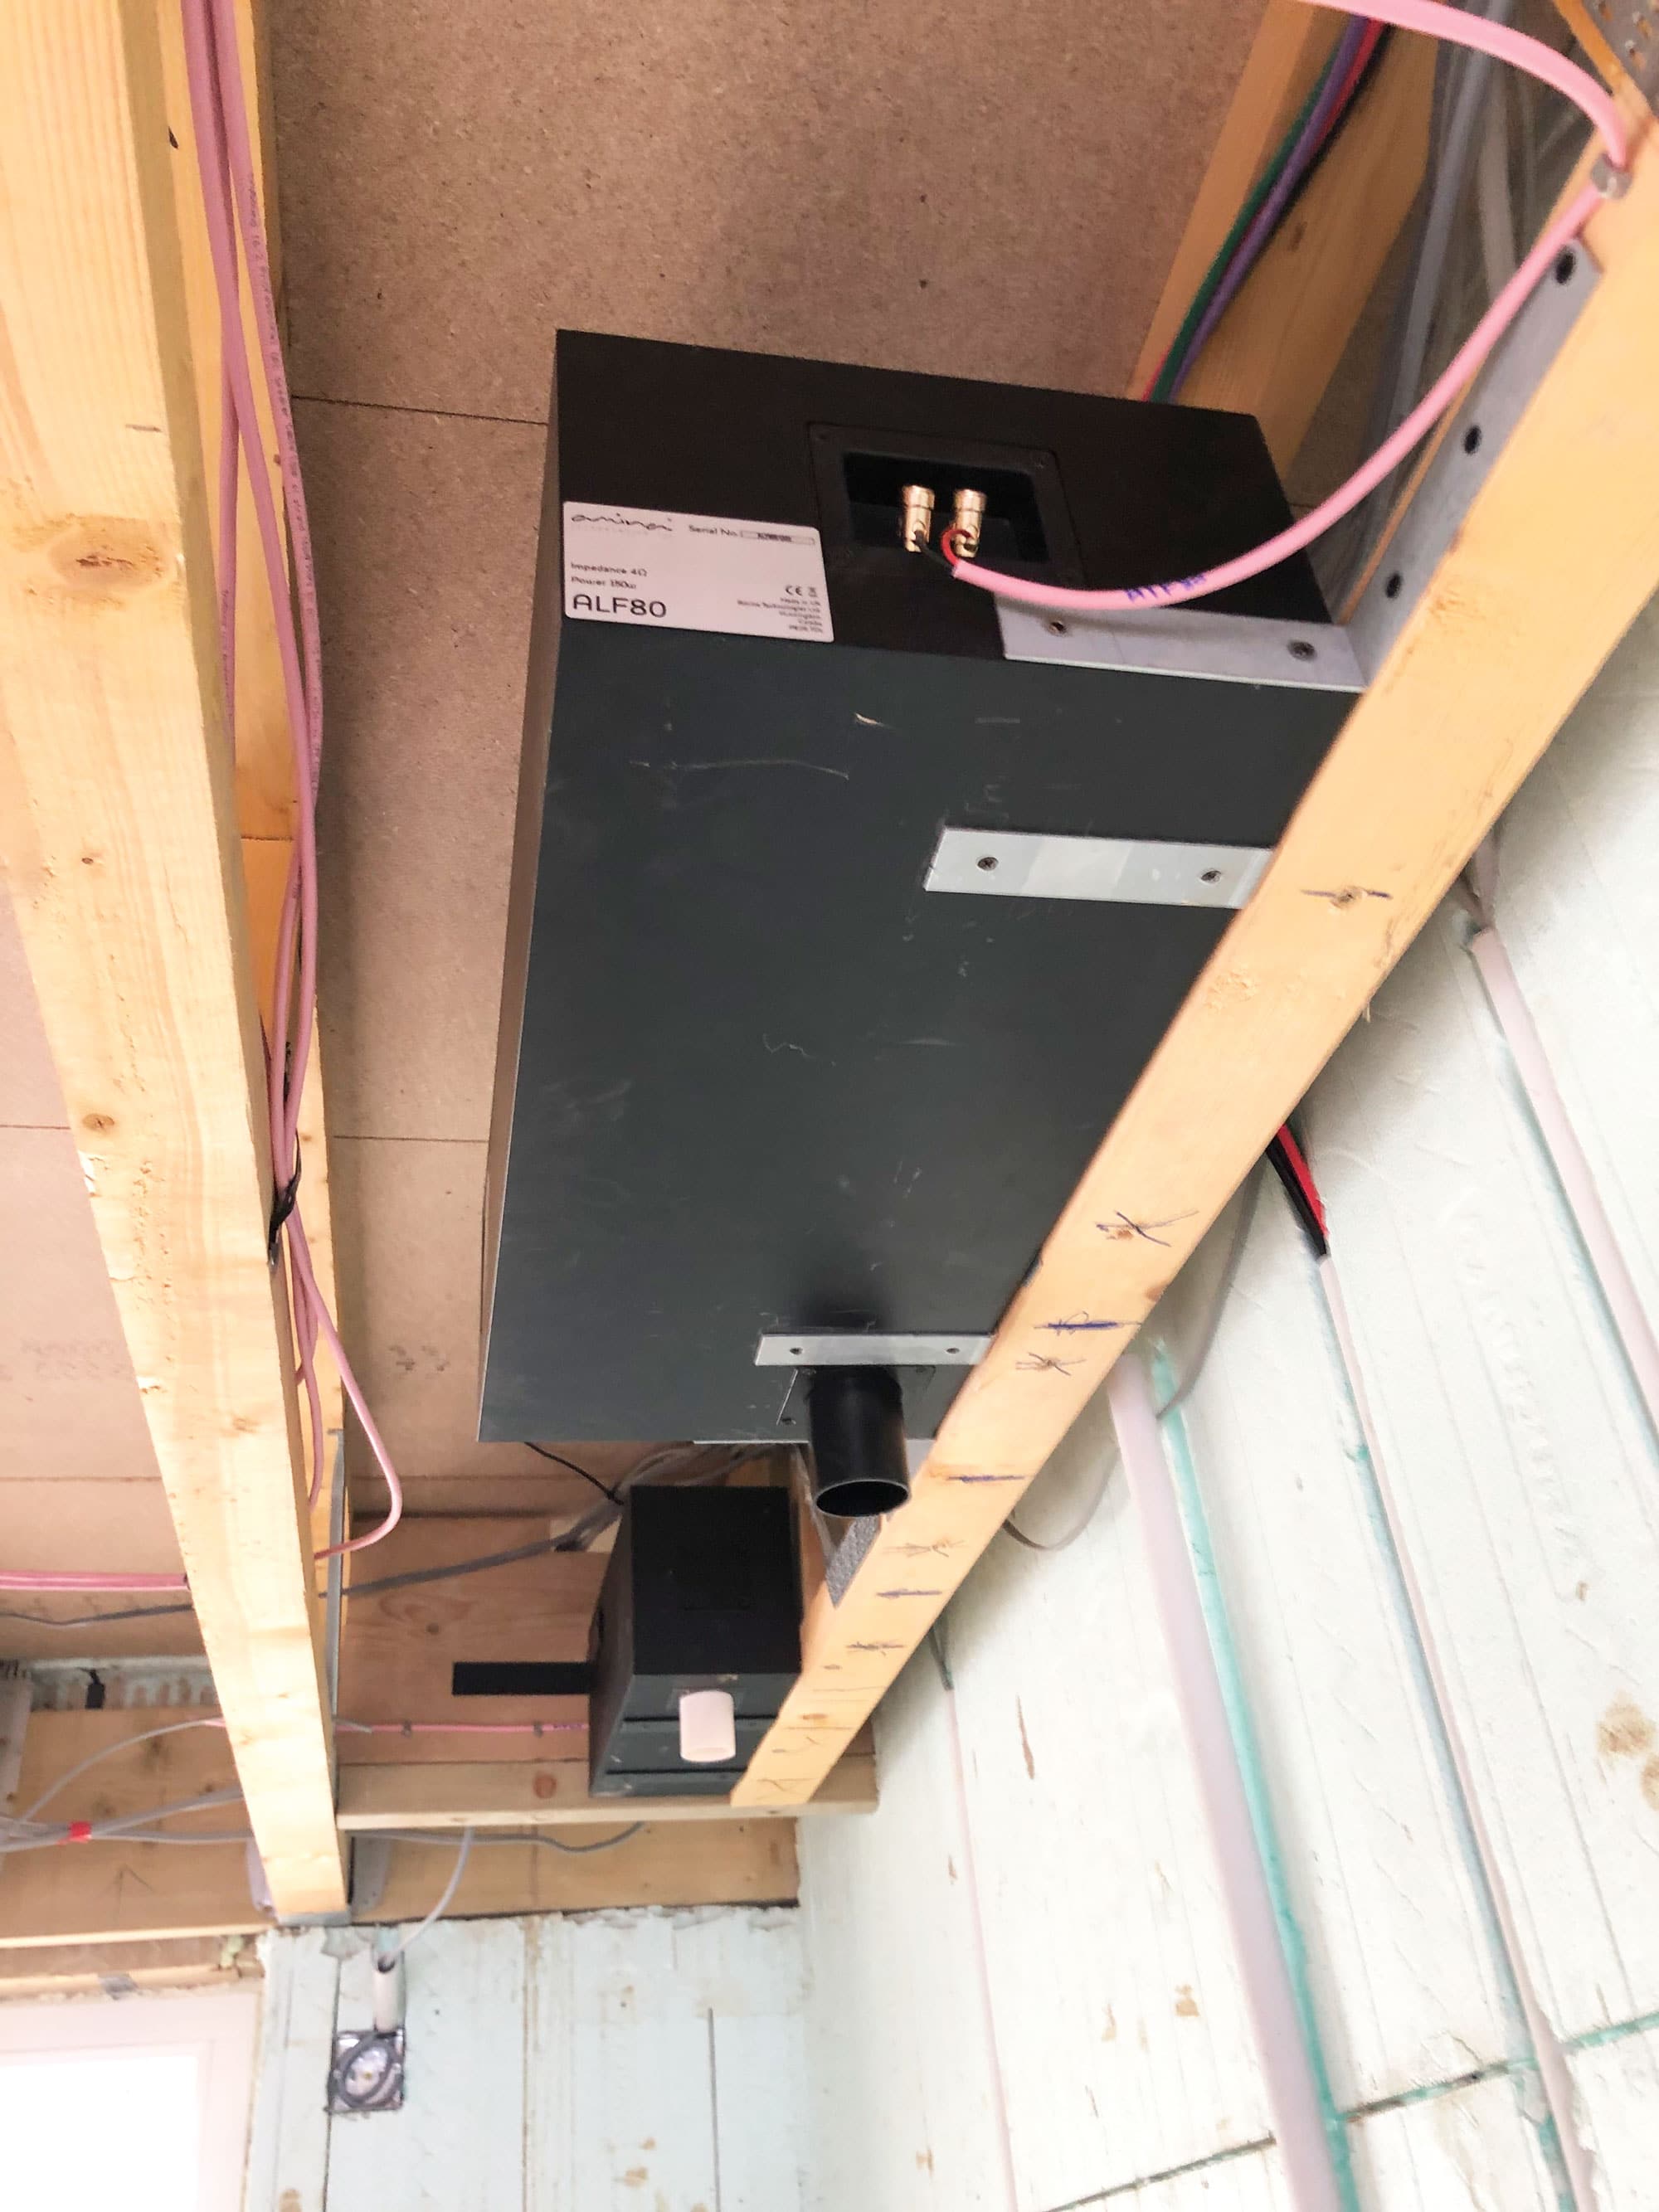
We’re playing with different configurations on the ground floor, so you can experience a range of options and compare quality. Accompanying the lounge TV is a pair of Amina’s high-performance Mobius 7 ceiling speakers, along with both an ALF40 and an ALF80 subwoofer to demo different levels of bass. Naturally, in a conventional home you’d just have a single sub.
The iQ3 flat panel installed into the back box. Note the slight gap all around the speaker: this will be filled with a jointing compound.
There are also two rival (visible) in-ceiling speakers so you can experience the difference in sound transmission. In addition, there’s an iQ3 in the dining room and another in the hall for a quick comparison.
SONOS amps will drive everything, while Moss has based the TV distribution on a 4K matrix to deliver yet more future-proofing – although initially we’ll just use standard smart TVs. The audio links back intelligently to the house’s central Niko control hub. So, for example, when somebody presses the video entry doorbell, the music will pause and notify you.
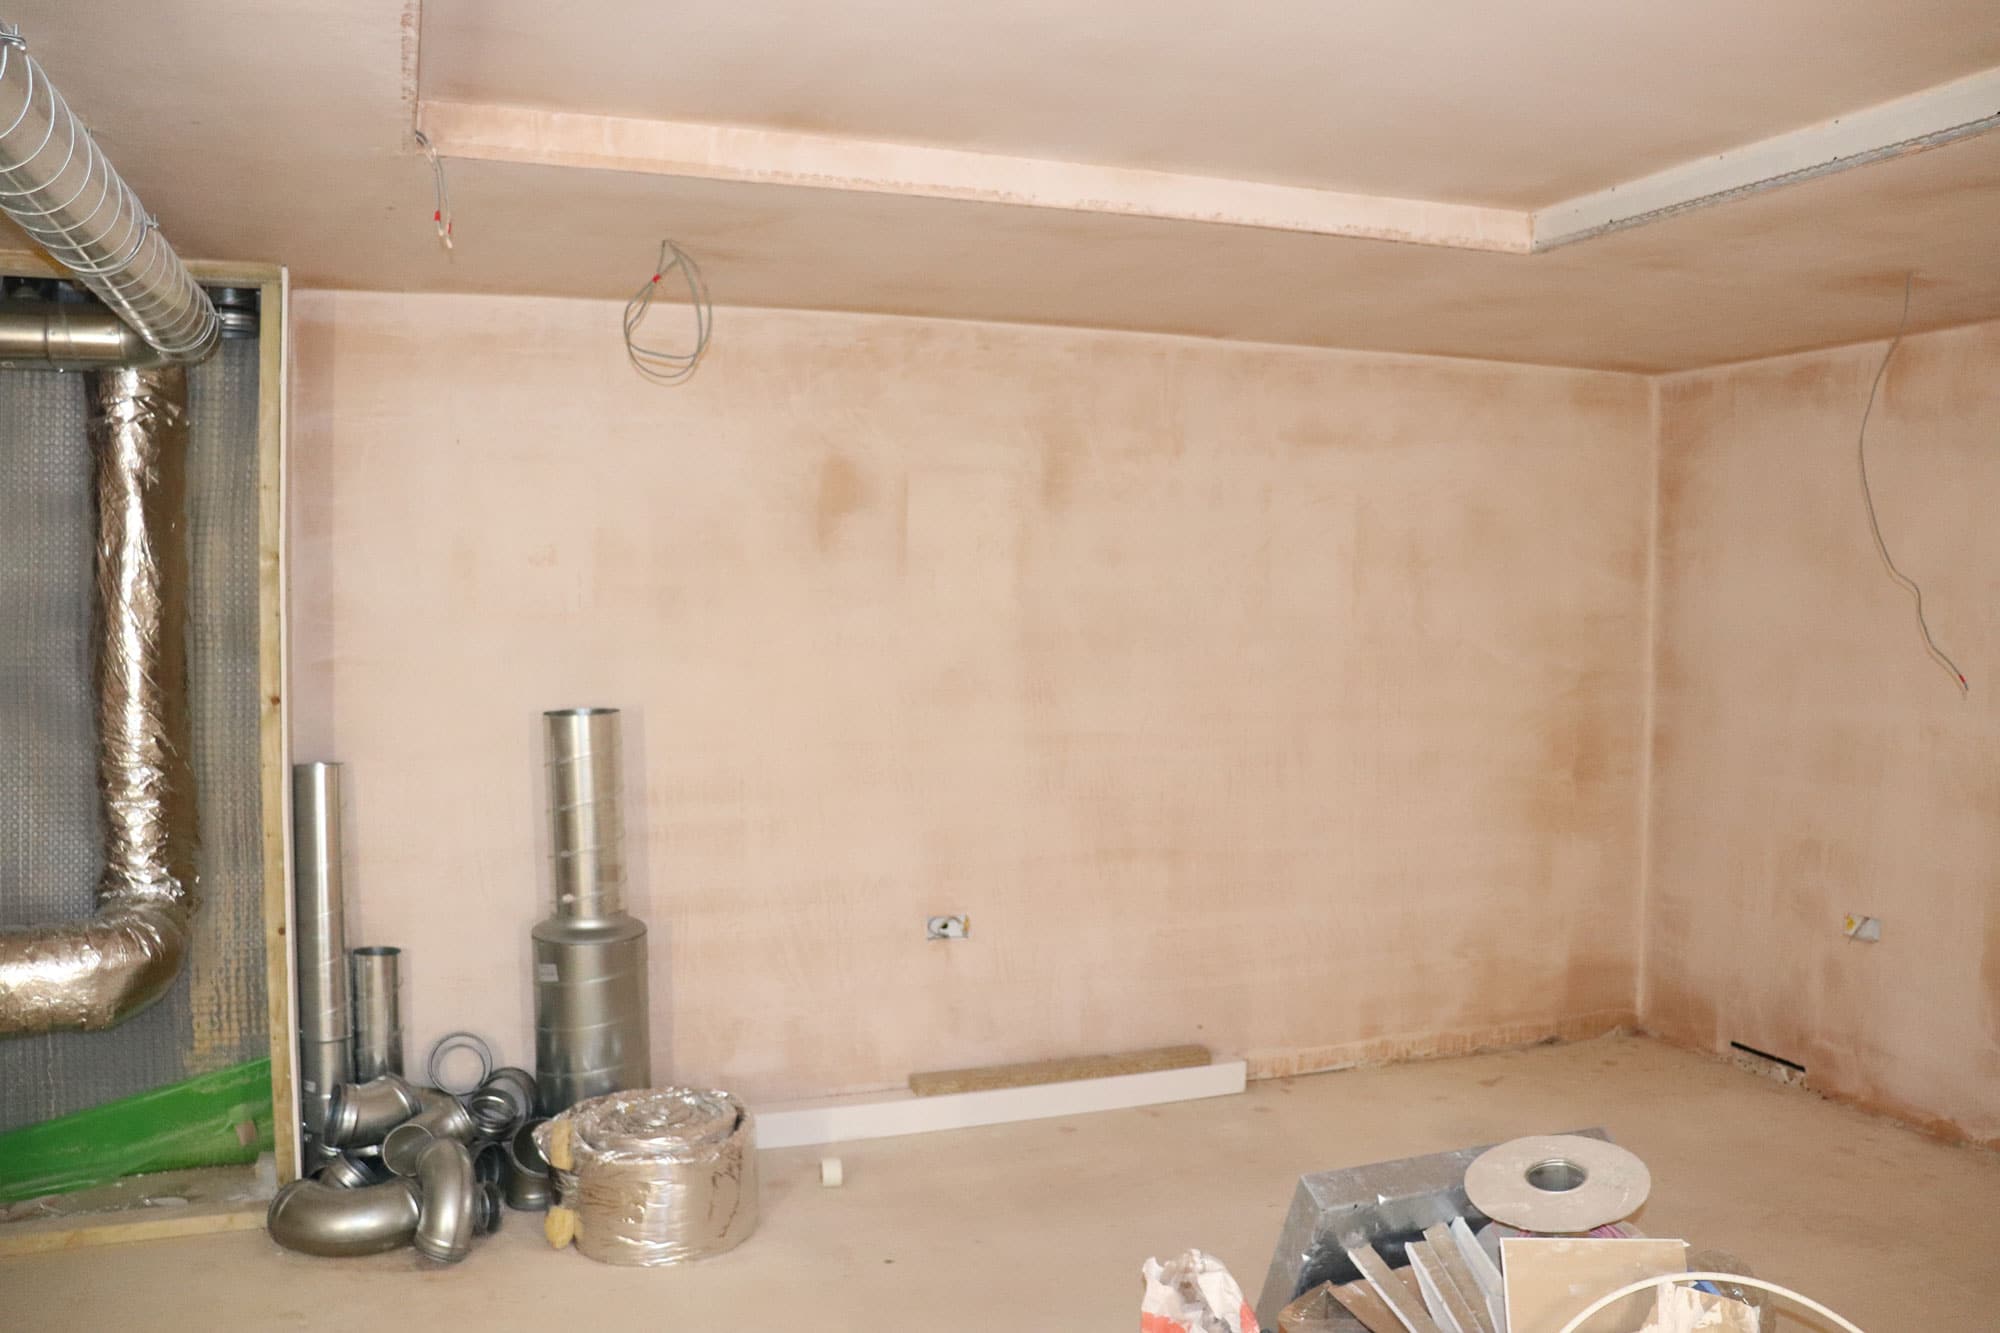
The fully plastered basement walls. If you look closely, you can still just spot the outline of the speakers. Once the decorating is done, they’ll be totally invisible.
Installing the hidden speakers
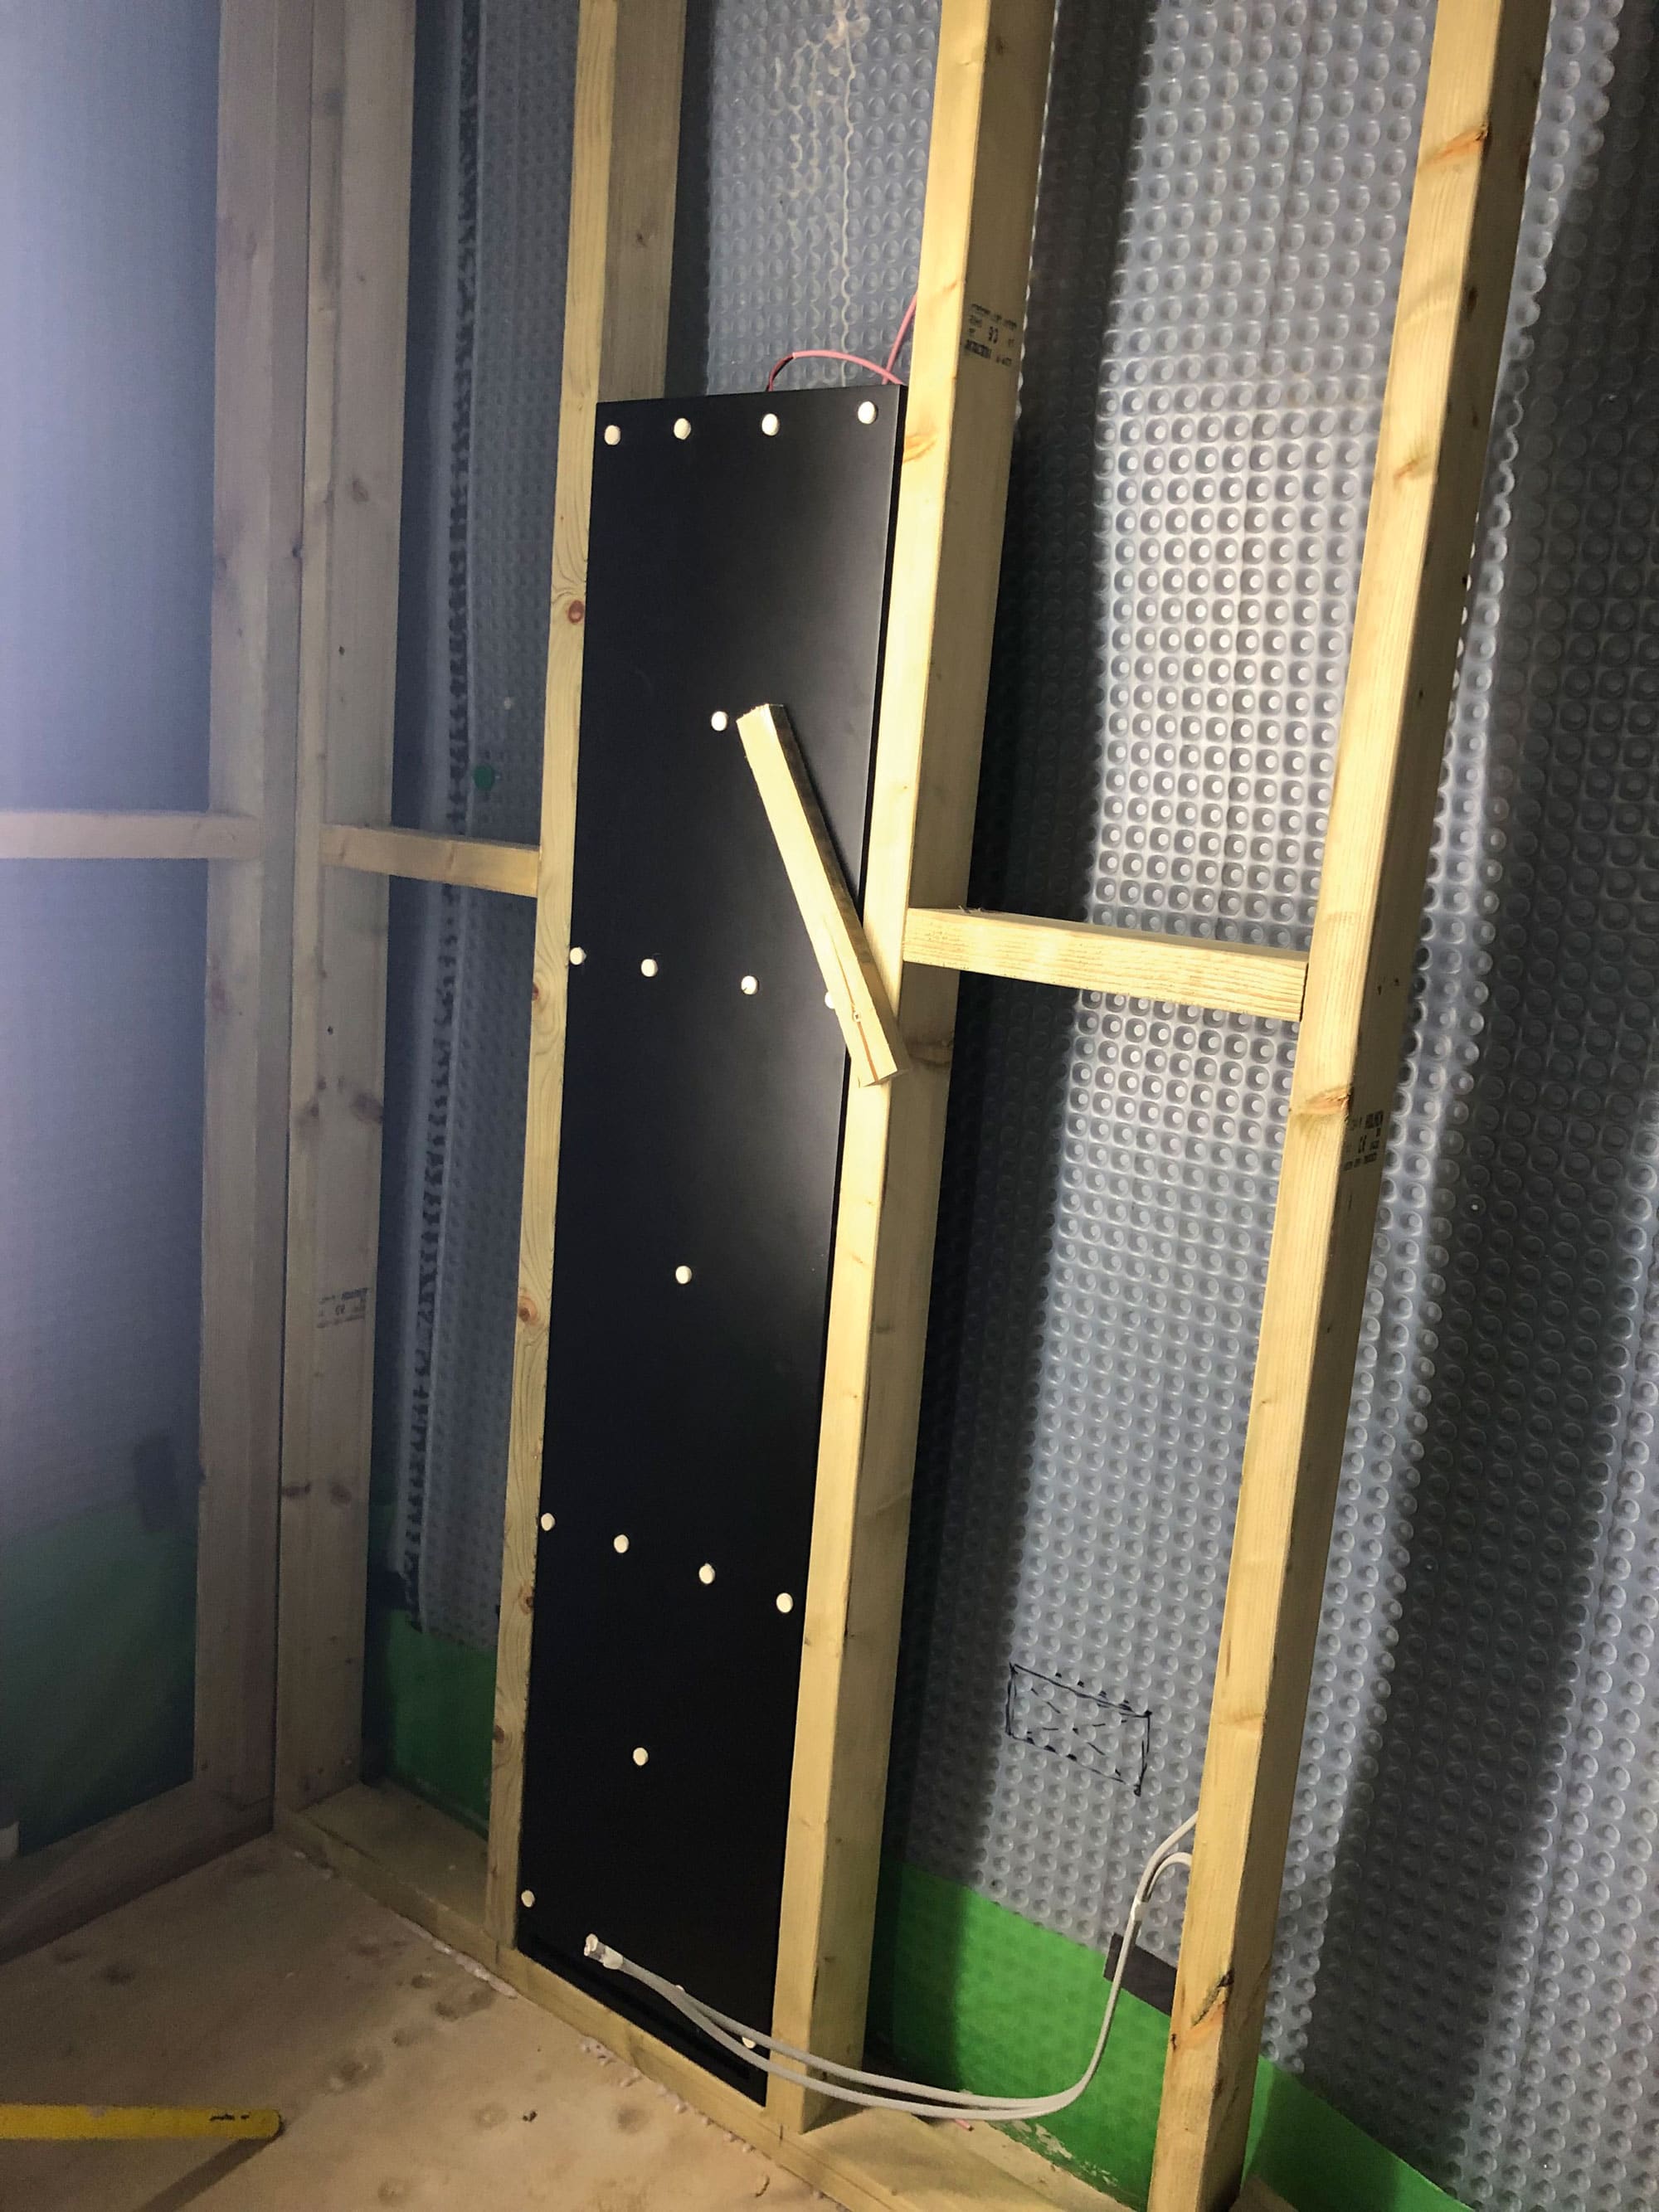
Our Mobius 7 and iQ3 speakers are plaster-over designs (although the Mobius can be finished with a range of materials, from wood through to leather). We’re installing them into standard 12.5mm plasterboard on our stud walls and joisted ceilings. In the basement, we’ve battened out beneath the beam and block floor to create a recessed ceiling feature, so it’s a similar story here.
It’s important to get the centres right between timbers to allow enough space for the speakers. That’s easy with stud walls, as by the time you get onto this first-fix work you’re likely to have made many of your fit-out decisions.
We’re installing two Amina subwoofers in the lounge, to demonstrate the different levels of performance available
But floor joists get designed and installed very early on, so if you want discrete in-ceiling speakers, you need to make sure this is factored in early to avoid any need to notch out.
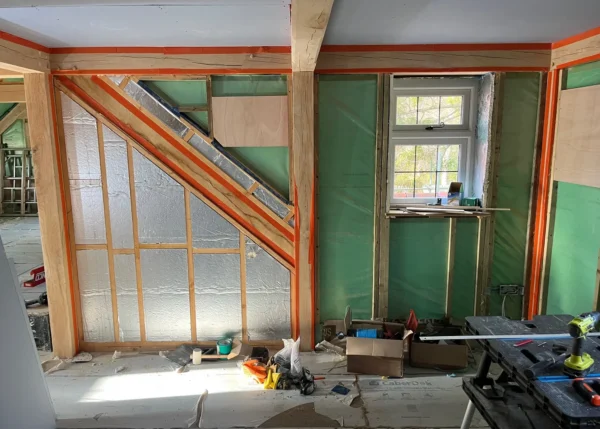
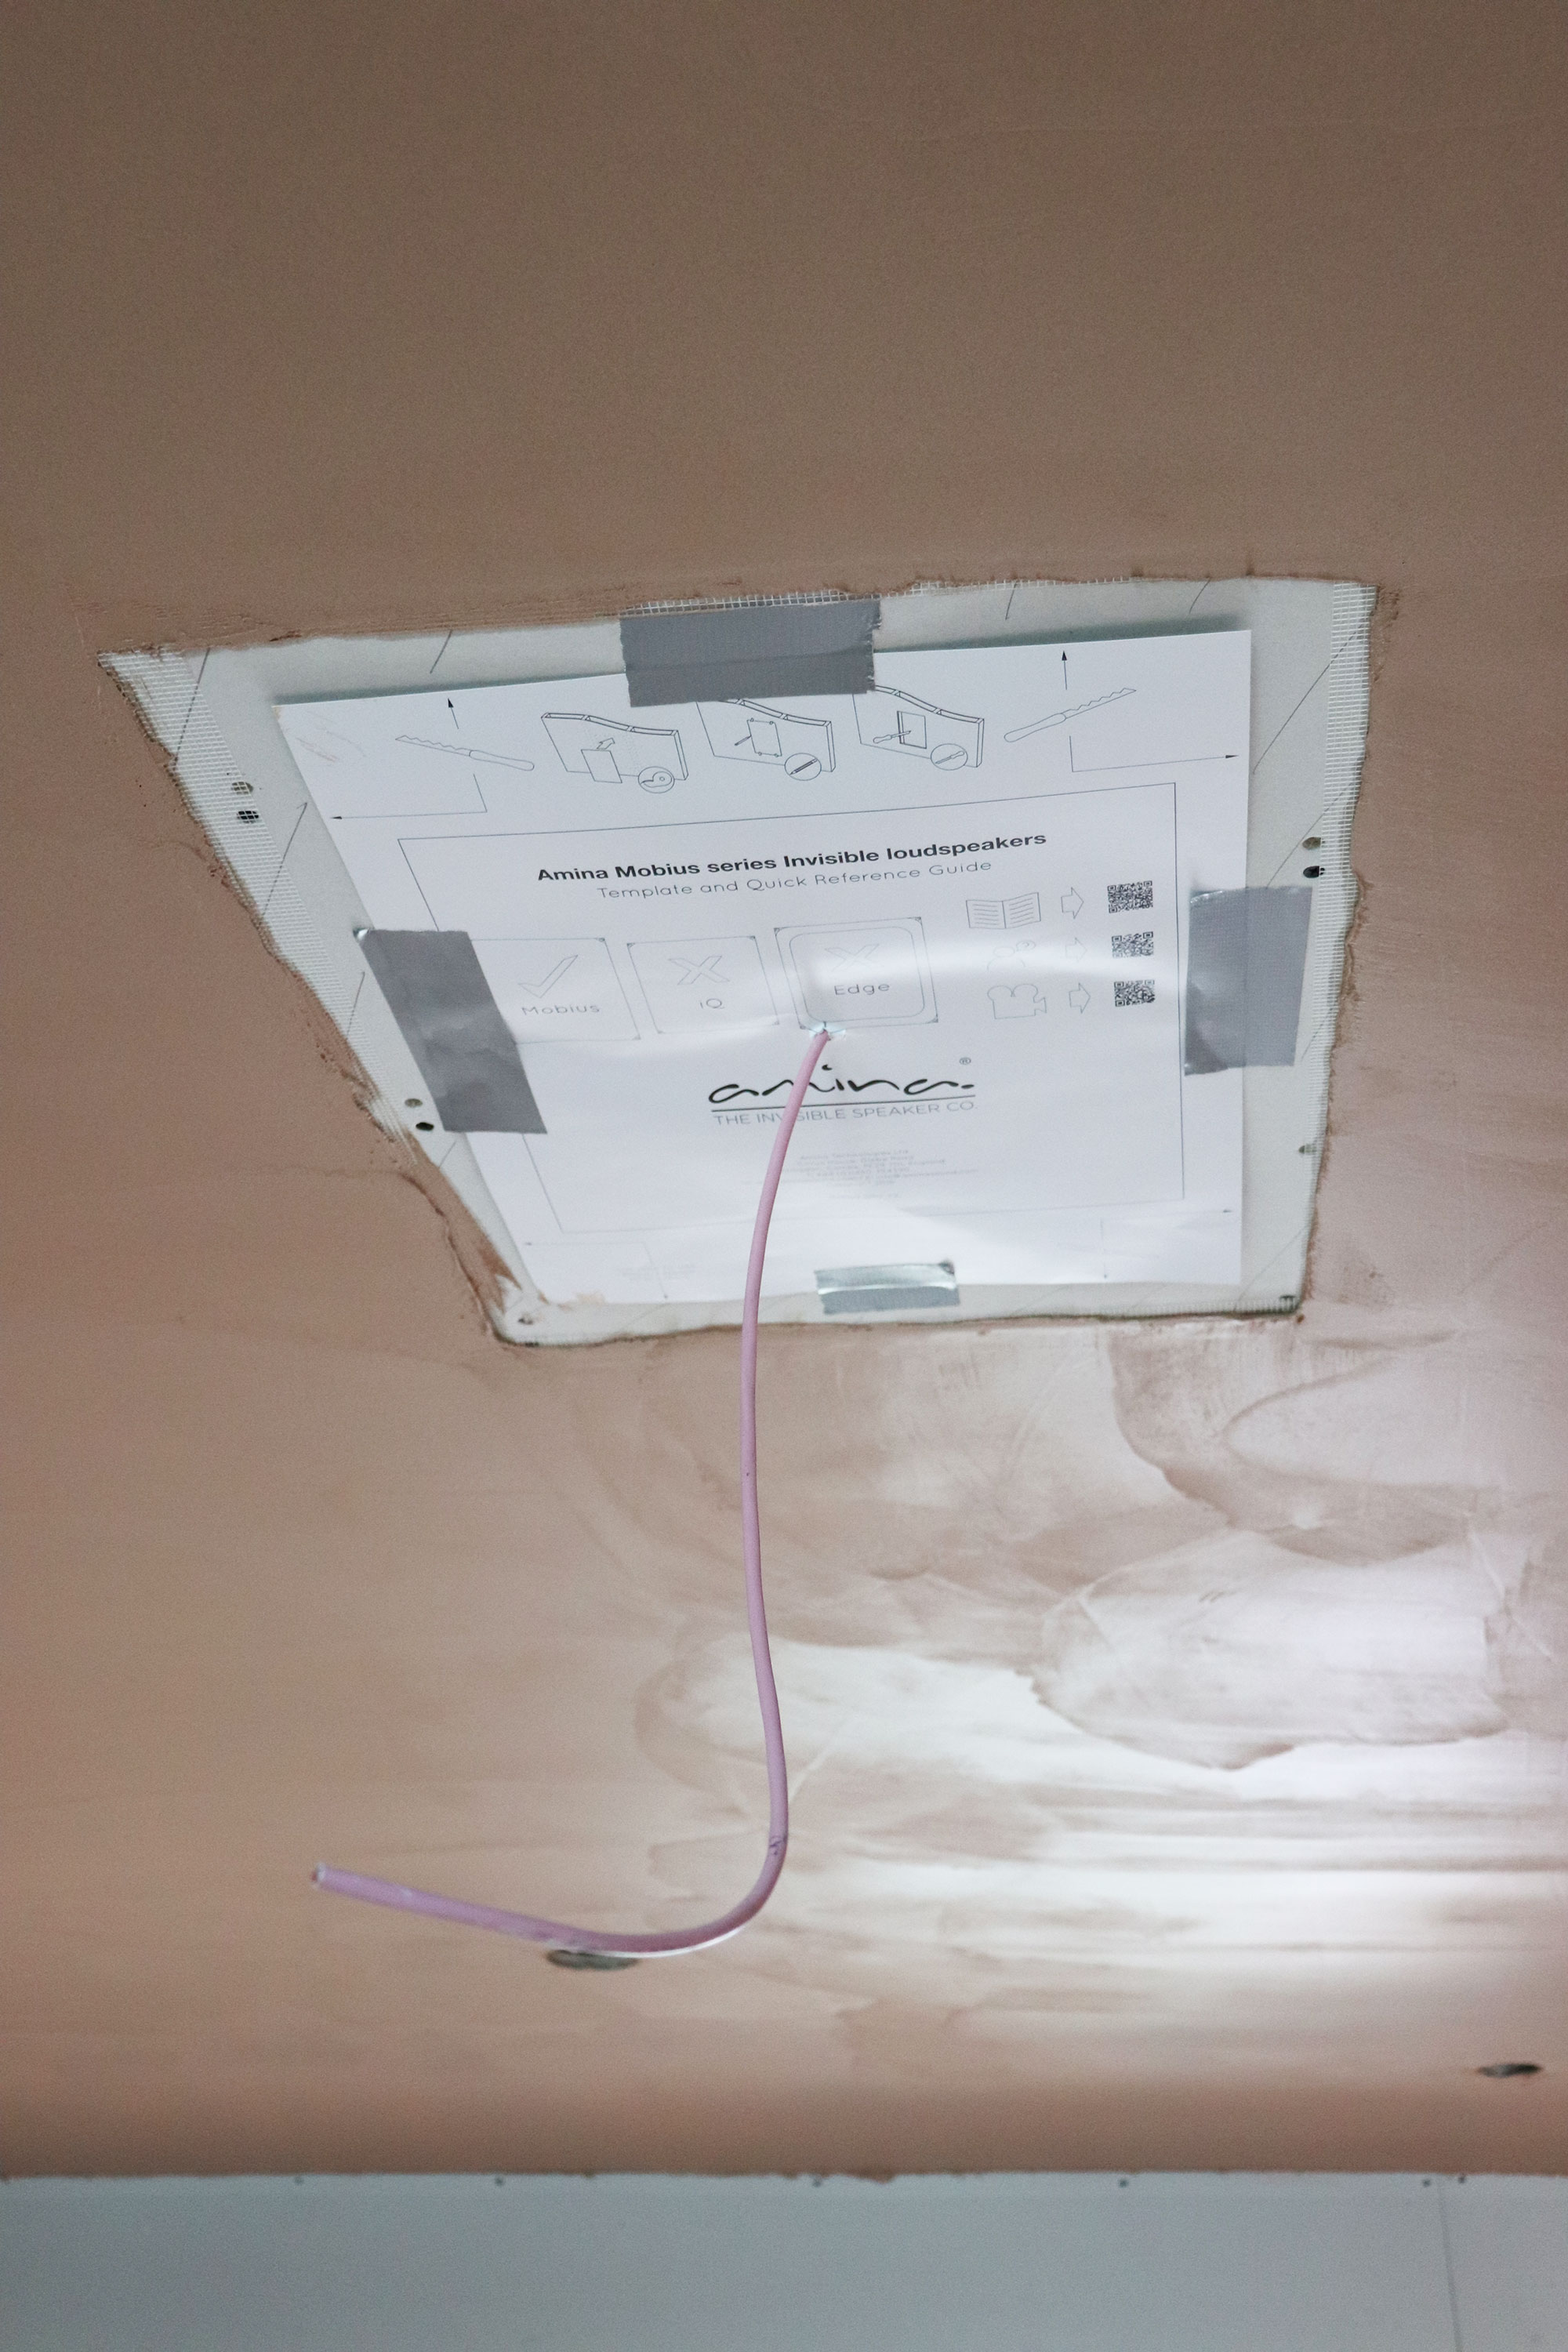
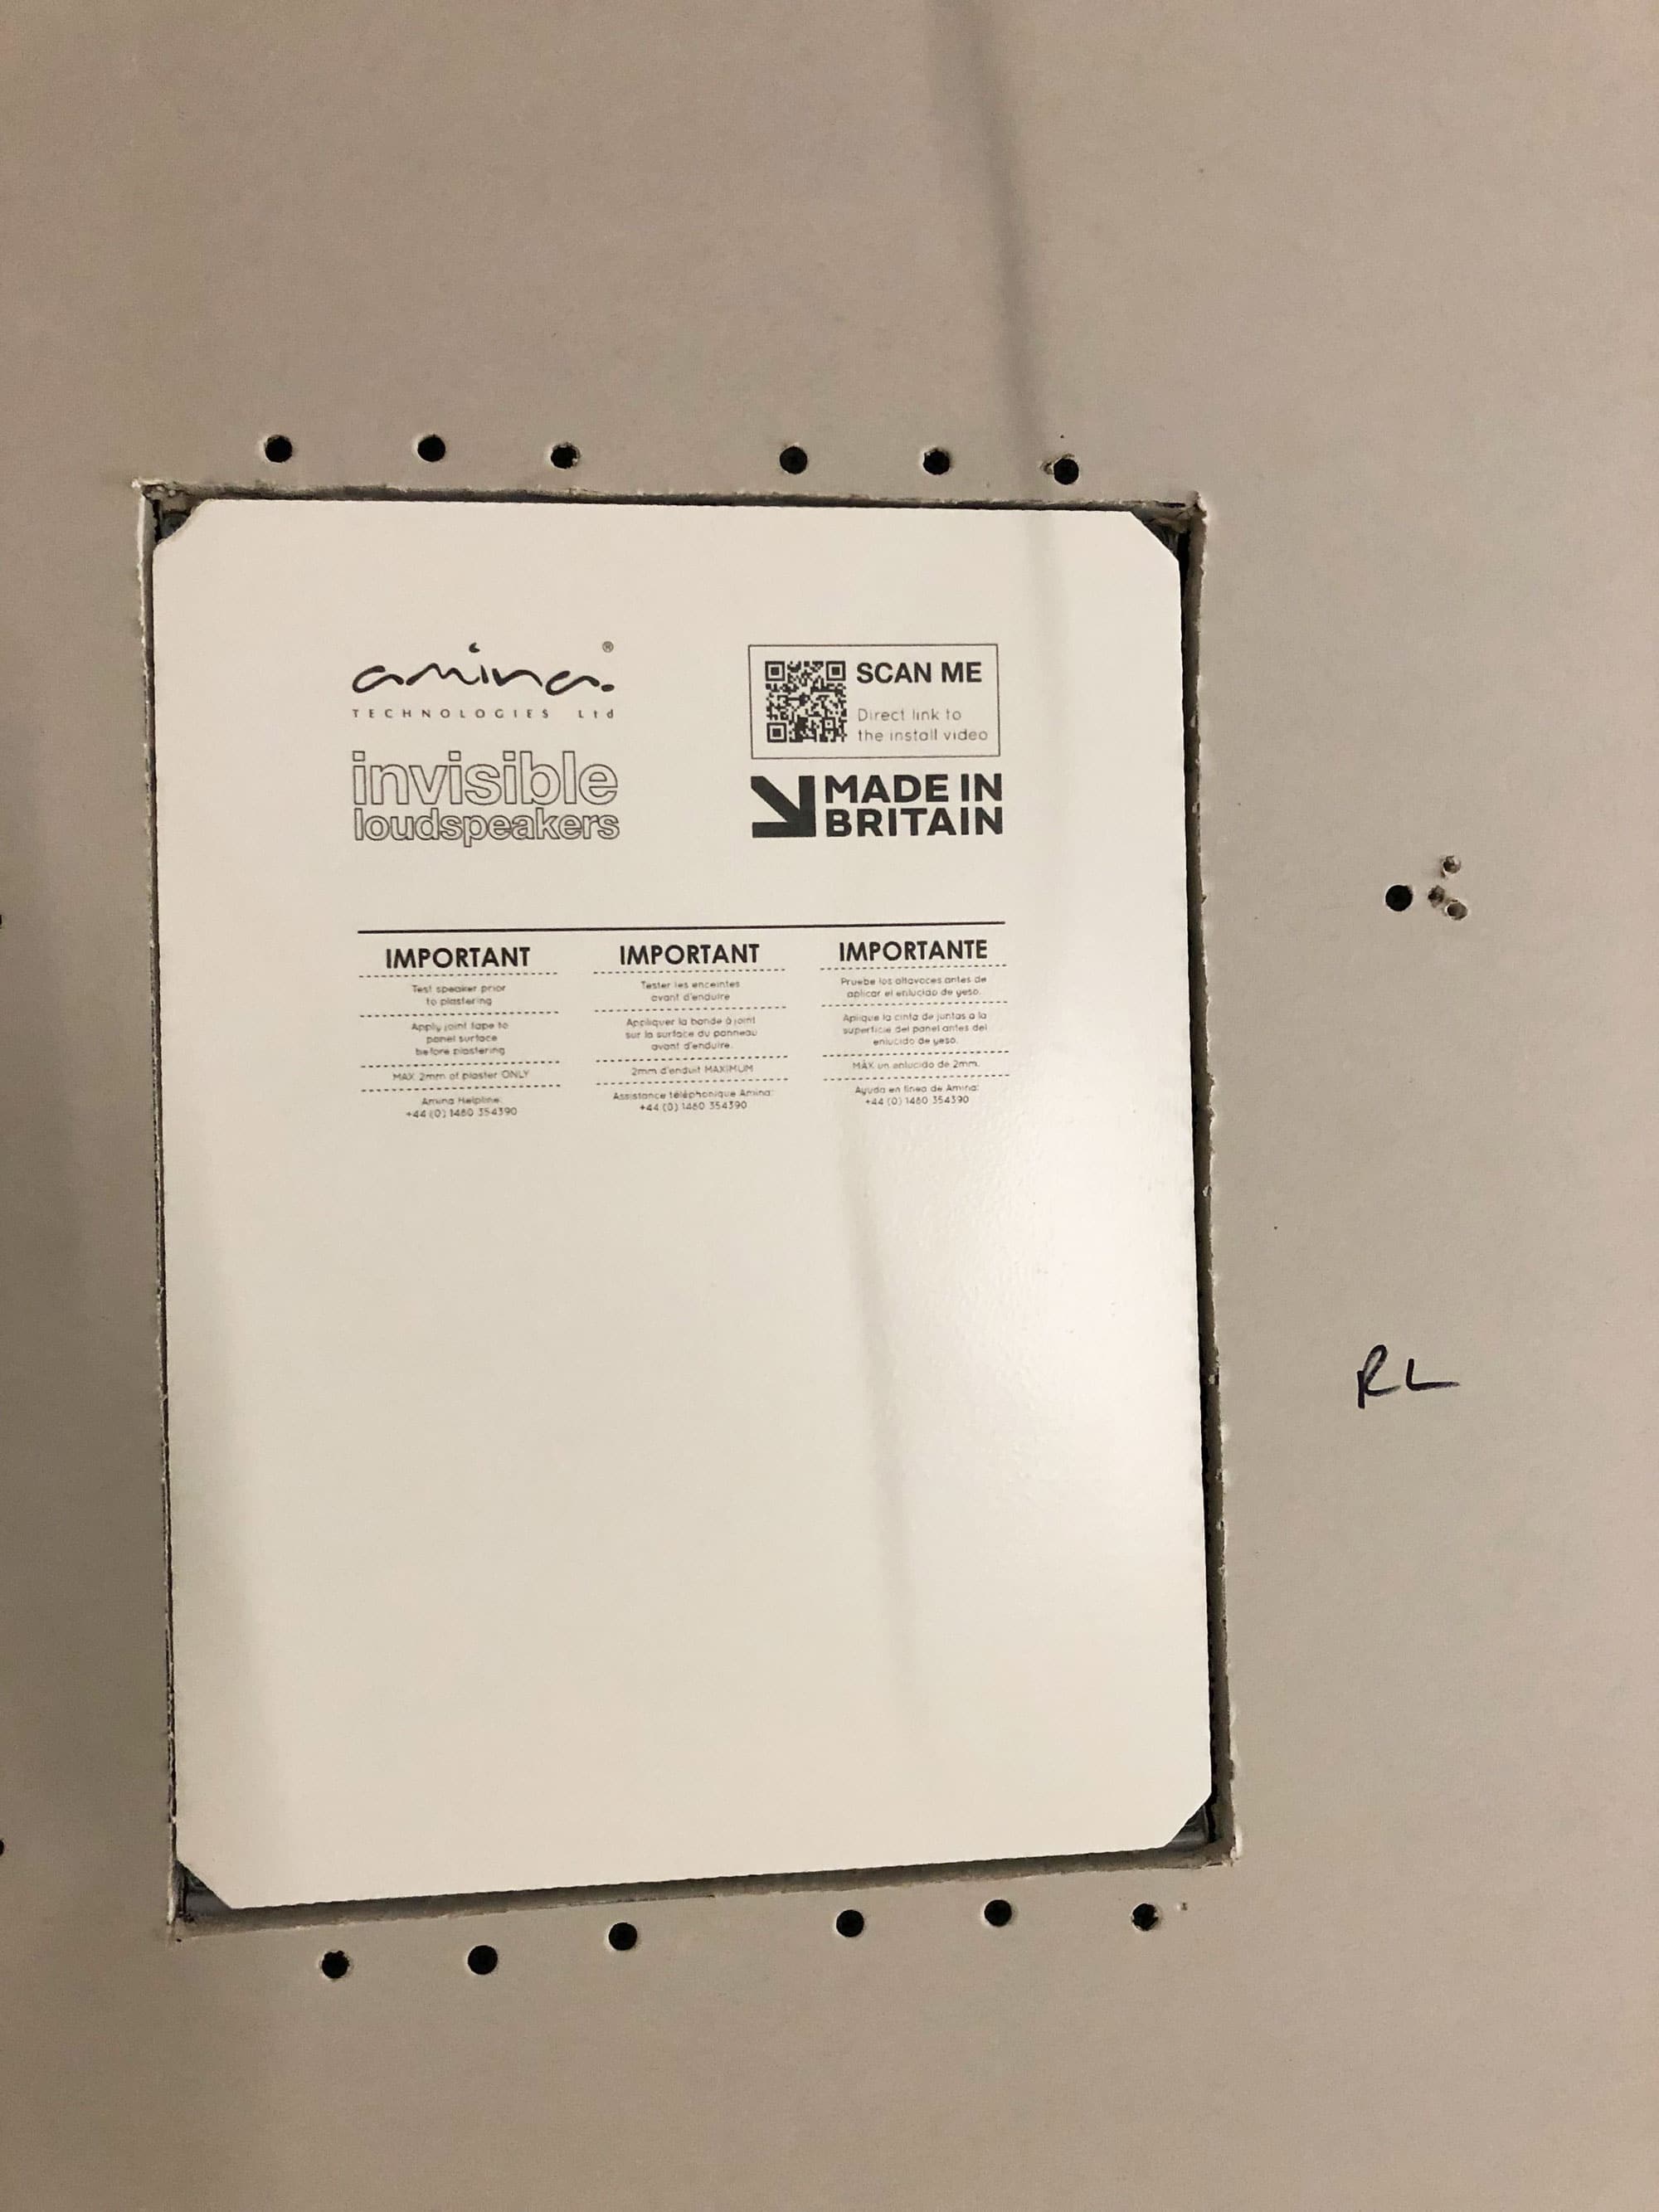
By this point, all the first fix cabling infrastructure was in place – including the wiring for the AV, which was pulled through the plasterboard where required. The speaker installation is done between the tacking and skim stages. A suitably sized hole is left in the plasterboard (Amina provides templates) and a back box fitted between the studs or joists. This is fixed only to the plasterboard (not the timber).
Challenges on site: There’s always a solution!Ideally, you’d always get the invisible speakers in before the plaster skim is done, as it’s simpler to ensure a smooth finish. This is what happened in the basement at the Build It House – but time pressures meant that we had to do it a little differently on the ground floor. We needed to get our floor tiles down to avoid delaying other follow-on trades, but you don’t want to do that before the ceiling is skimmed. Working with Amina’s sales engineer, John Cattani, and the Moss team, we figured out a solution that worked for everyone. We marked out a 100mm tolerance around the speaker locations so that the crew could crack on with plastering most of the ceiling – feathering in around the tolerance area. These speakers are now in and commissioned, and finishing them off should be a simple job. |
Technically, the back boxes aren’t essential – so they can be omitted if the joists are tight and there’s not enough room. But they act as a mount for the speaker, optimise sound quality and minimise unwanted noise transfer. The tricky bit is ensuring they’re perfectly in position, so when the speaker panels are screwed in, they finish flush with the plasterboard. The setup is then tested prior to the skim, while the speakers are still accessible.
Finally, the speakers and joints are taped with scrim and the plasterers can do their skim (which must be 2mm thick max to get the correct sound performance). The process isn’t rocket science, and Babs tells me some DIYers have installed the speakers themselves. But for peace of mind and to ensure the best possible sound quality, we never questioned getting them fitted professionally (plus using a qualified installer will give you access to Amina’s 10-year guarantee).
I can’t wait to hear them in action!
Chris Batesmith
You may be interested in