- Plan ItBack
- Design ItBack
- Build ItBack
- Homes
- ProductsBack
- CostsBack
- Self Build Cost Calculator
Estimate your project costs instantly with Build It's interactive self-build cost calculator
Calculate Now - Costs & Finance
- Contracts & Warranties
- Build It Estimating Service
Get an accurate, detailed cost breakdown of your project
Submit plans
- EventsBack


 Login/register to save Article for later
Underfloor Heating Installation

There are 9 steps in this guide
- First Fix Smart Home Electrics at the Build It Education House
- Heat Pump Ventilation: a Modern Home Heating System
- Underfloor Heating Installation
- Fitting the Rainscreen Cladding
- Installing the Rear Sliding Door
- Applying the Modern Silicone Render
- Plastering Internal Walls
- Roofline and Rainwater Goods
- Installing the AV and Invisible Speakers
We’re fitting warm water underfloor heating (UFH) in three key zones: the ground floor WC, and the bathroom and master ensuite upstairs.
We don’t necessarily need the extra output they’ll provide, because the heat pump ventilation system is technically a whole-house system. But underfloor heating is one of those must-haves for a new home, especially for taking the chill off underfoot after a shower or soak in the tub.
Why underfloor heating?
UFH is the preferred choice of heat emitter for many self builders – and with good reason.
Its low flow temperatures marry up perfectly with renewables such as heat pumps. Standard boilers run more efficiently with UFH compared to using radiators.
It’s also a hidden system, so it reduces the need for wall-hogging traditional emitters – although you may still want to include a towel rail in wet zones to provide a timely boost when external temperatures drop into the minus figures.
UFH works by pumping a controlled flow of warm water through tubing embedded in the floor. This in turn warms the surface above, transforming it into a whole-room, low-temperature heating emitter. We’re using non-slip tiled finishes in the wet rooms of the Build It House, which are a great combination with UFH.
Specifying the UFH systems
From the very early stages of our project, we were sure we wanted to partner with Nu-Heat for our UFH. The company offers an in-house design service, so you know you’re getting a system planned by the experts.
Installation is usually by your plumber or a registered Nu-Heat installer, but in our case, Nu-Heat is working on a supply and fix basis.
To design the right system, the team needs to know the planned performance of the house and the rooms the UFH is going into, along with full details of the floor build-up, so they can identify the best fixings and calculate the required output.
The system capacity is principally controlled by the pipe spacing and flow rate – the design will look to optimise both to give you the most efficient results.
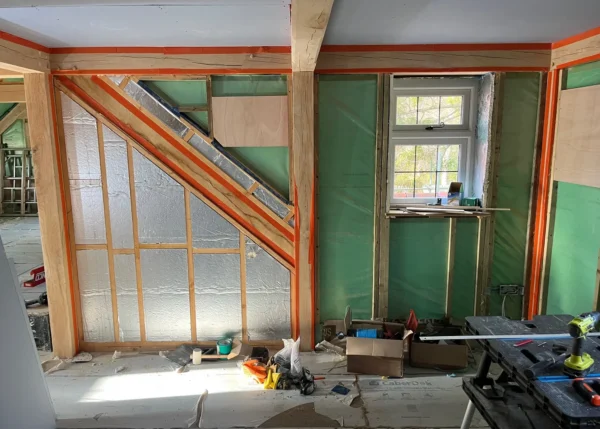
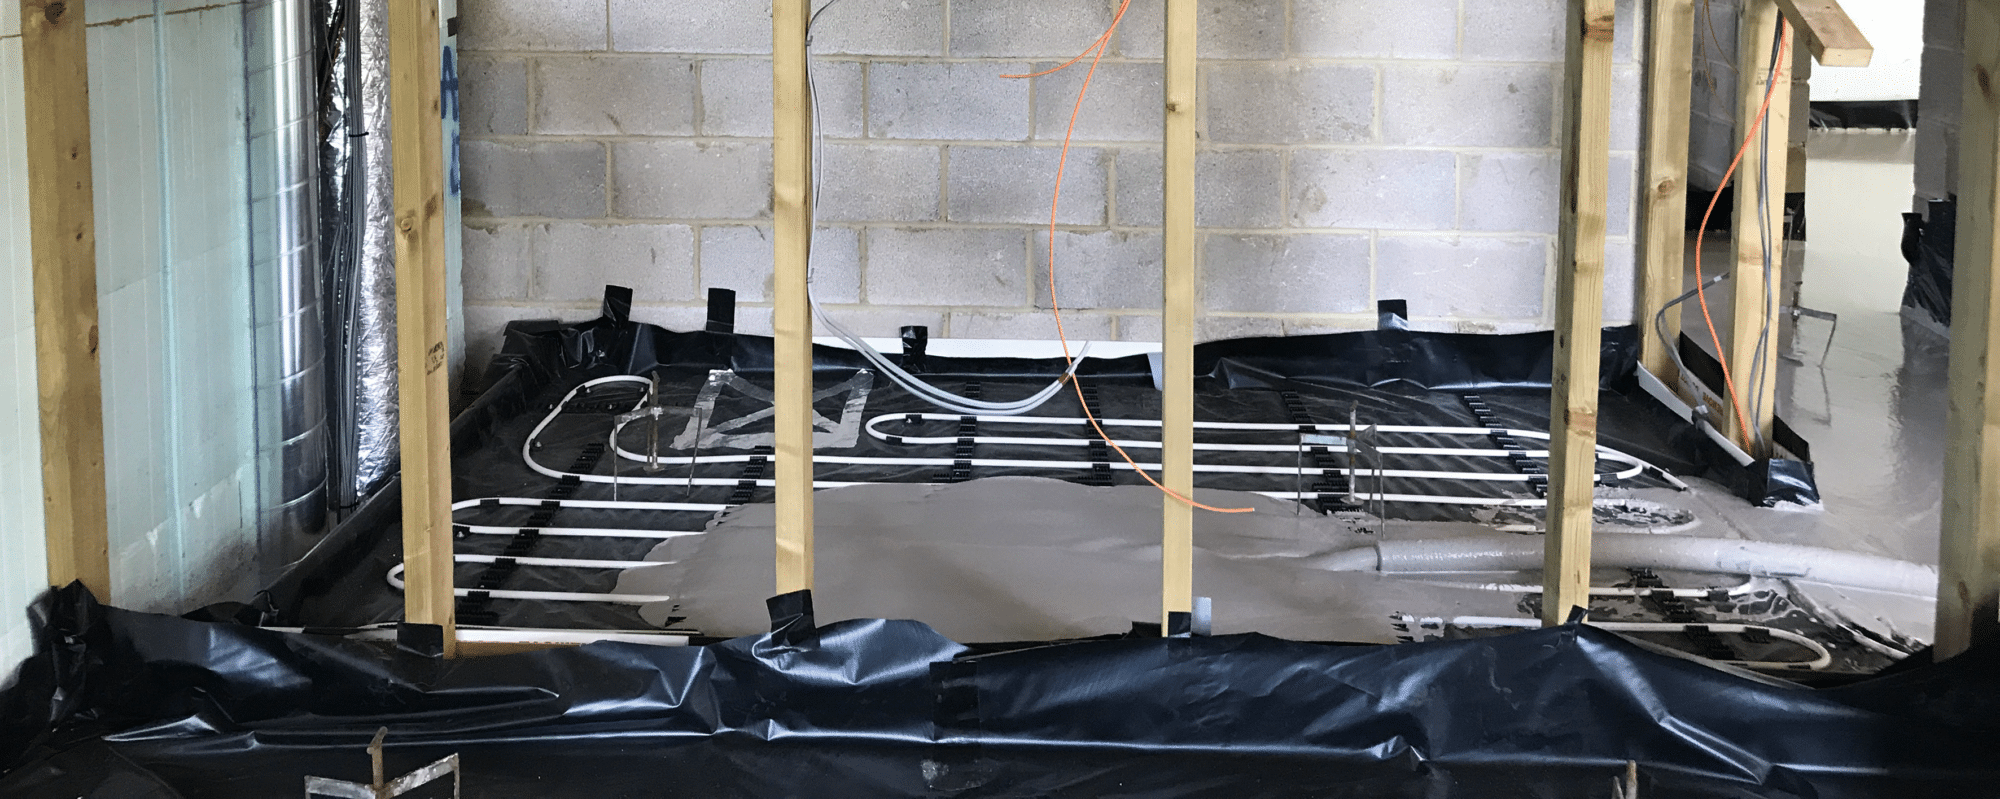
Fitting Nu-Heat’s Fastflo UFH |
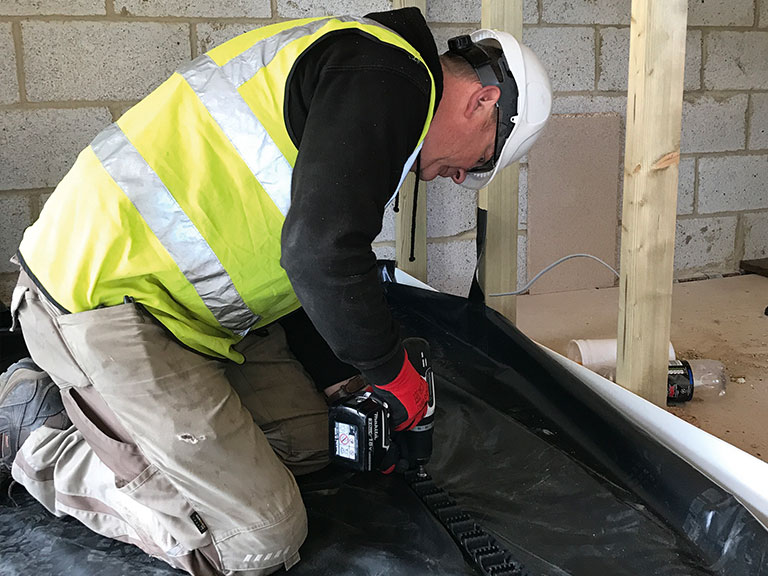 2. While the manifold goes in, the cliptrack is fixed into position. Note the polythene membrane, whcih will stop the screed escaping when it’s poured.
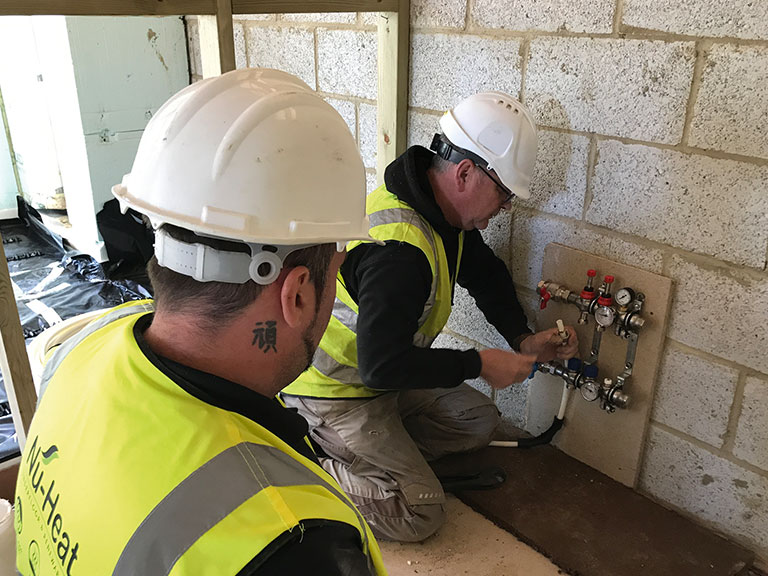 3. The feed for the ensuite is hooked up to the manifold before any pipework gets clipped into place.
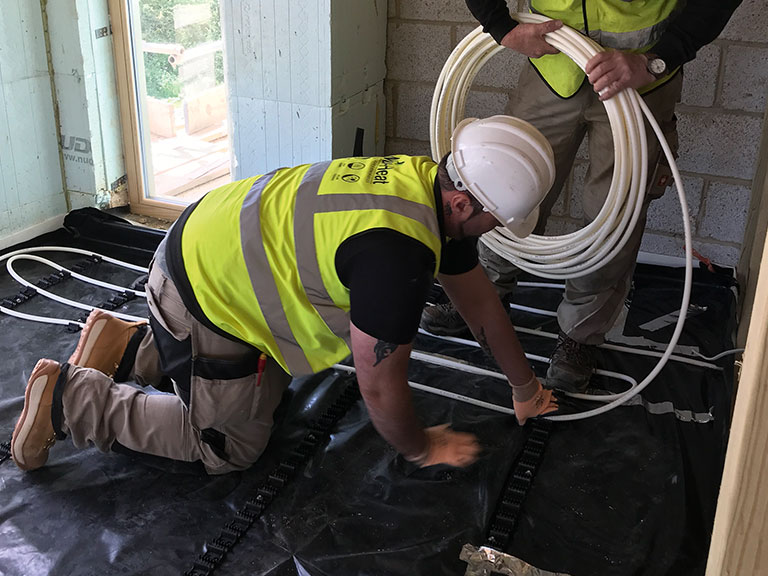 4. The team starts coiling out the 14mm high-density polyethylene Fastflo tube, which comes with a 10 year insurance-backed warranty.
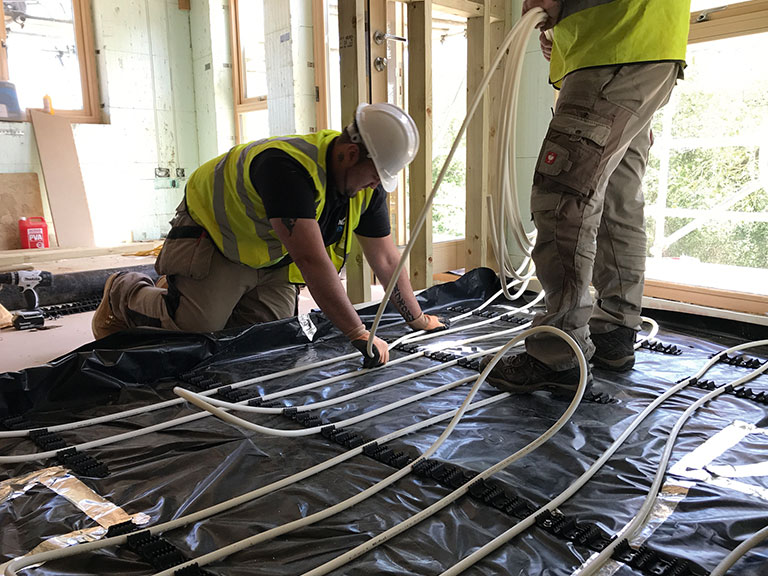 5. Experience allows the team to confidently get the arrangement right first time, with only minor adjustments needed.
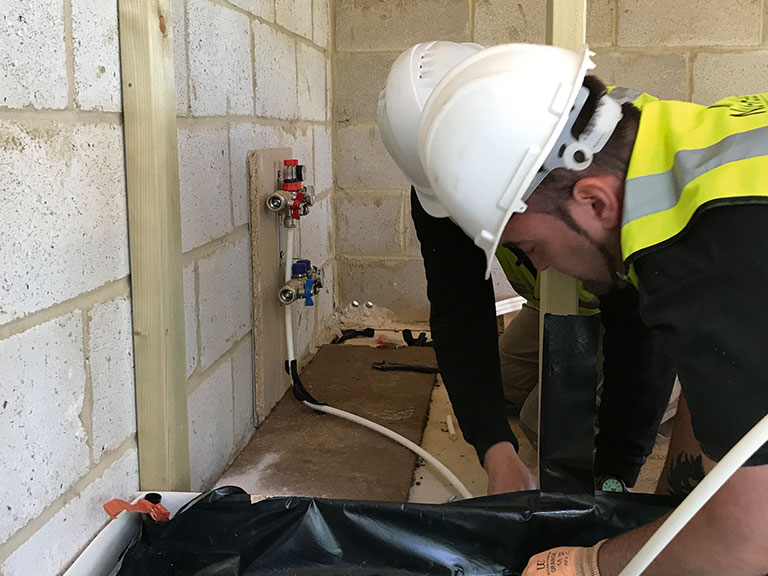
On a standard new home, we might have specified the same type of UFH system for all three rooms. But we’re keen to demonstrate the different options self builders can consider, and Nu-Heat were happy to mix-and-match a little to help us do that.
Ground floor WC
In the WC we’re using LoPro 10, which is more commonly specified for renovations. It’s an ultra-slim solution with a total build-up of 15mm, so it can maximise head room on a new build with tight ceiling heights, too.
The LoPro 10 underfloor heating system is made using pre-routed gypsum panels, which are simply glued and screwed directly onto the subfloor (in our case, a layer of rigid insulation above a beam and block floor). This type of UFH can be tiled straight over, but we’ll fit a decoupling membrane beforehand to reduce the risk of the tiles cracking.
First floor bathroom & ensuite
On the first floor, we have metal-web timber posijoists; so you might think the same solution would work. But we’re also installing a specialist acoustic floor system from Screedflo, to see how it performs compared to beam and block.
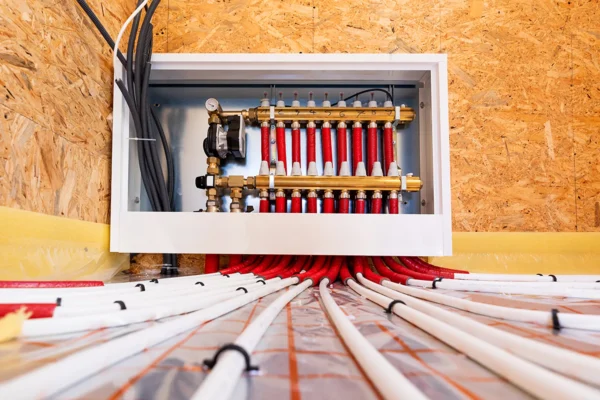
This gives us a screeded floor on top of noise-reducing foamboard, so a more conventional solution will suit as better. Nu-Heat accounted for this by opting for its Fastflo in-screed system for the family bathroom and master ensuite.
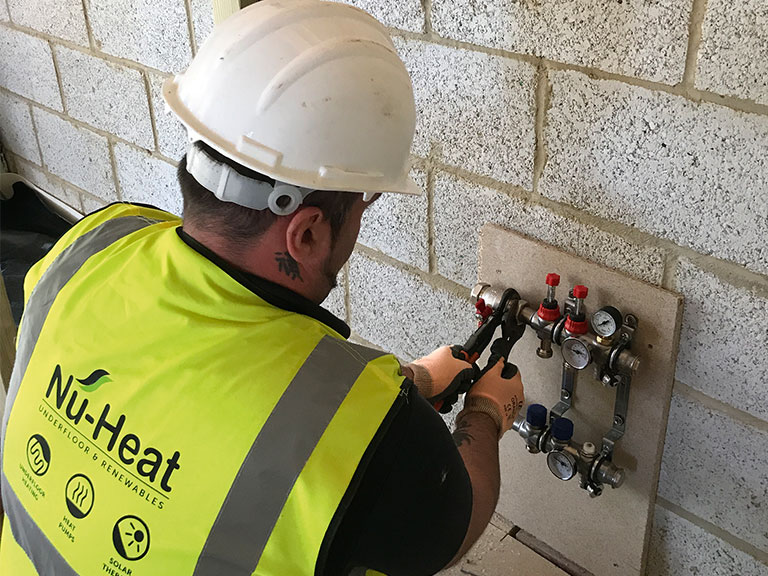
Once the design is finalised, Nu-Heat sends out a pack with all the details – manifold positions, pipe spacing, electrical layouts etc – which clearly sets out everything the installer needs to complete the project (see the box above for how the process went).
Wrapping up
I caught up with the installers before heading off site. Their main concern was when the screed would be in – you don’t want anyone accidentally damaging the pipework. So they were pleased to hear that Screedflo were due back in two days! With the ensuite almost finished, they were moving on to the main bathroom.
This is a simple rectangular shape, so straightforward to handle, and hooks up to the same manifold in the dressing room. With both elements of this system in, they’d then pressure-test the setup.
The WC floor would be done last, and at this stage would just be left with the pipes running down into the basement ceiling, as we didn’t yet have confirmation of the final manifold position (we need to coordinate with Moss Technical and Total Home Environment on this, too).
Nu-Heat will be back on site next week to do this, and our electricians have kindly agreed to run 5-amp fused spurs up to the manifolds. The actuators (which control the flow of water) and wireless wiring centres (for the controls) can then be fitted to complete the UFH installation.
Chris Batesmith
You may be interested in