- Plan ItBack
- Design ItBack
- Build ItBack
- Homes
- ProductsBack
- CostsBack
- Self Build Cost Calculator
Estimate your project costs instantly with Build It's interactive self-build cost calculator
Calculate Now - Costs & Finance
- Contracts & Warranties
- Build It Estimating Service
Get an accurate, detailed cost breakdown of your project
Submit plans
- EventsBack


 Login/register to save Article for later
Fitting the Rainscreen Cladding

There are 9 steps in this guide
- First Fix Smart Home Electrics at the Build It Education House
- Heat Pump Ventilation: a Modern Home Heating System
- Underfloor Heating Installation
- Fitting the Rainscreen Cladding
- Installing the Rear Sliding Door
- Applying the Modern Silicone Render
- Plastering Internal Walls
- Roofline and Rainwater Goods
- Installing the AV and Invisible Speakers
One of the elements I love about the Education House design, which was drawn up by architect and Build It expert Opinder Liddar of Lapd Architects, is that it strikes a fantastic balance between clean contemporary lines and soft, textural finishes.
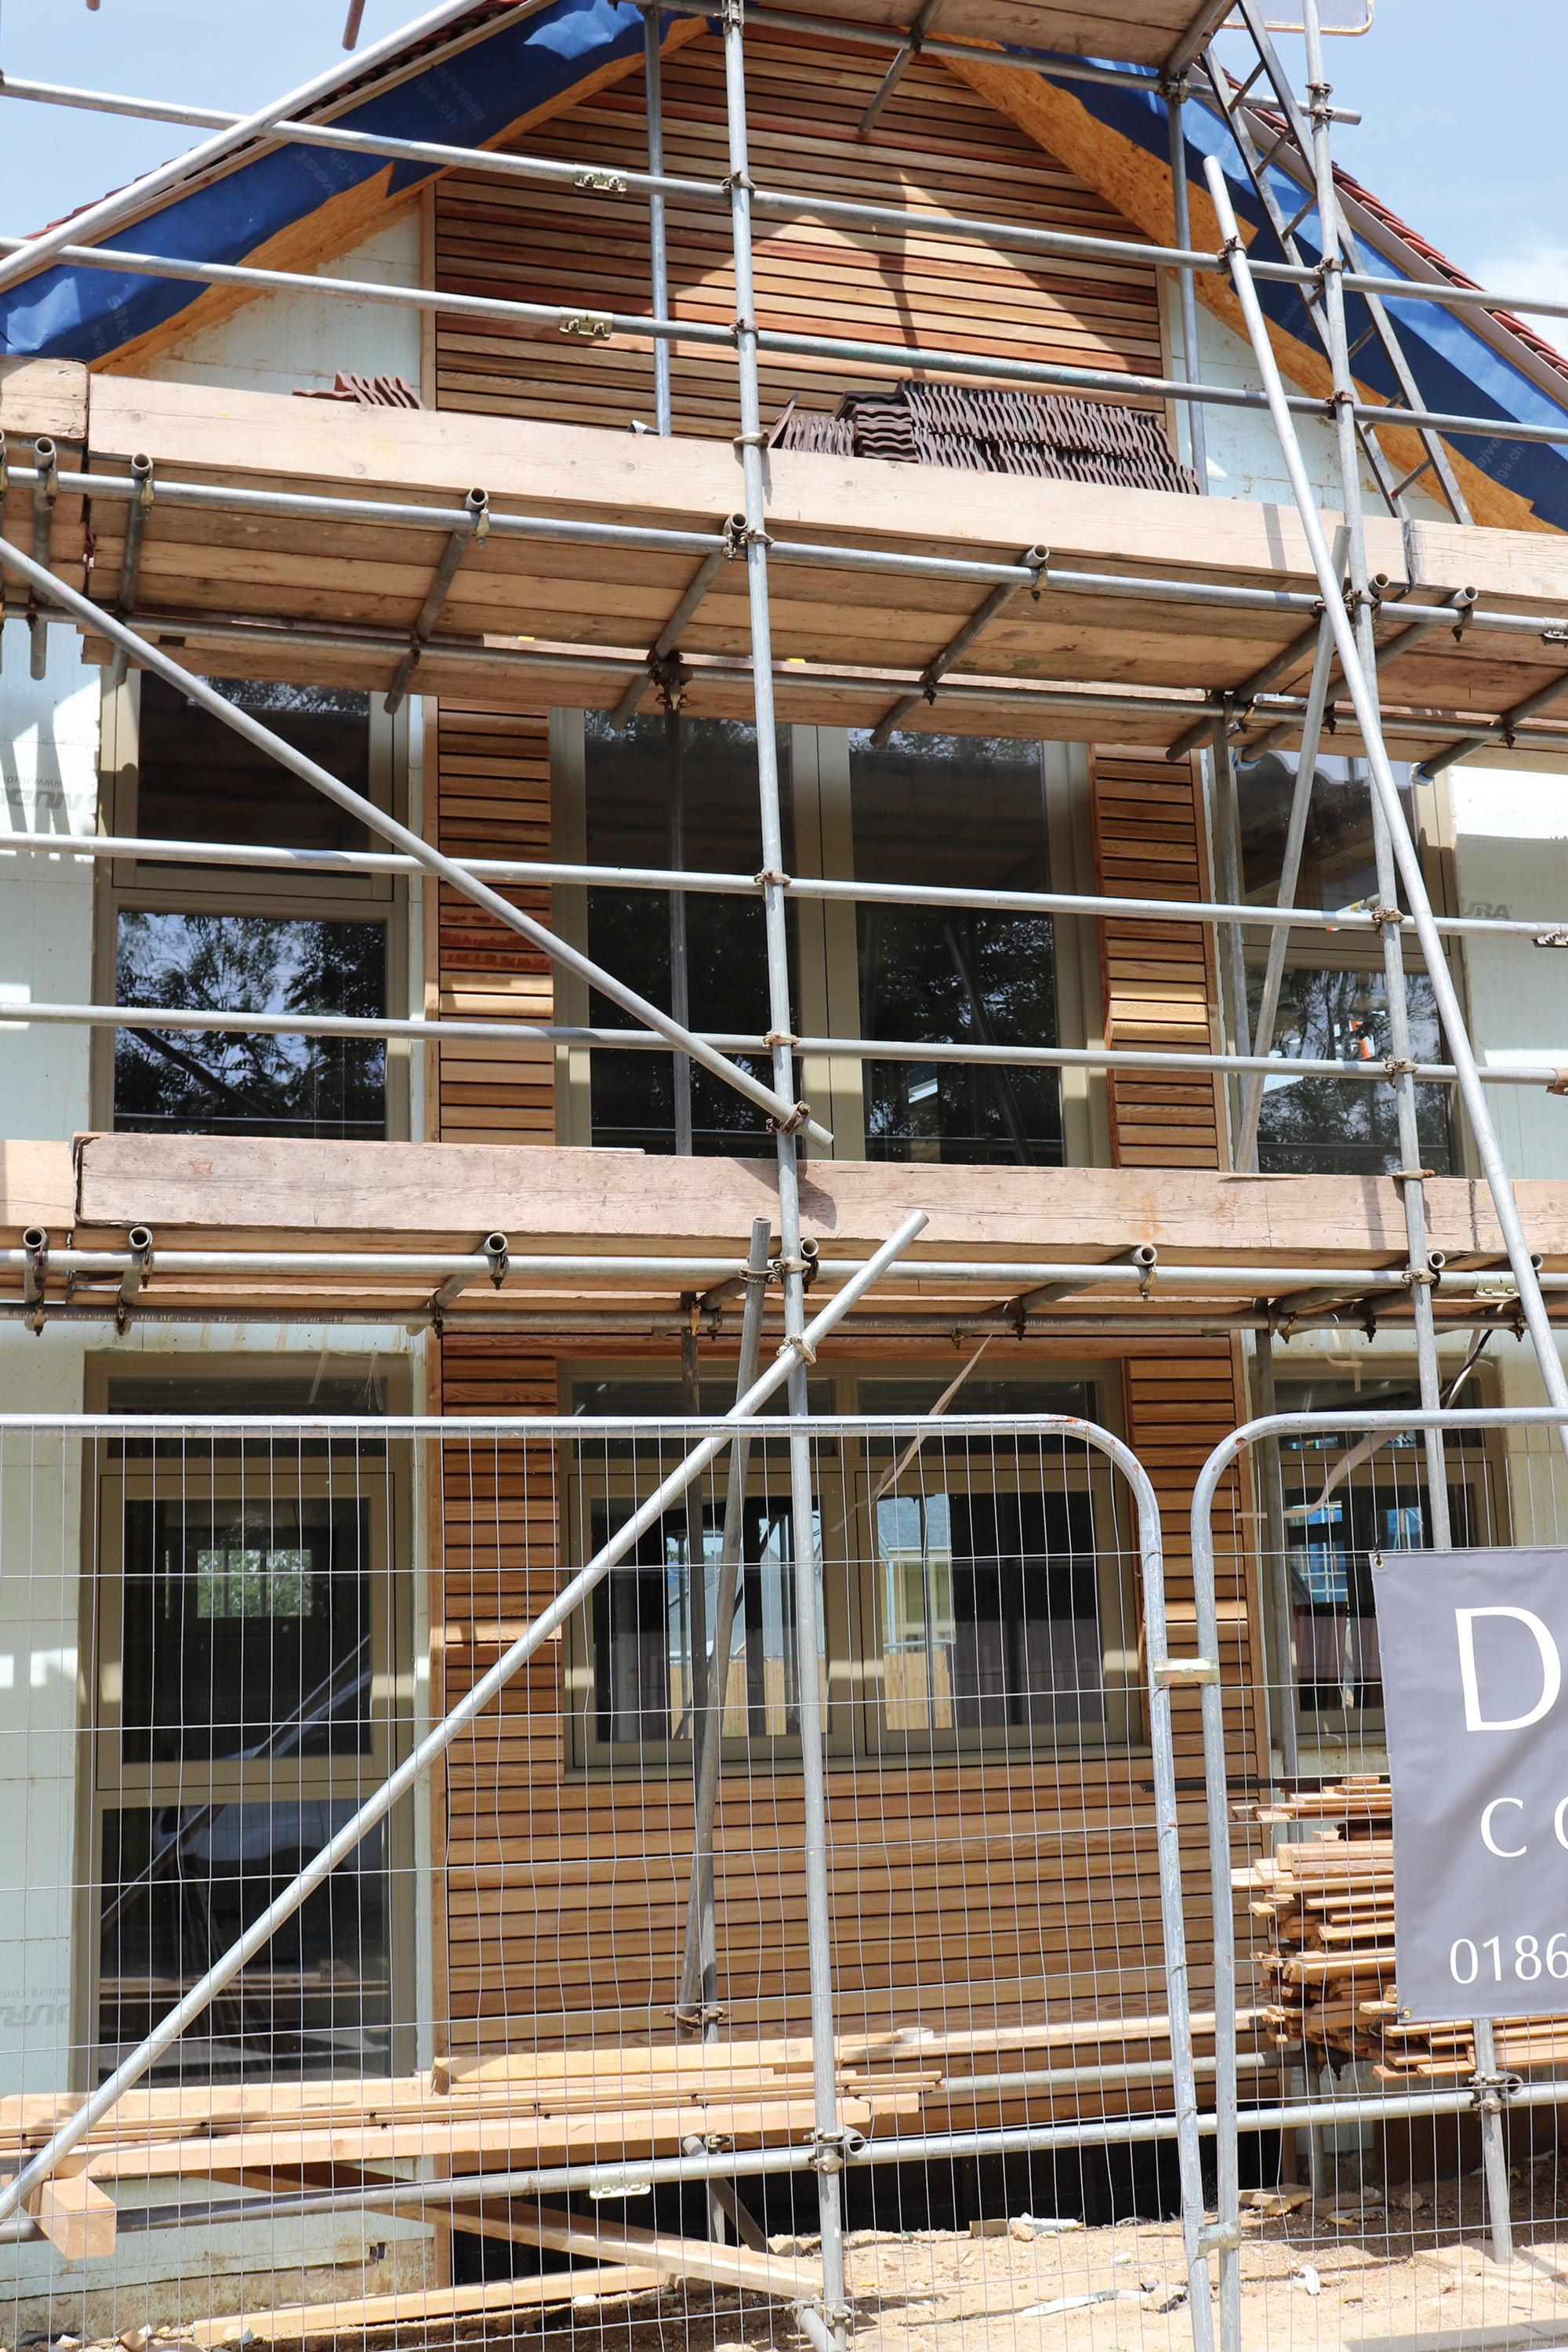
That’s partly down to the mix of external materials: particularly the crisp white render, timber cladding and characterful roof tiles.
Choosing the right cladding was always going to be crucial, then.
There are all manner of species and profiles to choose from – from the likes of Western red cedar through to the modern fad for charred woods. For the Build It House, we wanted something that would give us a blend of wow factor and durability, as well as fit with most self builders’ budgets. And we found it in Russwood’s Siberian larch.
A slow-grown, high-density timber, Siberian larch is one of the toughest softwoods around – with a typical lifespan of 50-100 years – making it perfect for external cladding. It’s easy to machine, too, so it’s available in a wide range of profiles.
We can’t wait for the scaffold to come down in a few weeks’ time so we can see the cladding in its full glory
Russwood offers an advanced option that’s factory-coated in SiOO:X, a water-based silicone treatment that helps to give that lovely weathered appearance at an accelerated rate. It’s a clever solution that prevents the differential weathering you sometimes see on more exposed elevations, beneath windows etc – although it does add to lead times (we needed to place our order about six weeks before we wanted the cladding on site).
Fitting the cladding
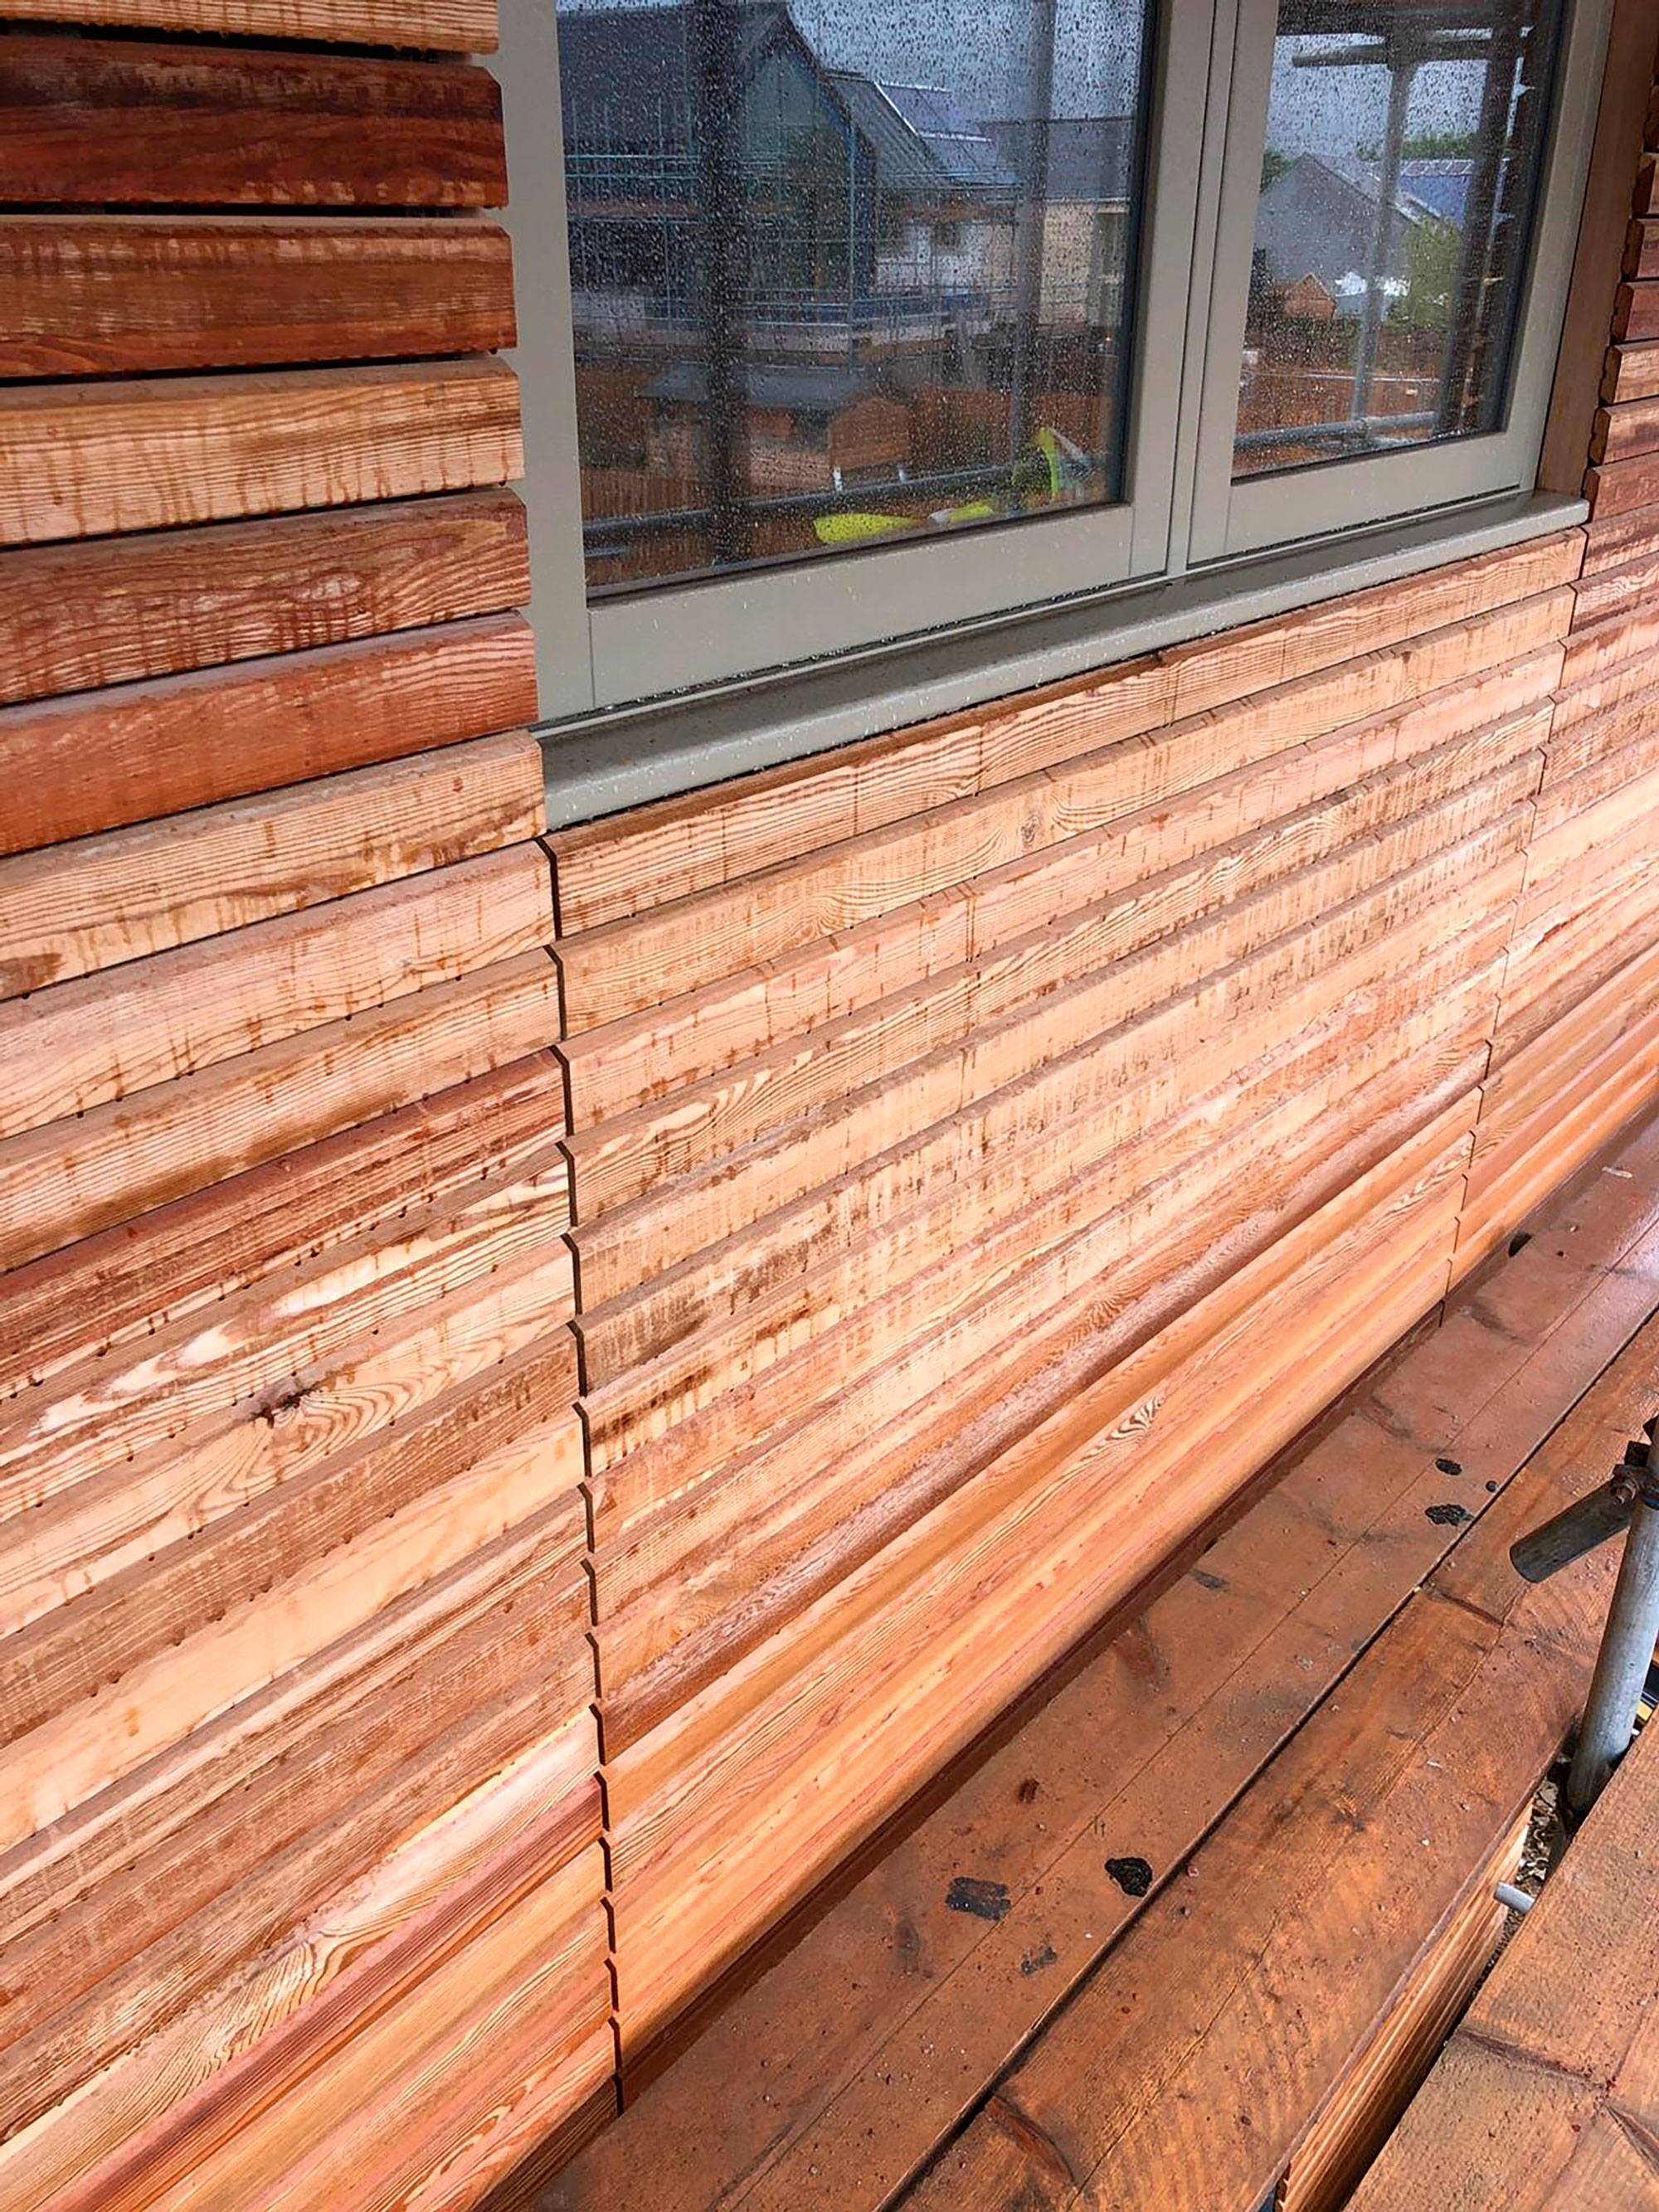
Russwood’s MD, John Russell, recommended a rainscreen format. This arrangement features narrow strips of timber (ours are 70mm wide) with a chamfer at the top and bottom to allow water to drip down the face.
We’re fixing it horizontally onto vertical battens (which will hold a breather membrane onto the ICF walls), with an 8mm gap between boards. This design encourages airflow behind the cladding to ensure any moisture that does penetrate evaporates effectively.
In total, Lapd estimated we needed 108m2 of cladding (including a 10% allowance for cuts and wastage), along with 51m of larch stop beads.
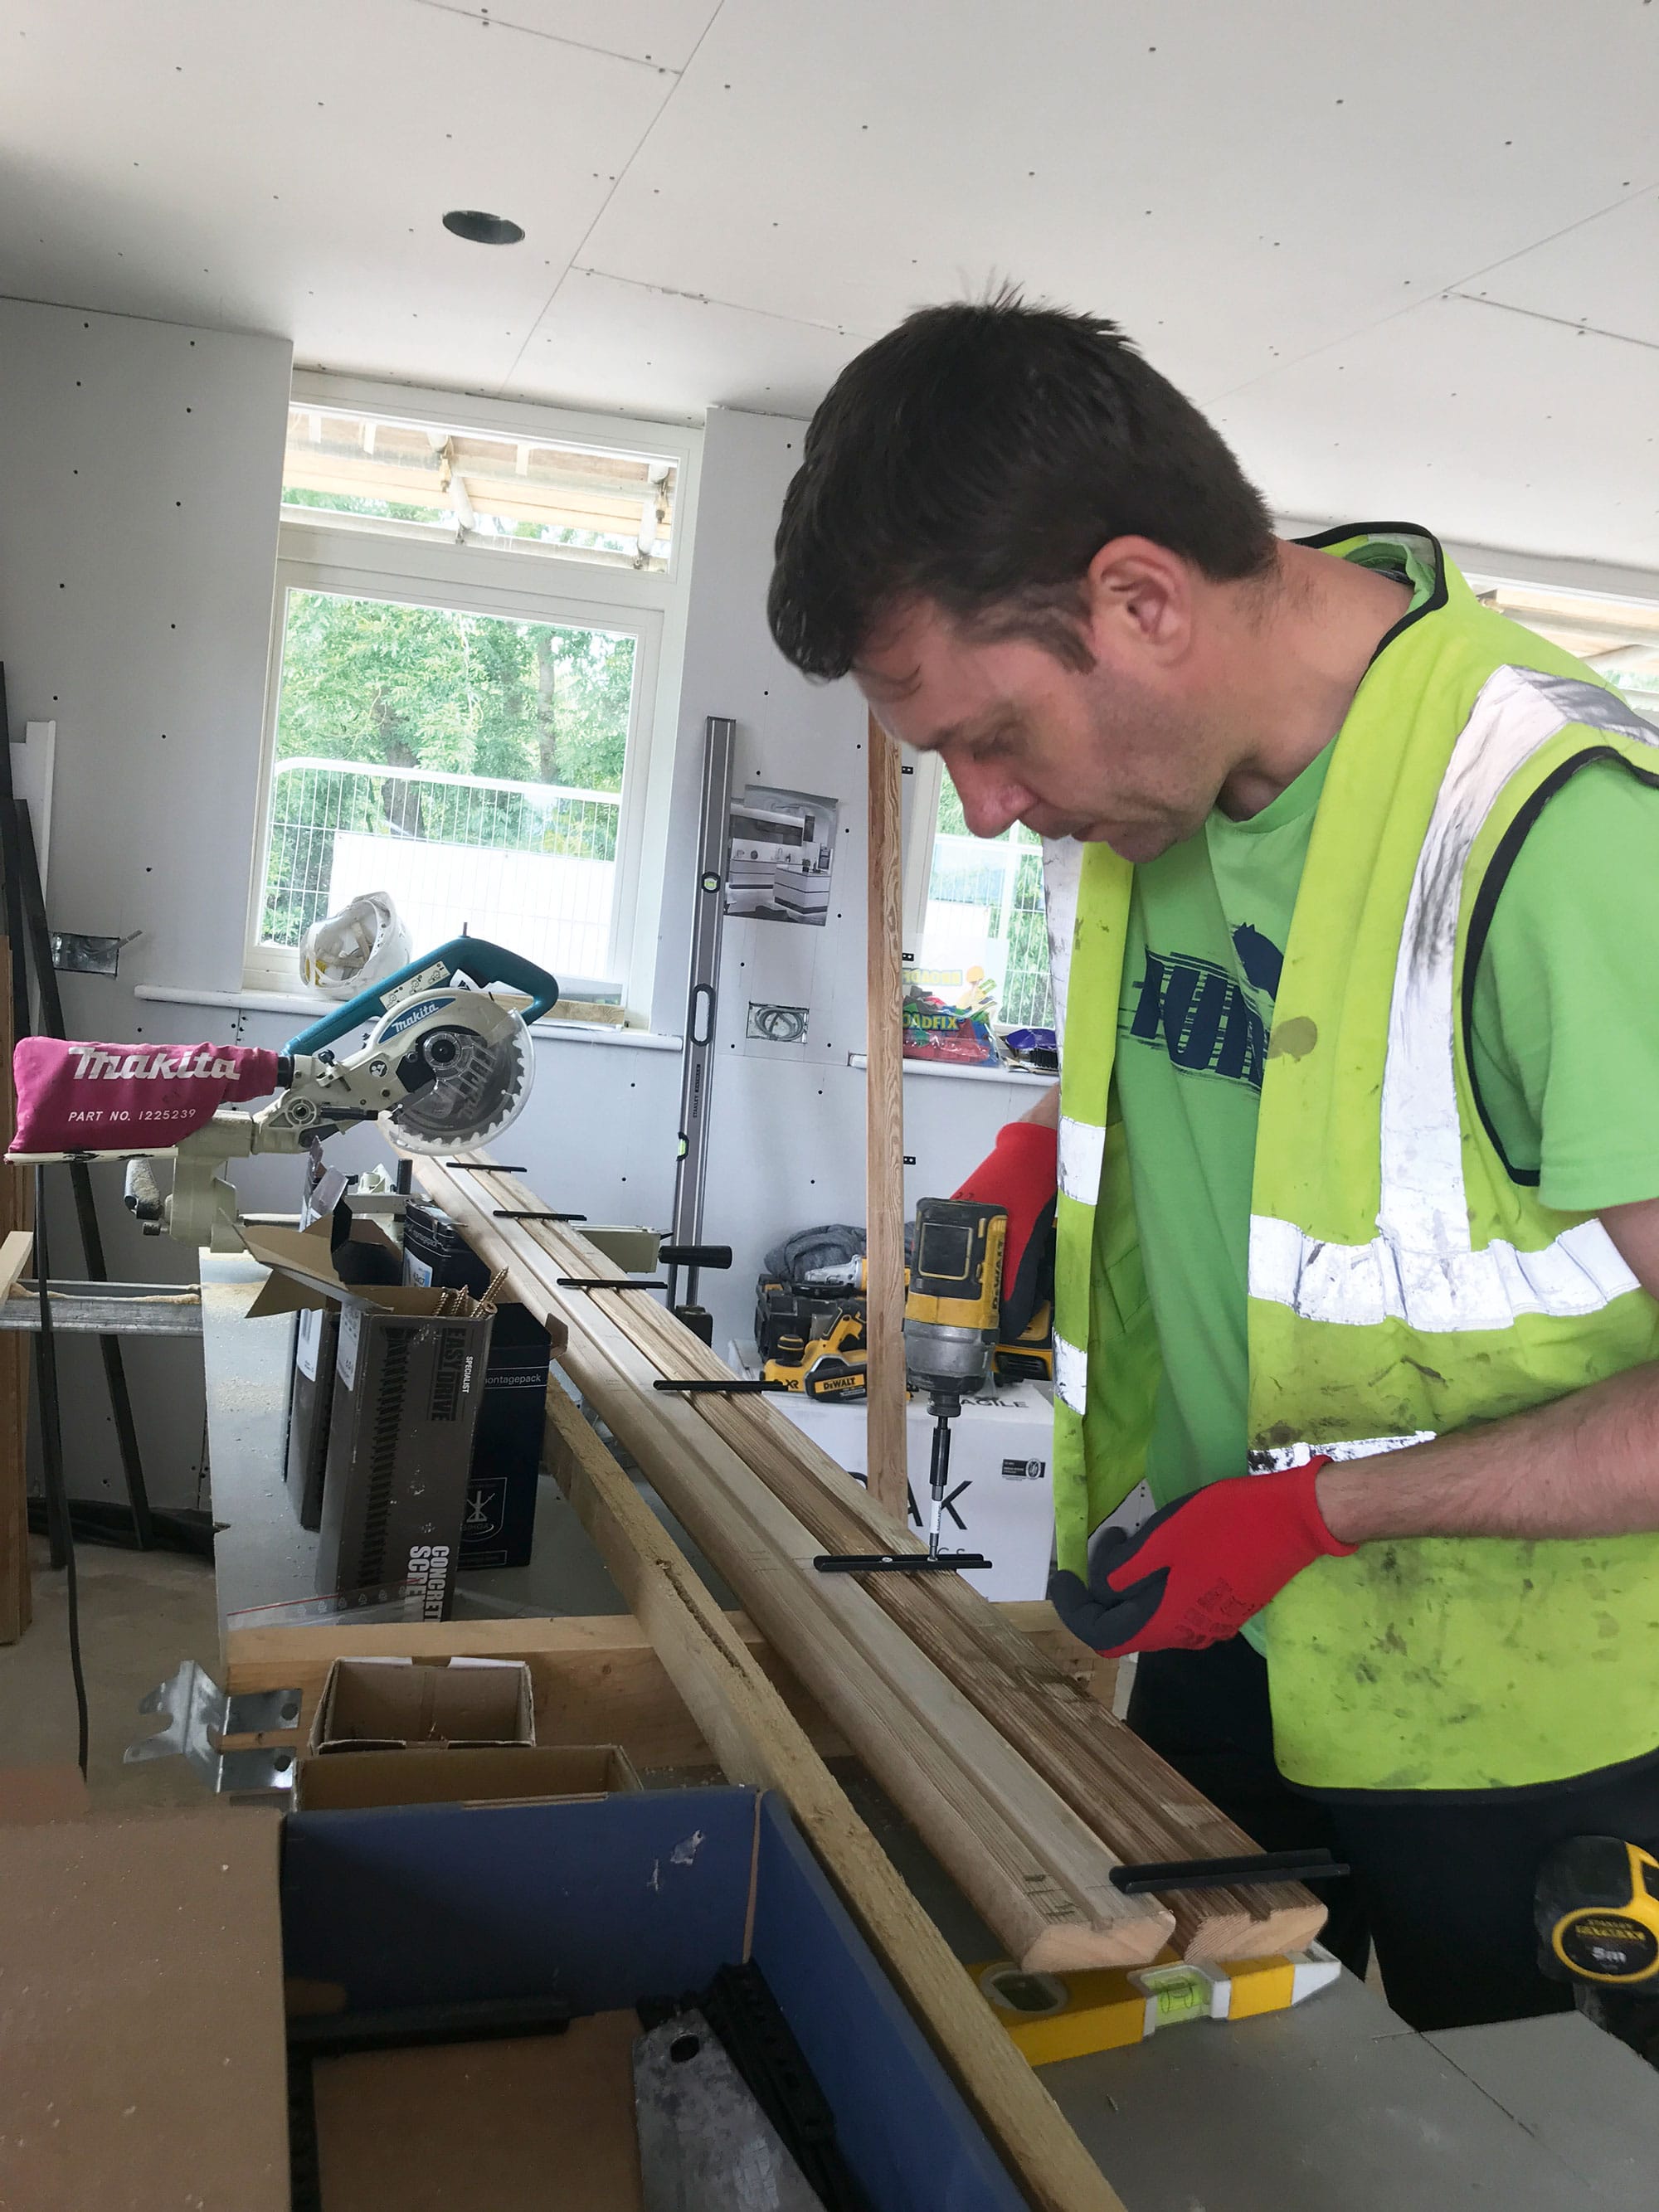
While we figured out the detail for the window reveals, our carpenter cracked on with fabricating as much of the secret-fix cladding as possible
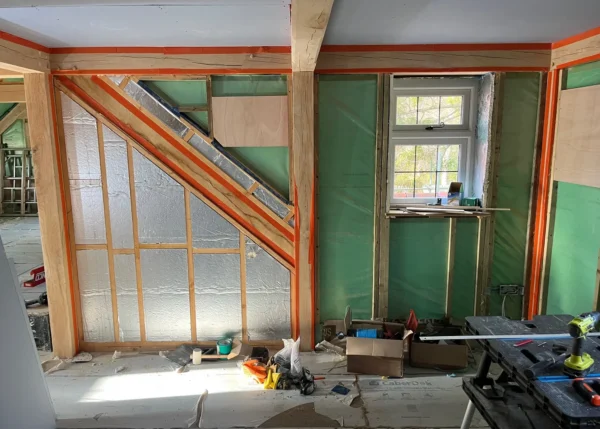
Once the stud walls were done inside, Drewett & Hunt’s carpentry team shifted their focus to prepping for the cladding. Stage one was treating all the battens with a black exterior-grade paint, to hide them against the membrane and reinforce the shadow-gap effect.
They’re fixed at 400mm centres, with extra lengths where needed, such as at corners and some structural openings. We got this done before the renderers started because if you try to screw battens in afterwards you’re likely to end up with cracks and chips where the materials join.
We’re trying two fixing techniques for the larch, to demonstrate the different effects you can achieve.
On the most visible elevations, we’re using FassendenClips, a secret-fix system that means you won’t see any screw or nail heads. This method simultaneously creates a tiny gap between the back of the board and the vertical batten, enhancing ventilation and the durability of the timber.
Russwood had a FaceTime call with Drewett & Hunt to run through the details of how it works.
The results are crisp and sleek. Our chippy found it straightforward to use, but it was undoubtedly slower (with higher labour costs) than the more conventional method we’re using on a short stretch of cladding on the wall facing the neighbouring plot.
Here, we’ve gone for a KompeFix strip (flexible PVC) between battens and boards to aid ventilation, while the larch is fixed with special stainless steel screws that don’t need pre-drilling. Demonstrating the implications of these kind of choices is a big part of what we want to achieve with the Build It House.
Cladding: It’s all in the detailAt the design phase one of the Build It team visited Russwood’s showroom where they have an extensive range of options on display in sample panels and on buildings. It became very clear that they have huge depth of knowledge and there are far more decisions needed than we realised … so if you want a wow-factor look then making the journey is well worthwhile. Here are some of the elements we’ve decided on: Precision Alignment
Mitred corners
Window reveals
|
 We’ve probably not made it easy on our carpenter with the cladding – our design choices here really do require excellent attention to detail. For instance, on the rear elevation we need to have joints between the boards, as they’re not long enough to cover the area in one go. Rather than take the conventional approach of staggering those joints, we’ve opted to square them up beneath the edges of the windows. It’s not exactly difficult, and a competent DIYer could probably do it themselves to save money and free up labour elsewhere on the project, but everything needs to be fitted perfectly to get the right look.
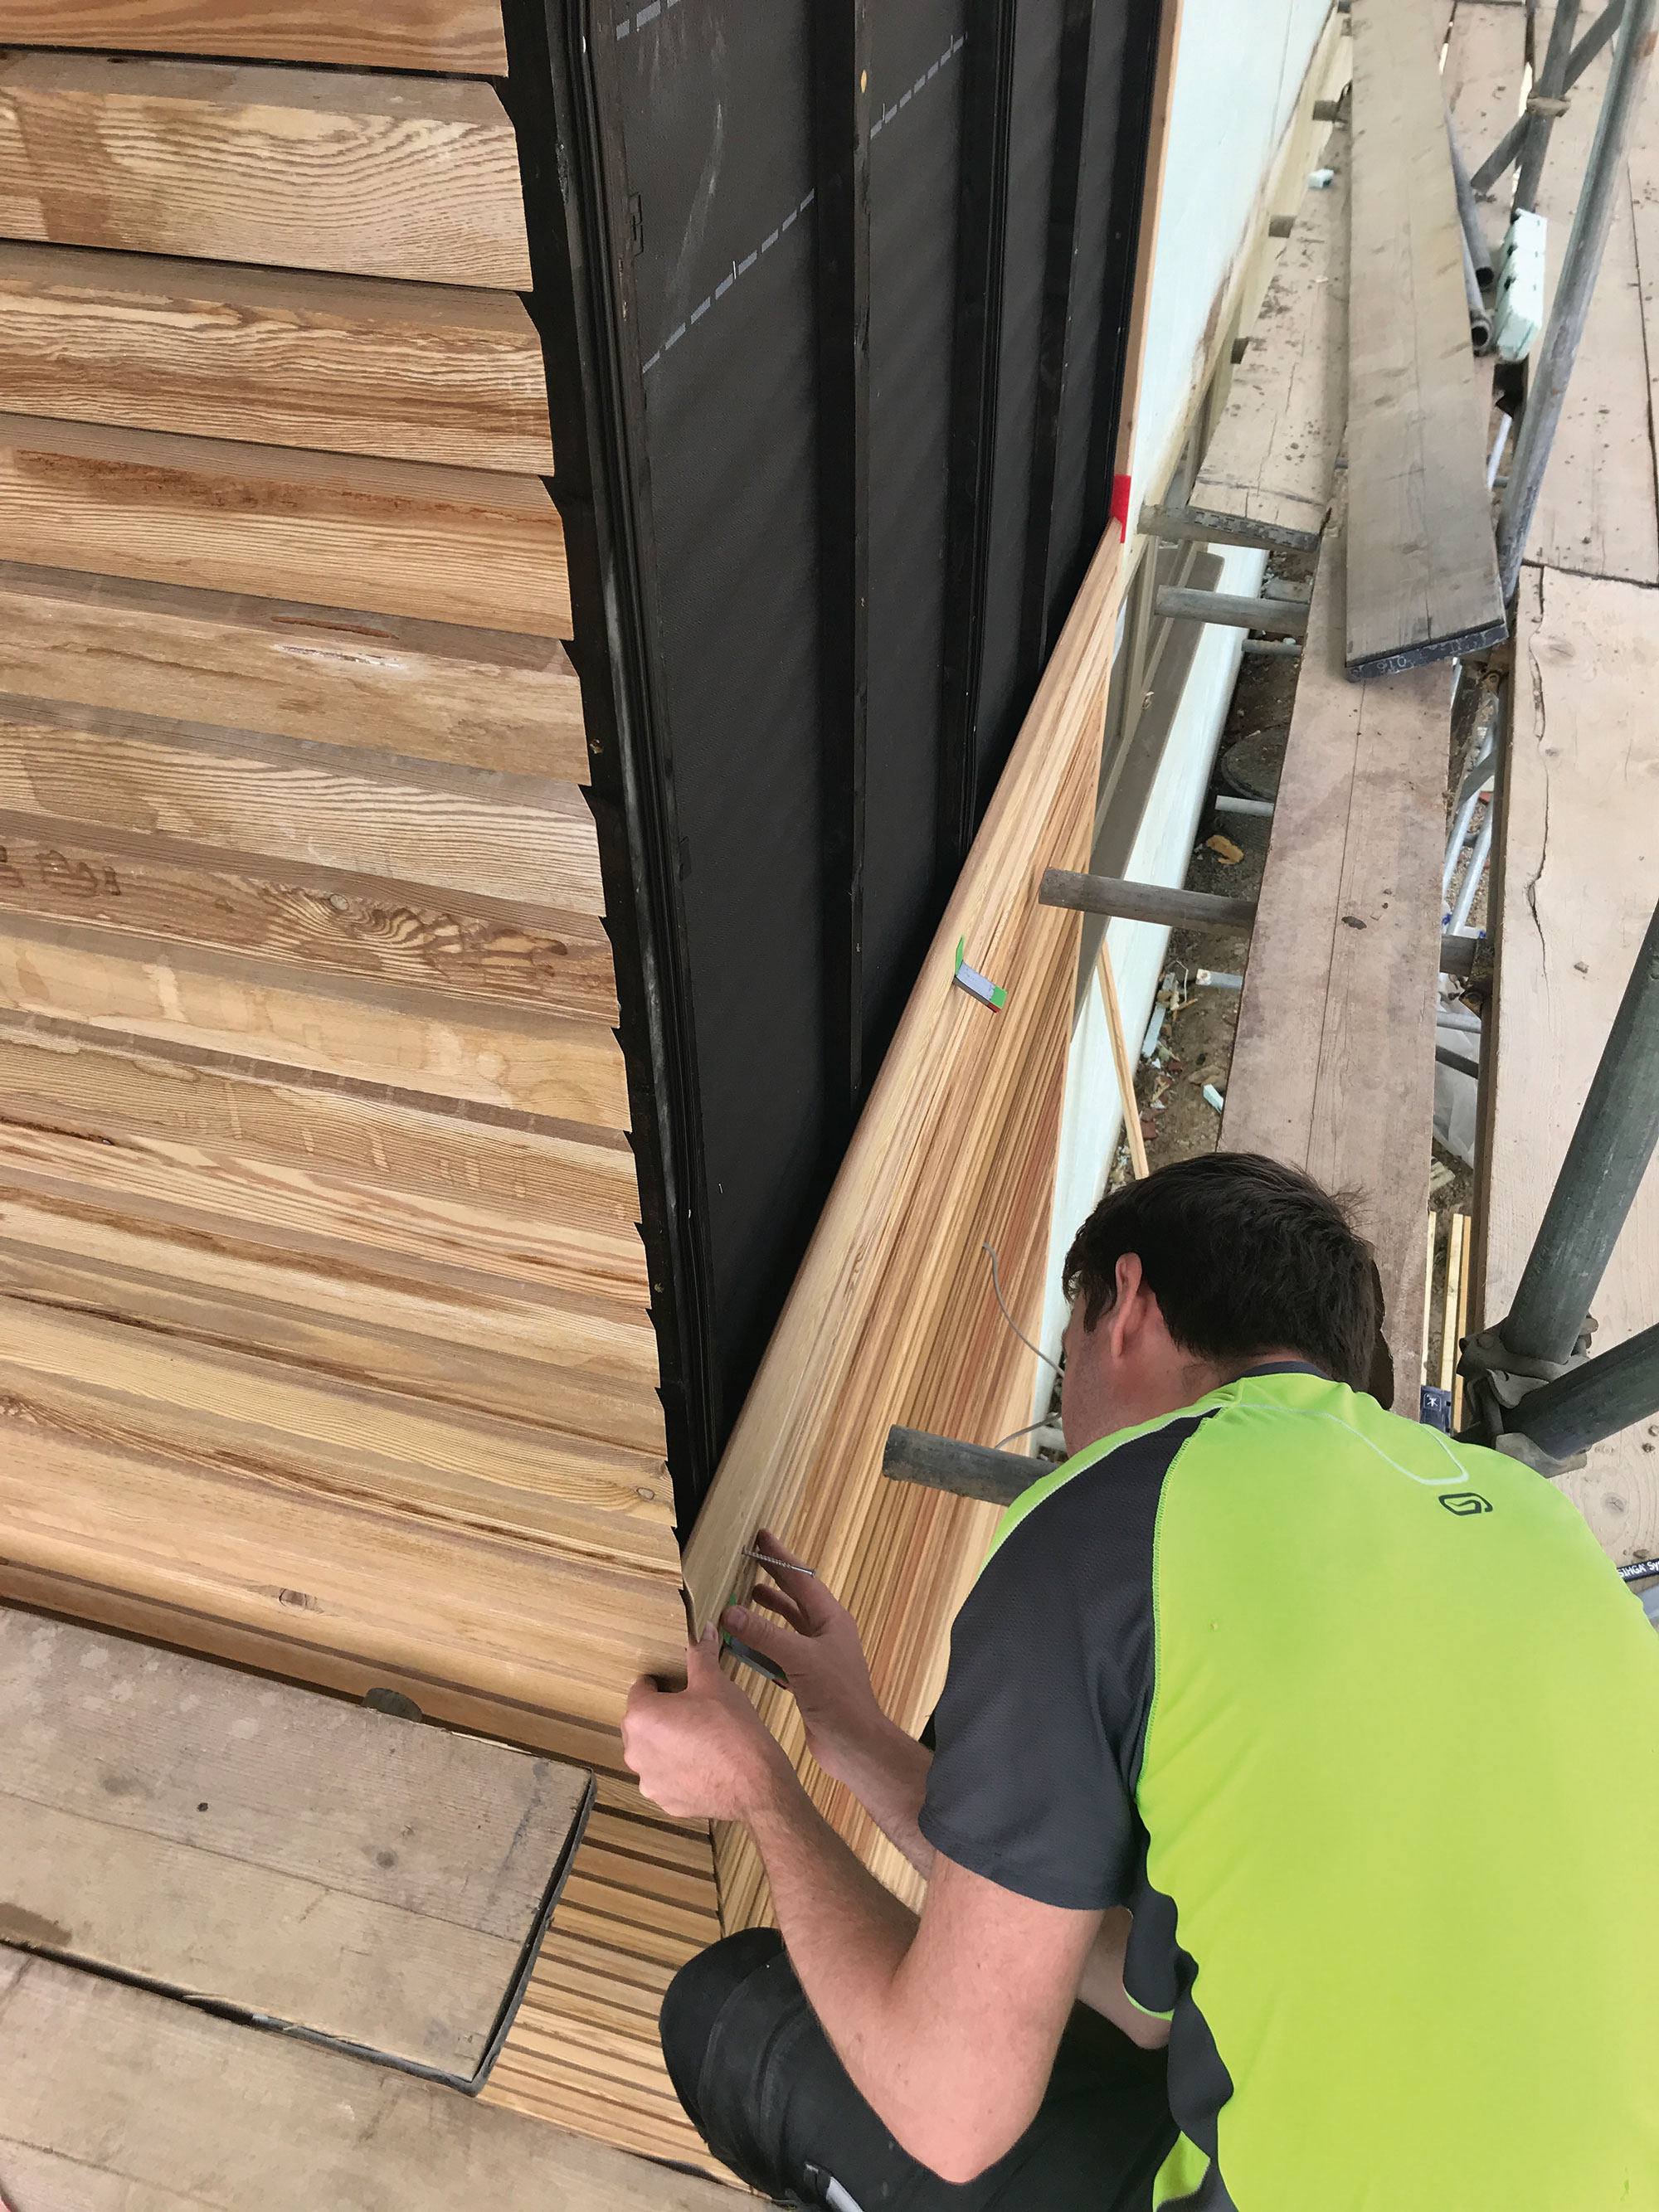 Similarly, at the corners you’d normally have a stop bead, but it turns out that’s not so easy to do if you haven’t planned it into an ICF build from the start. We can’t really fit these securely into the polystyrene as there isn’t an embedded fixing strip here, so for a little while we were a bit stumped about what to do. The solution – to mitre the one external corner we’re cladding – looks fantastic, but again needs a lot of care and attention to get right. On John’s recommendation, we’ve left a gap of 10mm between the mitred cuts on each elevation to get the best look.
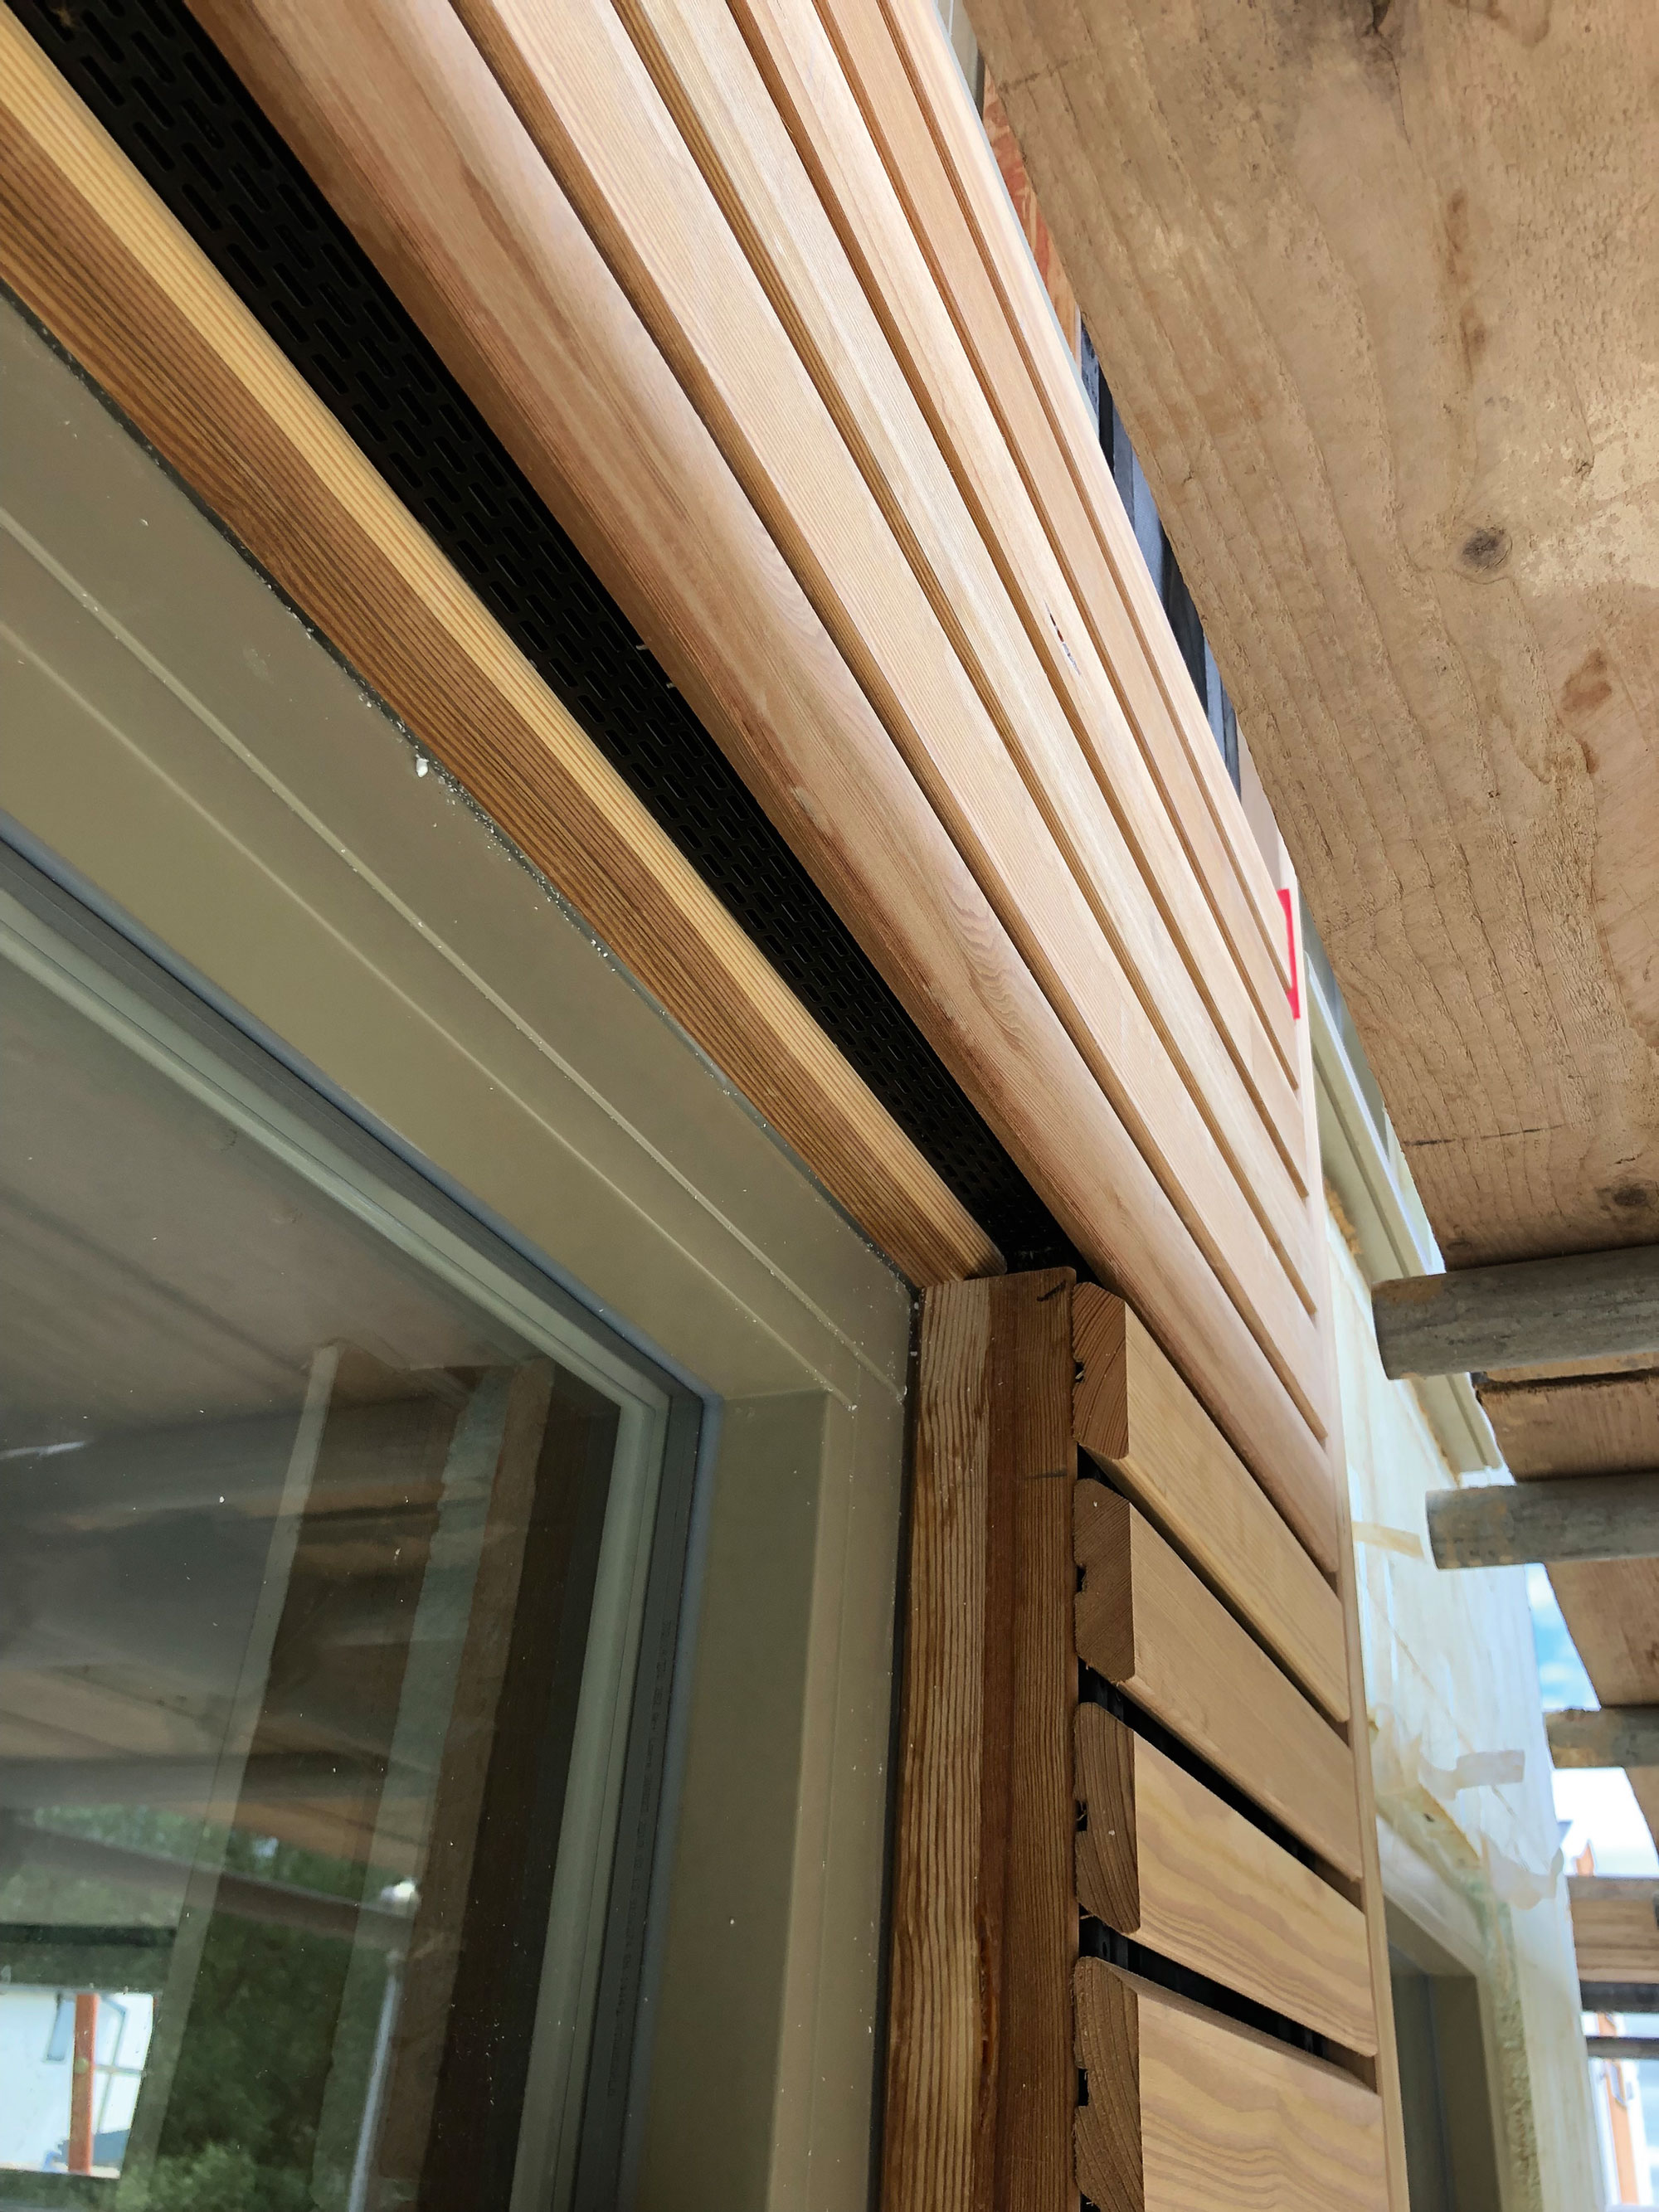 How to finish the cladding around windows took considerably brainpower from everyone involved: our architect, the chippy, Kloeber as the window supplier, Russwood and the Build It team. There doesn’t appear to be a universal solution for this kind of detail that relies on widely-available materials; certainly not for a rainscreen cladding system where you need to maintain ventilation at the head of structural openings – but don’t want to just look straight up at a breather membrane and the ends of some black-painted battens. We knew we wanted to use a perforated closer that would water to escape, but couldn’t find anything of the right size. In the end, we came up with a solution that combines a thin strip of larch with a black metal grill above the windows; with the side reveals finished in larch.
Chris Batesmith
You may be interested in