- Plan ItBack
- Design ItBack
- Build ItBack
- Homes
- ProductsBack
- CostsBack
- Self Build Cost Calculator
Estimate your project costs instantly with Build It's interactive self-build cost calculator
Calculate Now - Costs & Finance
- Contracts & Warranties
- Build It Estimating Service
Get an accurate, detailed cost breakdown of your project
Submit plans
- EventsBack


 Login/register to save Article for later
Timber Frame Cladding Options Explained – Which is Best for Your Timber Frame Self Build?

Wondering which house cladding material is best for a timber frame home? Cladding plays a crucial role in both the aesthetics and performance a finished house. With a variety of characterful materials available in a range of shades, finishes and laying patterns, you’re certain to find an exterior solution that balances these factors with your project budget, location and other considerations. Designing this element alongside your structural plans is key for ensuring you can achieve great results, potentially using a combination of quality materials.
When specifying your exterior finish, core considerations include durability, breathability, thermal performance, aesthetics and cost. Like most construction approaches, timber frame homes need a cladding system that allows moisture to escape, while protecting the structure from the elements. Maintenance requirements, installation complexity and sustainability credentials should also be factored into your final decision.
Ultimately, finding the most appropriate exterior material will enhance your home’s character while providing long-term protection. Whether you prefer a rustic, natural look or a sleek, modern design, there’s a cladding option to suit your needs. Here I’m taking a look at the most popular house cladding options for timber frame homes.
Wood cladding options for timber homes
There are plenty of different types of timber cladding systems on the market, with a plethora of species, treatments and finishes to choose from. The options can be broken down into: hardwood, softwood and engineered wood.
In terms of hardwood, oak is a classic choice in the UK. Thanks to its hardiness, it can be left untreated and will develop an attractive silvery patina over time. If you prefer, the wood’s original honey-coloured hue can be retained by applying a protective coating every couple of years. Depending on its level of exposure to the elements and the maintenance routine followed, oak cladding can last up to 100 years.
Engineered cladding solutions such as Accoya, Kebony and Vastern’s Brimstone range are all products that undergo a process to render them more dimensionally stable. As a result, they bear similar characteristics to hardwood products in terms of their durability.
Some of these claddings are treated at high temperatures to remove moisture and resins that make the wood less structurally sound (thermally modified), whereas others are infused with non-toxic chemicals to increase their durability (chemically modified).

This illustration from the Timber Decking & Cladding Association shows cross-battening being used to fix vertical tongue-and-groove wood boards
Larch and cedar are among the most popular softwood cladding options in the UK. High-quality larch products tend to feature few knots, which makes them well-suited to crisp, machine-cut finishes on contemporary new homes.
AR Design Studio won the 2023 Build It Award for Best Timber Frame Home with their outstanding project Woodland House, which has championed the advantages of timber frame construction to create a distinctive home. Millworks provided the Charcoal Black Siberan Larch for the exterior, which has been finished with their Millcoat factory coating for enhanced performance and increased UV protection. Photo: Martin Gardner
Available in a range of colours and grades, larch cladding lasts between 30 and 50 years. Cedar provides a clean, knot-free aesthetic and is naturally resistant to decay. Well-maintained cedar cladding can last 50+ years, depending on its level of exposure to the elements.
Flint & steel cladding for timber frame homes
Traditional random stone walling has a naturally uneven profile, so it’s usually laid against a backing block to maintain a stable cavity. This approach increases wall thickness and requires more wet-trade work, making full-house coverage less common. Instead, stone cladding is often used to highlight key elevations or feature sections of a timber home.
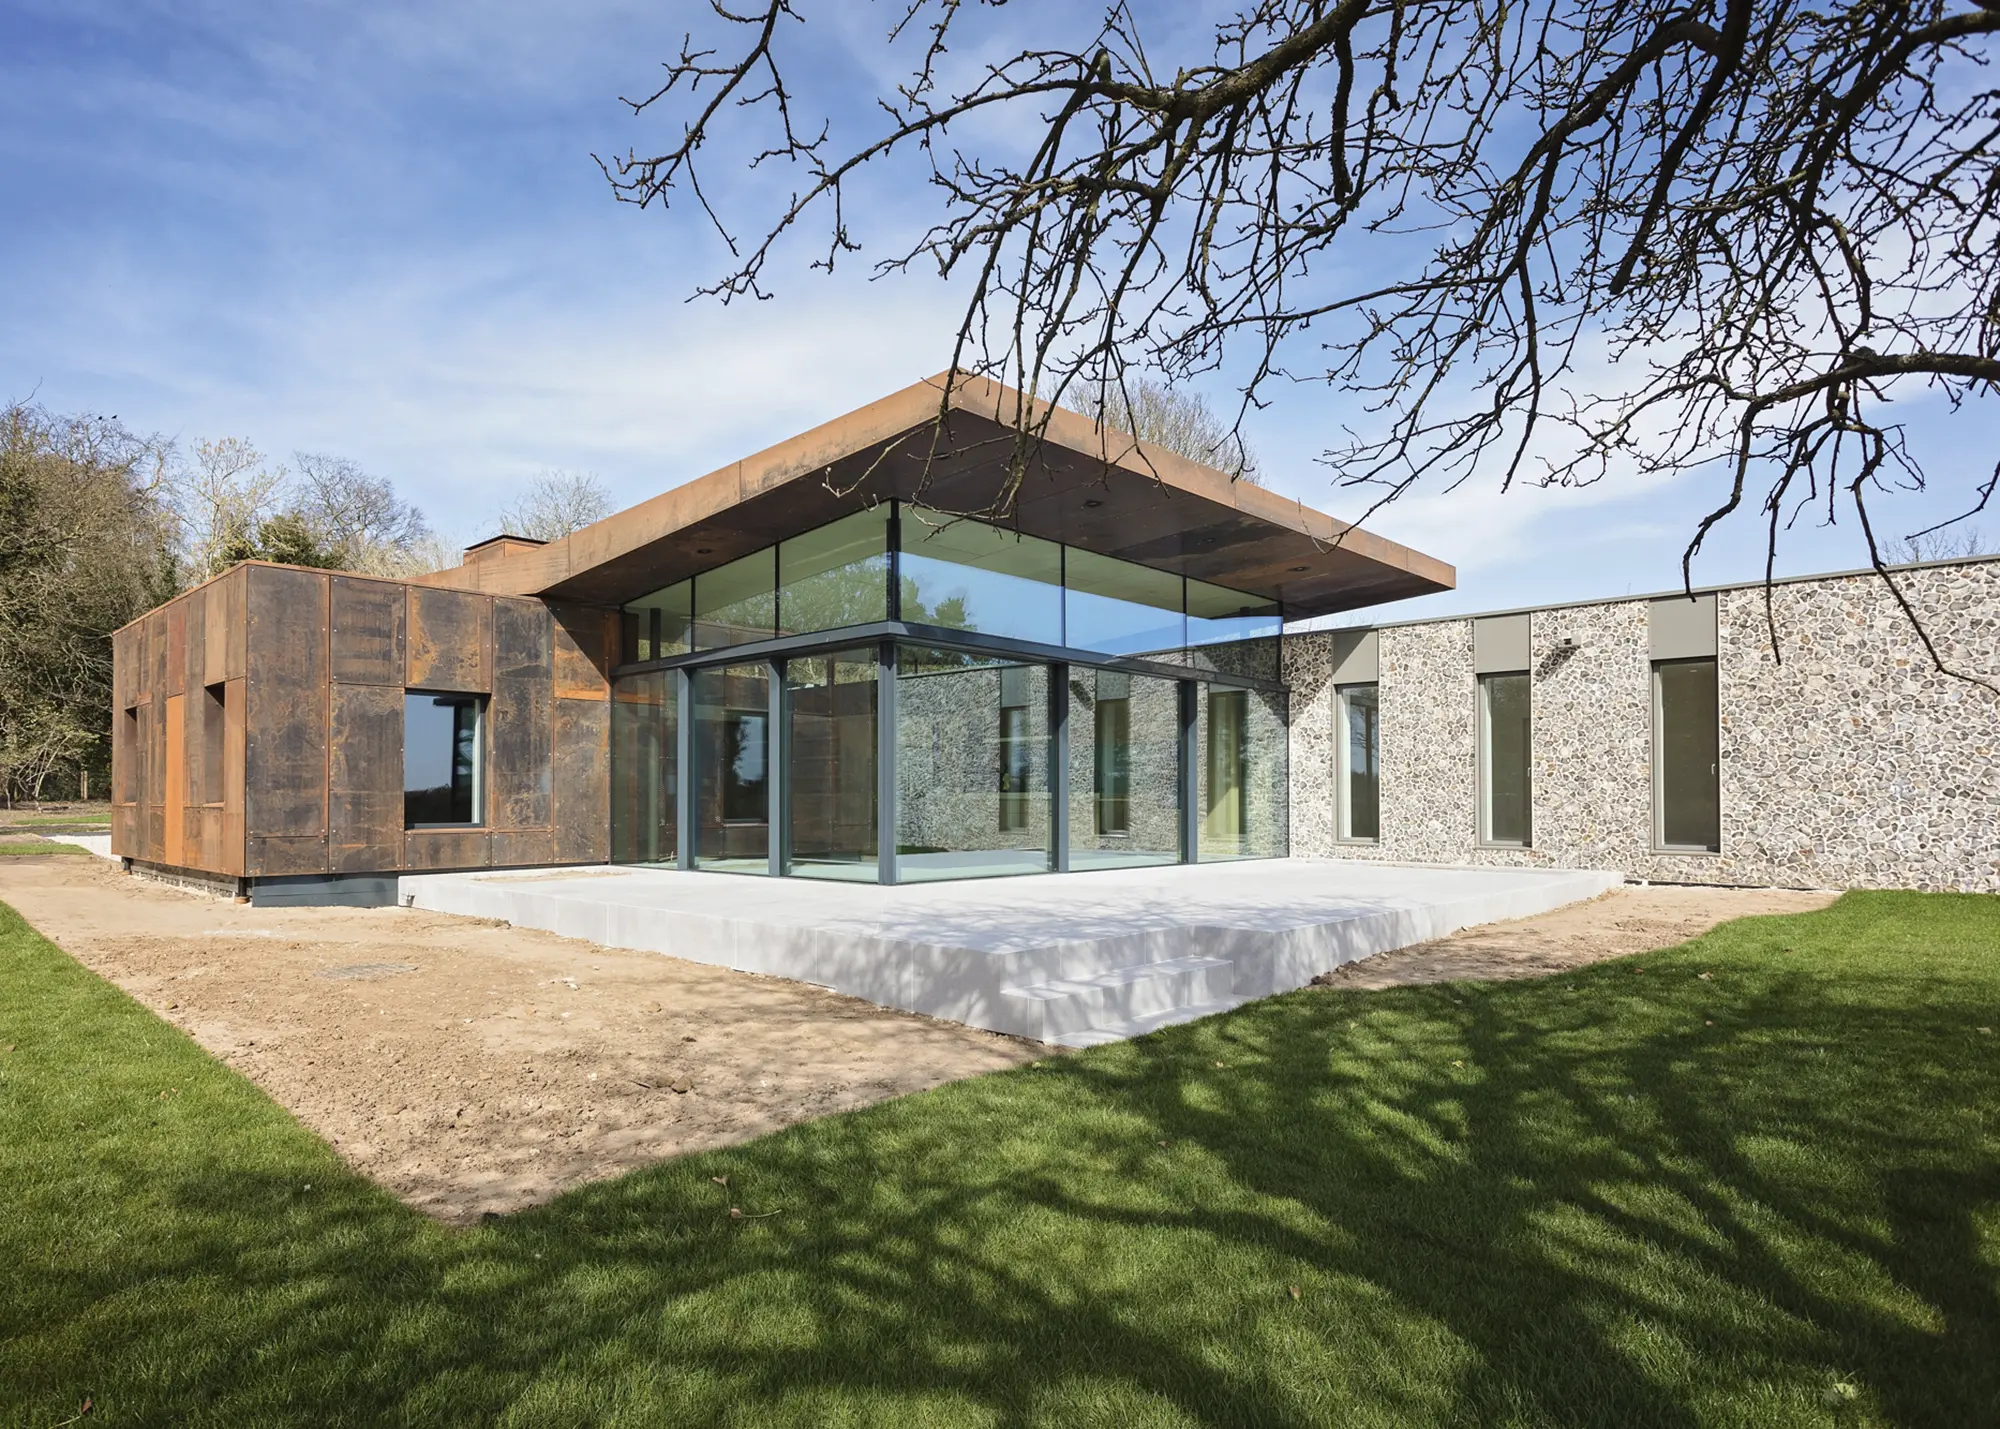
This ultra low-energy property incorporates Timber Innovations’ Passiv Innovations system with a striking mix of flint and steel cladding for a bold, modern finish.
Tudor-style board cladding
From ultra-modern angular designs to charming heritage-style properties, your chosen exterior finish will help to complete the look you want for your ideal home and location.
This heritage-inspired property by Frame Technologies features Tudor-style render and board cladding on the upper portion of two gable walls, set against an appealing random stone finish. This type of exterior boarding can be stained in a range of shades, combining the charming look of natural oak with modern durability.
Bricks & brick slips for timber frame homes
If a brick finish is best suited to your location and project goals, special wall ties are available to secure the cladding to the main timber superstructure while allowing for differential movement between the two materials. These are usually nailed into the frame and bedded into the mortar layer.
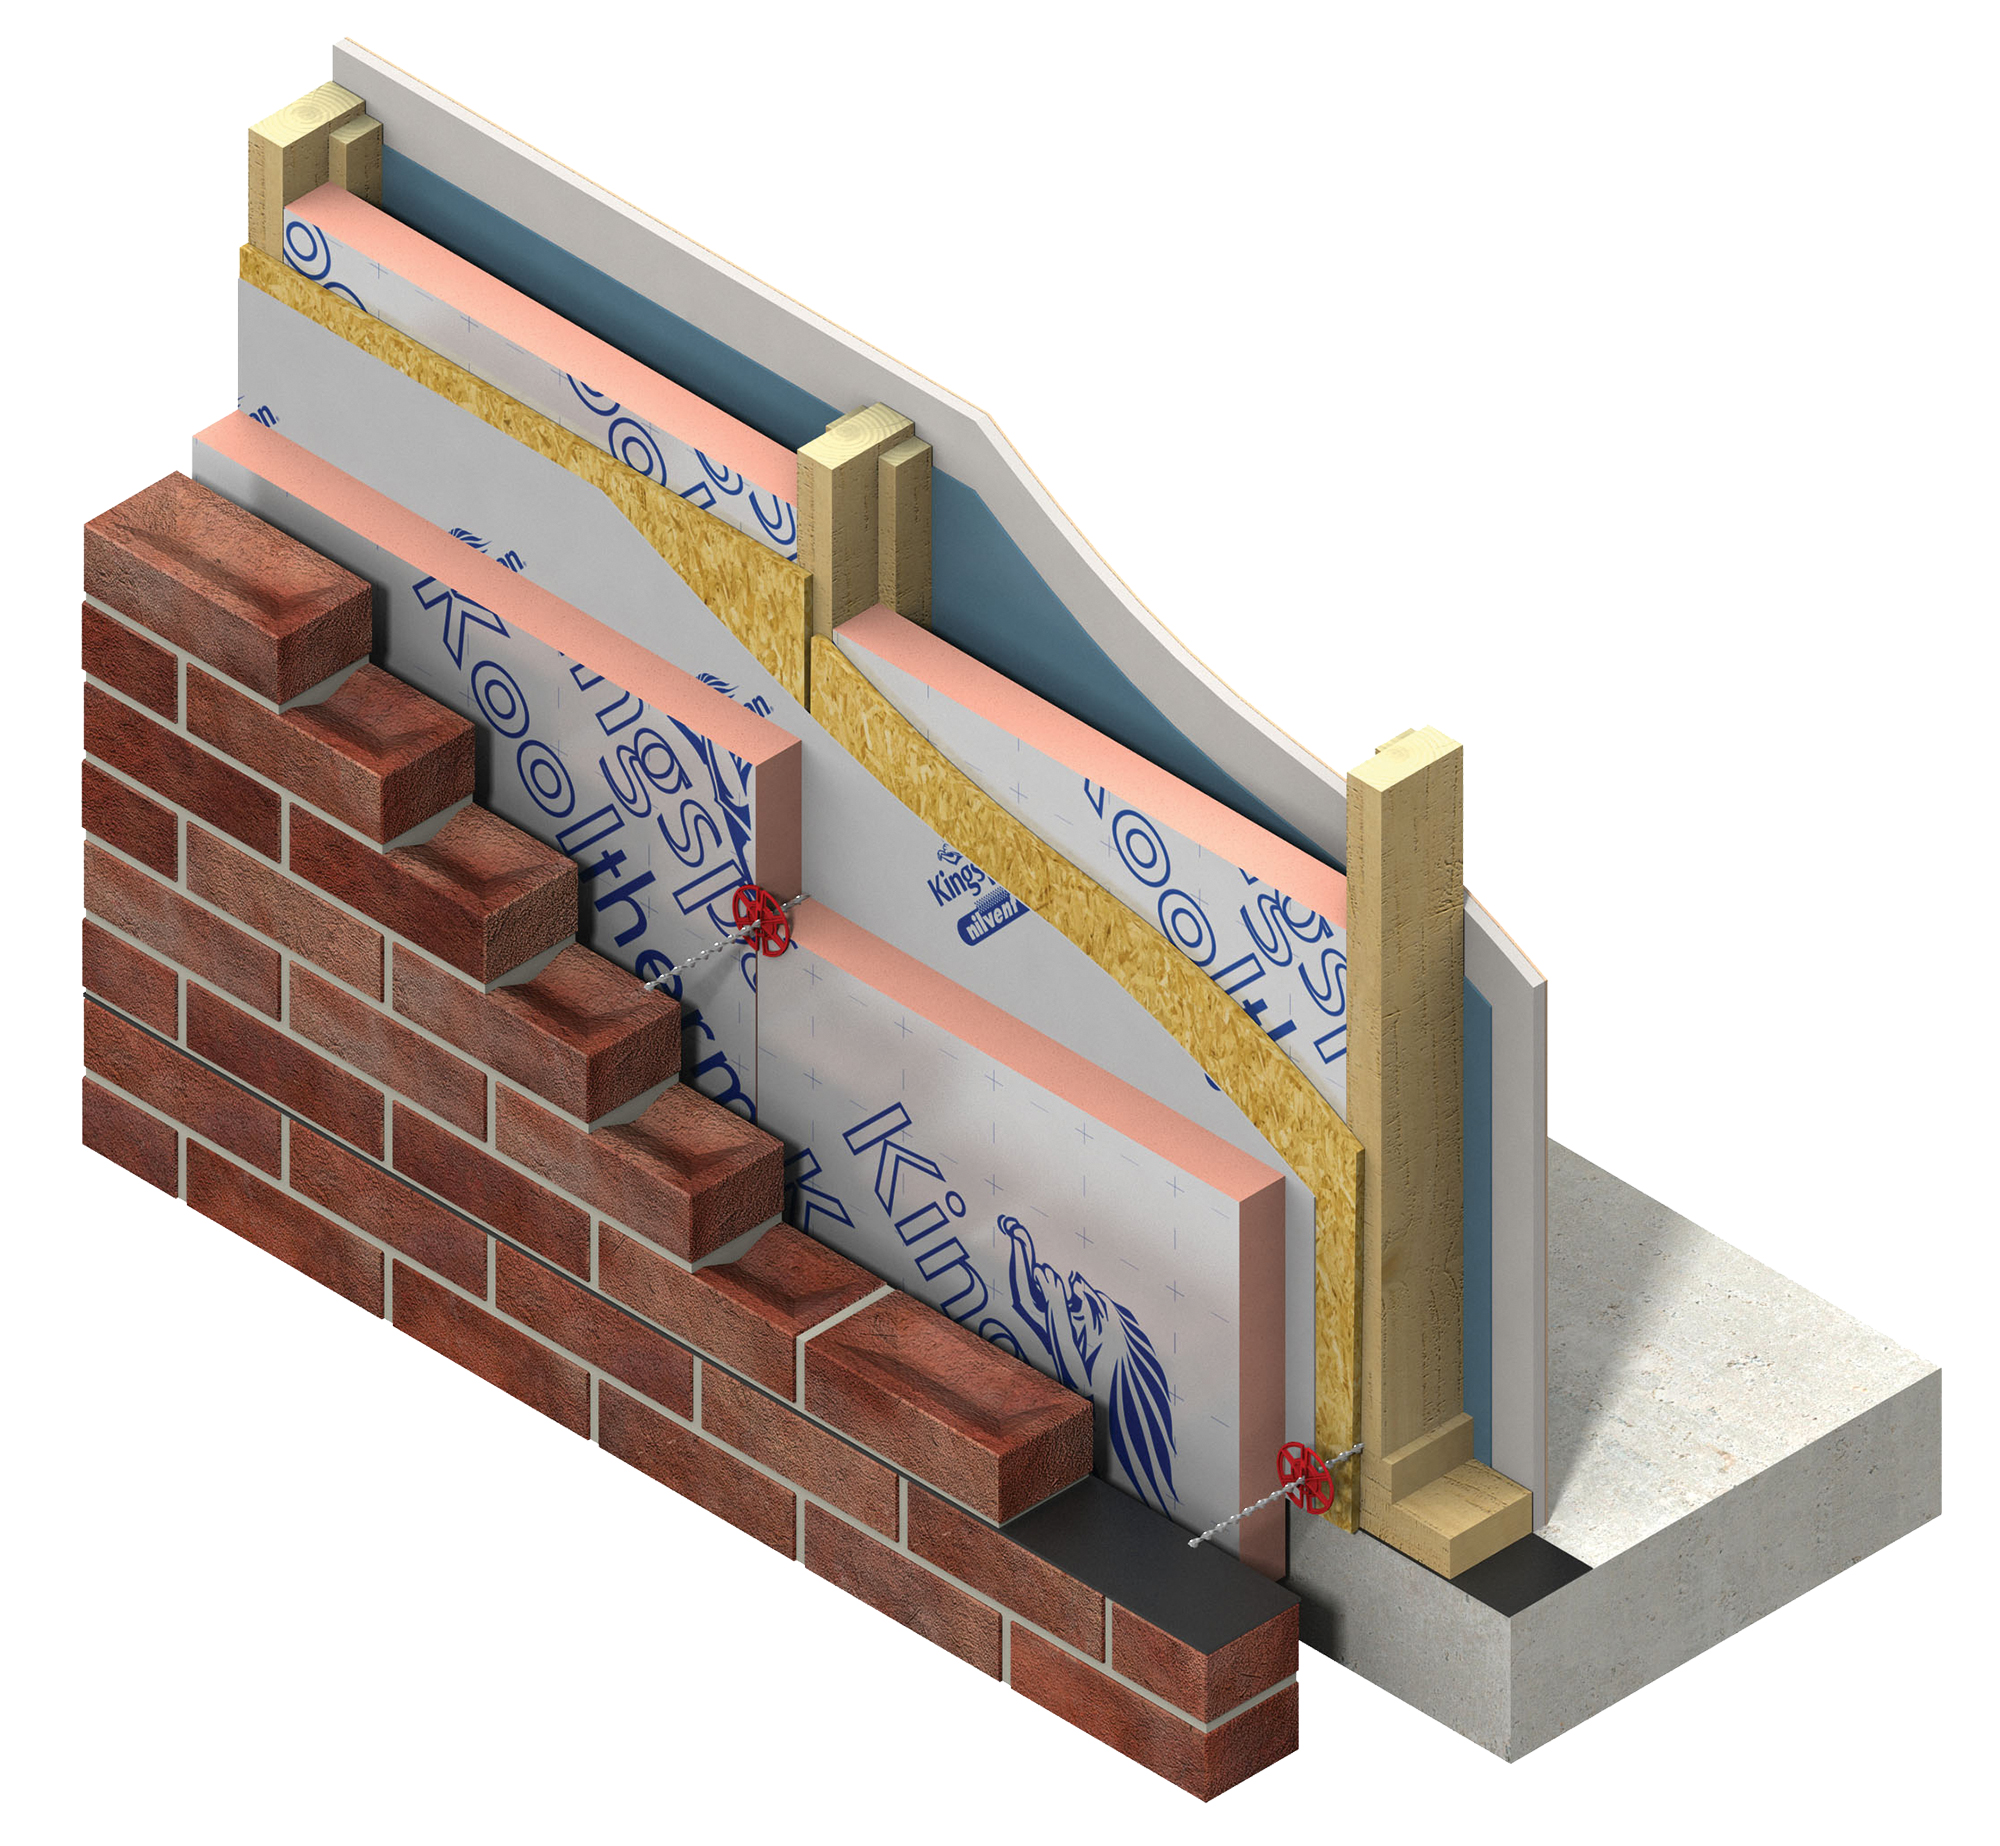
This diagram shows a masonry external wall tied back to a timber frame structure using cavity wall ties. Note the red clips to hold an extra layer of external Kingspan Thermawall insulation in place
Brick slips (thin tiles) are a lightweight alternative, ideal for creating intricate patterns on one elevation, finishing returns and similar details.

Supplied and constructed by Daniels & Vincent, this timber frame home in Suffolk features a muted, neutral brick finish, plus zinc and composite cladding for a modern yet sympathetic and durable exterior facade.
Standing seam zinc cladding
Zinc is low-maintenance, highly durable, cost-effective and offers great design potential for a range of property styles. Plus, it’s renewable and recyclable, contributing to the eco-credentials of your project. When chemically treated, zinc’s natural shiny finish can be altered, developing a ready-made patina and creating a more weathered look.

Photo: Andy Stagg
Situated amongst a row of Georgian terraces, this infill timber frame home in North London, designed by Paul Archer Design, features standing seam zinc cladding that wraps around the whole exterior of the new building as part of an insulated system.
House cladding materials pros & cons

Different cladding products each have their own advantages, and the right choice for your project will depend on the look you’re after, your budget and long-term maintenance considerations. A mixture can be very effective – generally a maximum of two or three finishes looks right; more than this and it can start to appear too busy. Choosing the best materials for the local vernacular is important, too, particularly in terms of planning permission. Getting the proportions and detailing right is essential to ensure the design looks its best, is sufficiently durable and offers easy upkeep.
Timber cladding
Timber cladding is a natural, honest, beautiful and sustainable material, and highly durable when used with the right detailing. Available in a wide range of profiles, it can be painted, stained or left untreated. Species such as oak or larch have high resistance to decay and can be left to silver naturally. It’s relatively easy to install, fixed back to the frame using appropriate battens, stainless steel nails and breathable membranes. Some mortgage companies prefer to only see up to 50% of a house or garage clad in timber. Fire regs set criteria for distances to boundaries and protection during the construction process, which a design professional can advise on.
Price range: £ – ££ – £££ (depending on species and finish)
Metal cladding
Metal cladding such as standing seam, aluminium or zinc, is a modern option for timber homes, offering a contemporary aesthetic in a range of colours and textures. Products are highly durable, weather-resistant, non-combustible and low-maintenance, requiring only occasional cleaning. Some, like zinc, develop a protective patina that enhances character and longevity. Careful detailing and professional installation are crucial due to thermal expansion and fixing requirements.
Price range: £ – ££ – £££ (depending on material and finish)
Render
Render provides a smooth, modern finish over a timber frame, with a wide range of colours and textures – from smooth to roughcast. Correctly applied, it offers good weather resistance and can enhance insulation properties. Render may be prone to cracking over time but can be repaired and repainted when needed. Self-cleaning silicone versions reduce maintenance requirements. Design-wise, render can appear bright in a landscape, so it’s important to consider its visual impact. For timber homes, it requires specialist installation over a compatible render board system.
Price range: £ – ££ – £££
Composite weatherboard
Composite weatherboard is made of several different materials, such as fibre-cement or wood composite. It offers a balance of durability and aesthetics, available in wood-effect, smooth and textured finishes in a range of colours. These products are low-maintenance, particularly when pre-finished, and usually have good resistance to moisture, rot, pests and fire. Composite cladding is typically fixed to battens with specialist fasteners.
Price range: £ – ££ – £££
Brick & brick slips
Brick & brick slips are available in a wide range of colours and textures to suit both heritage and modern styles. Installed with a ventilated cavity for moisture control, they offer excellent durability and weather resistance, with minimal maintenance other than repointing over time. Brick slips (tile-like versions) can be installed using adhesive panels, whereas full bricks require structural support. Typically, brick ties are added to external battens and bound into the masonry. Expect mid-range prices for slips, and high-end for full brick.
Price range: £ – ££ – £££
Natural stone
Natural stone offers a natural, luxury aesthetic and can applied as thin stone veneers or full 150mm stone faces over a timber structure. With proper detailing, this finish is extremely durable and weather-resistant. Limestone, sandstone and slate are popular options, and the choice may come down to the local vernacular. You’ll need a specialist installer or stonemason to ensure correct fixing. Like brick, the stone should be tied back, and repointing may be needed over time.
Price range: £ – ££ – £££
House render for timber homes
Cost-effective and highly versatile, render can be used as a full finish, to highlight certain features, or as an accent alongside other materials. Available in virtually any colour and a range of textural finishes, this solution can help to create sleek, ultra-modern homes, heritage-style properties and everything in between.
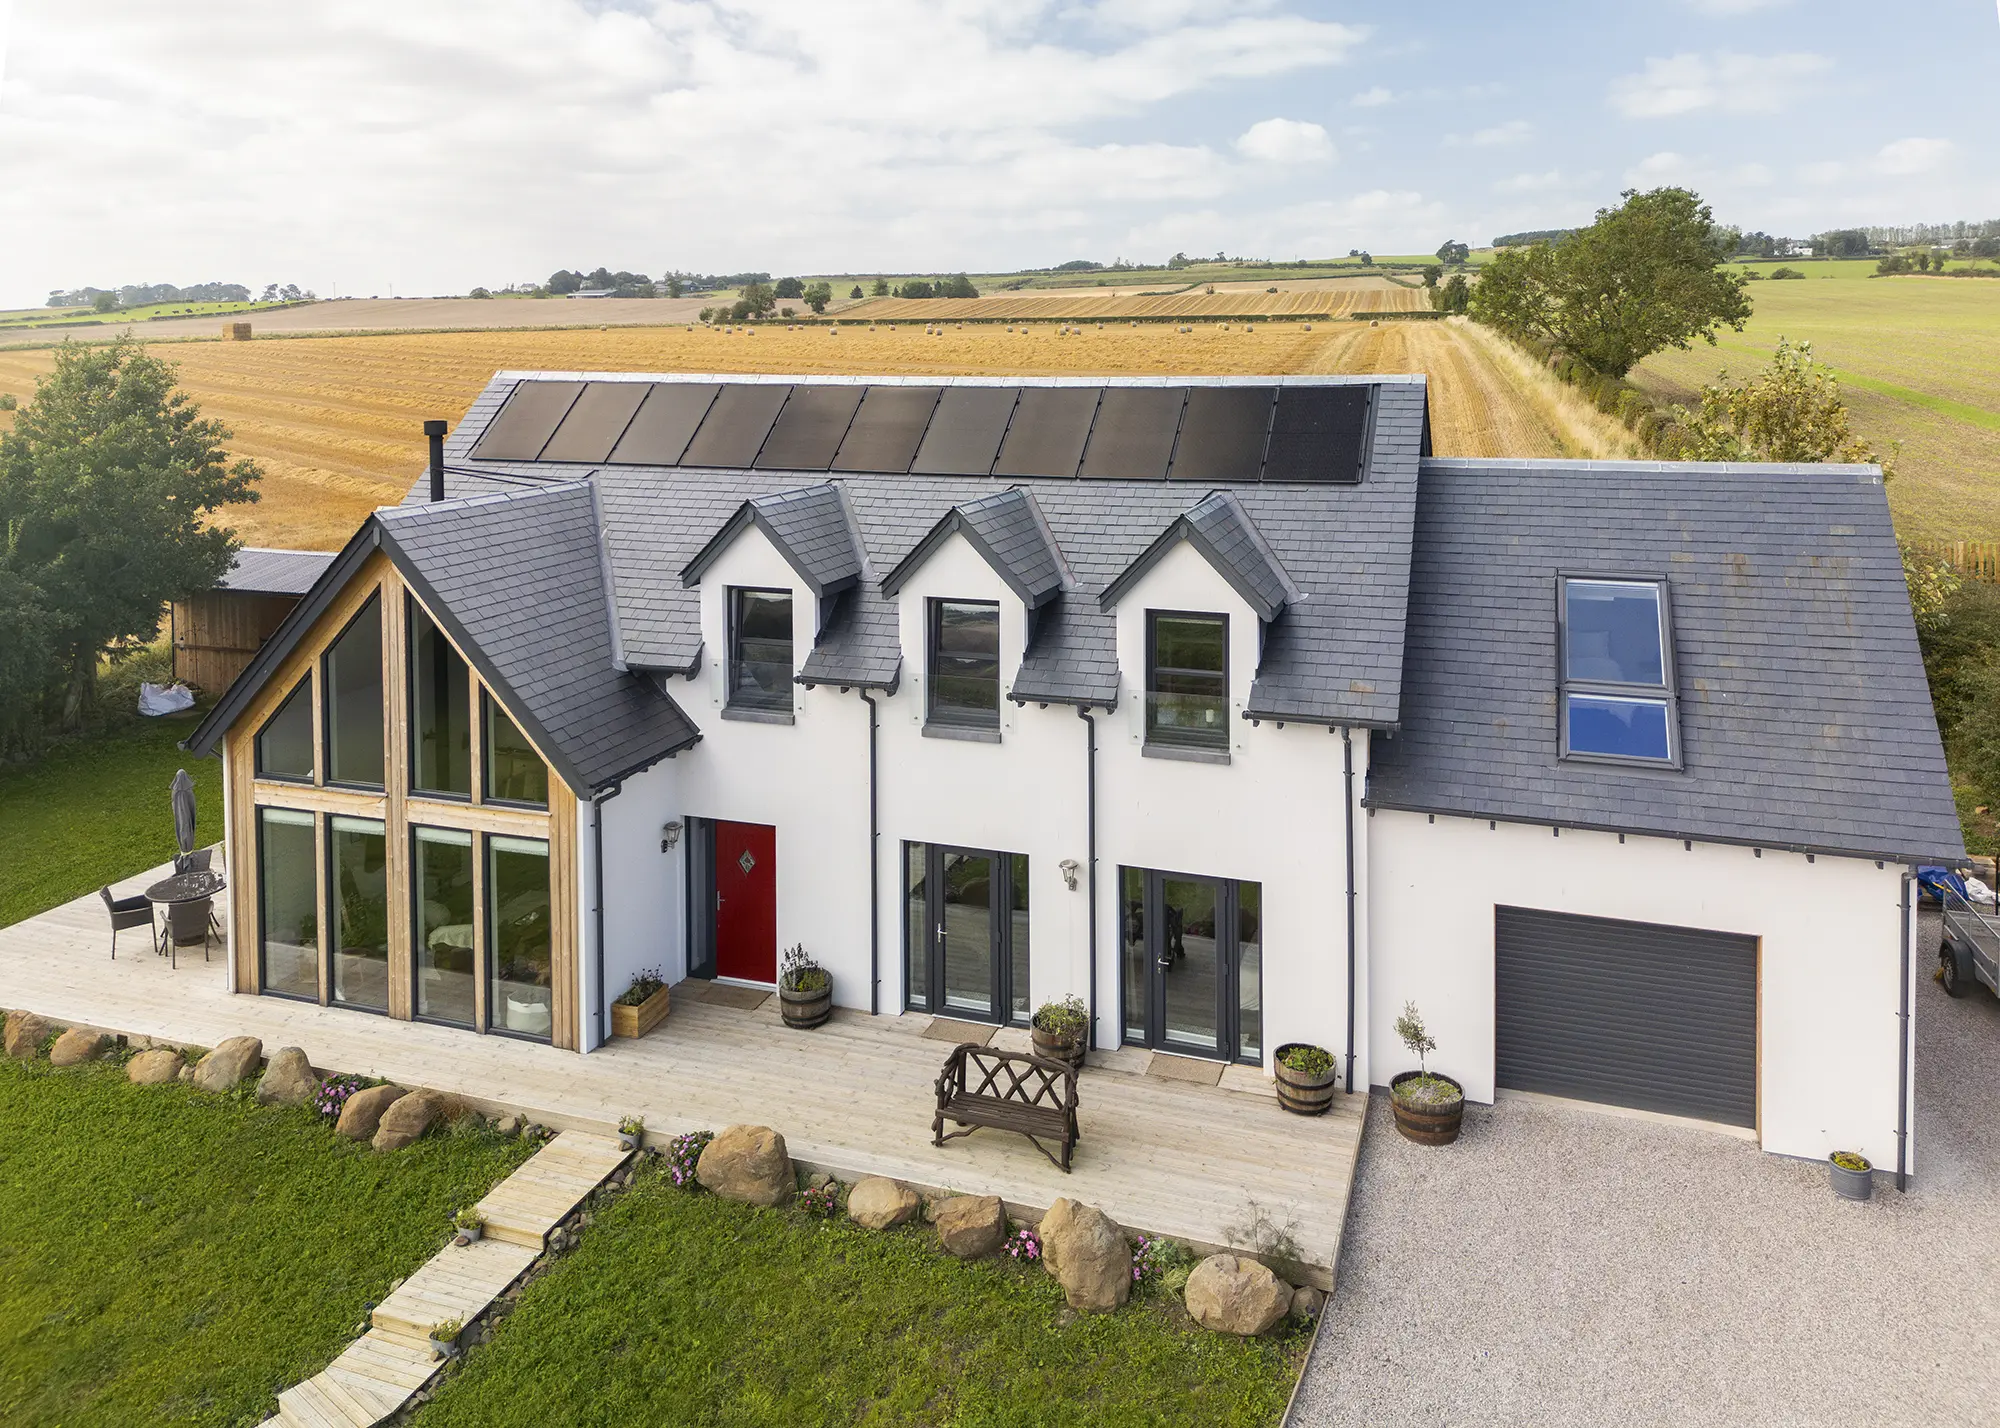
Fleming Homes delivered the timber frame for this sustainable, energy-efficient house in Nenthorn, Roxburghshire. Designed to slot in beautifully with the countryside context, white render, timber accents and slate roofing were selected to create a timeless look.
Timber shingle cladding
Shingles are a modular exterior material made from split logs. Unlike traditional wooden cladding boards, they look more like tiles and can be used on your home’s walls and roof. Timber shakes are a similar alternative with a more natural, rustic look. The hand-cut individual pieces are less uniform in size, shape and finish than sawn shingles.
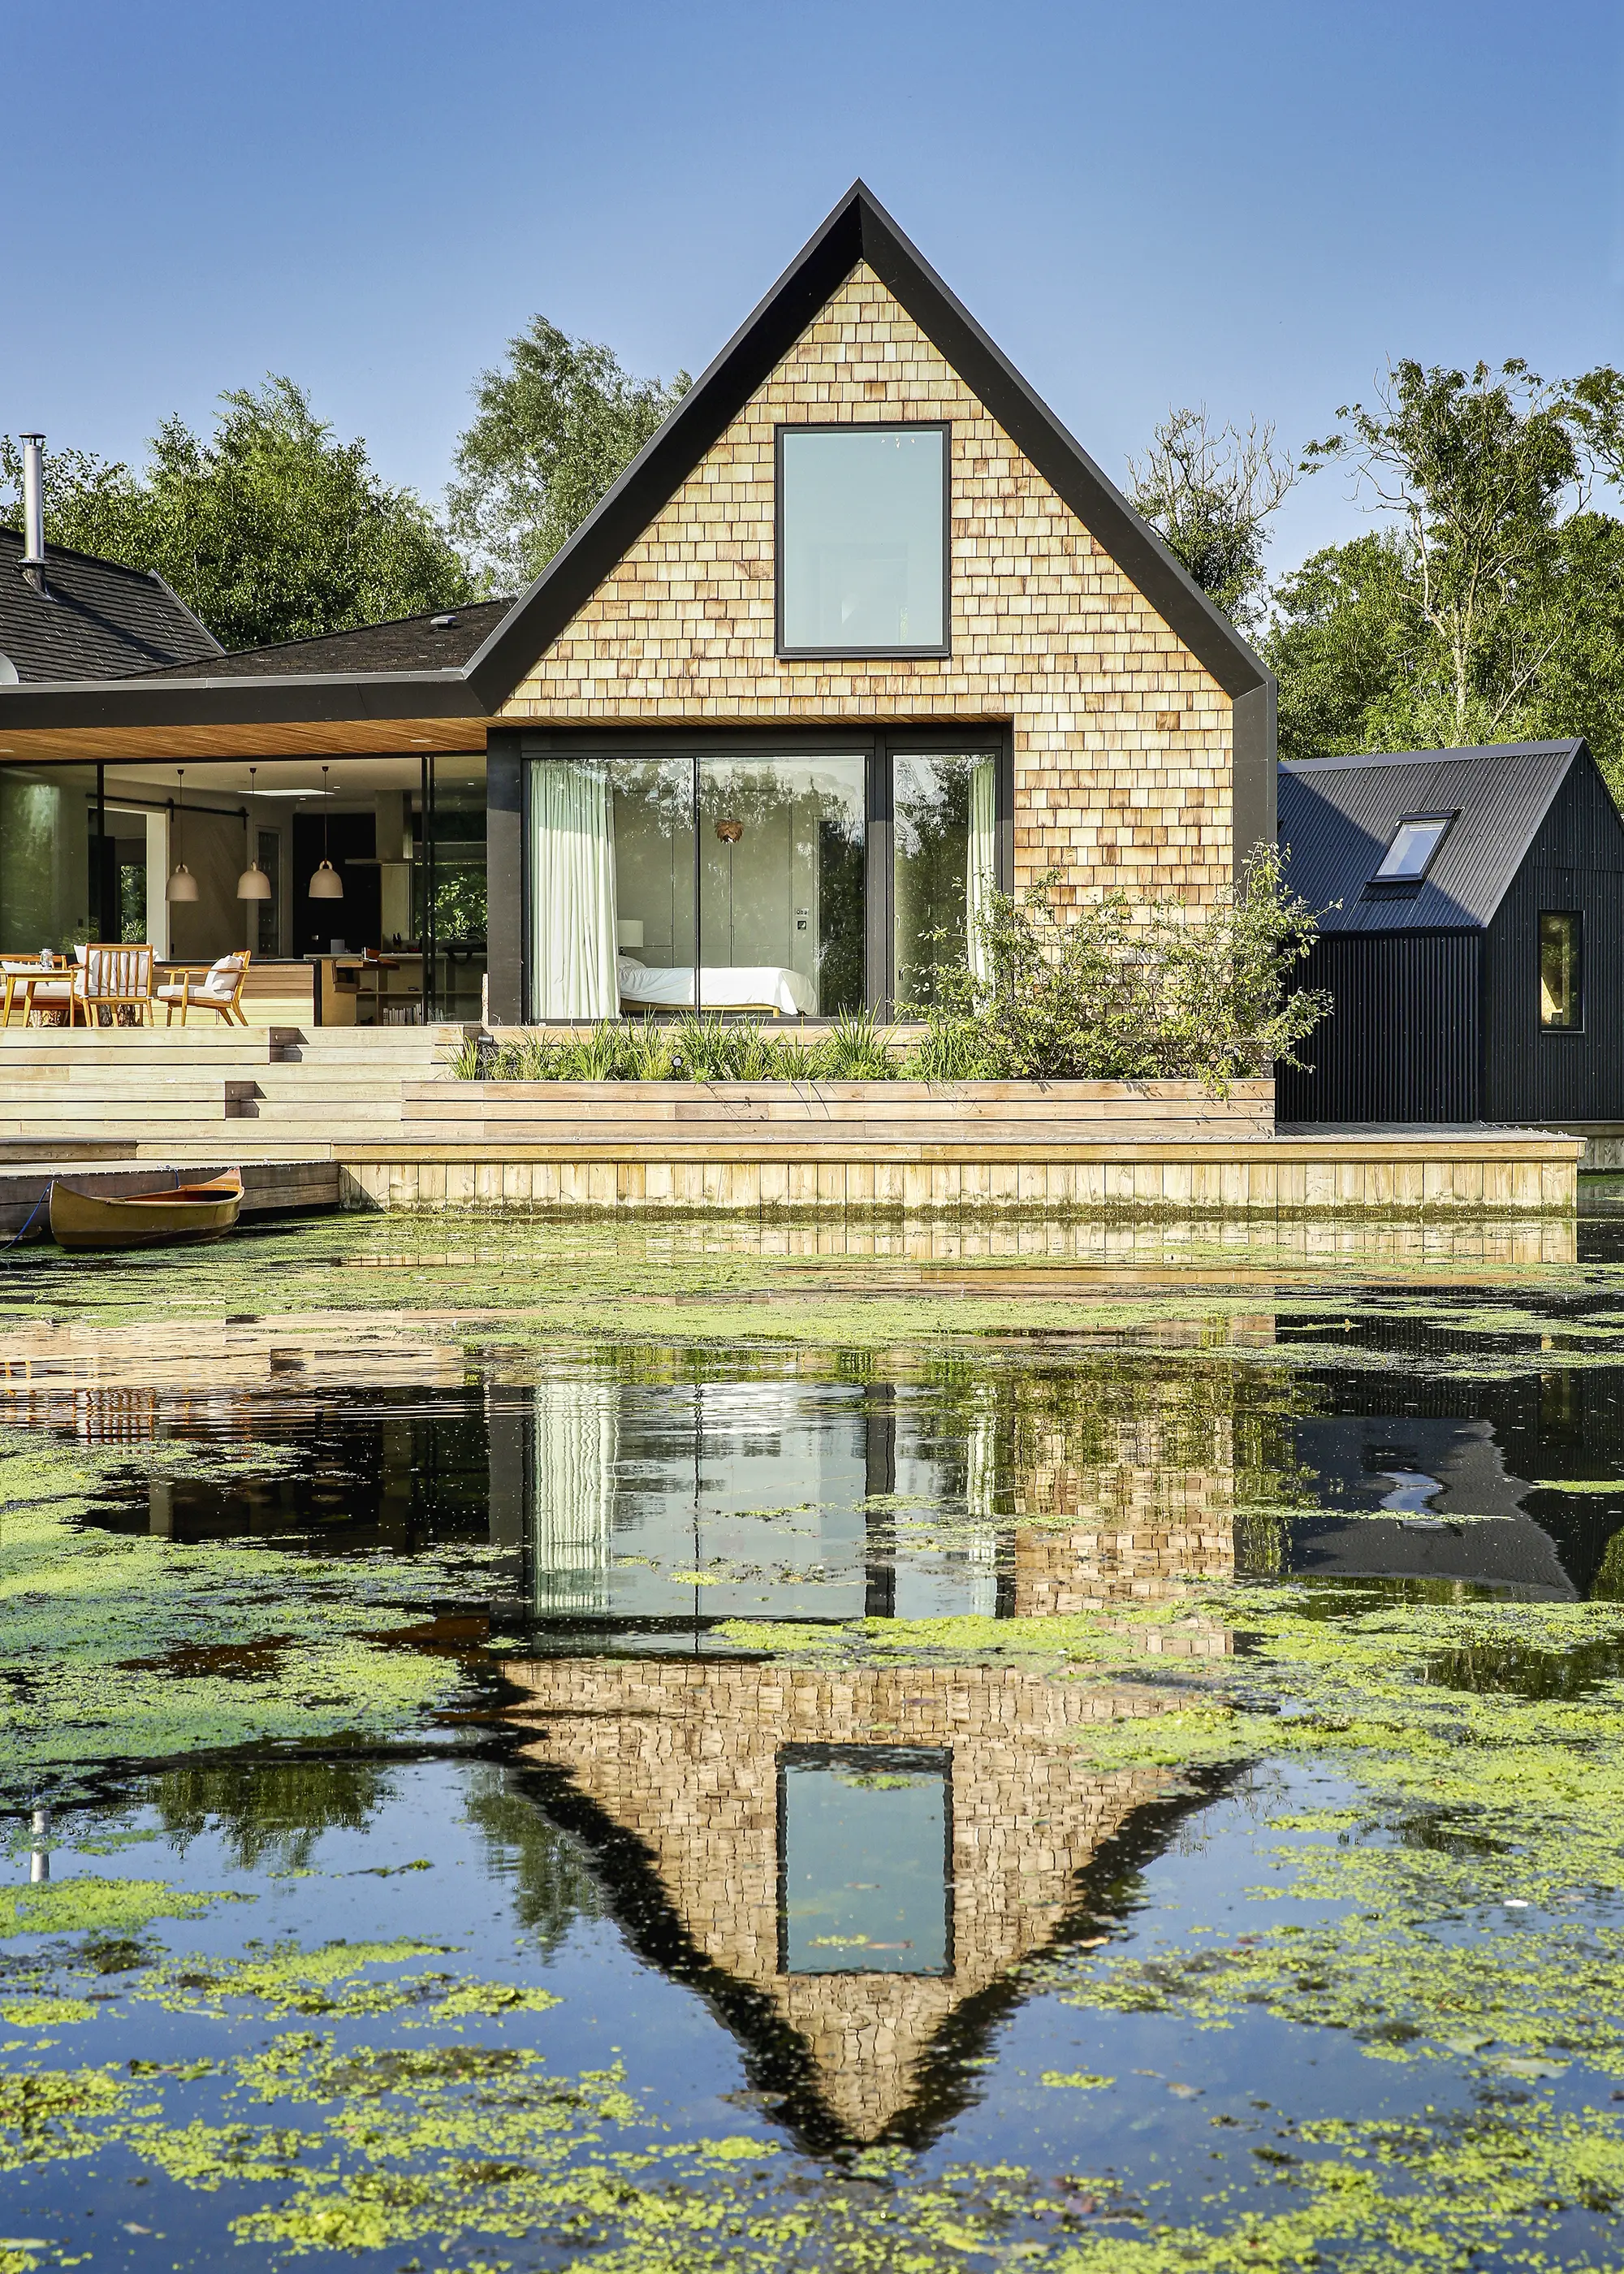
Alan Williams
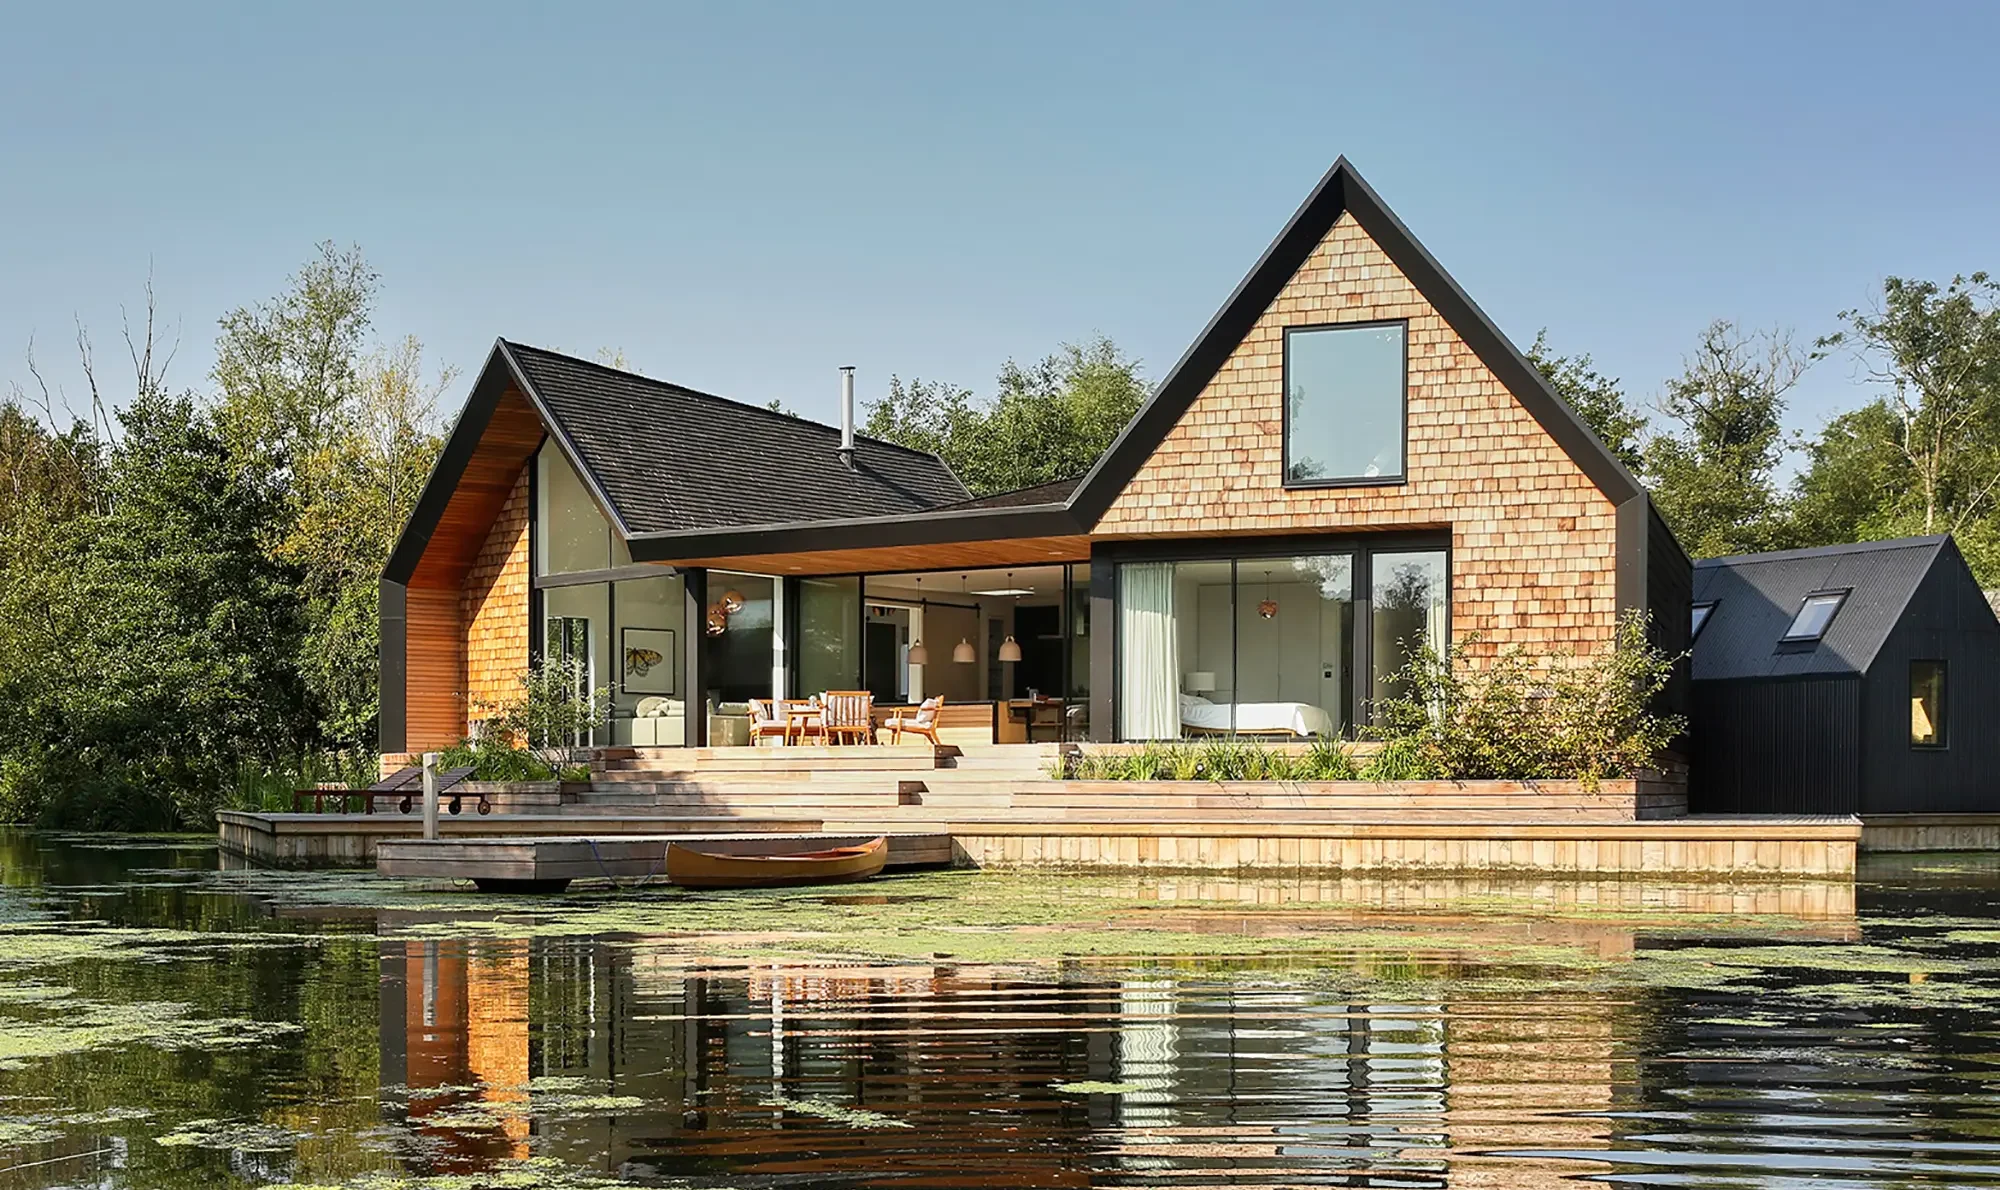
This home replaced an outdated bungalow on the Norfolk Broads. Platform 5 Architects opted for blackened timber shingles on the roof and side walls, while the same material was left untreated on the front and rear elevations, allowing the finish to weather naturally.
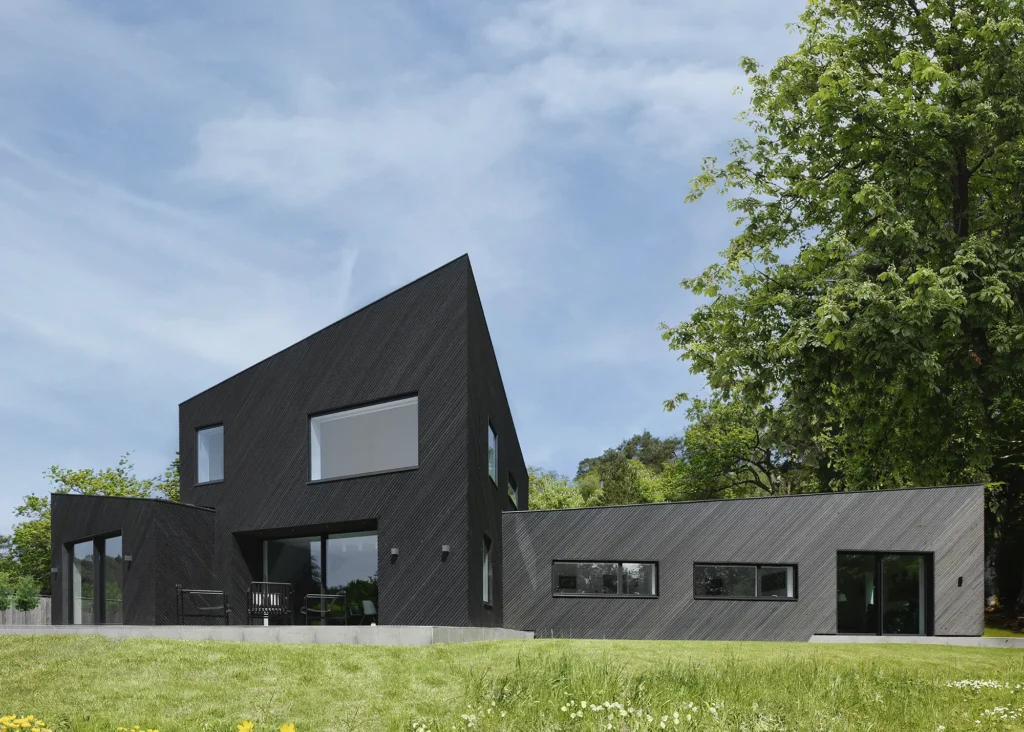
EXPERT VIEW Designing your cladding setupWhat should you prioritise when selecting cladding? Your choice of exterior material should be guided by your home’s setting and orientation, considering exposure to rain and sun, the availability of locally-sourced materials and any planning constraints – as well as personal preference. On a tight budget, it’s wise to specify more durable materials for the most exposed elevations. When it comes to timber cladding, choosing the right species is crucial – not just for durability and appearance but also for its impact on biodiversity. Much of the timber used in the UK is imported, but at Studio Bark we aim to work with locally-sourced products where possible. Opting for timber with Grown in Britain certification ensures it’s sustainably sourced in line with the UK Forestry Standard and the government’s Timber Procurement Policy. What different factors will influence cladding design? Local authorities often default to brick, simply because adjacent buildings use it. To make the case for an alternative exterior finish, we take a context-sensitive but playful approach – picking up on relevant architectural patterns and reinterpreting them in our cladding design. This helps us demonstrate a connection to the surrounding area while introducing low-carbon materials that support a more sustainable build. Cladding design, both in terms of material selection and patterning, is something you should always discuss from the early stages of a project, ensuring it complements the overall design vision and meets practical requirements and aesthetic goals. What solutions can add wow factor to a timber property? We often leave wood cladding to weather naturally, allowing it to develop a soft, silvery-grey patina that blends with the landscape. Over the past decade, black-stained or charred timber has surged in popularity. It’s great for organic settings, where it acts as a quiet, recessive element in the landscape, allowing plants and greenery to pop. More recently, we’ve experimented with a rainbow of cladding colours and stains, especially for urban projects that suit a bolder, more playful aesthetic. The possibilities are endless! What other design elements should you take into account? It’s important to consider how the cladding interacts with the size, shape and details of your building. Vertical or horizontal boards work well on flat surfaces, while curved forms suit smaller elements like timber shingles. Windows and doors play a key role: aligning cladding boards with their edges creates a clean, intentional look, and varying board widths below windows can add subtle visual interest. Practical detailing is essential for durability. Timber board ends are vulnerable to moisture, so capping them and incorporating overhangs can significantly extend their lifespan. |

Corrugated metal cladding
Metal cladding offers a sleek, contemporary finish for timber frame homes, combining durability with minimal maintenance. Materials like zinc, galvanised steel and aluminium provide excellent weather resistance while enabling creative designs. Ideal for feature sections or entire elevations, metal cladding pairs well with timber and other materials for a striking, modern aesthetic.
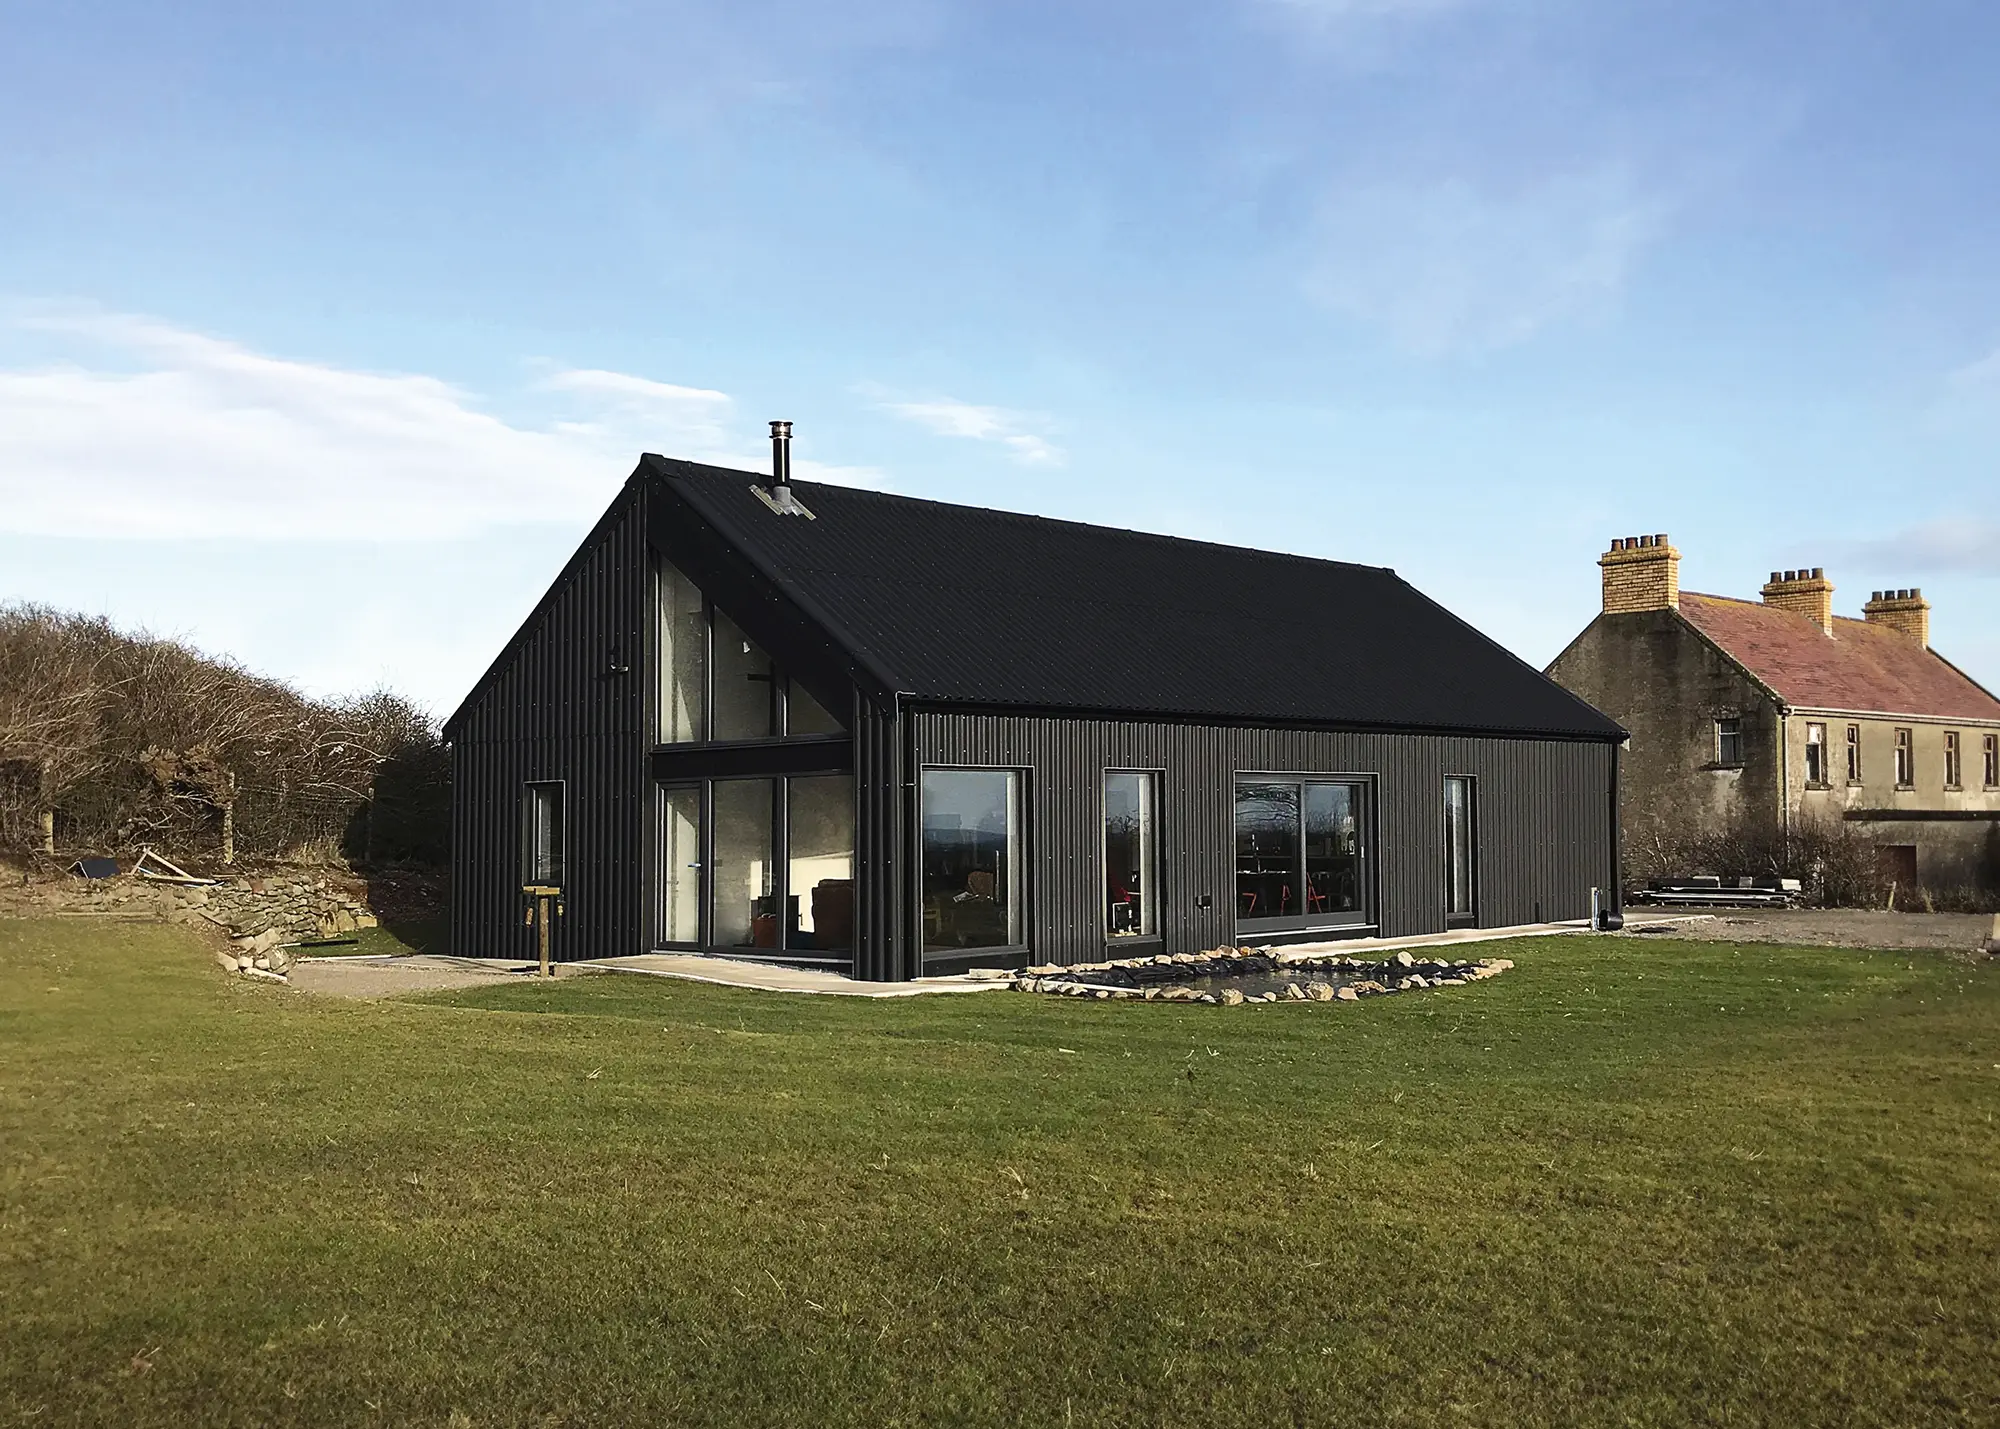
Designed by 2020 Architects, this timber frame cottage is clad in budget-friendly, corrugated black metal panels.
Fibre-cement cladding for timber frame homes
Made from a mix of wood cellulose, cement and sand to form a strong, water-resistant boarding, fibre-cement cladding comes in a variety of textures, baked-in colours and it can be easily painted in your chosen shade.
Photo: Katy Donaldson
For this turnkey home by Hanse Haus, a wood-effect fibre-cement weatherboarding was selected to complete the exterior in order to satisfy local planning requirements.
Erika Chaffey
You may be interested in