House Rendering Options Explained – Your Complete Guide to Choosing the Right Solution
Render is a popular way to finish the exterior of a home – working across a variety of architectural styles, from heritage homes to sleek new builds. So, which solution is best for your project? From silicone to lime, this is your complete guide to the different options
Tim Doherty
Render is a hugely versatile cladding option for self builds, renovations and extensions. It’s widely available from a range of suppliers and can be specified in a vast array of colours to perfectly suit your home’s exterior design.
The manufacturers of building materials are constantly coming up with new ways of blending minerals and chemicals together to give us superior products to use on site – sometimes for easier application, but also with improved performance for lower maintenance. Exterior render is one of these products, although with so many different options and outcomes, knowing which render will work best on the exterior of your project may be a challenge.
For renovations or retrofits, rendering the exterior is a great way to for give the property a new lease if life, or for uniting old and new elements. “Render can prolong the life of a building by adding a weatherproof barrier between the brick construction and the elements. It is also a great way of refreshing tired, damaged or mixed brickwork with a consistent overall finish across a property,” says Frank Brown, product manager of builders’ merchant MKM Building Supplies.
So, which exterior render option is best for your house? Here we shed some light on the most popular solutions available in the UK and their benefits to help you pick the right material.
This complete guide to rendering a house looks at:
What is render & is it right for your home’s exterior?
House rendering is a popular exterior cladding material. It is a coating applied to a building’s external walls – basically, the smooth, usually white surface on the outside of a house. Traditionally, house rendering is a mix of lime, water and an aggregate (such as sand) created a flexible and breathable covering.
This method hasn’t been particularly popular in the last few decades, but has recently experienced a bit of a resurgence; it’s certainly still used for period property conservation projects and renovations.
Conventional house rendering materials are made from a cement, sand and aggregate blend, but many modern products are cement free. These newer render options sometimes contain products to help waterproofing and resistance to algae growth – you can even get renders pre-mixed with a colour for a vibrant finish and ones that work with external insulation.
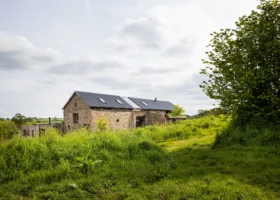
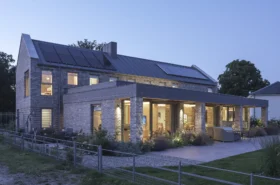
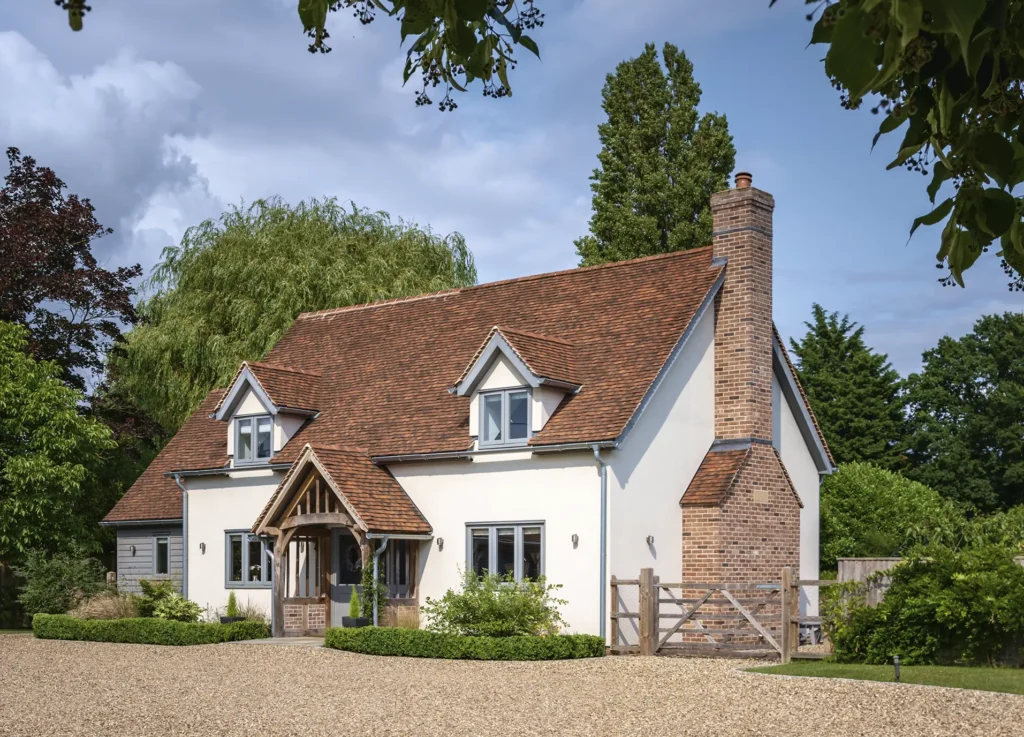
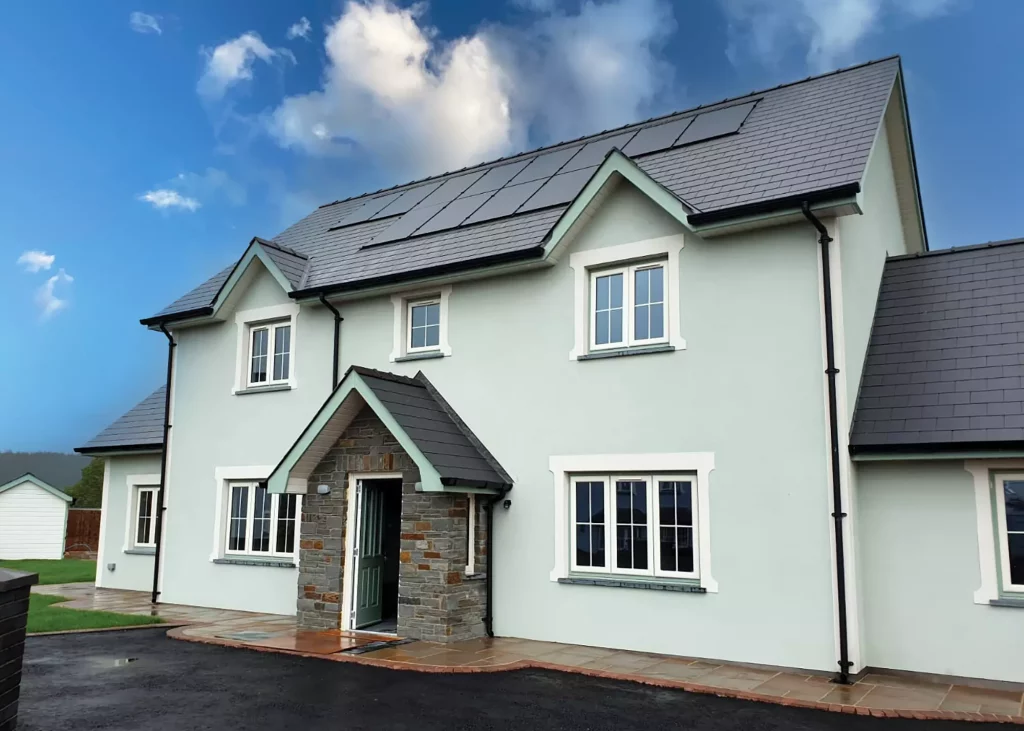
Sarah and Matt Switzer partnered with Welsh Oak Frame to create their dream self build home in the Essex countryside. The mortgage company wouldn’t allow timber cladding on the oak build, so the couple decided to render the main part of the property and used painted cedar planks on the side section and rear. Photo: Nikhilesh Haval
Generally, modern house rendering systems can be divided into three main types: mineral, acrylic and silicone – but there are other options, as we look at further down. Normally these need only one coat of 1mm-4mm thickness, but this is highly influenced by the substrate material used under the render. If chippings are being added to the surface once the render is in place, then it may need to be at least 6mm thick.
A basecoat of 8mm-10mm will be needed to level out a poor brick surface, sometimes using a mesh membrane to reinforce. For lighter weight construction – timber frame or steel studs – a proprietary backing board can be applied to act as the substrate, which is then covered in a reinforcement mesh, much like the levelling coat over masonry.
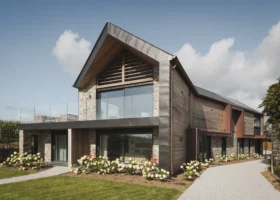
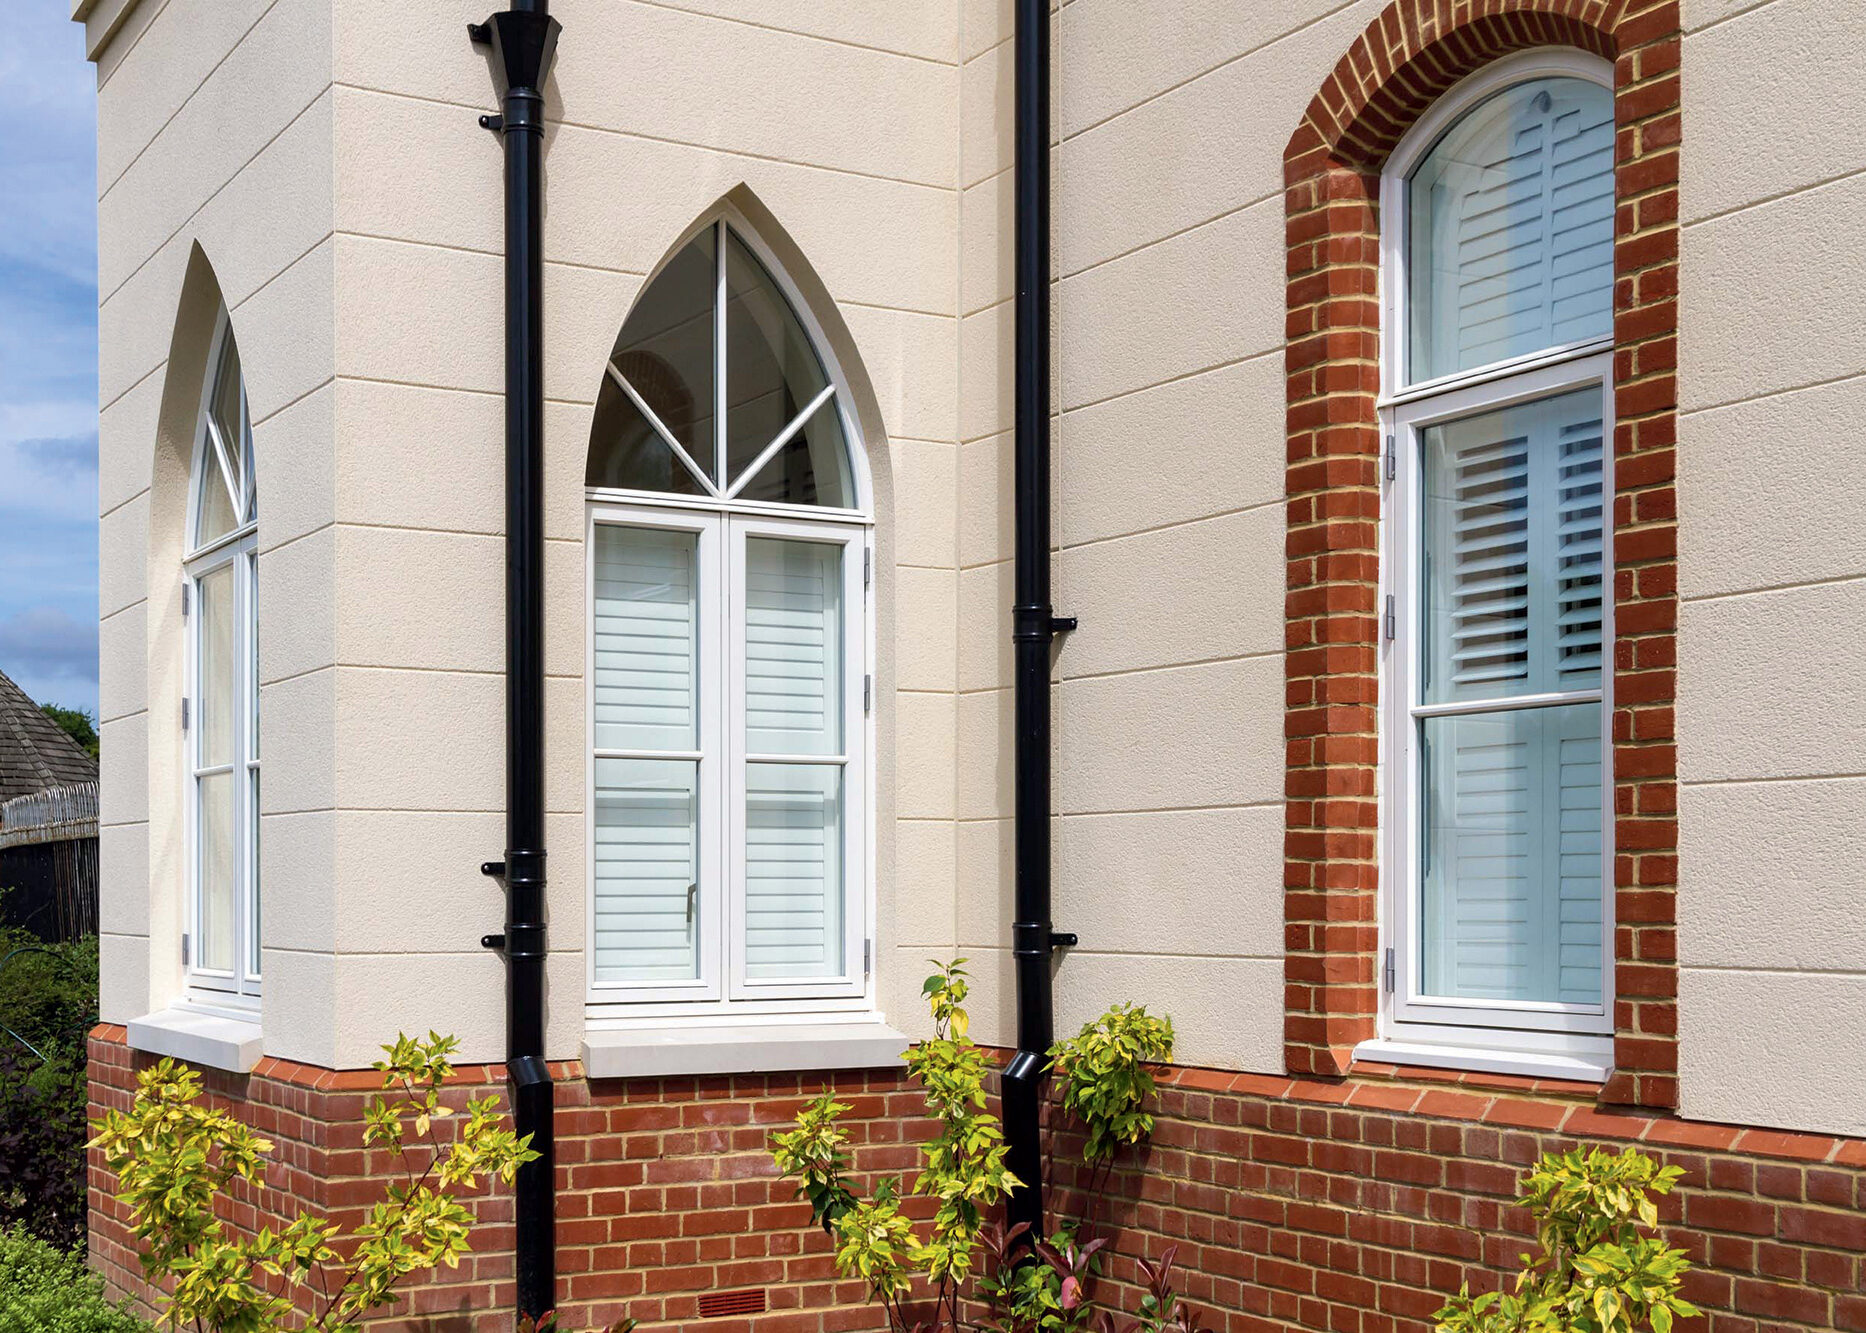
Saint-Gobain Weber’s monocouche render creates a stonework aesthetic on the gothic facade of this new build in West Sussex
One of the features making modern house rendering systems so popular is that they can be combined with external wall insulation (EWI) thanks to their light weights and thin coats. Normally there’s only need for one layer on the outside of the insulation, but still on top of a reinforcing mesh.
With houses built using timber frames or steel studs, a cavity might need to be specified to ensure no interstitial condensation beyond the insulation in the panel. Details vary job-to-job, depending on the construction method and any restrictions in place.
Be the first to hear about the latest project advice, inspiration and product guides from Build It magazine. Also gain free show tickets and special magazine offers.
Choosing the best render colour for your home
Your house’s colour and exterior aesthetic can make a big impact on its kerb appeal and identity. So, it’s important to know all the options before choosing a system and getting ahead with a project.
“Before choosing the colour, you need to consider what type of render to use,” says Elissa Turnbull from Saint-Gobain Weber. “Mineral finishes like monocouche render use natural pigments to create pastel hues and earth tones. For something brighter, opt for synthetic products, such as silicone-enhanced textured finishes and paints.”
If you’re renovating a listed home, or if your property is located within a conservation area, you may be restricted to the type of finishes and colours you’re able to use. It’s wise to check with your local council before doing too much research into the different options.
“Many modern builds are finished in light shades, but you could opt for a Cornflower Blue, for example, if you’d like to stand out. Properties with low-light or north-facing facades may suit brighter colours that will reflect light rather than absorb it,” says Elissa. “Envisaging how your newly rendered home will look can be difficult, especially alongside other external features such as doors and windows. The colour facade simulator from Saint-Gobain Weber shows exactly how different decorative finishes would look on your home. Simply upload an image of your own property and select the colour you’d like.”
Sand & cement render
Cement-based or mineral house rendering systems have been around for centuries. They are made from a mix of sharp sand, cement and sometimes a little lime to add flexibility, built up over several layers.
Cement-based render needs to be painted on top (as opposed to being self-coloured), meaning added maintenance over the years. The cost is this option’s main advantage – you can expect to pay £25-£45 per m² including labour and materials.
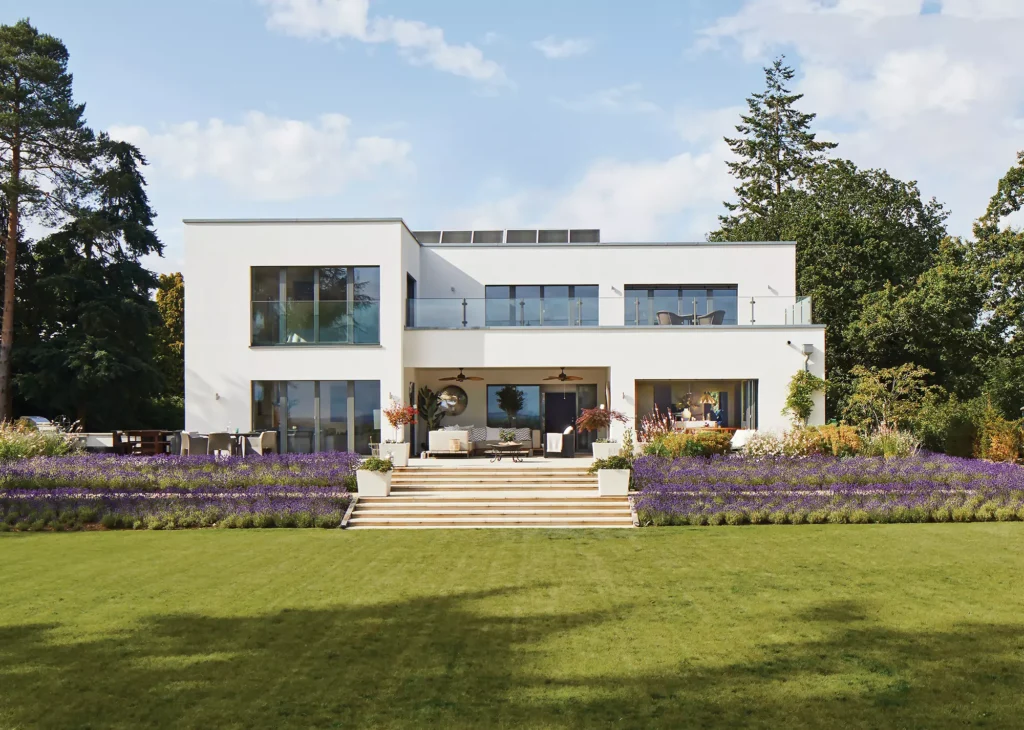
Baufritz designed this Bauhaus-inspired self build for downsizers who wanted a home that would see them through into old age. The modern, mineral-based render is factory-applied in Germany during prefabrication of the timber frame house shell
“It can be more susceptible to cracking, as it is not very flexible and its performance is heavily reliant on the correct mixing of the materials, as it is not usually pre-mixed off-site in a modern, quality-controlled factory environment,” says Frank.
When render fails, water can seep in, which leads to damp problems. Pre-mixed products are available, however, which are designed to ensure the right ratio of ingredients every time; Frank recommends EcoRend’s OCR (Ordinary Cement Render) base coat.
Modern silicone and acrylic renders tend to be pre-made, arriving on site in tubs – they can even be pre-coloured with near enough any pigment to produce a vibrant finish. It’s durable, but the waterproofing qualities aren’t great and it can attract algae.
This house rendering option will fit the bill if you’re after a system that delivers on flexibility, helping to prevent cracking over time. They are applied in stages (a base coat, primer and top coat), and need less drying time than standard cement.
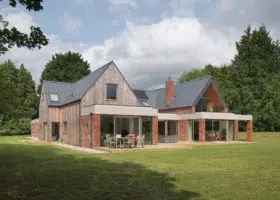
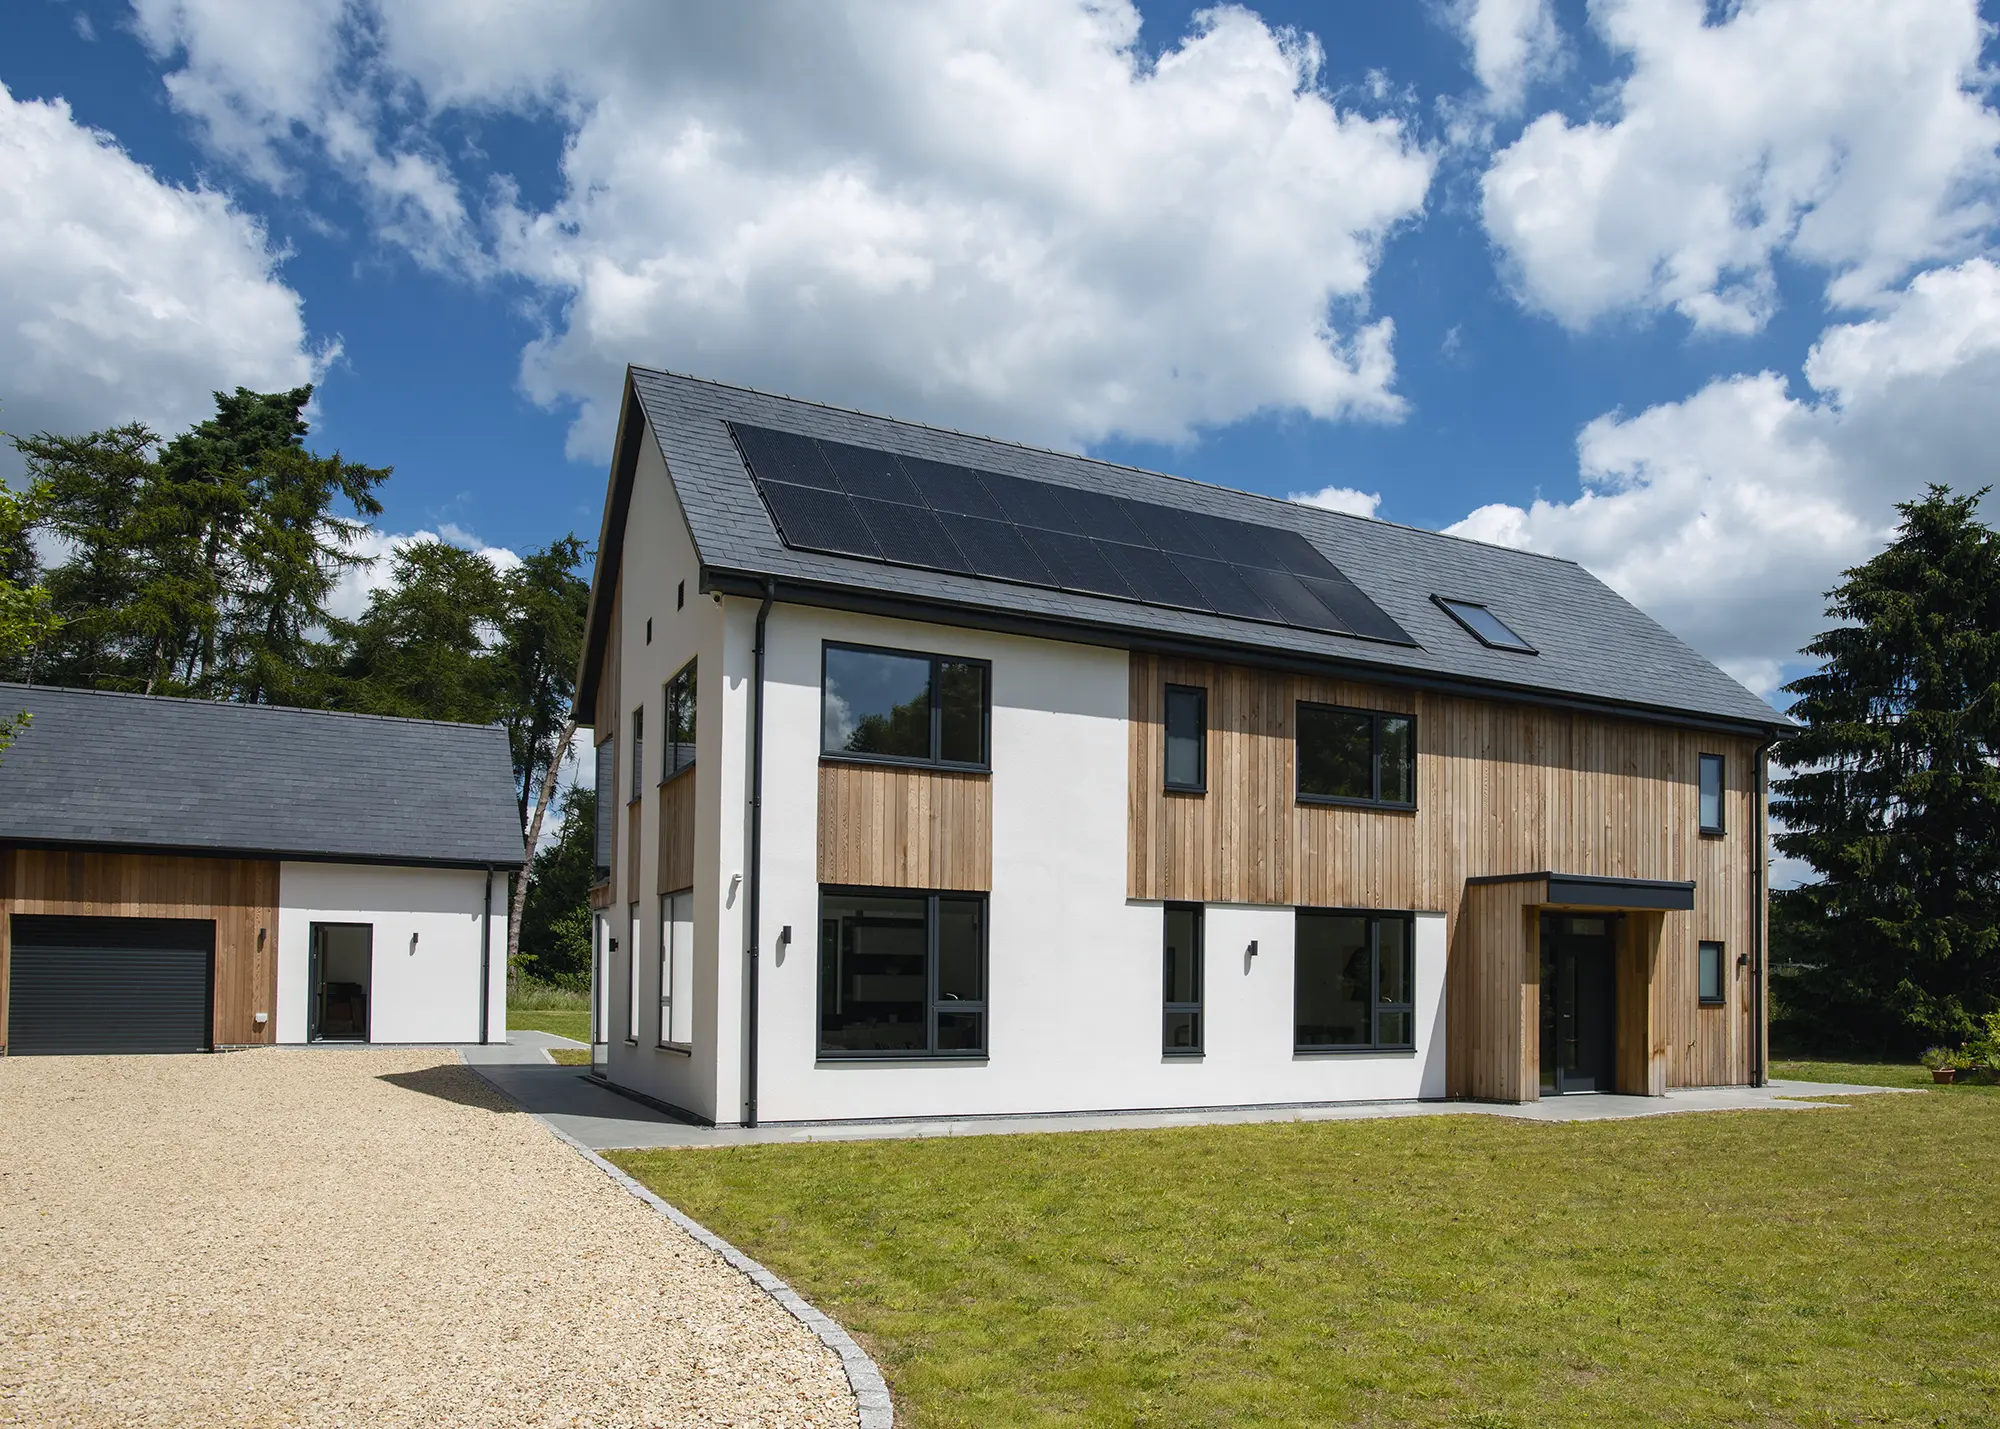
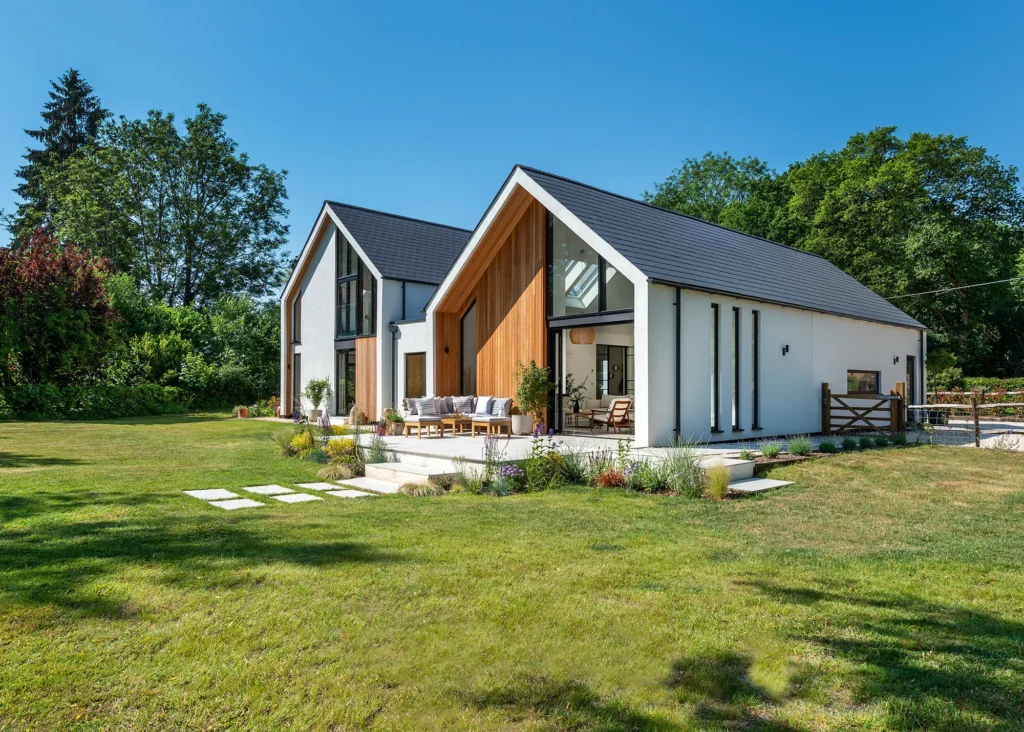
Vincent Denecker’s old brick house proved difficult and expensive to heat, so after years of contemplating a project, he replaced it with a contemporary, energy-efficient timber home. The house is finished with off-white acrylic render, British cedar cladding and a slate roof. Photo: David Stewart
“Thin-coat silicone and acrylic systems are considered premium products and are generally more expensive as a render solution when compared to other options,” says Frank, who adds that these systems cost in the range of £70-£90 per m² including labour and materials.
Why did we choose silicone render for the Build It Education House?
We selected K Rend’s silicone thin coat render for the Build It Education House. A cement-based render system incorporating silicone, it offers a number of advantages over traditional solutions.
Here are the main advantages that made it the top choice for us:
Silicone render is self-coloured. The colour (there are 20 standard options) is embedded into the topcoat. So it doesn’t need painting, and there’s no redecoration to do over its lifetime.
It’s flexible. Properly applied and cared for, K Rend has a long life expectancy of 30+ years. One reason for this is silicone render is more flexible than traditional products,
so it accommodates movement and resists cracking.
It’s water repellent. The silicone imparts a hydrophobic quality, which means it’s highly water (and dirt) resistant. So much so, that this type of render offers an element of self cleaning. The only regular maintenance is a light pressure wash every few years.
This house rendering option is cement-based but is more breathable, and it’s through-coloured so no extra painting is required. Its overall thickness is designed to be 15mm and it arrives on site as a dry mix, ready to be blended with water. One layer can be sufficient for well-built, neatly finished blockwork, which means that it is ideal for those looking for a quick application process with great results.
Through-colour is one of monocouche’s advantages, so there’s no need to paint on top. This house in Wales uses EcoRend’s monocouche render in Sea Mist
Expect to pay £50-£65 per m² for monocouche rendering (materials and labour). Homeowners looking for a high-quality product often weigh up the comparative benefits of silicone and monocouche. The choice can come down to durability: monocouche house rendering is a touch cheaper but won’t last as long (up to 10 years) and is not as good at repelling water and dirt.
Cork render
Spray-cork coatings are relatively new to the market. They consist of fine cork pieces (a waste product from the wine cork-making industry) in a water-based resin, sprayed on in two coats of about 3mm each. Cork render can be applied to a variety of substrates and is breathable, so it’s suitable for older properties.
Cork render by CorkSol has been sprayed over the existing finished on this property in Norfolk. Cork’s advantages include extra thermal and acoustic protection, in addition to fulfilling render’s traditional role of weatherproofing
It also brings significant benefits beyond aesthetics and weatherproofing. “Cork has the advantages of other systems, but its real strength is what else it can deliver: it gives thermal, acoustic and fire protection, all in one system,” says Chris Heaton, marketing manager for CorkSol UK. “In warm, dry weather it’s possible to apply two coats in the same day. You could do a standard three-bed semi in less than a week.” The granulated cork leaves a finely textured finish, so if you are looking for an absolutely smooth render, this might be a factor to consider.
You should budget around £40-£50 per m² for cork render (material only) with installation adding a further £30-£40 per m² depending on project scope.
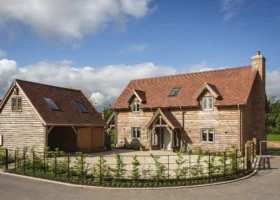
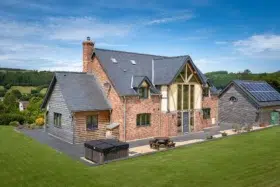
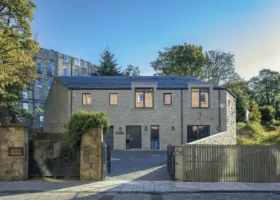
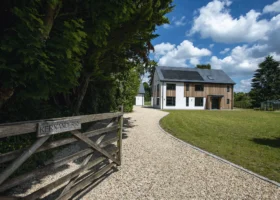
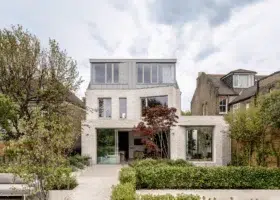
CASE STUDY Contemporary self build with a rendered exterior
Lowri Horstead was keen to have a home that her family and mother could live in together comfortably for years to come. Their existing home was, however, not suitable – with only one bathroom and insufficient space. They decided to join forces and find a larger place that could provide three generations of the family with a sociable home as well as private spaces.
Frustrated by their lack of success when viewing properties, they stumbled on the idea of a self build when Lowri found a newly listed bungalow. After going to see it, they realised that if they knocked it down and started again, they could achieve exactly what they wanted.
Katy Donaldson
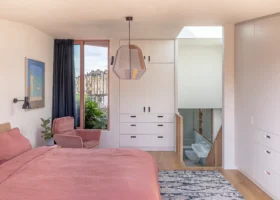
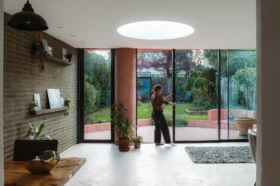
Designed by C7 Architects, the new home has been constructed using timber frame, with SIPs panels and composite slate tiles forming the roof. The exterior walls were rendered to achieve a crisp, clean finish – with areas of Siberian larch timber cladding for added interest. A spacious vaulted area houses the kitchen, dining and sitting area, alongside a practical walk-in larder and a separate utility room.
Although it hasn’t been widely used for over half a century, lime has experienced a recent resurgence thanks to its flexible and breathable advantages. Its permeability means it is great at preventing damp, mould and condensation in older properties, which were constructed differently to modern self builds.
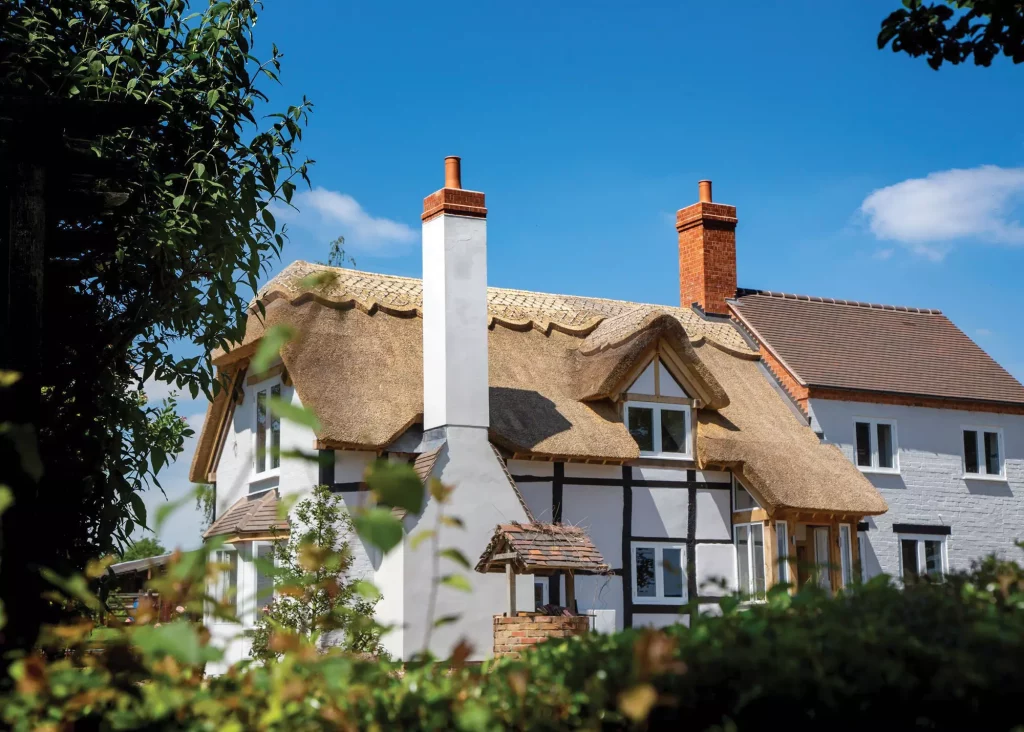
A fire-damaged listed cottage in Worcestershire was brought back to life using products from Lime Green – lime render externally, combined with insulating woodfibre boards coated with lime plaster on the inside of the house
If applied to blockwork, it’ll need three coats – two base and one top – each between 8mm-10mm thickness. The mix will be calculated individually to suit the specific property (based on its exposure, the substrate material etc) as will its application speed. You should budget between £55 to £75 per m² for lime render.
Render FAQs
Answered by Gerry Gould
Gerry Gould is technical sales consultant as SAS Render, a leading UK manufacturer of premium render systems.
Can I render my house myself?
Technically, yes, you can. However, rendering requires knowledge of preparation, correct material mixing, weather conditions, detailing around windows and movement joints and correct application thickness. Poor workmanship can lead to cracking, detachment, damp issues and expensive remedial work. For best results and warranties, it’s advisable to use an experienced contractor and a certified system.
Do I need planning permission to render my house?
In most cases, planning permission is not required to render a residential property, as it is generally classed as permitted development (PD). This means homeowners are typically allowed to alter the external appearance of their house without submitting a formal planning application, provided the changes do not materially alter the structure or significantly affect neighbouring properties.
However, you may need to apply for planning permission if your property is listed, as any alterations to a listed building require formal consent, regardless of how minor the change appears. Similarly, if your home is located within a conservation area, a national landscape (formerly a AONB) or another designated zone, additional restrictions may apply.
Planning permission may also be required where the proposed render would significantly change the building’s appearance, particularly if the finish, colour or texture would alter how the property is viewed from the street or affect the character of the surrounding buildings.
Can rendering a house prevent damp?
When designed and installed correctly, render can help protect external walls from water penetration by creating a weather-resistant barrier. This is particularly true when a low-porosity render, such as a silicone resin render is used, as it offers increased water repellence while remaining vapour permeable. This allows rainwater to be shed from the surface, reducing water absorption into the wall, while enabling trapped moisture vapour to escape – an important balance in maintaining a healthy building envelope.
However, if a render system is applied incorrectly or installed over a saturated, contaminated or unsuitable substrate, it can trap moisture within the wall construction. This may lead to worsening damp problems, surface staining, cracking, blistering, or even bond failure over time. For this reason, correct preparation of the background, appropriate detailing and the use of breathable, compatible materials are all essential.
How can I look after a rendered house to ensure it stays looking clean?
A rendered facade will remain attractive and perform well for many years if it is properly maintained. While modern renders, particularly silicone and mineral finishes, are designed to be low maintenance, some basic care will greatly extend their lifespan and appearance.
Regular visual inspections are recommended, particularly after periods of harsh weather. Look for small cracks, impact damage or areas where water may be sitting or staining the surface. Addressing minor defects early can prevent more serious problems, such as water ingress or frost damage from developing over time.
For routine cleaning, use a soft brush and low-pressure water to remove surface dirt and debris. High-pressure washers should be avoided, as they can damage the surface, dislodge aggregates and force water behind the render. In areas prone to shade and moisture, such as north-facing elevations, green algae or moss may develop. This can be treated safely with a specialist biocidal wash or fungicidal remover formulated for rendered surfaces.
Ensuring that gutters, downpipes and drainage systems are kept clear is also essential. Faulty rainwater goods can cause persistent staining and oversaturation, leading to premature degradation of the render system.
Can rendering a house improve its energy efficiency?
Rendering alone is primarily intended to protect and enhance the external envelope of a building. However, when a finish is installed as part of an external wall insulation (EWI) system, it can significantly improve a property’s thermal performance, comfort, and energy efficiency.
External wall insulation works by wrapping the outside of a building in a continuous layer of insulation, which is then protected with a reinforced basecoat and decorative render finish. This creates a highly effective thermal barrier that reduces heat loss through the walls, eliminates many cold bridges and improves the overall airtightness of the structure. The result is a warmer, more stable internal environment with reduced reliance on heating.
For older properties, particularly solid wall or poorly insulated buildings, the impact can be substantial. Homes that previously lost large amounts of heat through uninsulated walls can see their U-values reduced dramatically, often from around 2.0 W/m²K or higher to as low as 0.18–0.30 W/m²K, depending on the specification. This improved thermal performance translates directly into lower energy demand.
Can render help to reduce a house’s energy bills?
Homeowners can typically expect noticeable reductions in heating costs following the installation of an insulated render system. While exact savings will vary depending on property size, insulation thickness, occupancy patterns, and fuel type, many households may see annual savings in the region of several hundred pounds per year. Over the lifespan of a certified system, this can amount to many thousands of pounds in reduced energy expenditure, alongside improved EPC ratings and increased property value.
Tim Doherty
Tim Doherty is a self-builder and chartered surveyour. He was the founding MD of the National Self Build & Renovation Centre as well as a founding member of NaCSBA. Tim now runs Dobanti Chartered Surveyors, a specialist surveying and building consultancy. The company provides support to both the residential and commercial sectors.
CorkSol make claims for the use of SprayCork in external and internal wall insulation scenarios, and to tackle cold bridges that are tricky to reach but easier to spray-seal. However they will not give any verifiable figures about the likely improvement in U-values or EPC points after treatment. If you want a new render on existing walls to achieve the minimum 0.3 W/m2K required by Building Regulations, or if you want to tell your EPC Assessor what you’ve done and ask for an increase in your EPC rating, you are completely on your own. I have been told explicitly by CorkSol that it will be up to me to commission an Energy Assessor to create drawings and prove the U-values to sceptical building inspects and SAP assessors. And no, there are no data sheets . . .


 Login/register to save Article for later


CorkSol make claims for the use of SprayCork in external and internal wall insulation scenarios, and to tackle cold bridges that are tricky to reach but easier to spray-seal. However they will not give any verifiable figures about the likely improvement in U-values or EPC points after treatment. If you want a new render on existing walls to achieve the minimum 0.3 W/m2K required by Building Regulations, or if you want to tell your EPC Assessor what you’ve done and ask for an increase in your EPC rating, you are completely on your own. I have been told explicitly by CorkSol that it will be up to me to commission an Energy Assessor to create drawings and prove the U-values to sceptical building inspects and SAP assessors. And no, there are no data sheets . . .