Just over two weeks to go until our brand new show!
Build your dream home with confidence
BOOK YOUR TWO FREE TICKETS HEREBuild your dream home with confidence
BOOK YOUR TWO FREE TICKETS HEREEstimate your project costs instantly with Build It's interactive self-build cost calculator
Calculate NowGet an accurate, detailed cost breakdown of your project
Submit plans
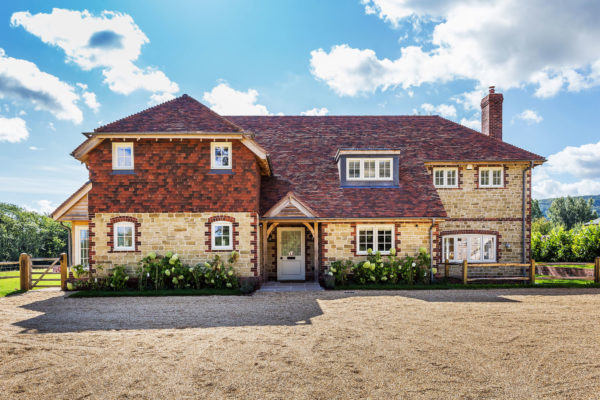
Buoyed by the success of their first self build project, John Bearman and Stephanie Rogers were keen to repeat the experience and expand on their newfound knowledge. They were weighing up options and had just decided against investing in an ambitious local construction opportunity, when they heard that the sale of the house next door – a two-storey, 1950’s chalet-style property – had fallen through.
“We’d been marketing our own home as part of the venture we’d been looking at, and amazingly we found a buyer really quickly,” says John, “As we’d then pulled out of the investment, we decided to maximise the situation, go ahead with the sale, and buy next door instead as a development project.”
The couple had initially dismissed the property as the garden was smaller than their own. Revisiting the site, however, they could see potential – while realising that simply replicating the style of their first self build wouldn’t work here.
“We’d constructed a high-spec, Arts & Crafts-inspired house on a generous plot,” says John. “There were features we wanted to take from it, but this site was smaller and we couldn’t just build a scaled-back version. Second time around, I wanted to try something different with both the appearance and the construction.”
The pair decided to work with 2-4C, the team who had designed their first self build, to come up with the plans for their new home. Conscious they were replacing a relatively modest structure, John and Stephanie wanted to avoid an overly ornate or imposing building.
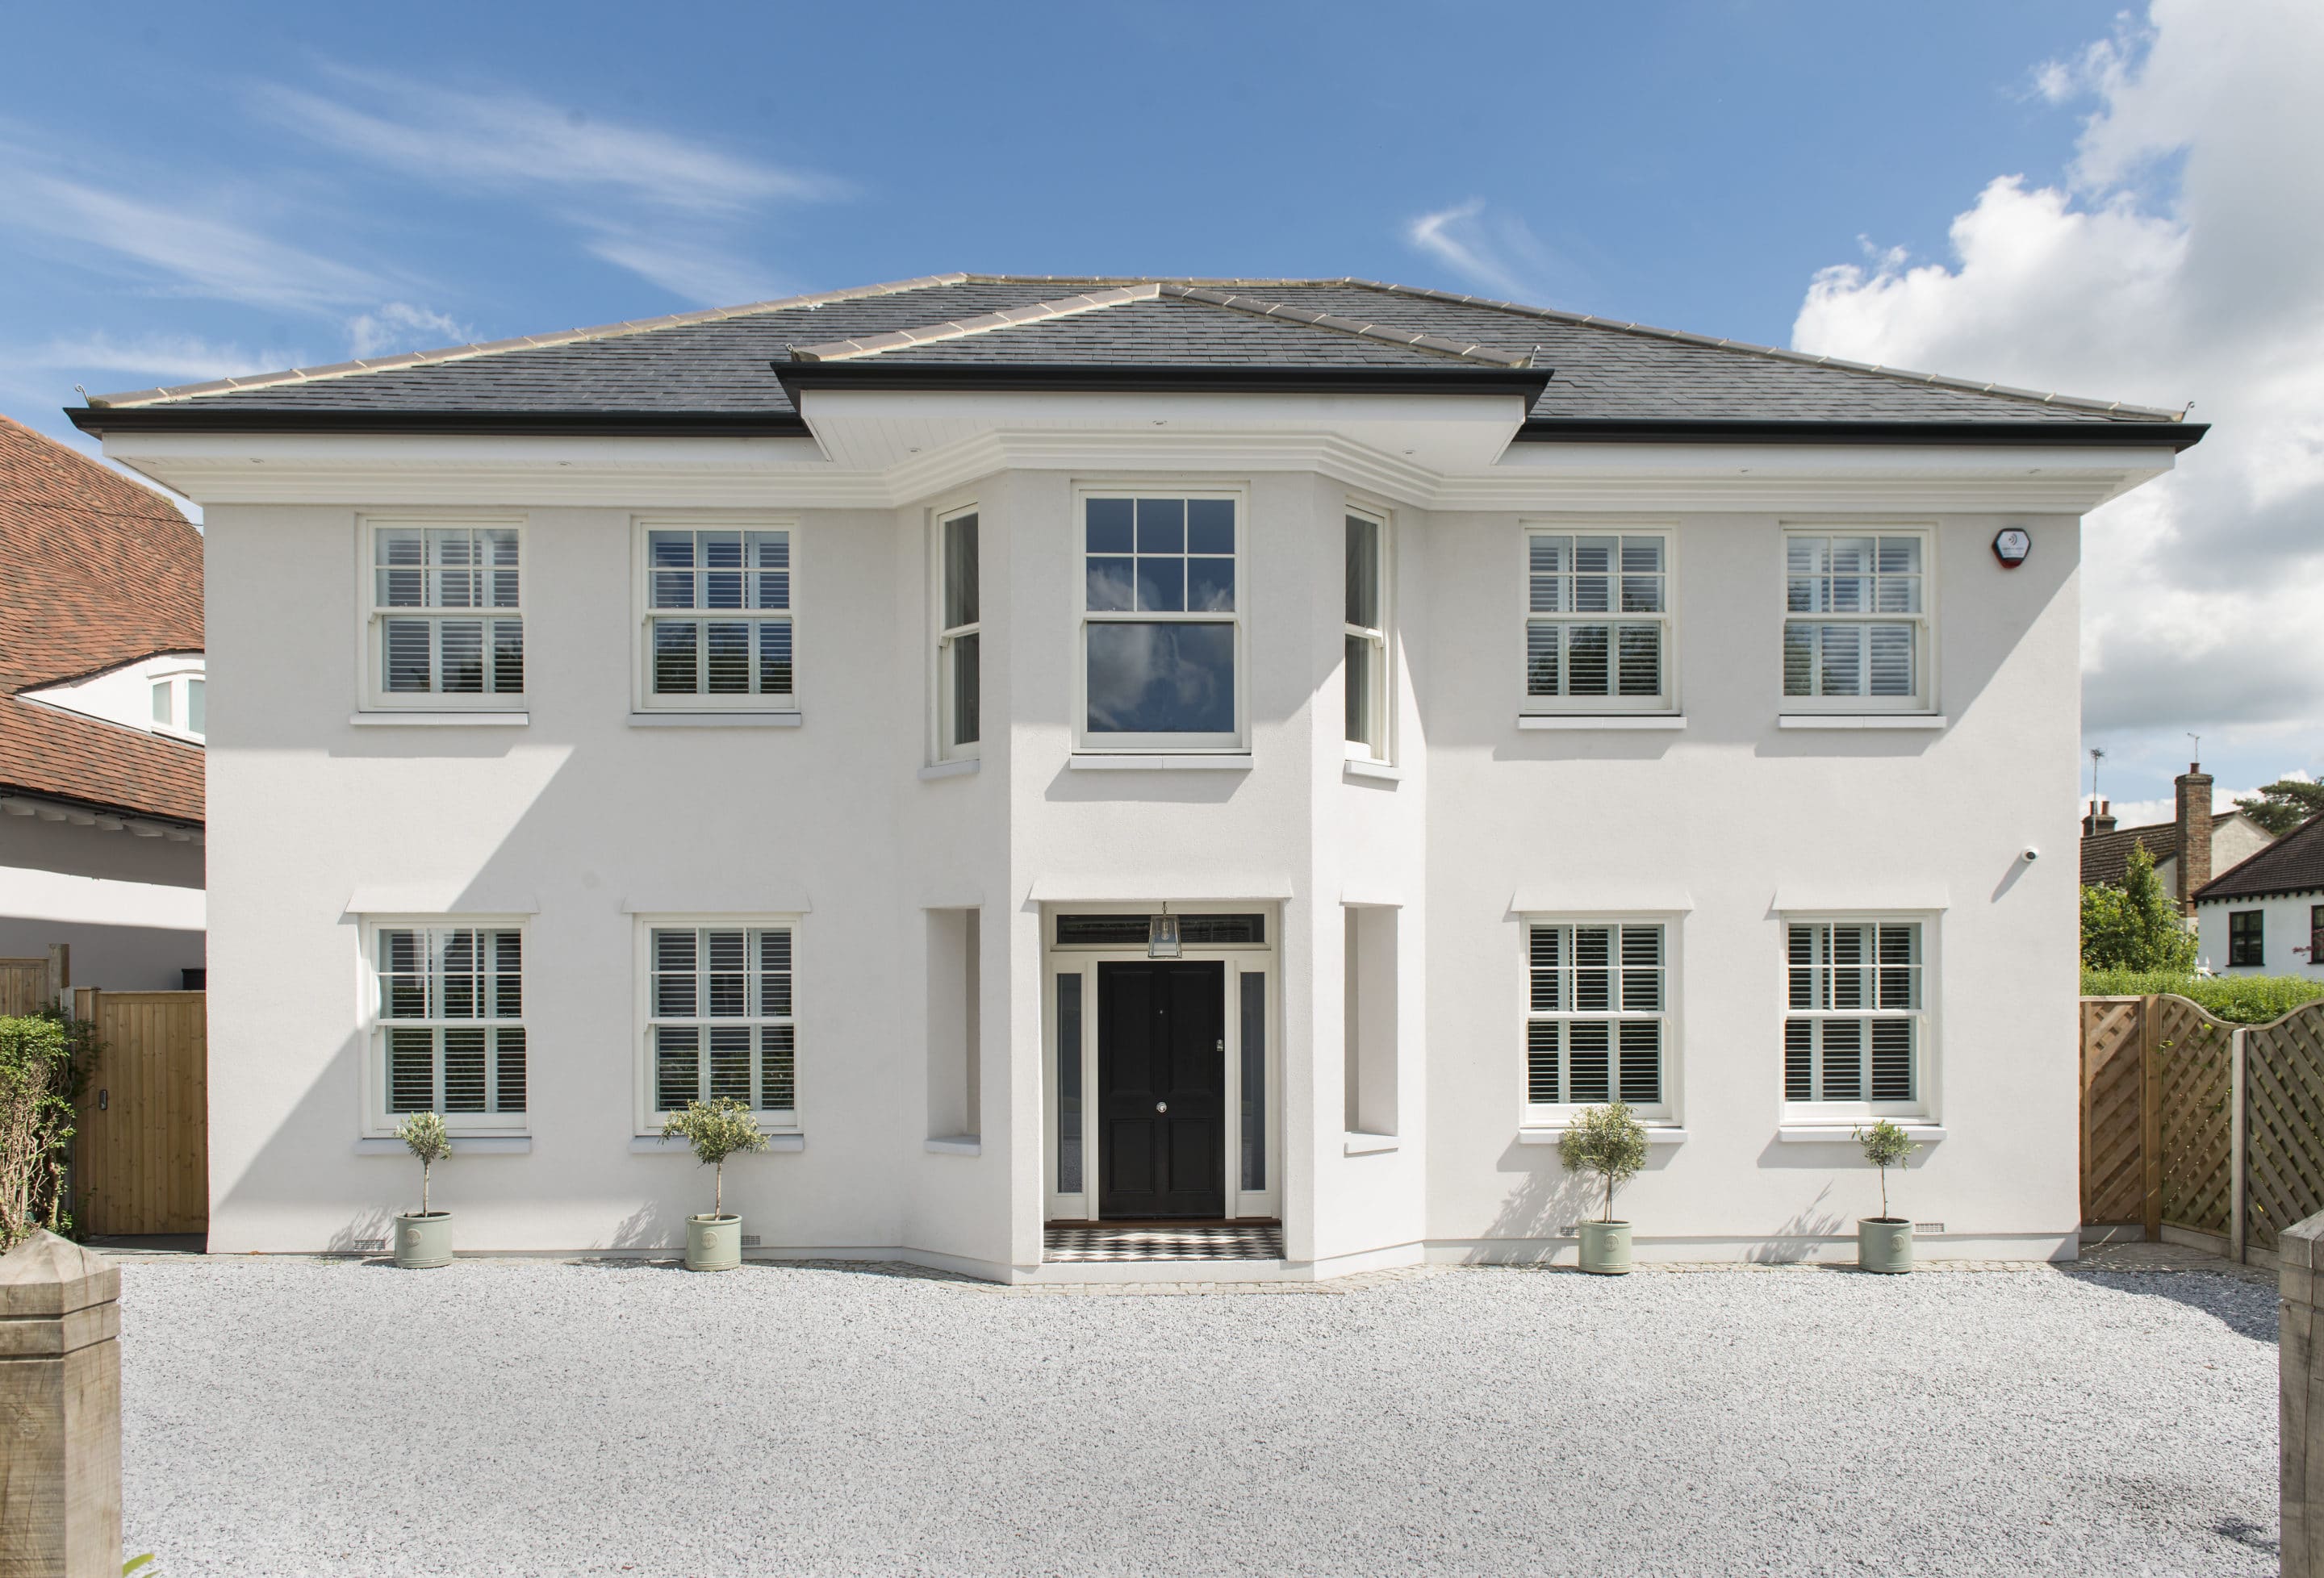
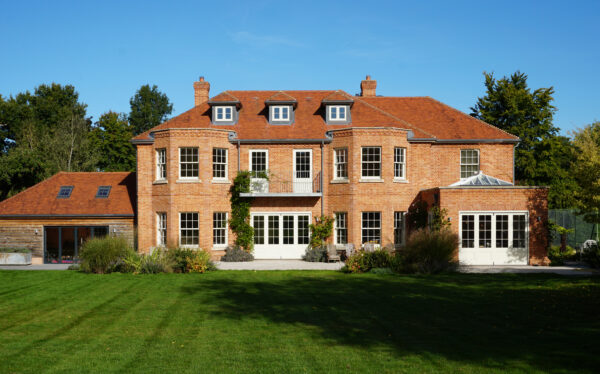
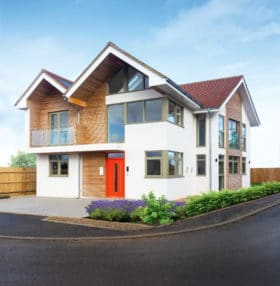
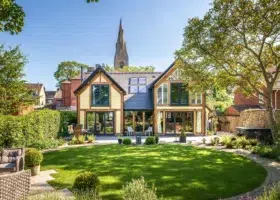
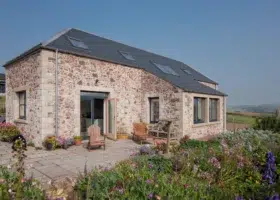
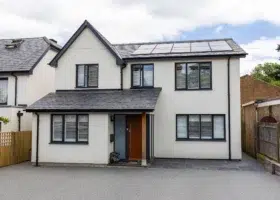
Having looked around the local housing stock, they settled on the idea of a symmetrical, neo-Georgian property with classic exterior design details such as sash windows and a shallow, hipped roof.
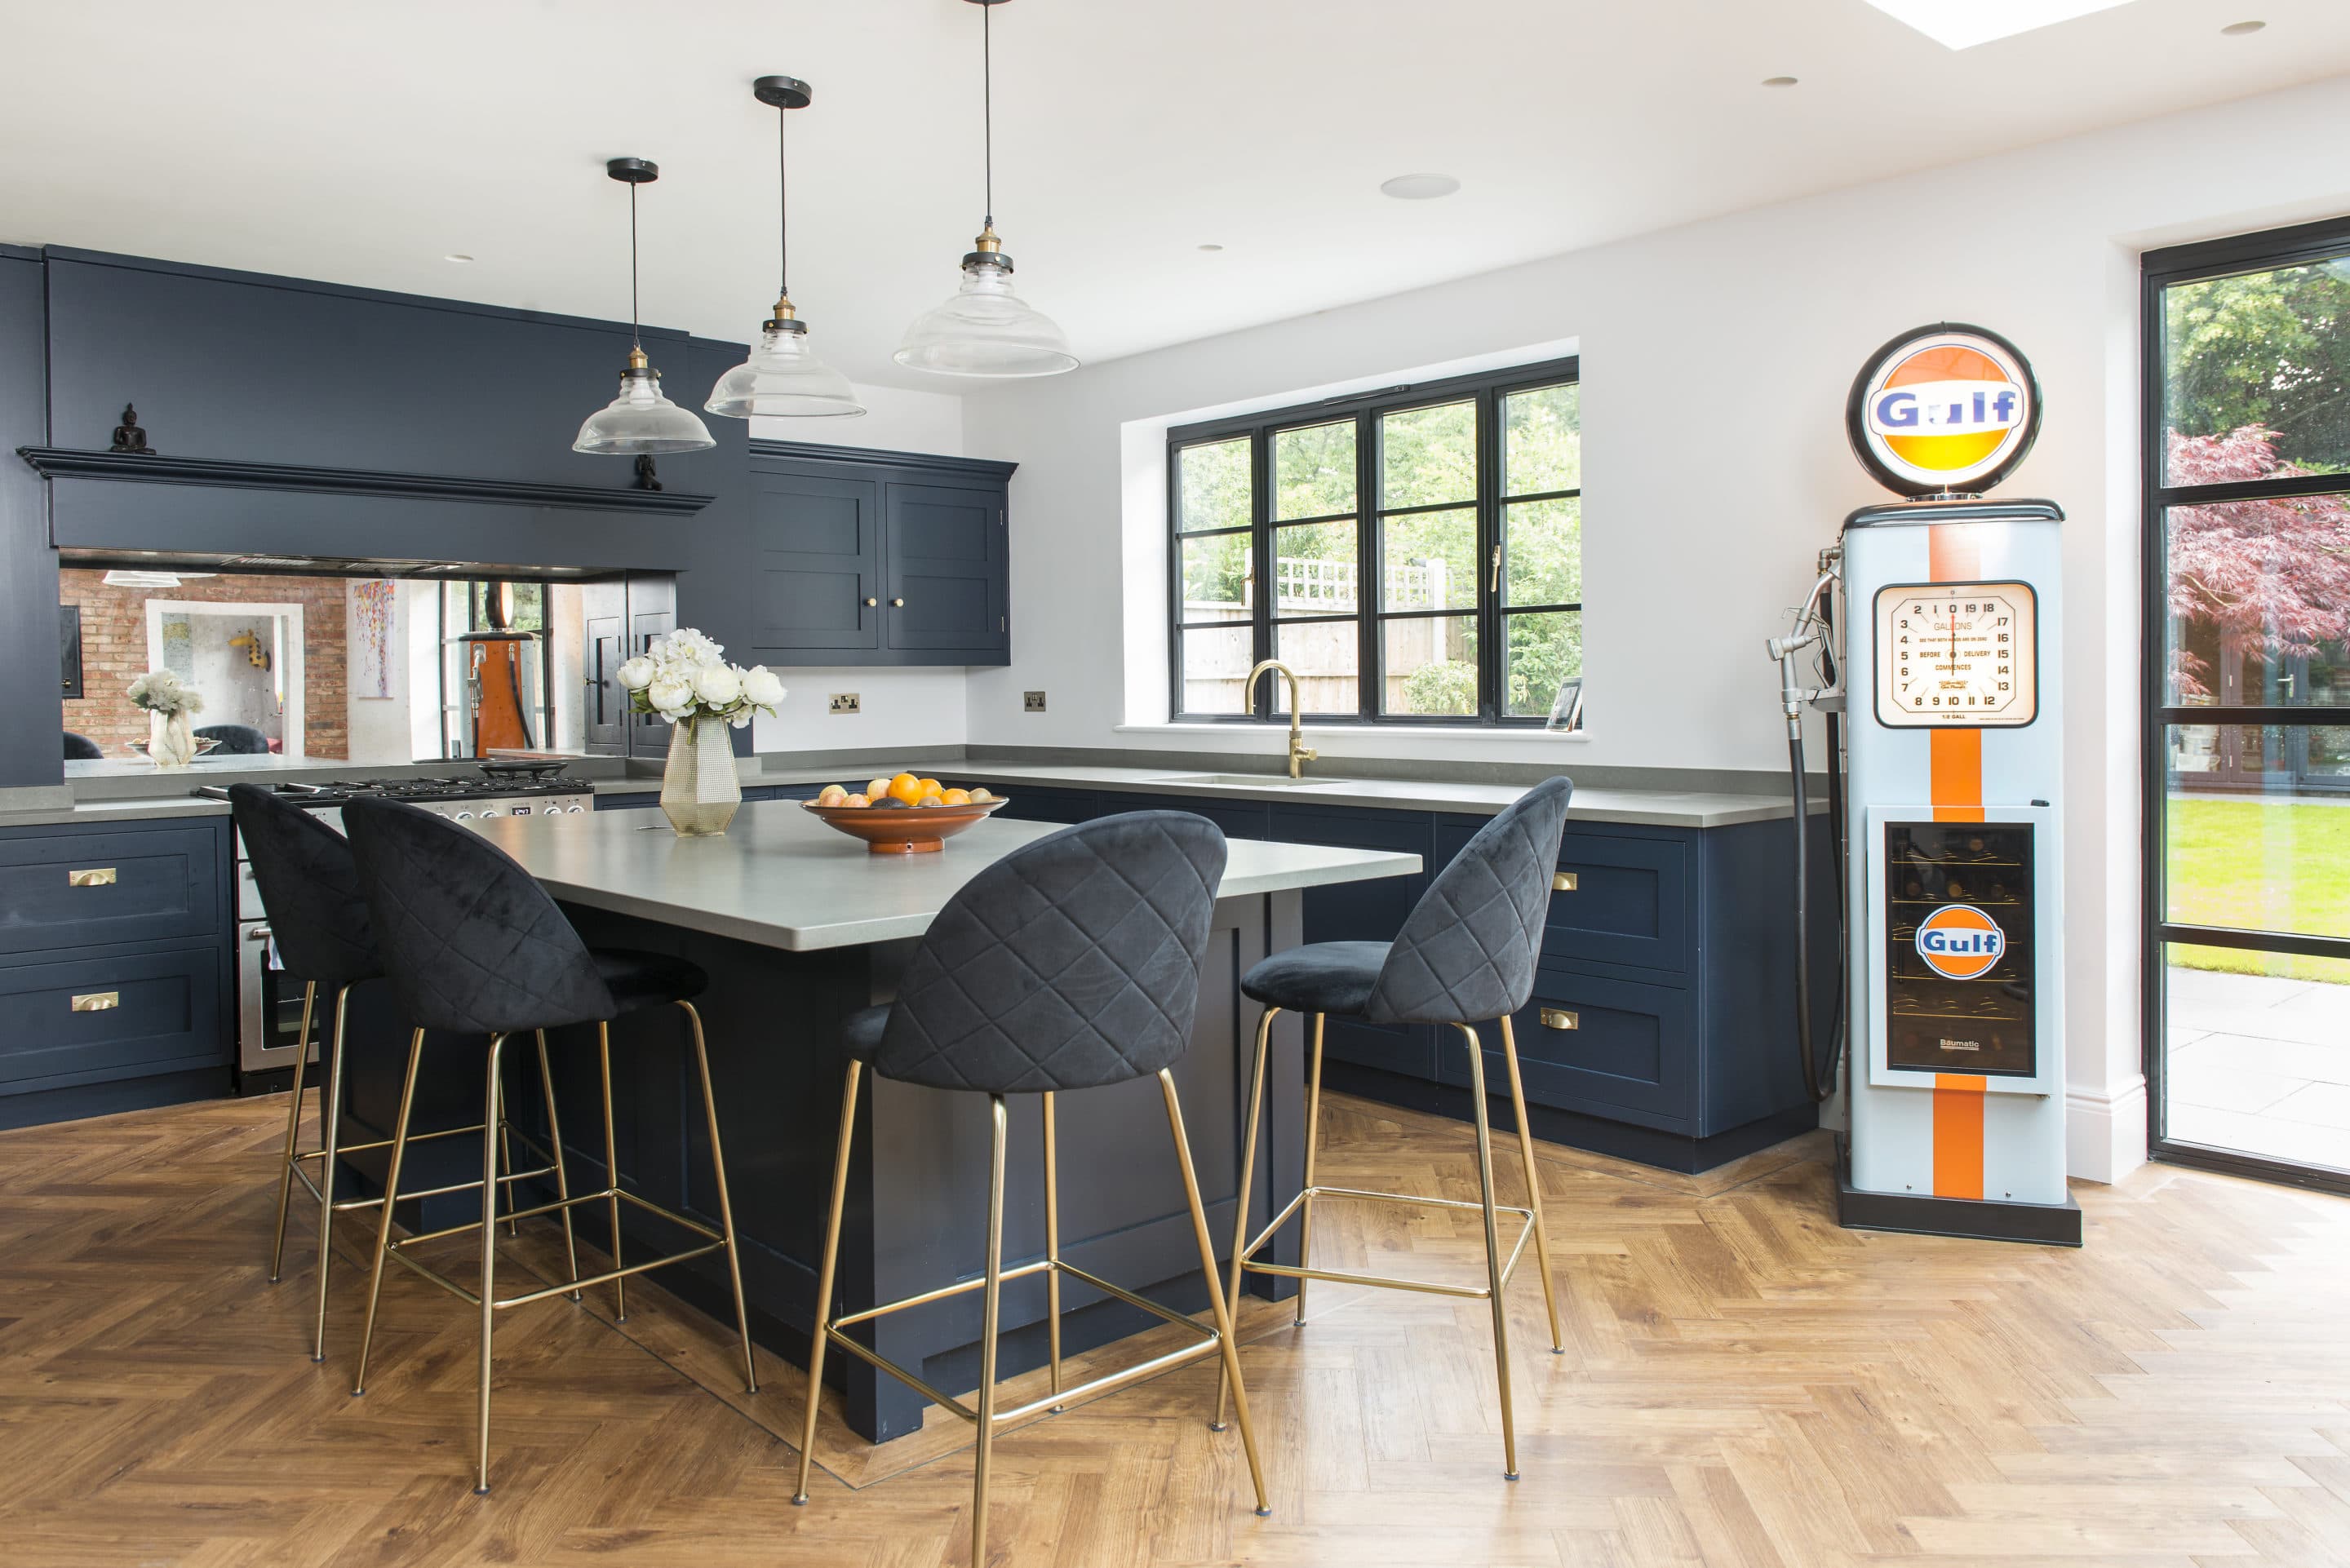
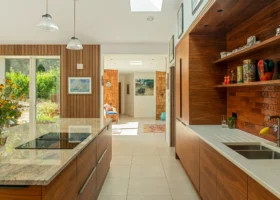
A mirrored splashback bounces light around the kitchen zone, offsetting the dark painted cabinets and concrete-look quartz work surfaces
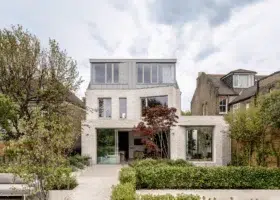
Suggestions of decorative columns, gable ends and circular windows were rejected before they eventually arrived at an elegant, well-proportioned design that would fill the width of the site. The main facade of the house would be broken up by a central, double-height bay.
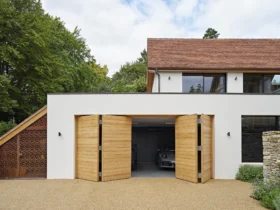
“The bay creates a more interesting roofline,” says John, “It also meant we could have really large windows and masses of natural light on the landing.” The only downside would be the lack of space for a garage, but there was scope at the back of the house for a garden room to provide storage.
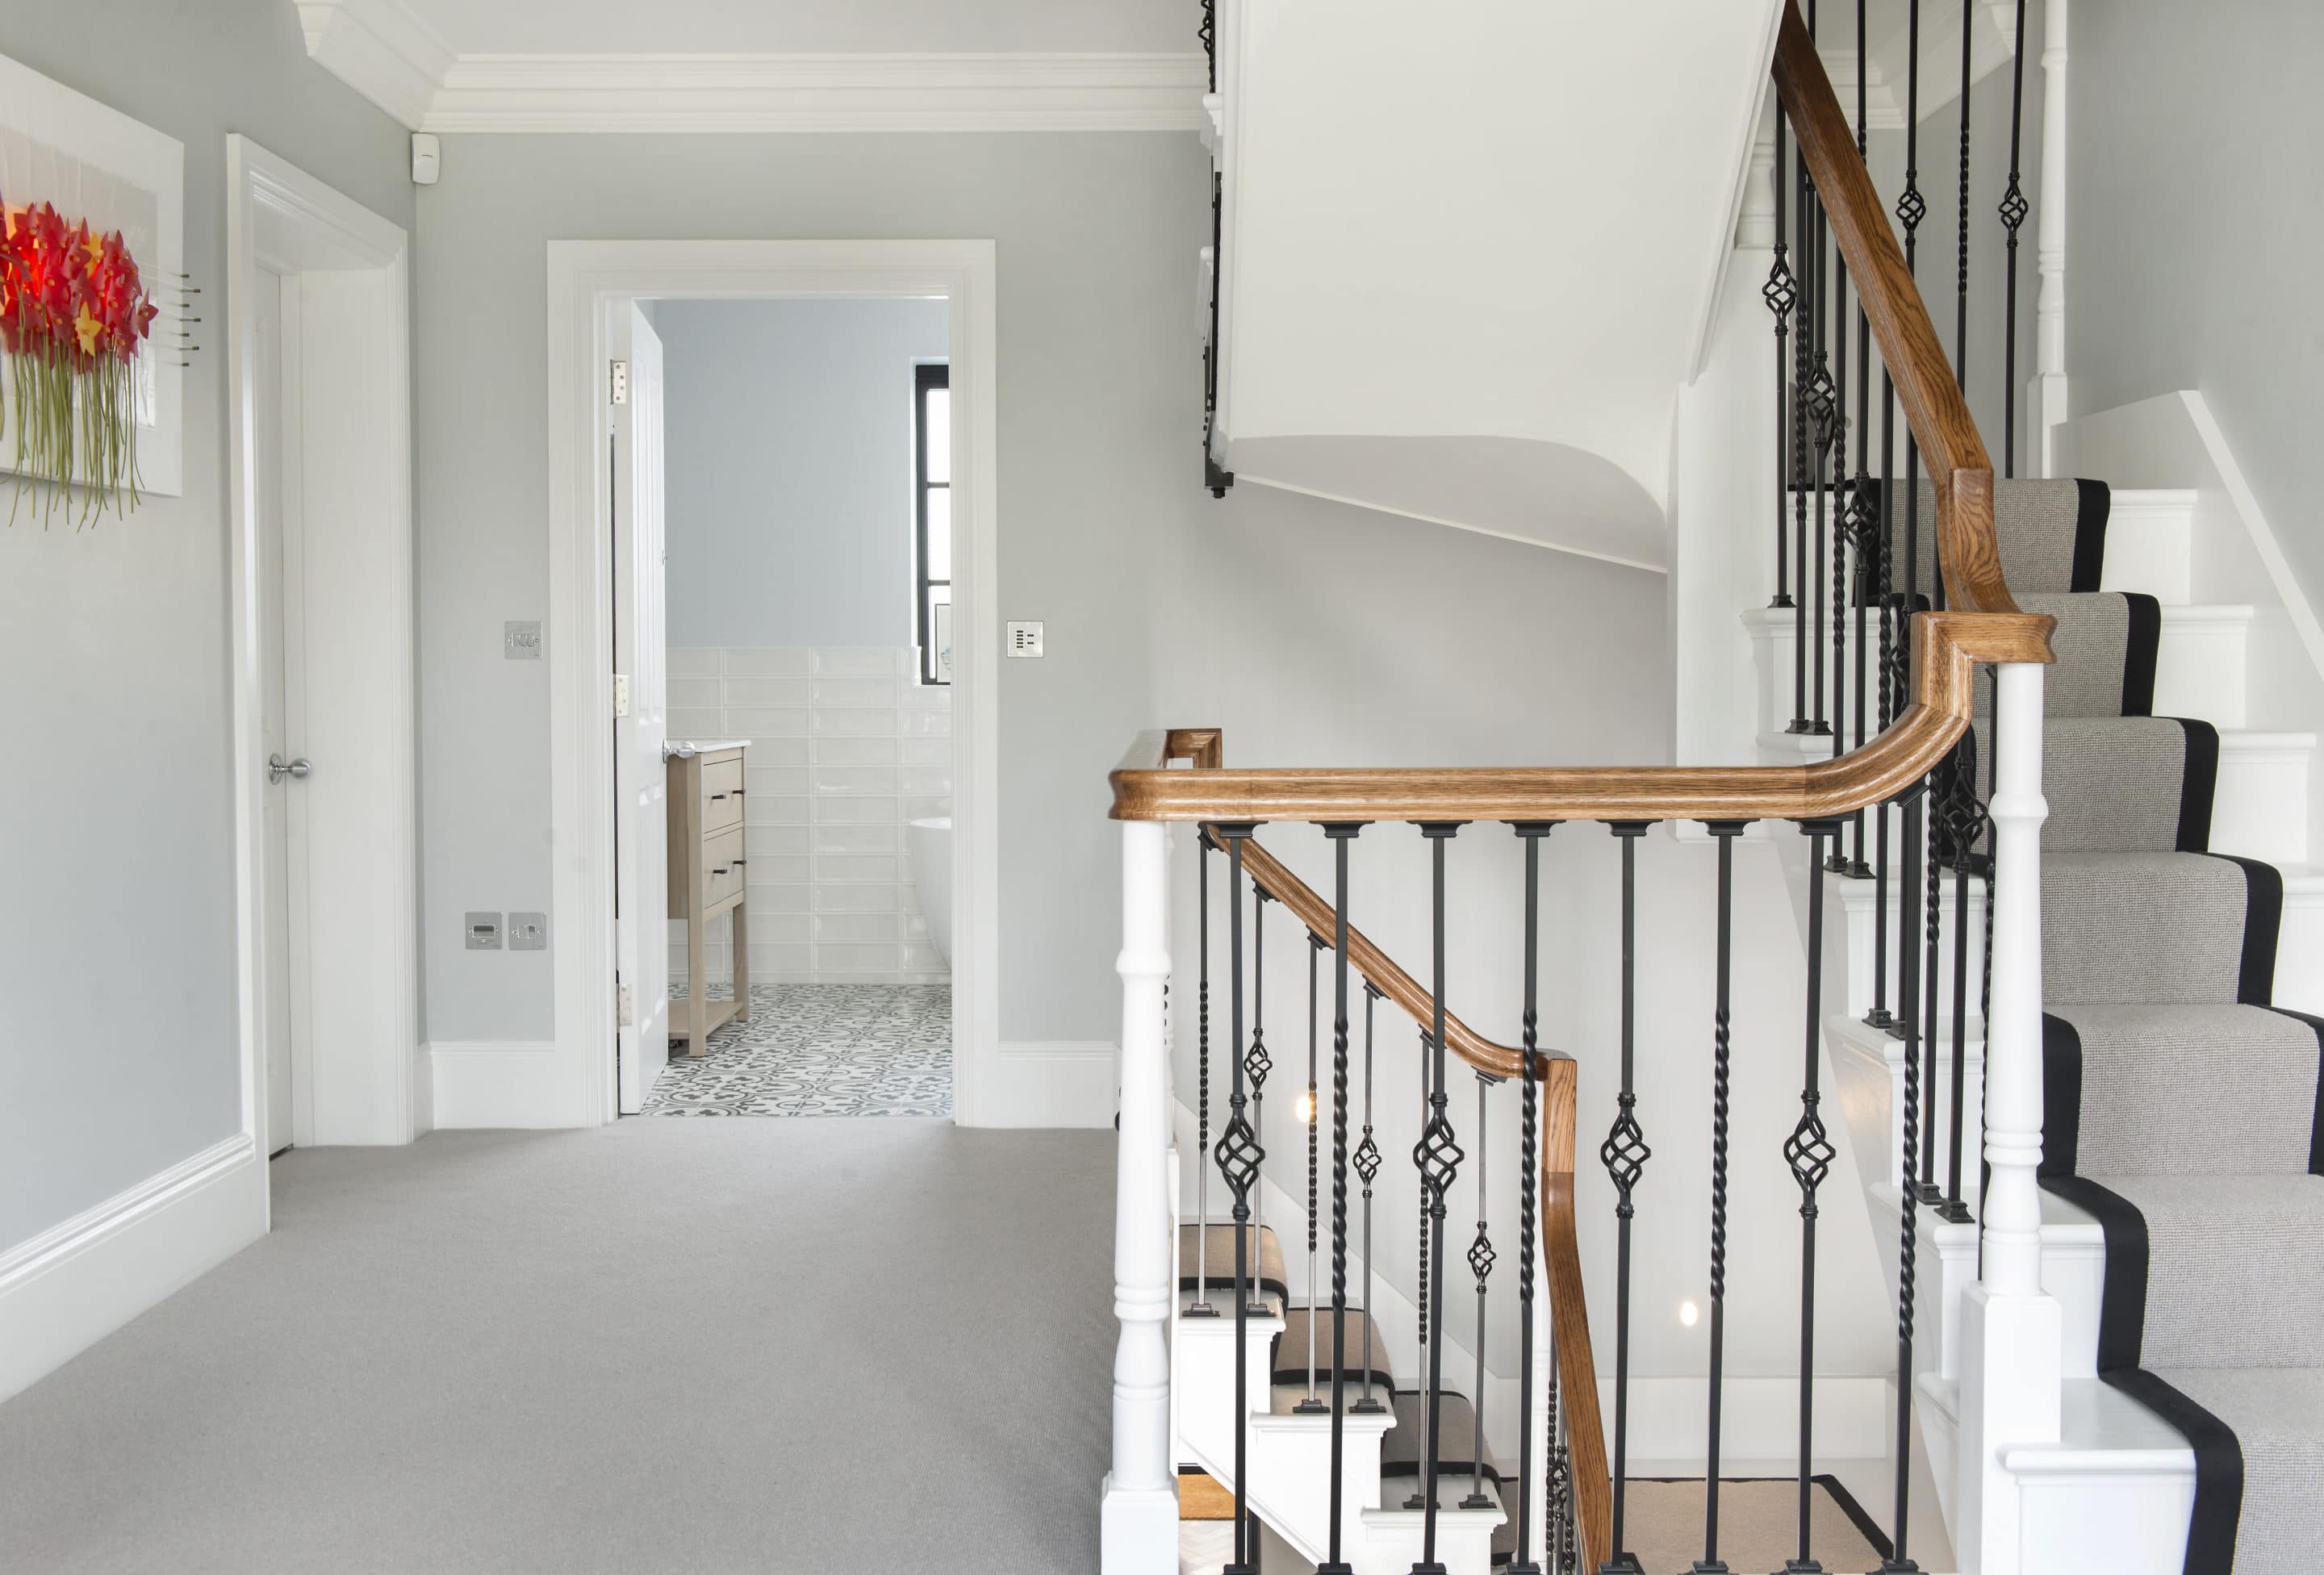
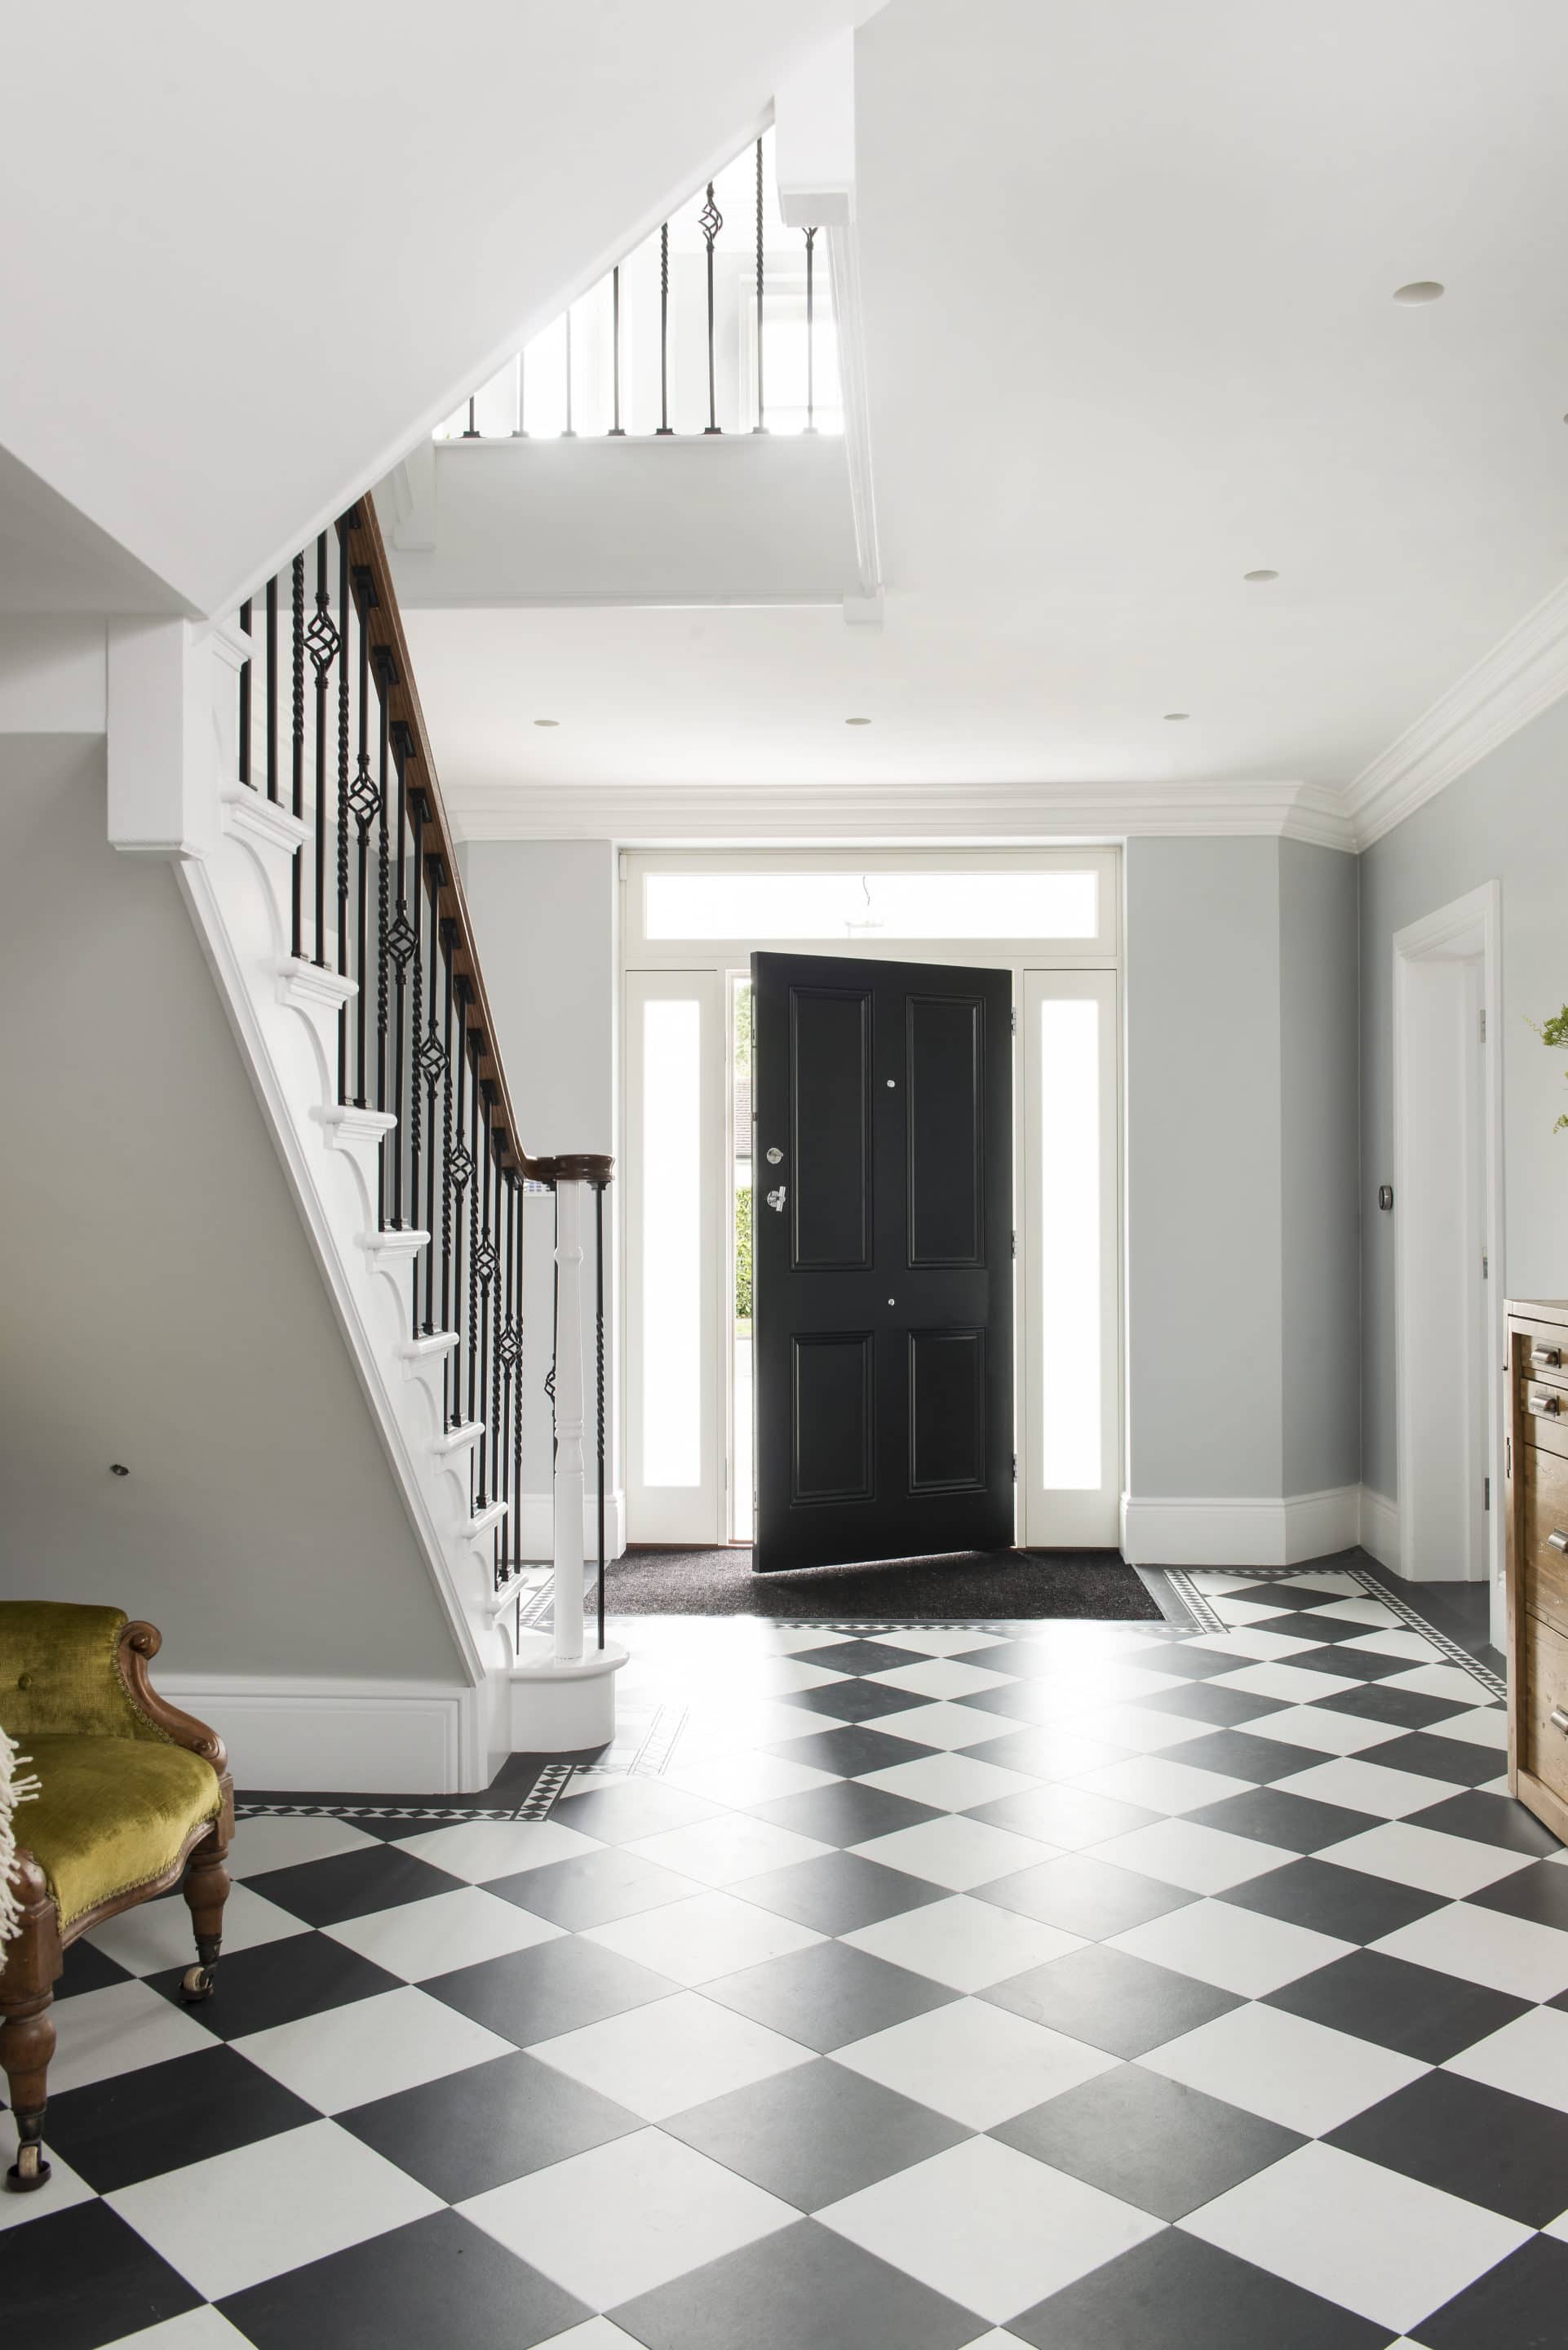
Inside, a dining room and living room would lead off from an impressive entrance hall. There would be a capacious, open-plan kitchen-cum-family room with glazed doors at the back, and a sightline from the front door right through to the garden. From the hall, a feature staircase would lead up to the airy landing and on to a master suite, family bathroom and two further bedrooms.
Above, the attic would contain an office, guest suite and storage area. “The big, bright hall and landing were important features,” says Stephanie, “You walk through those areas several times every day, and if they feel light and spacious, it makes the whole house feel spacious.”
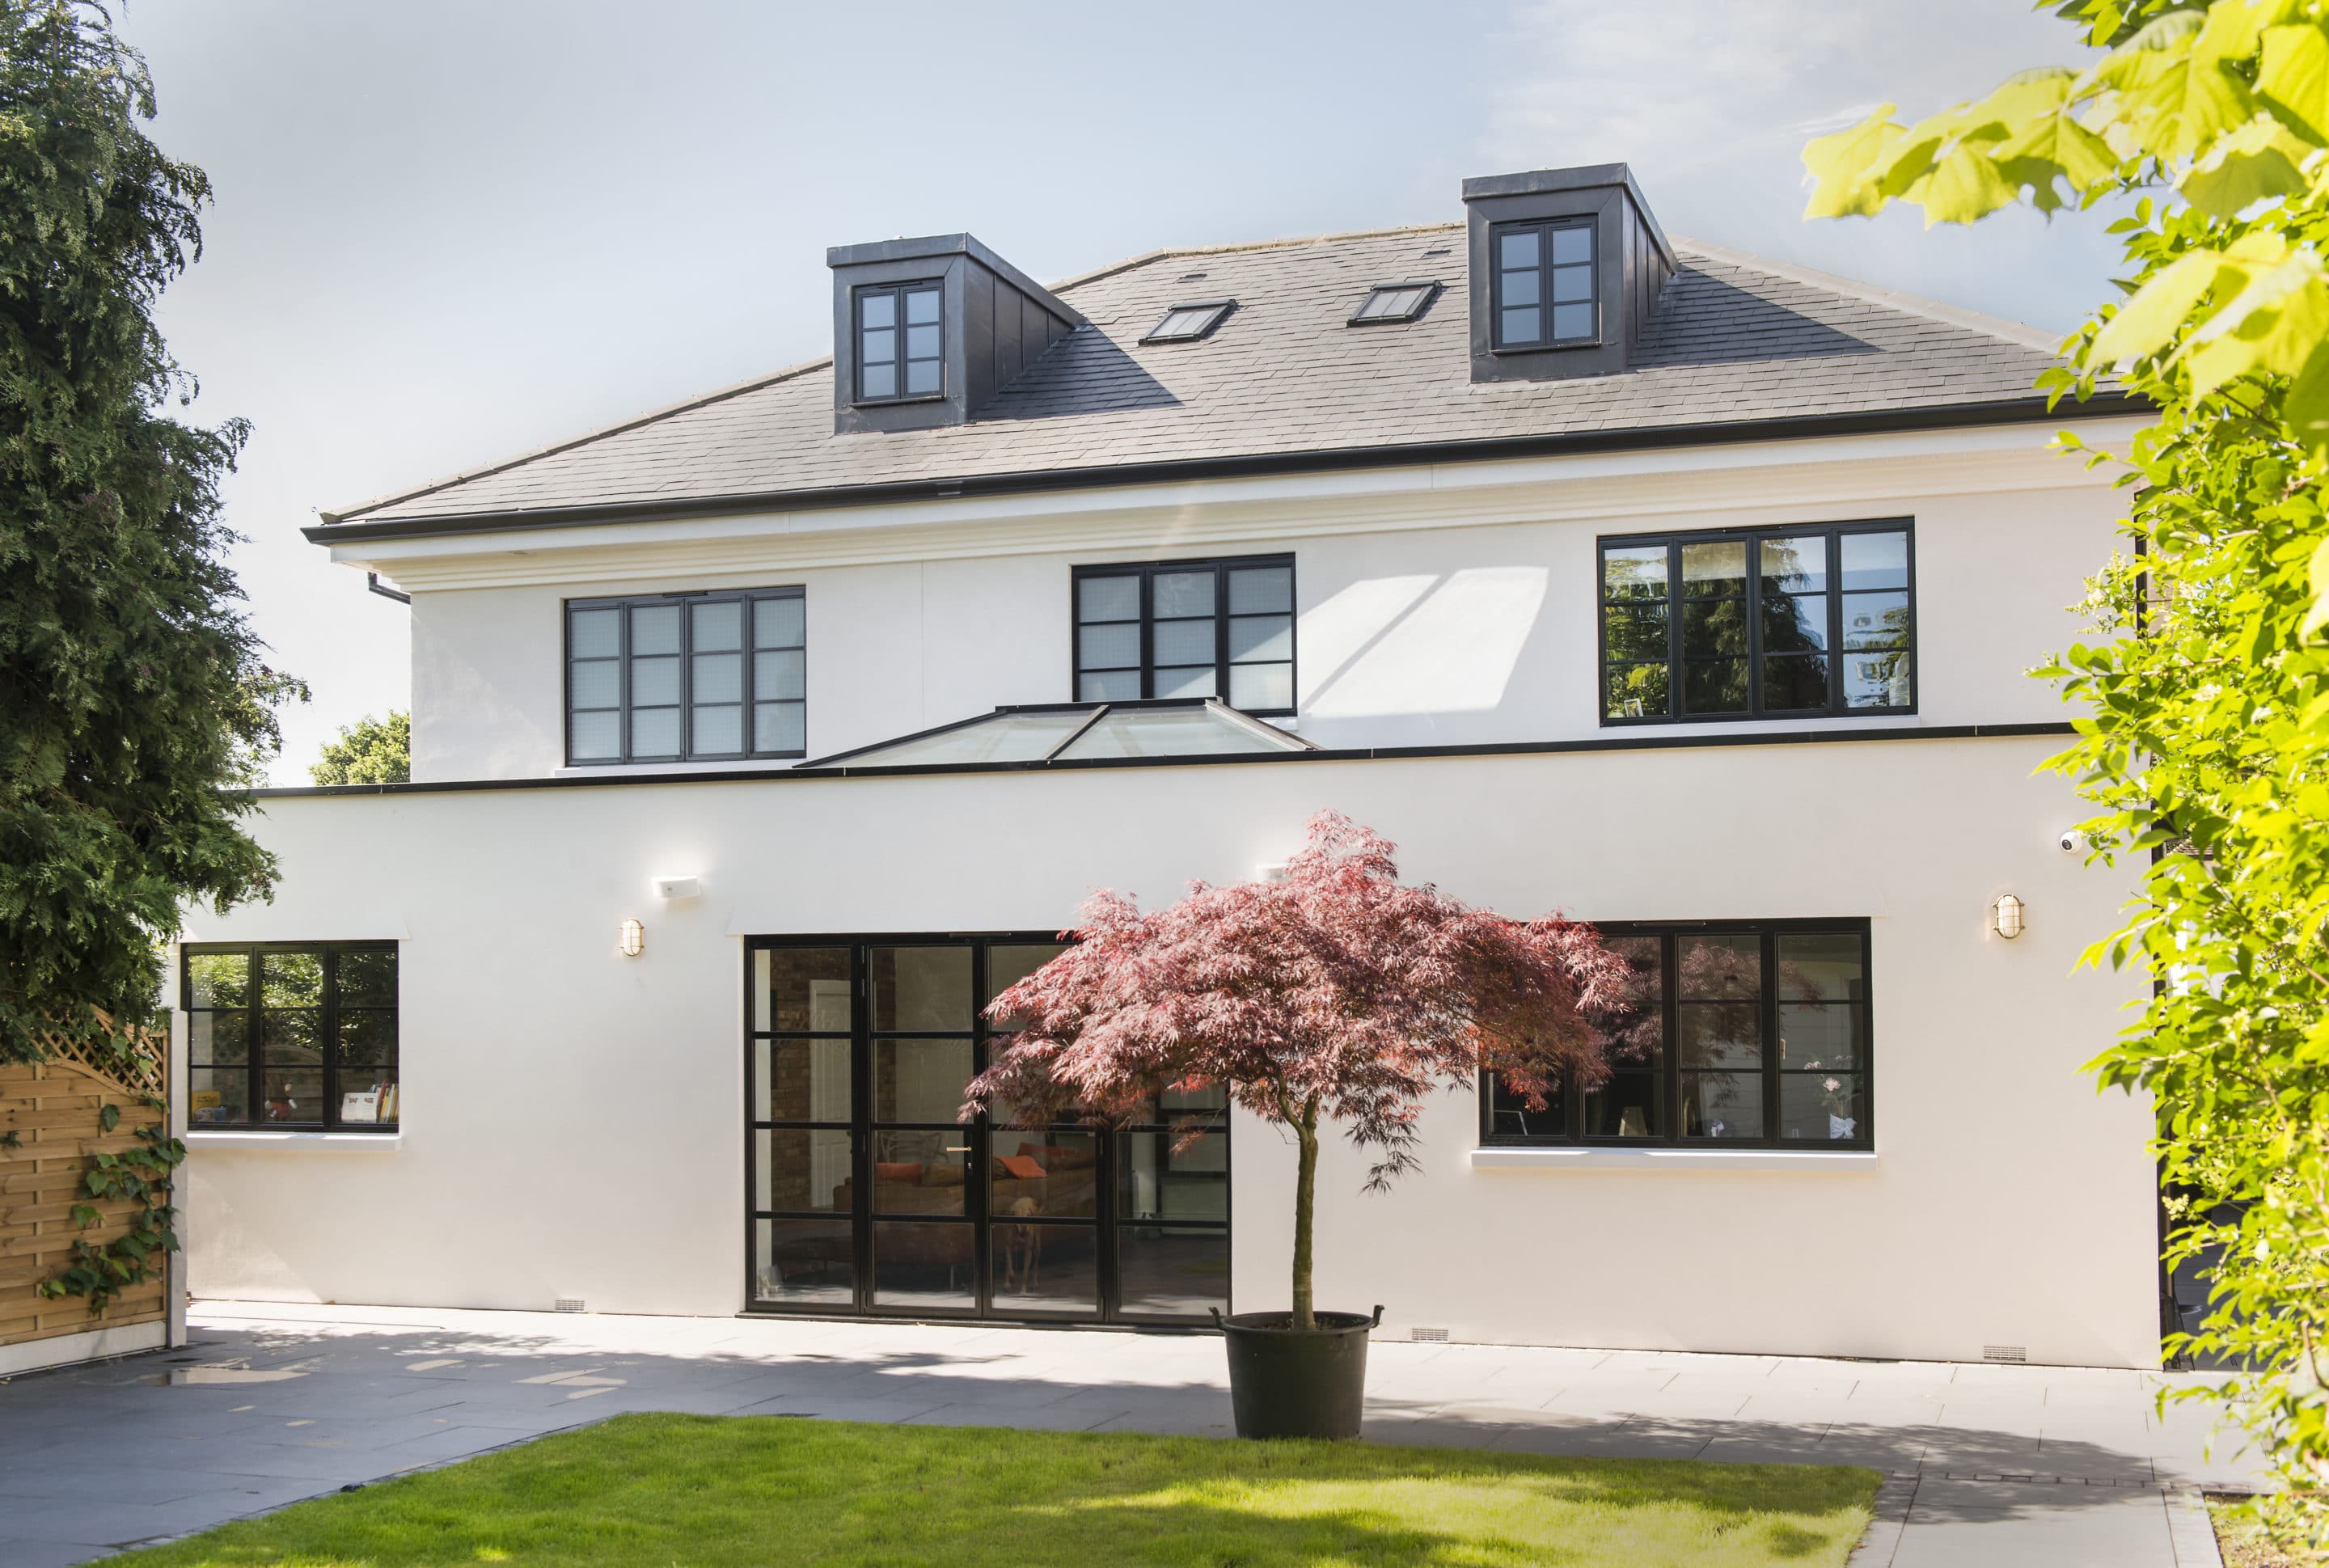
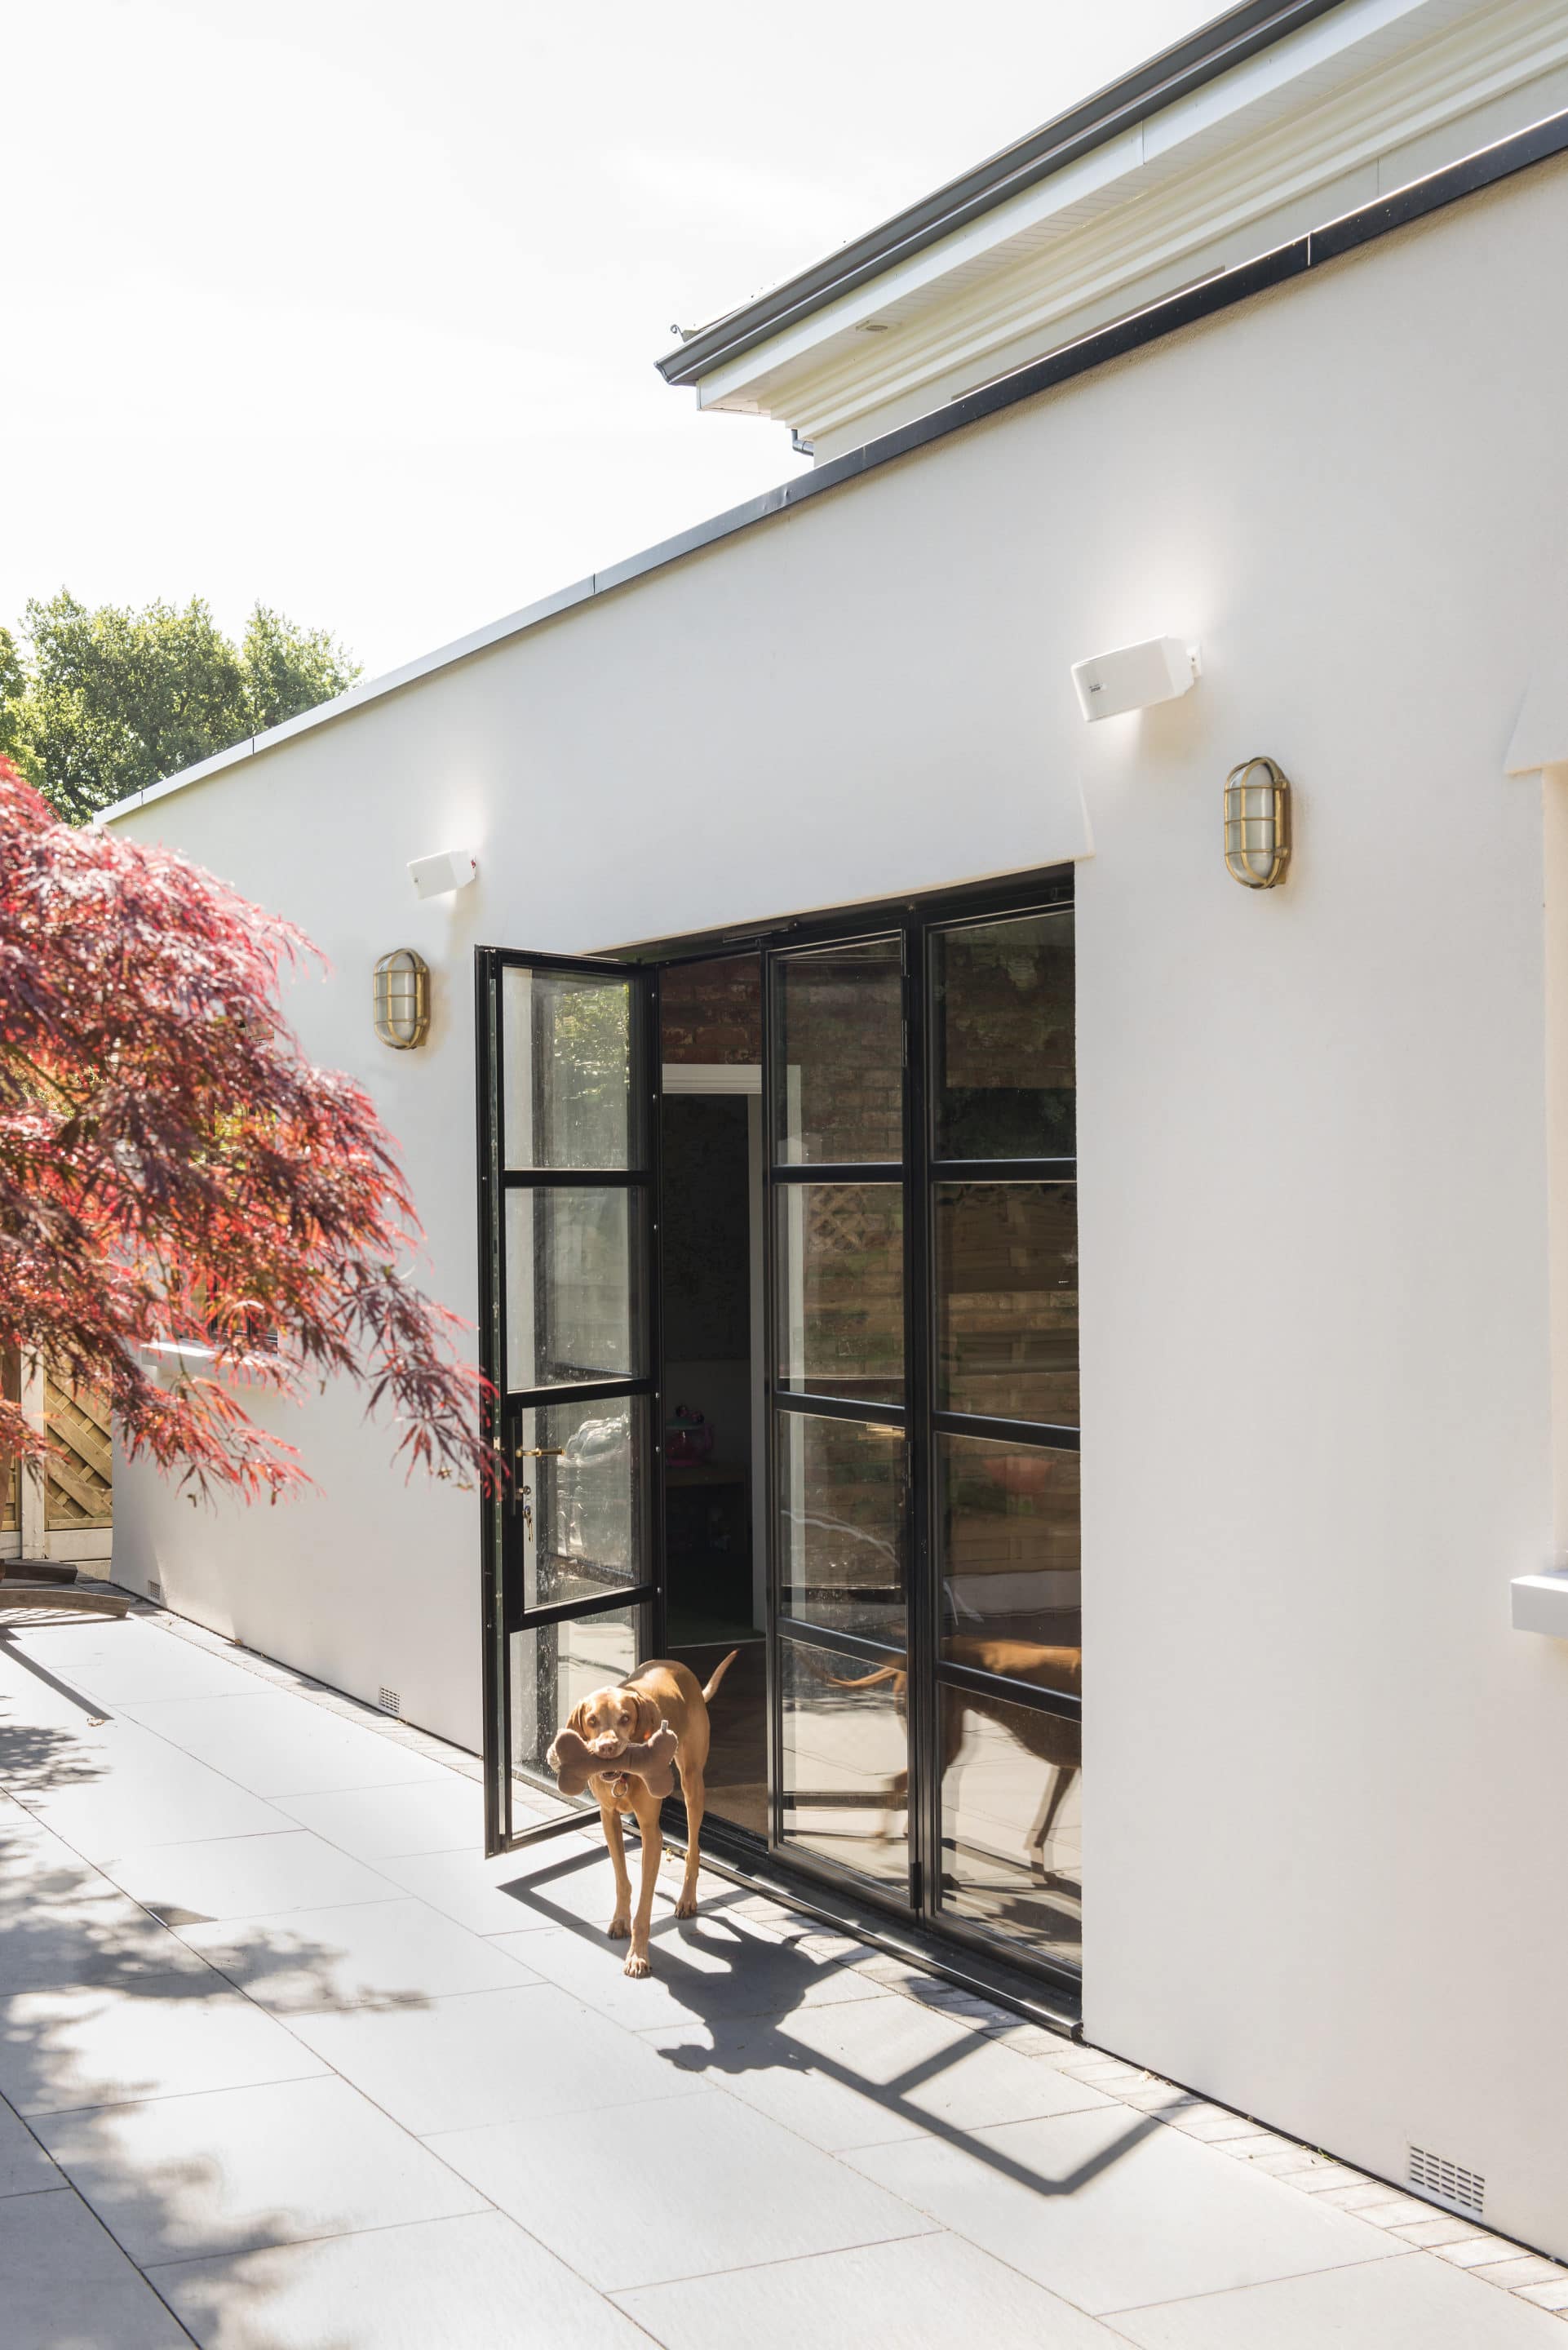
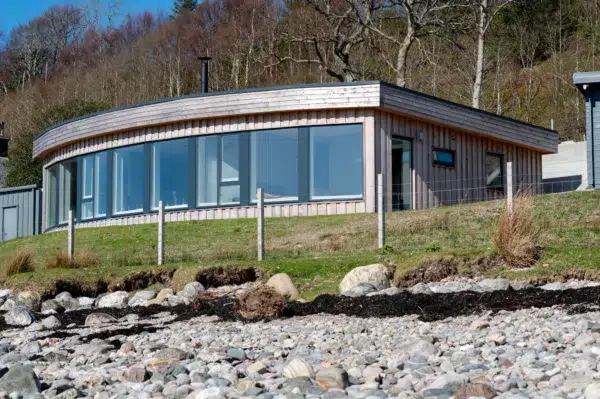
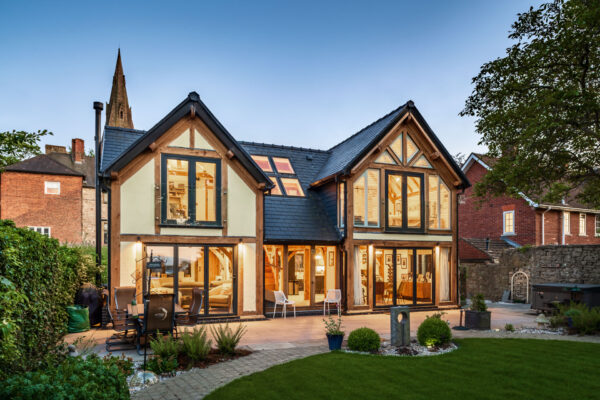
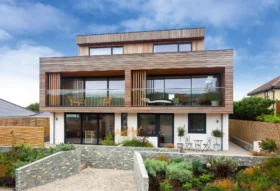
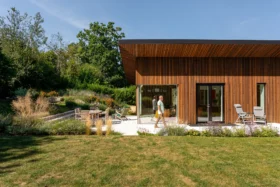
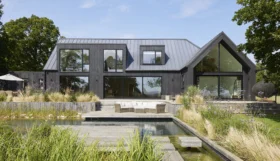
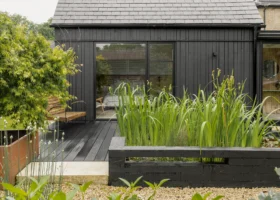
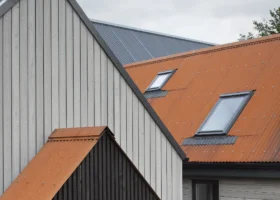
Second-floor dormers and aluminium windows and doors give the back of the property a contrasting, more contemporary look
From previous experience, John was aware of the merits of holding a pre-planning meeting with the relevant officers, to highlight any major issues ahead of submitting the full application. No points of contention were raised at this stage.
Nevertheless, by the time the couple applied for full planning permission, they had amended the original design to include a crown roof rather than a hipped one. This meant a larger roof area with a steeper pitch. “This would have made the second floor more user-friendly, as we’d have had better ceiling height and a gentler slope to the walls,” says John, “Unfortunately the roof was judged to be too high and overbearing, and the plans were rejected.”
Thankfully, the couple were allowed to amend and resubmit their application, rather than having it refused outright (which would have added cost and delay). The consultation period was extended and, four months and two revisions later, in November 2017, full planning permission was granted.
Soon after approval came through, demolition works began onsite. Things didn’t go to plan, however. “We came home from holiday to find that instead of clearing the site, the demolition contractor had just driven all the waste and rubble into the ground, pushing up the levels,” says John.
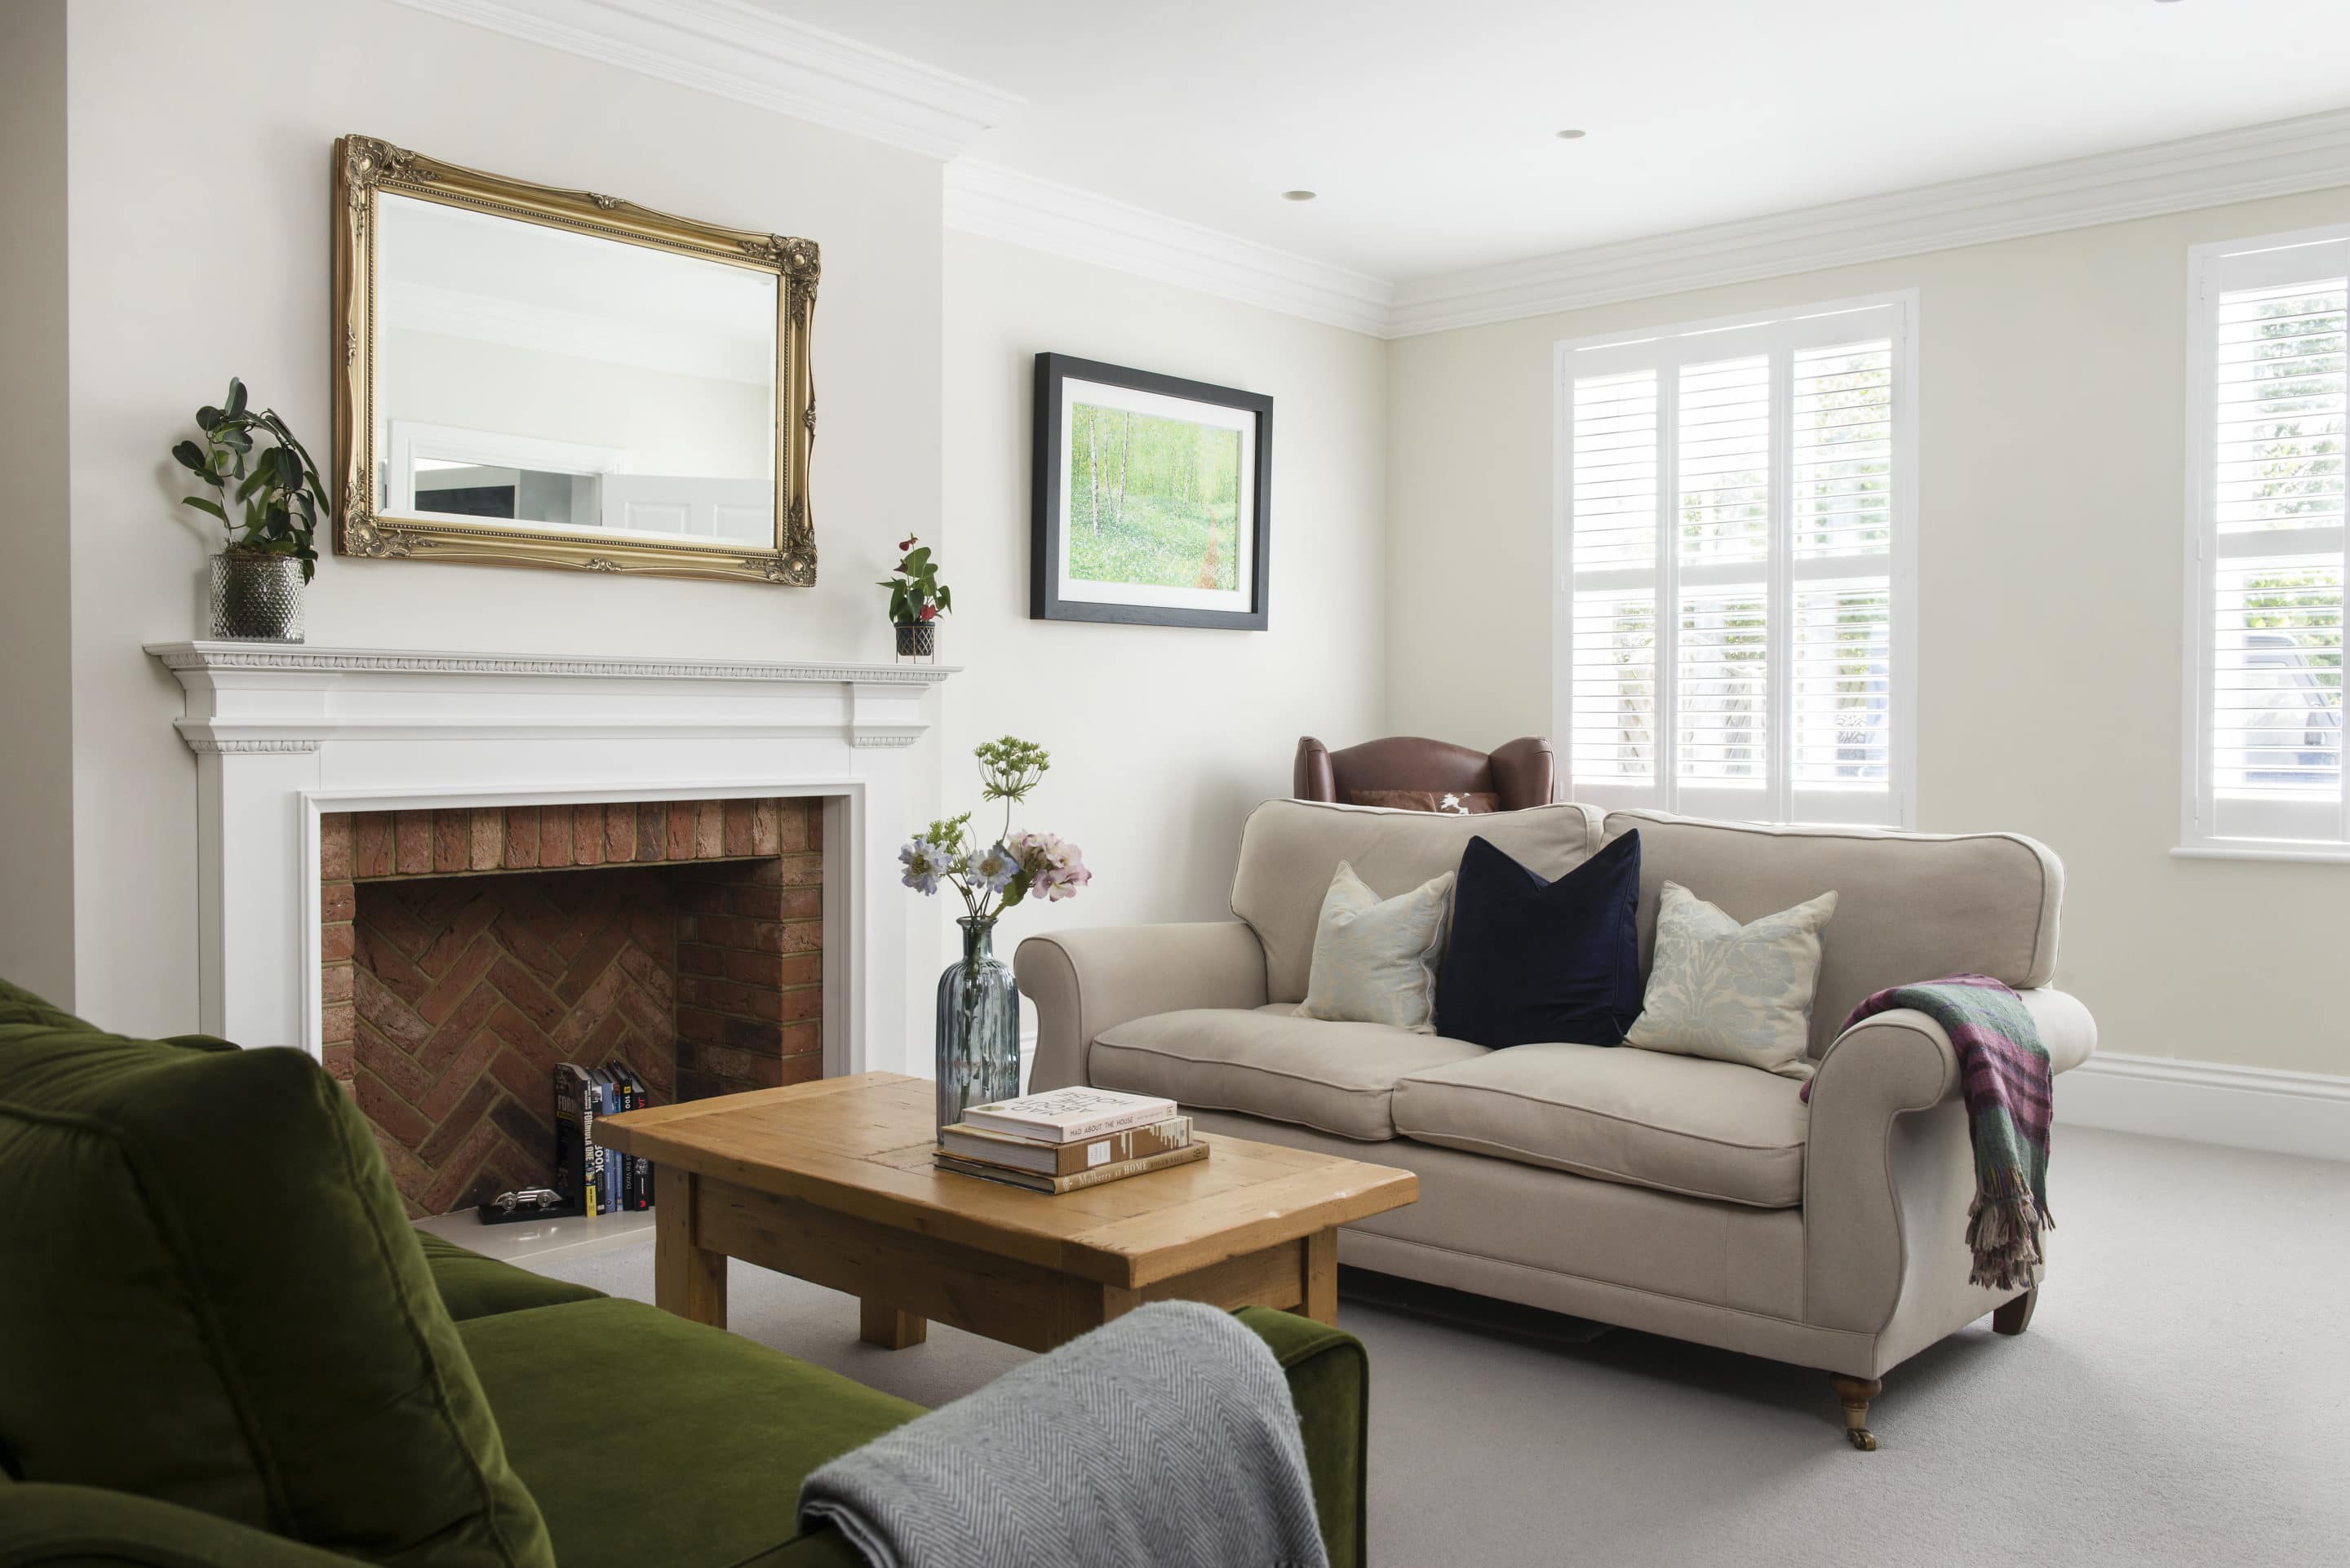
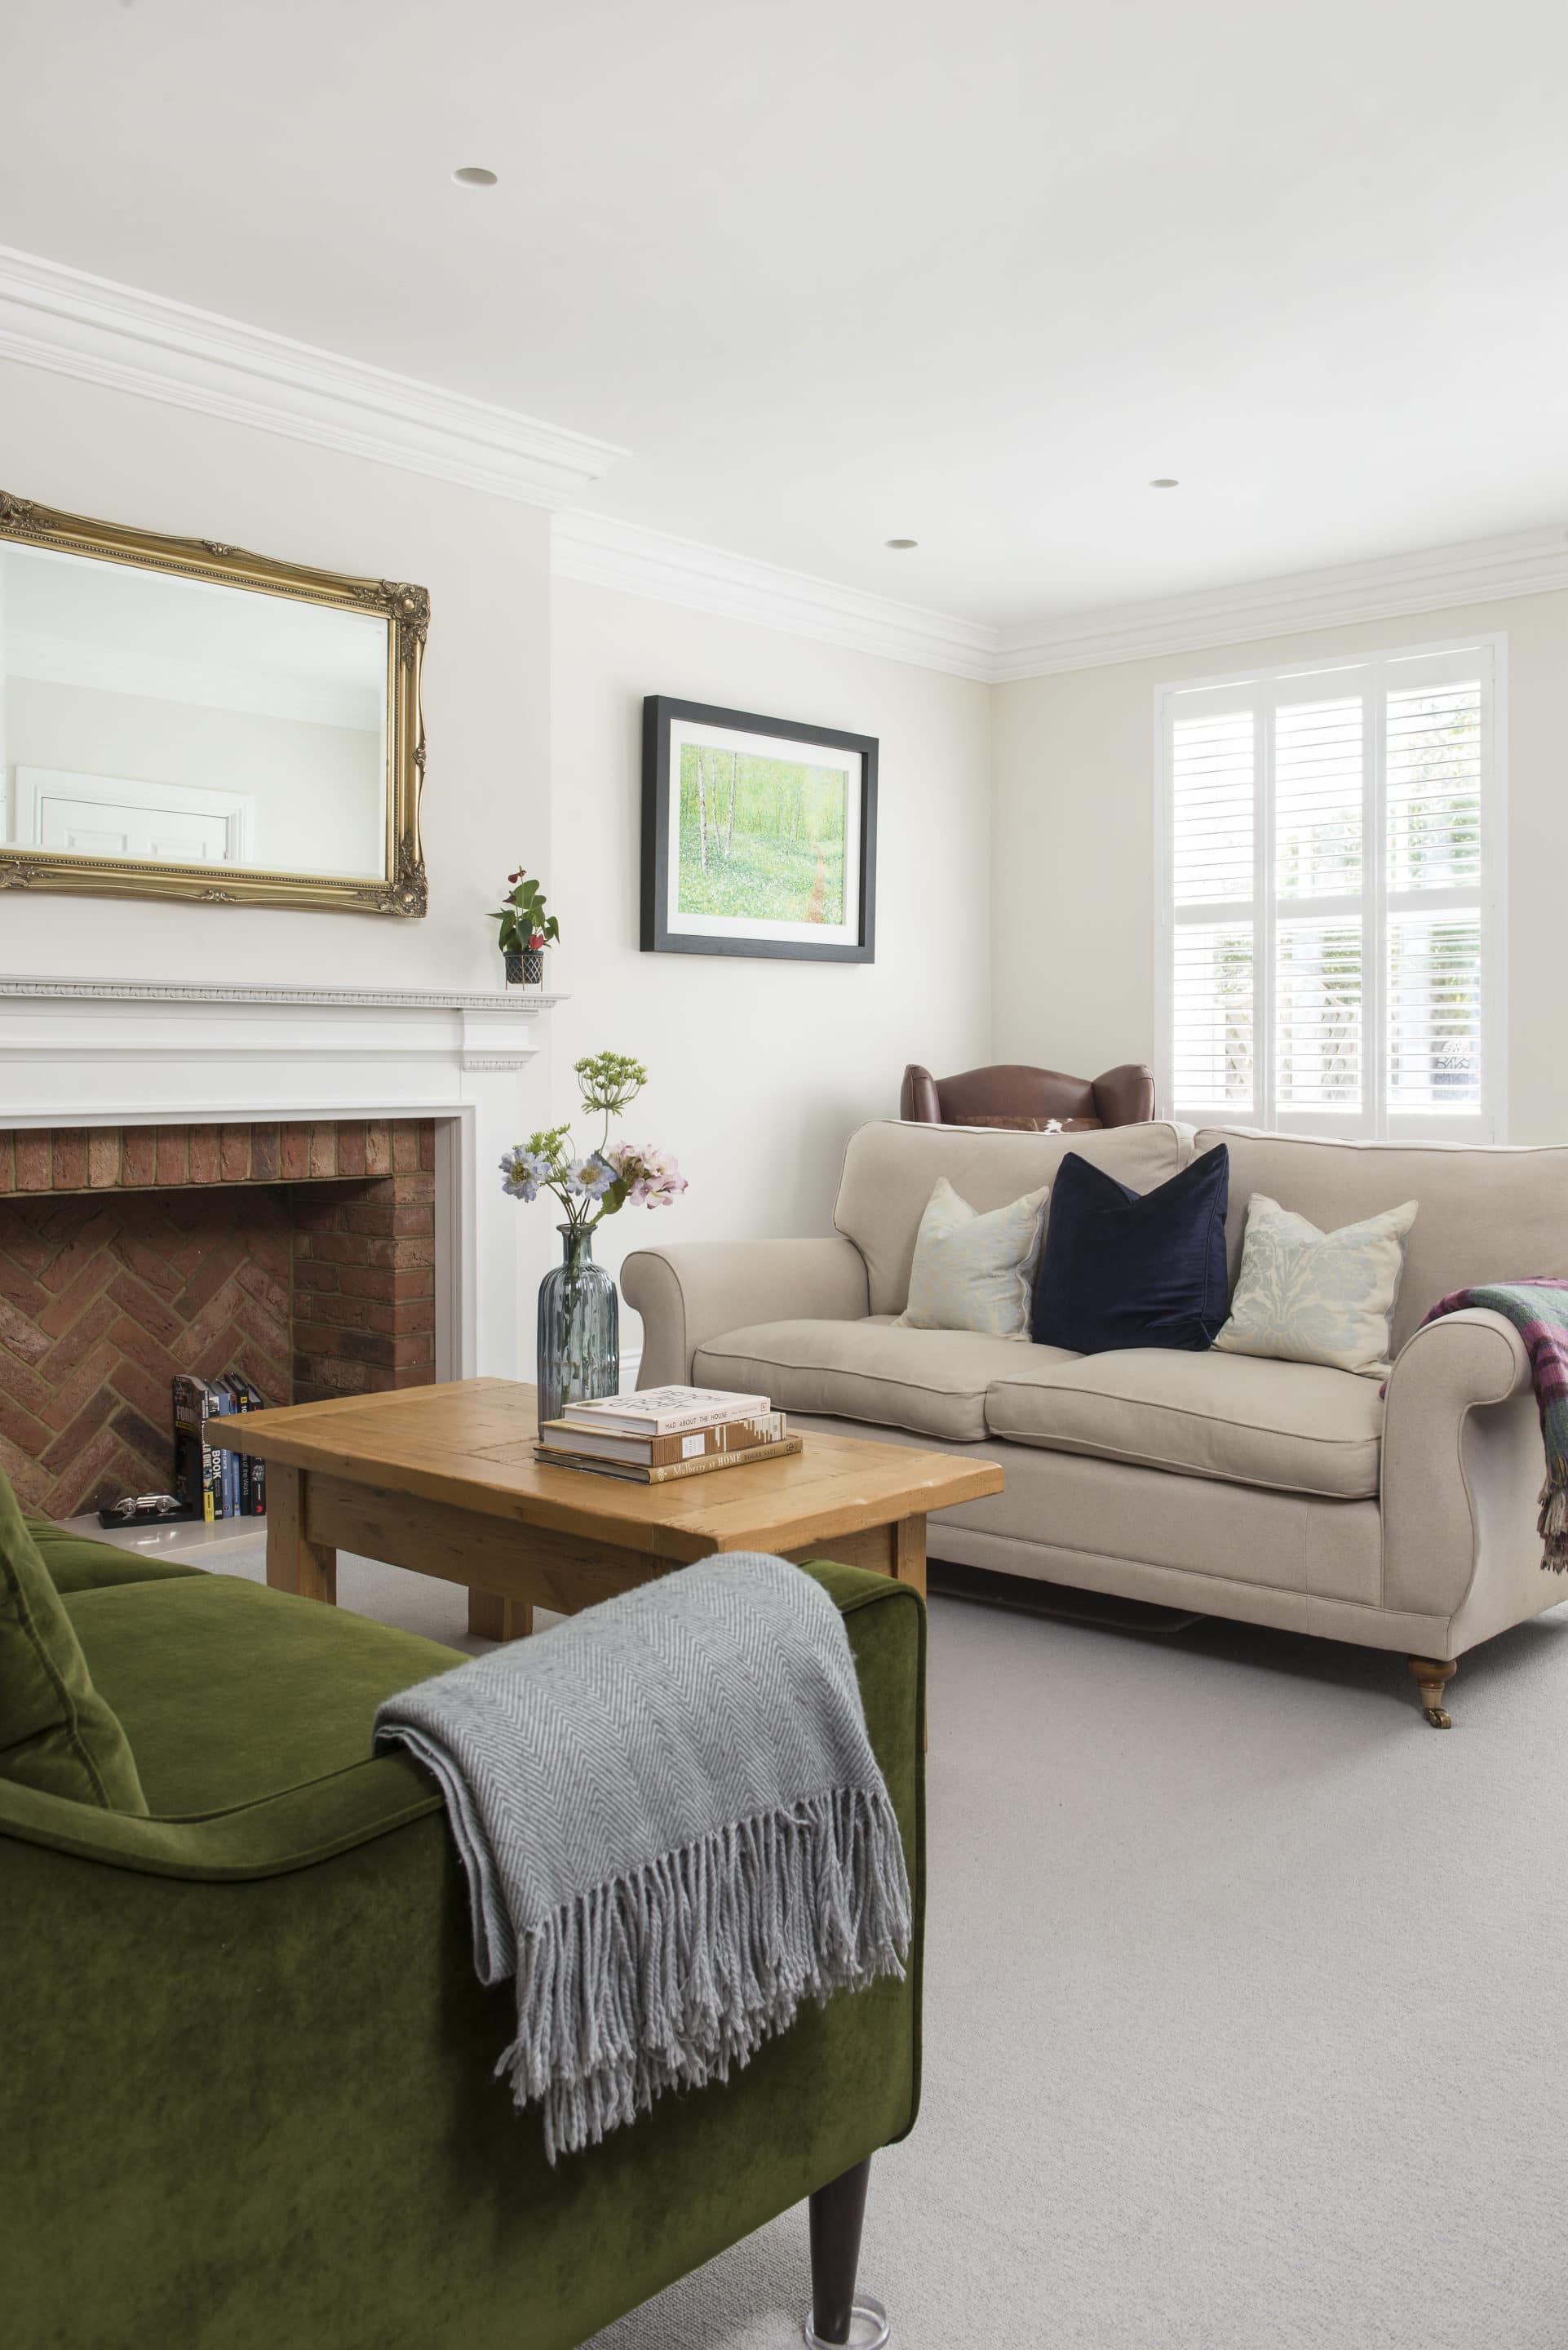
A false chimney breast and brick-lined fireplace have been added to bring character and warmth to the sitting room. The bespoke fire surround is made from painted MDF
“I refused to pay until everything was taken away and disposed of properly. Fortunately, I’d allowed a 10-day margin before the groundworks were due to commence, otherwise it could have scuppered the build programme from the start.”
Once this initial hurdle had been overcome, things progressed smoothly, and the groundworkers and specialist piling contractor completed their tasks ahead of schedule, ready for the main build team. The couple were keen to use a straightforward construction system that would deliver value for money and a robust structure – so they opted for rendered blockwork.
“I selected heavy blocks for both the outer and inner skins of the cavity wall, rather than switching to a lightweight product for the internal leaf,” says John, “It took a little longer to lay, but the building feels really sound and I know that all the materials will move and behave in the same way.”
The exterior has been finished with a pre-coloured silicone render. Rather than a clean, smooth surface, John chose to specify a rougher, slightly pitted effect resembling traditional sand-and-cement, so it adds to the period look of the house. The modern render system chimed with the couple’s wish for a low maintenance property.
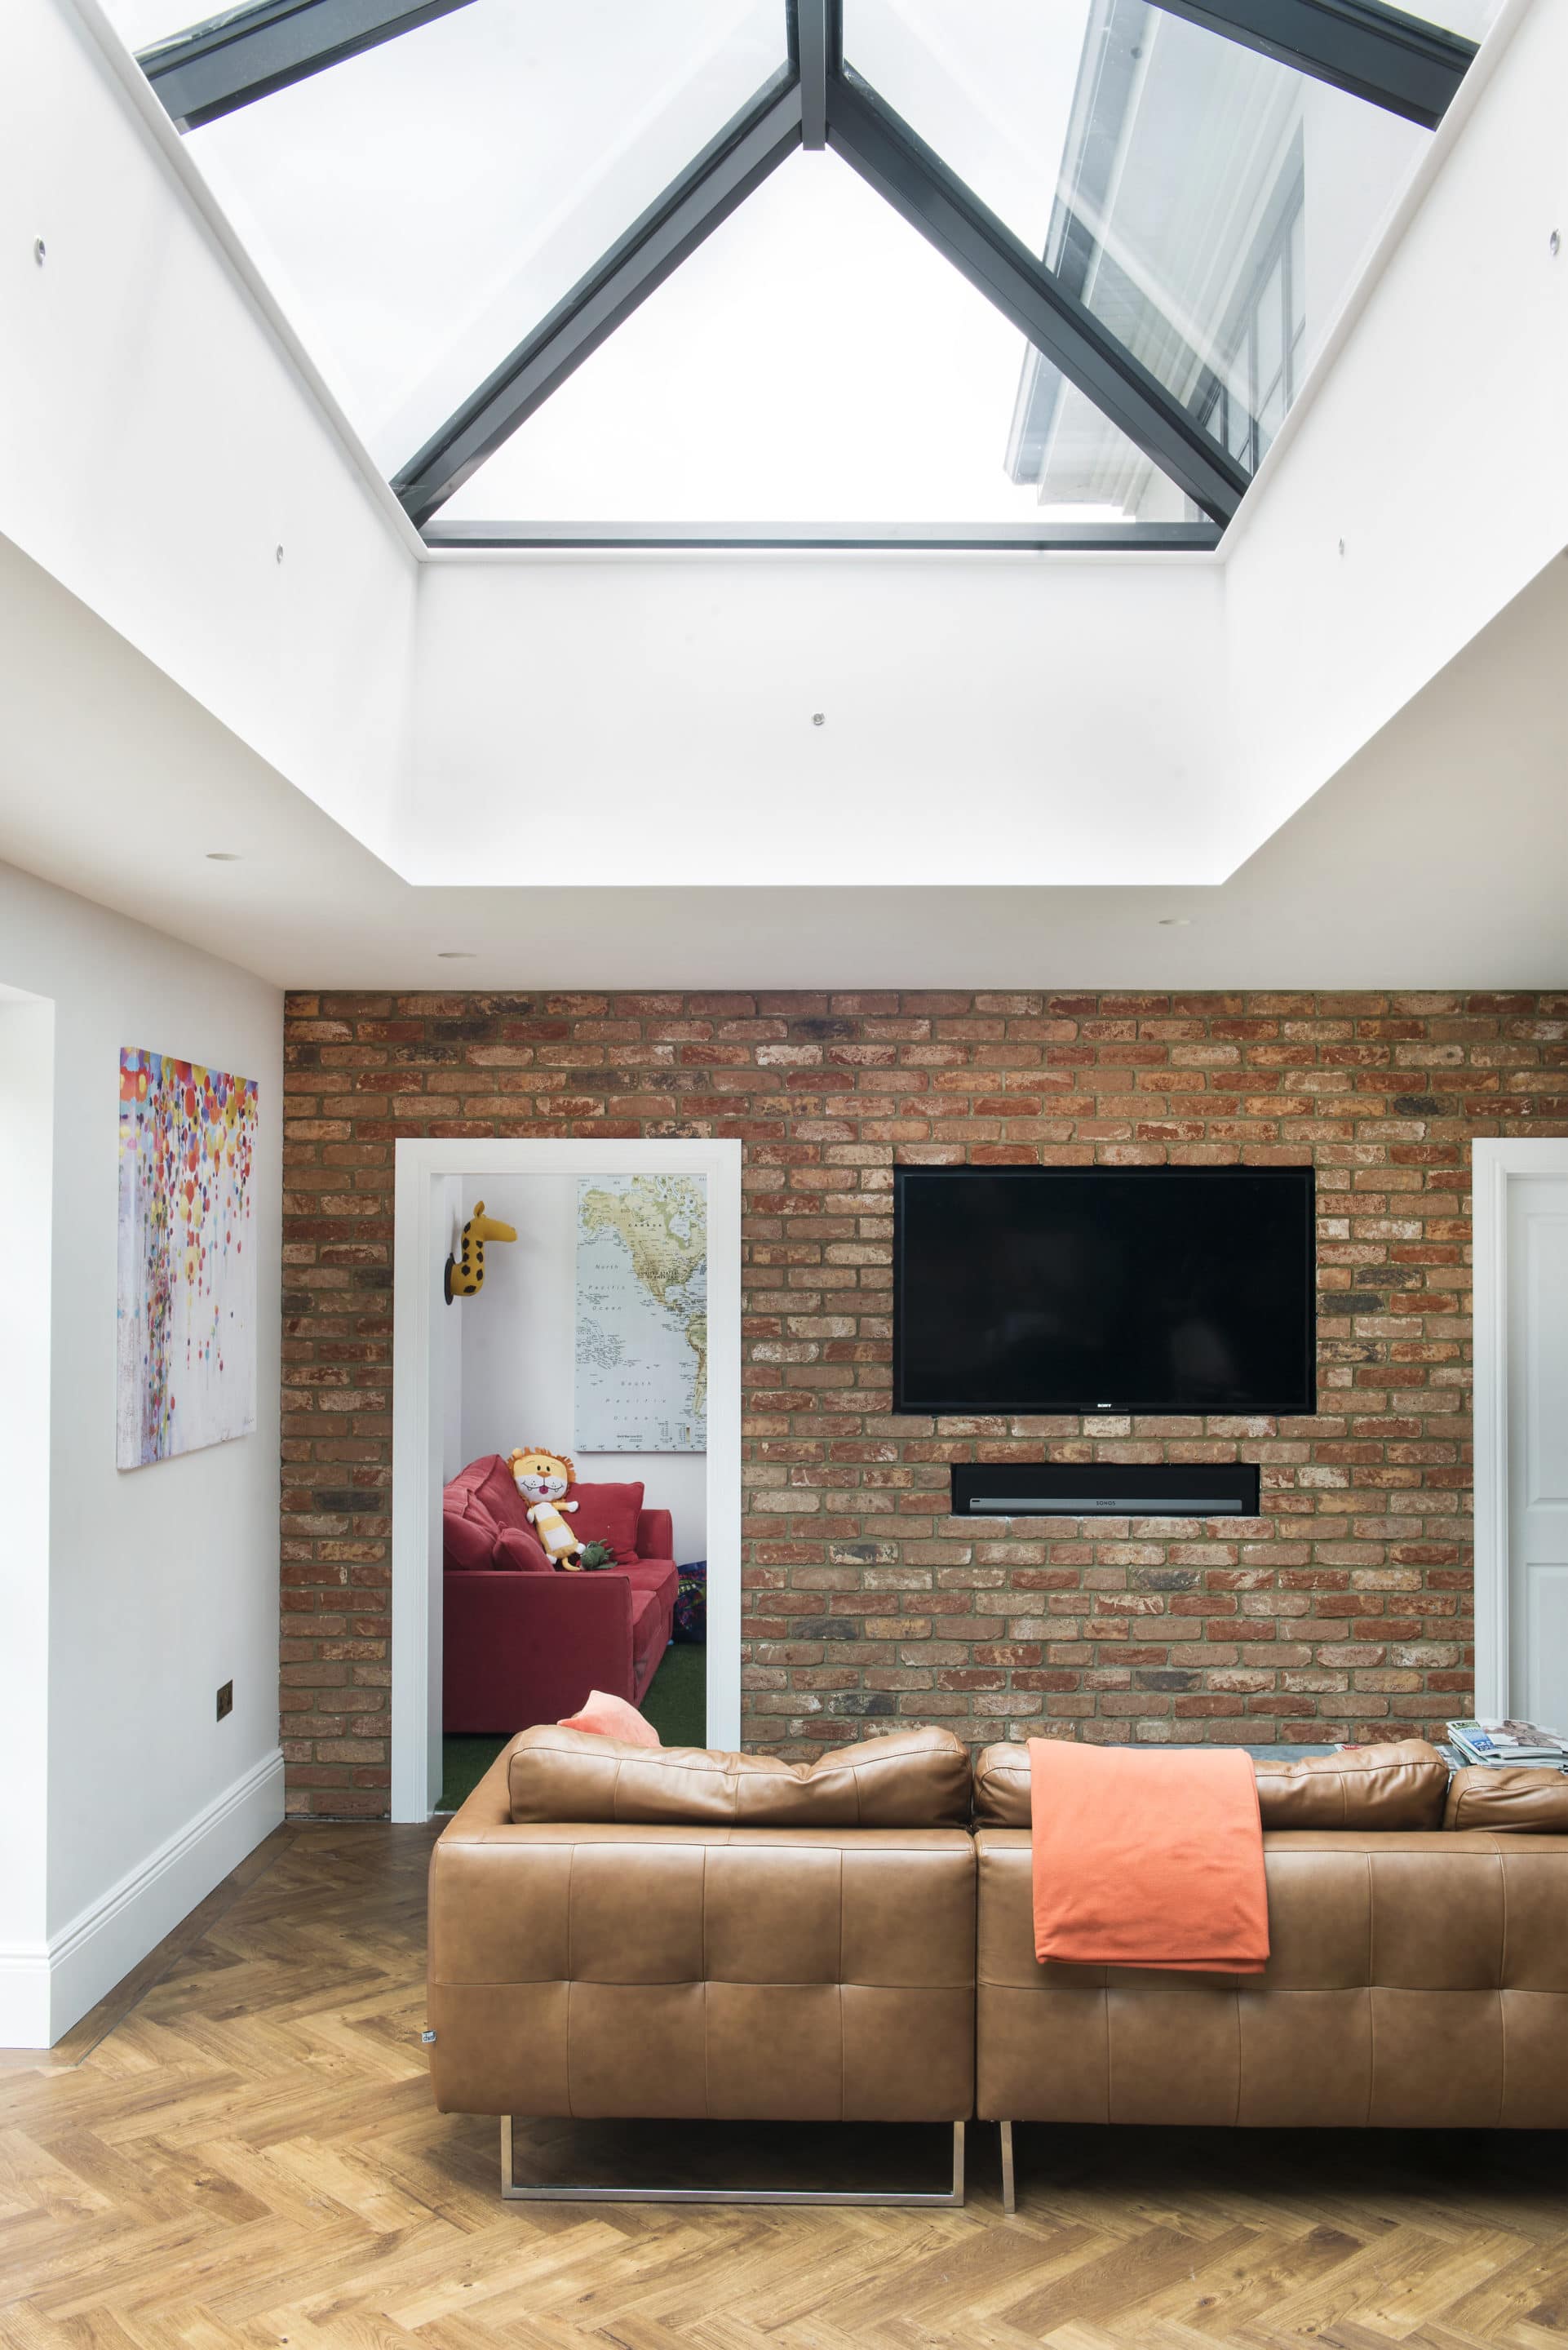
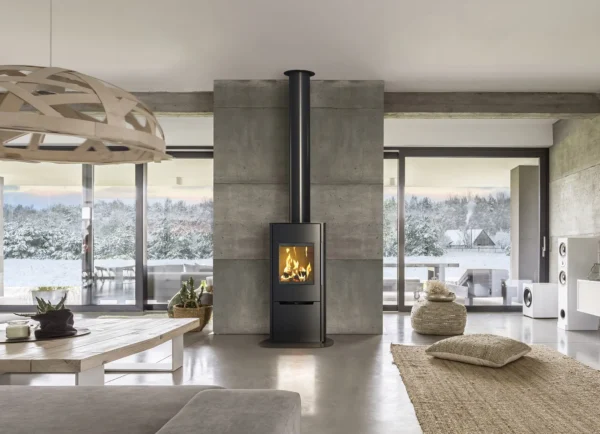
A roof-lantern boosts natural light in the kitchen/living area. The TV is recessed into the wall, which has been tiled with rustic-looking brick slips
Although they opted for traditional wooden sash windows at the front for their appearance, all the glazing on the back of the house is aluminium-framed and therefore trouble-free. “It started with the roof lantern in the kitchen, which had to be powder-coated aluminium for longevity,” says John, “From there, it made sense to have the back doors and windows all matching and a different, more contemporary look evolved on this side of the house.”
The couple’s previous self build incorporated blockwork partition walls and concrete floors throughout, and John was keen to achieve the same no-creak, solid feeling again. With one or two exceptions, the internal walls are blockwork, but the floors were constructed using the SpaceJoist system. This comprises two laminated softwood timbers joined by a steel web to produce rigid floor joists.
“I was interested to try something new and this made a good halfway house between solid concrete and traditional timber joists,” says John, “You run all the services through the steel mesh, which means there’s no cutting and therefore no loss of strength.”
The SpaceJoist structure is teamed with a wet underfloor heating system, fitted across all levels and powered by a dedicated Vaillant gas boiler. Nest thermostats control the temperature in different zones of the house and a 300-litre Megaflo cylinder supplies plenty of pressurised hot water for the whole family.
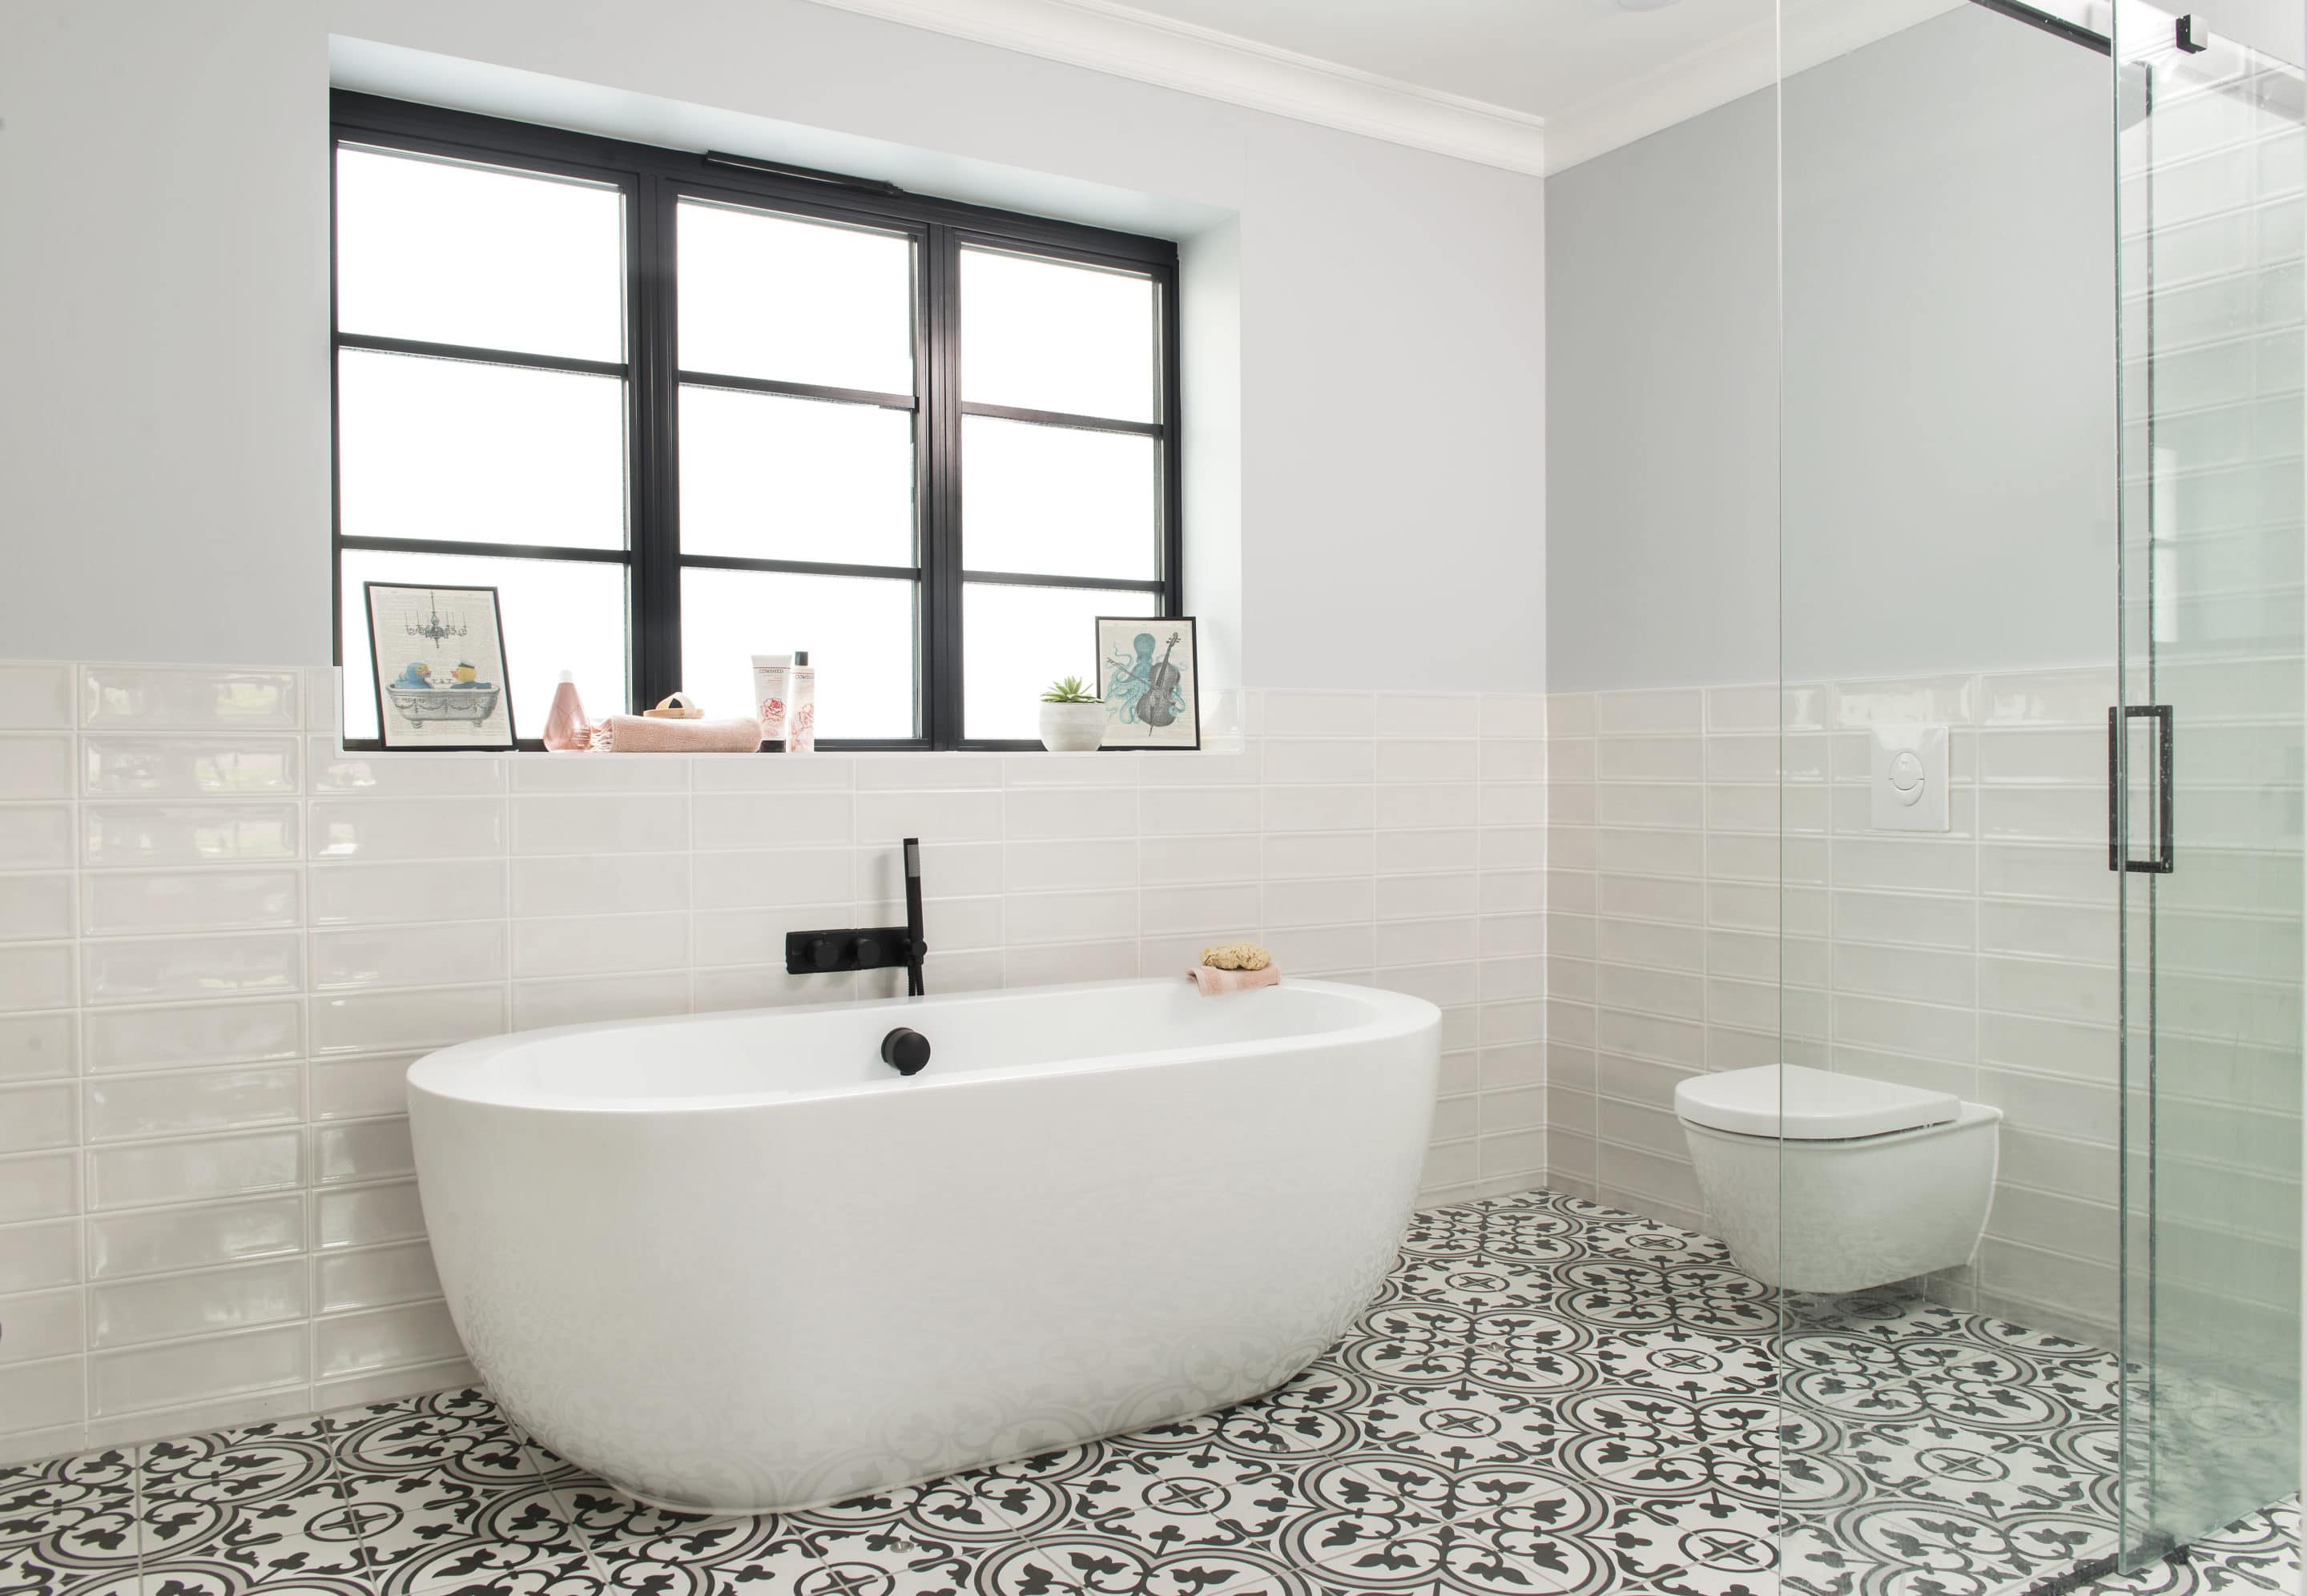
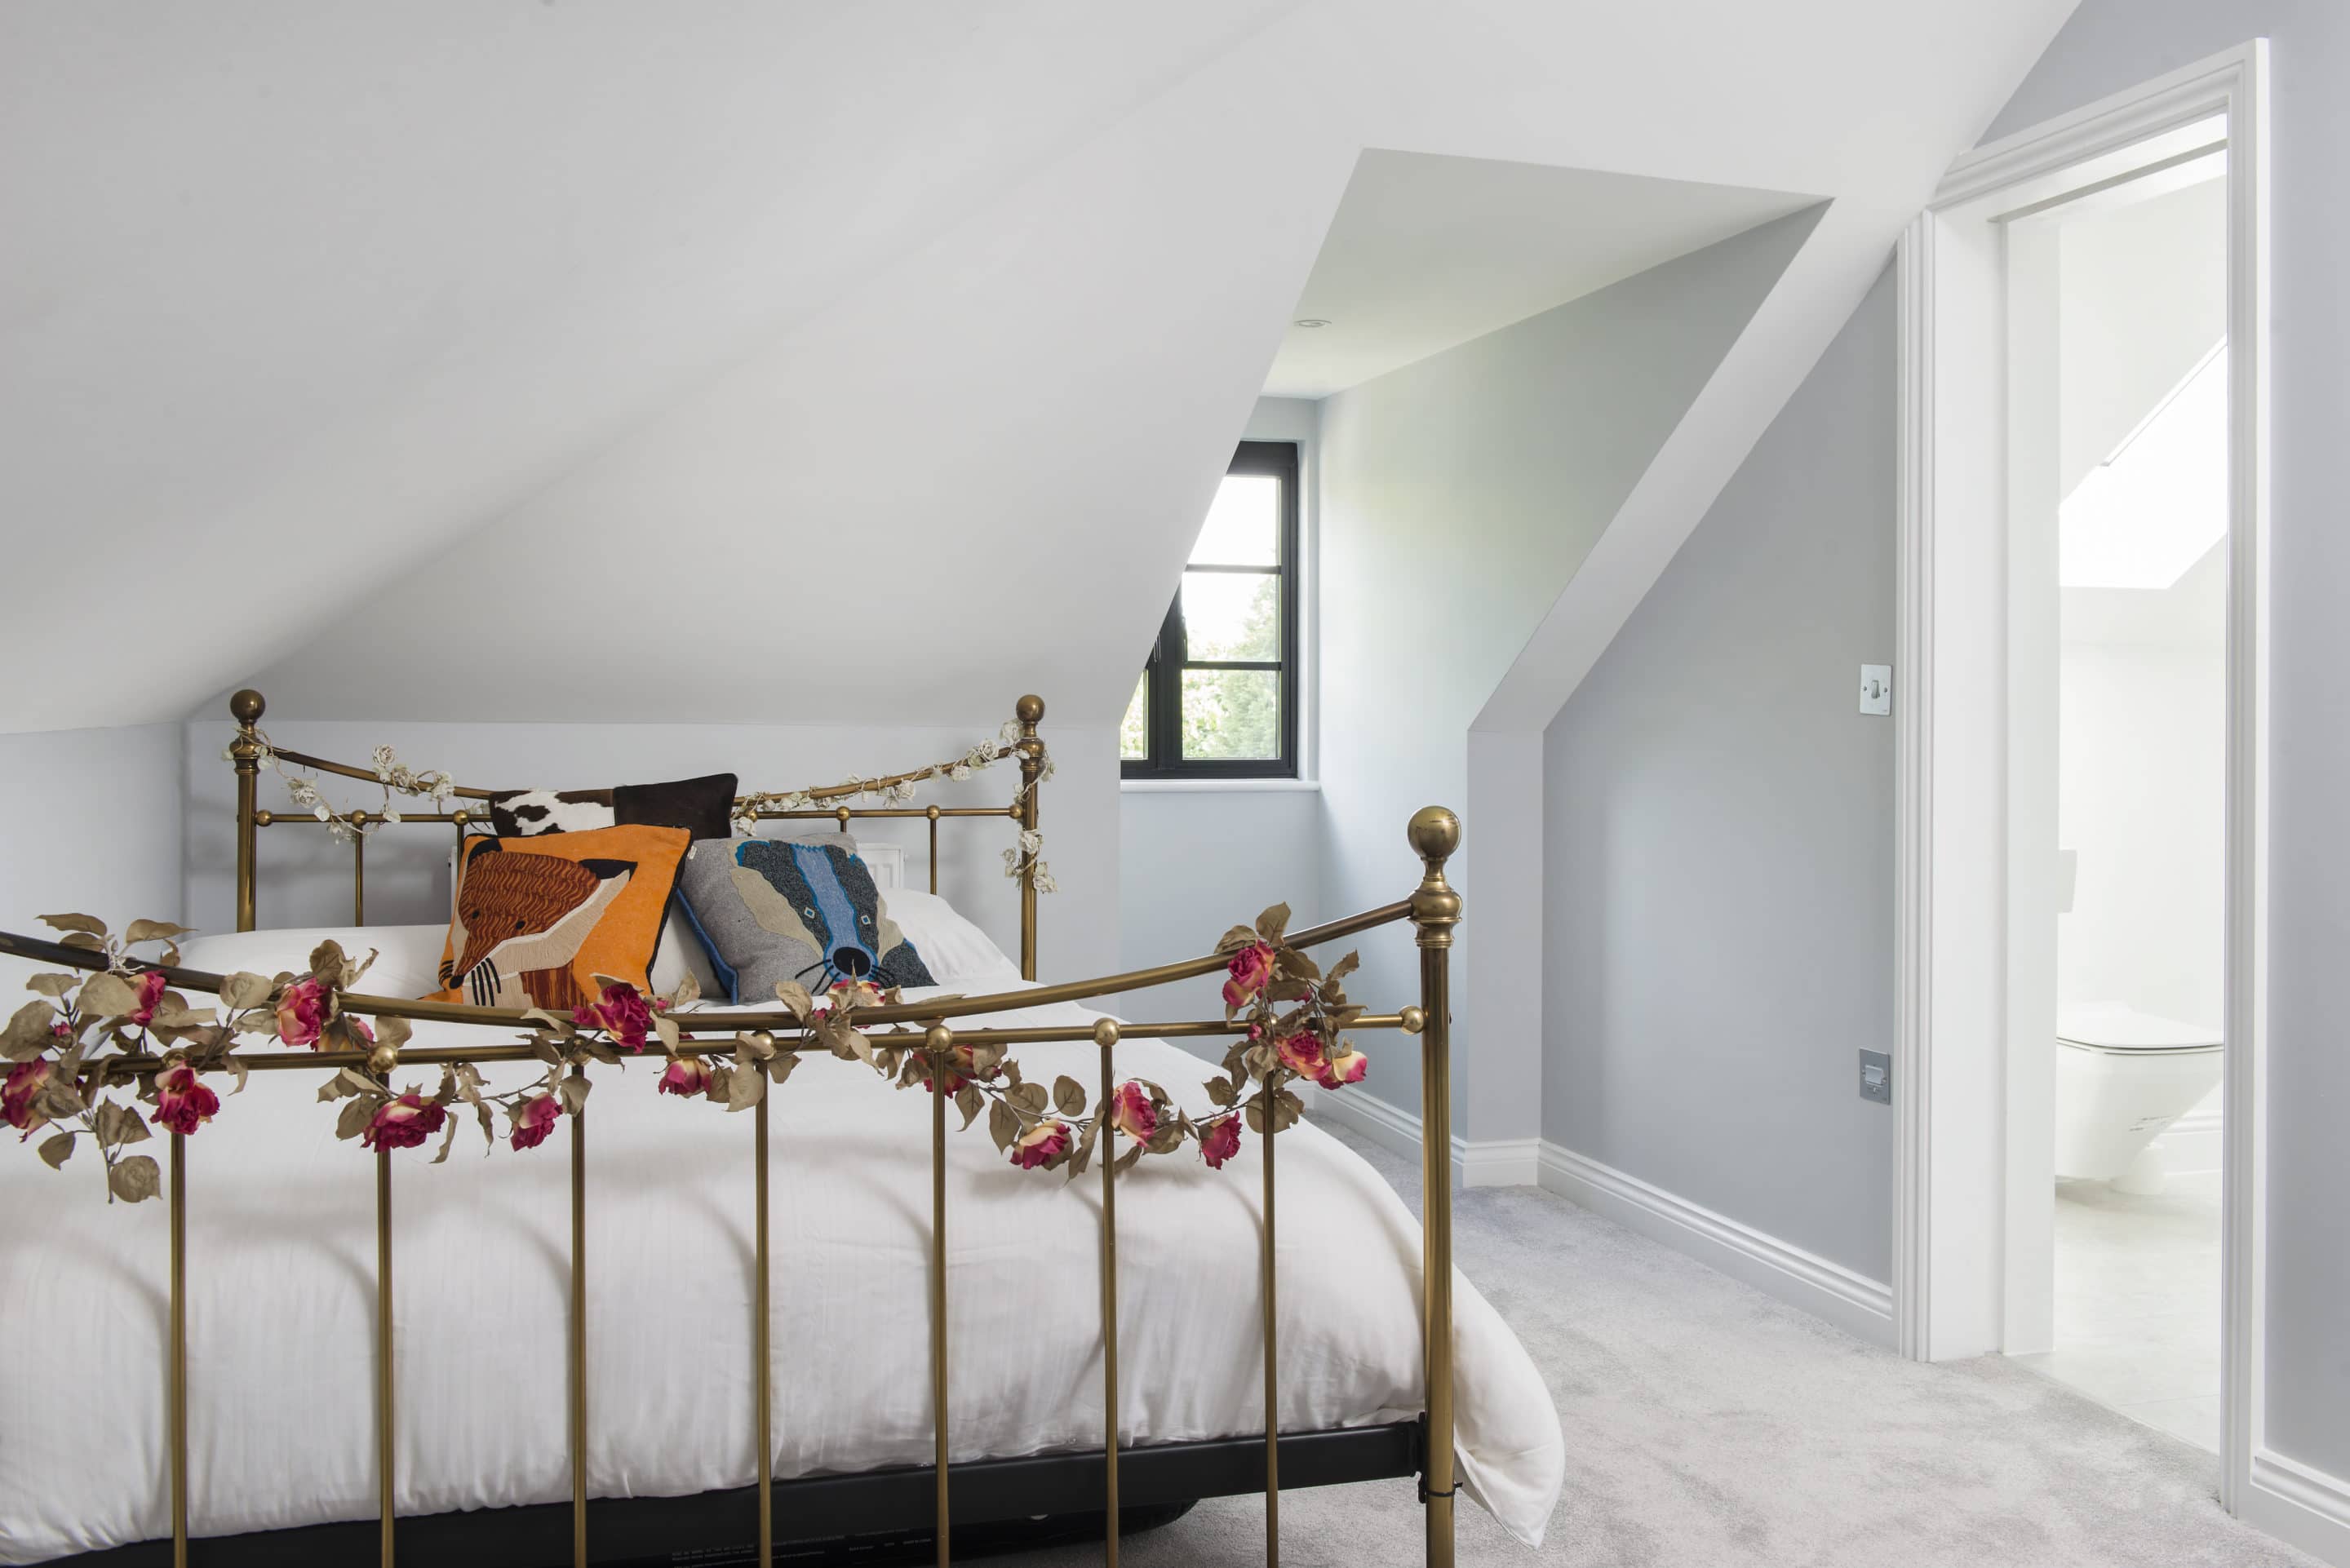
A pocket door makes a useful space-saver for the guest bedroom’s ensuite bathroom
A neat comms room off the kitchen accommodates the hardware, along with the Sky TV box, Sonos amps for the entertainment setup, security and smoke alarms, and a Rako smart lighting system. “All the cables run under the floor and everything’s controlled from an iPad or phone app,” says John, “We haven’t gone overboard on technology but it’s important to future-proof to an extent.”
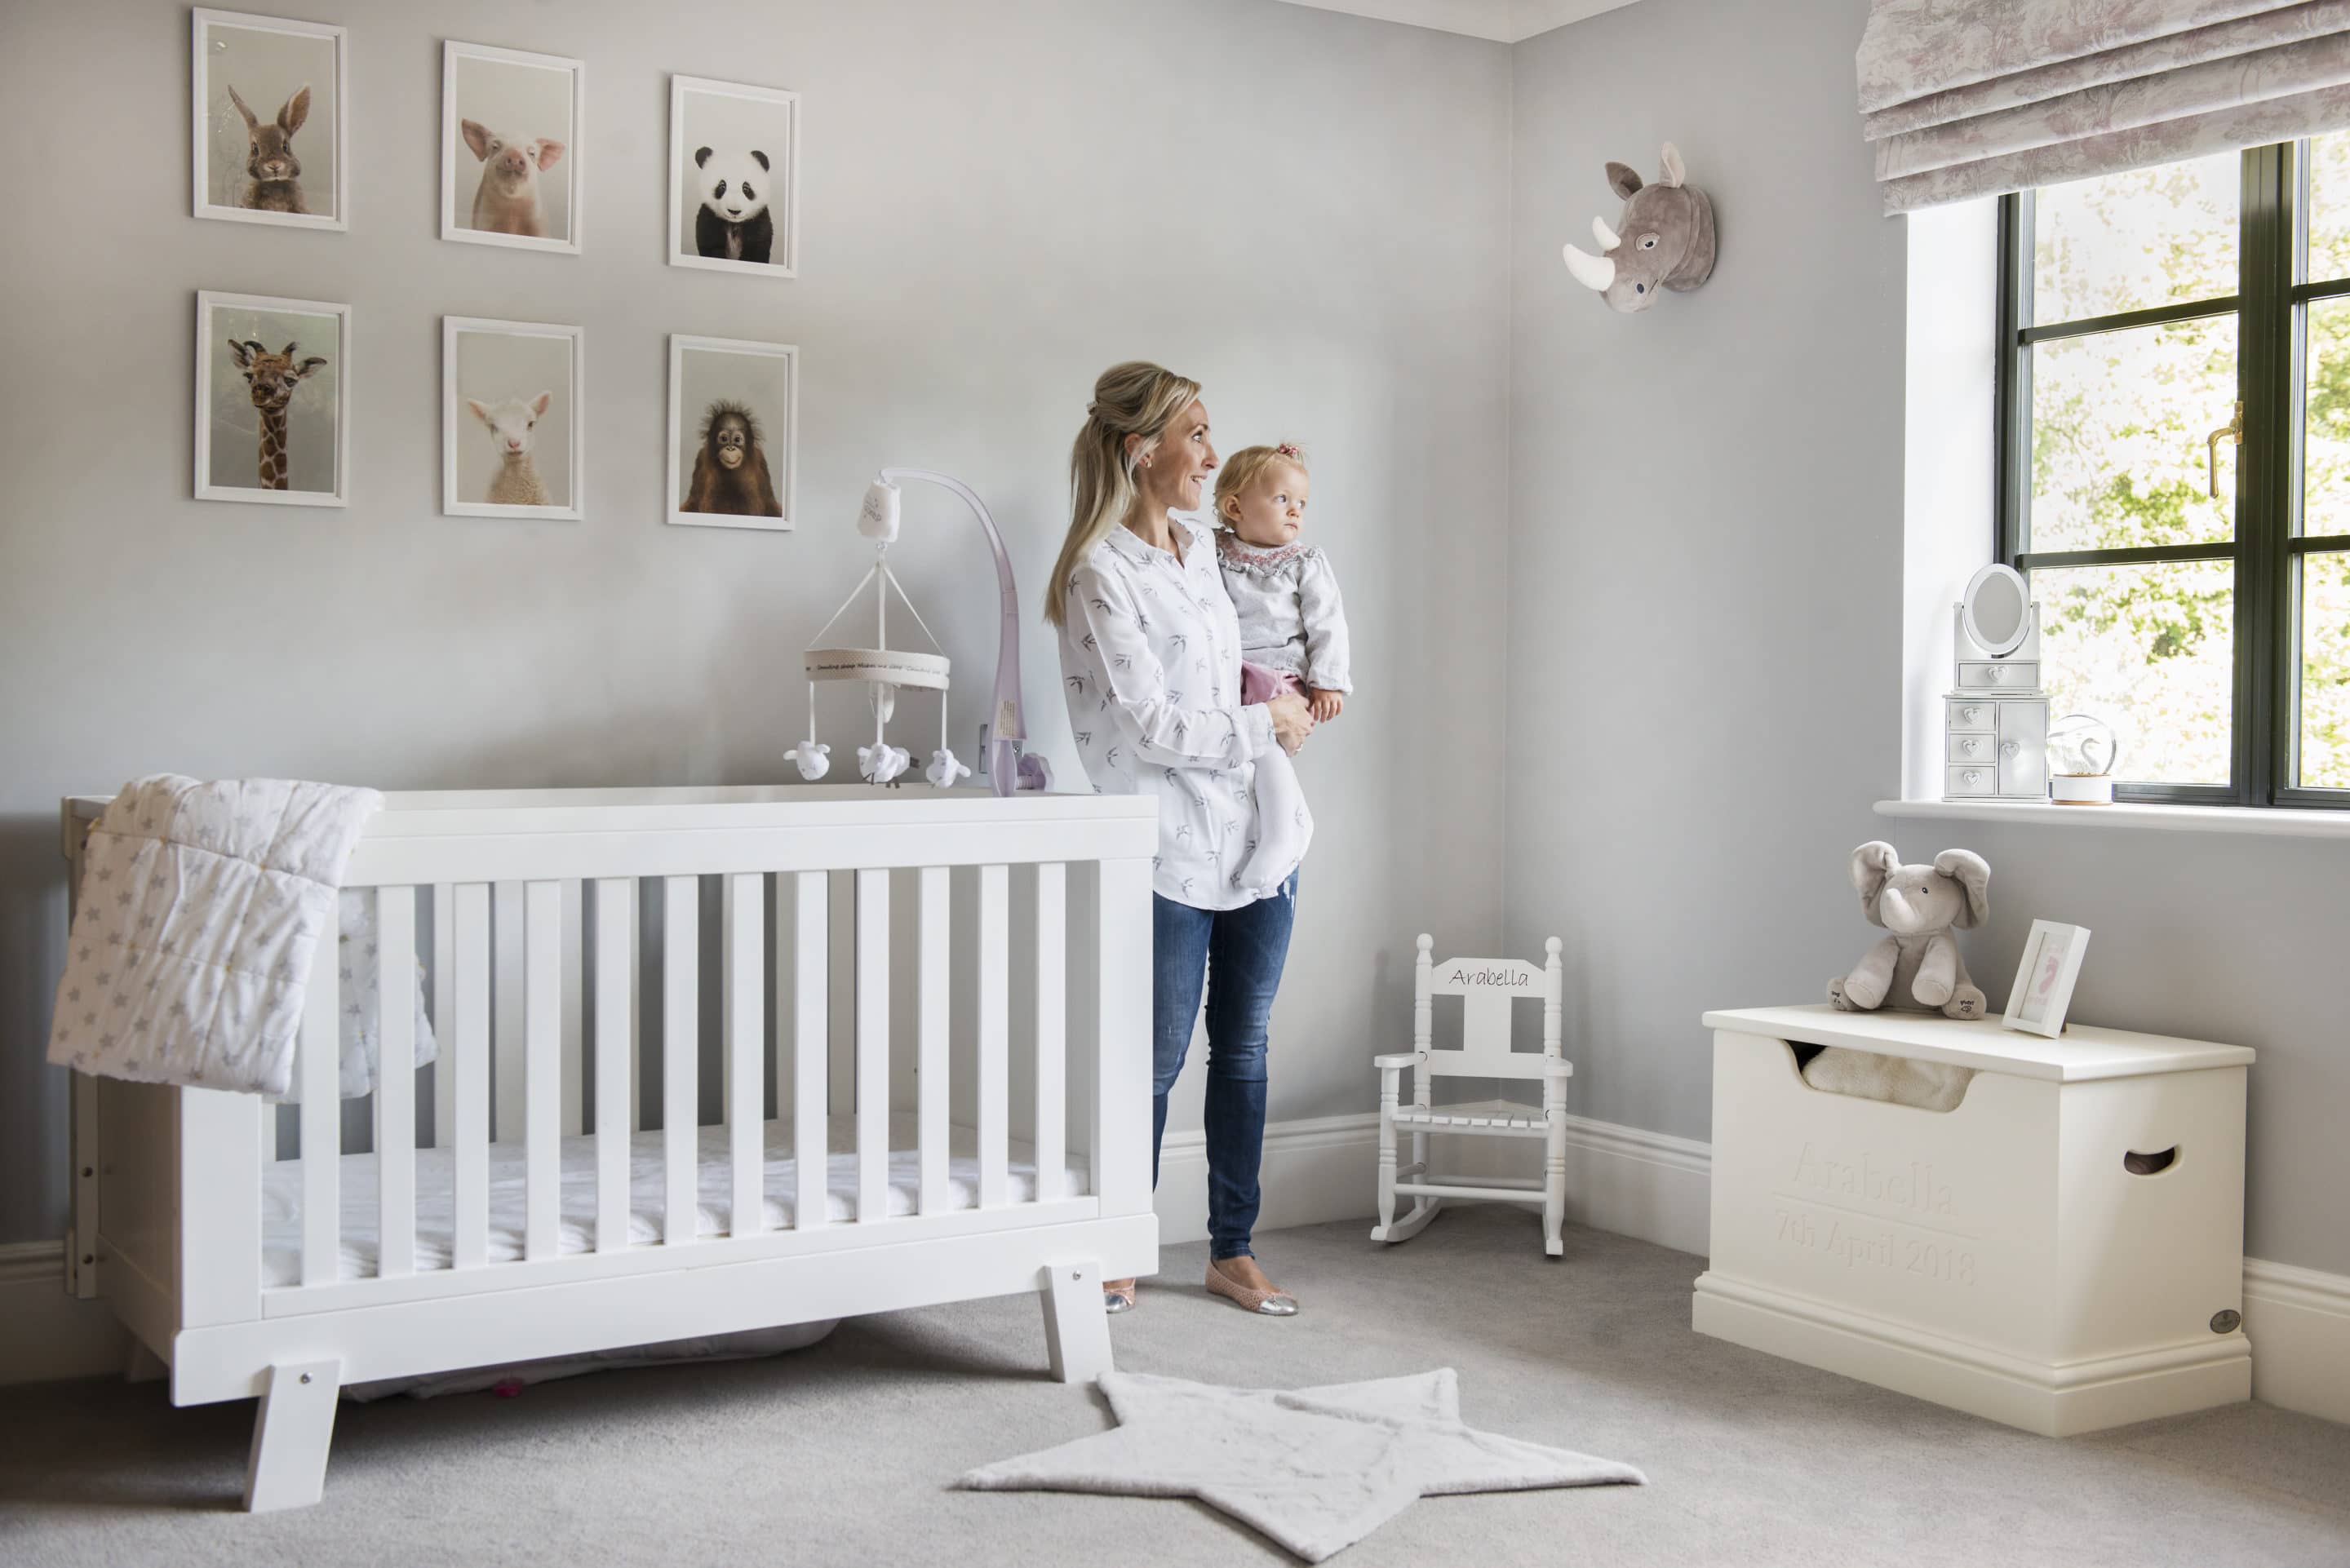
Having already sold their previous home, John and Stephanie moved to a rented house with their three-year-old son, Sebastian, and a new baby on the way. Their daughter, Arabella, was born in April 2018, four months into the build. John was working full-time alongside project managing the scheme, while Stephanie juggled a newborn and a toddler with researching products, planning the interior fit-out and controlling that part of the budget.
“It was tiring, but I’d prepared by making as many decisions as possible in advance, just working off the plans,” she says. “I fitted out our first build and had done an interior design course since, so I didn’t feel out of my depth.”
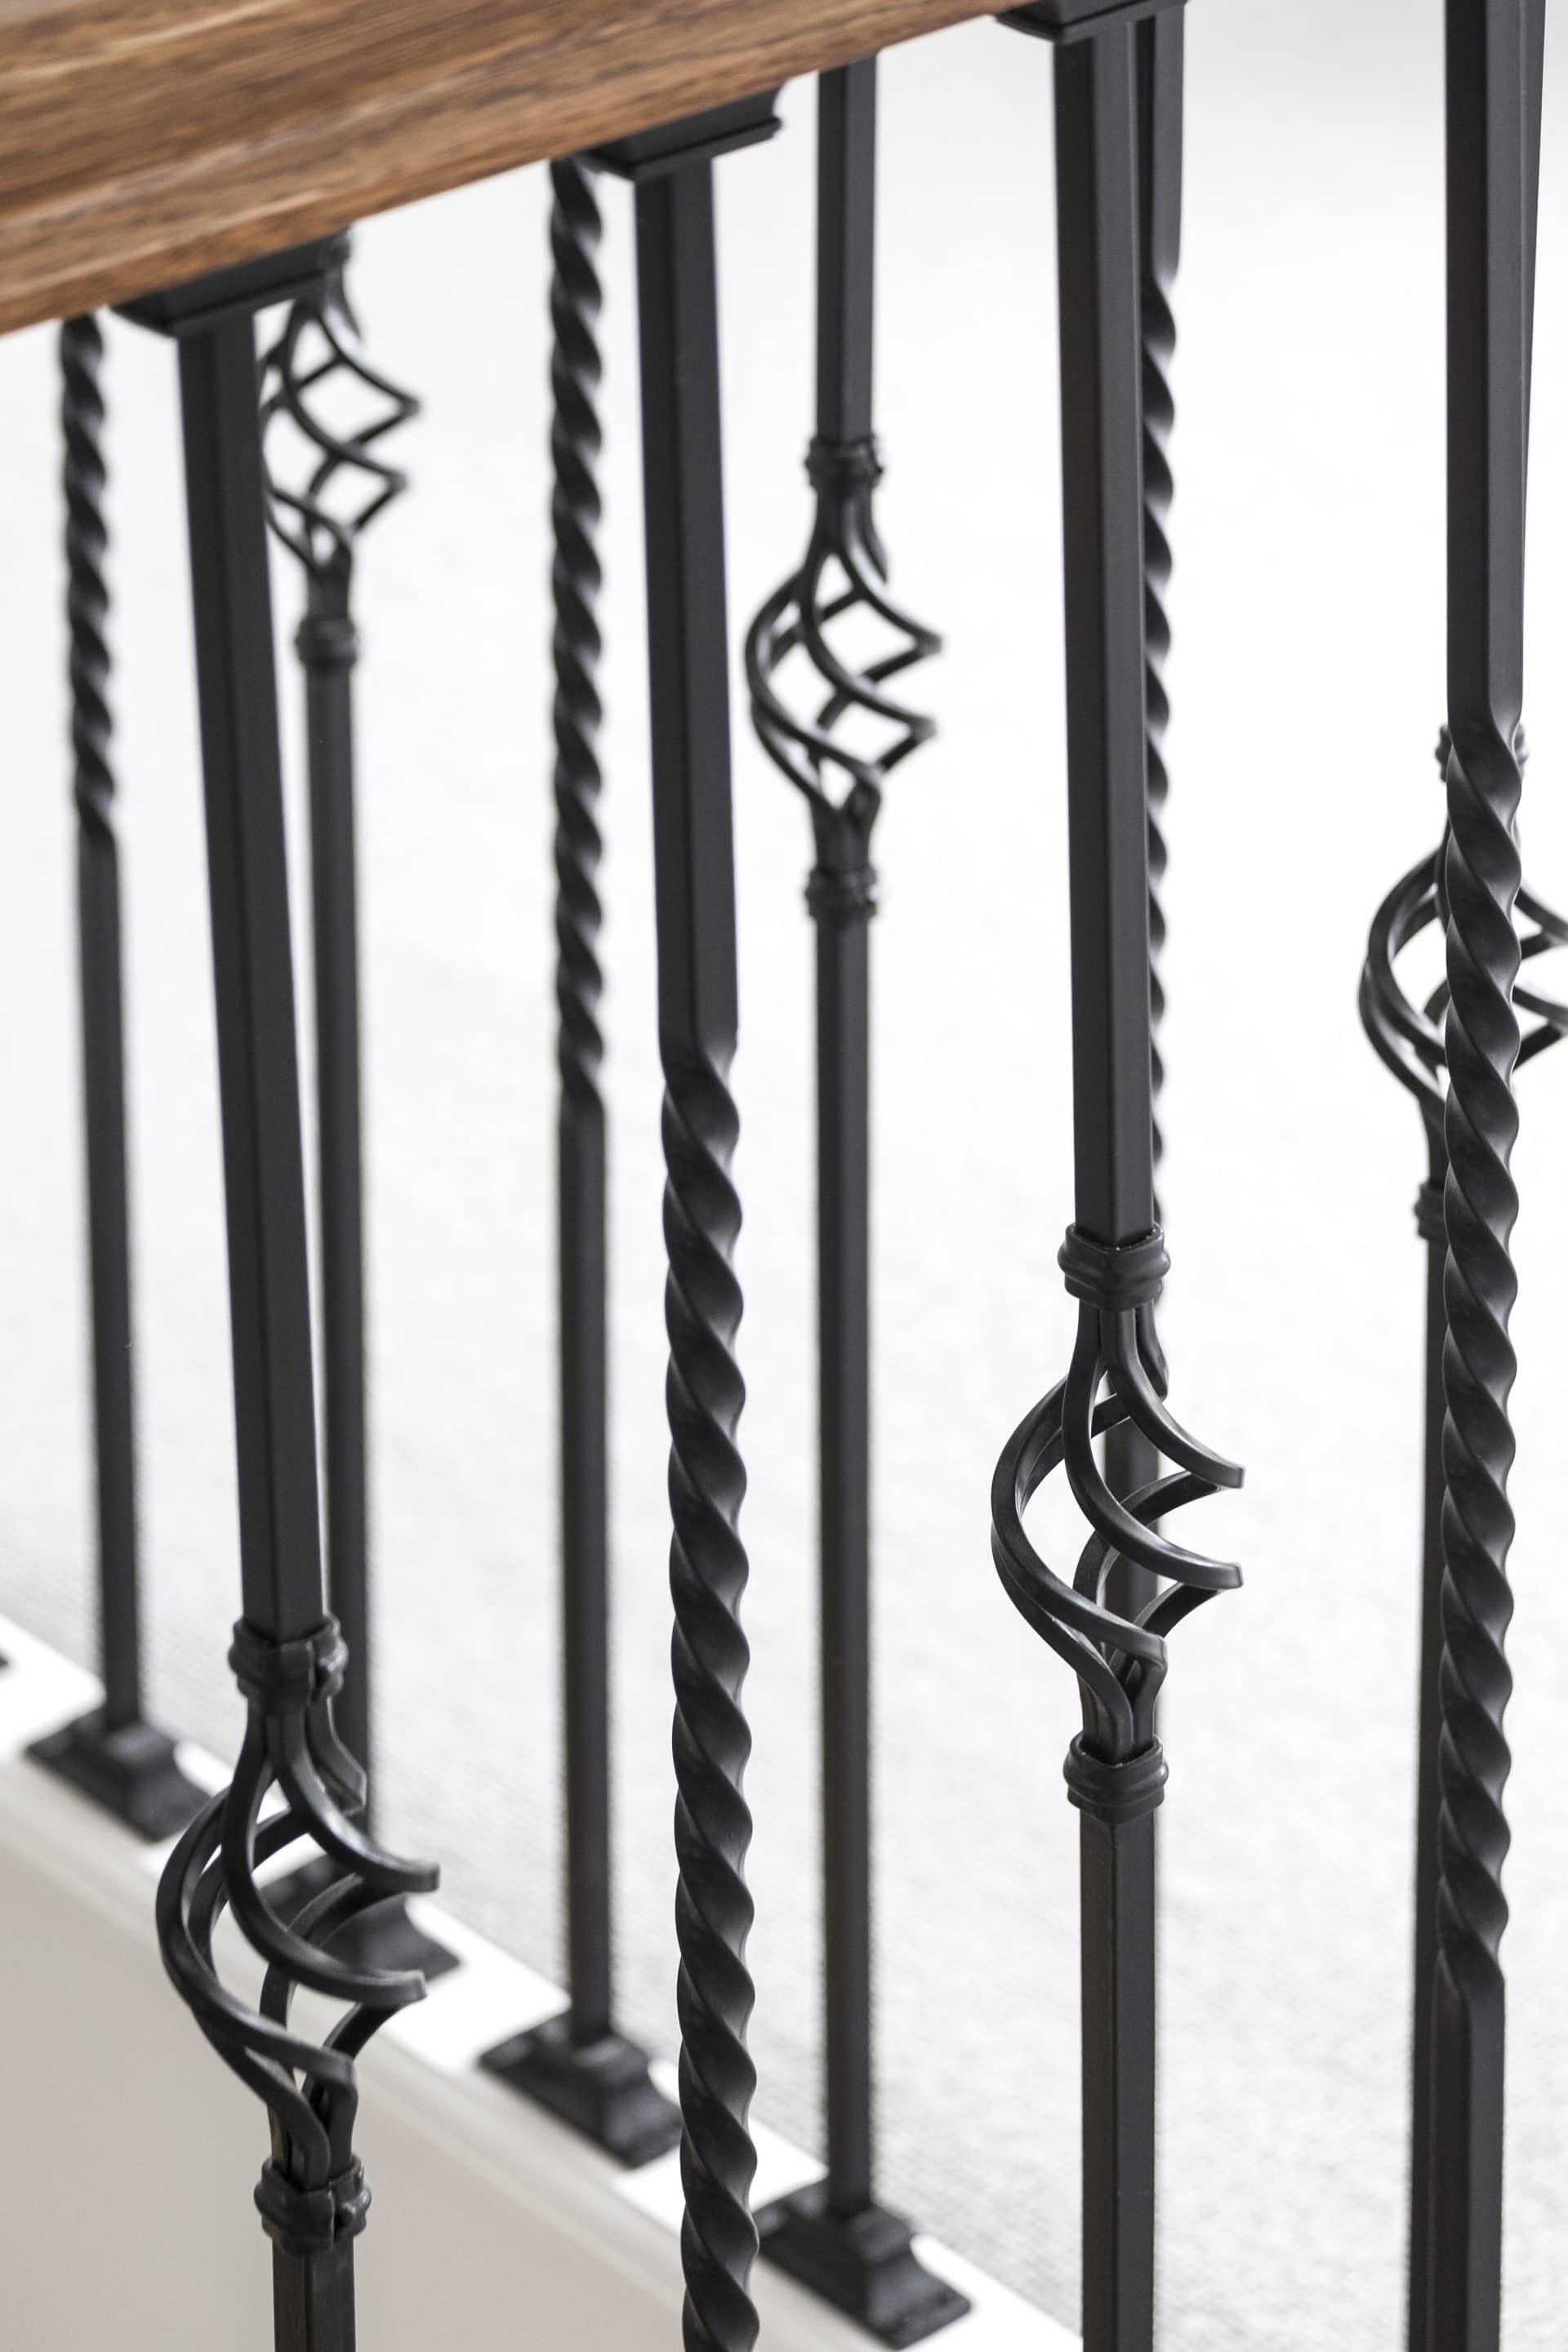
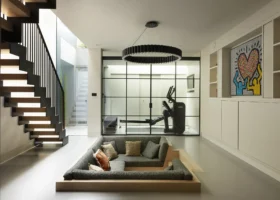
Stephanie cleverly reimagined successful aspects of their previous build, such as the idea of a multifunctional, family-friendly kitchen and adjoining playroom. She also instigated the striking feature staircase that gives the entrance hall and galleried landings their impressive wow-factor. She worked with a specialist joiner to craft a period-inspired design with a delicately-shaped, oak handrail.
“Although this is a new house, the traditional style creates a sense of grandeur,” she says. “The curves did add to the cost but it looks incredible and it’s a classic feature that won’t date.”
What we learnedTAKE ADVANTAGE of the pre-planning advice on offer from your local authority… and follow it! It will help iron out any issues before you make your application for full planning permission. |
Stephanie returned to some of her tried-and-trusted suppliers from before, too, maximising bargaining power by bulk-purchasing from local businesses wherever possible. “I ordered all the switches, sockets and spotlights in one place, the carpets in another and all the door furniture in another. It saved so much time and legwork, and gave me room to negotiate on cost,” she says. “It was important because these little things really add up.”
It took just under a year to complete the build; a swift timeframe given the level of detail and quality of finish. The family thoroughly enjoy their new home. “This is such an easy house to live in,” says Stephanie. “It really suits us and everything is in the right place. It might not be our forever home, though, as I can definitely see us doing another build in time – we’ve just got the bug!”


 Login/register to save Article for later