Estimate your project costs instantly with Build It's interactive self-build cost calculator
Calculate NowGet an accurate, detailed cost breakdown of your project
Submit plans

Money can be used as a yardstick for sustainability. How? Well, every time we spend money changing buildings, we are consuming resources. So, if an energy efficiency measure costs a lot but makes little difference in practice, not only is it a poor investment, it is also likely to be unsustainable.
The embodied energy/carbon of making changes needs to be compared with the energy it will save in practice – it’s no good expending a lot to save only a little. I’m going to be looking at different upgrades in turn to give you a flavour of each. But it’s important to note retrofit measures should be not considered in isolation – and here’s why:
Learn more: Insulation – The Key Considerations
When trying to work out best value options, this means that the ultimate cost may not just be the measure itself. Associated works may be required in other areas. This is explored further in the box-out section on avoiding unintended consequences.
Remember, every building is different and the most appropriate measures will vary even between similar buildings. That said, in general order of cost-effectiveness, the main upgrade options are as follows:
This measure has become, rather unfairly, the poor relation of the retrofit world. Often ignored, it is almost certainly the most cost-effective measure in many buildings, especially for older homes where up to 30% of heat may be lost through air leakage. Draught proofing is not heavily promoted by industry precisely because it is so cheap. It does not involve huge resources or time (and labour) and in many cases it can be carried out as a DIY job.
Begin by checking seals around windows and doors. You’ll often see cracks at the junction between the brickwork and outer frame. This is because different materials have differing rates of thermal expansion and contraction. Doors and windows are also subject to repeated wear and tear, which can lead to microscopic movements in the frame.
The good news is, it’s easy to resolve. Simply remove the existing sealant around the frame and replace with a good-quality silicone product (don’t use decorator’s caulk; and certainly nothing that sets hard, such as ready-mixed filler).
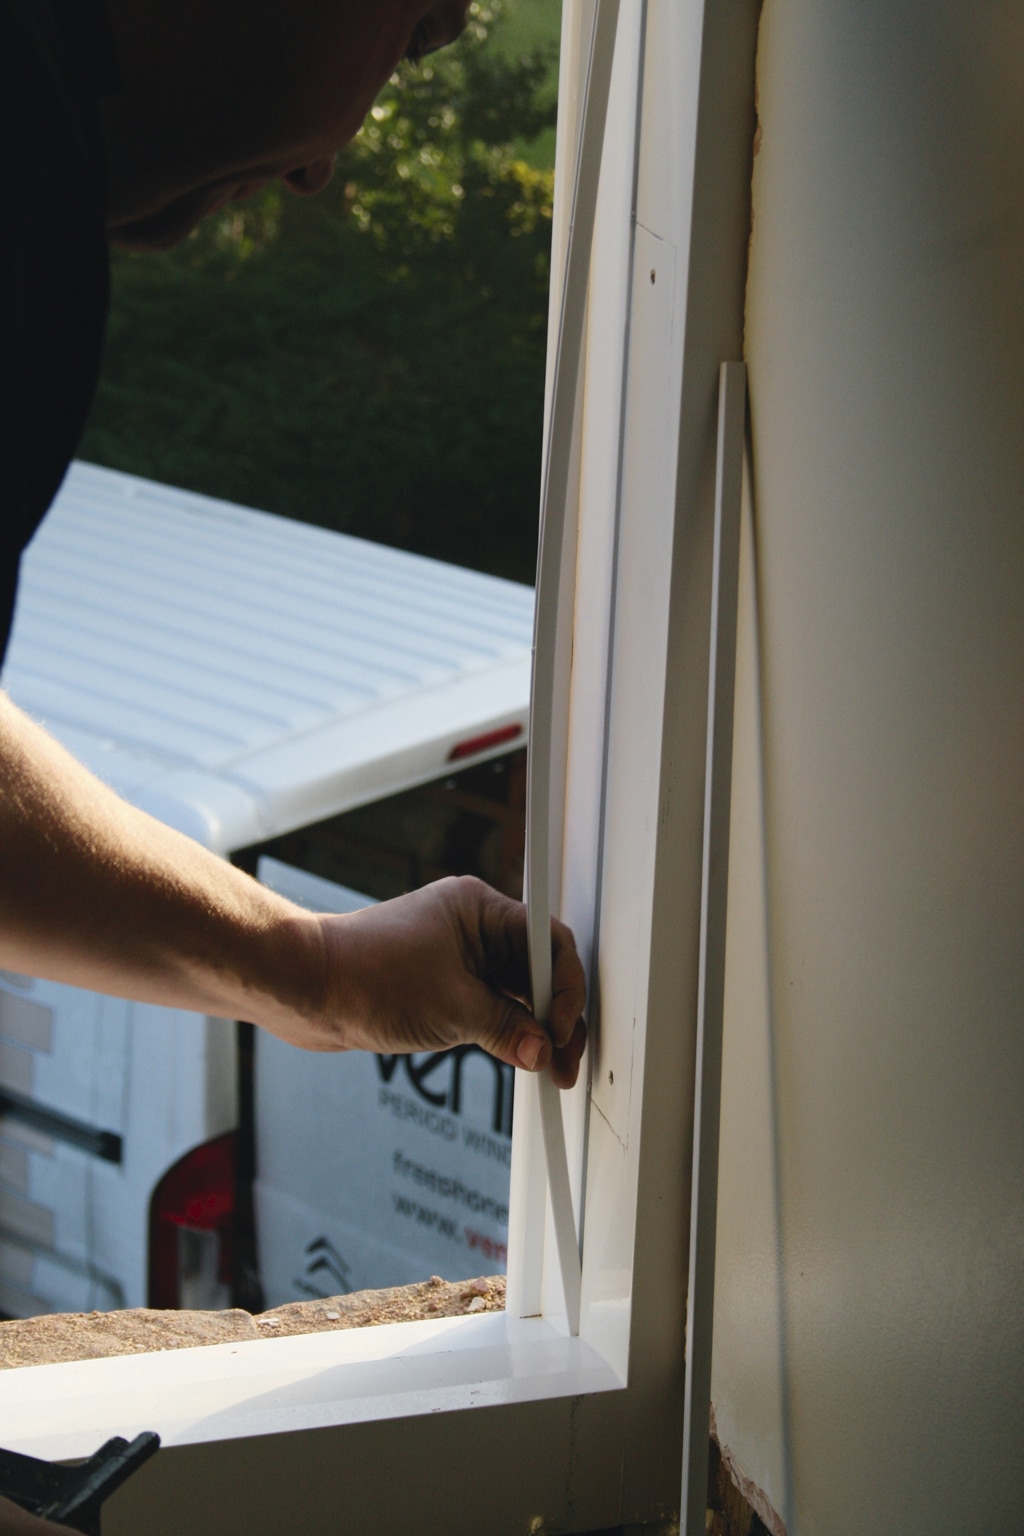
Ventrolla specialises in the sensitive overhaul of period windows, including cill repair, discreet draught proofing, secondary glazing, and other upgrades
Sealing up around the closure (between the casement and the frame) is more complicated. In some cases, a draught proofing strip can simply be nailed or glued to the frame. But in sash windows, for example, the seal has to be routed into the frame, which is a job for a professional. As this is expensive, it is normally carried out as part of a more comprehensive programme of window repair and upgrade.
If your home has a suspended timber ground floor structure, then there’s likely to be a significant air leakage path at the junction between the walls and floor. Often this is addressed by the use of a fitted carpet but if you have reverted to sanded floors with a rug, check the edges of the room to see whether these should be sealed up.
Lastly, if you still have open chimneys that are not being used, consider sealing these up. There are plenty of affordable, non-invasive solutions for this. As condensation can form within the chimney breast, some residual ventilation should still be provided by means of an air brick at the bottom and a vent at the top.
LEDs use about a tenth of the energy of the old incandescent lamps and much less than earlier ‘eco’ options such as CFLs (compact fluorescents) or halogens, too. Yes, they’re more expensive – but costs have come down and they also last much longer. So they pay for themselves fairly quickly, except for lights which are rarely used. The quality of light has greatly improved, too. So my advice is just do it!
Learn more: Installing Smart Lighting
One of the most cost-effective ways to save energy at little extra cost and disruption is by installing improved heating controls. As a minimum, all radiators should have thermostatic valves (TRVs), so rooms can be individually controlled. The system should also have a programmer and a thermostat. More sophisticated (but still inexpensive) products allow you to control the heating while you’re out – for instance, to delay it coming on if you’ve made a late decision to visit the pub rather than going home.
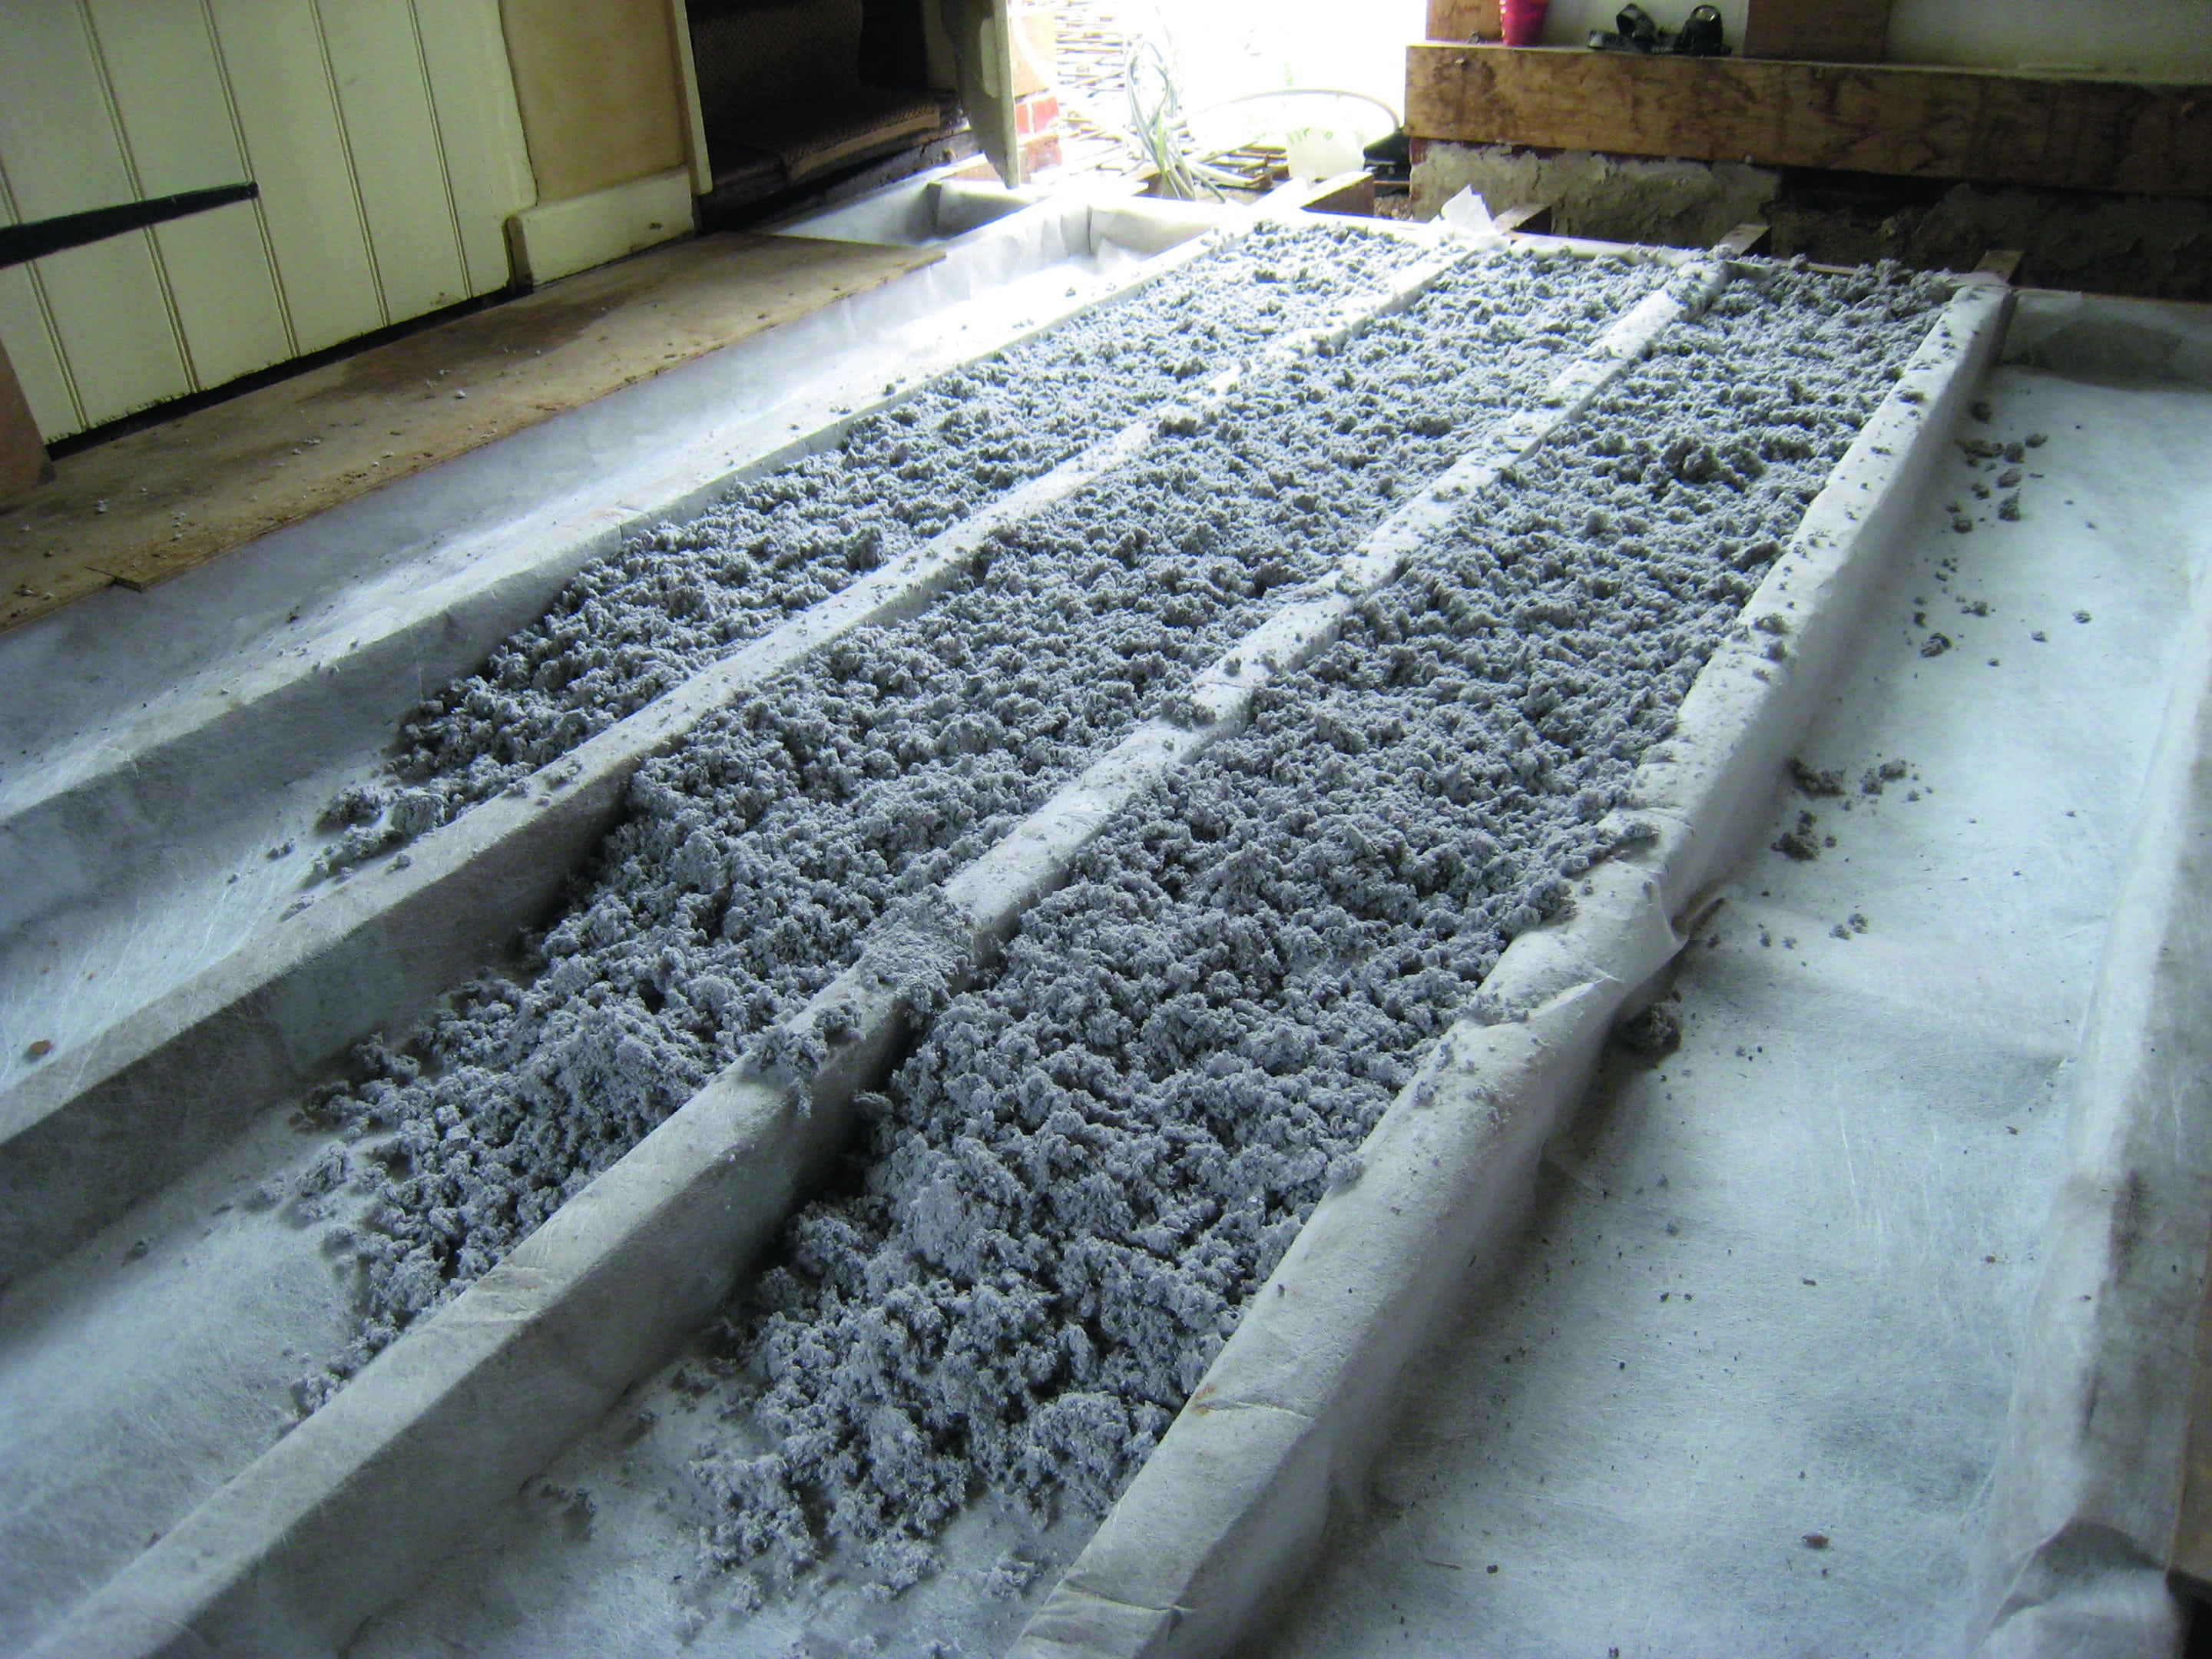
Loose fill cellulose can be poured onto a breathable membrane, in the gaps between joists, to insulate a suspended timber floor.
Insulating hot water distribution pipes (those carrying water to taps, showers etc) is another cheap DIY measure that’s often ignored. As it takes a combi boiler a few seconds to kick in once the flow starts, the warm water retained in the pipe between the boiler and the tap from the last use can be enough to wash your hands. It’s not worth taking a floor up just for this. But if you’ve got the floor up for some other reason, insulate whatever sections you can reach while you can.
The most cost-effective way to upgrade single glazed windows is to add well-designed secondary glazing, which is also easily removable and practically invisible. Systems have got much better in recent years. Combined with draught proofing and a good set of curtains or blinds, this will deliver most of the benefits of switching to double glazed windows at a fraction of the cost and embodied energy.
For historic fenestration, it also has the great advantage of retaining the original rolled glass, which will have characterful imperfections which can no longer be reproduced and yields a much better reflective quality.
Where no historic glass is present, the next best option is to retain the frames and to replace the glass panes. If the existing frame (or casement) is not particularly deep and cannot accommodate a modern double or triple glazed panel, you might consider using slim profile double glazing. Modern vacuum panels can offer U-values (a measure of heat loss)
as low as some triple glazing.
If a window is beyond repair and has to be replaced, there can be a conflict between best value and sustainability. PVCu windows offer good U-values, and will almost certainly cost less than replacement timber versions. But timber is a renewable resource, whereas plastic is produced from oil (a diminishing resource).
PVCu units are also very hard to repair and recycle, while a well-maintained wood product can last indefinitely. It’s worth noting that paint technologies have improved markedly in recent years so the gap between maintenance intervals for timber windows has got much longer.
Known as CWI, this is normally applicable only to early cavity walls that were constructed without any insulation at all. This is one of a few areas where we do have reliable data, which demonstrates that going from zero insulation to modern standards is in fact cost-effective and will usually pay back within seven years.
There are only two reasons not to make this upgrade. Firstly, if there is any risk that the external surface could admit any moisture into the cavity, then the installation of CWI could create a bridge to transfer this into the internal environment, causing damp and mould.
Available from Soprema. Pavadry woodfibre internal insulation boards offer natural moisture management qualities
Secondly, especially in narrow or hard-to-treat cavities, CWI might not deliver sufficient savings. This may lead you to consider external wall insulation (EWI) instead (see the final section for more on how this works). If you choose to rely on EWI and not insulate the cavities at all, careful thought must be given to the design – including any ventilation paths through the walls.
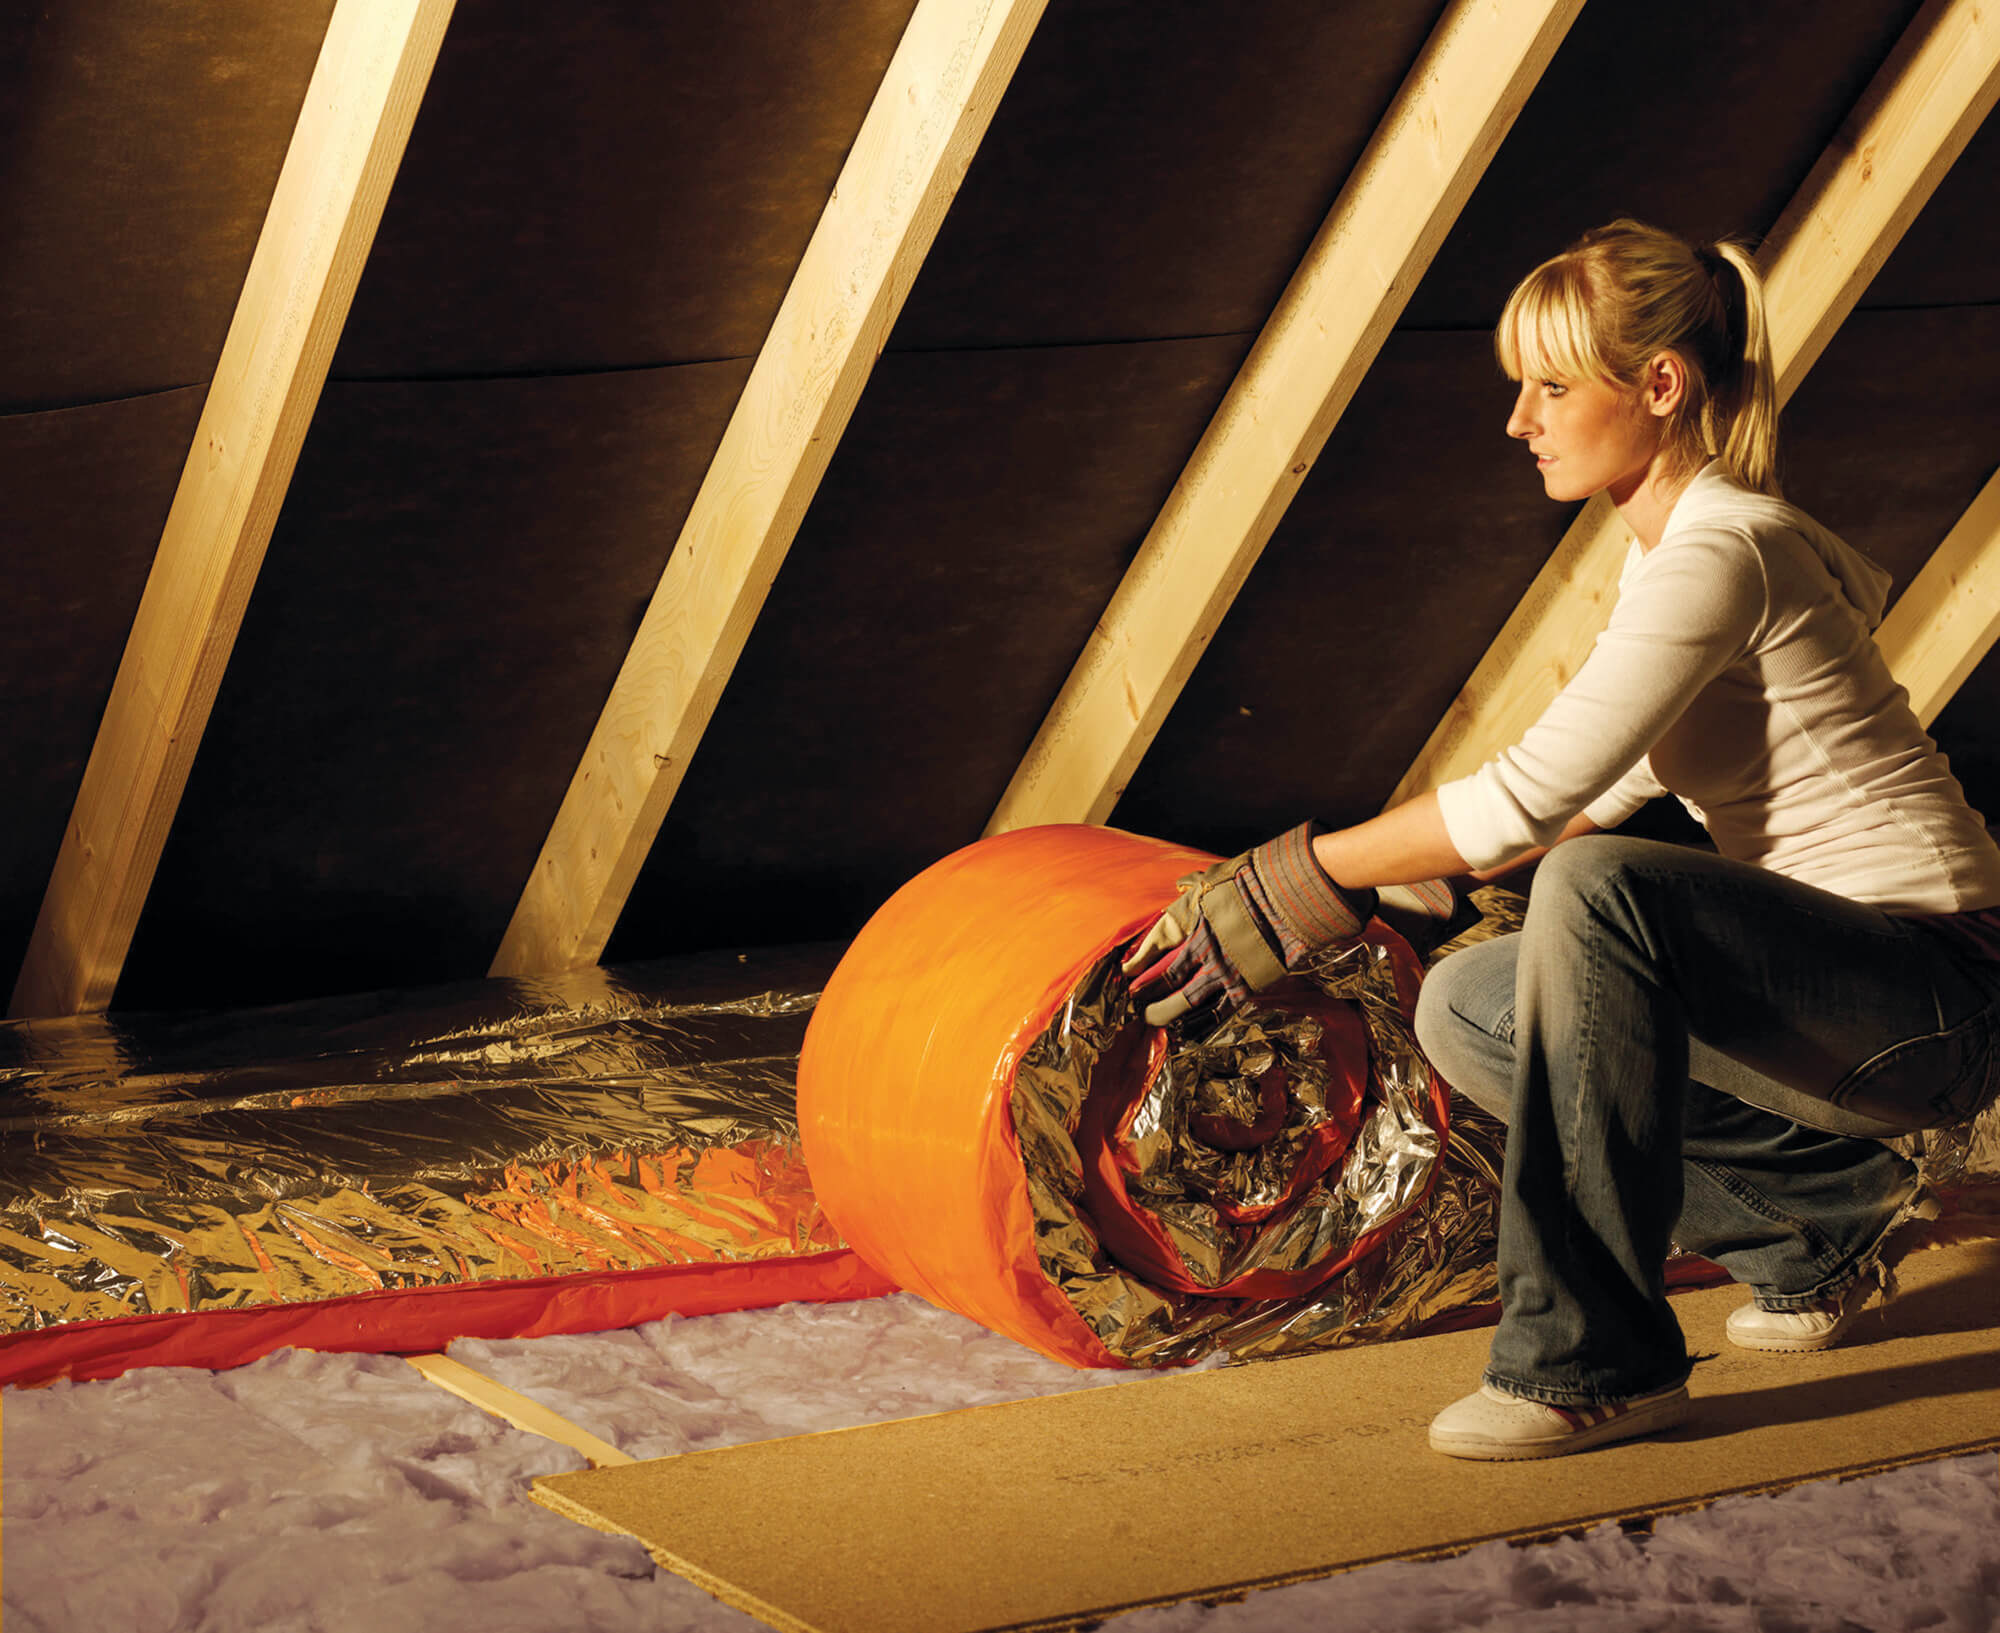
The current recommended amount of mineral wool in lofts is 275mm, which is nearly a foot deep in old money. But don’t take this on face value: a little insulation goes a long way, and it takes a lot more to do only a bit more work.
If you have at least 150mm of mineral wool insulation, there’s probably little to be gained by adding the extra 125mm. However, mineral wool is cheap and if you’re doing the installation yourself you can keep the cost right down. When adding insulation, be sure to leave a gap at the eaves to maintain ventilation of the attic space.
Of course, not all lofts are set over simple, flat ceilings. You may have sloping edges coming down into the main storey below, for instance, or possibly even a room-in-the-roof. In these cases, you’ll need to insulate at rafter level. This is more complex, and it’s essential to leave a cross-flow ventilation path above the insulation (and below the roof covering) so air can flow in and out to keep the rafters dry.
Learn more: Specifying Wall and Loft Insulation
It’s usually worth adding a layer of thermal protection below the rafters, too. As you may be constrained for headroom, remember that a little insulation goes a long way. Even 25mm of a high-performance product, such as PIR, will help to deal with the thermal bridge through the rafters.
Conventional wisdom used to be that replacing an old boiler is a no-brainer, but this needs a bit more examination. The Energy Saving Trust estimates that the saving on replacing a D-rated boiler in a detached house would be £170 per year. If a new boiler cost £2,500 to install, then it would take 15 years for the investment to be repaid.
That’s not far off the expected life of a new boiler. In any case, boilers installed during the last 15 years should have been A-rated anyway, so it now makes sense simply to maintain them well and run them until they fail, thereby reducing embodied energy in their manufacture and installation.
Heat pumps now deliver good carbon savings thanks to the decarbonisation of the electricity supply, and are currently supported by the Renewable Heat Incentive (RHI). Take that government cashback out of the equation, though, and you’re unlikely to save much on bills if you’re already on mains gas. That’s because electricity is more than three times
the price of gas, so you would need a coefficient of performance (COP) of at least three before you save on running costs.
This is pushing it during peak heating season for an air source heat pump (ground source versions are more efficient, but cost a lot more to install). If you’re off the gas grid and using LPG or electrical resistance heating, then a heat pump makes a lot more sense financially.
Solid floors are hard to treat. Digging out concrete to add insulation beneath, before relaying it, is always a disruptive, resource-intensive and expensive business. Meanwhile, insulating above solid floors reduces head height and causes issues at doorways, stairs and other thresholds. So I fall back on the maxim a little insulation goes a long way: if you only have 25mm of room to play with, then a high performance product (such as Spacetherm) could make a big difference.
CosyWool British sheep’s wool insulation from Thermafleece is a natural and breathable product that’s ideal for use in heritage homes.
Suspended floors are easier to deal with. If they can be accessed from below then mineral wool batts can be inserted between the joists, which is a relatively low-cost option. You could switch to recycled cellulose insulation if you want to boost your eco credentials. If the floor has to be taken up and treated from above, then of course the job gets much more expensive.
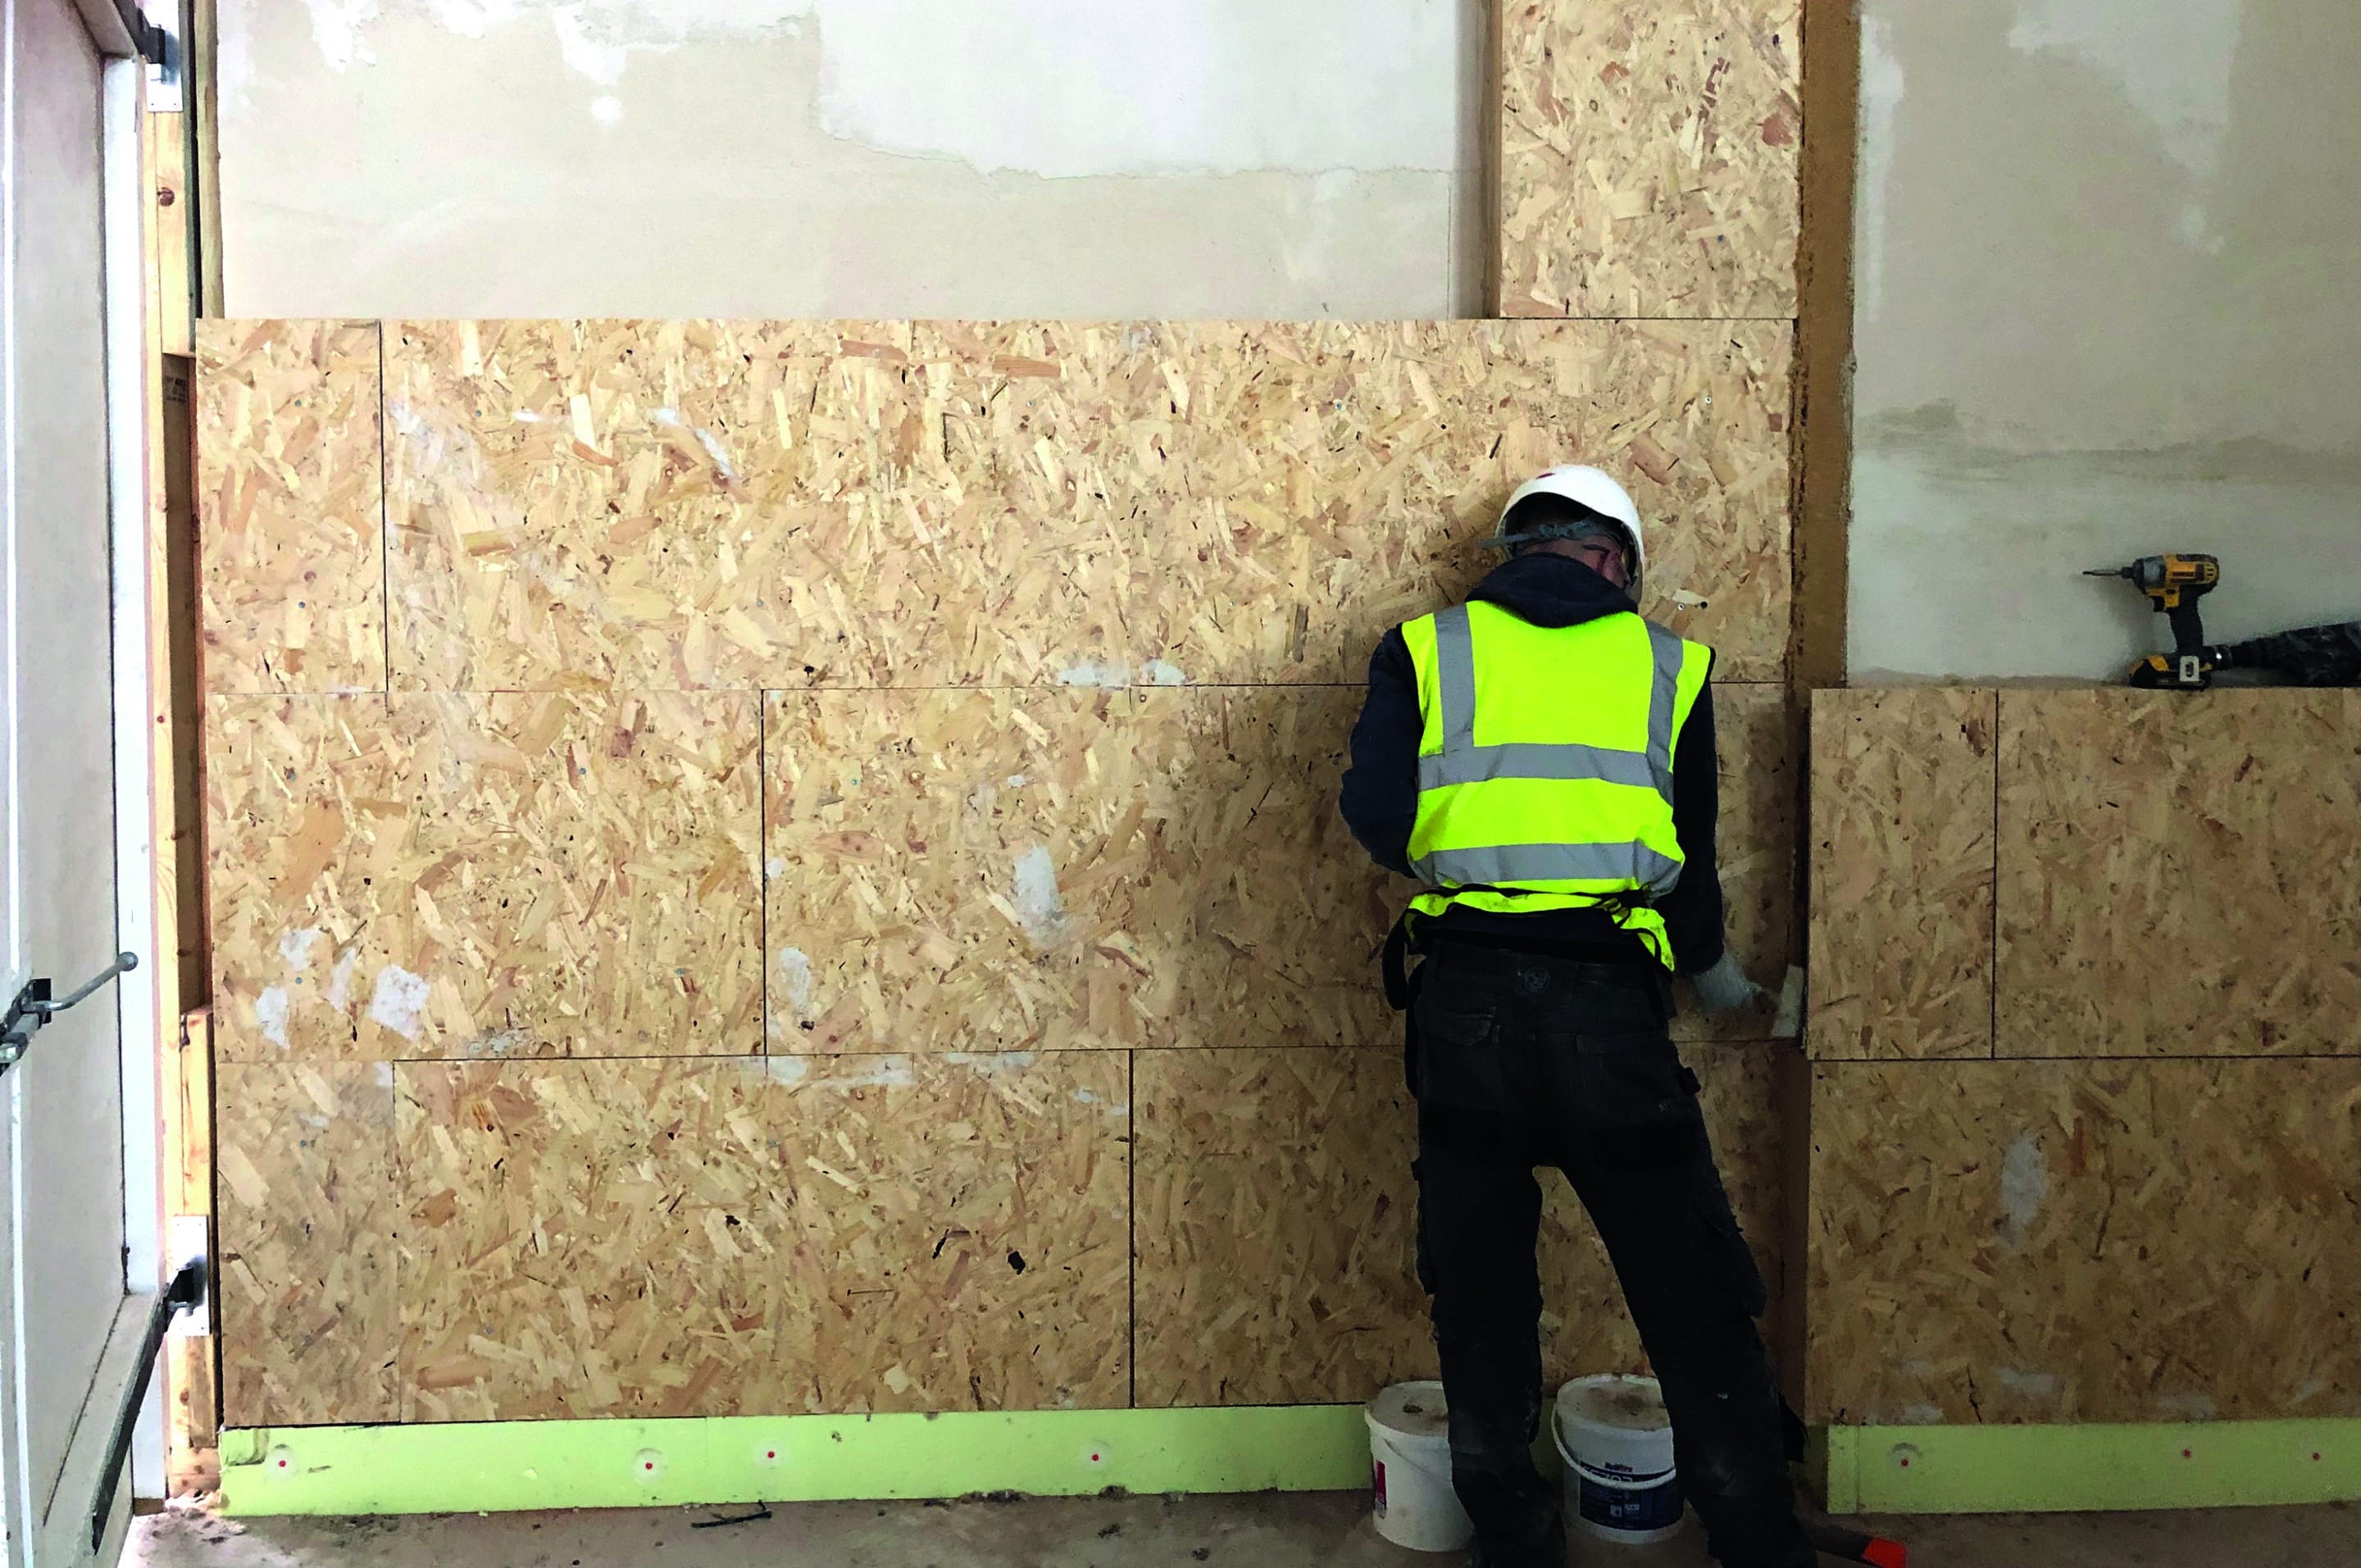
Reliable data is hard to come by for solid wall insulation (SWI), but educated guesses suggest that in some cases the payback period is likely to exceed 40 years – hence why it’s last on our list. There are also significant risks, especially when it comes to applying SWI to moisture-open structures such as traditional buildings (ie those constructed prior to 1919, which is the vast majority of our terraced housing stock).
In later, moisture-closed buildings, with simple elevations, there may be a good case for applying external SWI. This will mean all the masonry held within the insulated shell then becomes useful thermal mass (acting a bit like a large storage heater), which can really drive down heating costs. Internal SWI is a lot more risky, due to unavoidable thermal bridging and the way that the insulation changes the moisture movement within walls.
It’s also important to bear in mind the embodied energy of the solid wall insulation (and all the work to move services and deal with other details). What’s more, front elevations usually have a door plus a significant area of windows. When you take thermal bridging into account, the actual savings from treating the residual area are unlikely to justify the cost. Dealing with rear elevations can be simpler, though many will still have architectural significance that should be preserved.


 Login/register to save Article for later