Learn more about permitted development with our next online training course!
June 30th at 7PM - use code BUILD for 20% off
BOOK YOUR SLOT HEREJune 30th at 7PM - use code BUILD for 20% off
BOOK YOUR SLOT HEREEstimate your project costs instantly with Build It's interactive self-build cost calculator
Calculate NowGet an accurate, detailed cost breakdown of your project
Submit plans
There’s a whole host of options for finishing roofs, from tiles and slates through to the likes of zinc, green roofs, thatch and more.
Many self builders go for a straightforward roof finish in a single colour to achieve a clean, modern aesthetic. For instance, along Grand Designs: The Street (which backs onto our Graven Hill plot), many of the houses feature grey-hued metal or tiled roofs.
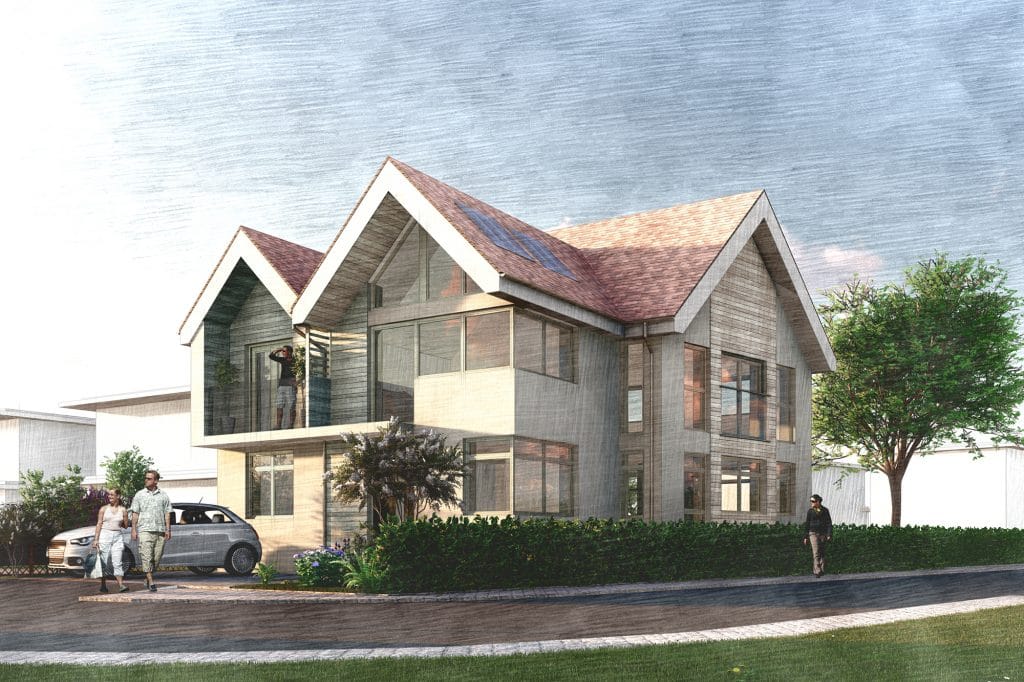
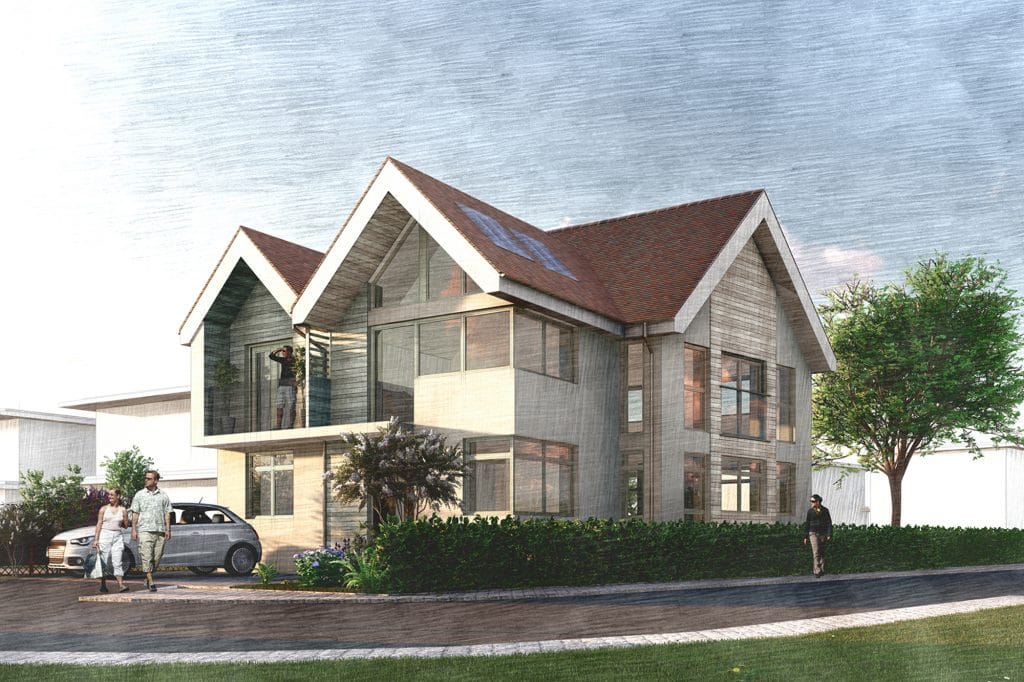
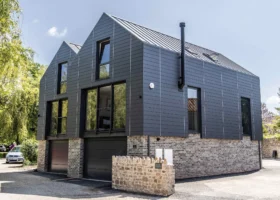
They look great, but we wanted to bring a little more warmth to our build. The three-ridge design of our roof isn’t as dominant as some, but it will still be highly visible. So it will have a major impact on the overall look and feel of the Build It Education House.
During the early research phases for the Education House, we were very taken with Dreadnought Tiles’ rustic range of machine-made clay plain tiles.
With these roof tiles, the colour is fired into the clay itself (rather than with applied finishes). This creates an extremely durable tile with a richness and character that can lift and soften a contemporary scheme.
Read more: Choosing Roof Tiles: Concrete or Clay?
Dana Patrick-Smith from Dreadnought suggested a mix of country brown, brown heather and red sanded tiles. The same blend was recently used to spectacular effect on a contemporary barn-style home. But I was a little dubious at first: after all, our project is anything but barn-like!
Dreadnought sent a sample panel for us to see the blend in the flesh, with some extras so we could also get a sense of two-tile blends. Even then, it wasn’t an easy decision.
Lapd Architects kindly reworked their initial 3D renders to give more of a sense of what each of the combinations would look like. Those images, coupled with Dreadnought’s enthusiasm, helped us settle on the original three-tile mix. I’m glad to say it’s proven to be the right decision!
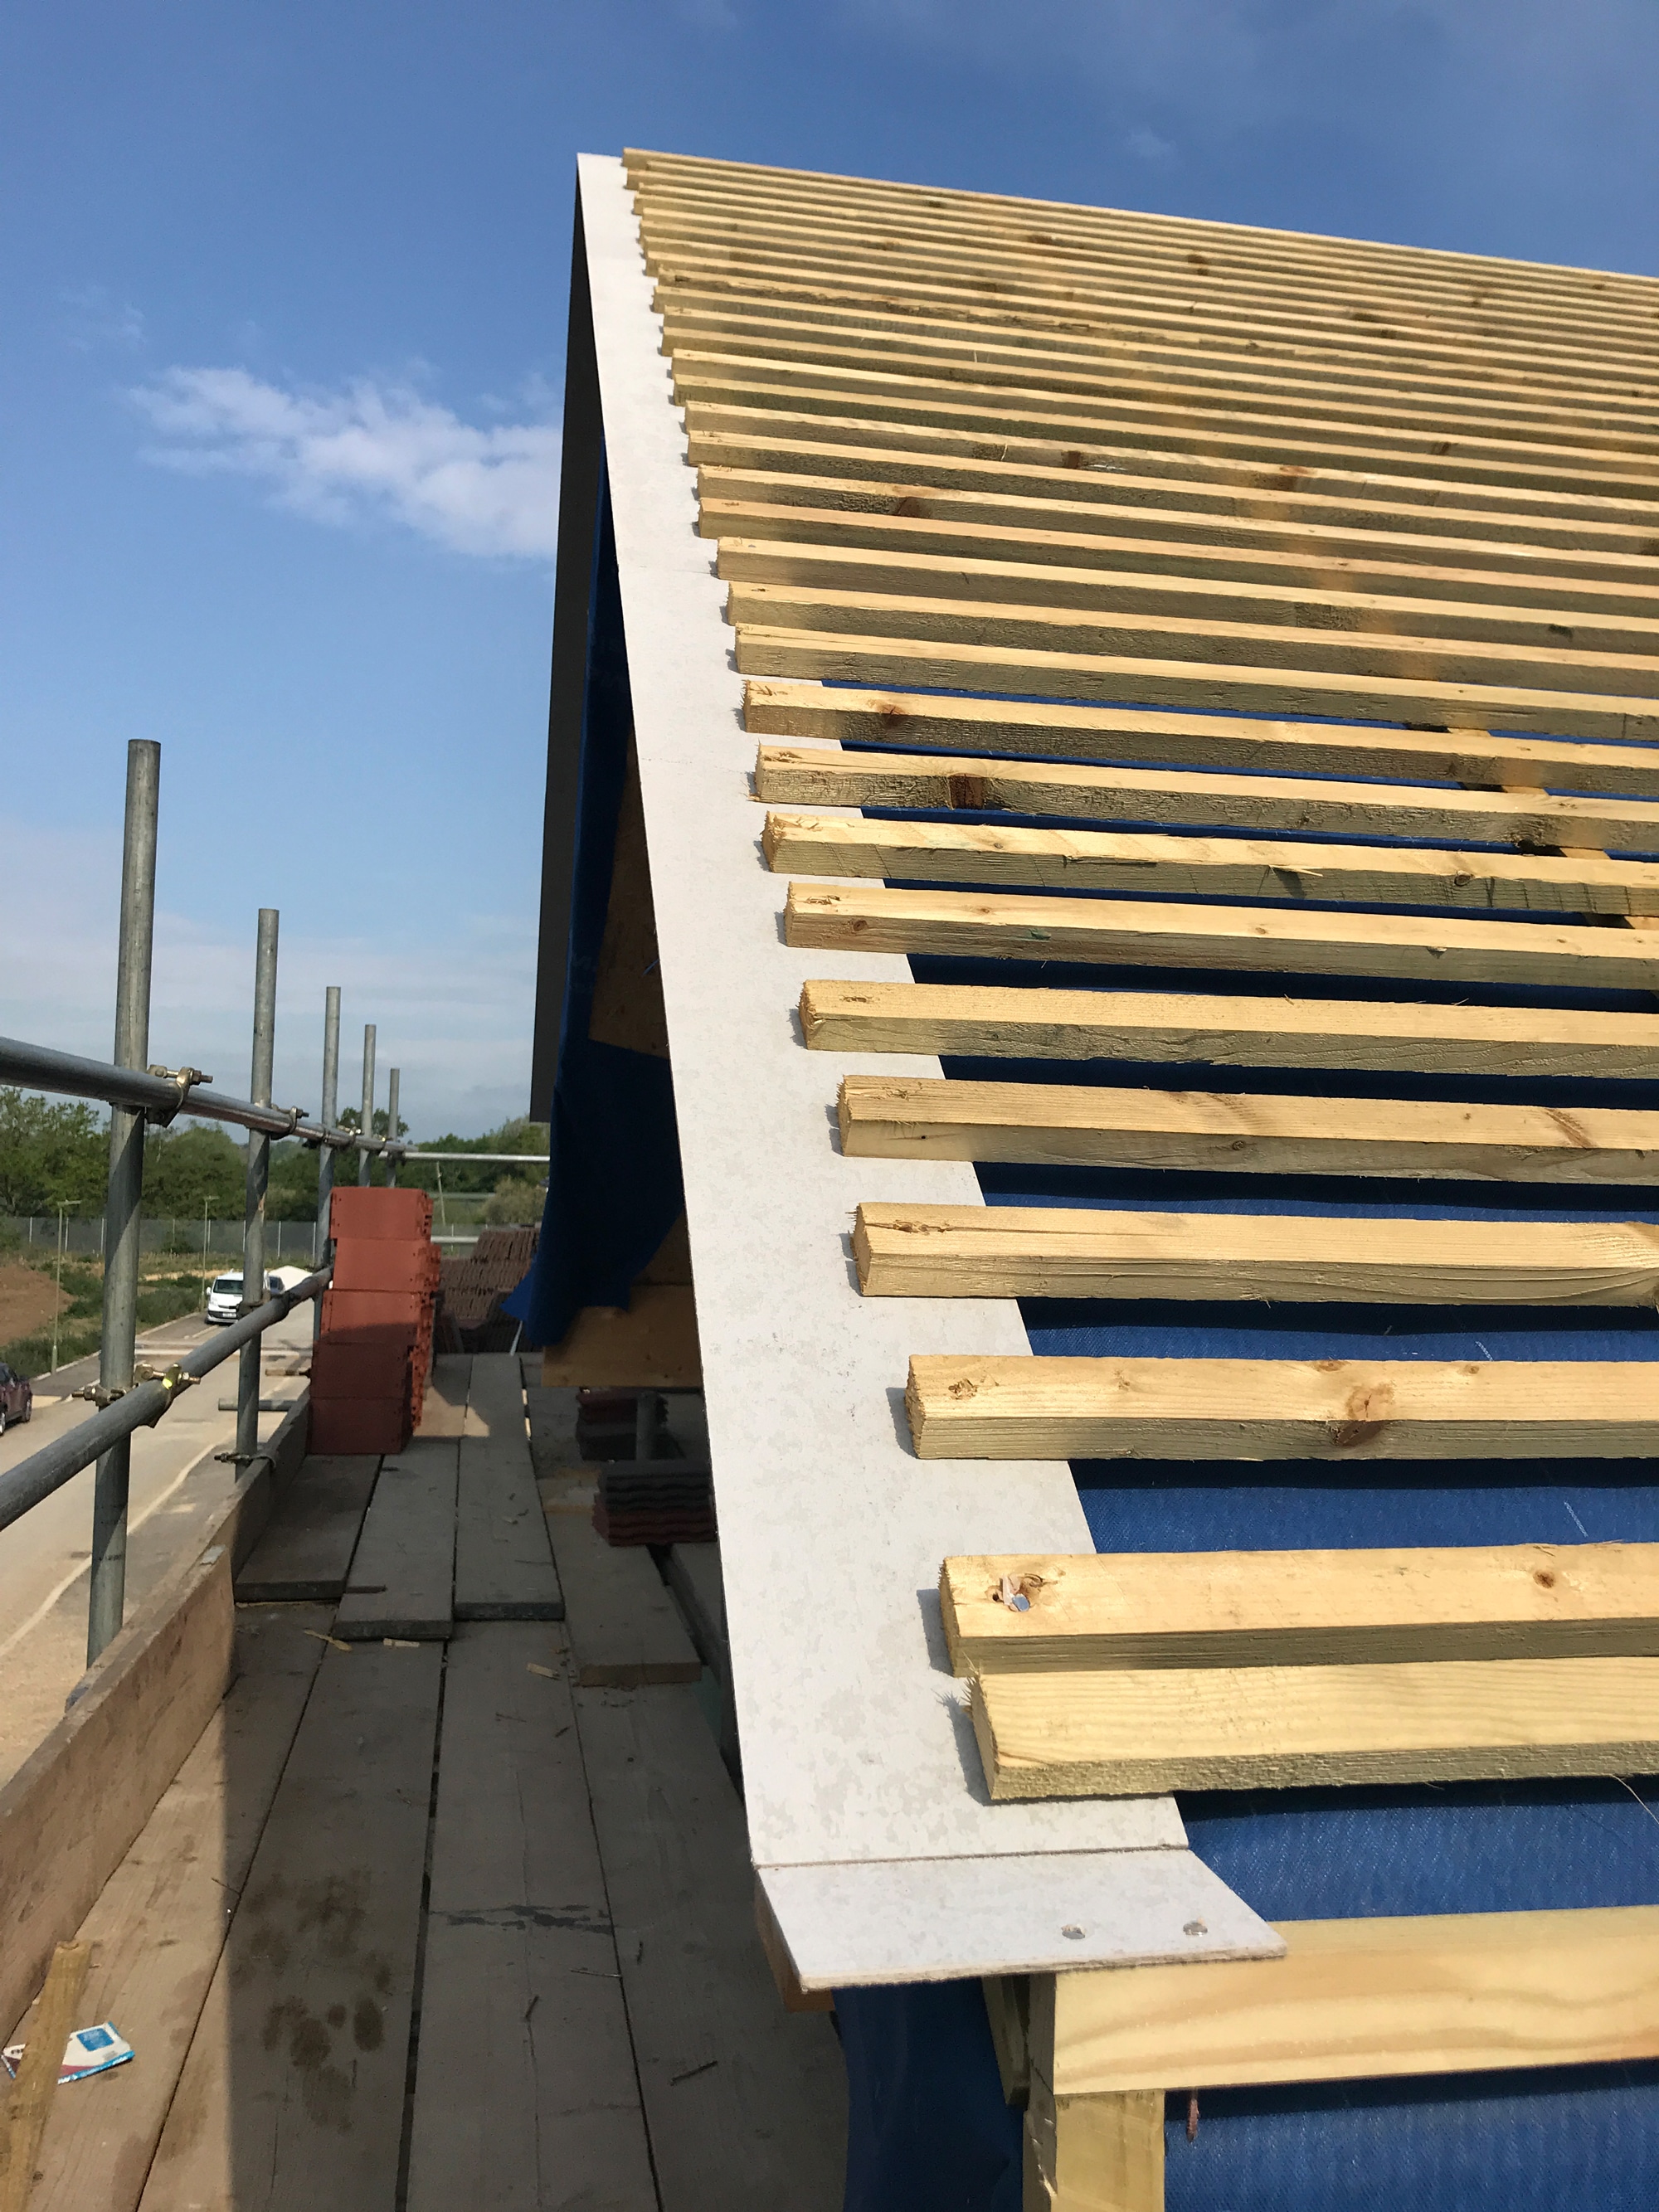
The Education House is topped with modern structural insulated panels (SIPs) to give us a pre-insulated attic within a thin roof profile. We chose this route to maximise space in the ready-to-convert loft, and it’s worked very well. But not every trade is familiar with SIPs.
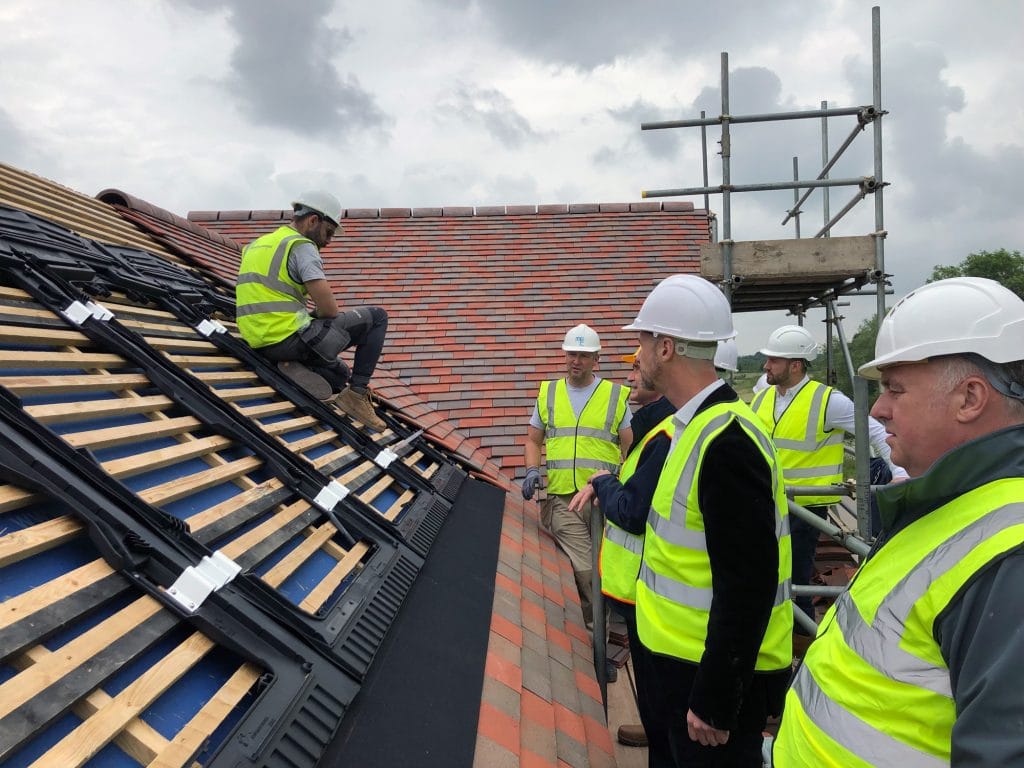
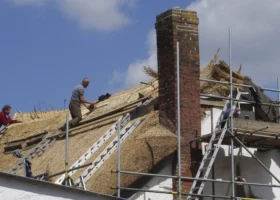
Our main contractor, Drewett & Hunt, arranged for the tilers to come for a site meeting during the SIPs install. This allowed Zoran Vjestica and his crew from Onpoint Roofing to get answers to their questions about the system.
The first consideration was where the breather membrane should go in the roof build-up. Most tilers are used to putting the counter battens down first, with the membrane draped on top.
But with SIPs it’s the other way round: the breather membrane gets applied directly to the panels, with the counter battens fixed on top to create the ventilation gap. This has follow-on implications, such as at valleys, where the detailing can be a little different to standard roofs.
Read more: Getting the Best out of SIPs
Zoran also had a few questions for me and Scott Hunt, our lead contractor on site. Should we use verge tiles at the visible sides of the roof (a quick option with no need for wet materials) or standard tiles with cement pointing? A phone call to Dreadnought confirmed the latter route.
Next up: what colour should the pointing be? Zoran volunteered to create some test sections in plain cement and various shades to match the tiles. All the options looked good, and it was helpful to be able to visualise how they would work. In the end we selected standard cement, as it should blend well with the fascia and will be easier to colour-match in future.
Another key detail would be where the roof planes intersect. We’re using special valley tiles to accommodate the angle. The alternatives are lead flashing, which is slower and tends to give a more traditional feel, and dry-fix GRP. We nearly went for the latter option, until we realised the trough would have got in the way of the flashing for our solar panels.
SIPCO’s installation crew fitted the membrane and vertical counter battens onto the SIPs panels. This membrane is the final line of defence, so if any water does penetrate through the tiles, it will be directed down into the gutters.

Zoran’s team then took over, starting with fixing the horizontal tile battens, which have a section size of 38mm x 25mm. Getting these perfectly into position is critical, as the gauge (distance between each batten) determines the final look of the roof.
The gauge needs to be even throughout to avoid some rows of tiles looking shorter than others. Every manufacturer will have a maximum gauge to ensure sufficient overlapping between tiles, too. In Dreadnought’s case, the maximum gauge for pitched roofs is 100mm and the minimum overlap 65mm.
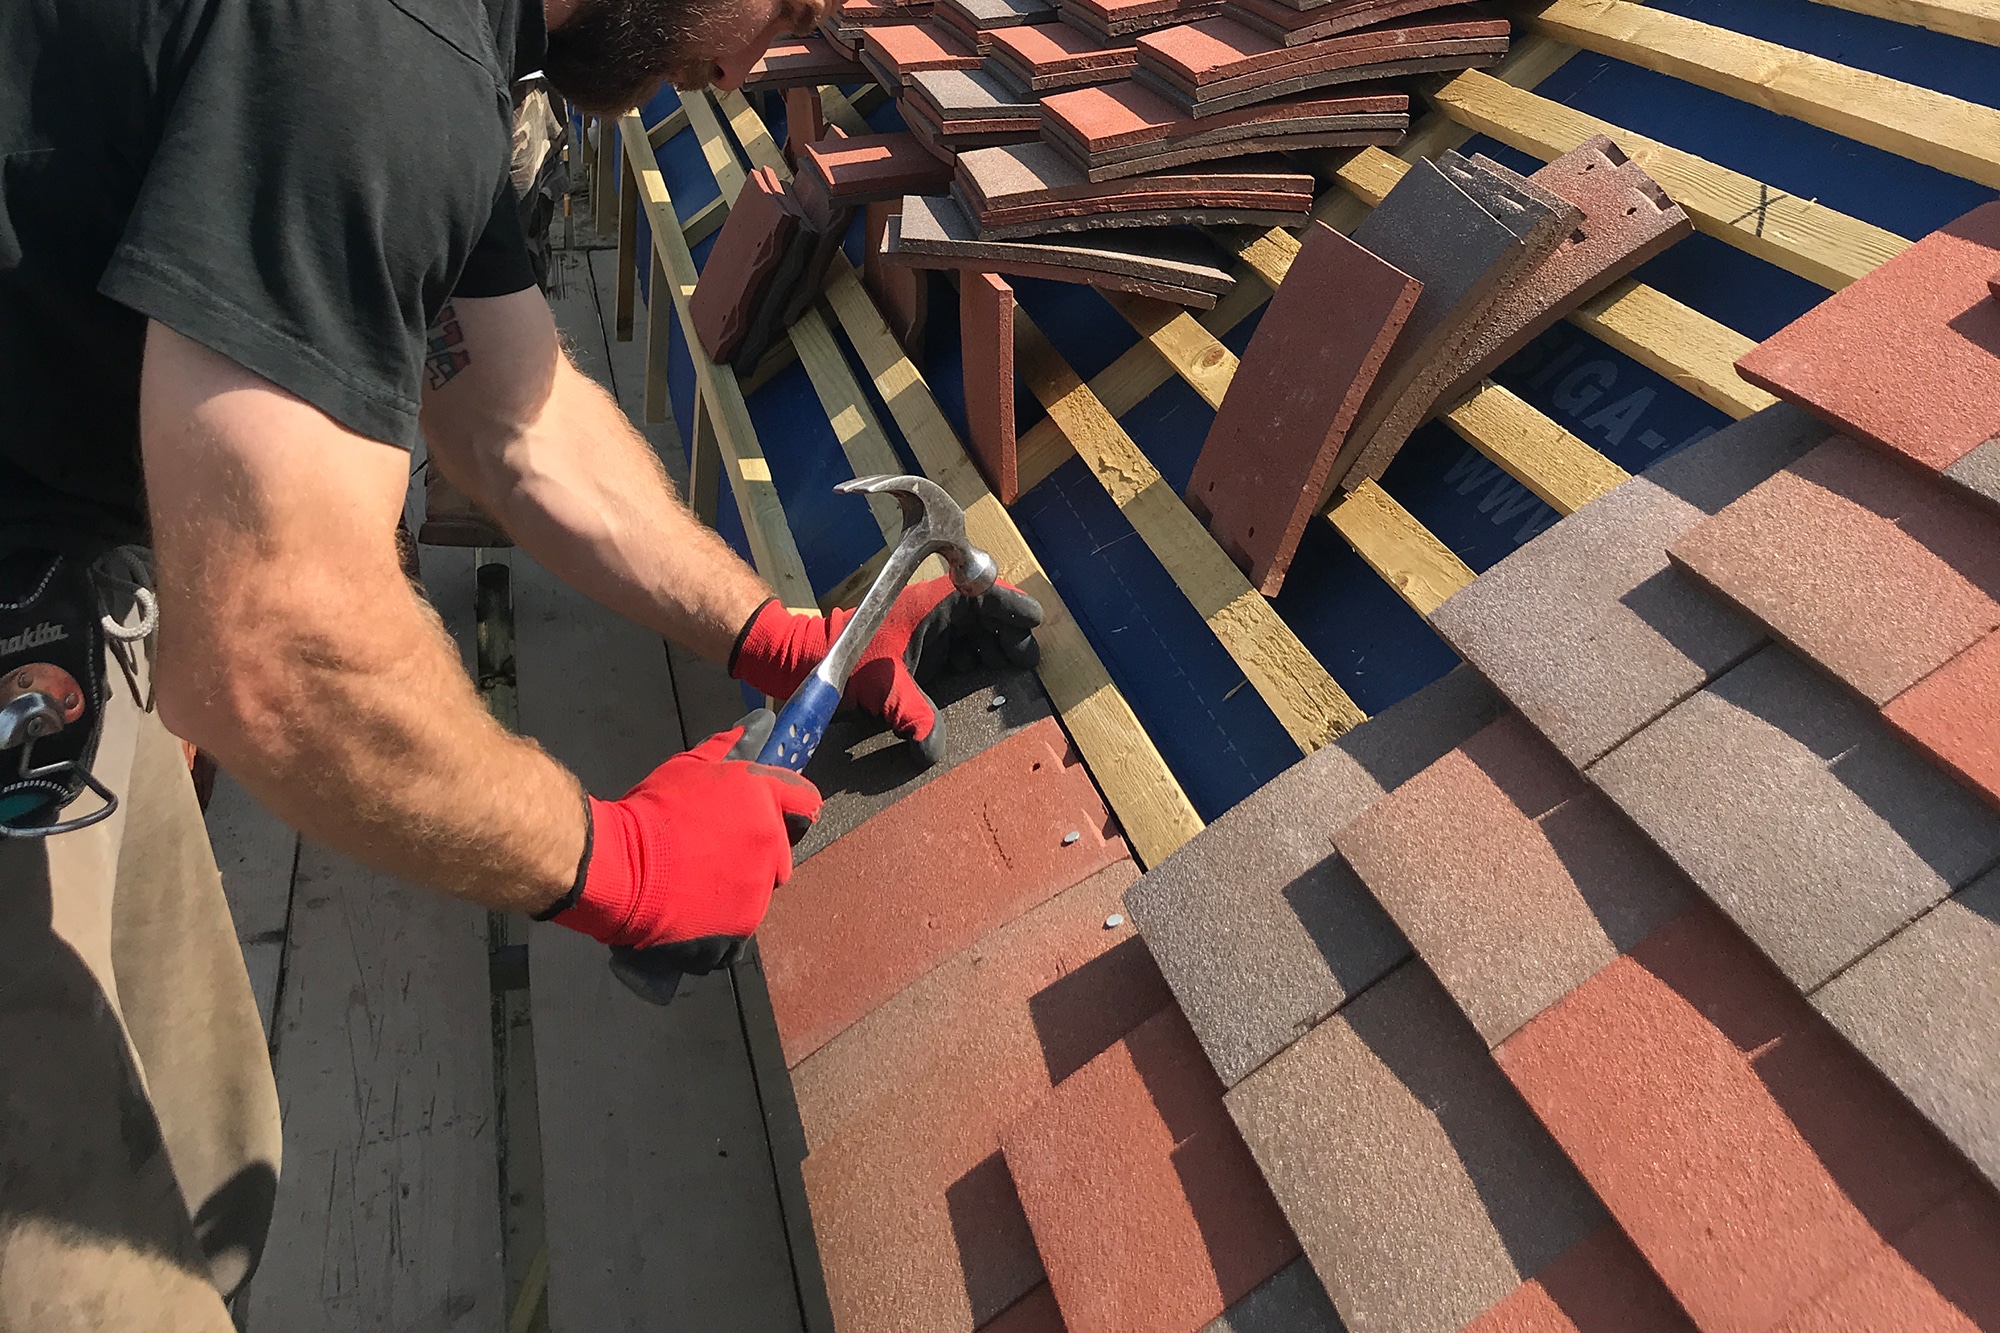
Once the battens were in place, the tilers could get cracking in earnest. As we have a three-tile mix, getting the blend right was a big part of the job (see the box below).
Blending roof tilesRoof tiles don’t usually arrive pre-blended – so this is a manual task. Zoran’s team likes to get most of the mixing done on the ground, so we agreed to set the palettes in sequence next to each other. The crew passes small batches up via a bumper (a long, thin conveyor belt) and the final mix is sorted up on the scaffold. All of this takes time, of course, and going for a three-tile blend has pushed our budget for the tiling up quite a bit compared to the original estimate. |
Fitting the tiles is probably the simplest part of the job, but with around 8,000 to install on a roof like ours, it takes time. The crew laid small patches of tiles, blending as they went, and nailed in every fifth course using alloy clout nails that won’t rust.
At the verges, Zoran fitted fibre-cement undercloaks. These help to support the verge tiles, with cement pointing holding everything in place and preventing water ingress. Dreadnought supplies one-and-a-half tiles for the verges, to minimise the amount of cutting.
One of the more complex areas was, surprise surprise, at the angled gable wall. Every single tile up the verges here had to be cut by hand to get the right finish.
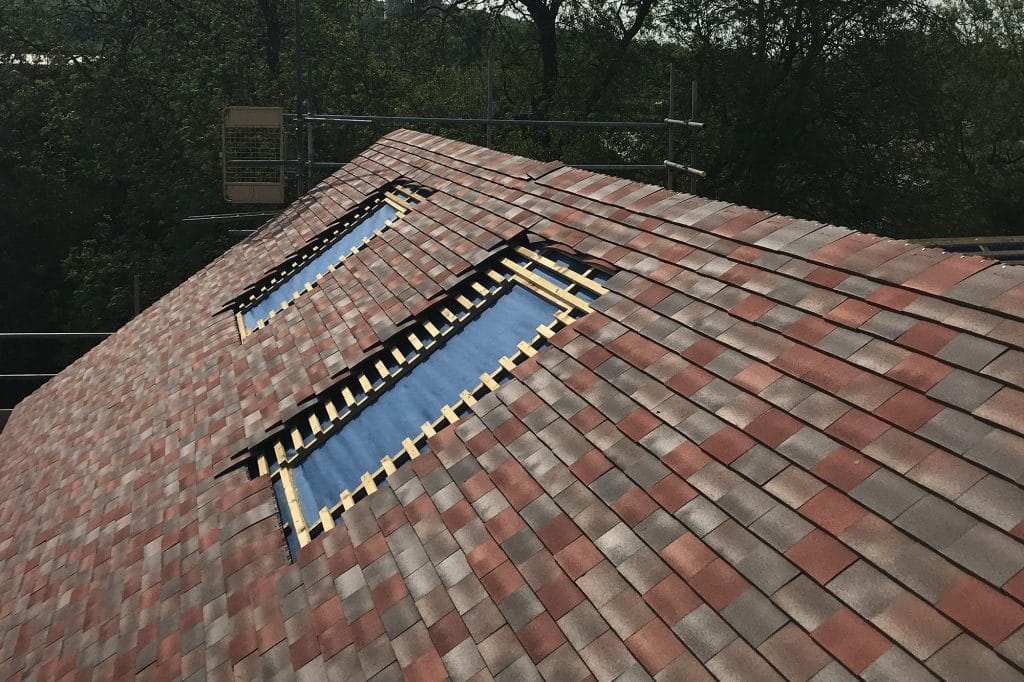
Zoran and his crew got as far as they could with the tiling, but were stopped in their tracks when we hit an unexpected issue with our solar electric panels.
We initially planned to include eight solar photovoltaic (PV) panels across three of the roof slopes to reduce our reliance on mains electricity. In general, it’s best to get at least the mounting system for this installed before the tiles go on, so the roofers know exactly what they’re dealing with.
Unfortunately, our original supplier decided to pull out of the self build market just days before we were expecting them on site. It just goes to show that it doesn’t matter whether you’re an individual self builder or an industry magazine working on an Education House – stuff can happen on any project!
As a result, work on the roof tiles ground to an unexpected halt, as Zoran’s crew had to leave several courses off to accommodate the PV mounts and flashing.
Thankfully, Environment Logic – which provides expert advice on solar storage for the self build and renovation sector – came to our rescue at very short notice.
They’ve been fantastic, even identifying a surprising flaw with the original supplier’s design. On one of the roof planes, the proposed panels would have actually been too big to fit, as there weren’t enough tile courses to finish off around them.
Environment Logic got straight to work re-evaluating and remodelling the design to suit the available roof areas (which in our case face south east, and is free from shading).
The complete-package approach through a specialist gives you the full benefits of green solar power tailored to contemporary living.
For the Education House, Environment Logic provided a higher-spec Solarwatt system that requires less total area to get almost exactly the same output.
The setup comprises photovoltaic panels for generation, smart batteries for storage, a controller for management and an advanced inverter. We also have EV (electric vehicle) charging to further future-proof the installation.
The growth in electric vehicles has prompted a surge in interest from homeowners seeing the benefit of EV charging at home, using free, rooftop-generated electricity. It’s easy, fast and safe to use, plus qualifying installations can benefit from a £350 grant via the government’s Electric Vehicle Homecharge Scheme.
So, while losing the original supplier did lead to some delays on site, we’ve ended up with a win-win situation.
Our solar PV equipmentSupplied and installed by Environment Logic, the PV, solar storage and EV charging system for the Education House comprises:
Our Solarwatt components feature five-year insurance against theft and weather damage, as well as if the output delivered is lower than expected. The panels also come with a 30-year warranty on the product and performance. |
Solar electric panels can be a valuable part of your energy mix, reducing your reliance on the national grid. Looks-wise, however, they can be a bit marmite. As our new setup requires fewer panels to get the same level of performance, we’ll be able to revert to a tiled finish for more of the roof.
More and more UK householders are switching on to the benefits of solar with storage. This is driven in part by a desire for energy independence and concerns over rising electricity prices.
Fitting the PV panels couldn’t have gone more smoothly. We were impressed at how everybody on the Environment Logic installation team, overseen on the day by director John Pearson, was clearly extremely knowledgeable.
The Environment Logic team fits the mounting system for the solar PV panels
Even the youngest member of the crew, who was tasked with screwing the panels together, could debate the pros and cons of battery storage for solar PV!
The building integrated roof mounting PV (BIPV) panels were installed within a few hours, ready for the tilers to fit the adjoining tiles and crack on with the rest of their work.
Hooking up the electrics and installing the smart batteries, EV charging etc will be completed as part of the first and second fix work.
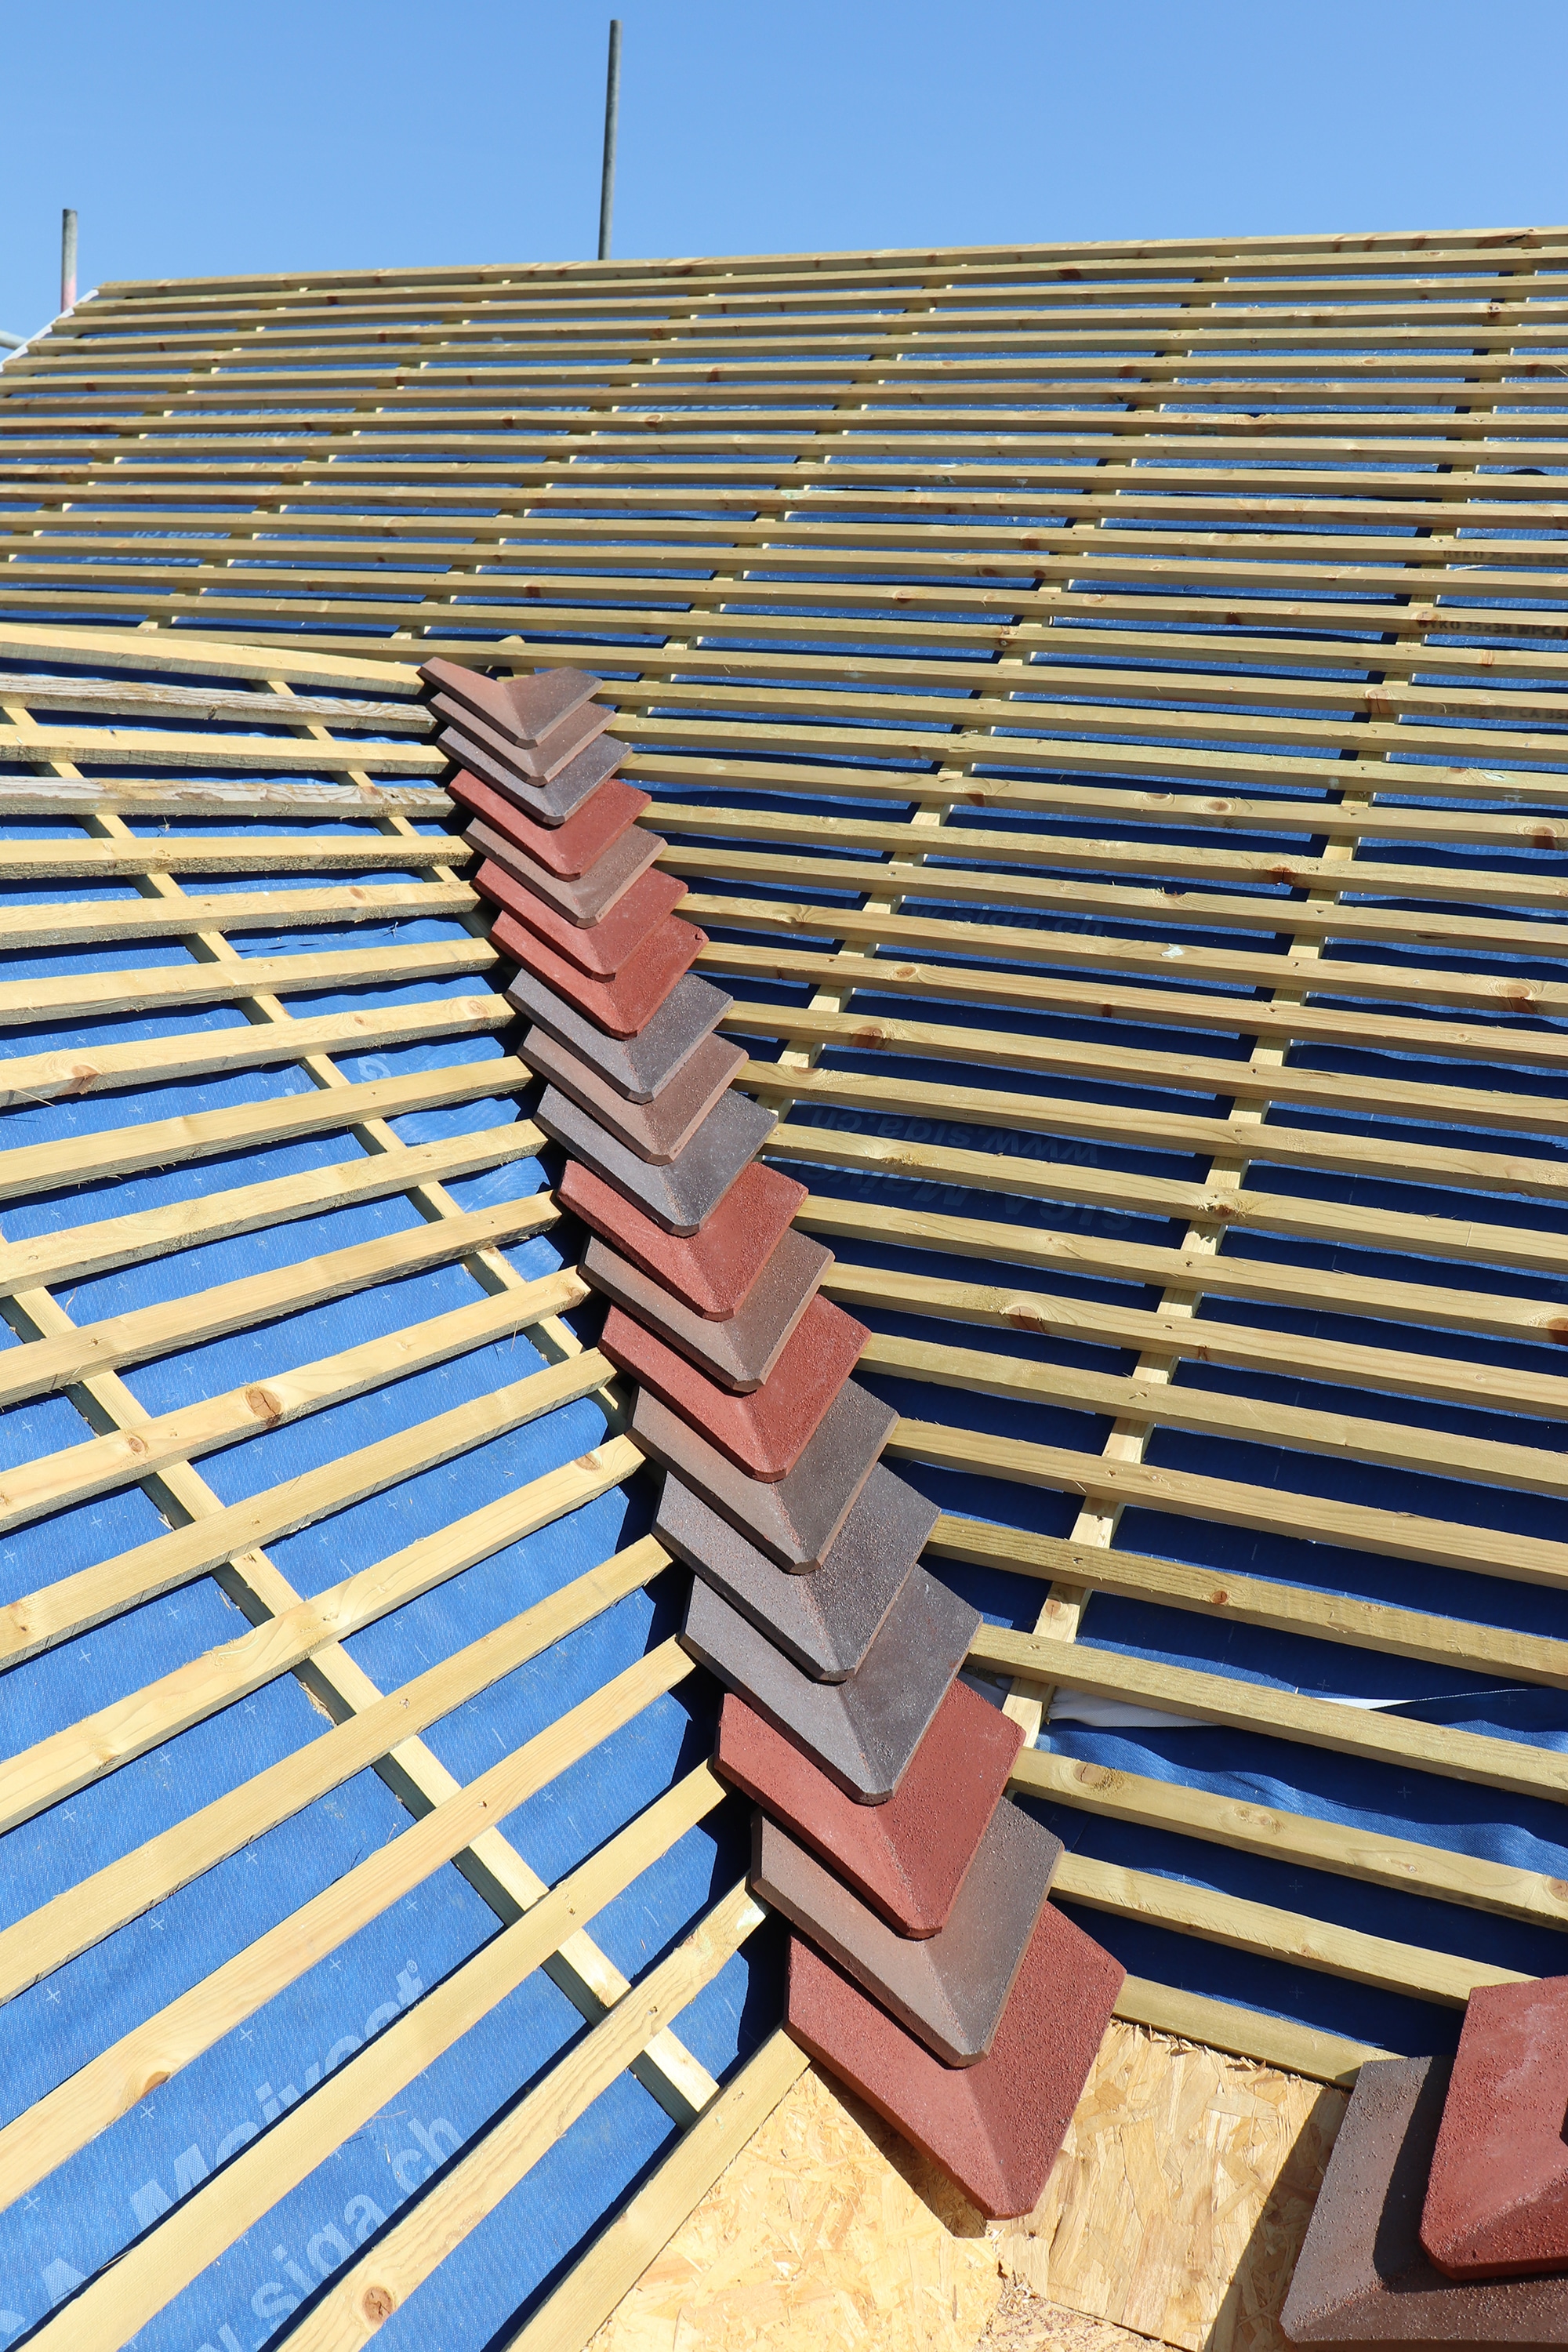
There was some debate about how to fix the ridge tiles for the Education House.
A message came through to me that building control were expecting us to use a dry ridge. This system uses quick-fit clips to keep the tiles in place, thereby avoiding the need to use cement mortar.
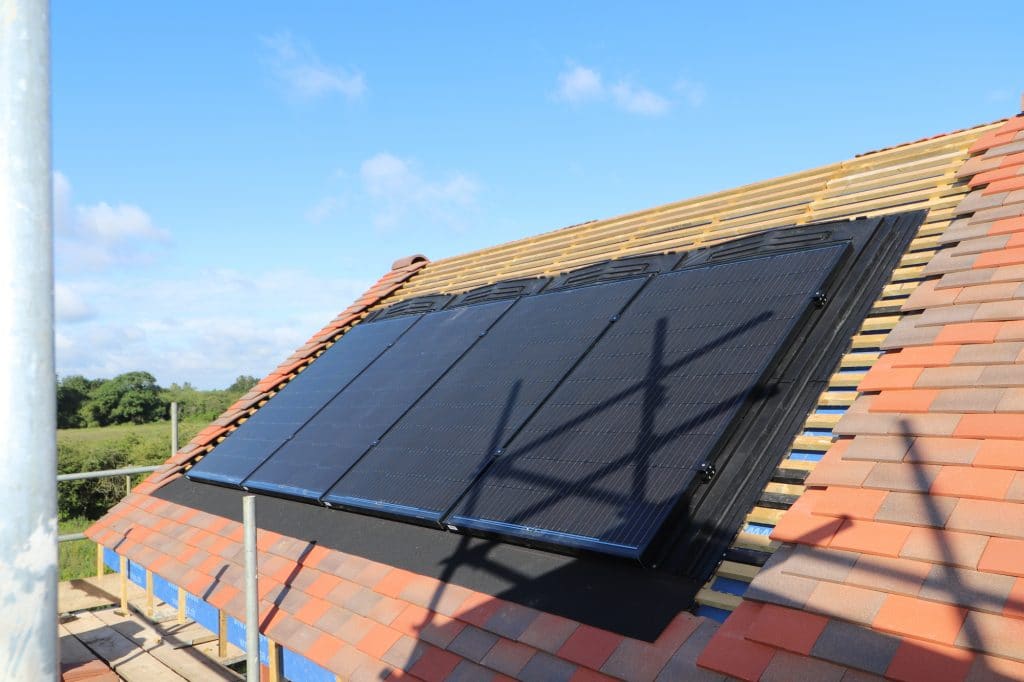
The PV panels in place, ready to be tiled up to. Don’t worry – the shadow is just from our scaffold. Once this is down, the collectors will be clear of any shading
For me, though, a dry ridge doesn’t look as good as wet fix on the kind of blended clay roof tile arrangement we’ve gone for on the Build It Education House.
Cue some frantic calls to our roofer, who was adamant that he preferred cement mortar (and wouldn’t even want to guarantee a dry ridge himself). It seemed like we were caught between a rock and a hard place, until I spoke to Dreadnought Tiles, who mentioned the option for a hybrid system.
A hybrid ridge combines the aesthetic appeal of mucked-in tiles with a mechanical fix. So you get certainty that, should the cement fail, the tiles will still be held in place. Armed with that knowledge, I spoke to Andy Butchers from Build-Zone (who are supplying our structural warranty) and confirmed this would be an approved solution.
I called our building control inspector to agree our solution – and it soon became clear the whole thing was a misunderstanding. He’d simply meant that he wanted to see a mechanical fixing, and was perfectly happy with a hybrid ridge tile fix. He’d simply mentioned a dry ridge as one of the options!

Zoran’s team installed a hybrid solution for the ridge tiles, combining wet cement muck with a mechanical fix
If any more issues like this crop up, I’ll be sure to call building control first to make certain the message has come through correctly and avoid wasting time.
With the confusion cleared up, Zoran’s team came back on site to fix the ridge tiles and muck in the verges (using a 3:1 sand and cement mix). It looks fantastic.
As I write, there’s one outstanding issue on our roof. This affects the valley at the front of the house, where the two main roofs join. Zoran chose a liquid waterproofing system for this, but it cracked as it dried out. He’ll be returning to site soon to rectify the issue so we can get the roof signed off.
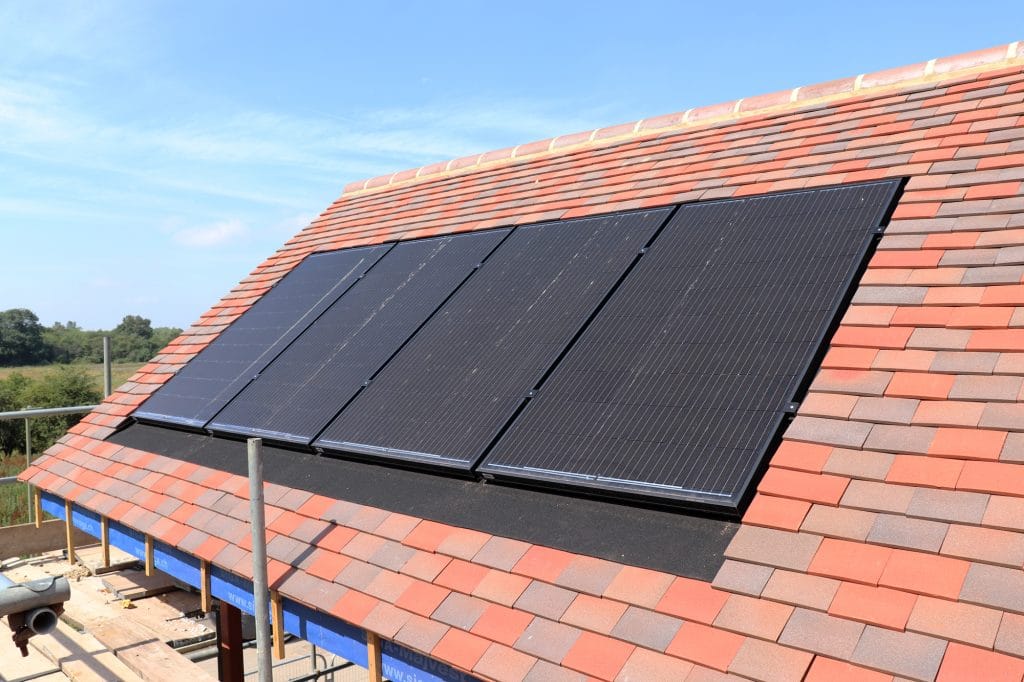
A fully tiled elevation, complete with in-roof solar PV panels from Solarwatt and newly-finished ridge tiles


 Login/register to save Article for later